

Creating and Managing I-140 Cases in ImmiBox
Overview
WelcomeThis video demonstrates the complete process of creating and managing I-140 immigration cases using ImmiBox. It covers case setup, document uploads, reviews, and tracking through USCIS submission and status updates.
1. Create New Case Start
 * click the image to view enlarged
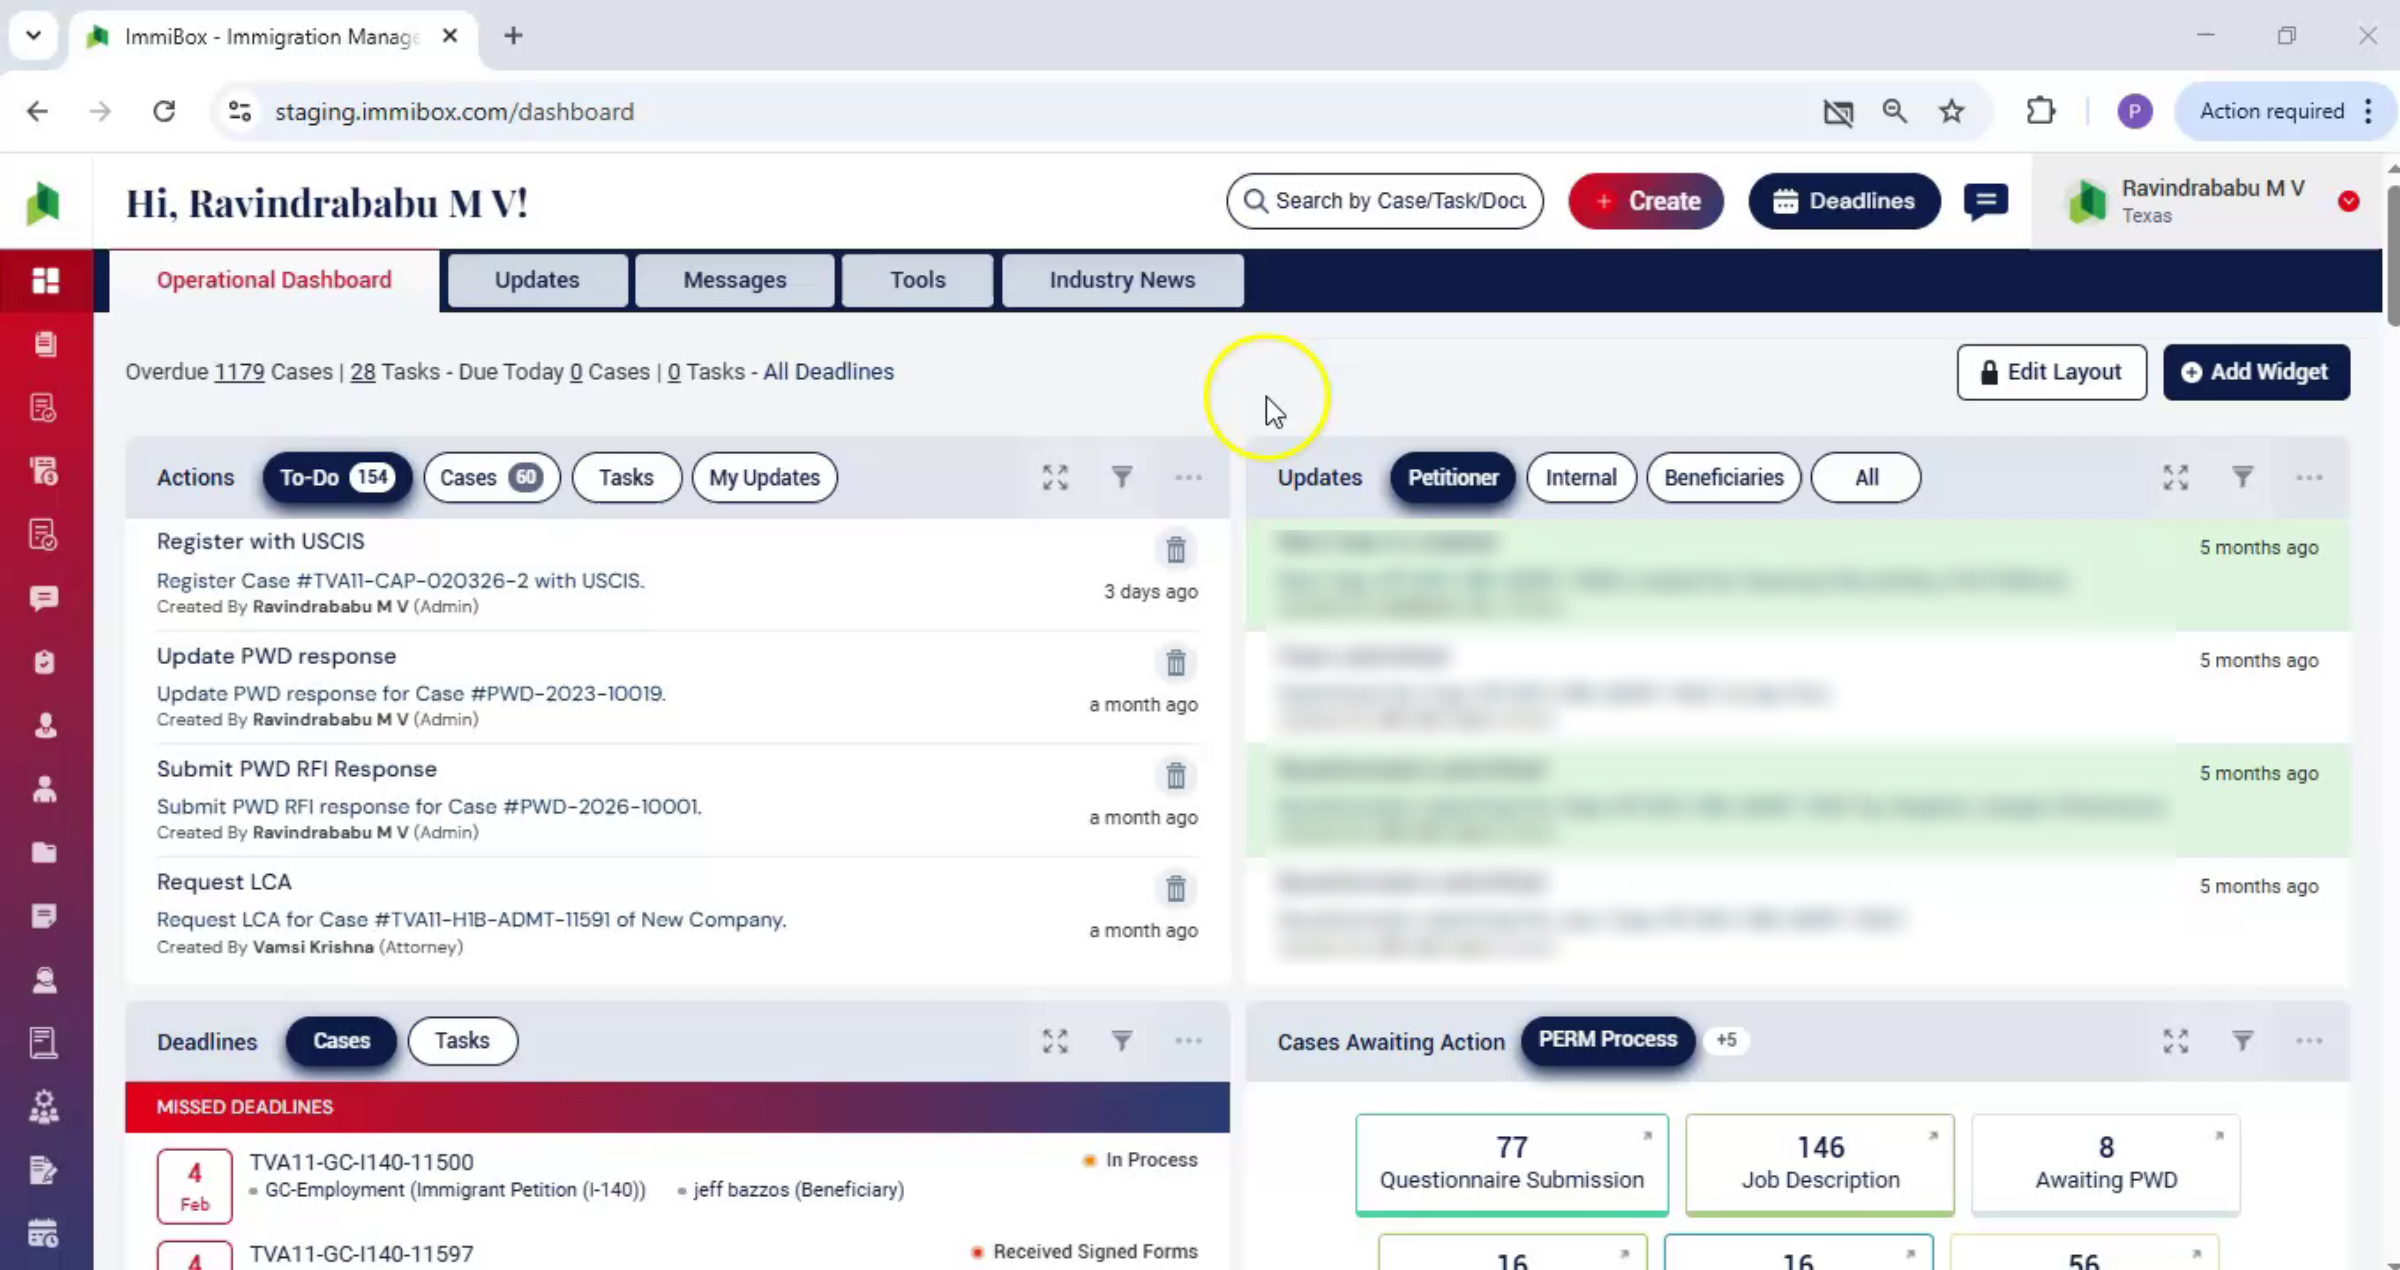
Let's begin. From the ImmiBox dashboard, click Create and then select New Case.
2. Enter Case Details
 * click the image to view enlarged
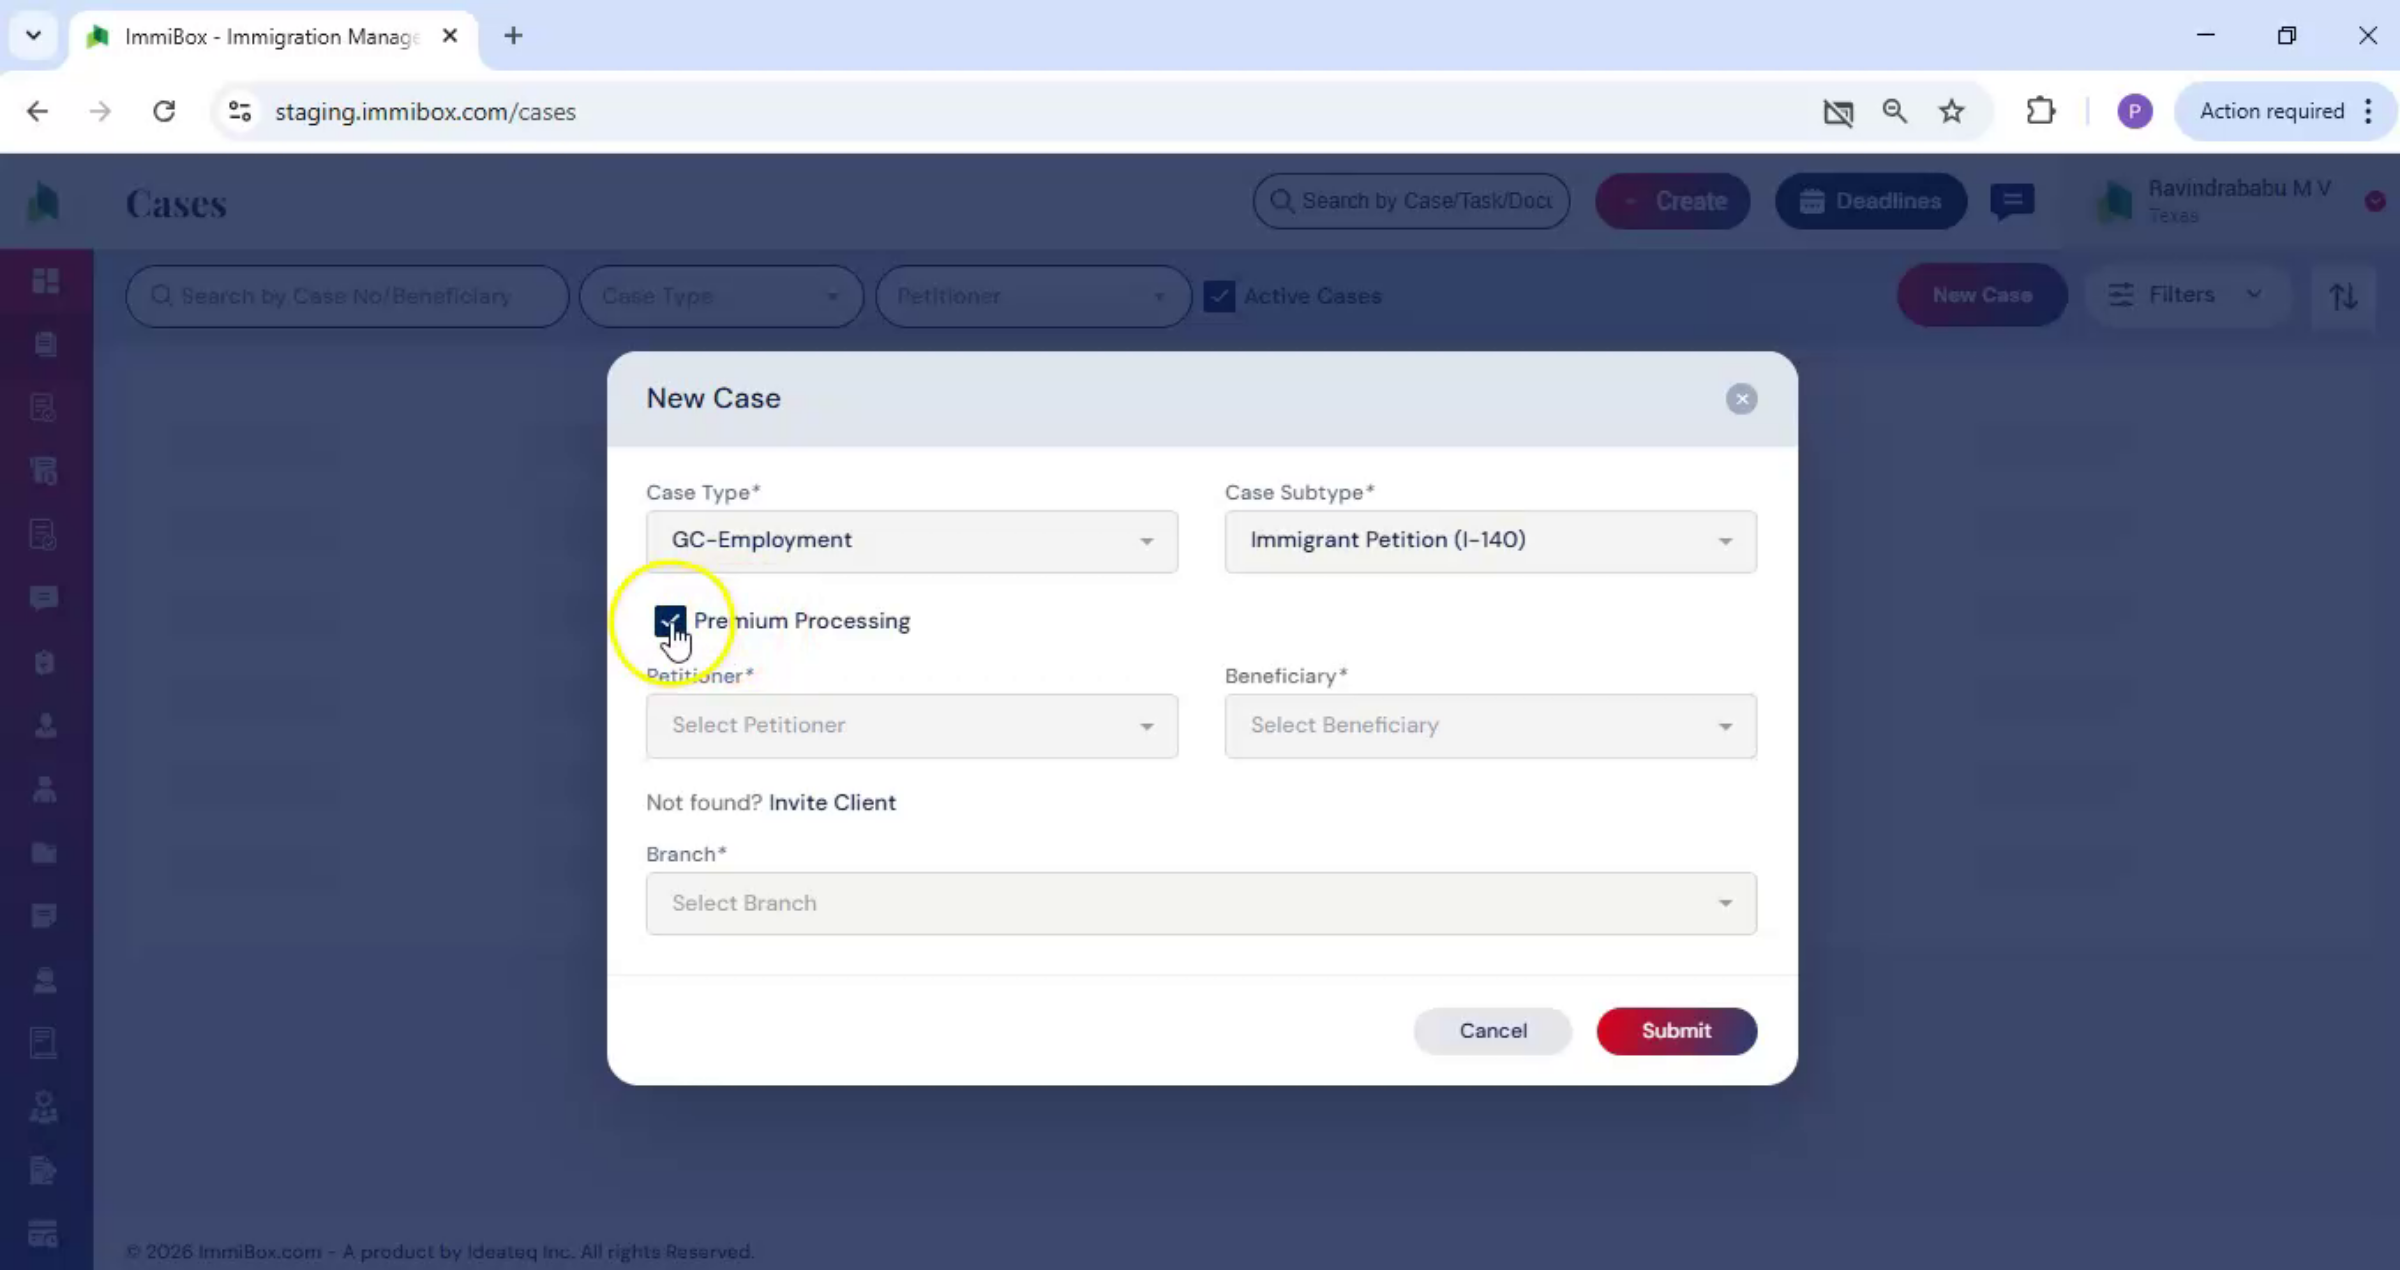
The new case window opens. Enter the required case details, including the case type and case subtype. Premium processing is available for this case, if applicable.
3. Select Premium Processing
 * click the image to view enlarged
Select the Premium Processing checkbox.
4. I-140 Case PERM Requirement
 * click the image to view enlarged
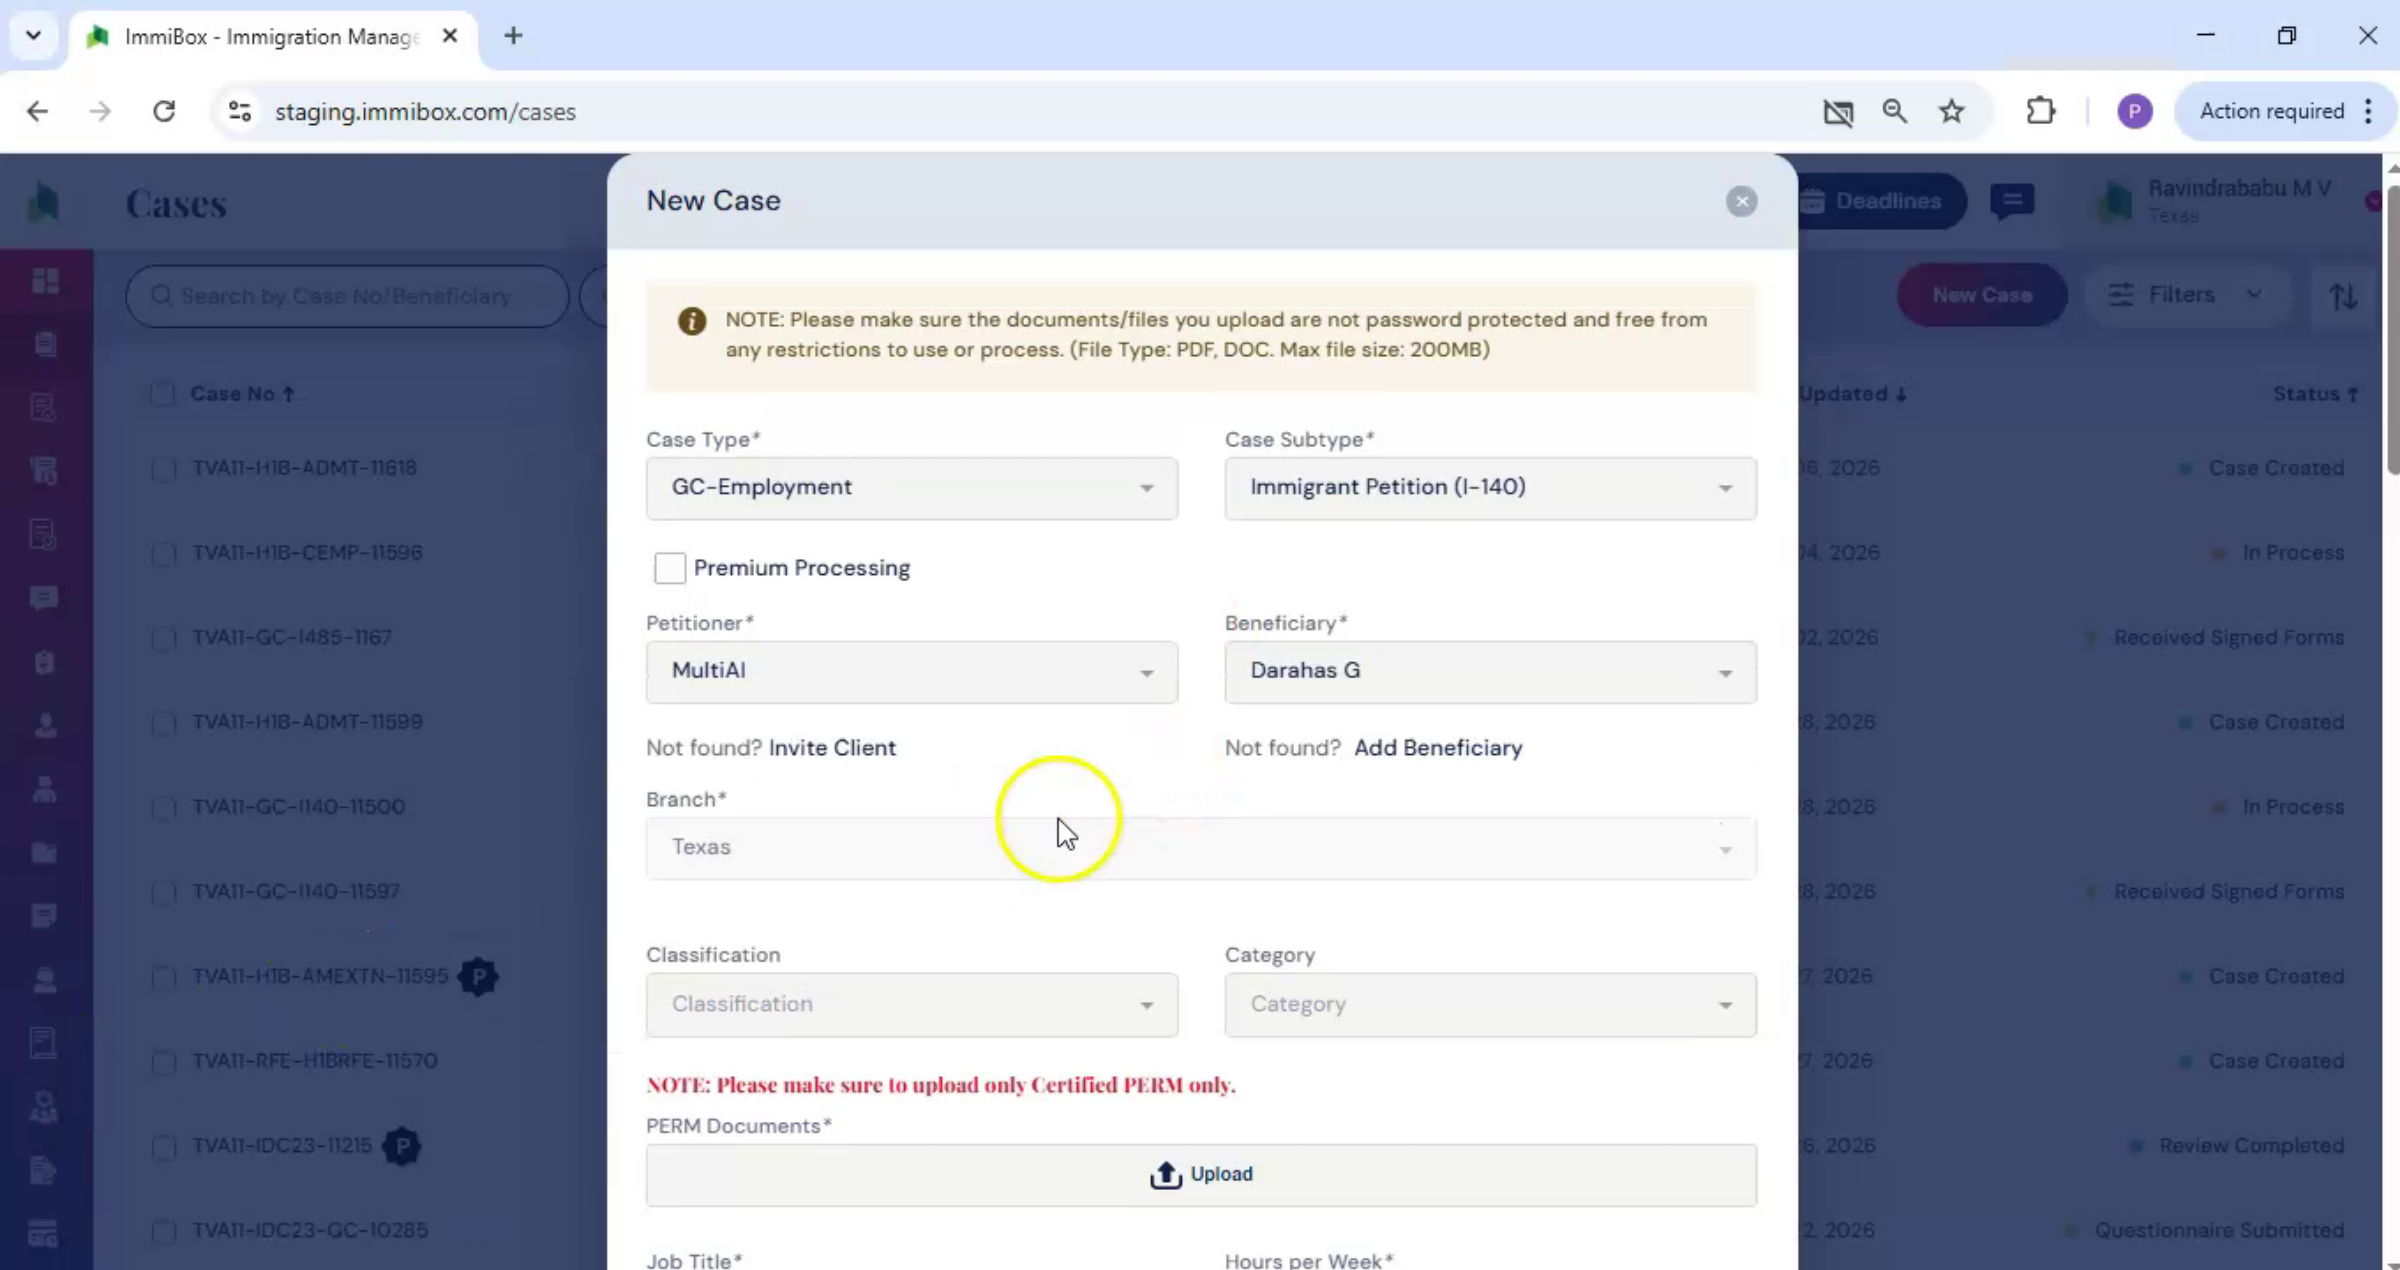
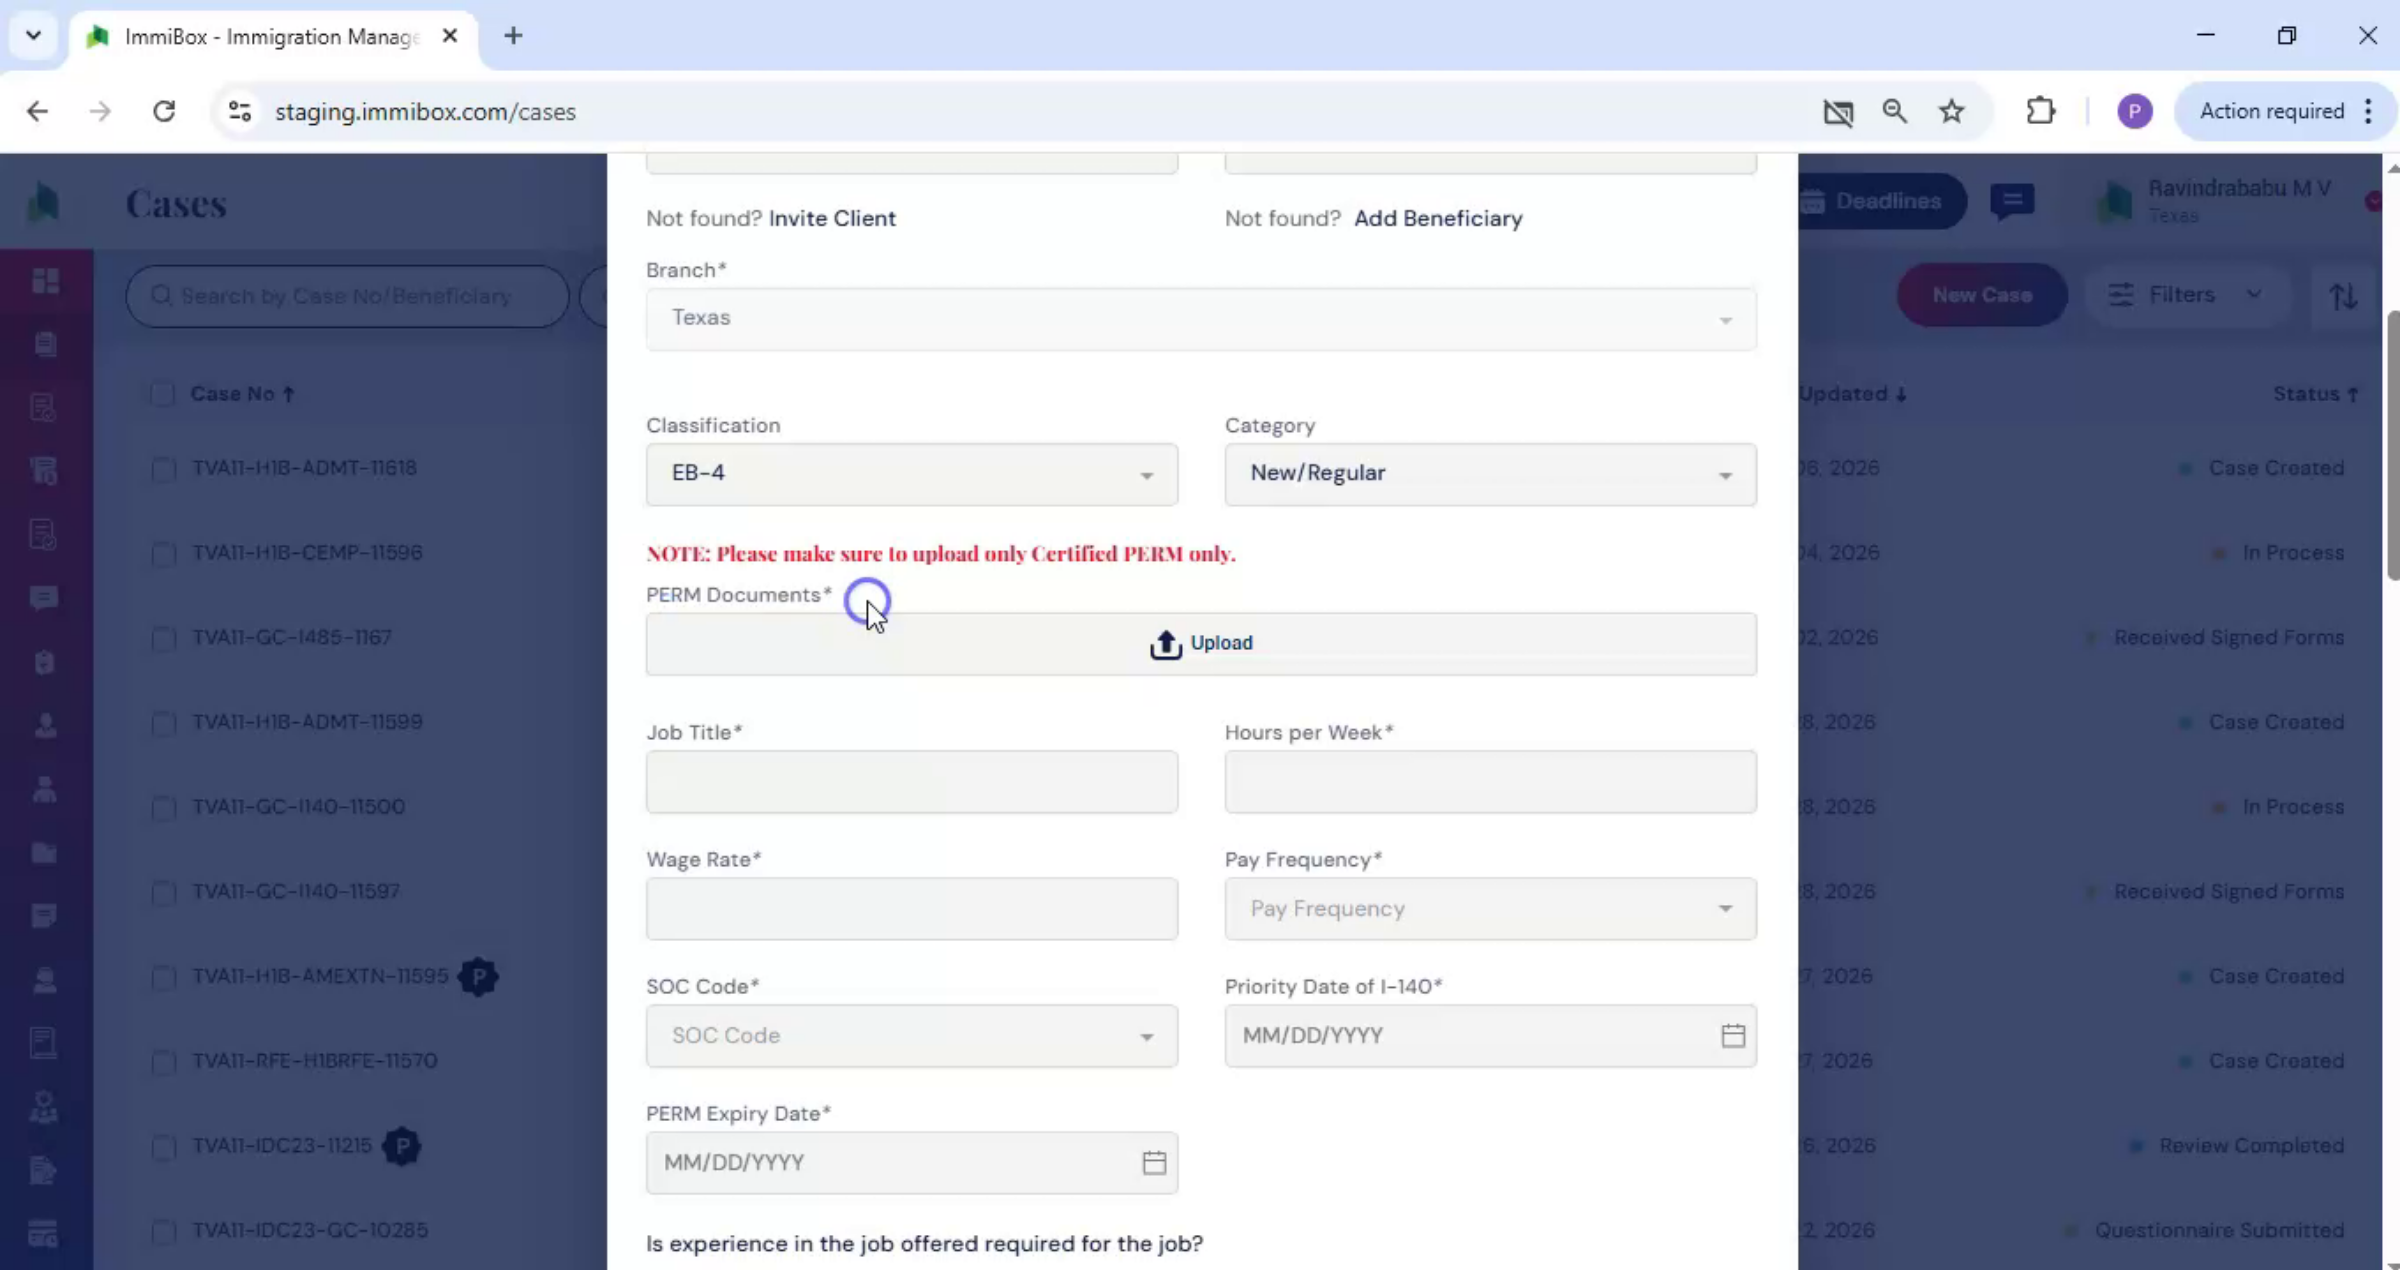
For an i-140 case. The perm document is required.
5. PERM Document Certification
 * click the image to view enlarged
The PERM document reflects certification by the U. S. Department of Labor regarding the offered position and wage. Because of this, the PERM document must be uploaded before the case can be filed.
6. Upload PERM Document Details
 * click the image to view enlarged
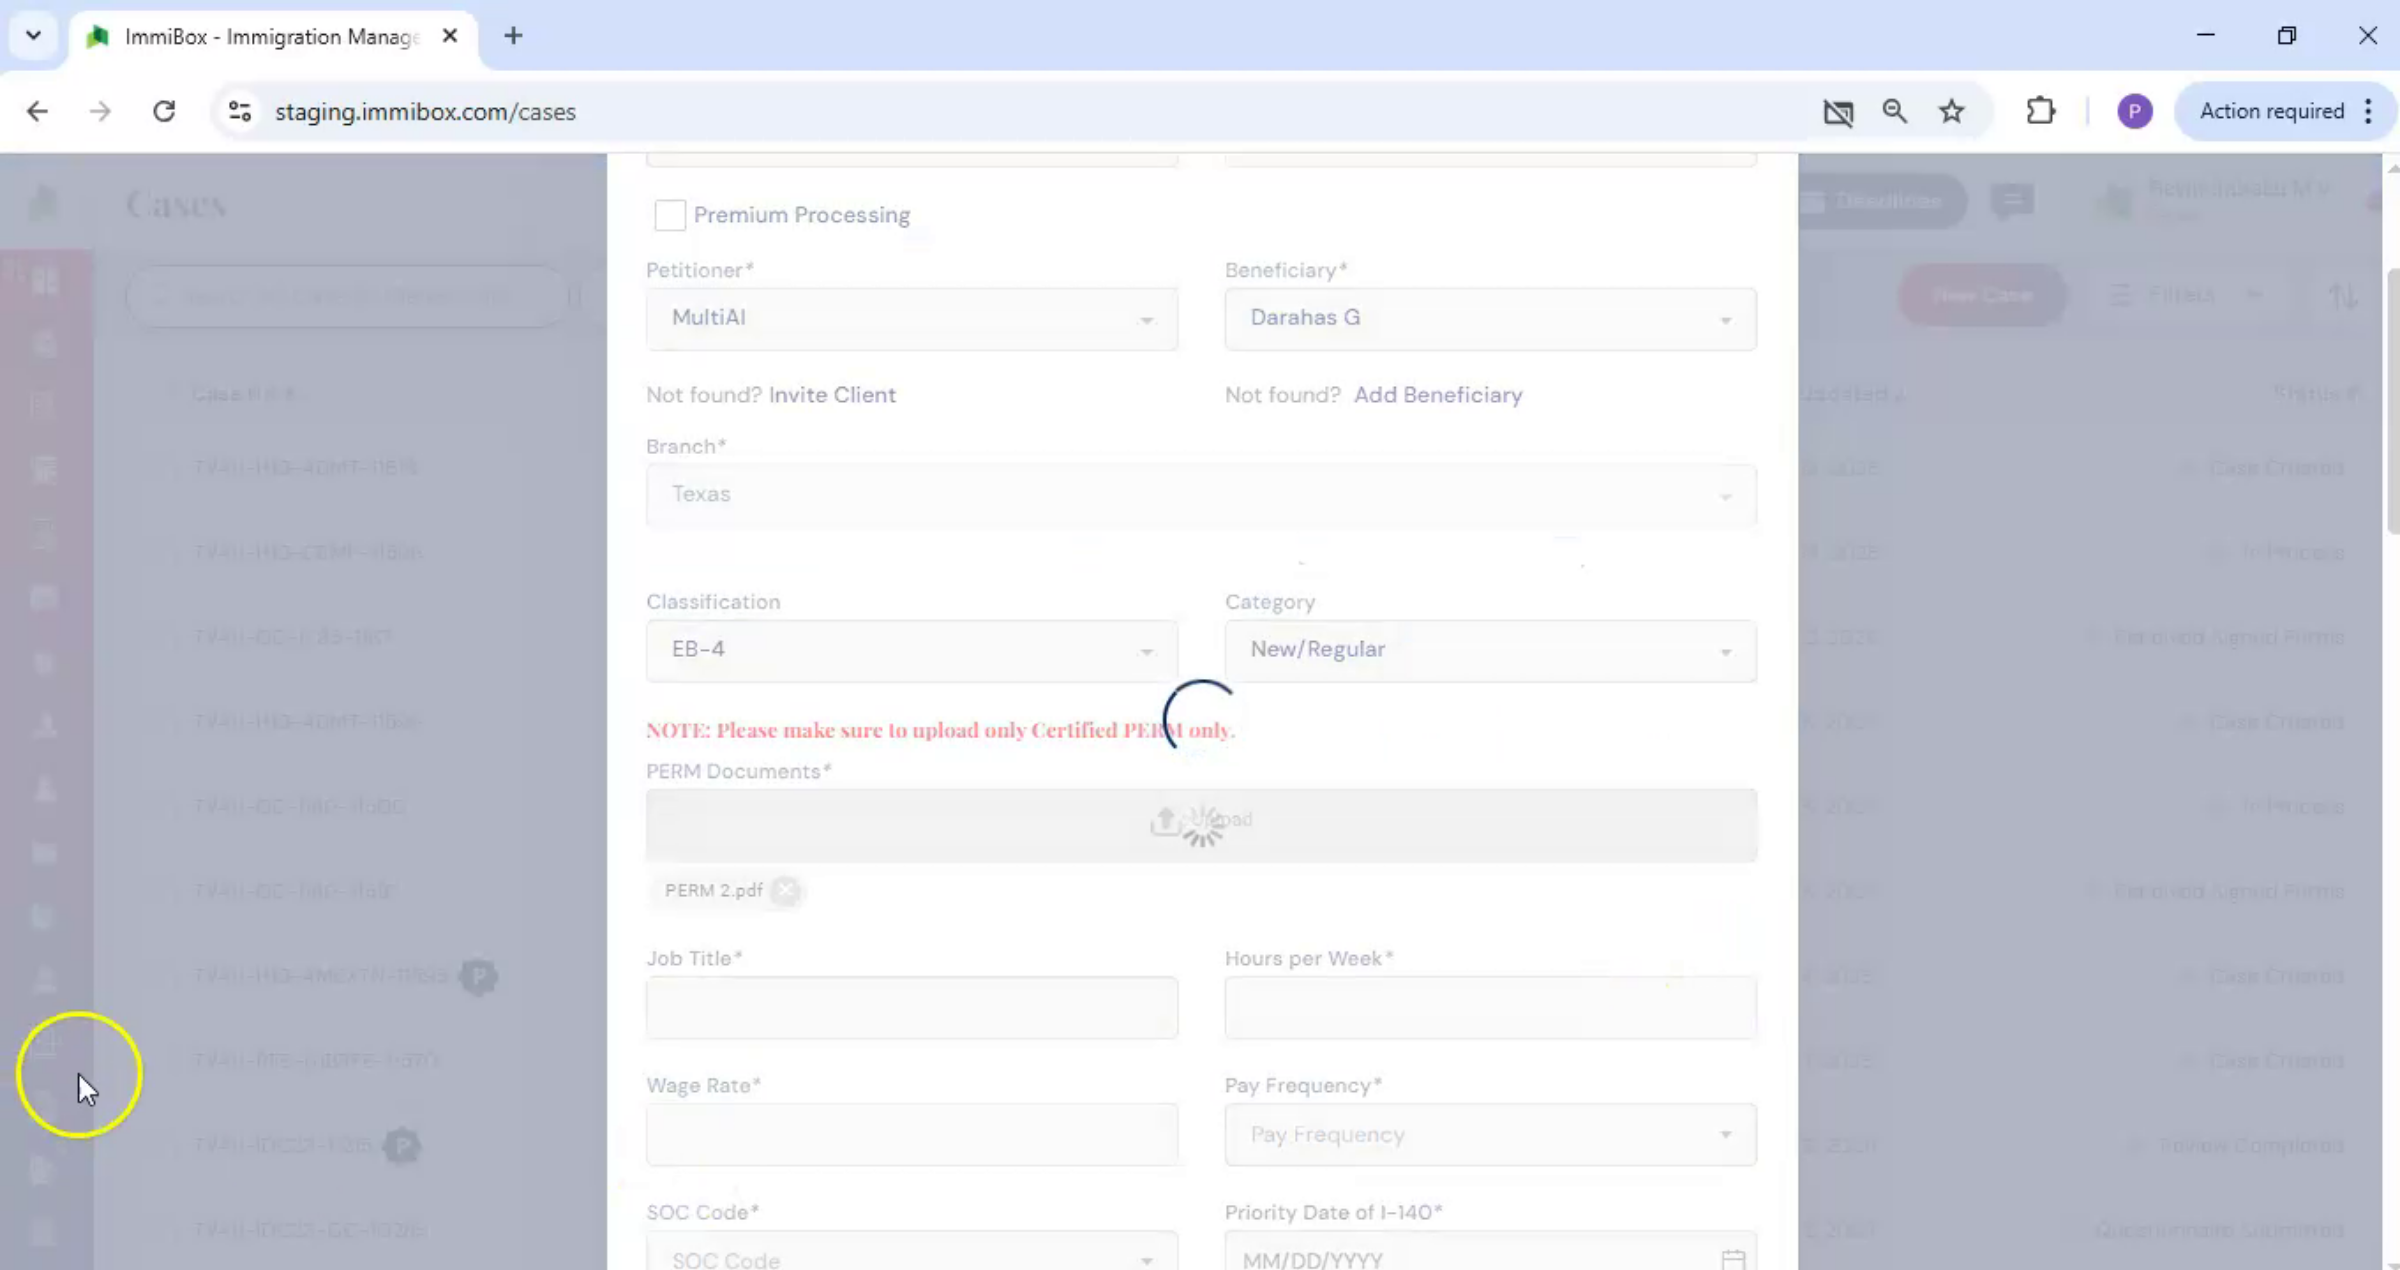
Once the PERM document is uploaded, ImmiBox will automatically attempt to populate key details, including the job title, hours per week, wage rate, pay frequency, and work location.
7. Review And Confirm Case Info
 * click the image to view enlarged
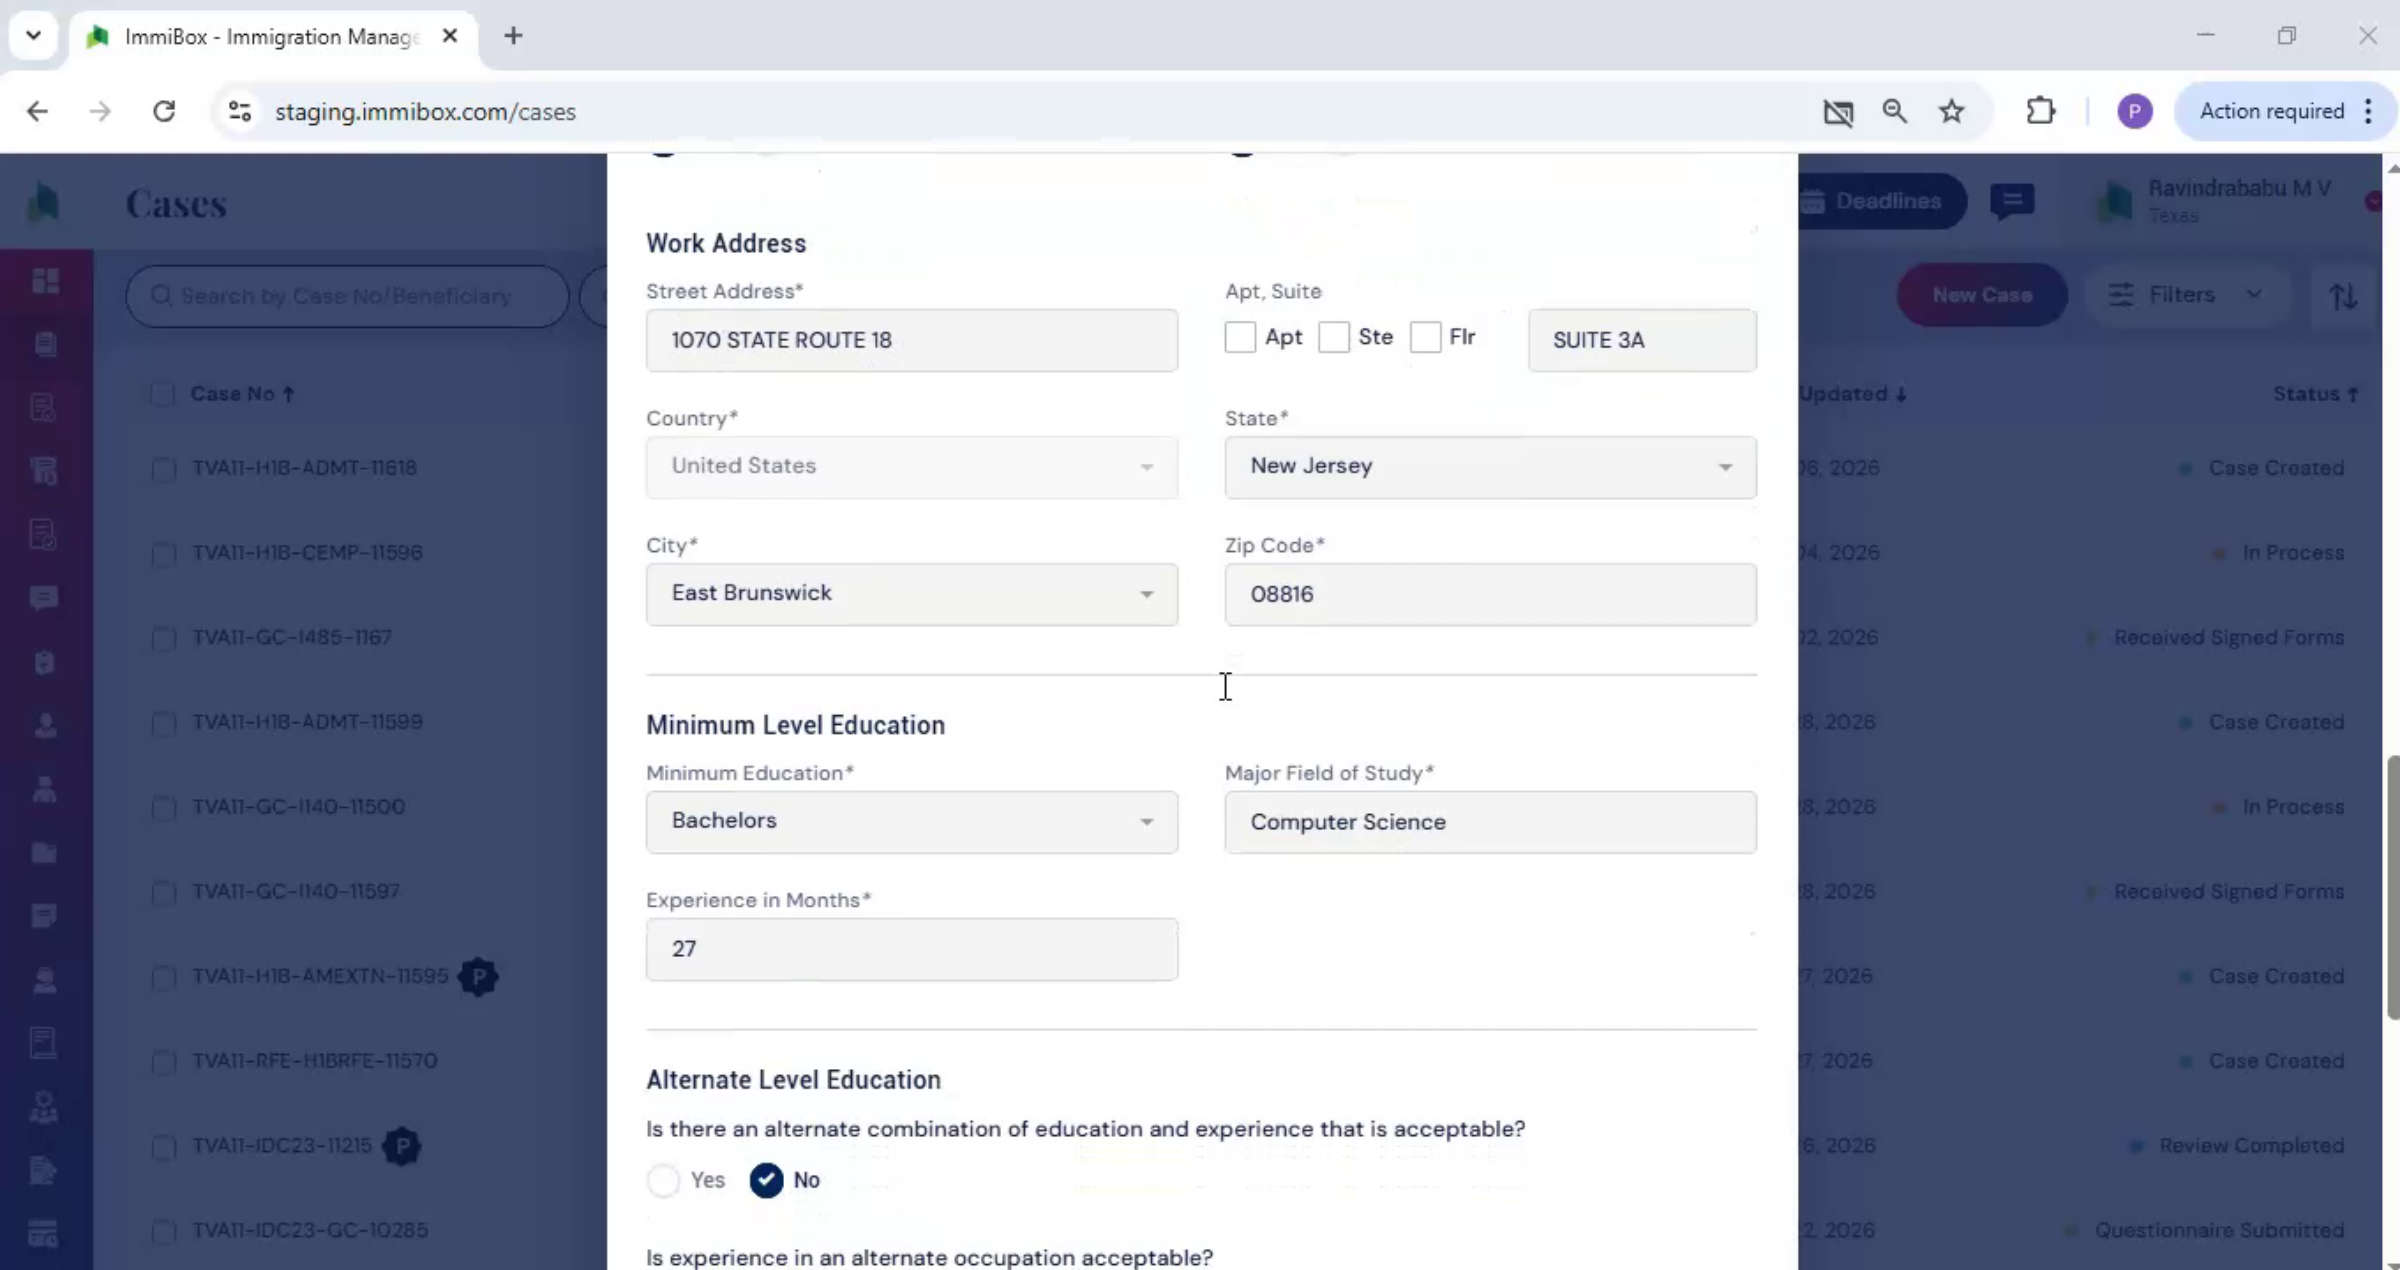
Review all populated information for accuracy and completeness. If any required fields are not populated automatically, enter the information manually after confirming that all required information is complete and accurate.
8. Submit Case Creation
 * click the image to view enlarged
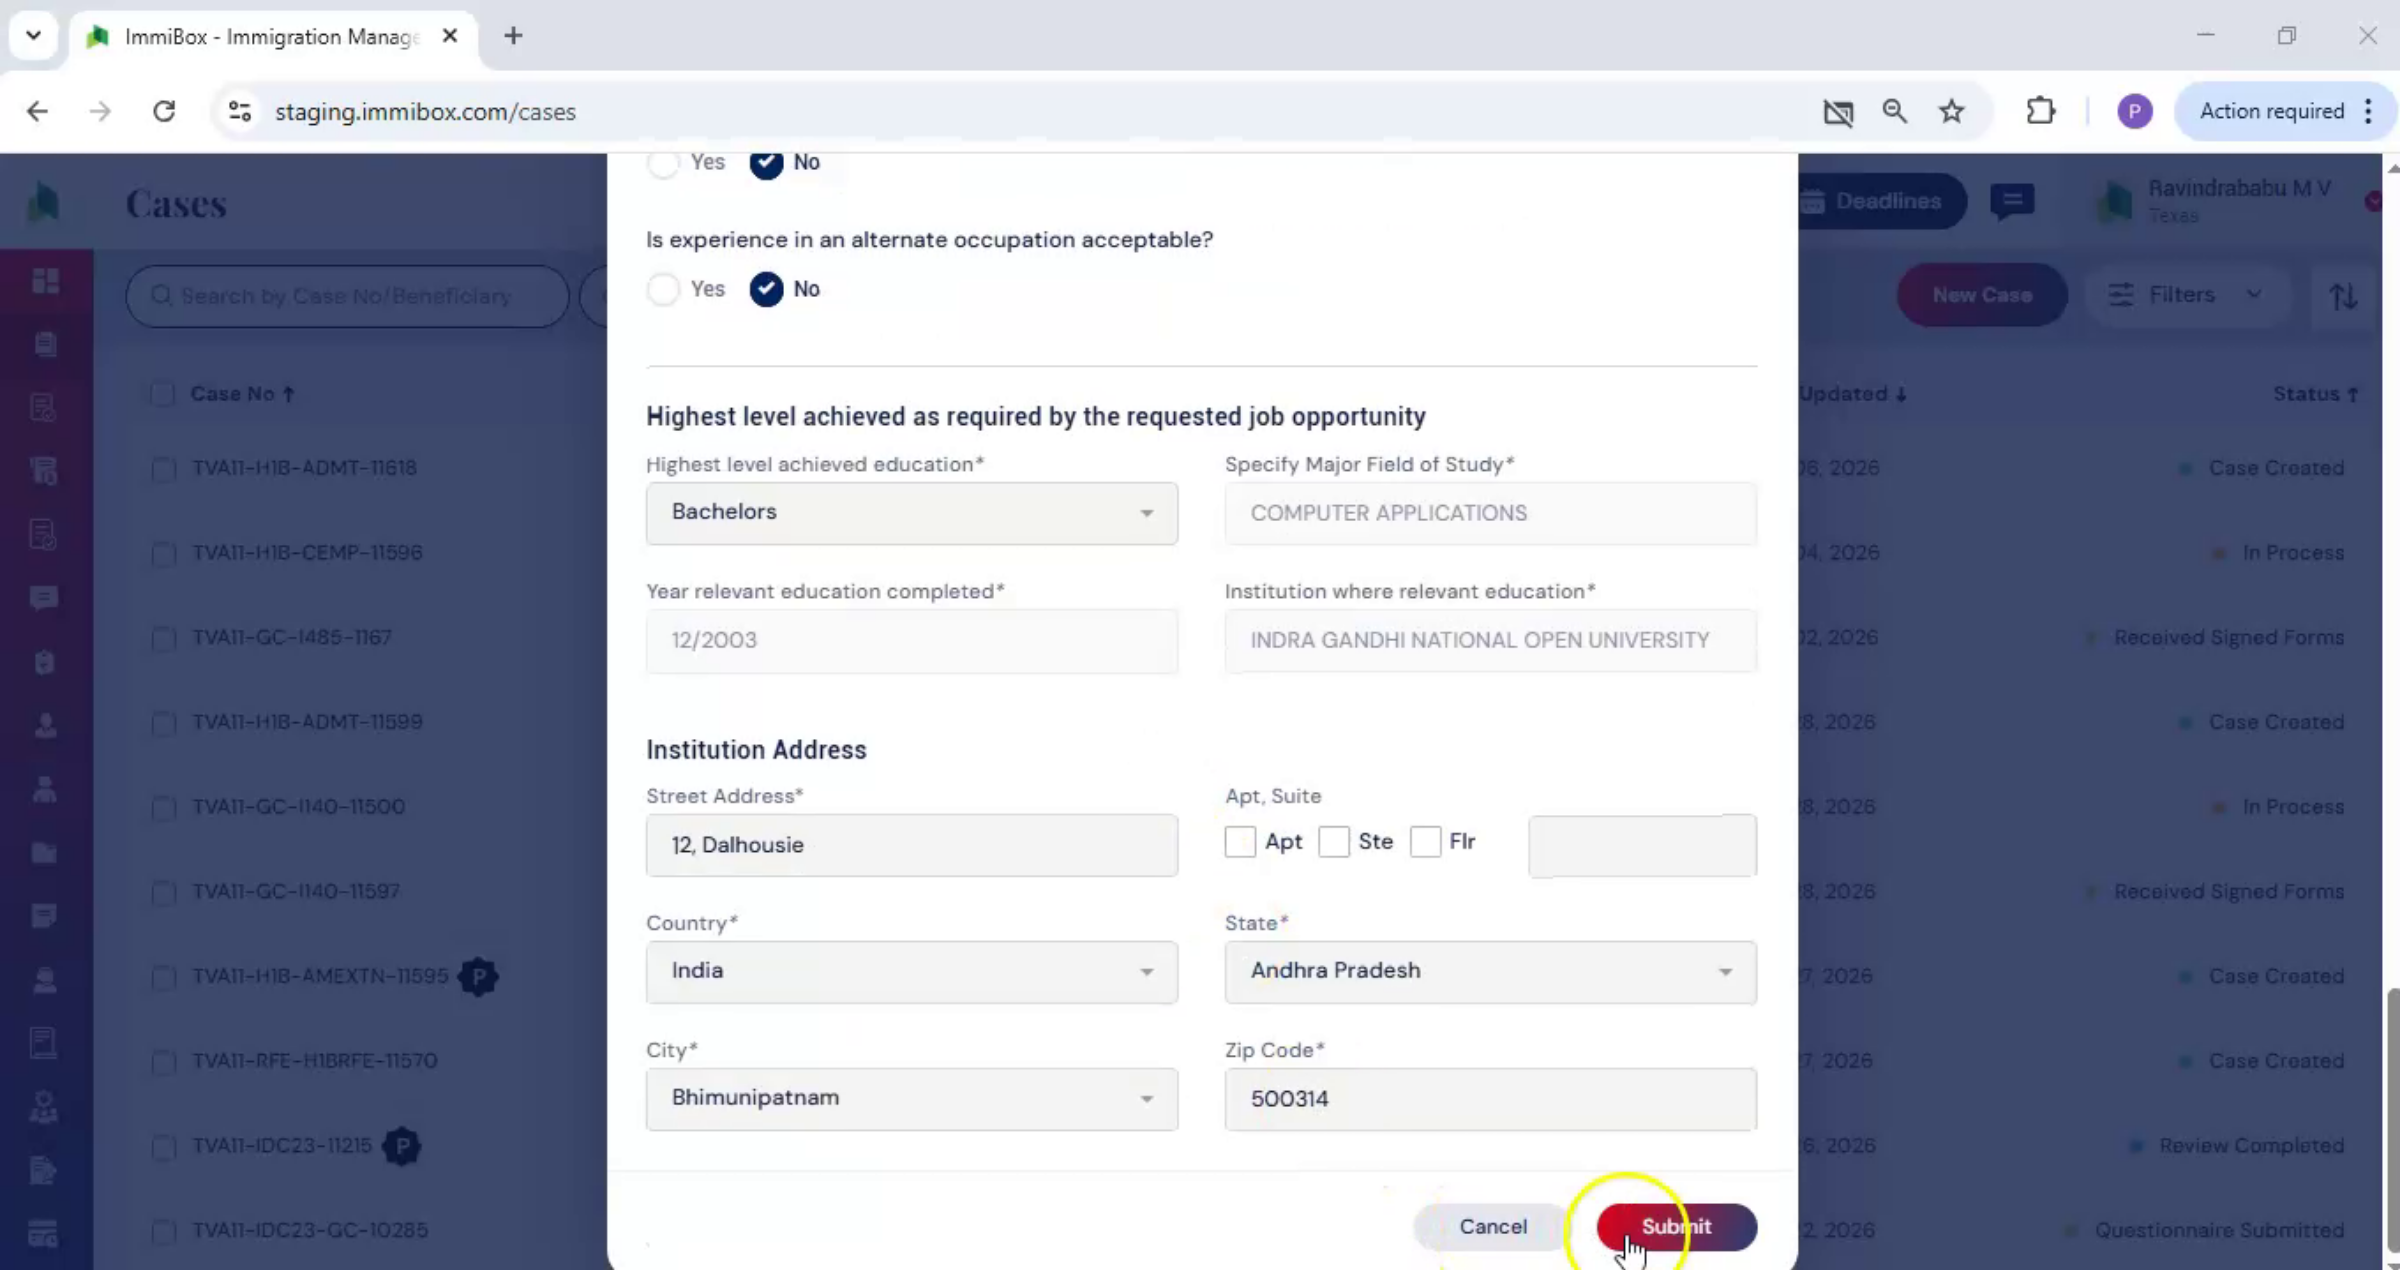
Click Submit to create the case. You will now be redirected to the Case Details page.
9. Case Status Overview
 * click the image to view enlarged
On the right-hand side of the screen, you will see the Status section. This section provides a clear view of where the case is in the process and outlines the next steps, one stage at a time.
10. Customize Workflow Option
 * click the image to view enlarged
If changes are ever required, the workflow can be customized using the Workflow Management Documentation.
11. Navigate To Beneficiary Info
 * click the image to view enlarged
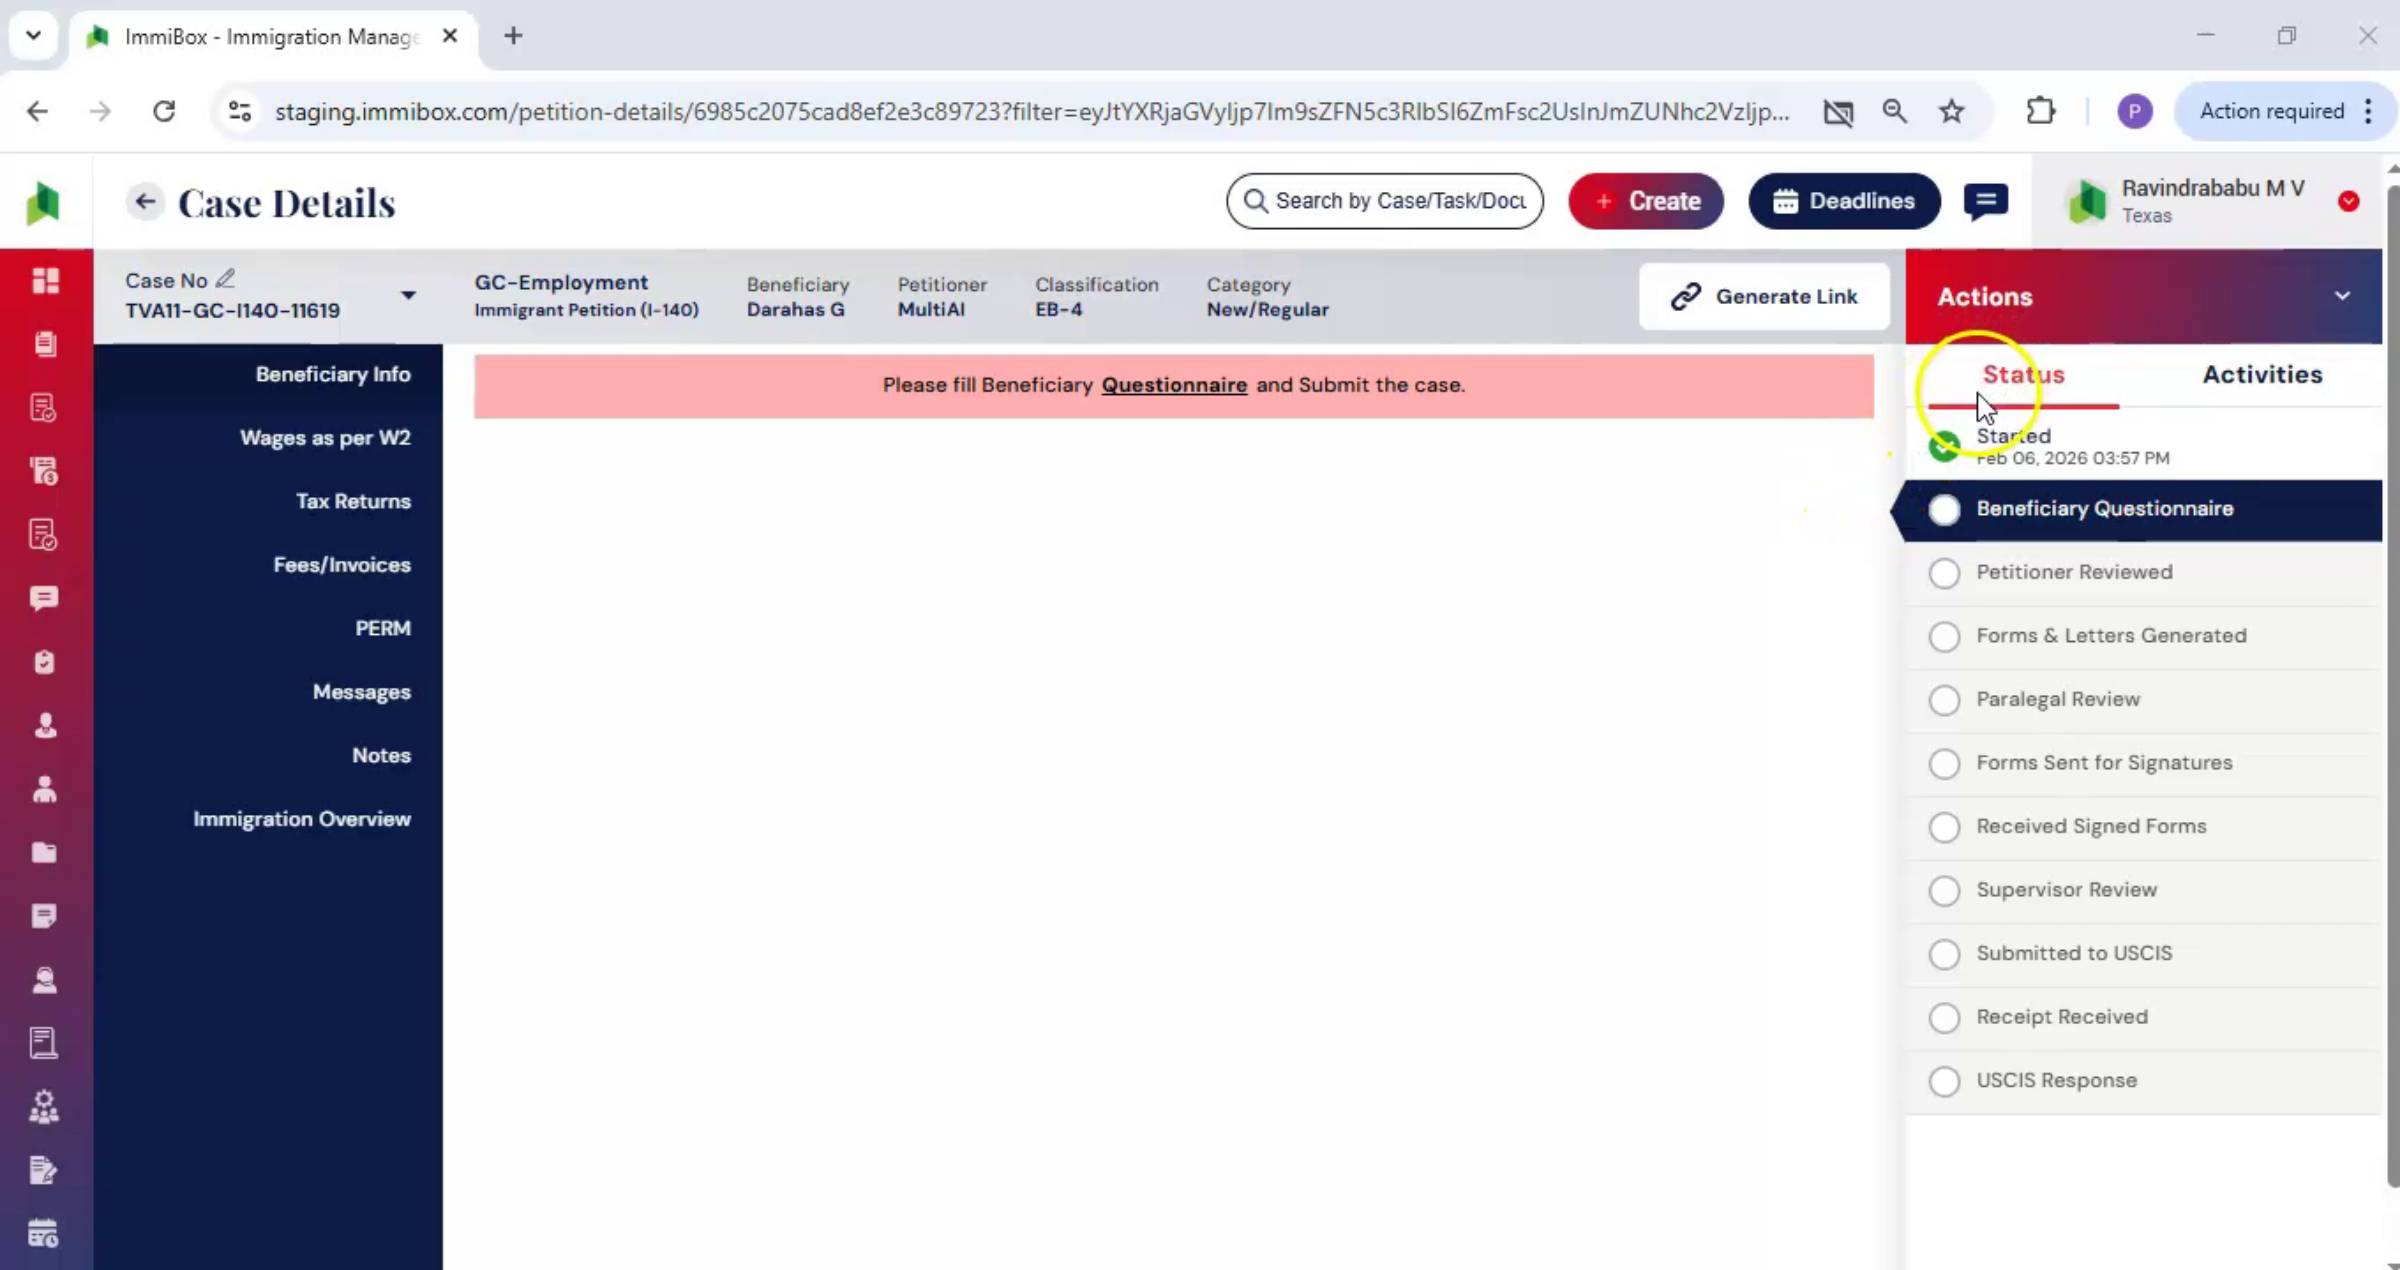
Next, navigate to the Beneficiary Info section. In most cases, the questionnaire is completed by the beneficiary or the petitioner.
12. Questionnaire Completion Responsibility
 * click the image to view enlarged
However, if you are responsible for completing the questionnaire on their behalf, you can access it directly from this section.
13. Access Questionnaire Link
 * click the image to view enlarged
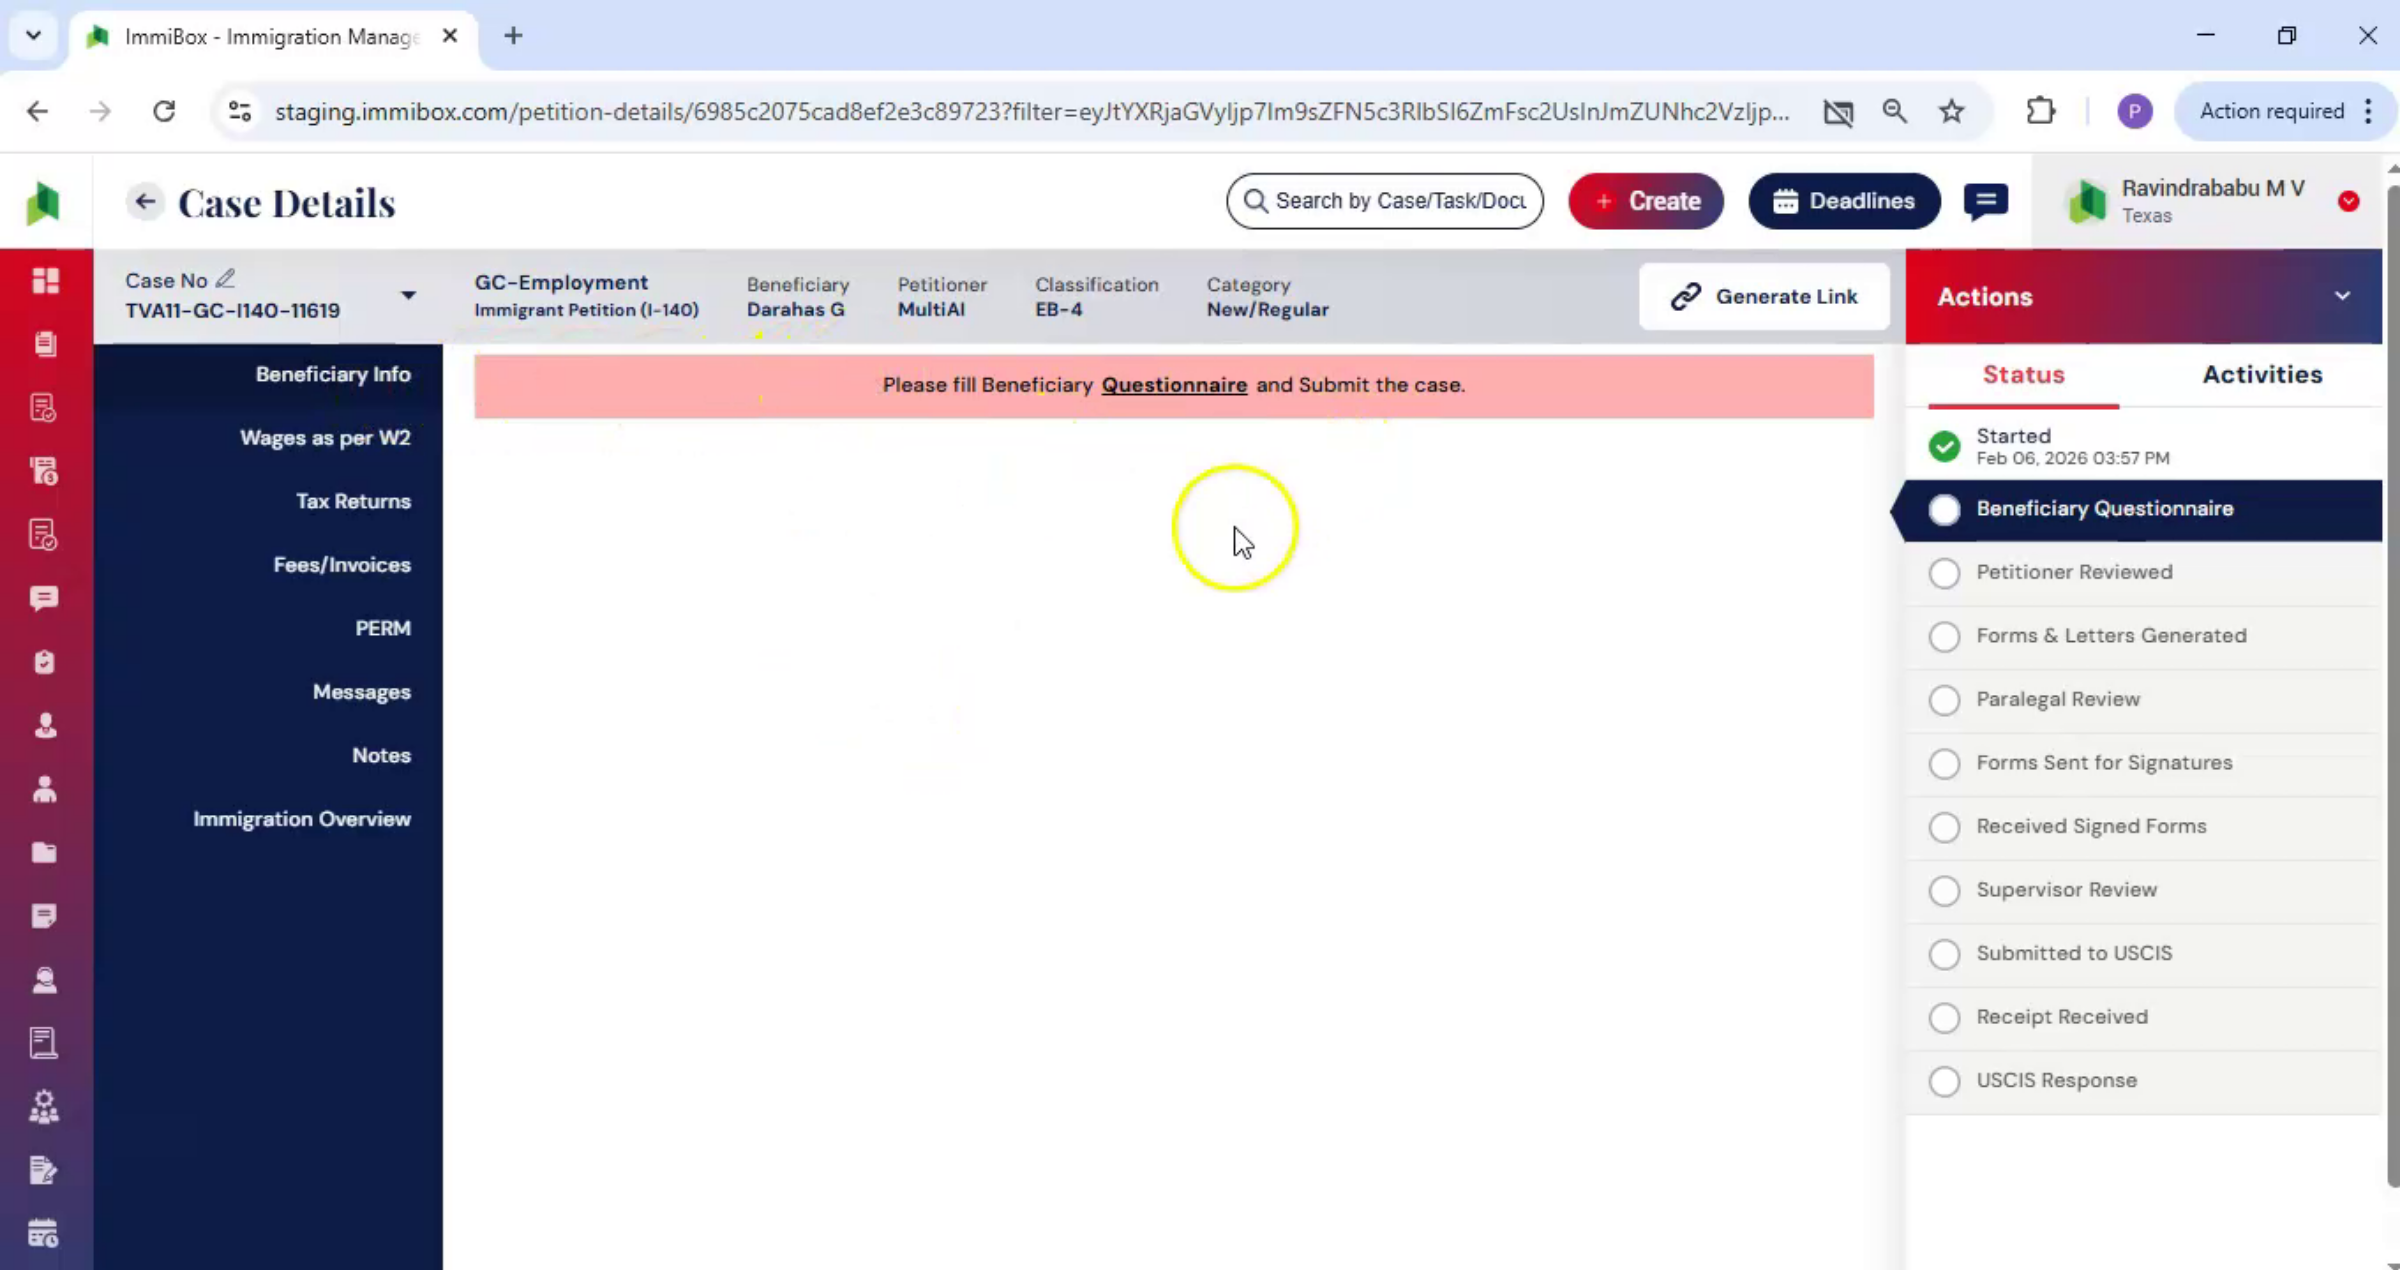
Under Beneficiary Info, locate the questionnaire link. When you click on the questionnaire,
14. Open I-140 Form
 * click the image to view enlarged
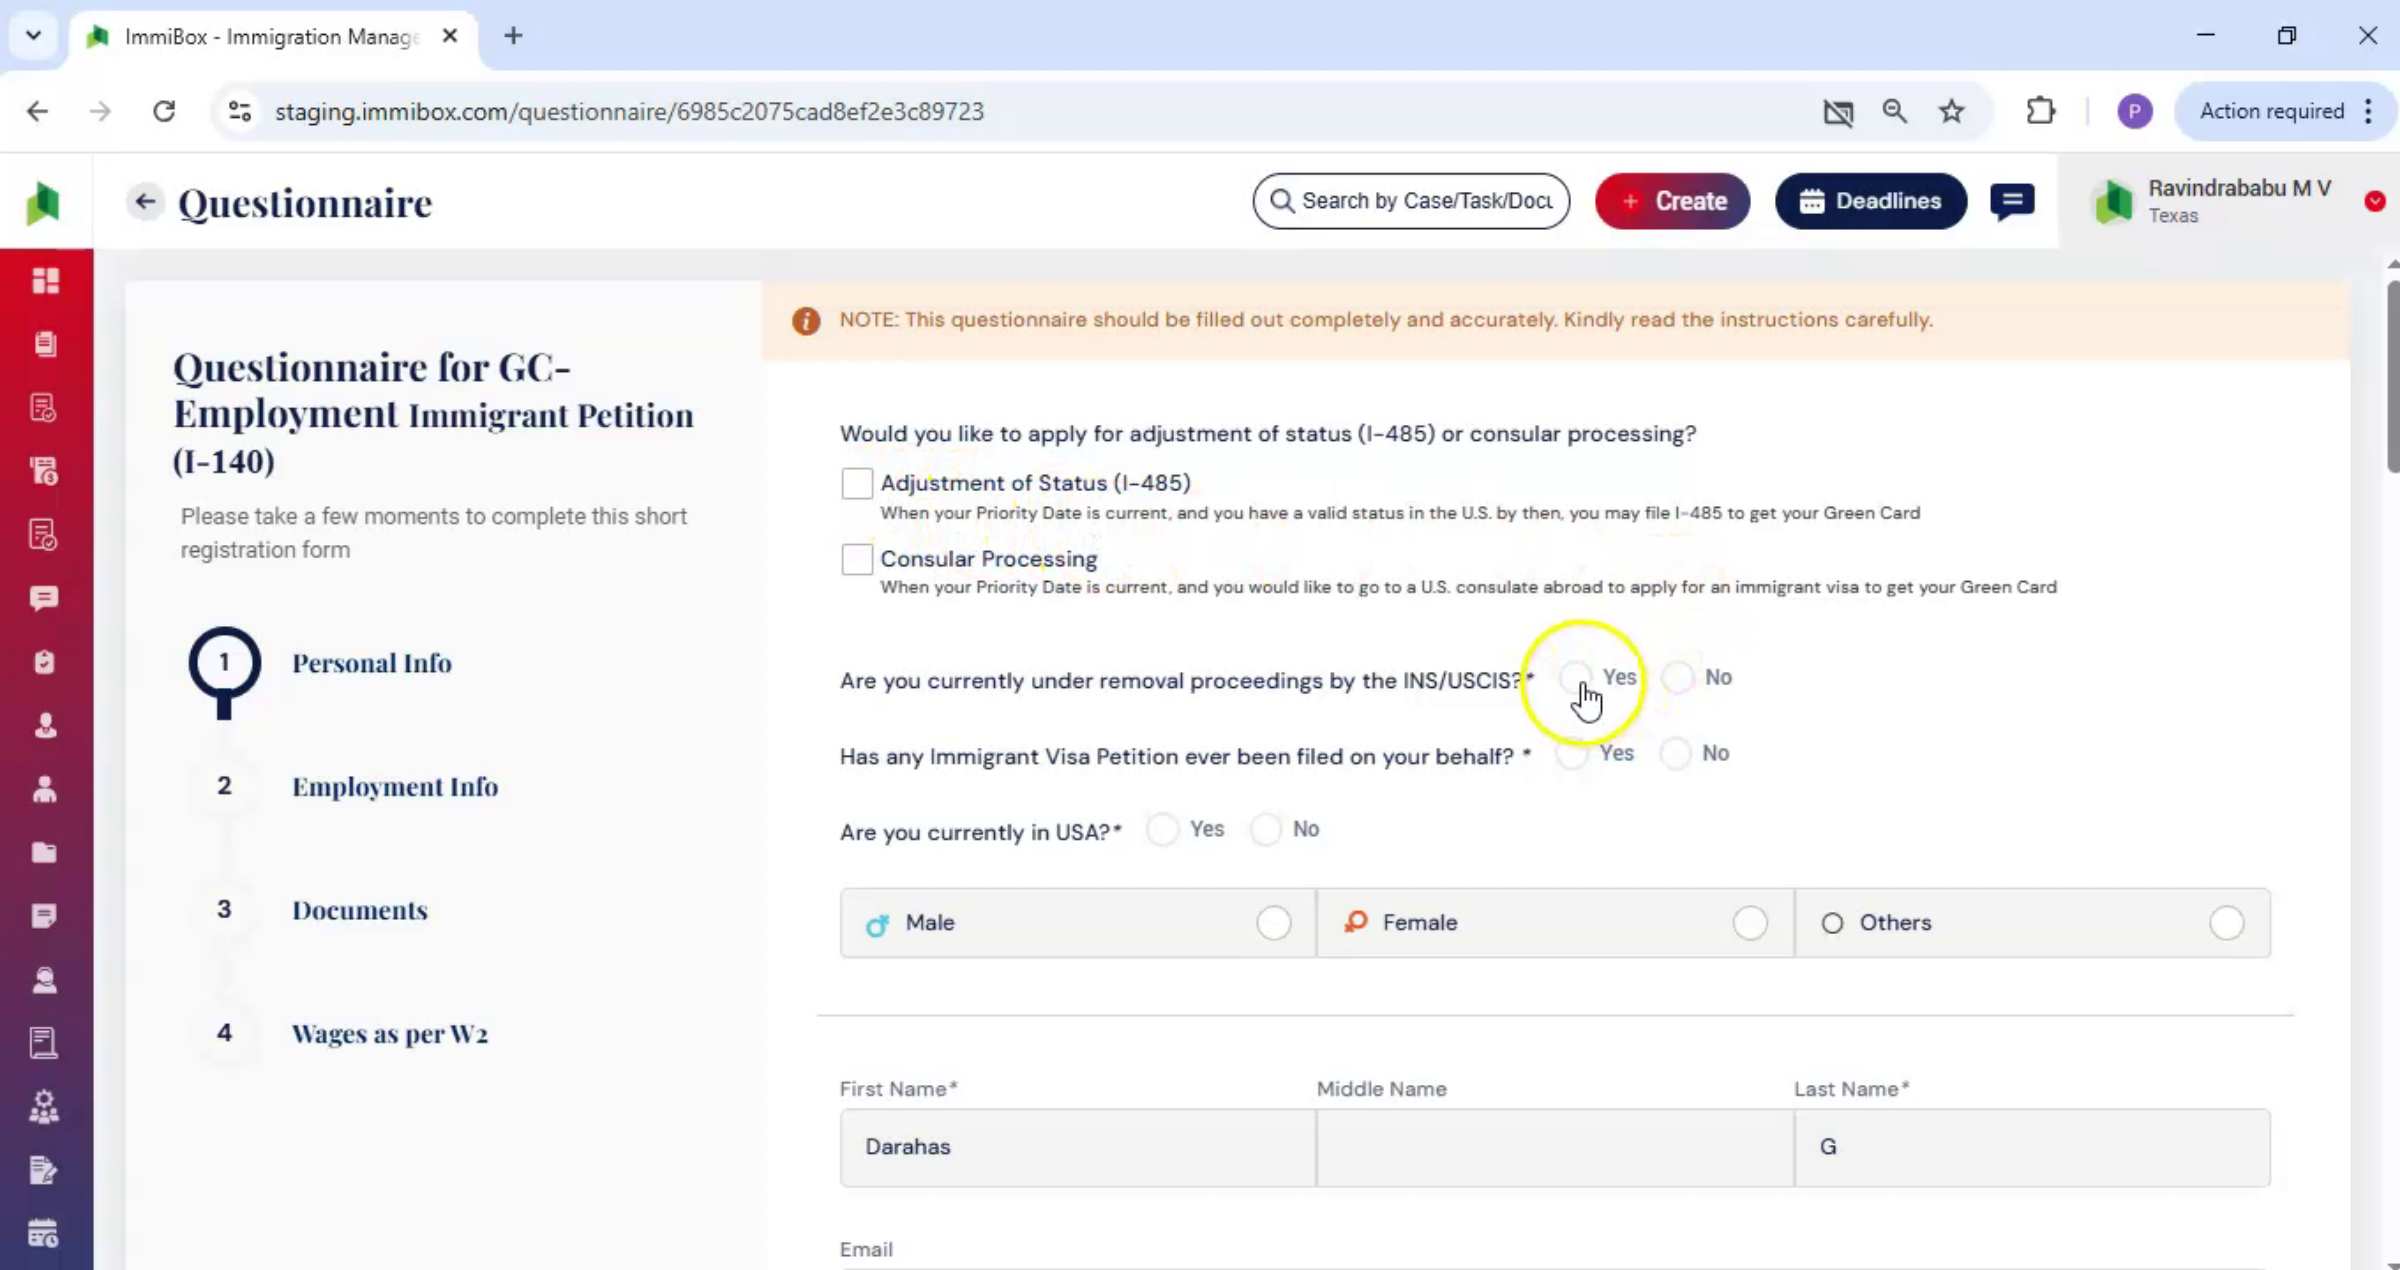
The GC Employment Immigrant Petition. The I-140 form opens on the screen.
15. Enter Questionnaire Details
 * click the image to view enlarged
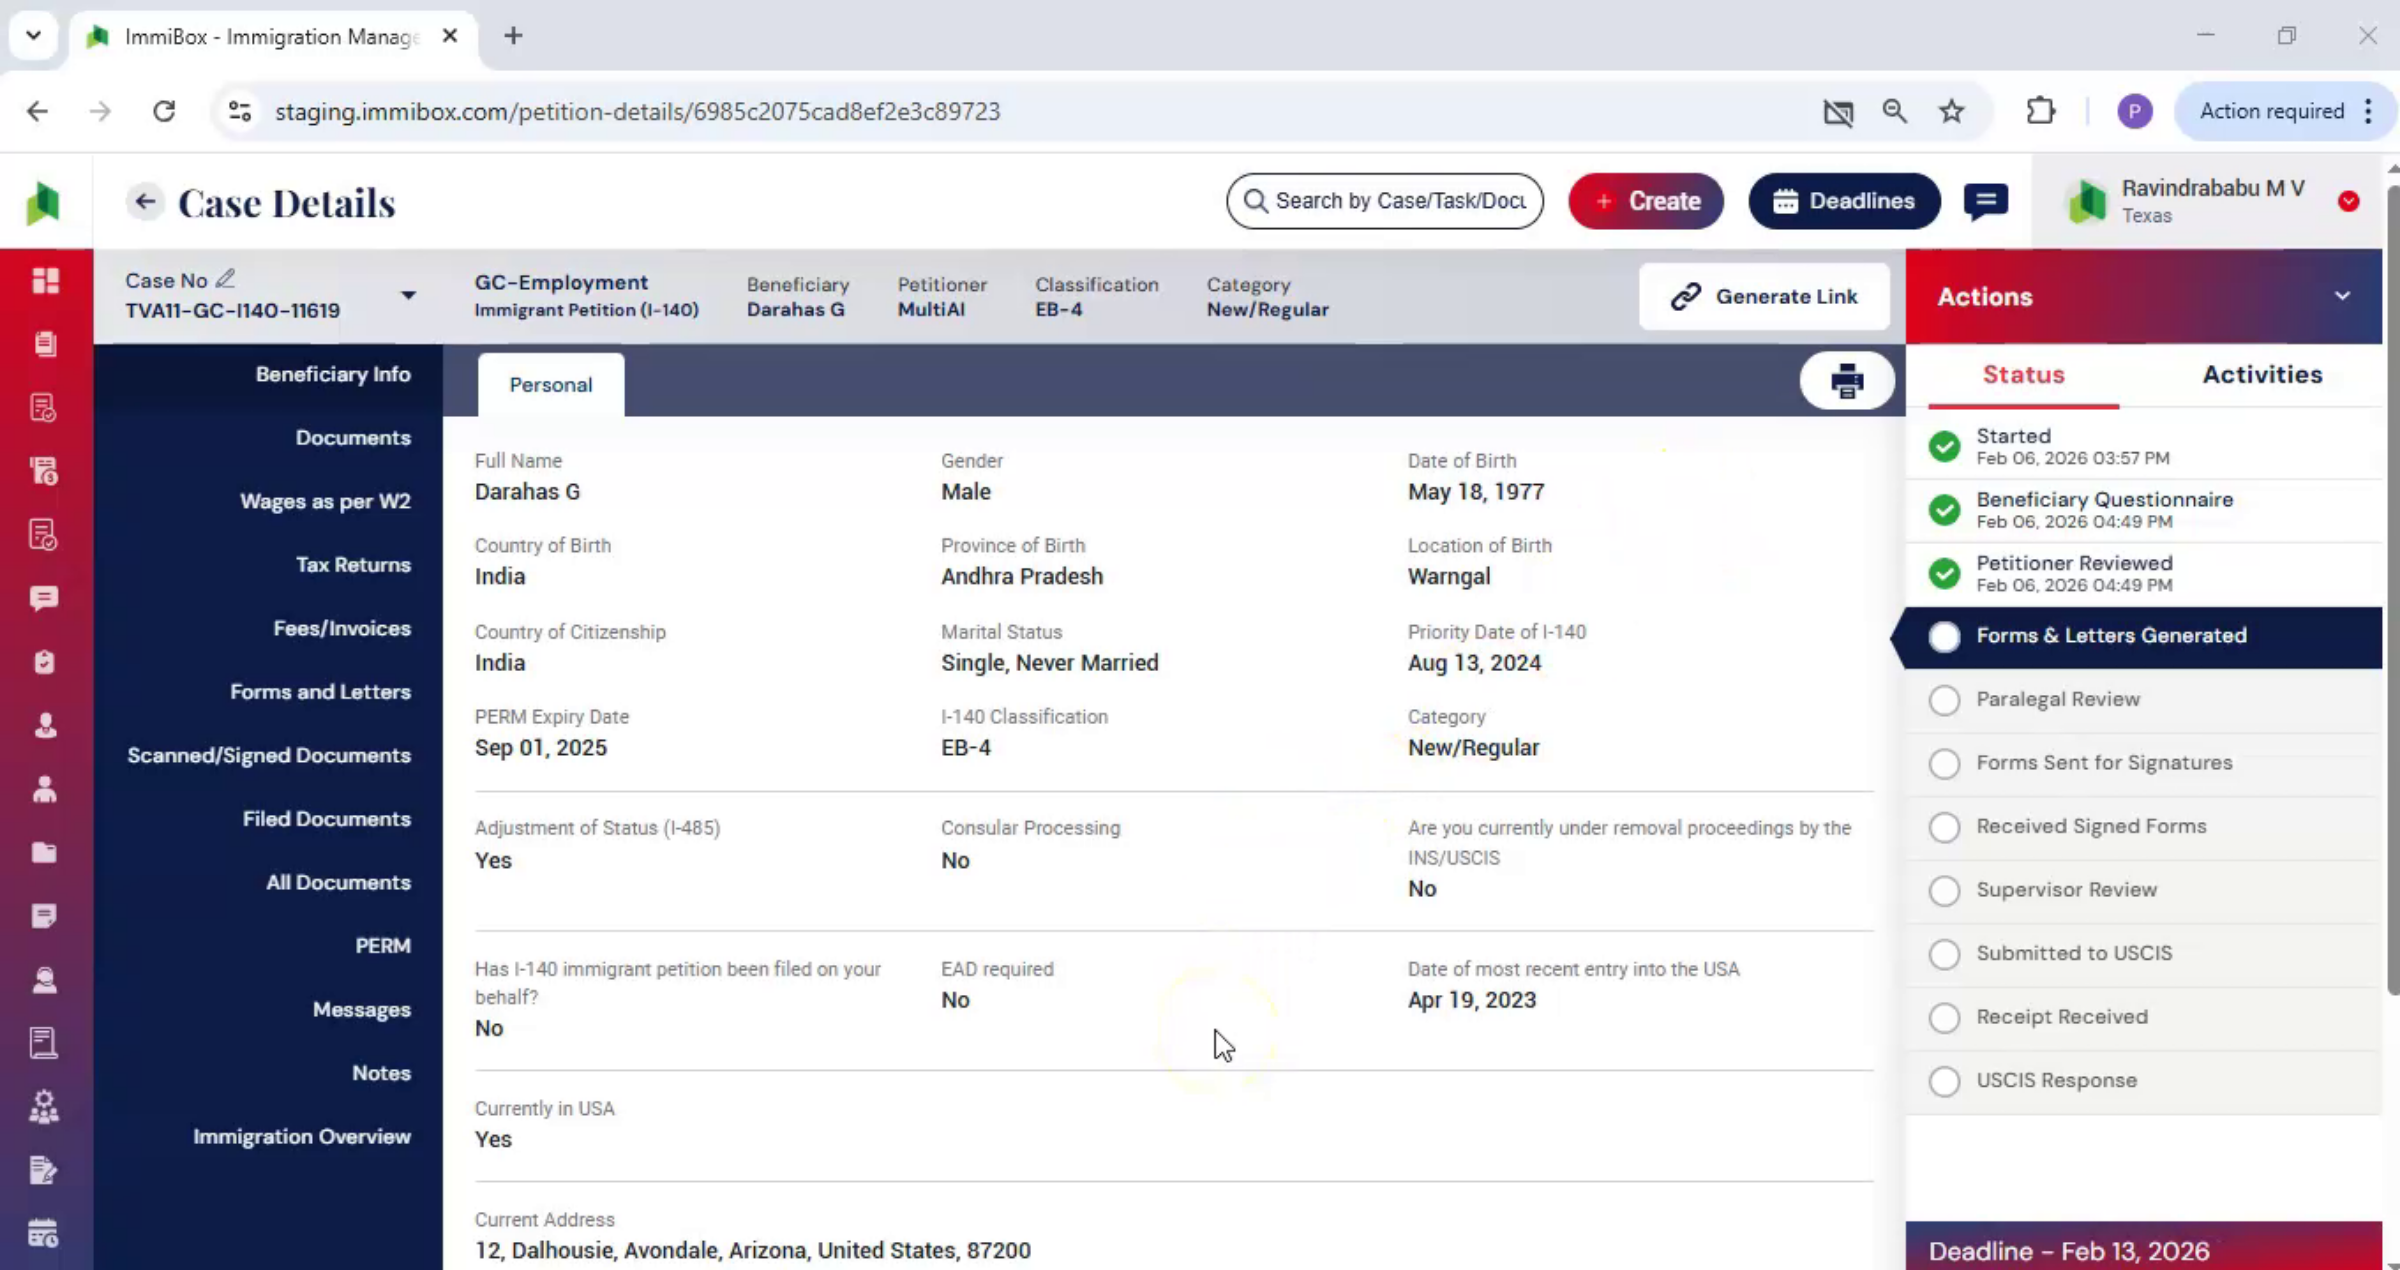
Carefully enter the personal details, complete the employment information upload, all required supporting documents, and enter wage information exactly as listed on the W-2. Once all required information has been entered, click Submit to complete the questionnaire. At this stage, all beneficiary information entered through the questionnaire is now visible within the case.
16. Assign Attorney Step
 * click the image to view enlarged
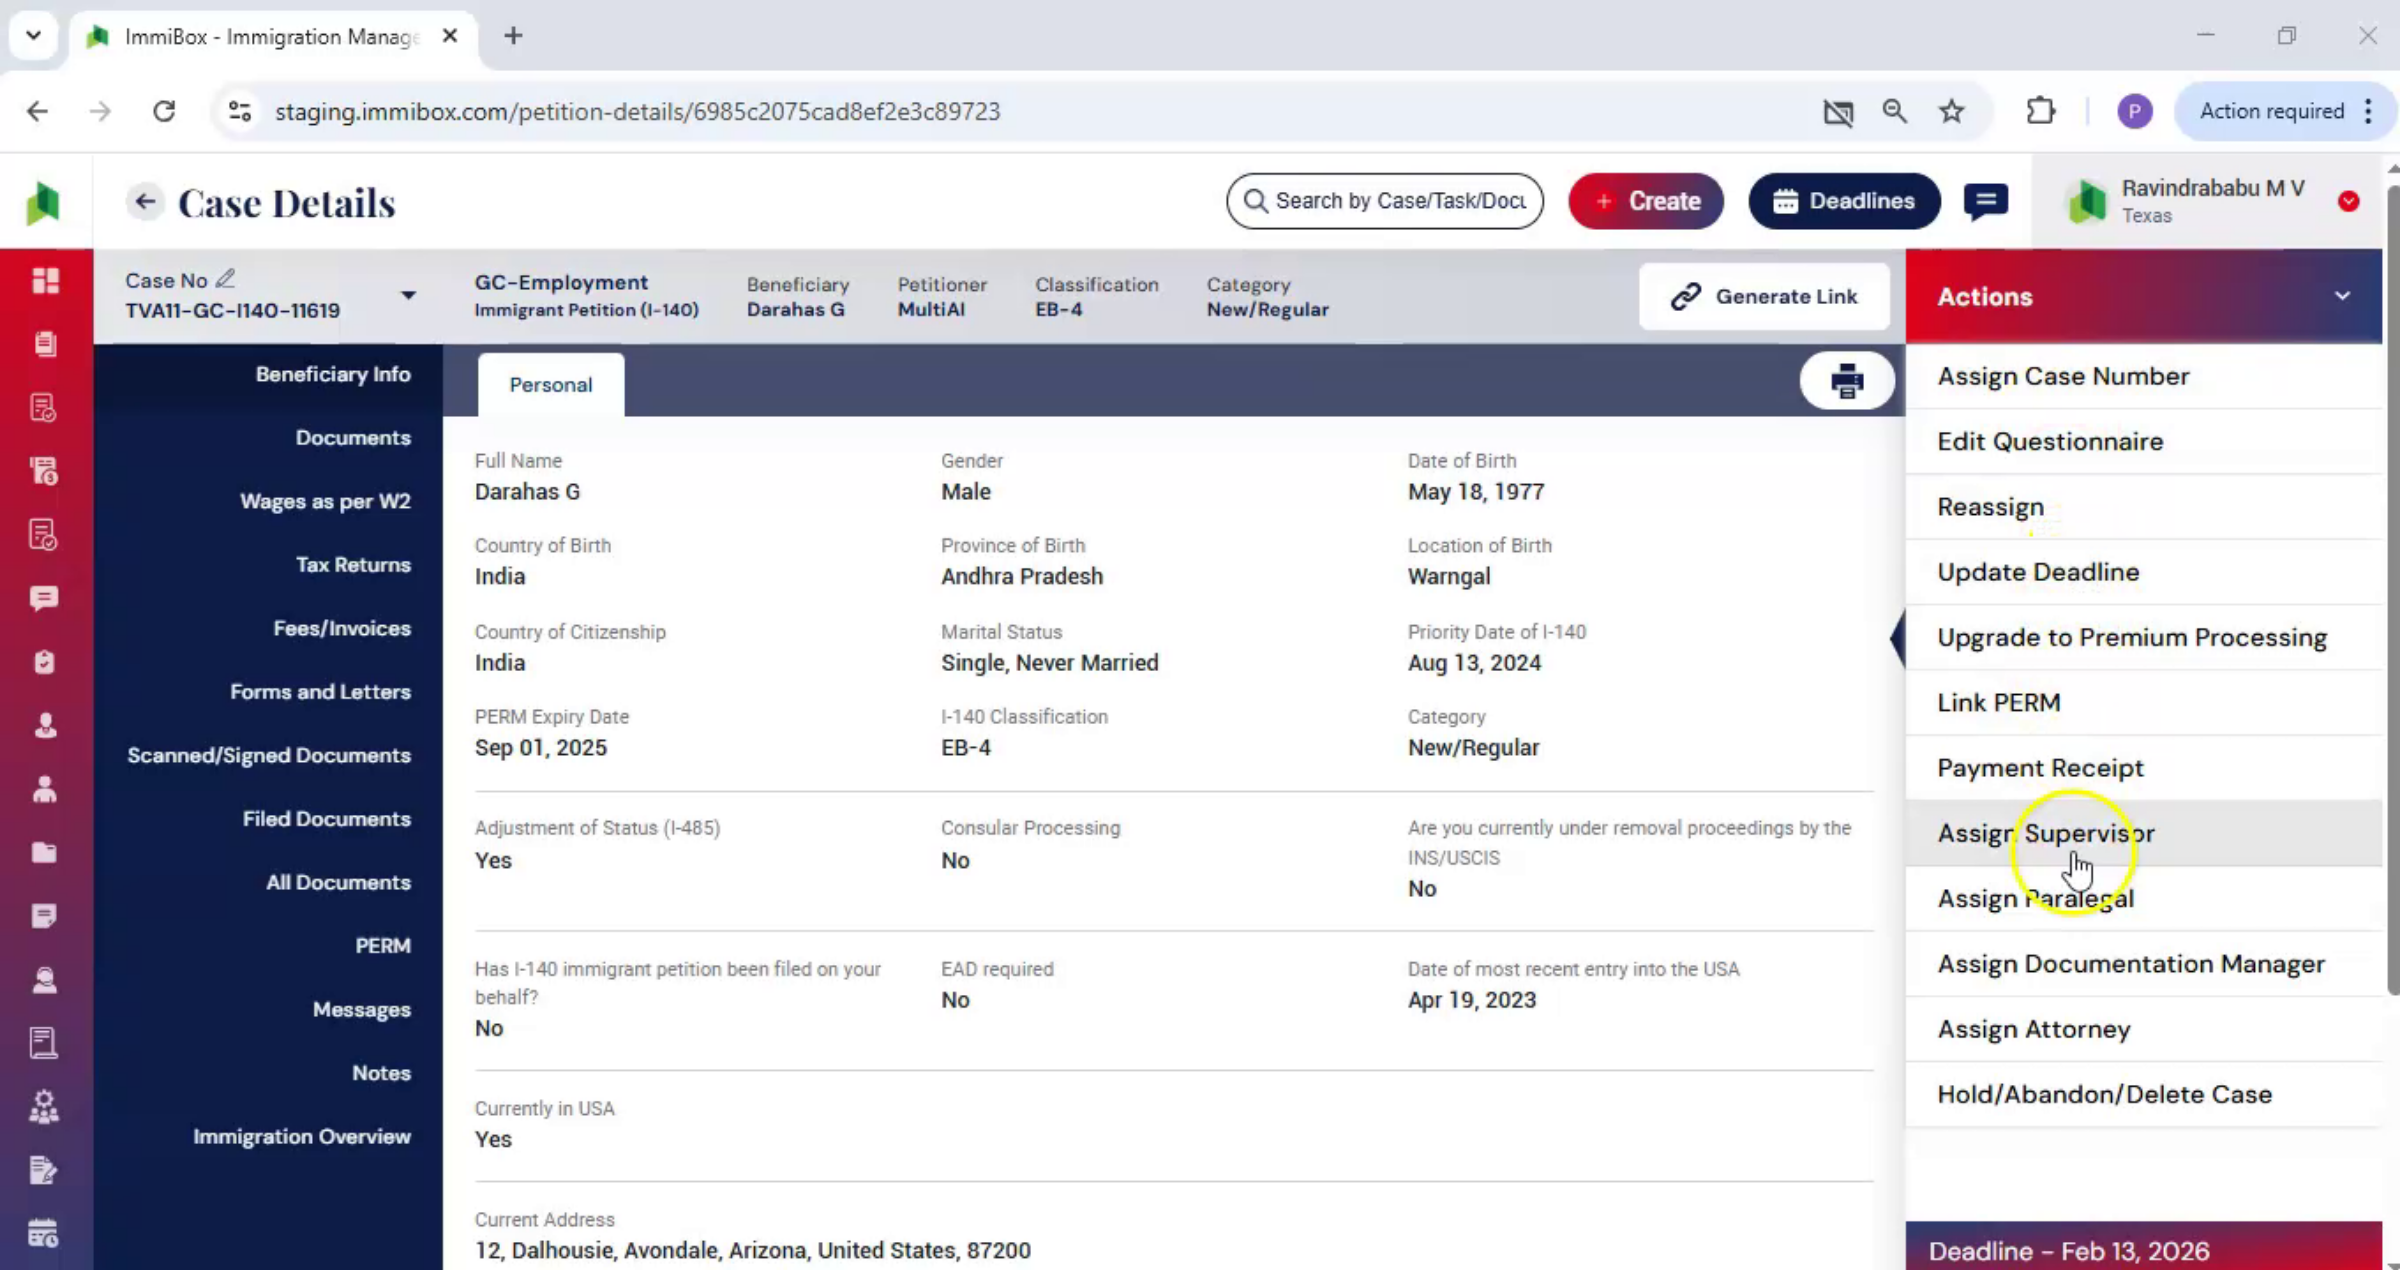
This allows the team to review all details in one place and confirm that the information is complete and ready for the next step. The next step in the workflow is to assign an attorney to the case. From the Actions menu, select Assign Attorney.
17. Select Attorney And Assign
 * click the image to view enlarged
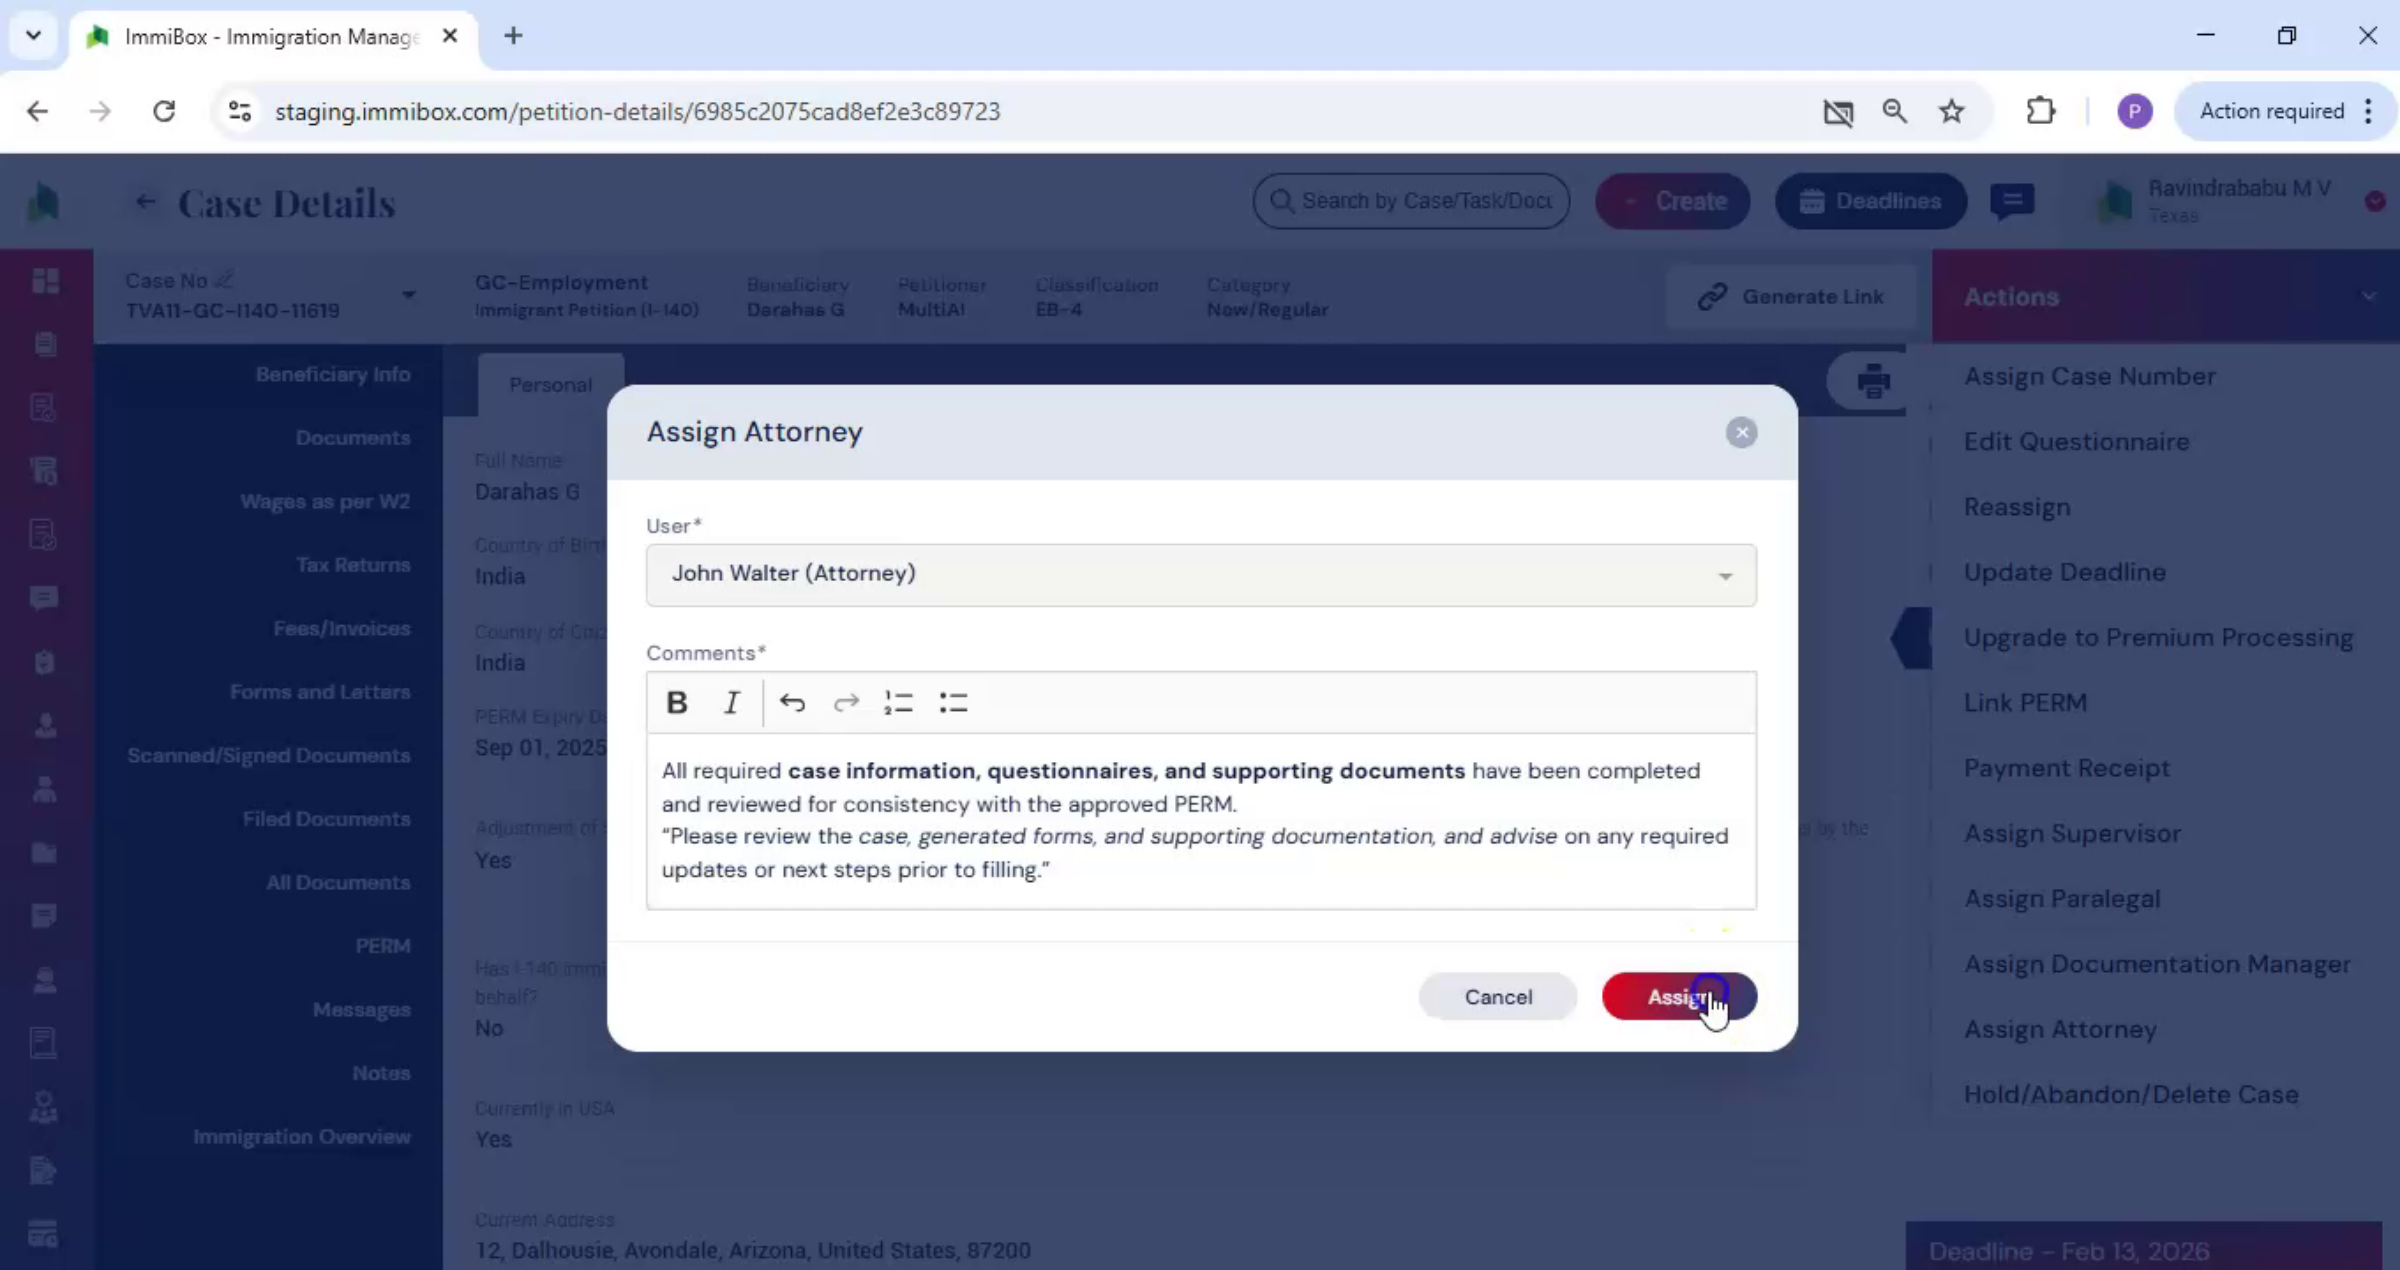
Choose the appropriate attorney from the user list. Add any relevant comments or case-specific details, and then click Assign.
18. Forms And Letters Preparation
 * click the image to view enlarged
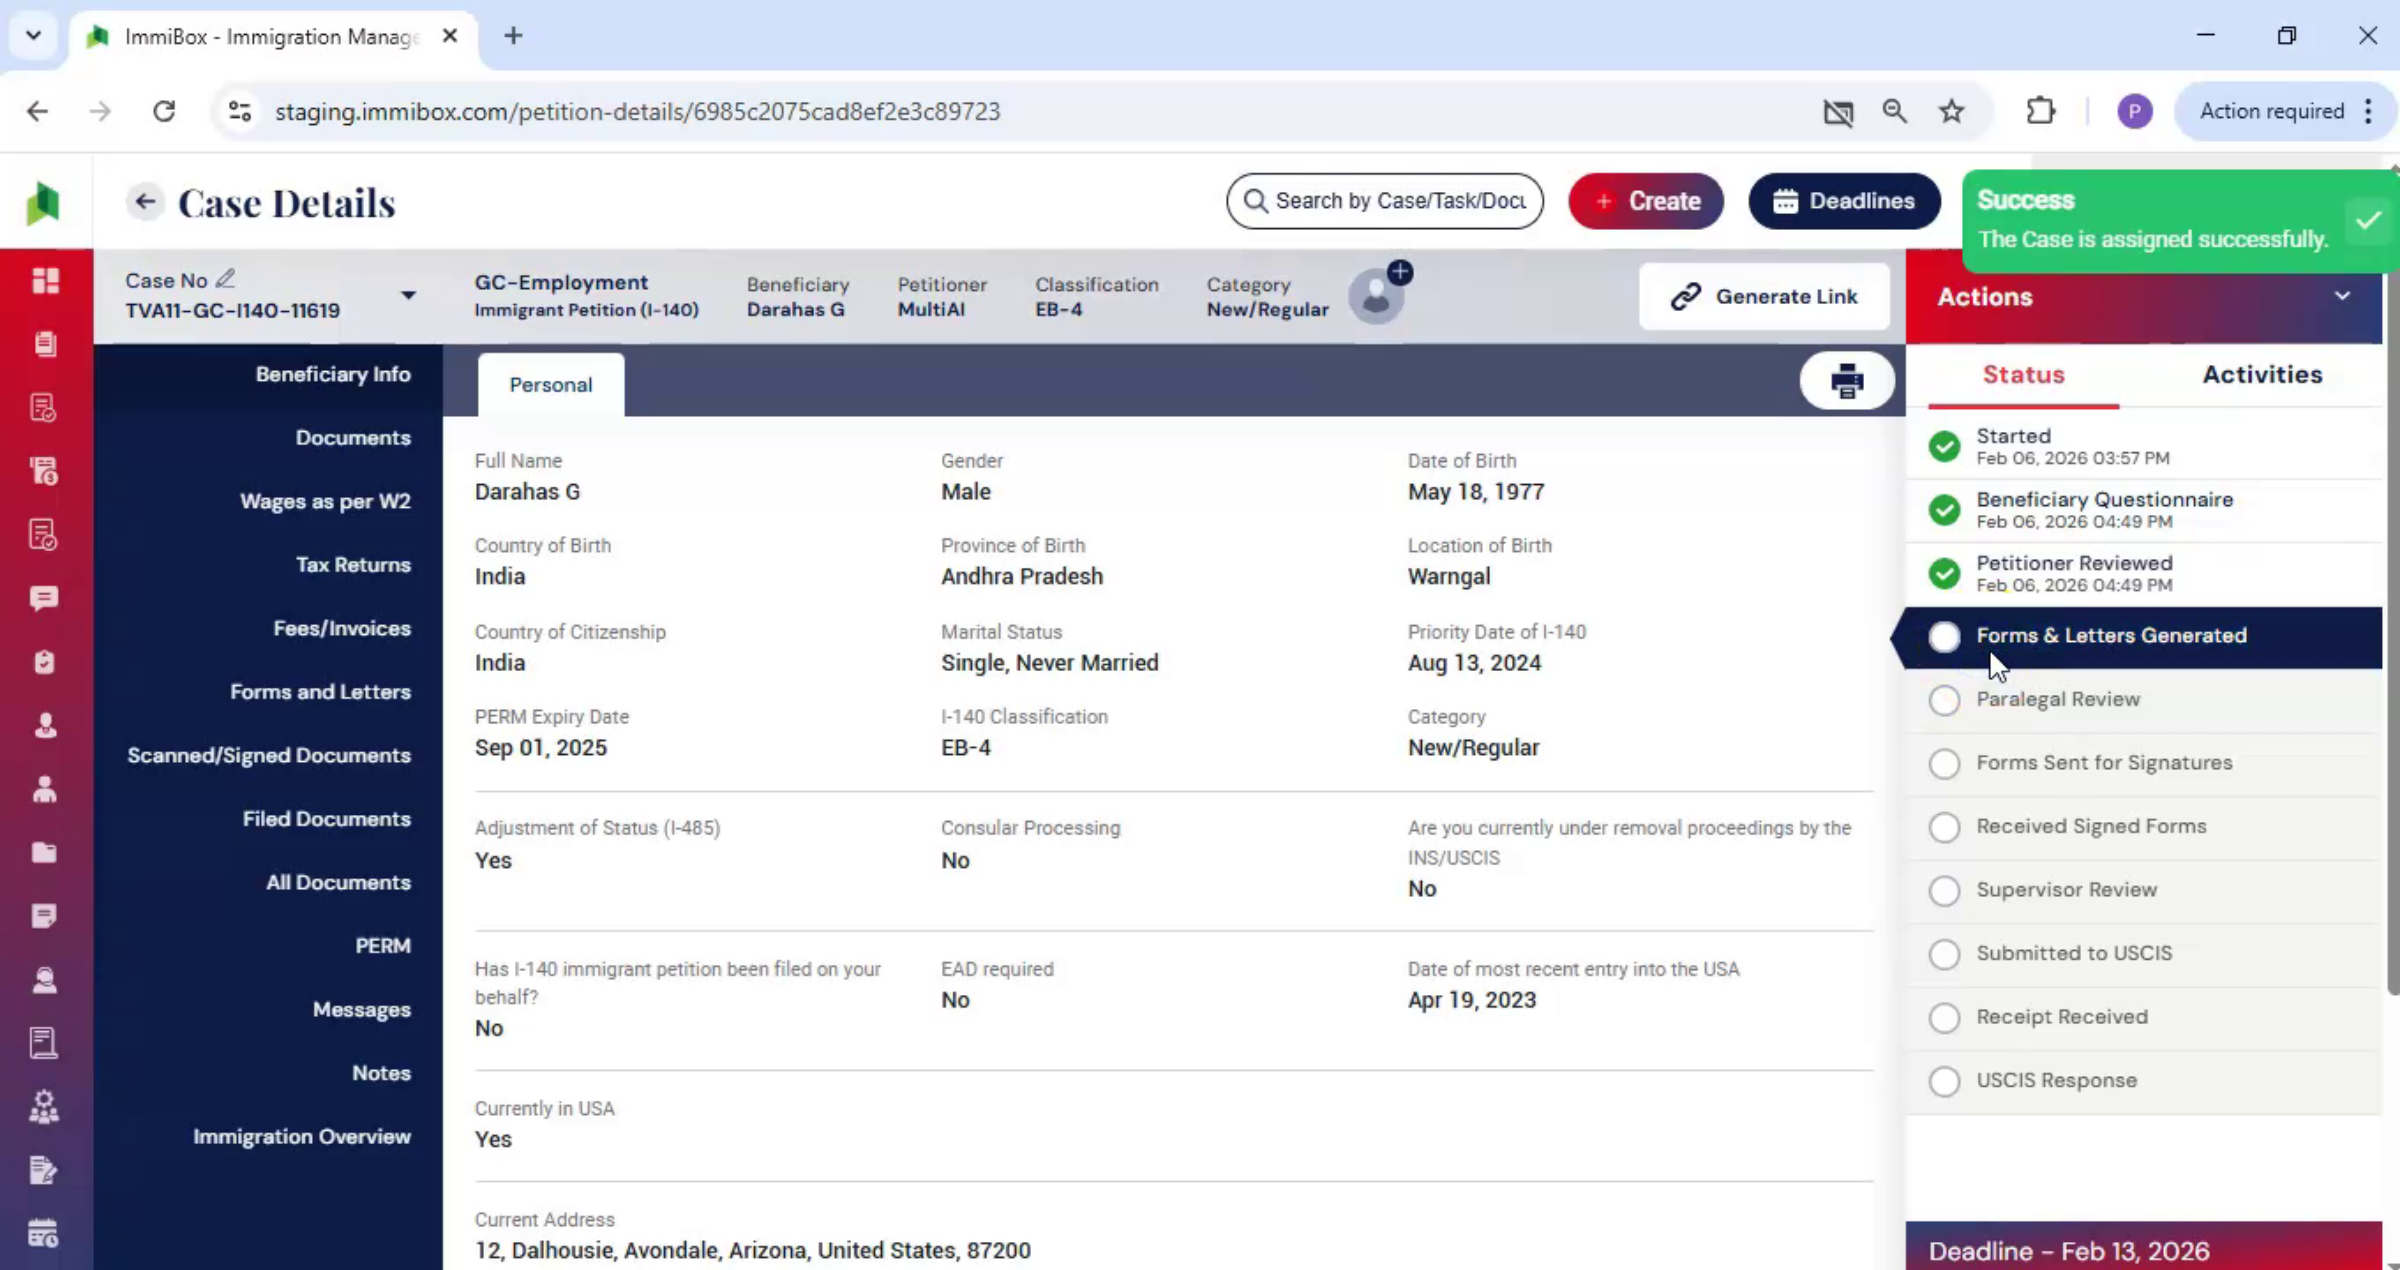
Once the attorney has been assigned, the case automatically moves forward to the Forms and Letters section. Here, ImmiBox uses the information already collected in the case to begin preparing official forms and supporting documents.
19. Legal Team Review Process
 * click the image to view enlarged
This step is completed by the legal team to ensure accuracy, consistency, and compliance with filing requirements while working within a single, centralized system.
20. Generate Forms And Letters
 * click the image to view enlarged
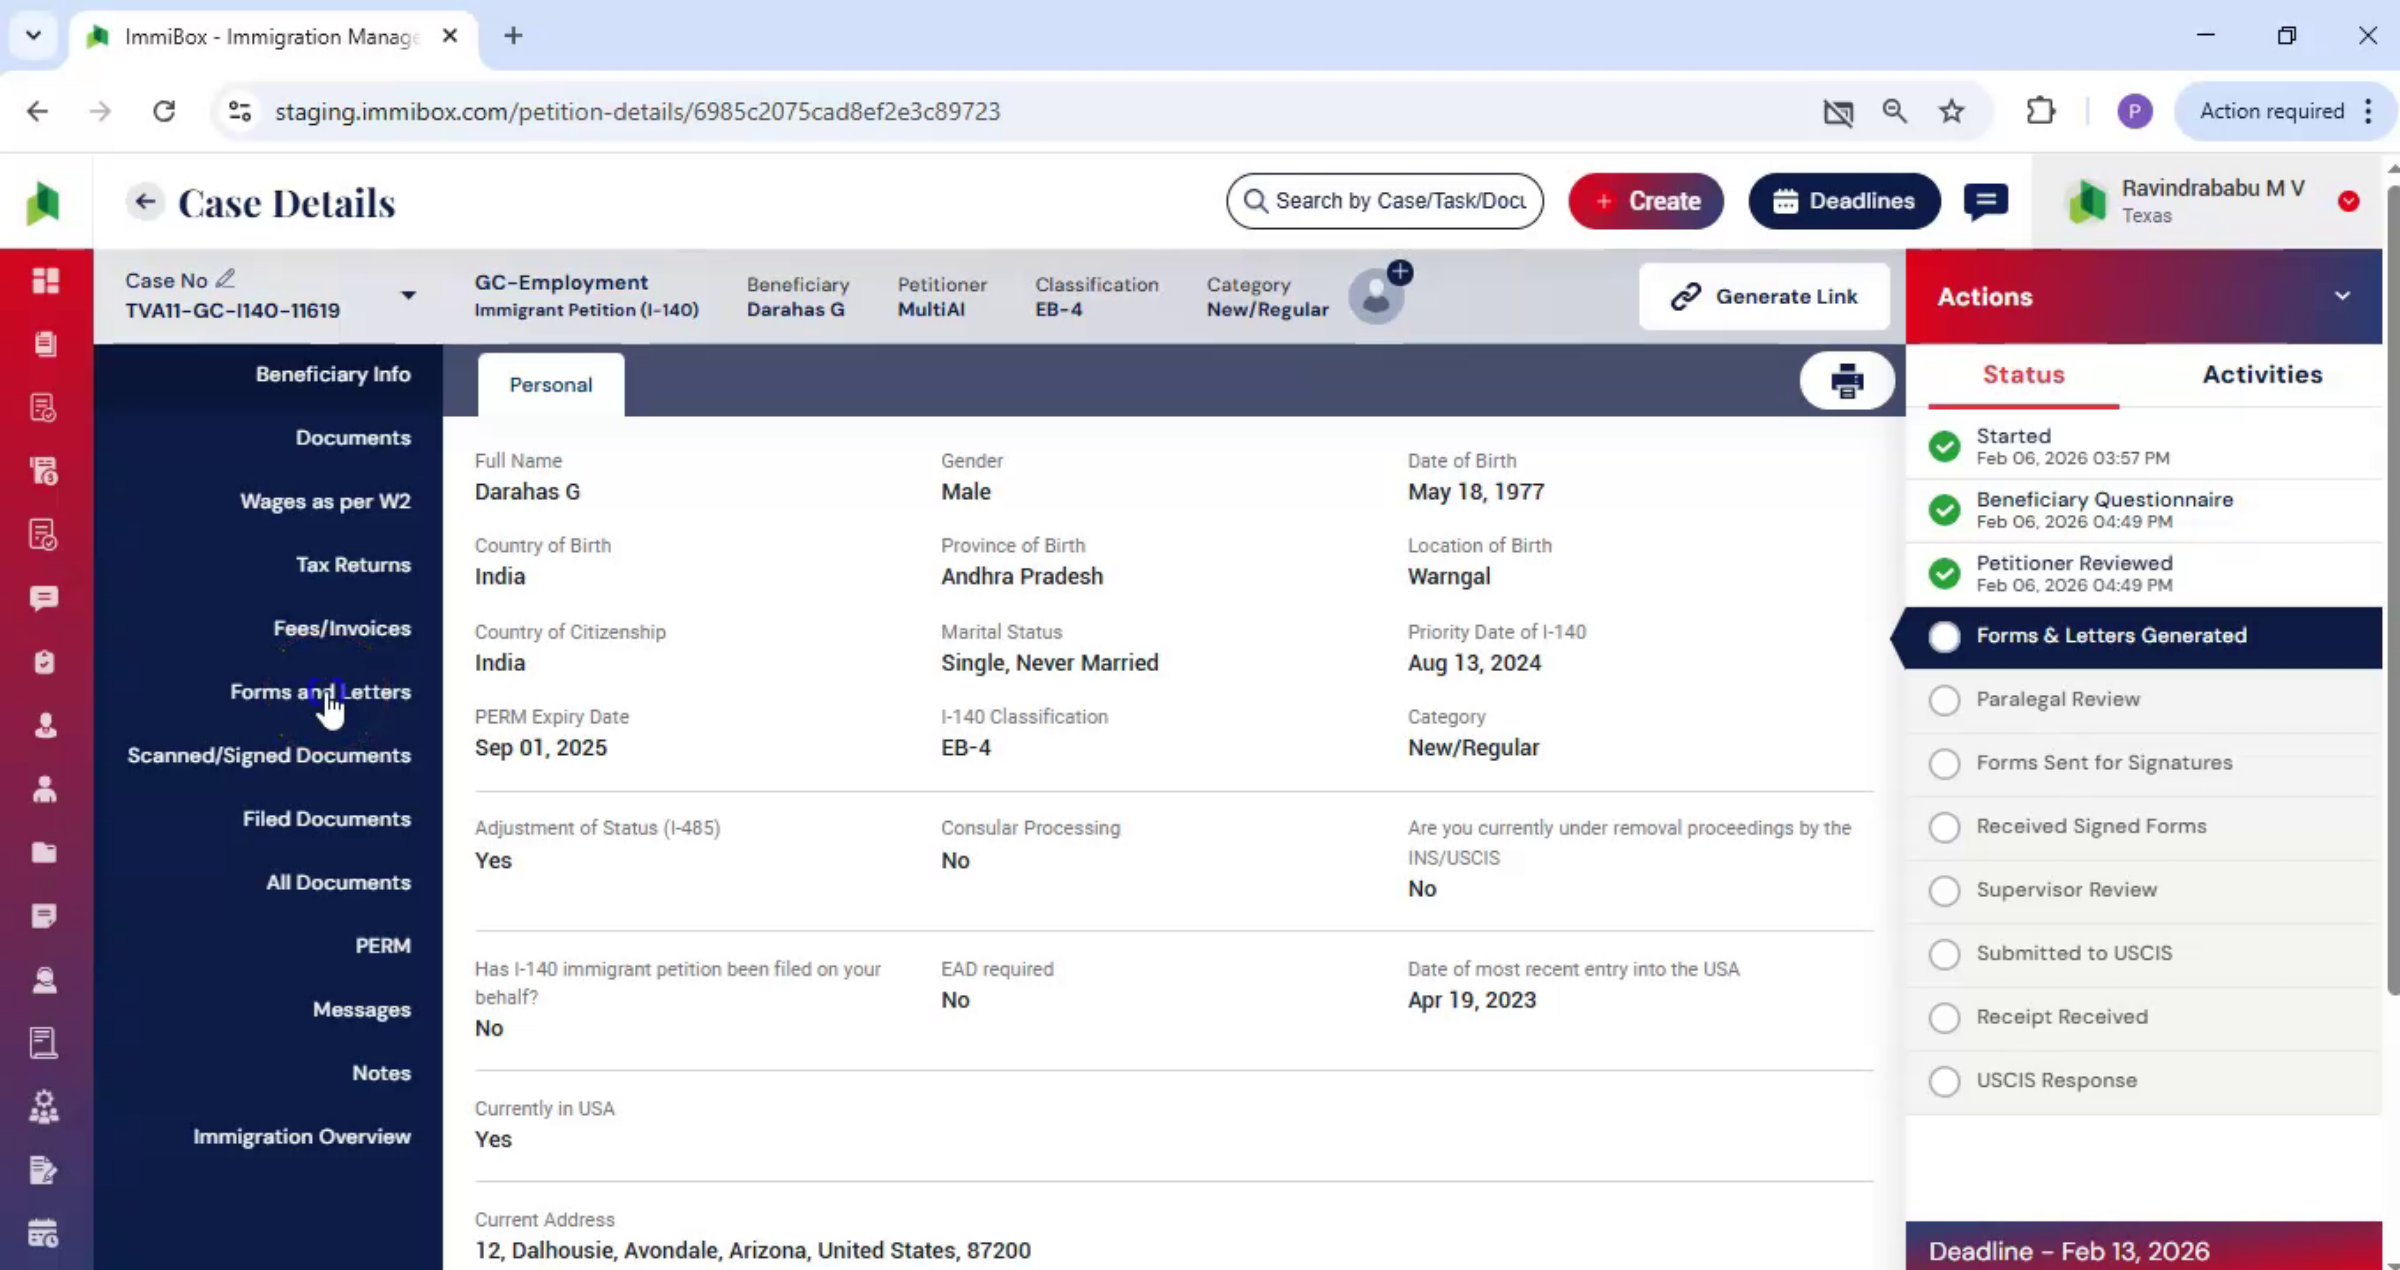
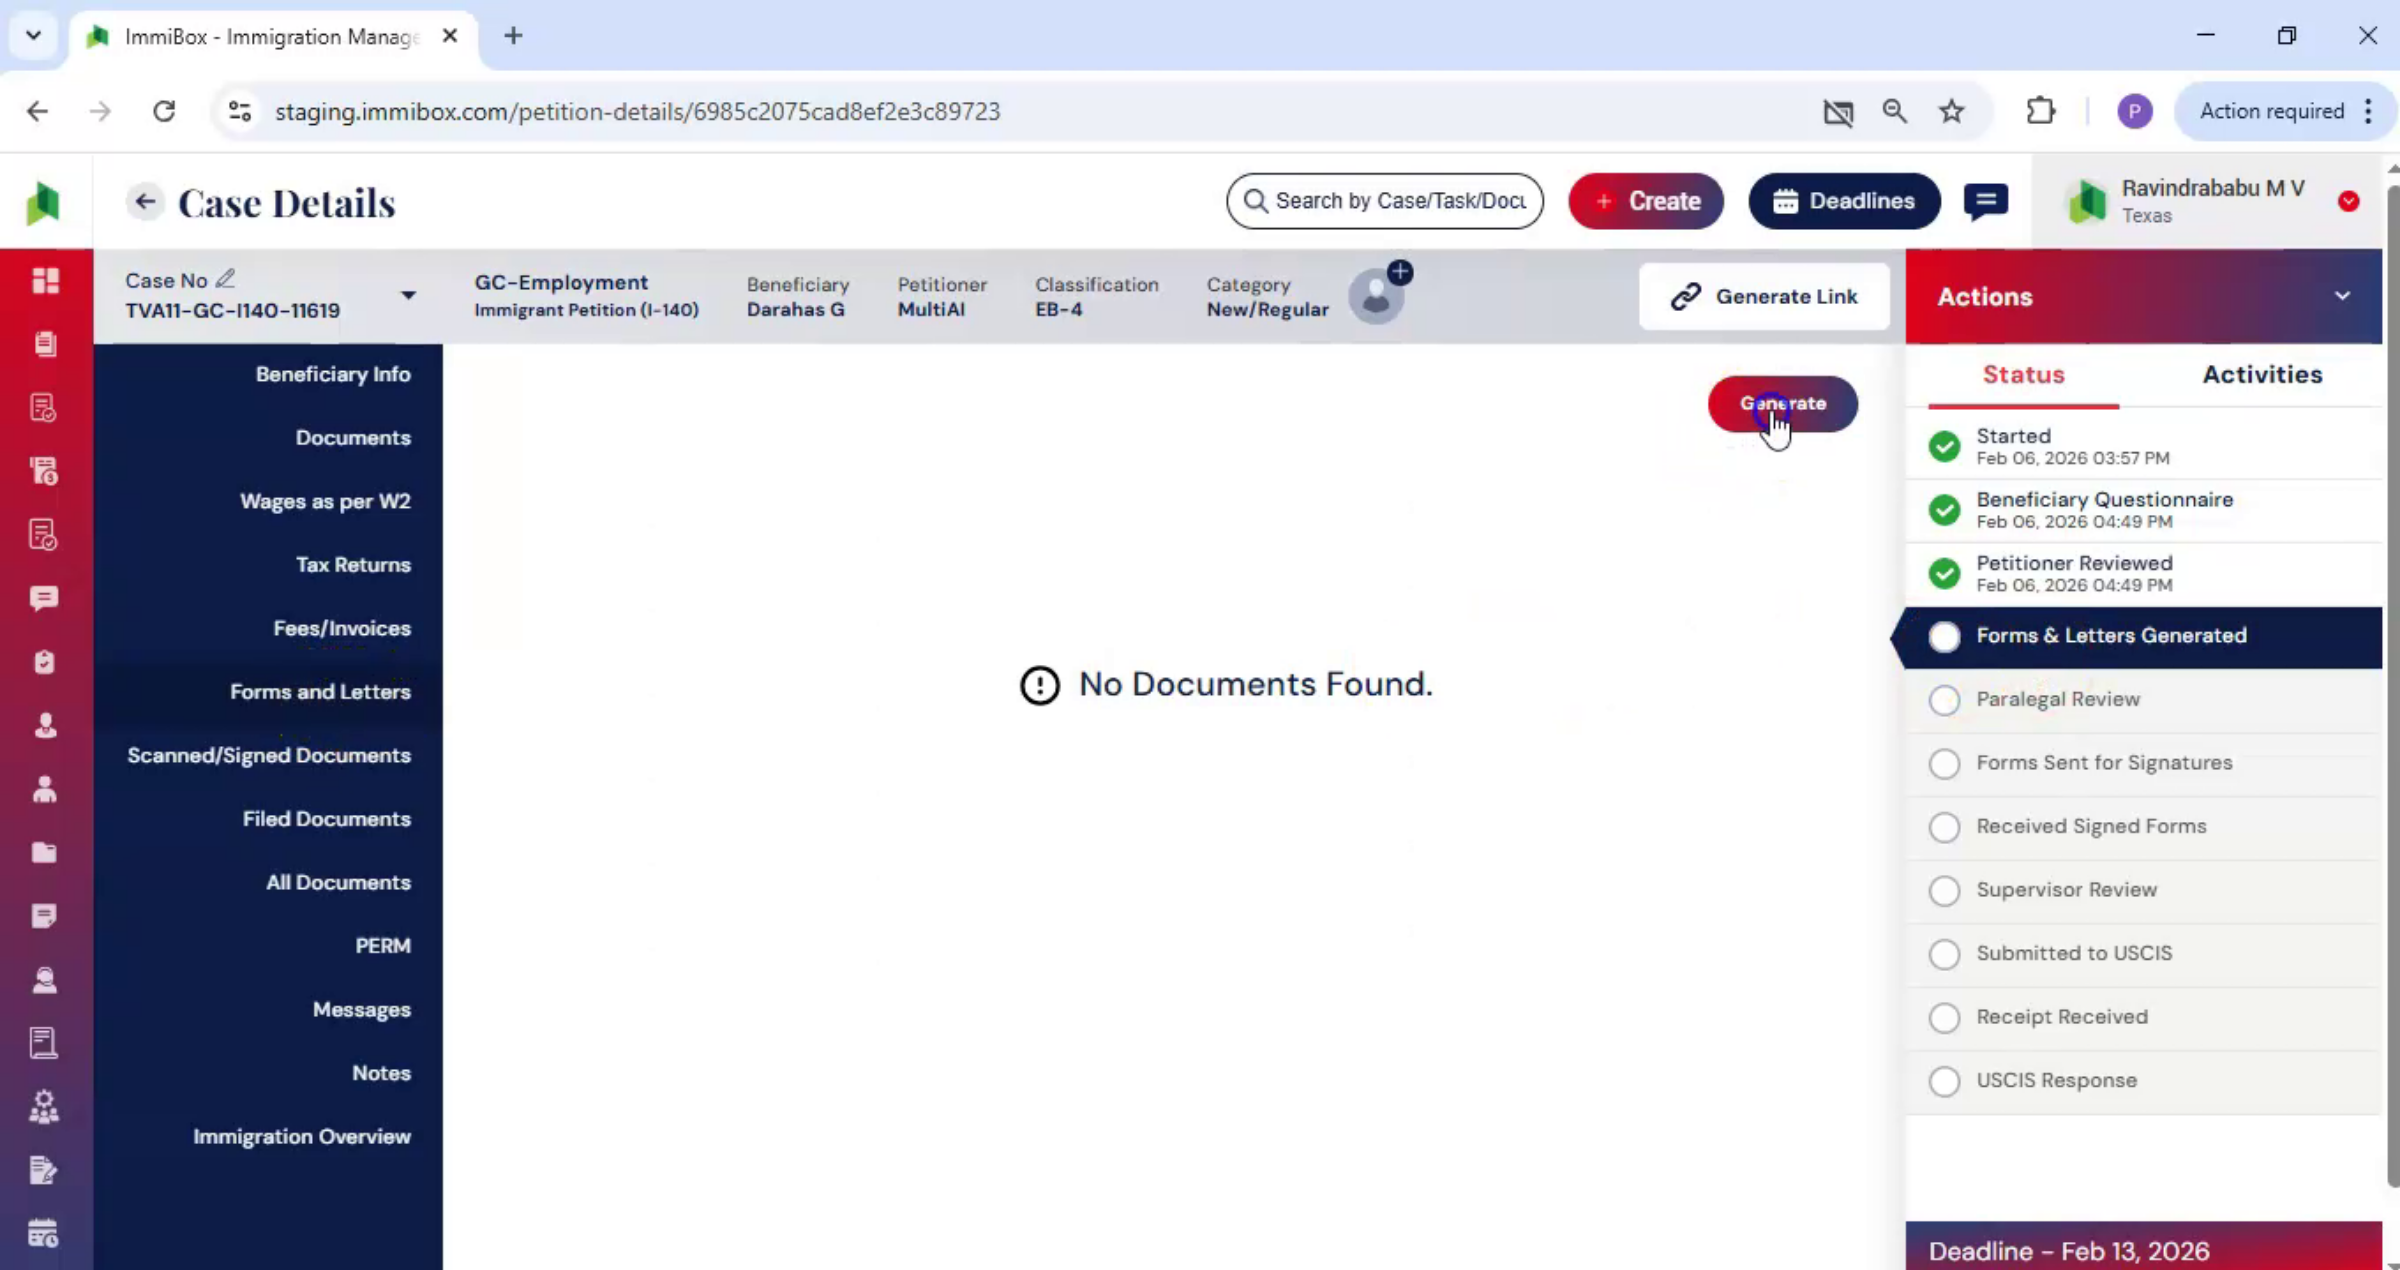
From the left-hand menu, click Forms and Letters, and then select Generate.
21. I-140 Additional Questionnaire
 * click the image to view enlarged
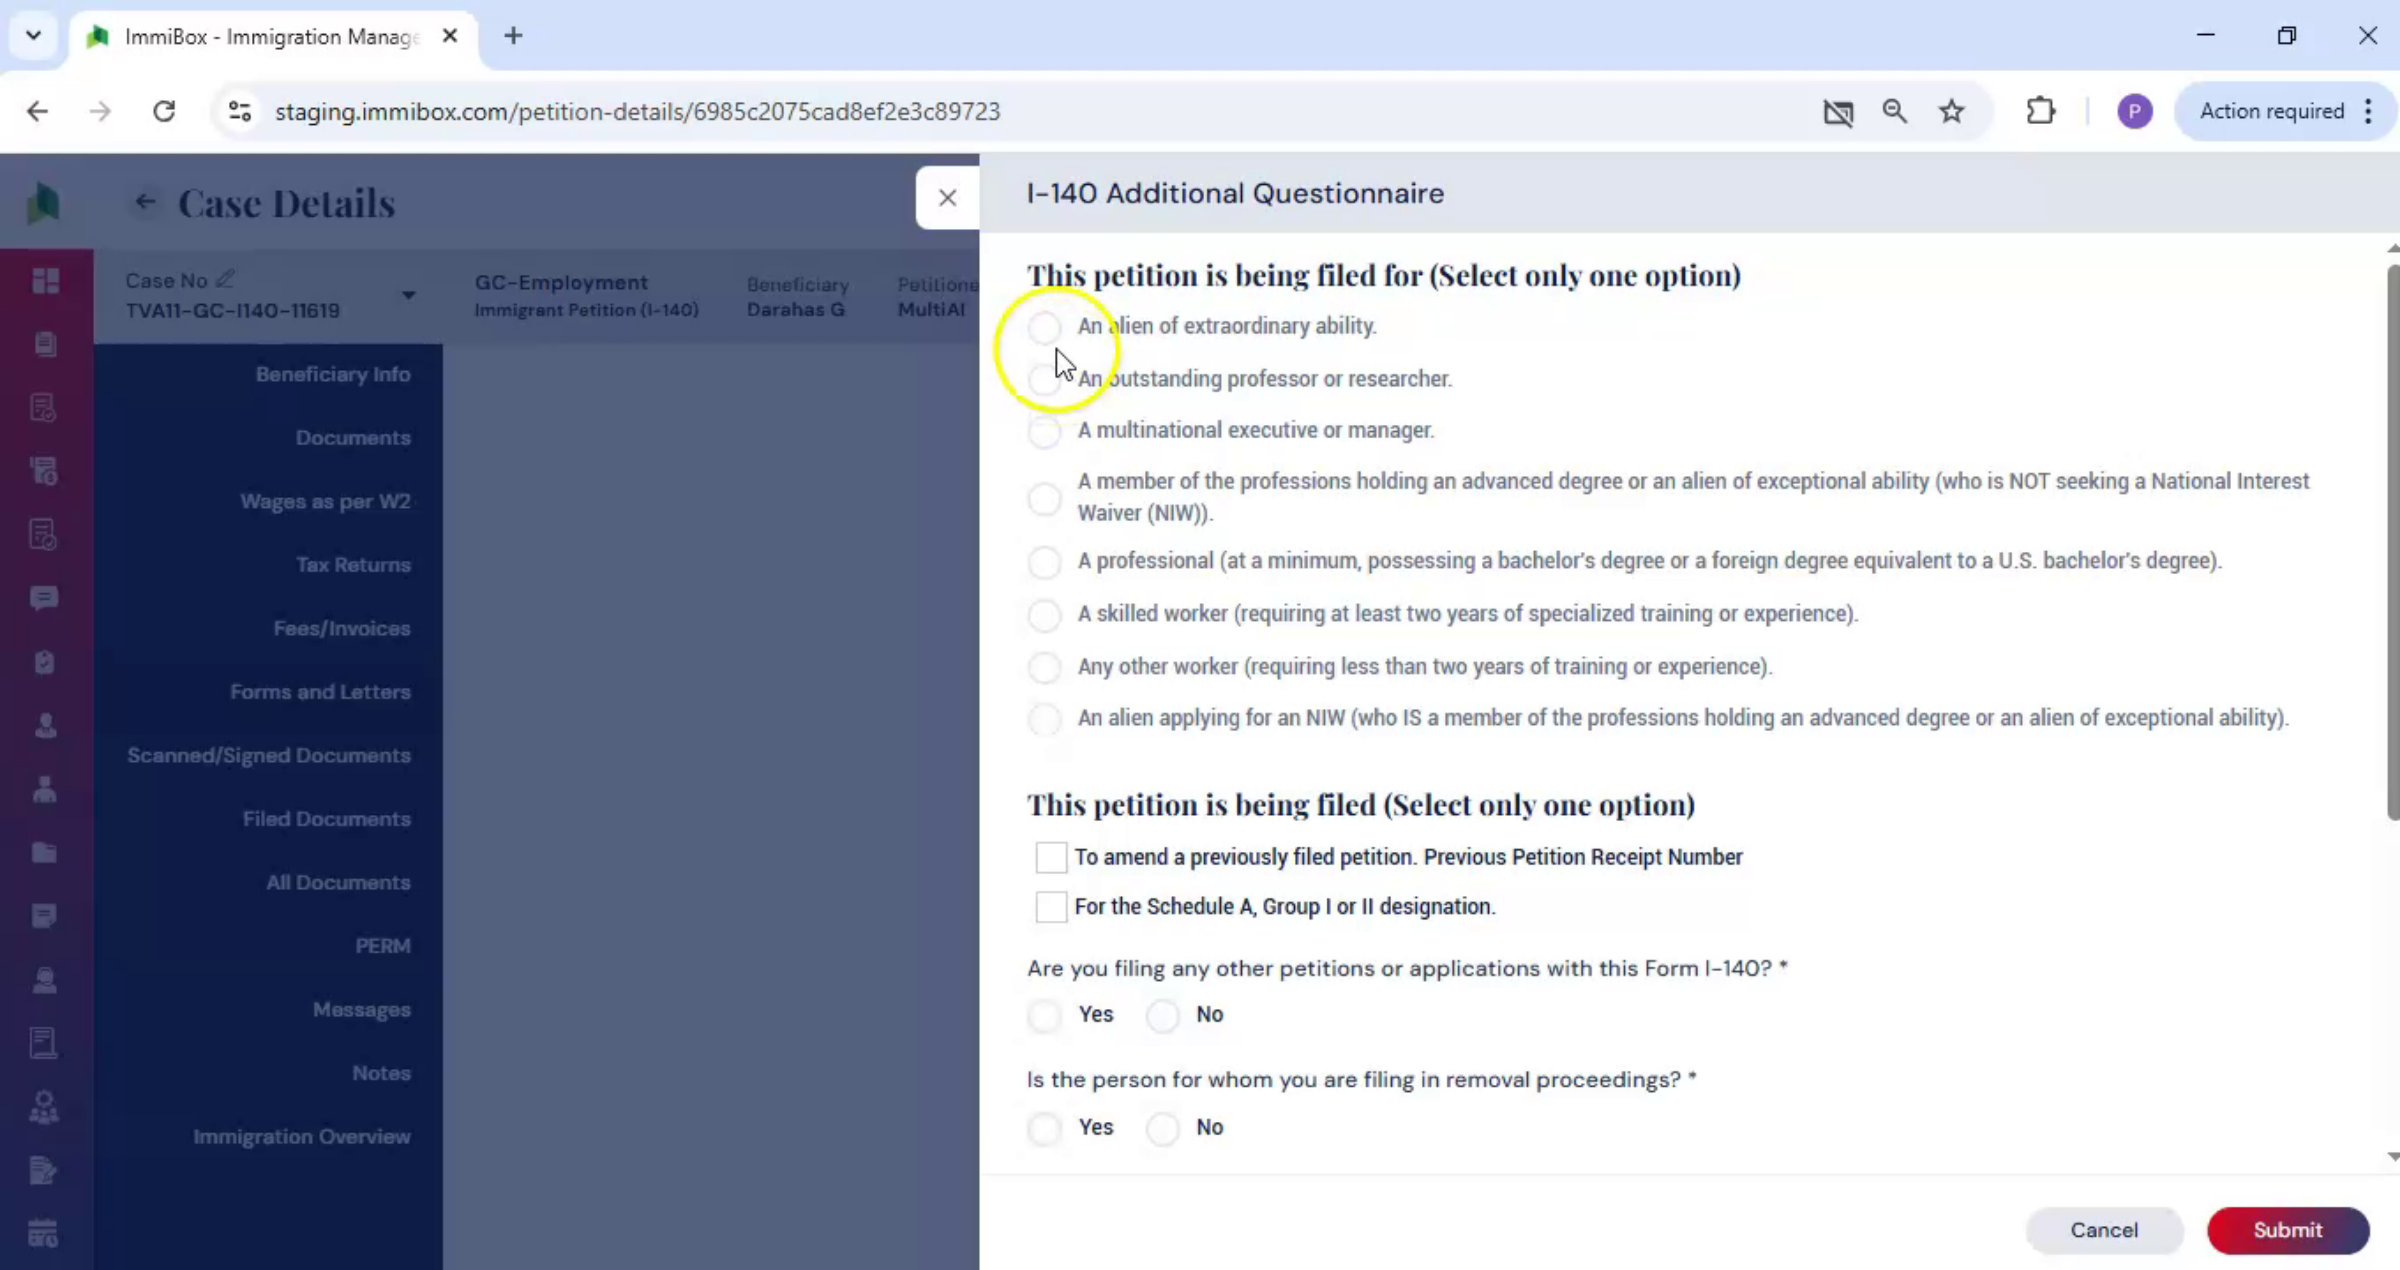
At this point, the I-140 Additional Questionnaire becomes available. This questionnaire appears at this stage because it captures attorney-level and filing-specific details required for form generation.
22. Legal Team Completes Fields
 * click the image to view enlarged
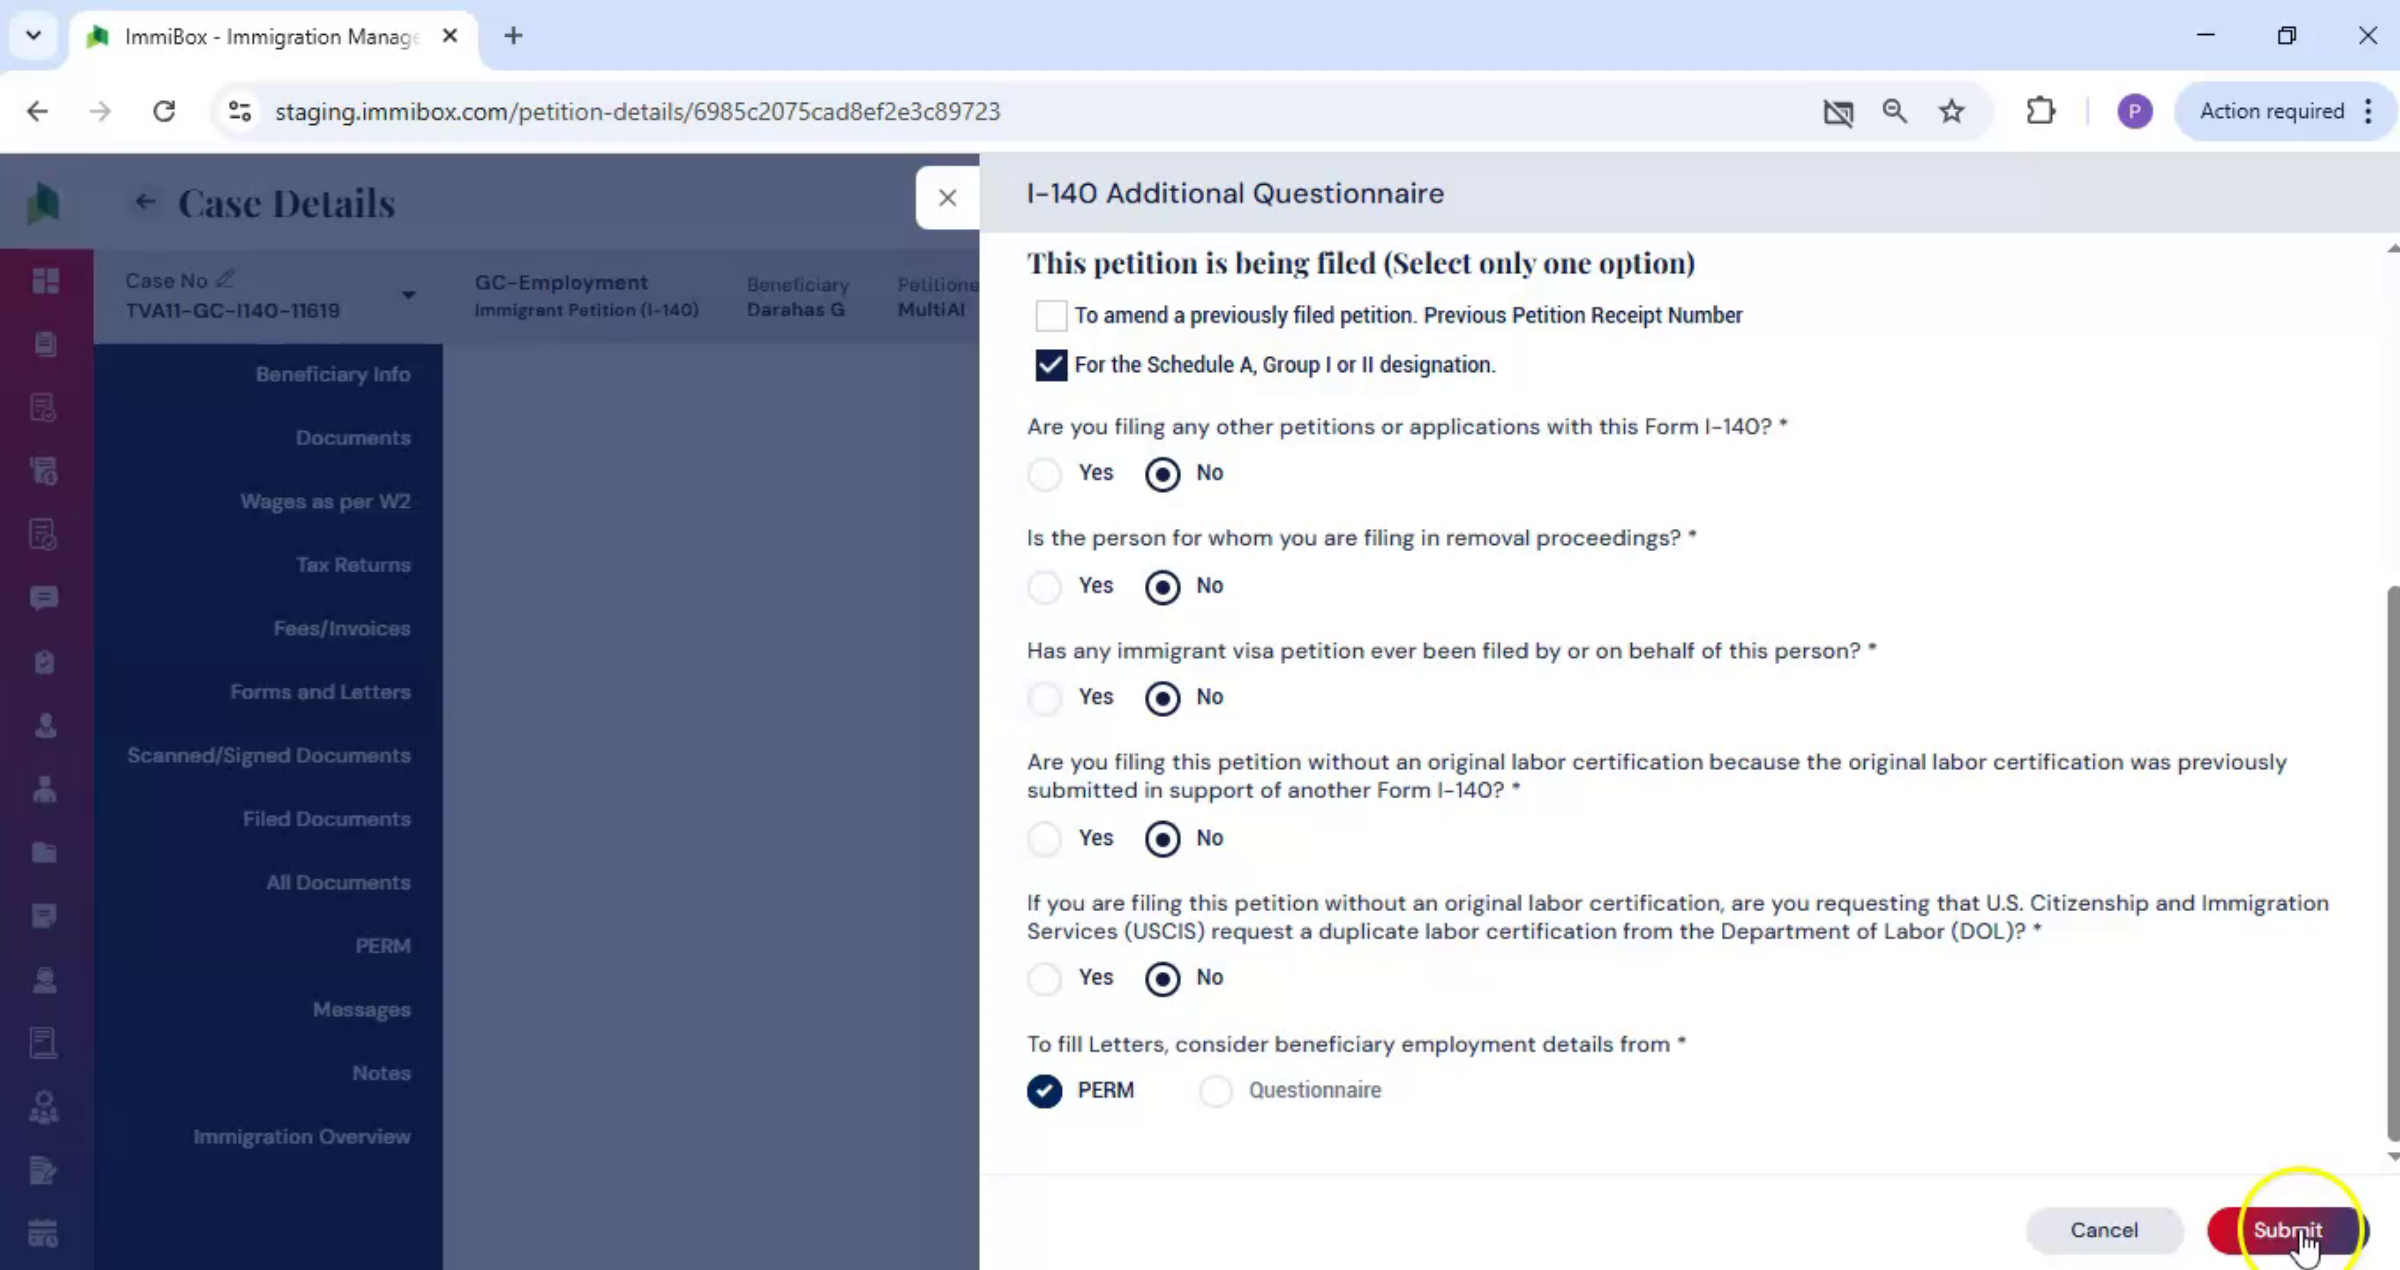
These details must be completed by the legal team. Carefully review all required fields, enter the necessary information, and click Submit.
23. Generate Forms Dialog Options
 * click the image to view enlarged
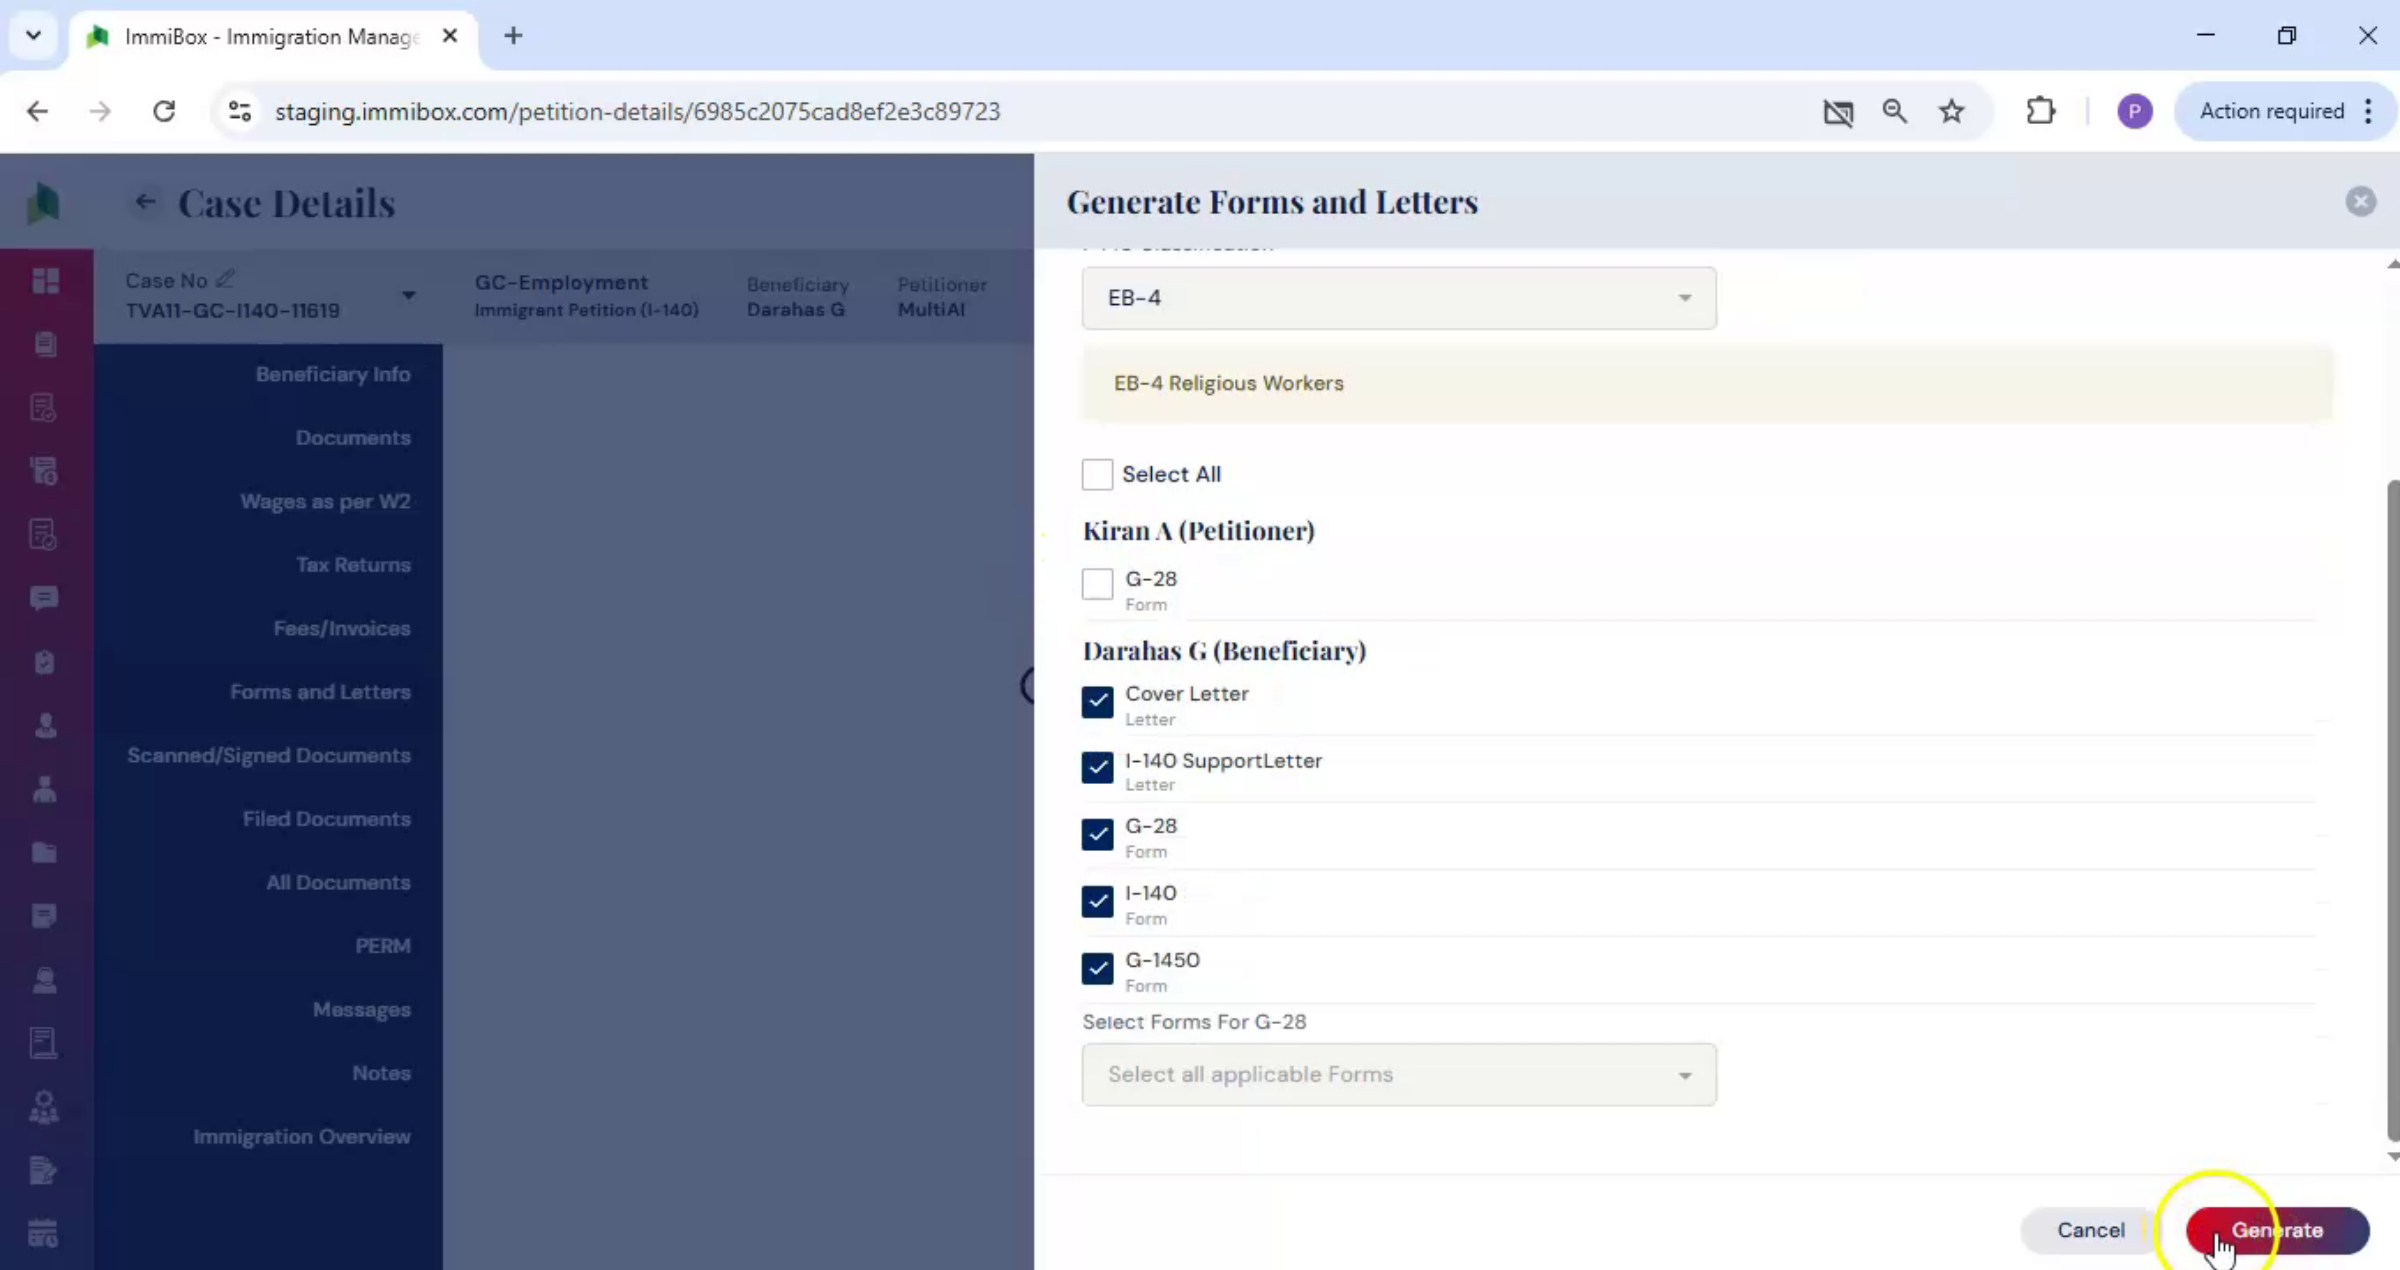
After submission, the Generate Forms and Letters dialog box opens automatically. Select the courier type, choose the appropriate service center, or select the Exclude option if applicable. Then choose the documents to be included. Click Generate.
24. Forms Ready For Review
 * click the image to view enlarged
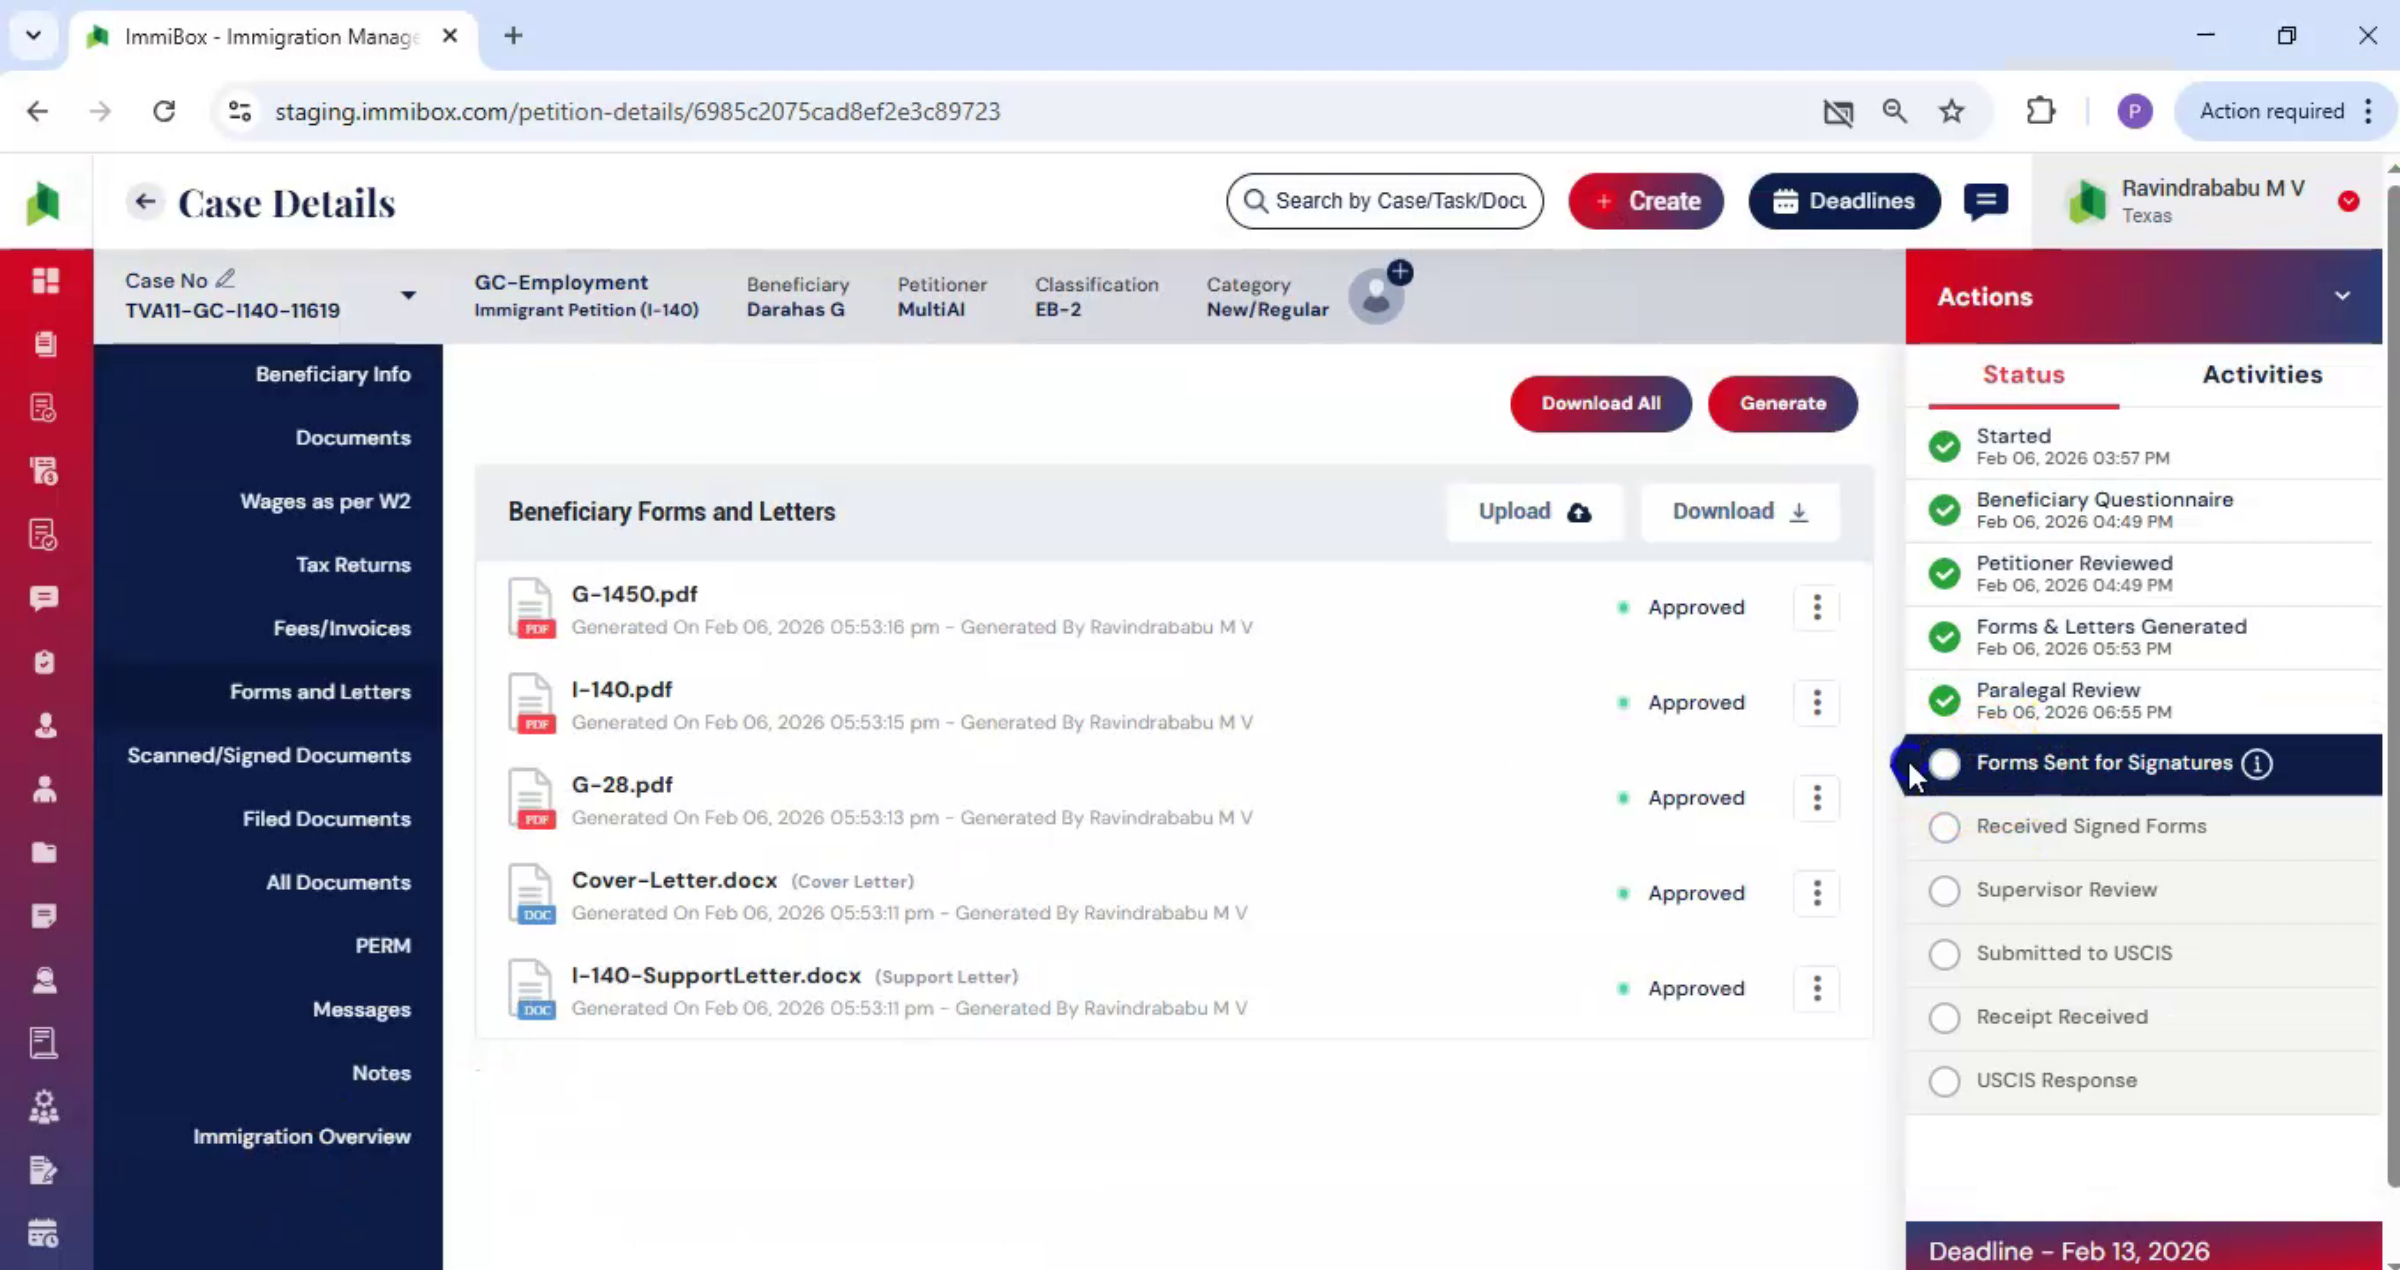
The required forms and letters are now created, and the case documents are ready for review and approval. After the forms and letters are generated, the next default step in the workflow is paralegal review.
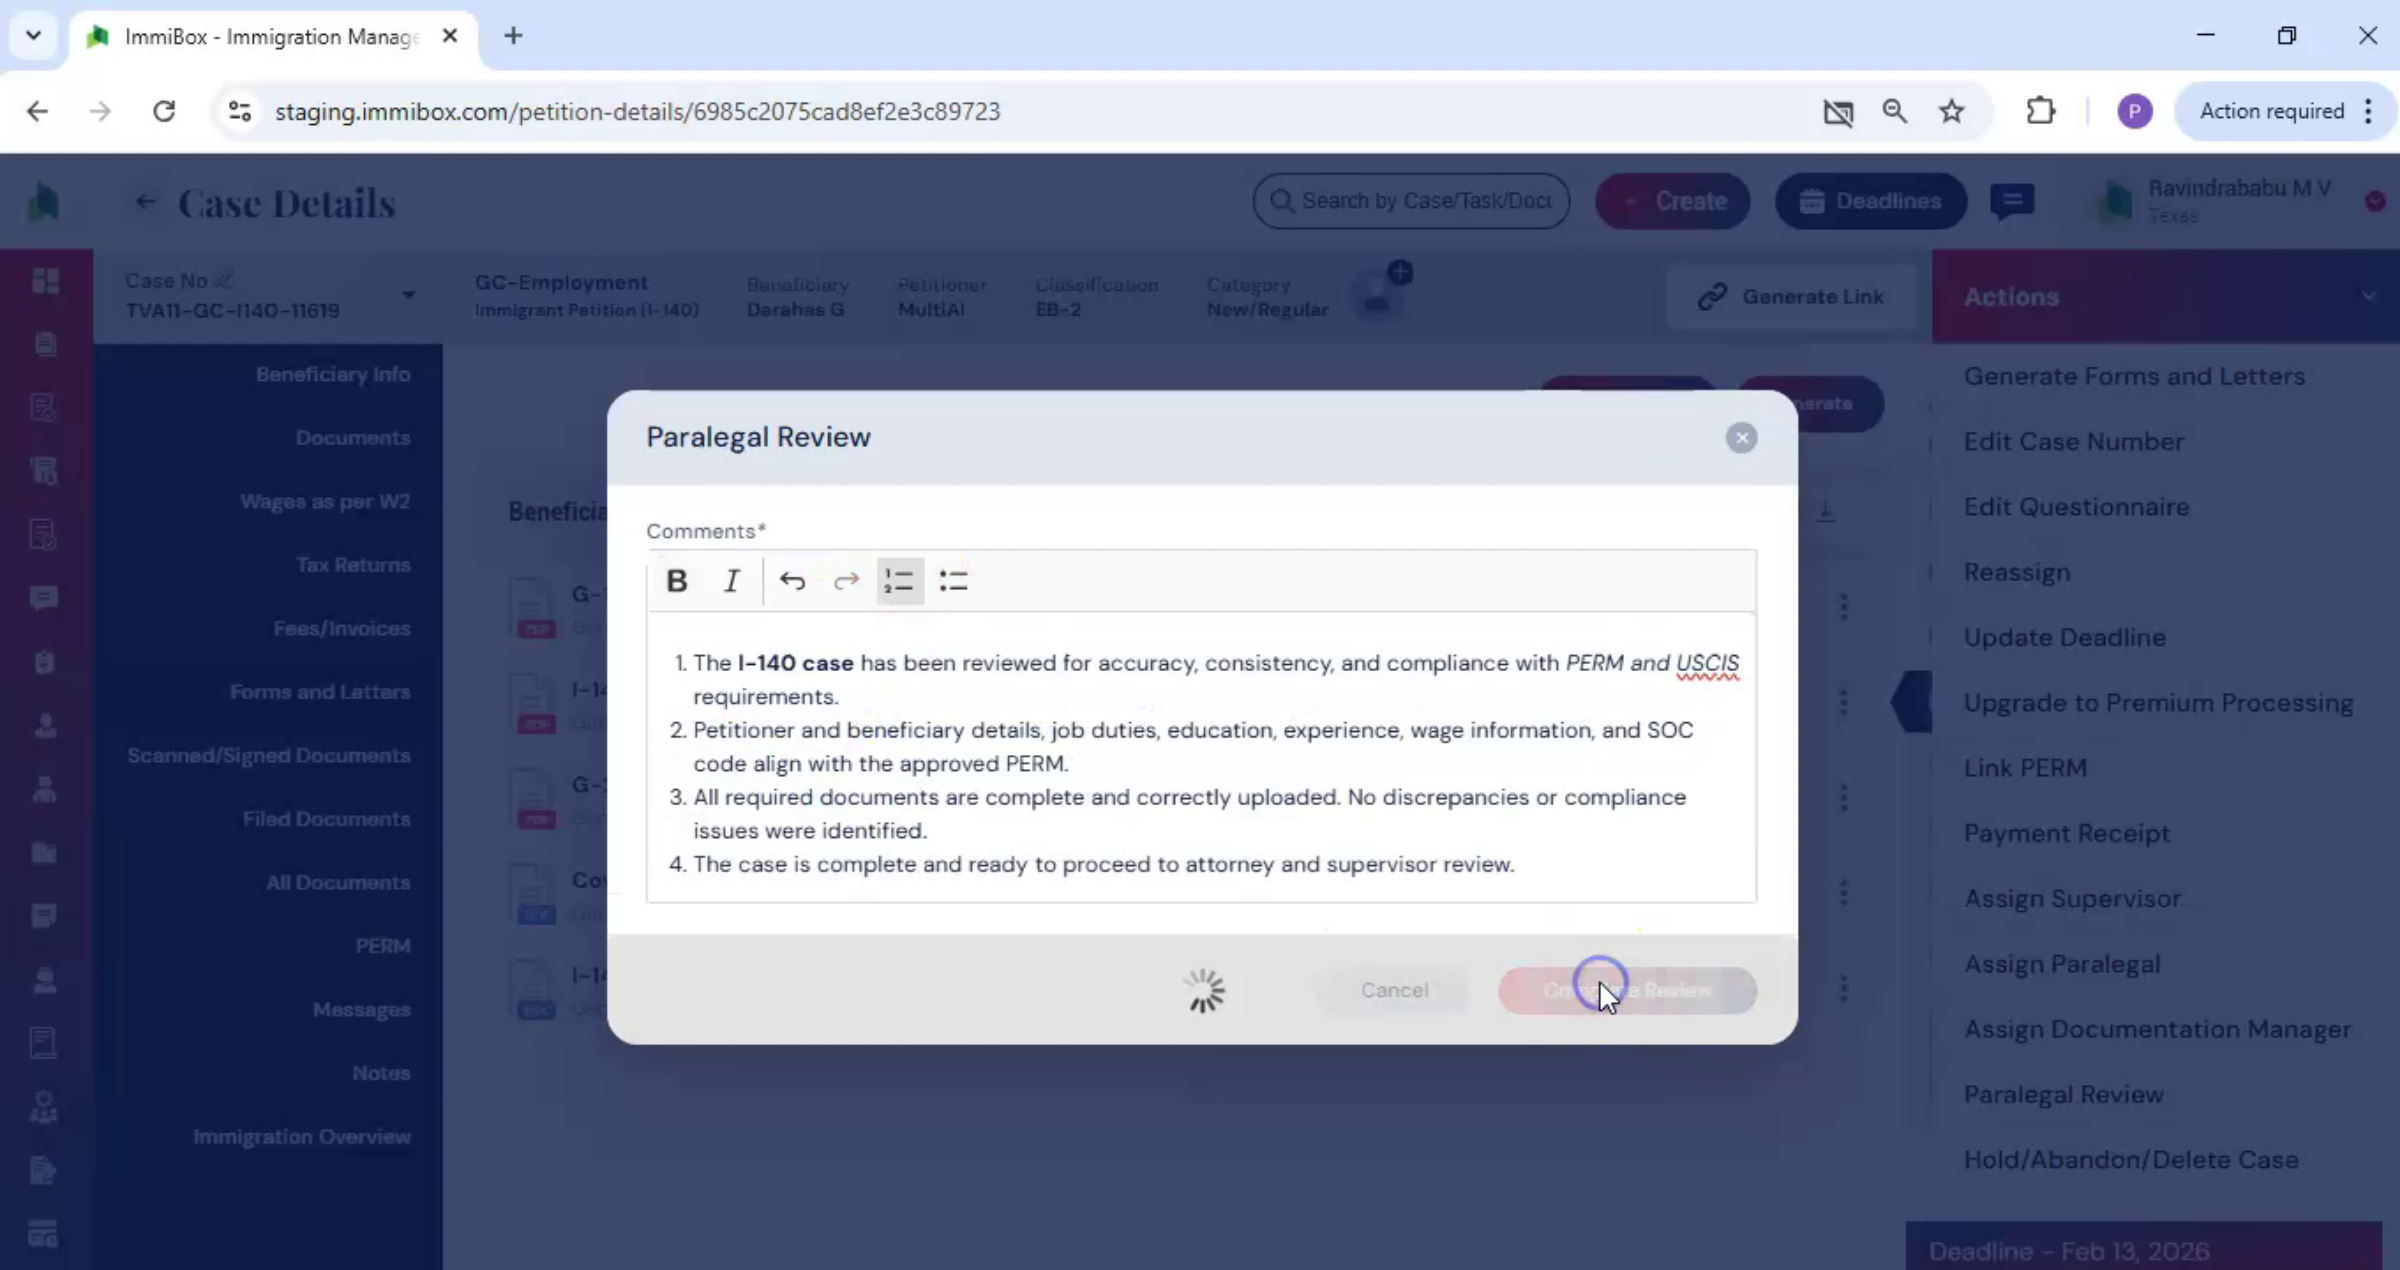
25. Paralegal Review Process
 * click the image to view enlarged
From the Actions menu, select Paralegal Review. In the Comments section, add your review notes or feedback on the case. Once the review is complete, click Submit.
26. Send Documents For Signature
 * click the image to view enlarged
The next step is to send the documents to the petitioner for signature.
27. Send For Petitioner Signature
 * click the image to view enlarged
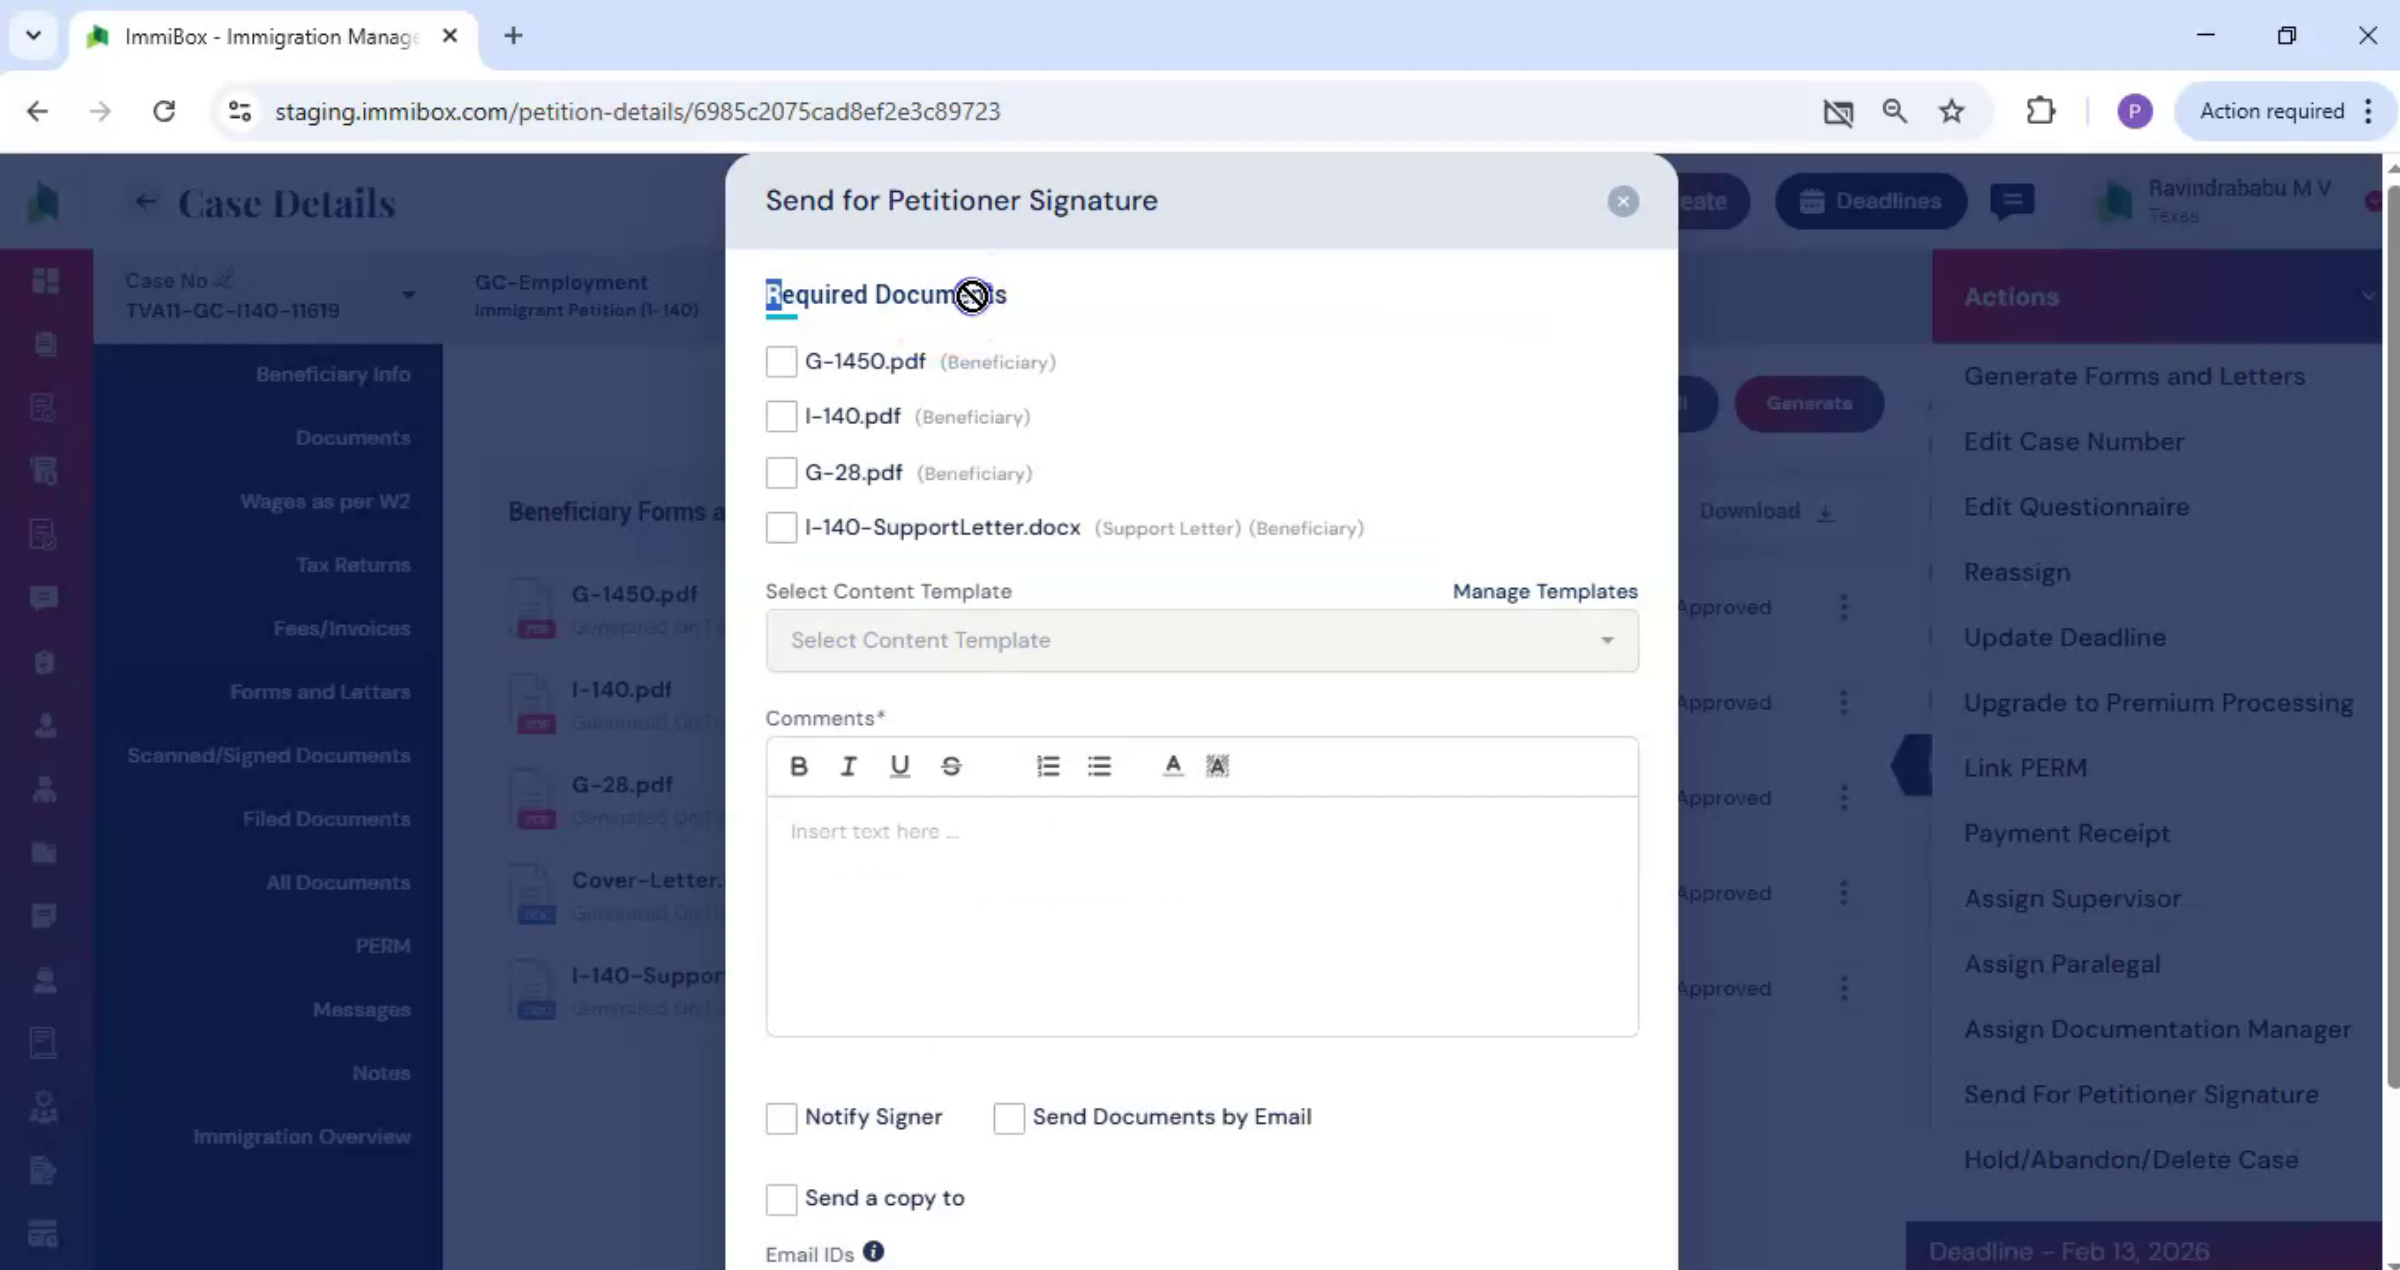
ImmiBox supports this step by allowing documents to be shared directly from the case. To send the documents, go to the Actions tab and select Send for Petitioner Signature.
28. Select Documents And Template
 * click the image to view enlarged
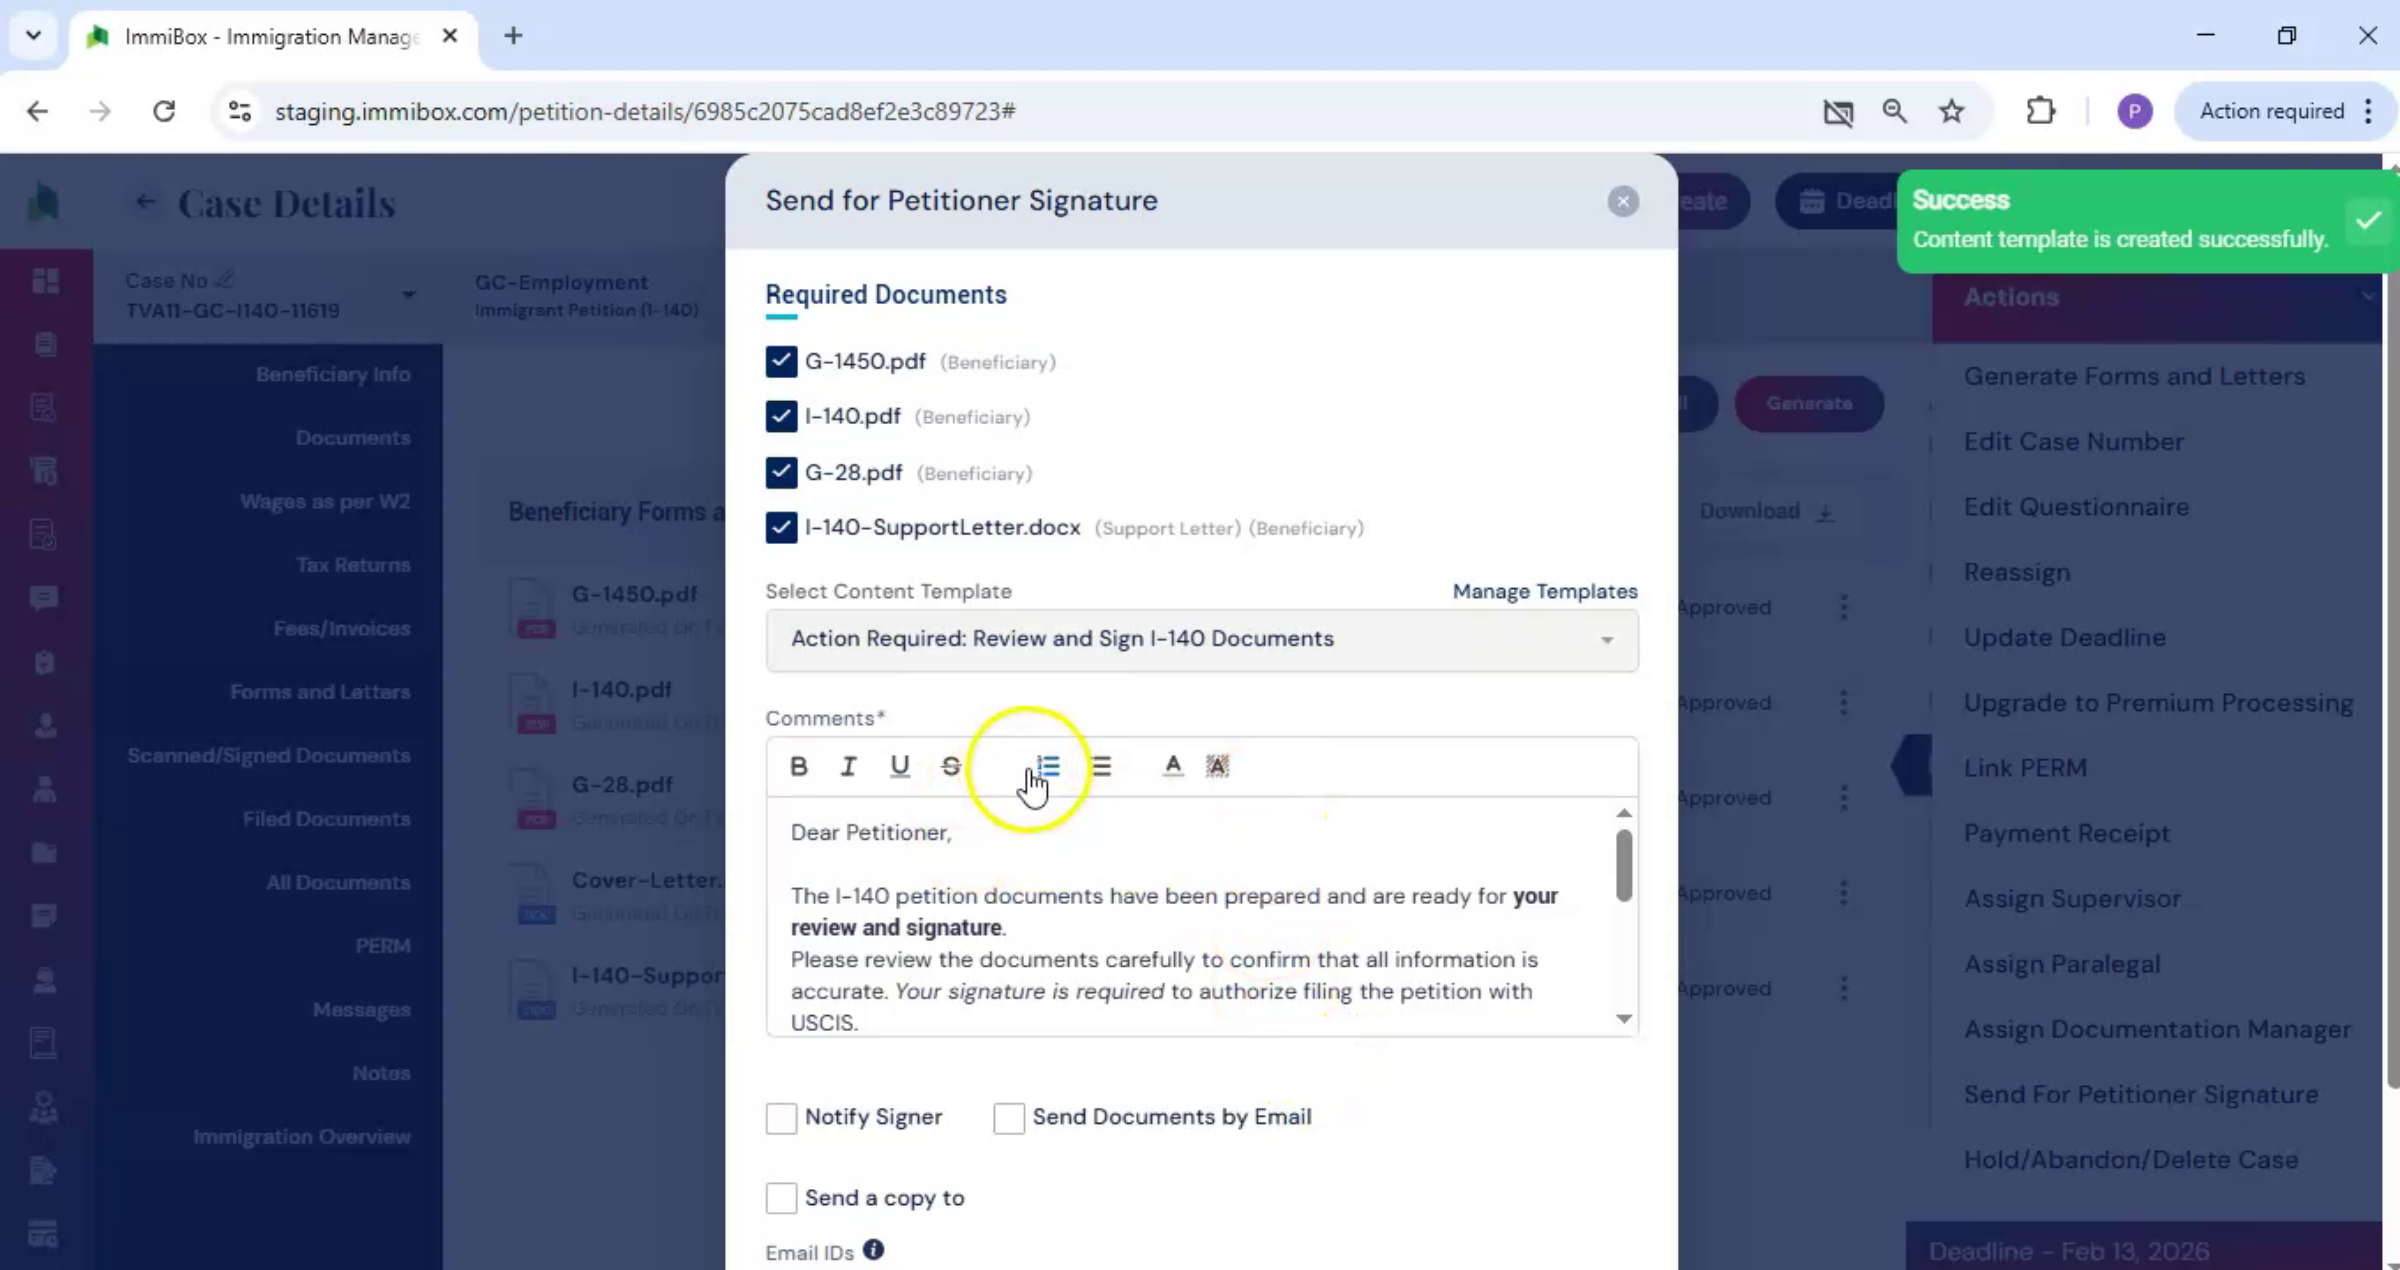
Choose the documents that require signatures. Next, select a content template. ImmiBox provides facilities to manage your own content templates, helping you draft a clear and professional message for the petitioner.
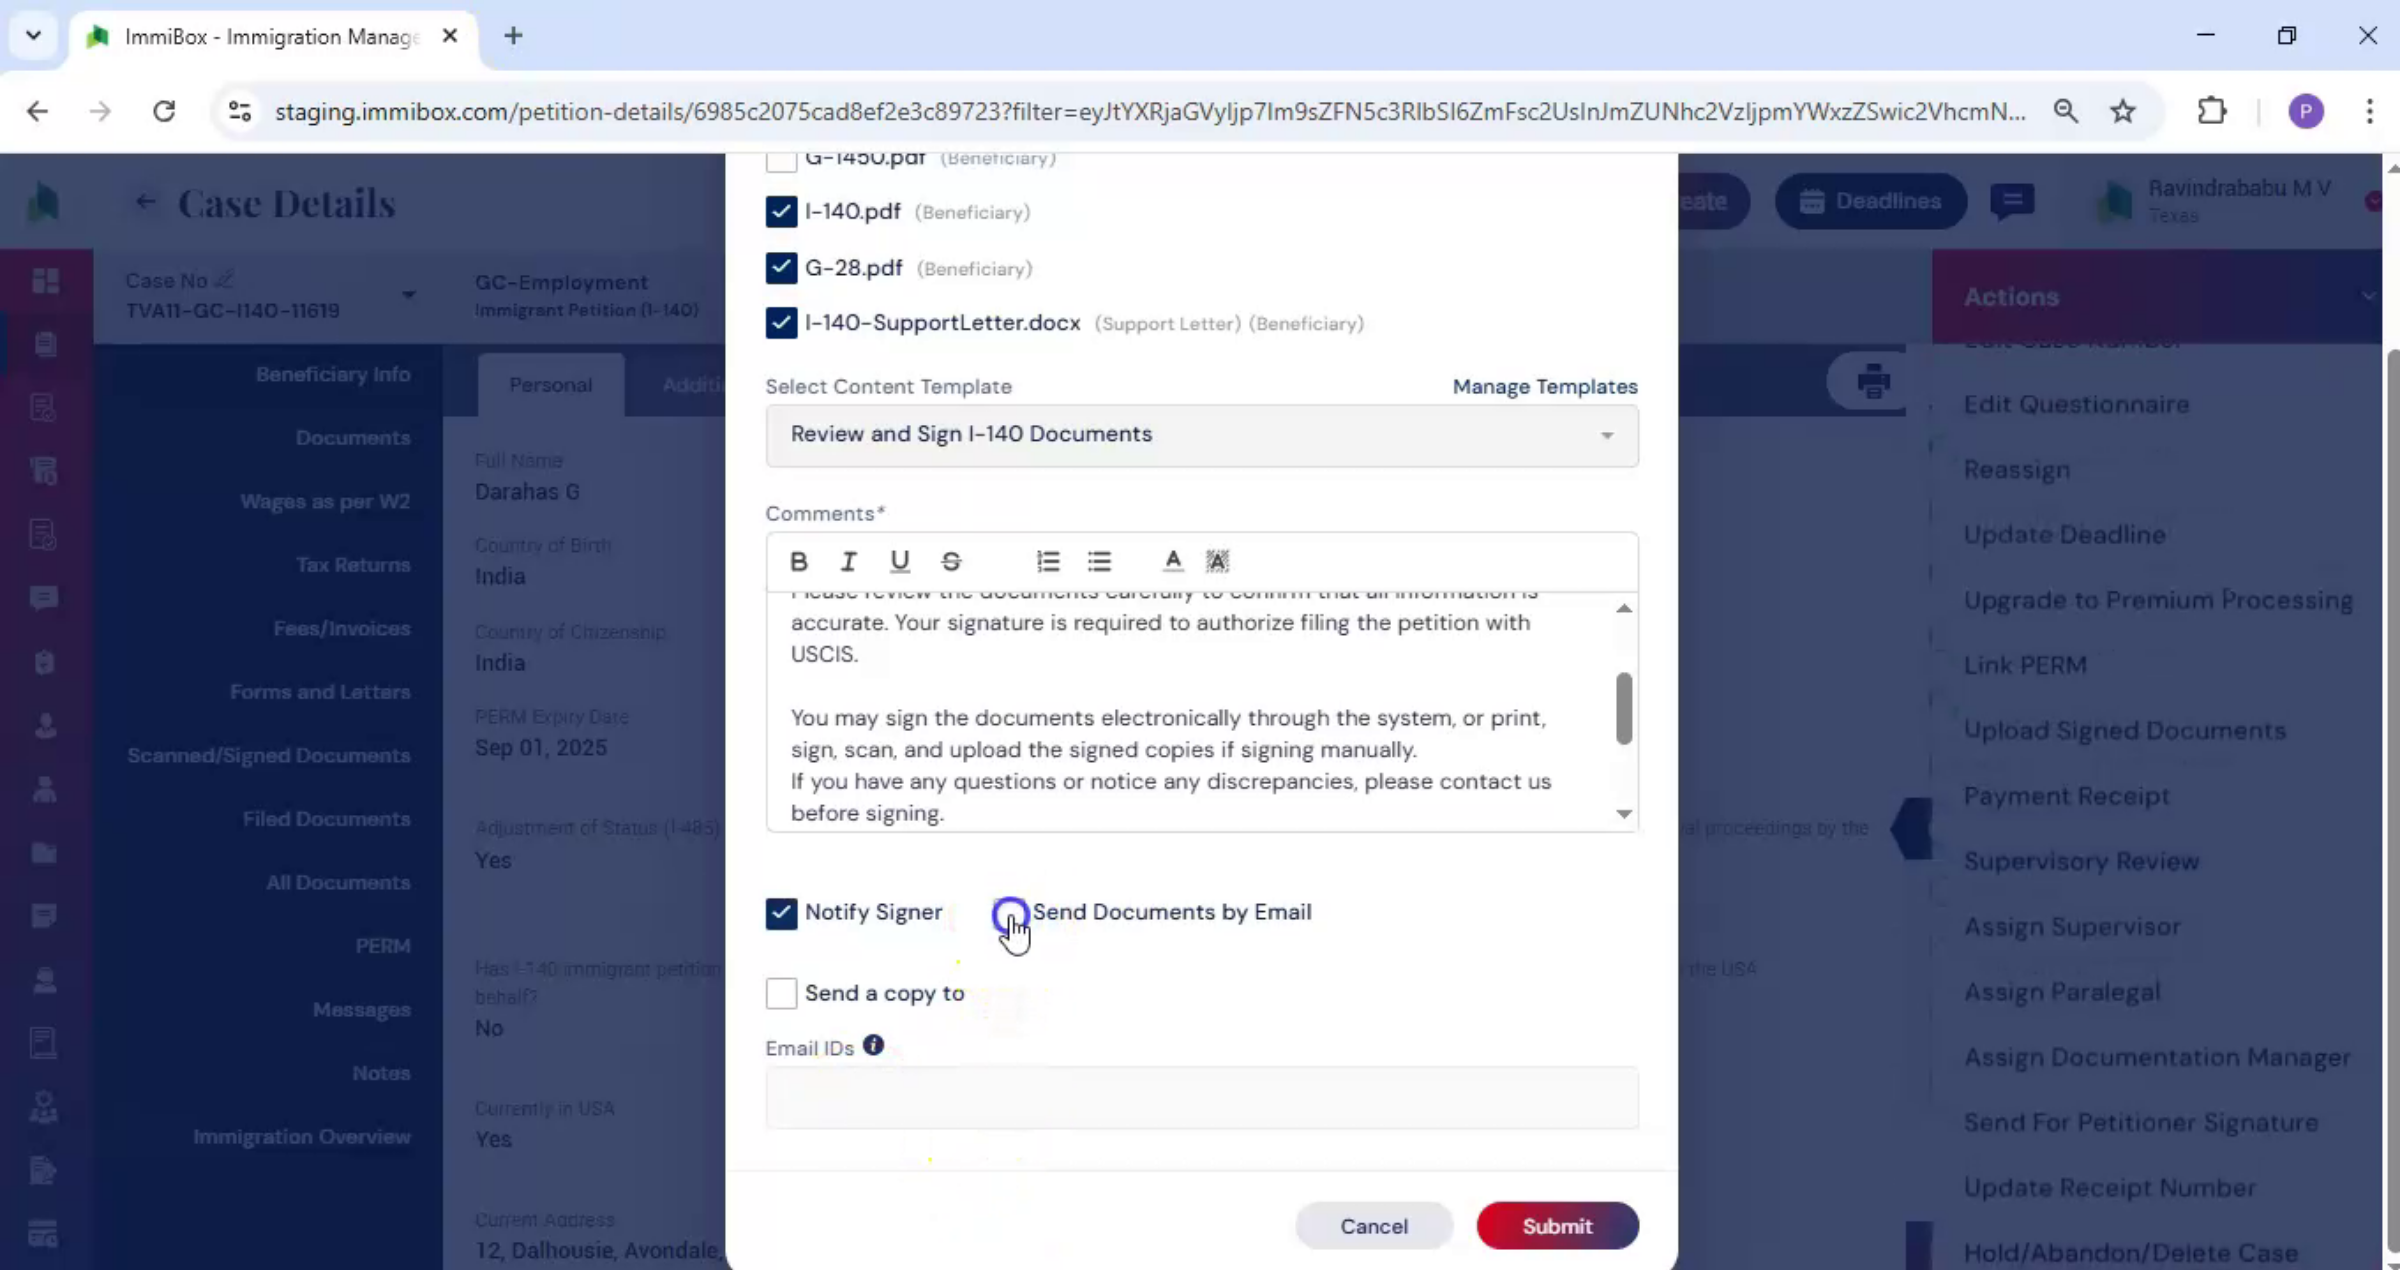
29. Notify Petitioner Option
 * click the image to view enlarged
You can also choose to notify the petitioner by enabling the Notify option. If you select Send on Mail, the signature request is sent directly to the petitioner's email address.
30. Send Copy Configuration
 * click the image to view enlarged
There is also an option to send a copy. When this option is selected, the Save Configuration dialog box opens.
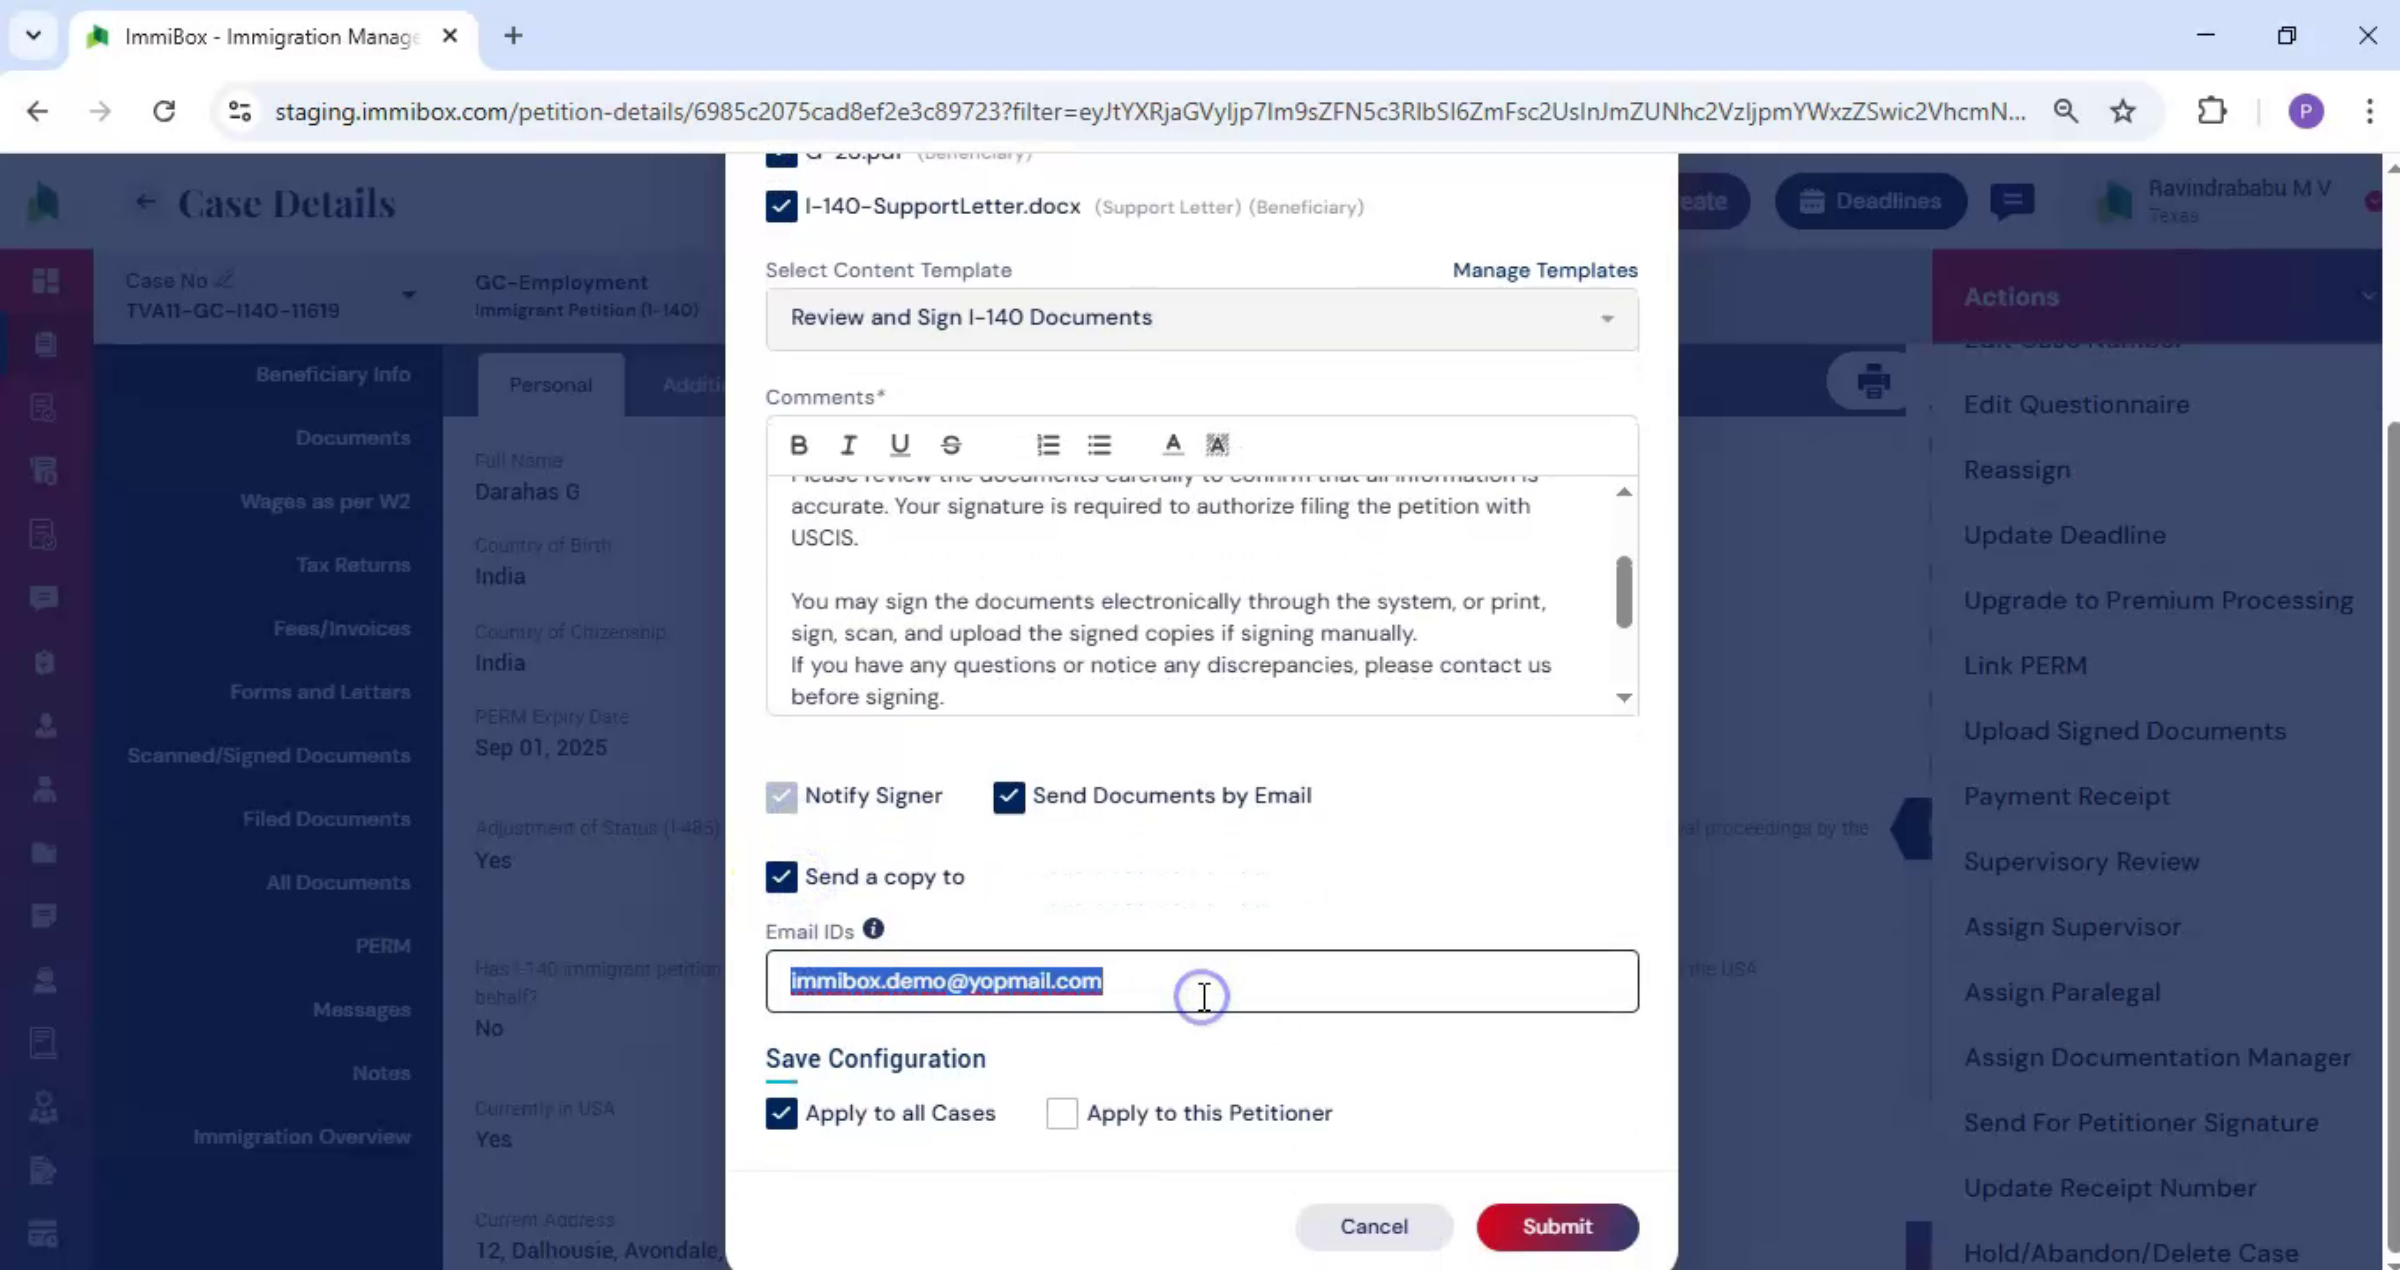
31. Copy Sharing Options
 * click the image to view enlarged
In this dialog box, you can choose how the copy should be shared. Select Apply to all cases if you want this user to receive signature emails for all future cases. Select Apply to this petitioner if you want the signature email to be sent to this user only for the current case.
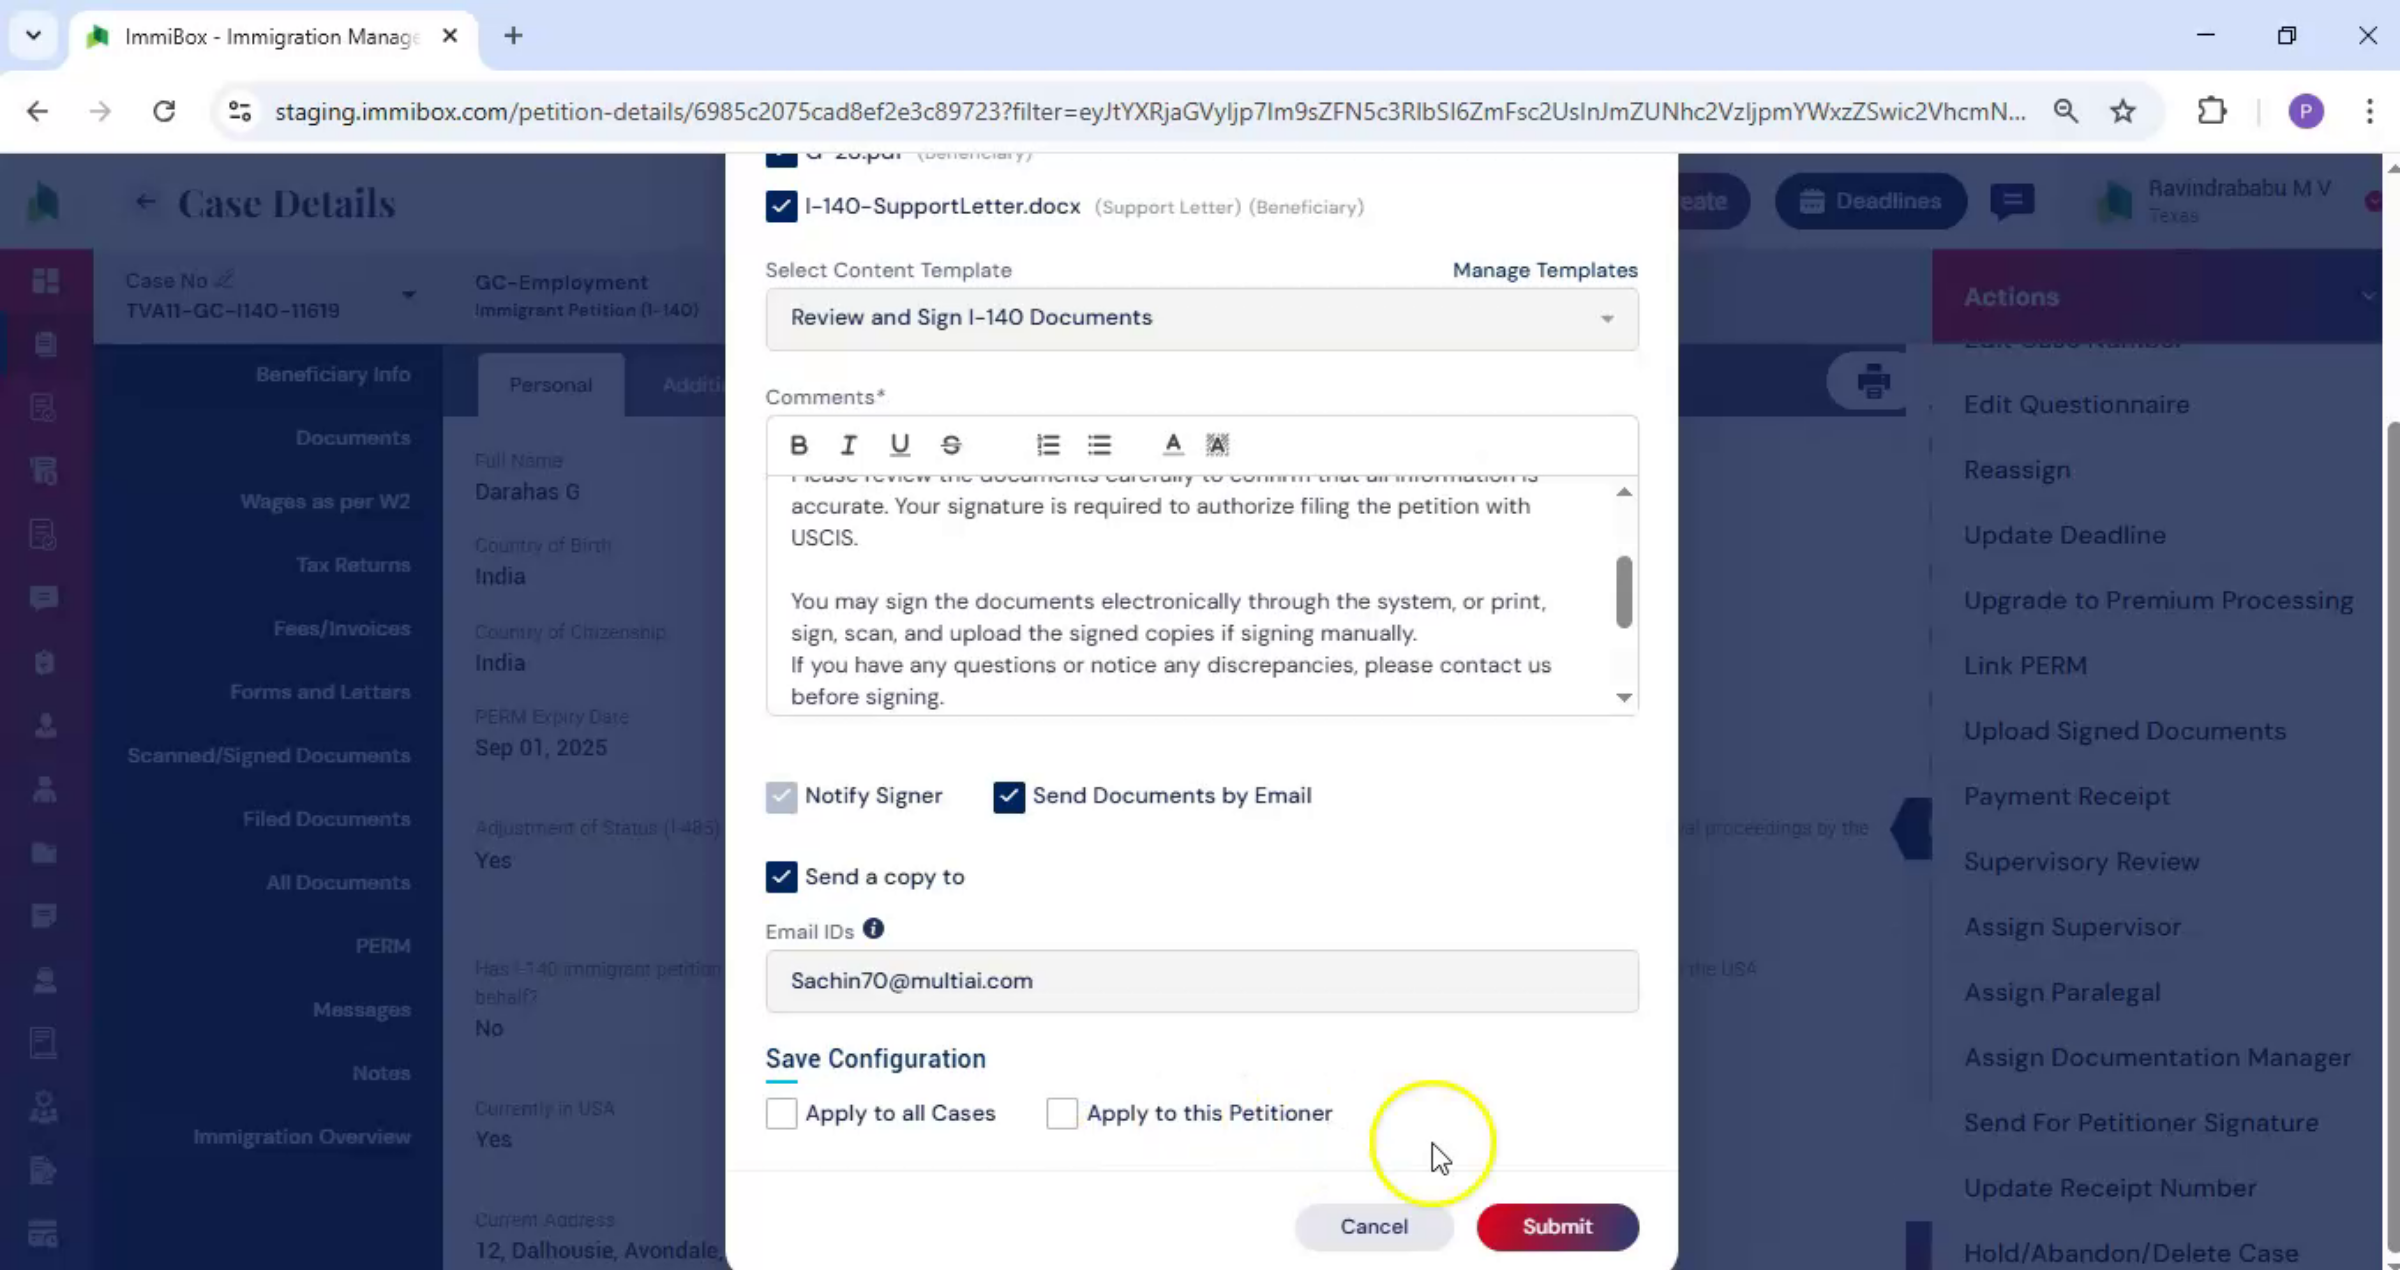
32. Enter Email And Submit
 * click the image to view enlarged
After selecting the appropriate option, enter the user's email address and confirm your selection. Once all options are selected, click Submit.
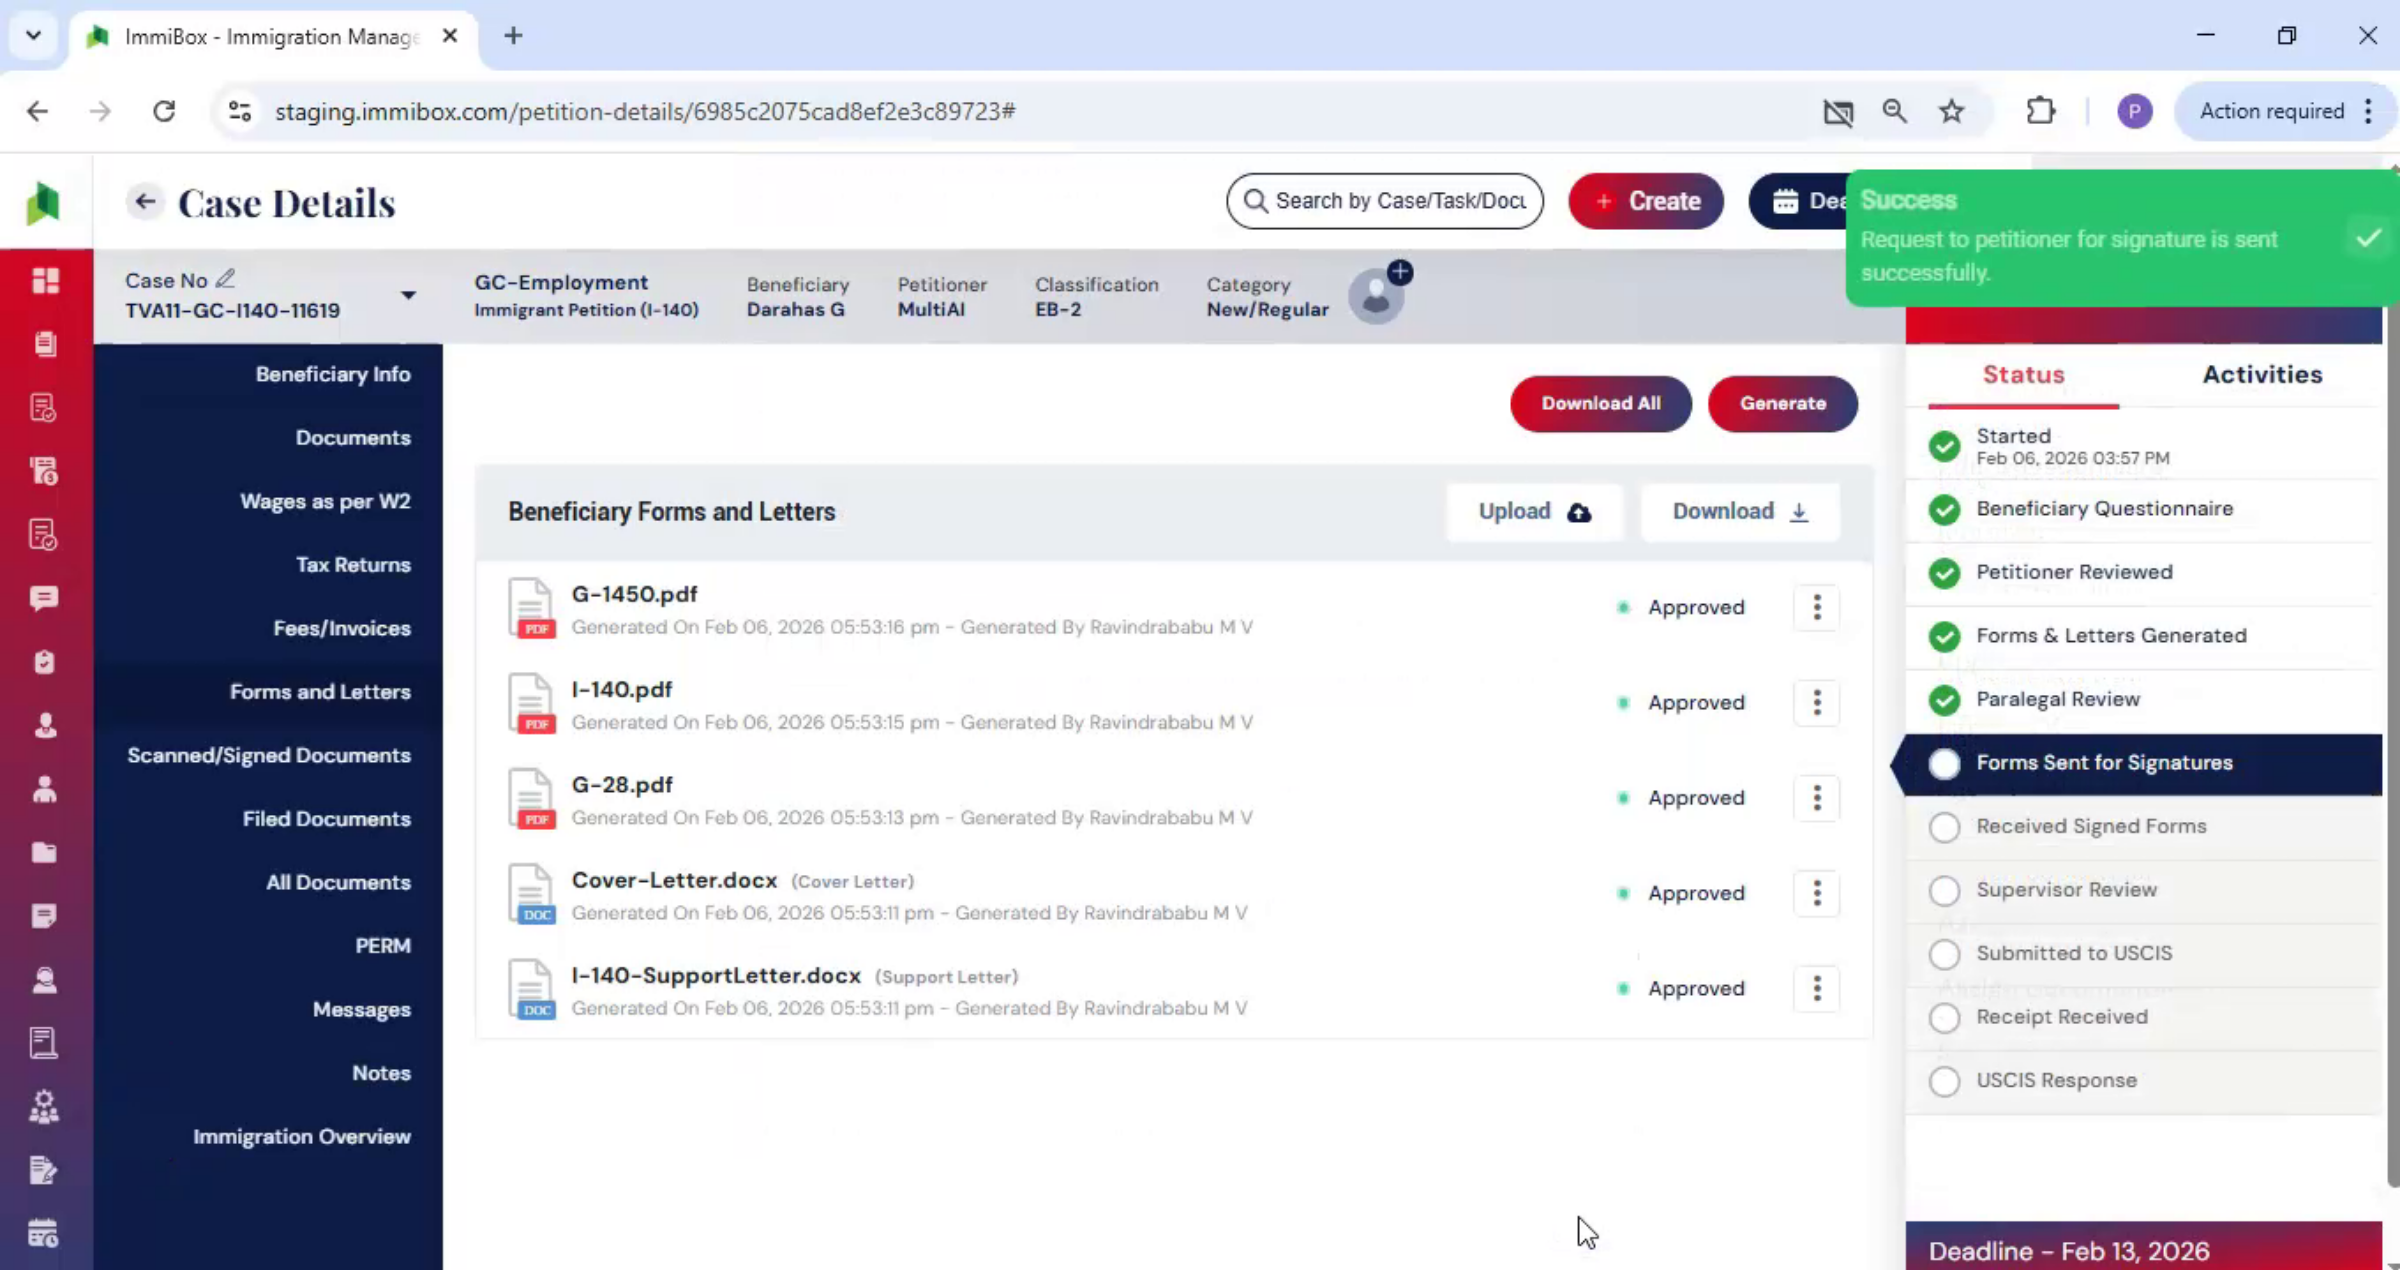
33. Signed Documents Storage
 * click the image to view enlarged
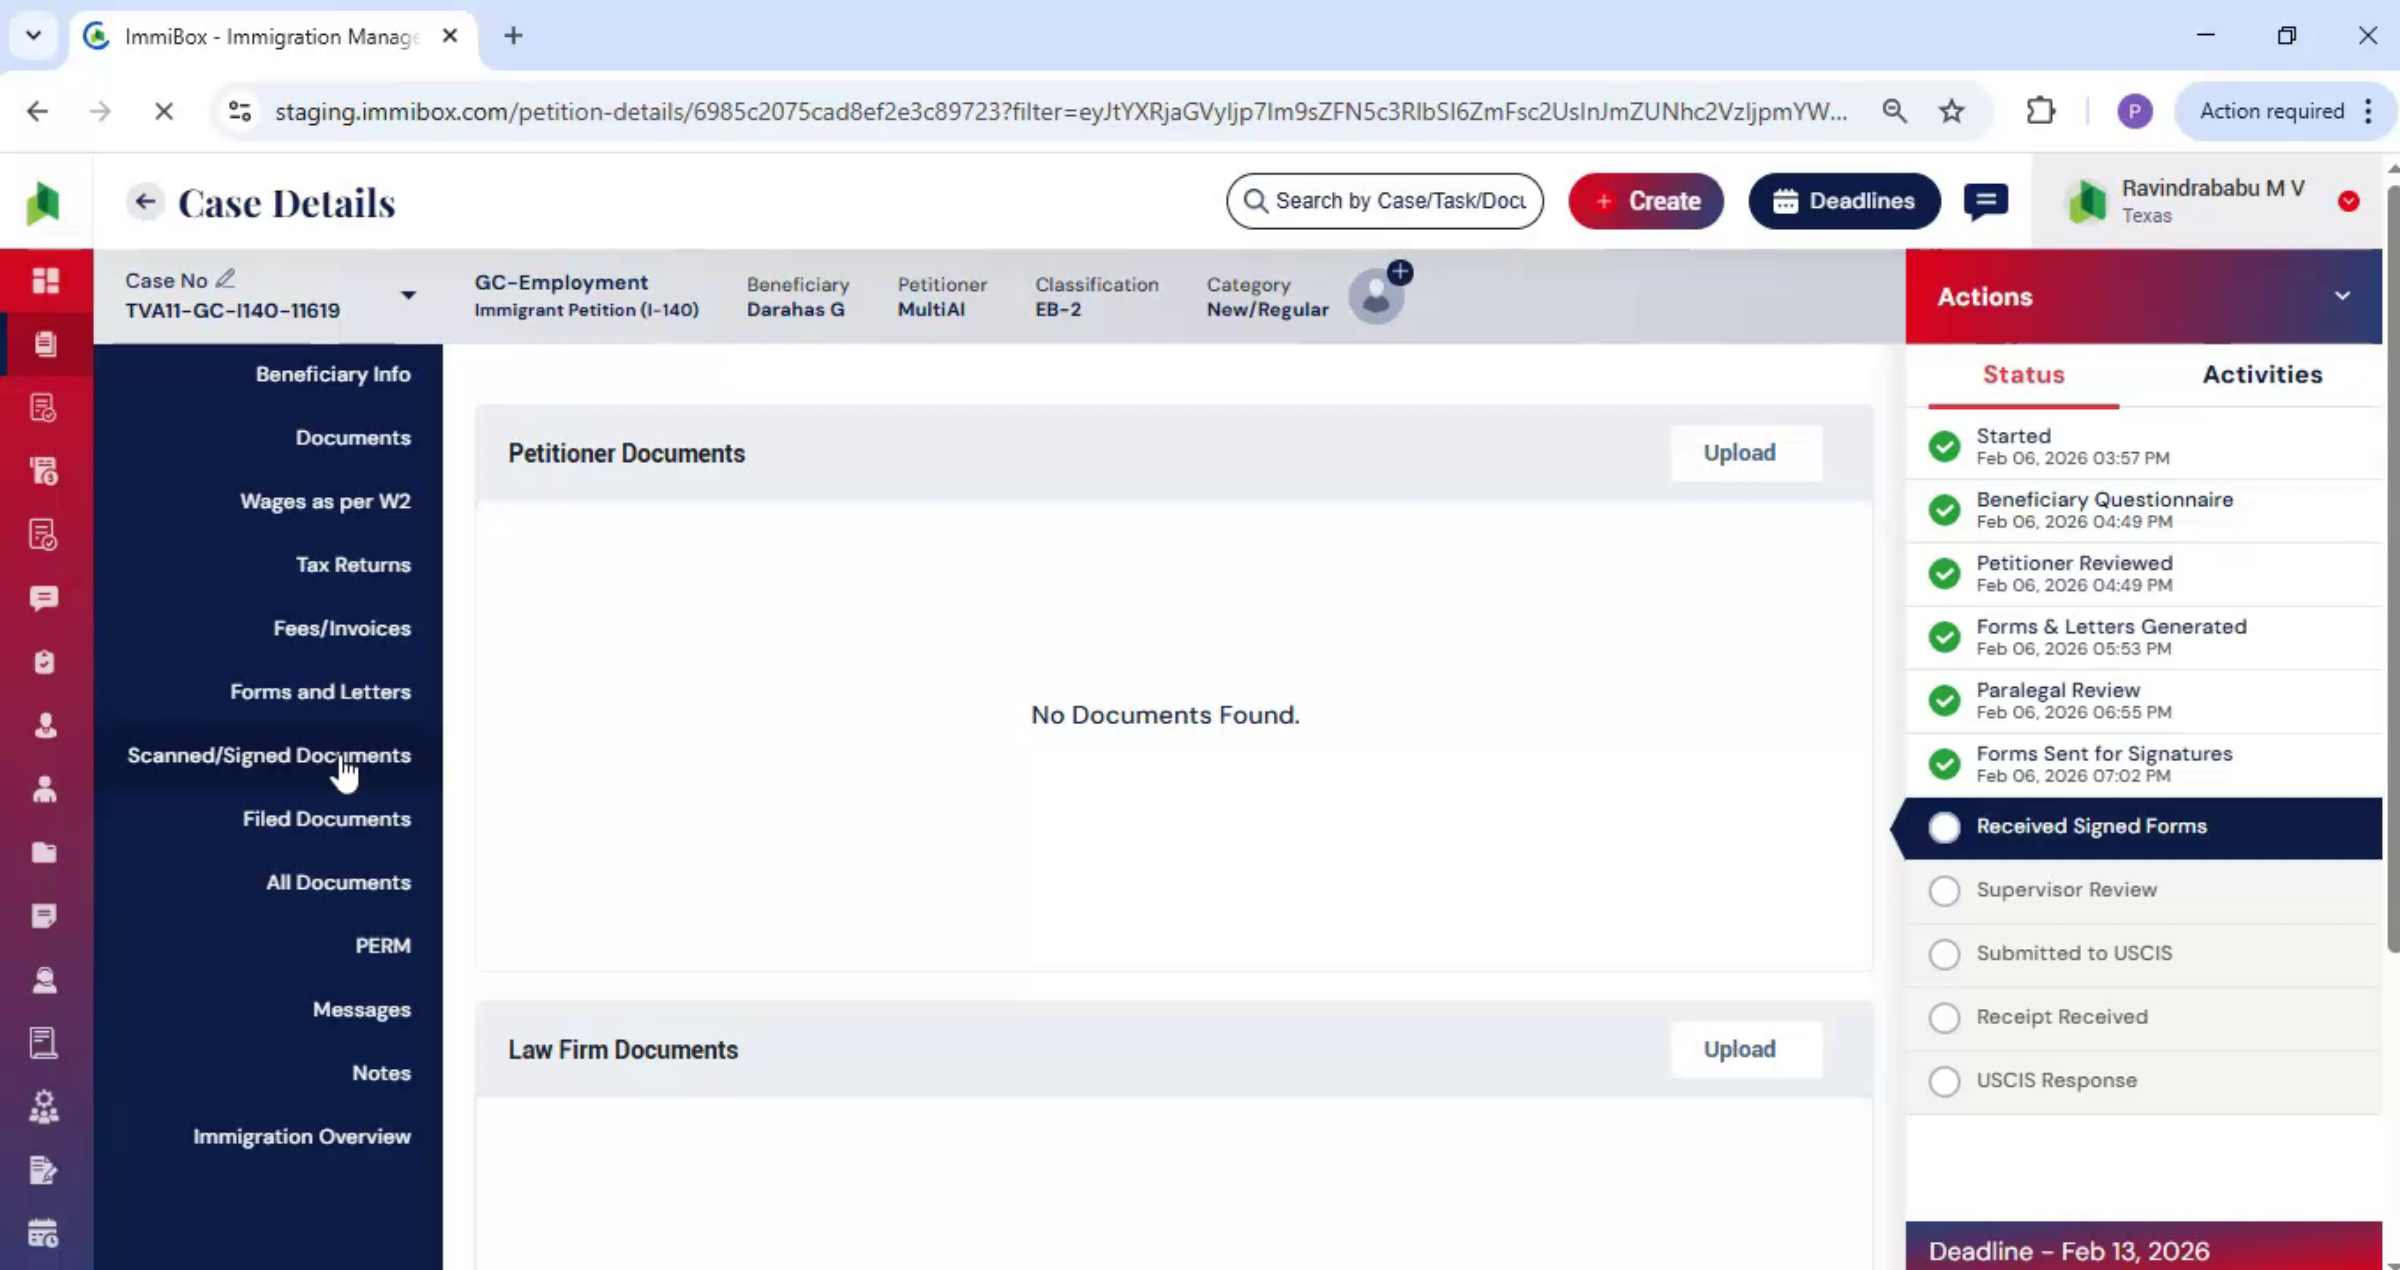
After the petitioner signs and uploads the documents in ImmiBox, the signed files are automatically stored within the case. You can view them under the Scanned and Signed Documents section.
34. Upload Physical Signed Copies
 * click the image to view enlarged
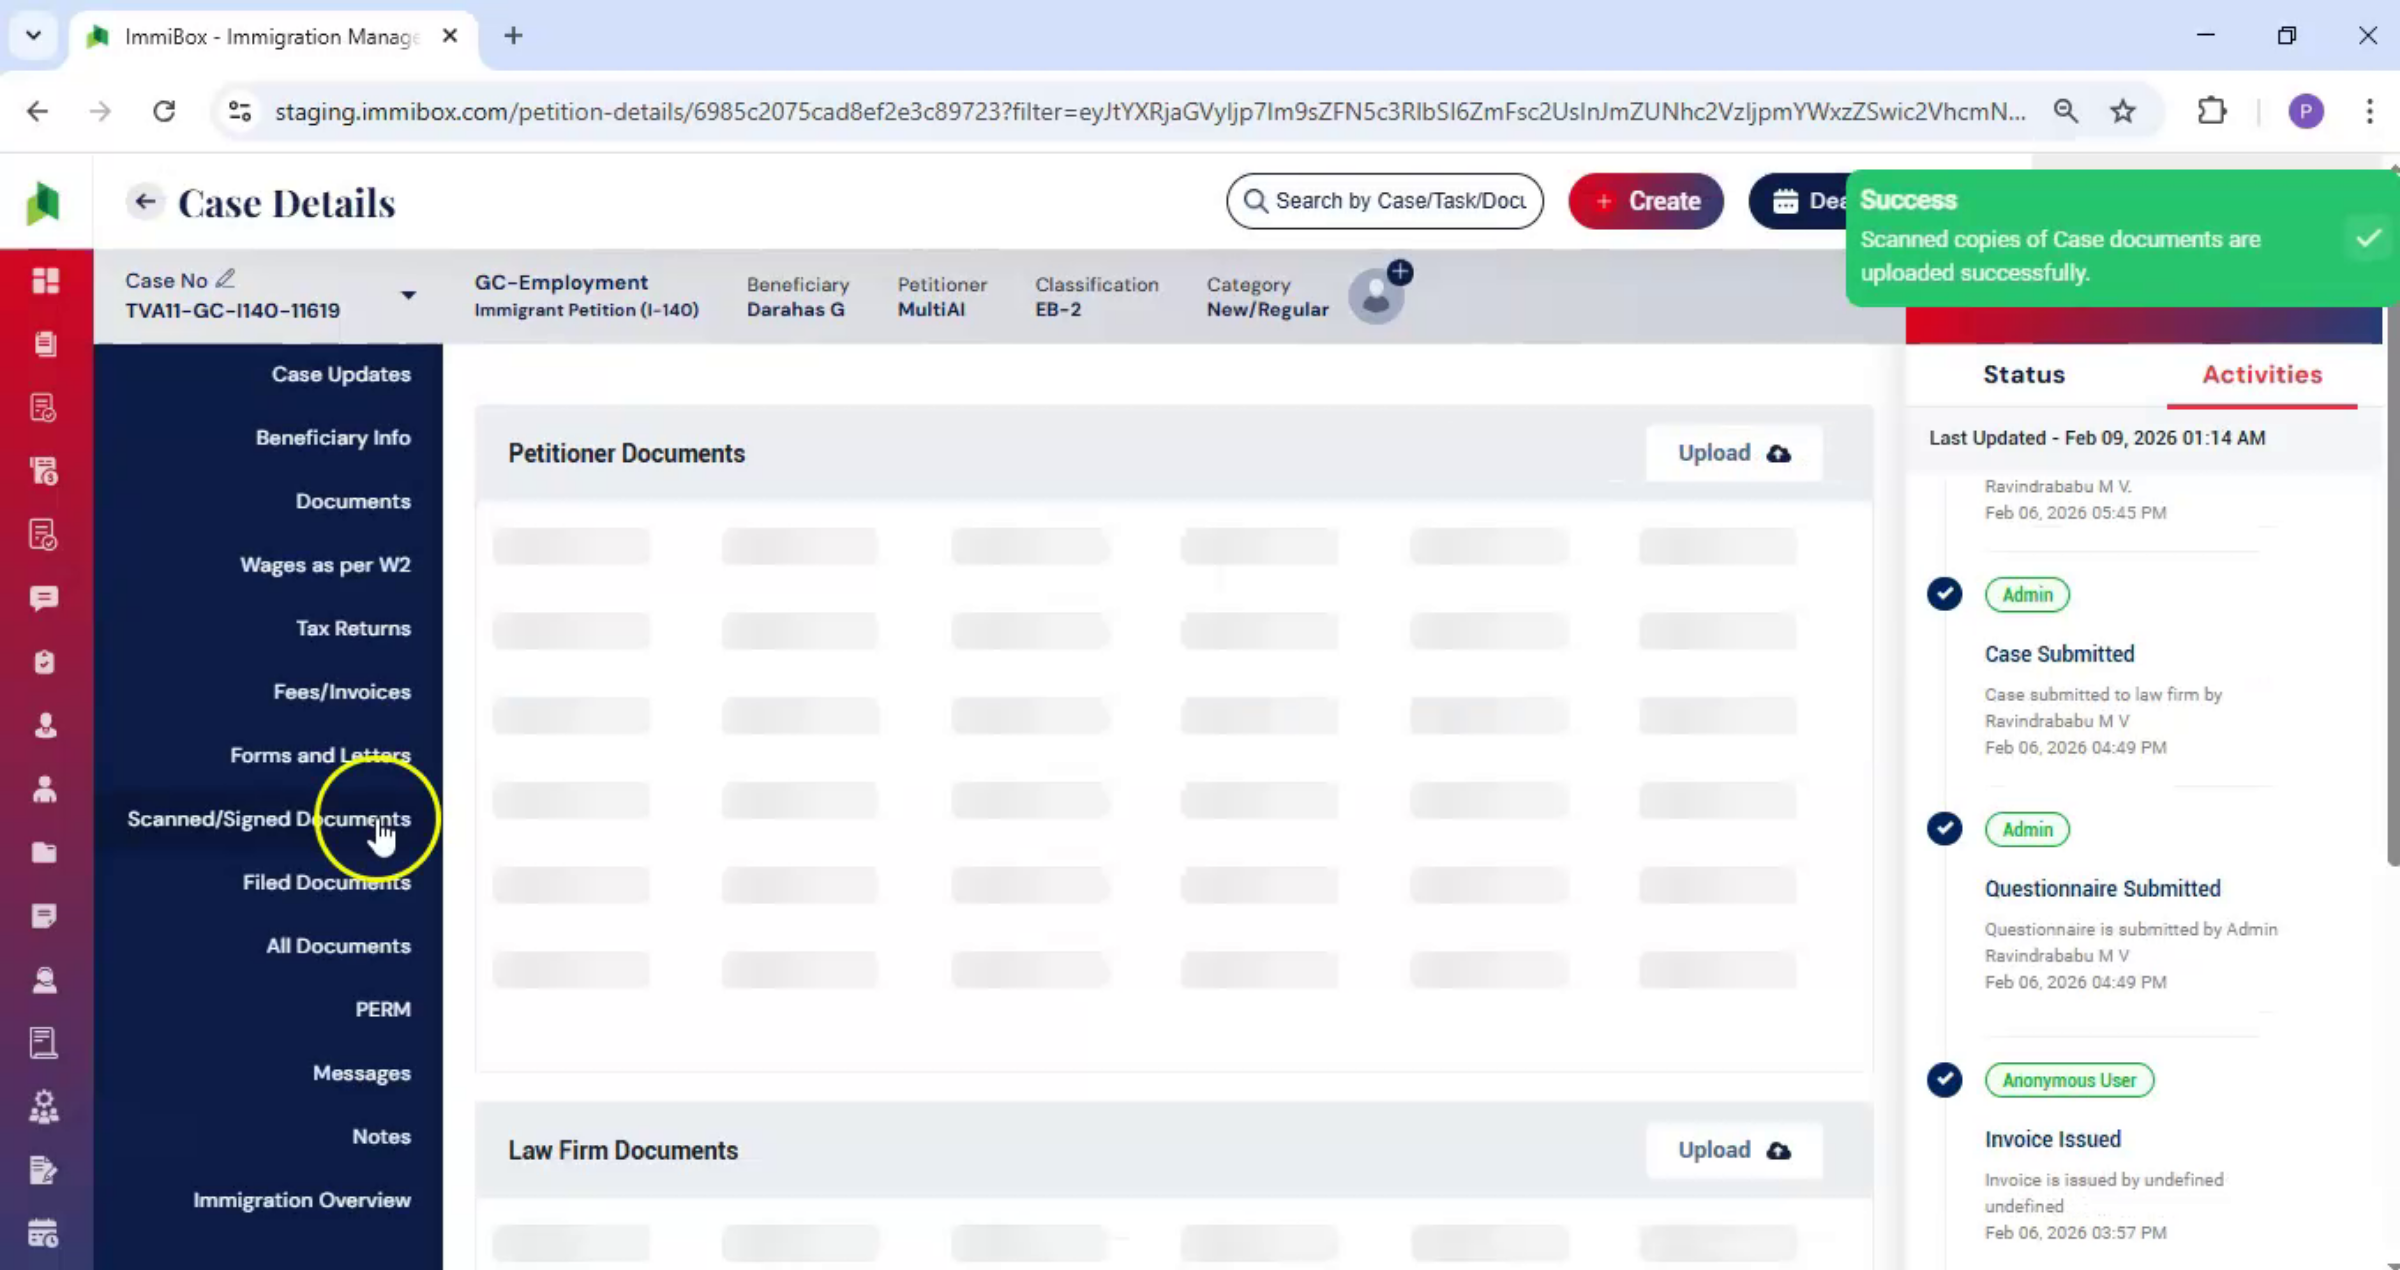
If signed copies are received physically, you can upload them to the case in just a few simple steps. Click Scanned and Signed Documents. On the right-hand side, under Petitioner Documents, click Upload. Upload the signed and scanned documents, and then click Submit.
35. Law Firm Feature Documents
 * click the image to view enlarged
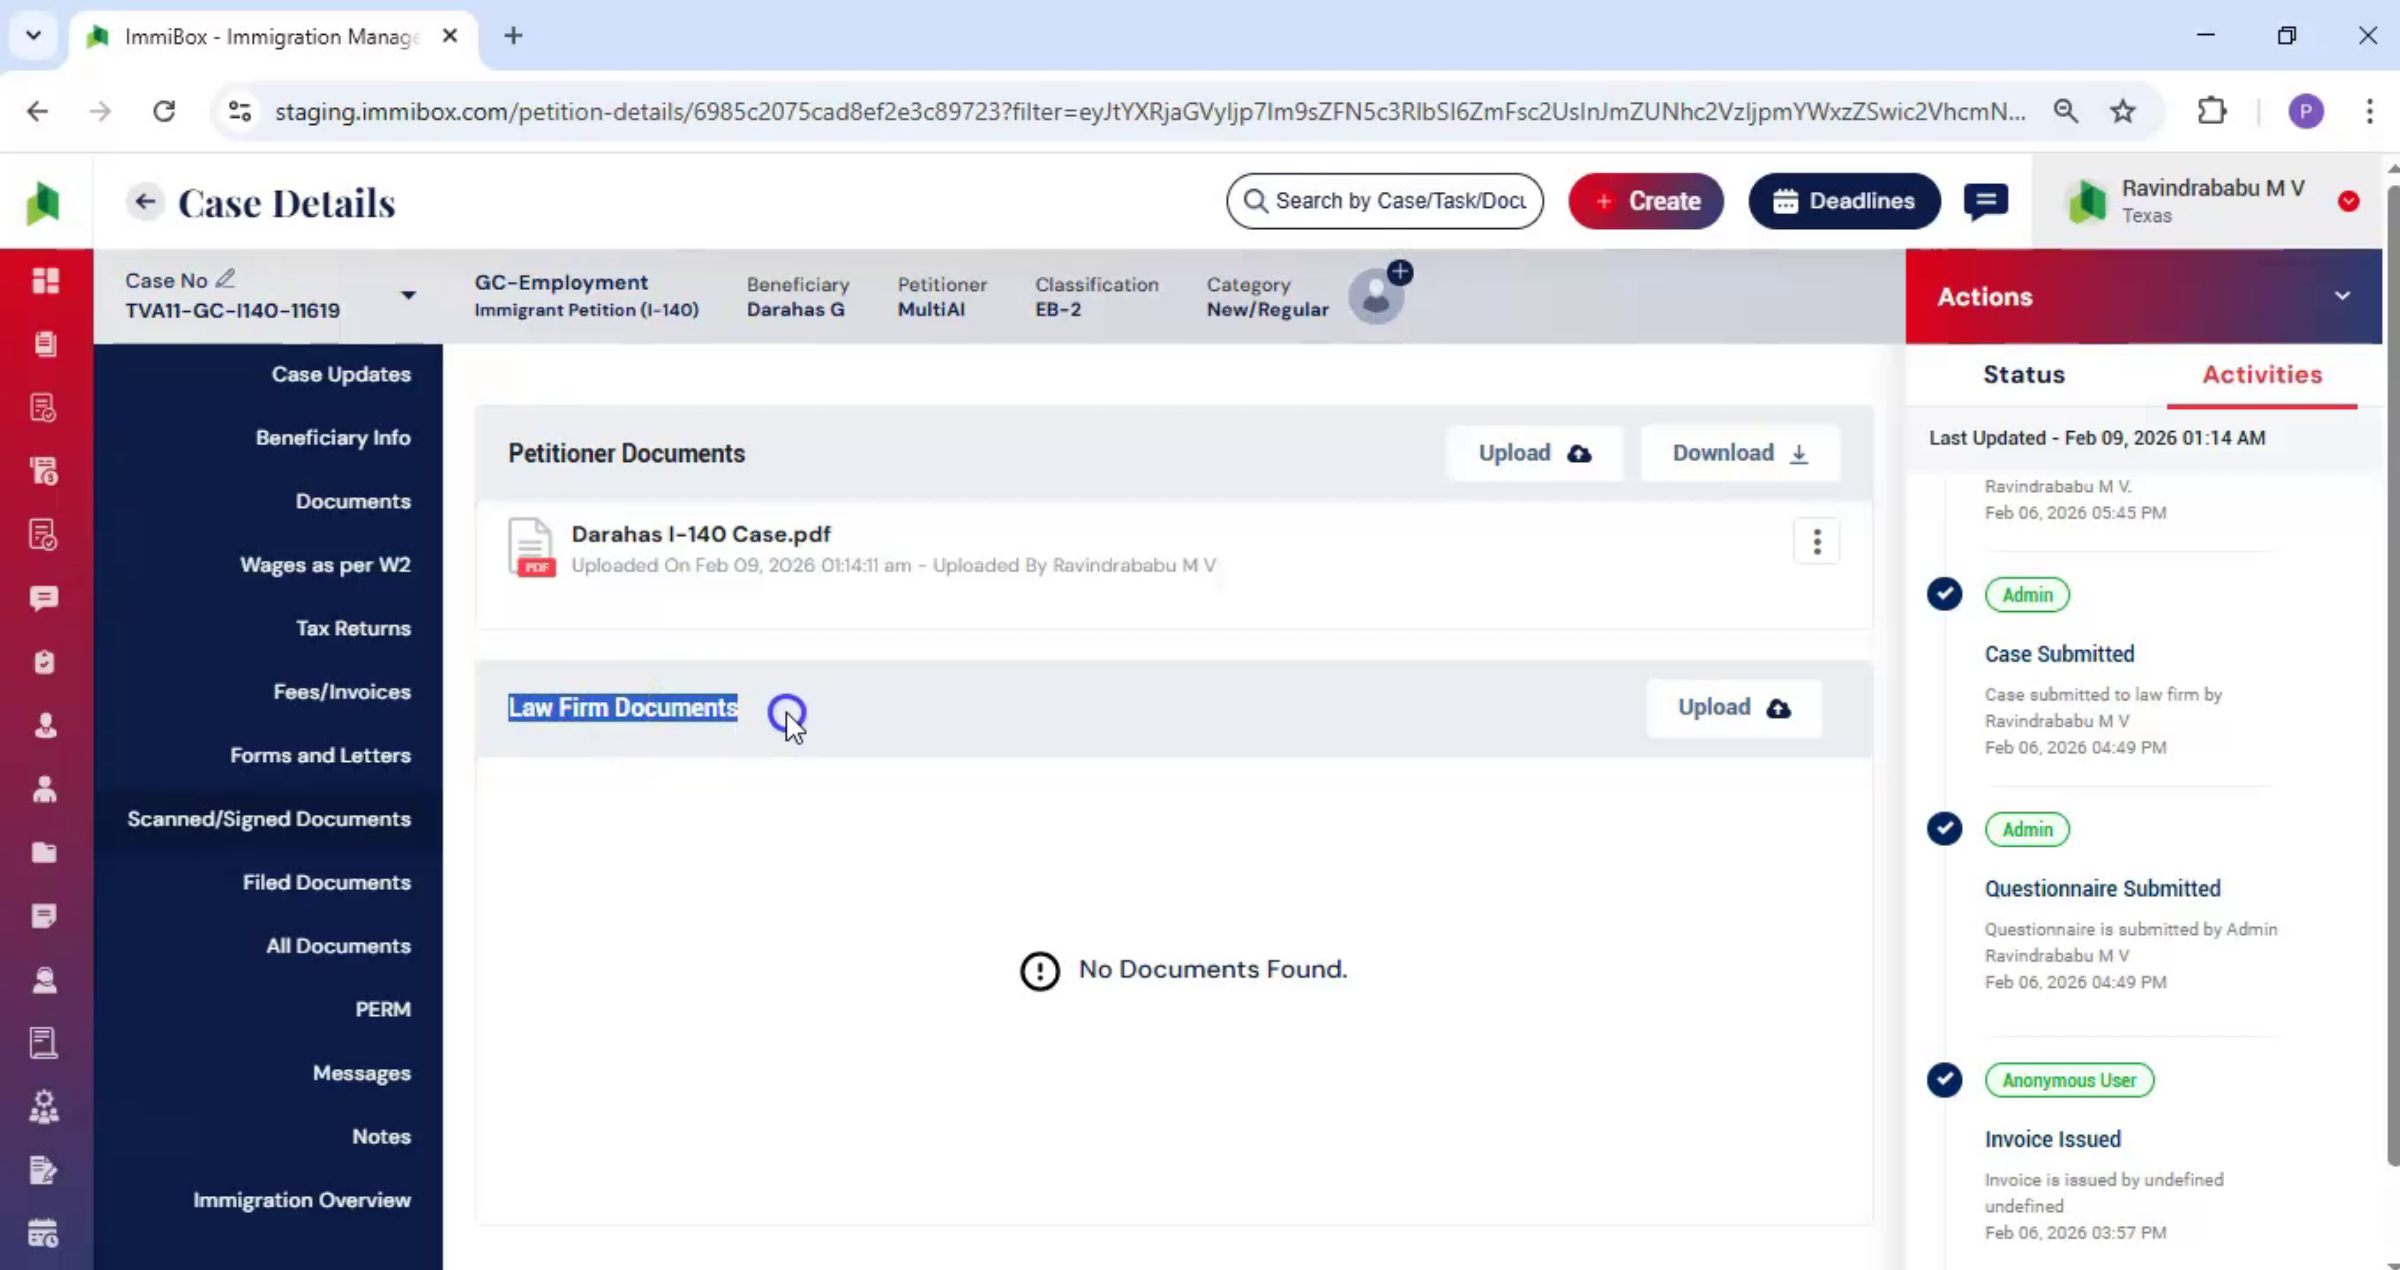
Under the Scanned Documents section, below Petitioner Documents, you will find Law Firm Feature Documents. This section allows you to upload internal law firm documents. Documents uploaded here are visible only to your law firm and are not shared with the petitioner.
36. Supervisor Review Step
 * click the image to view enlarged
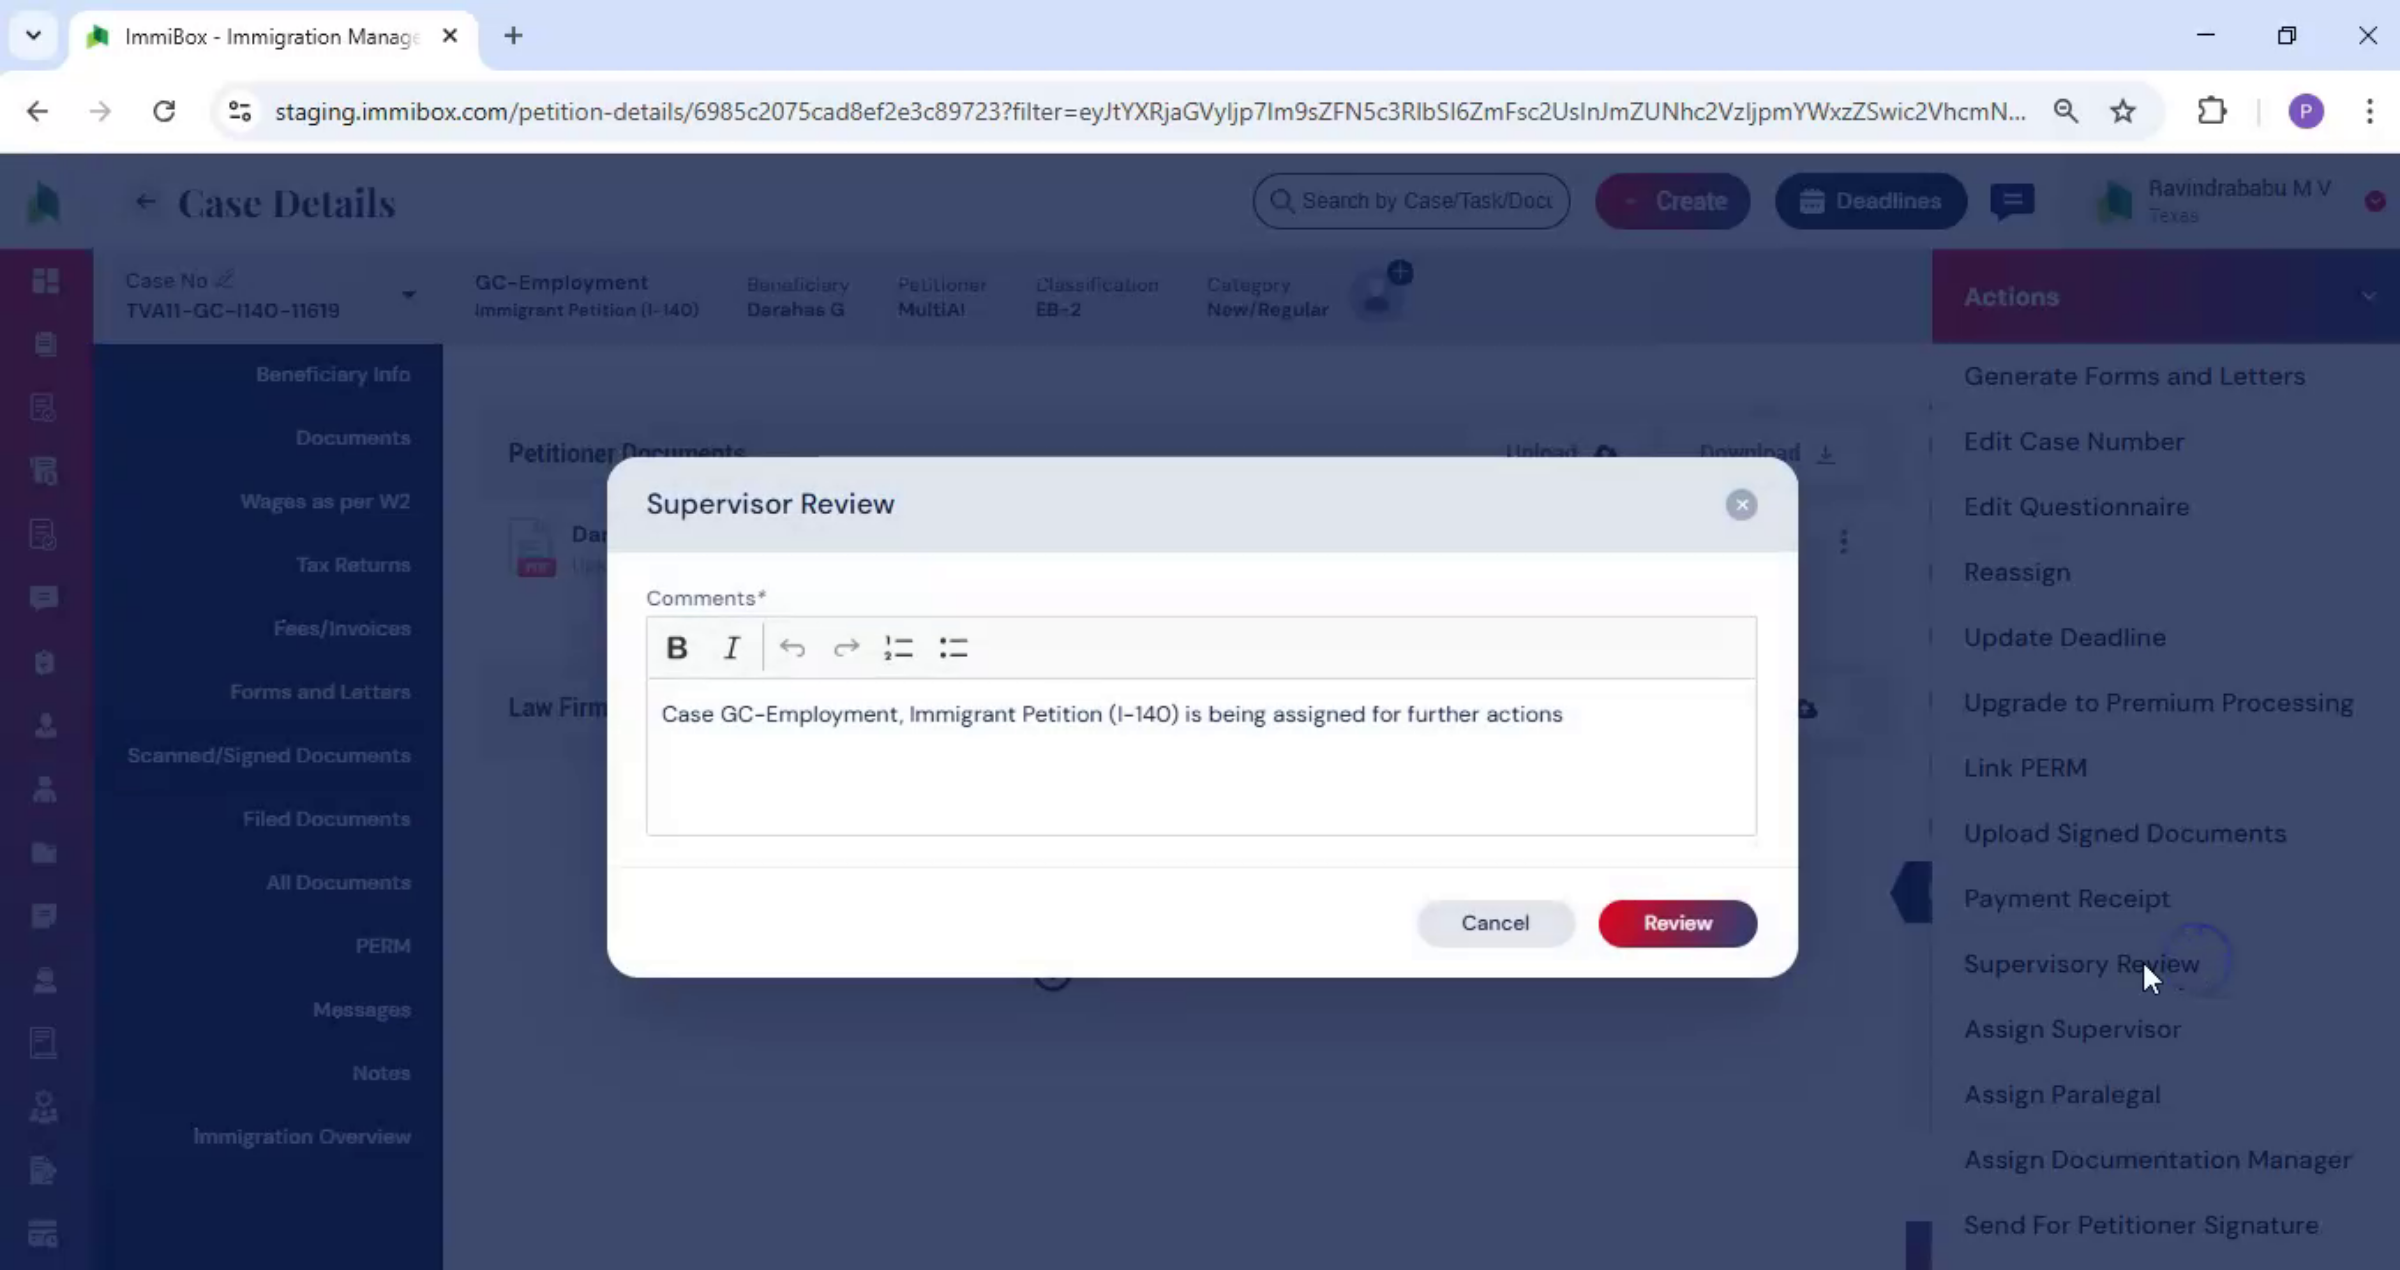
The next step in the workflow is supervisor review. From the Actions tab, select supervisor review. In the comments section.
37. Add Supervisor Review Notes
 * click the image to view enlarged
Add your review notes or mention any required changes. Once the review is complete, click submit.
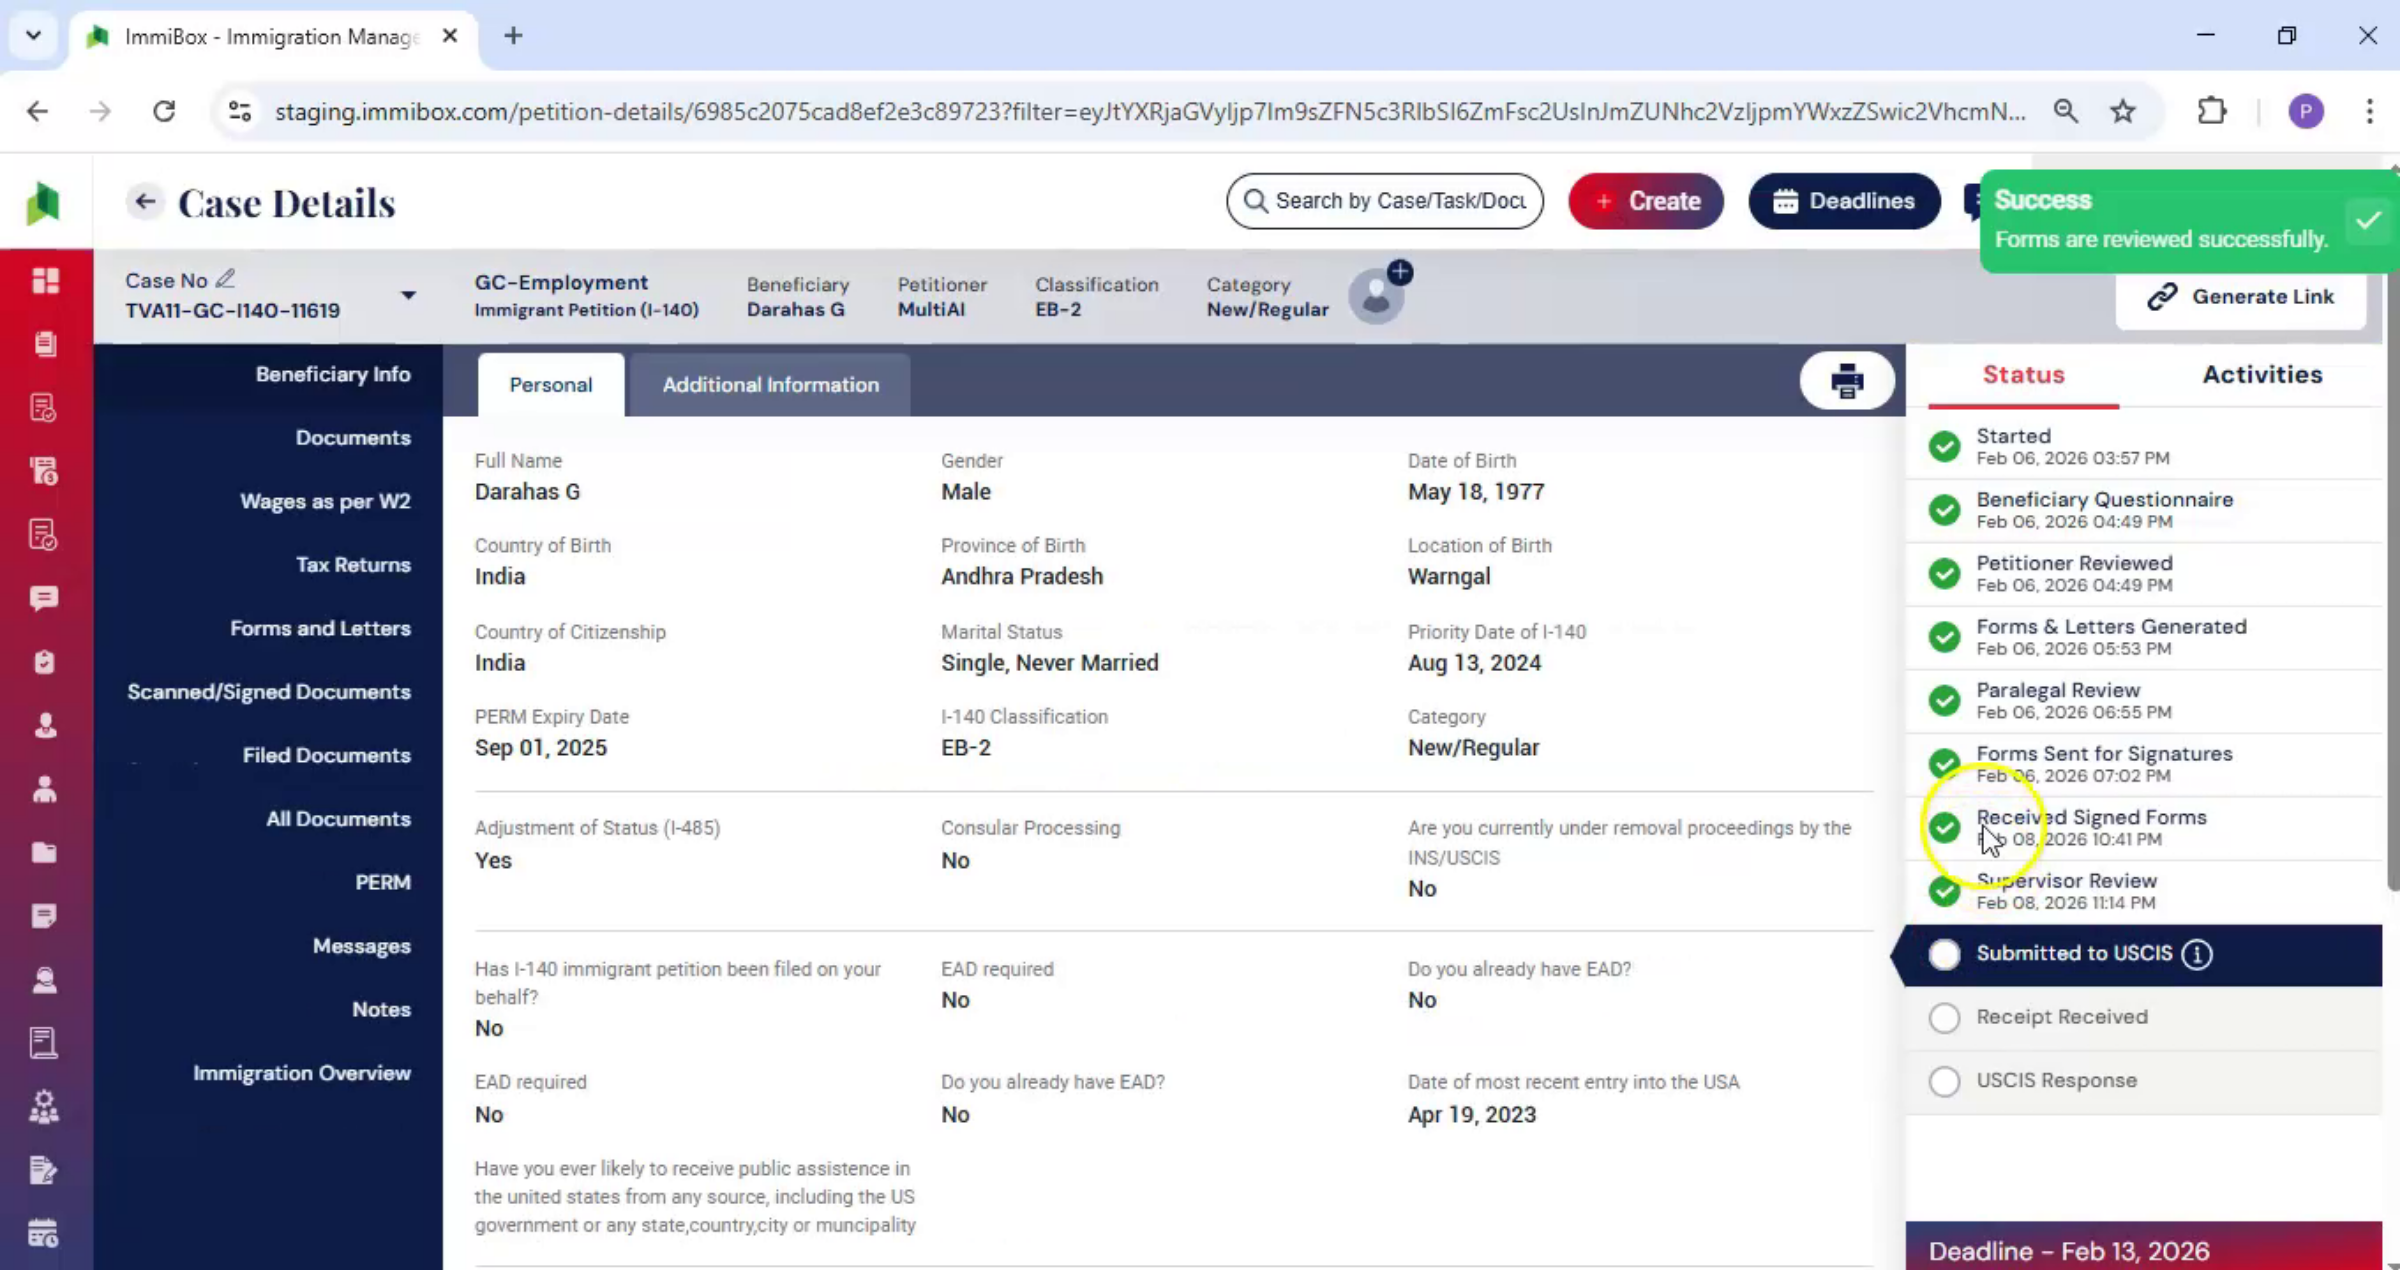
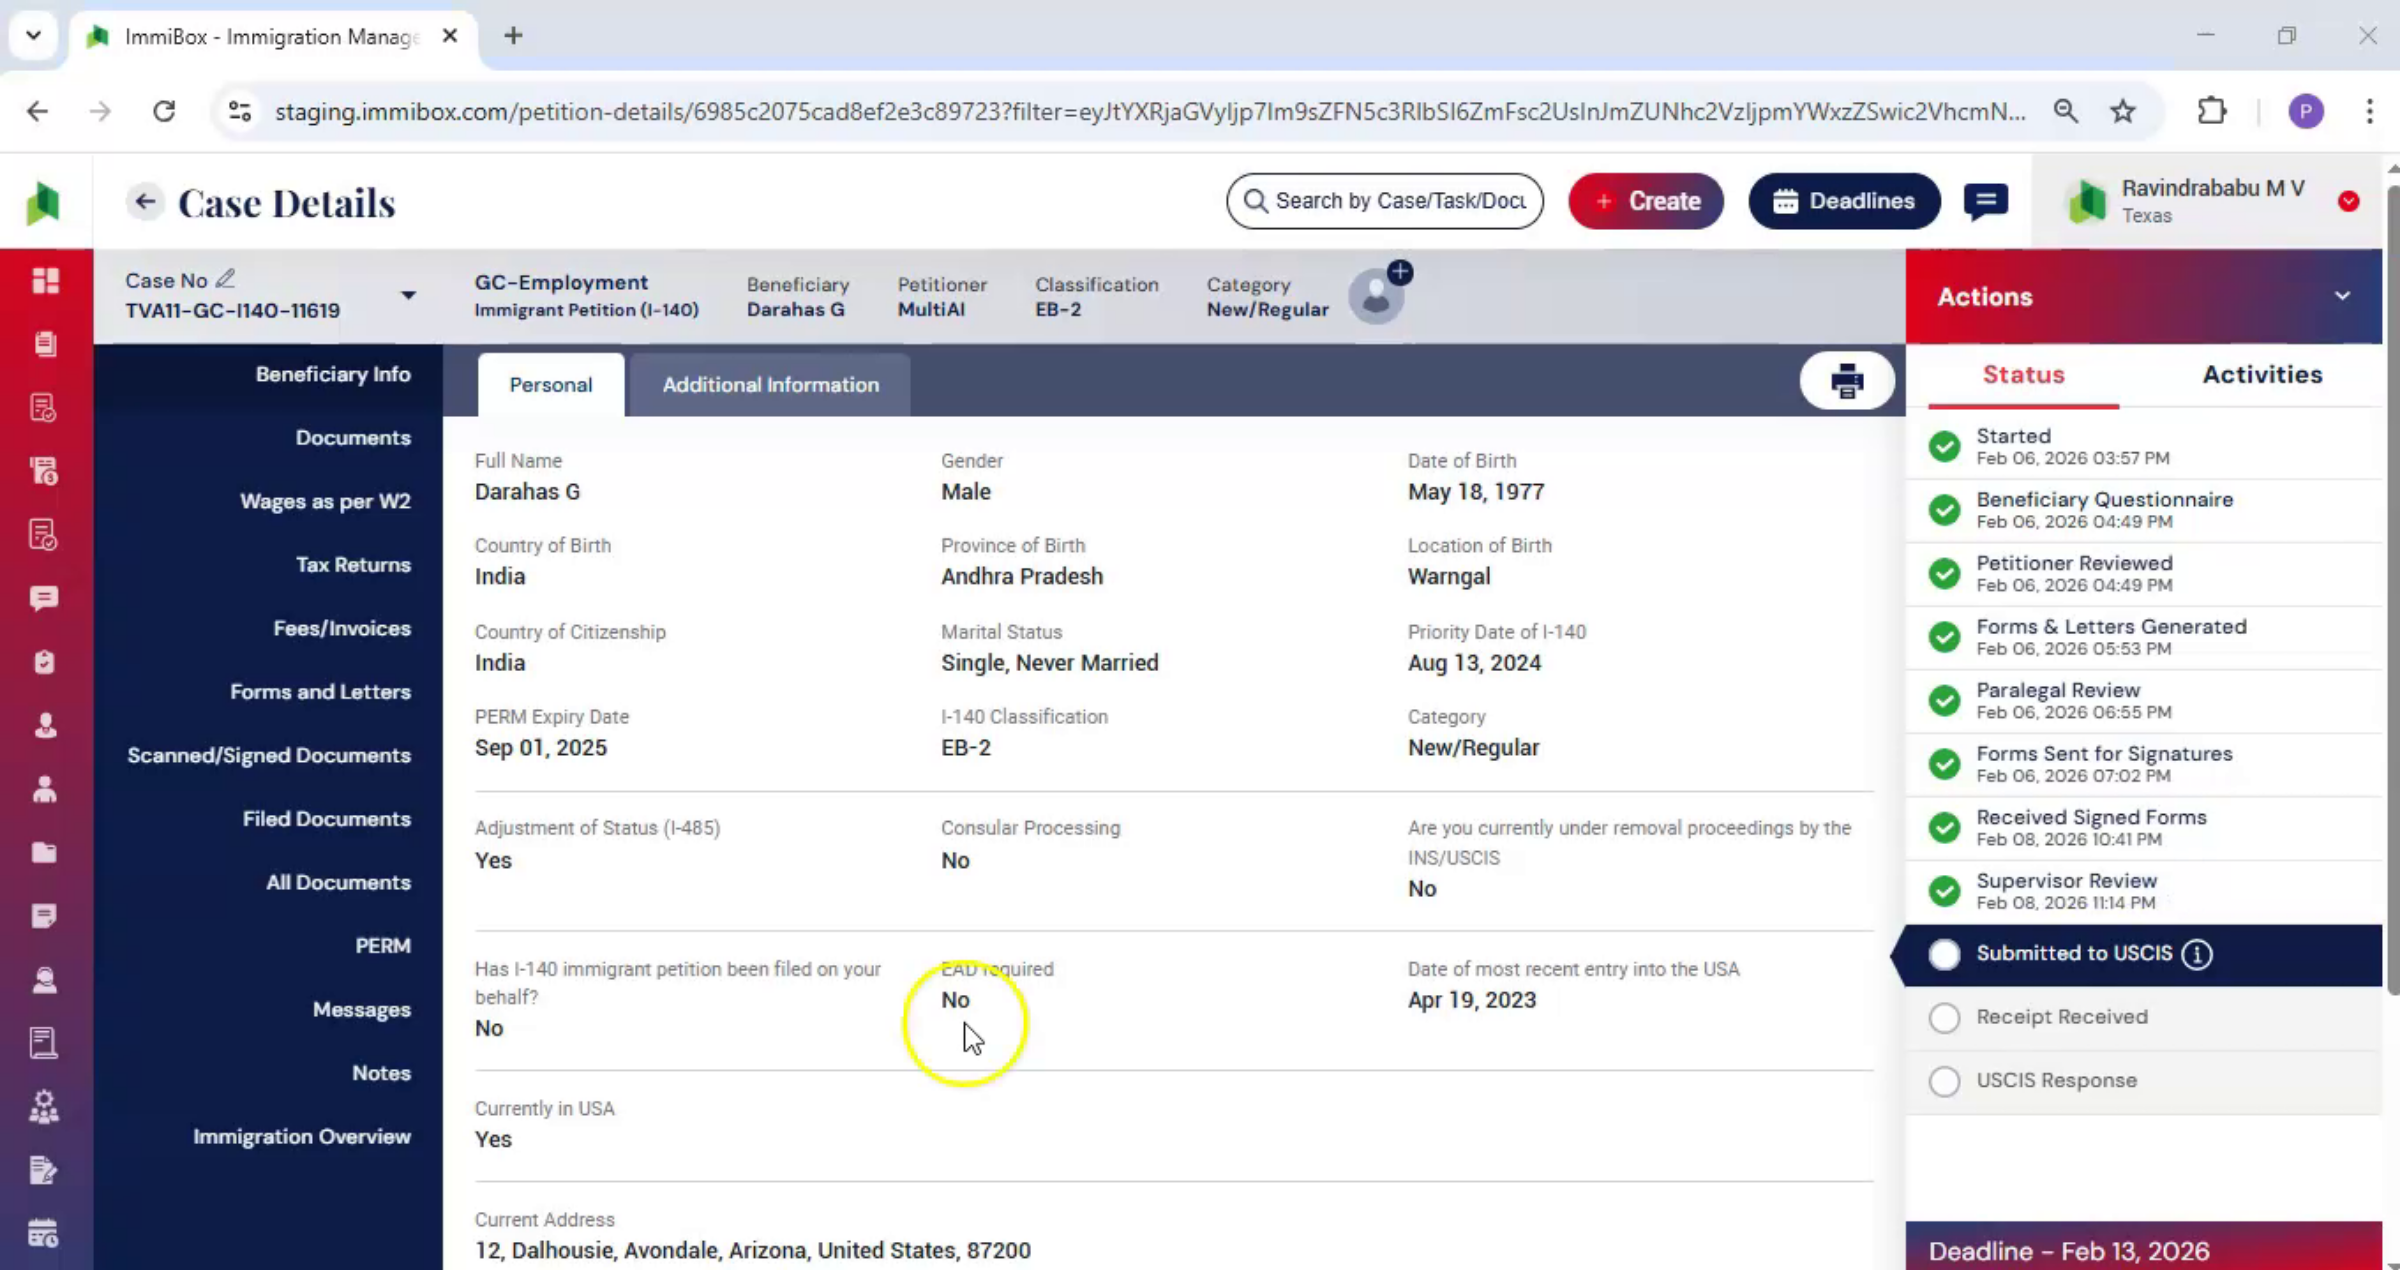
38. Complete Supervisor Review
 * click the image to view enlarged
The supervisor review is now complete.
39. Download All Documents
 * click the image to view enlarged
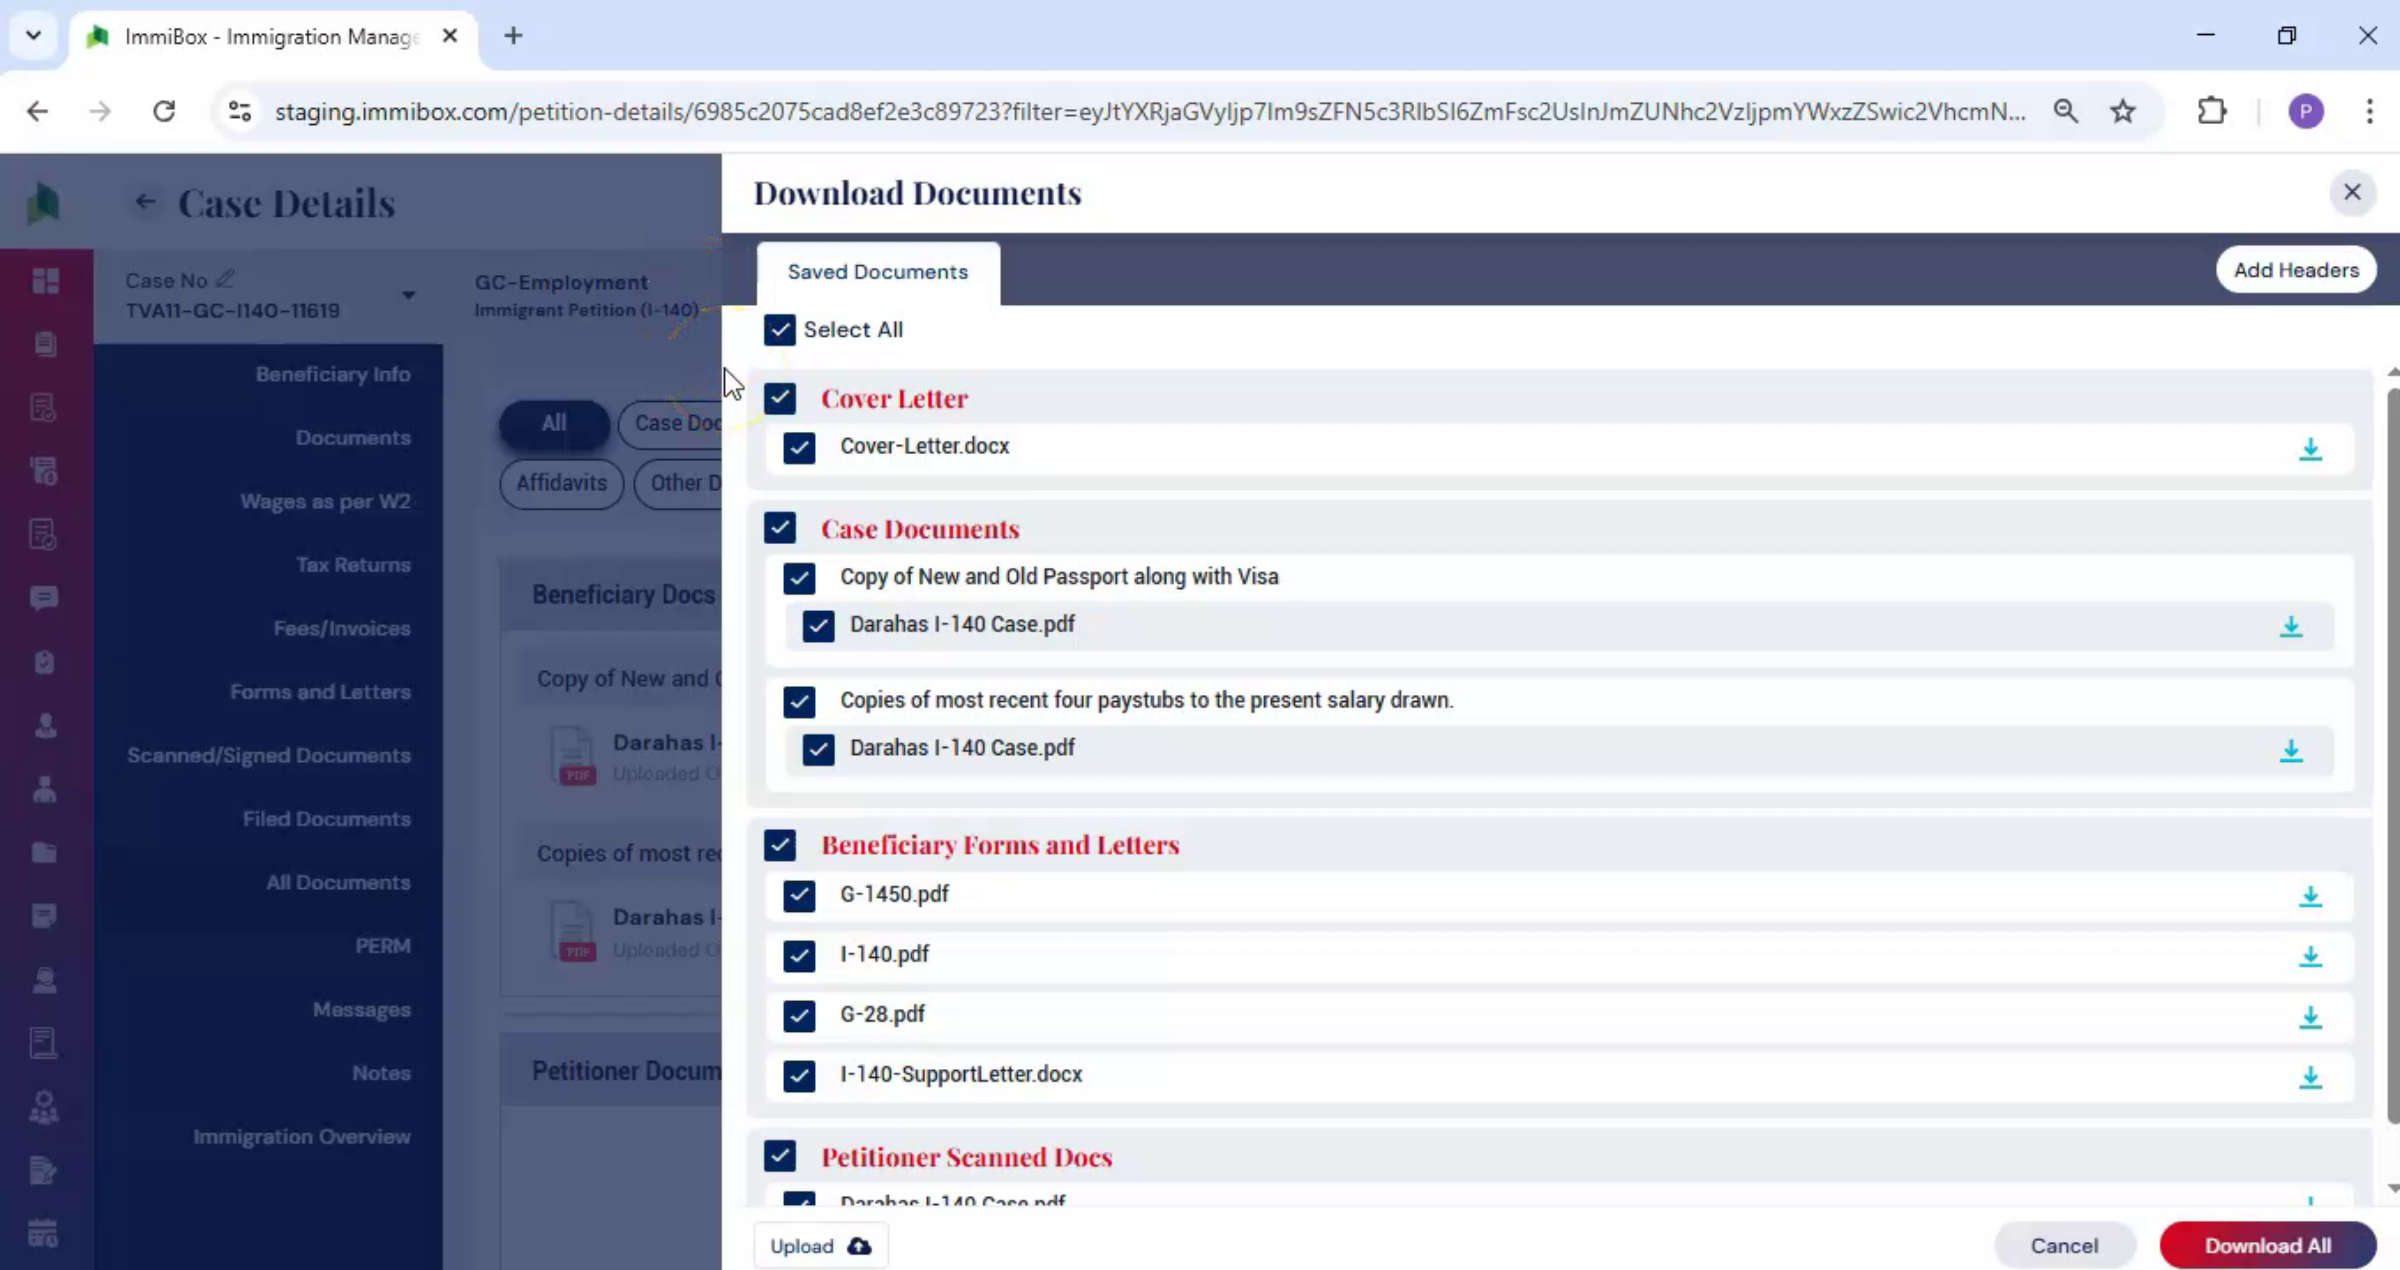
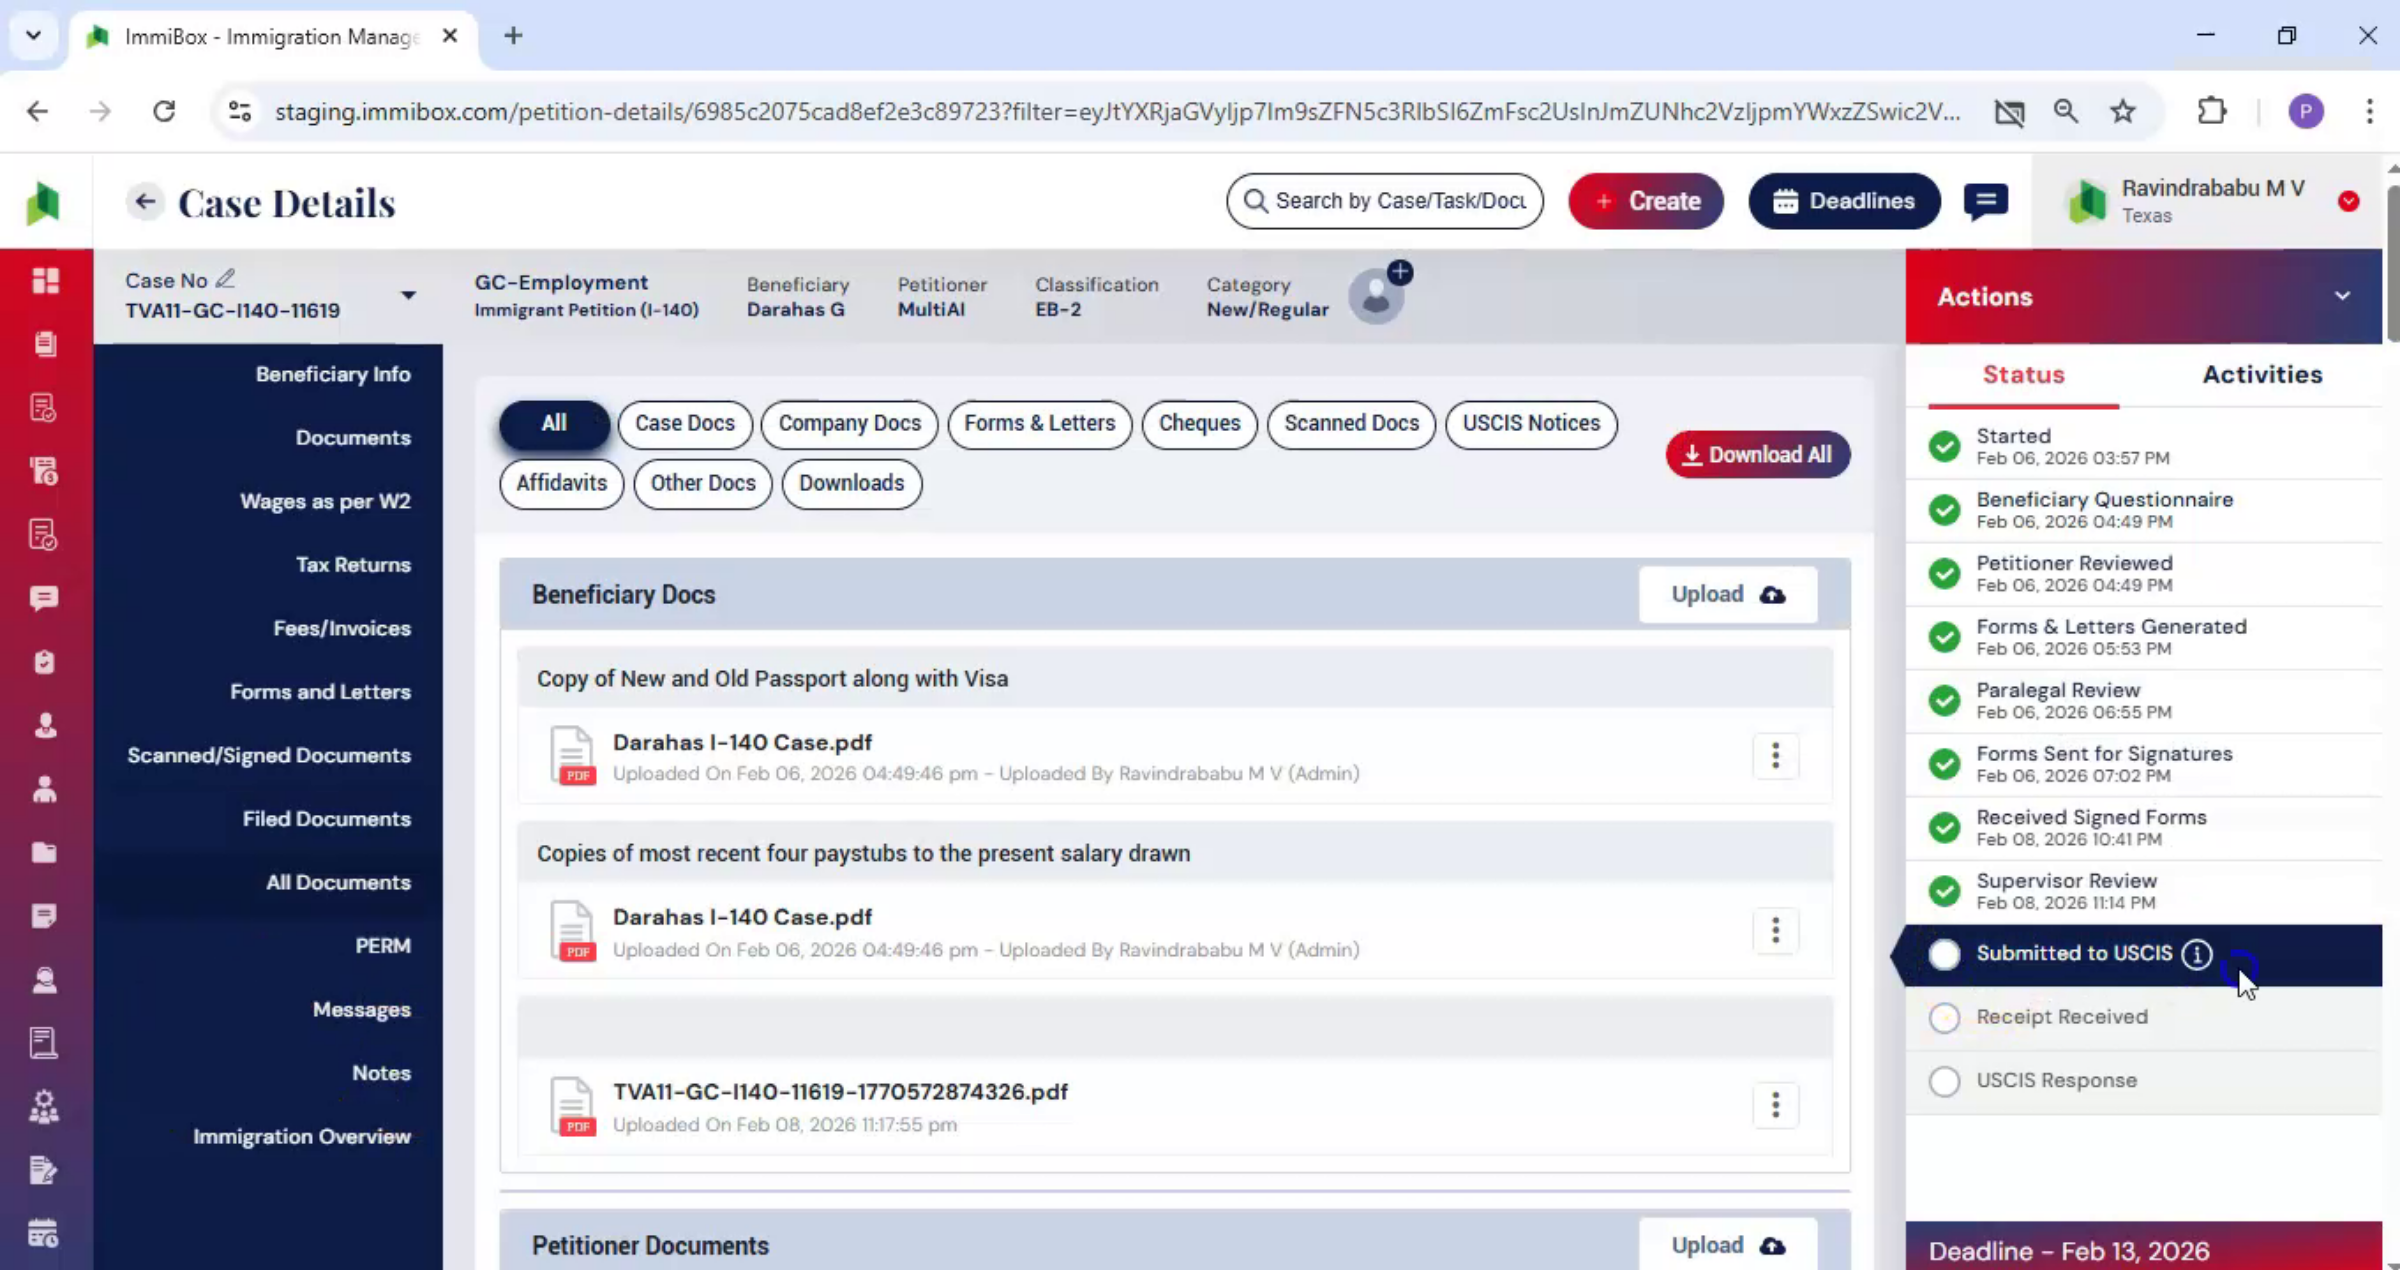
Next, navigate to All Documents from the left-hand panel. Then click on Download All option visible on the right-hand side. Here you can select the documents that need to be downloaded.
40. Document Selection And Download
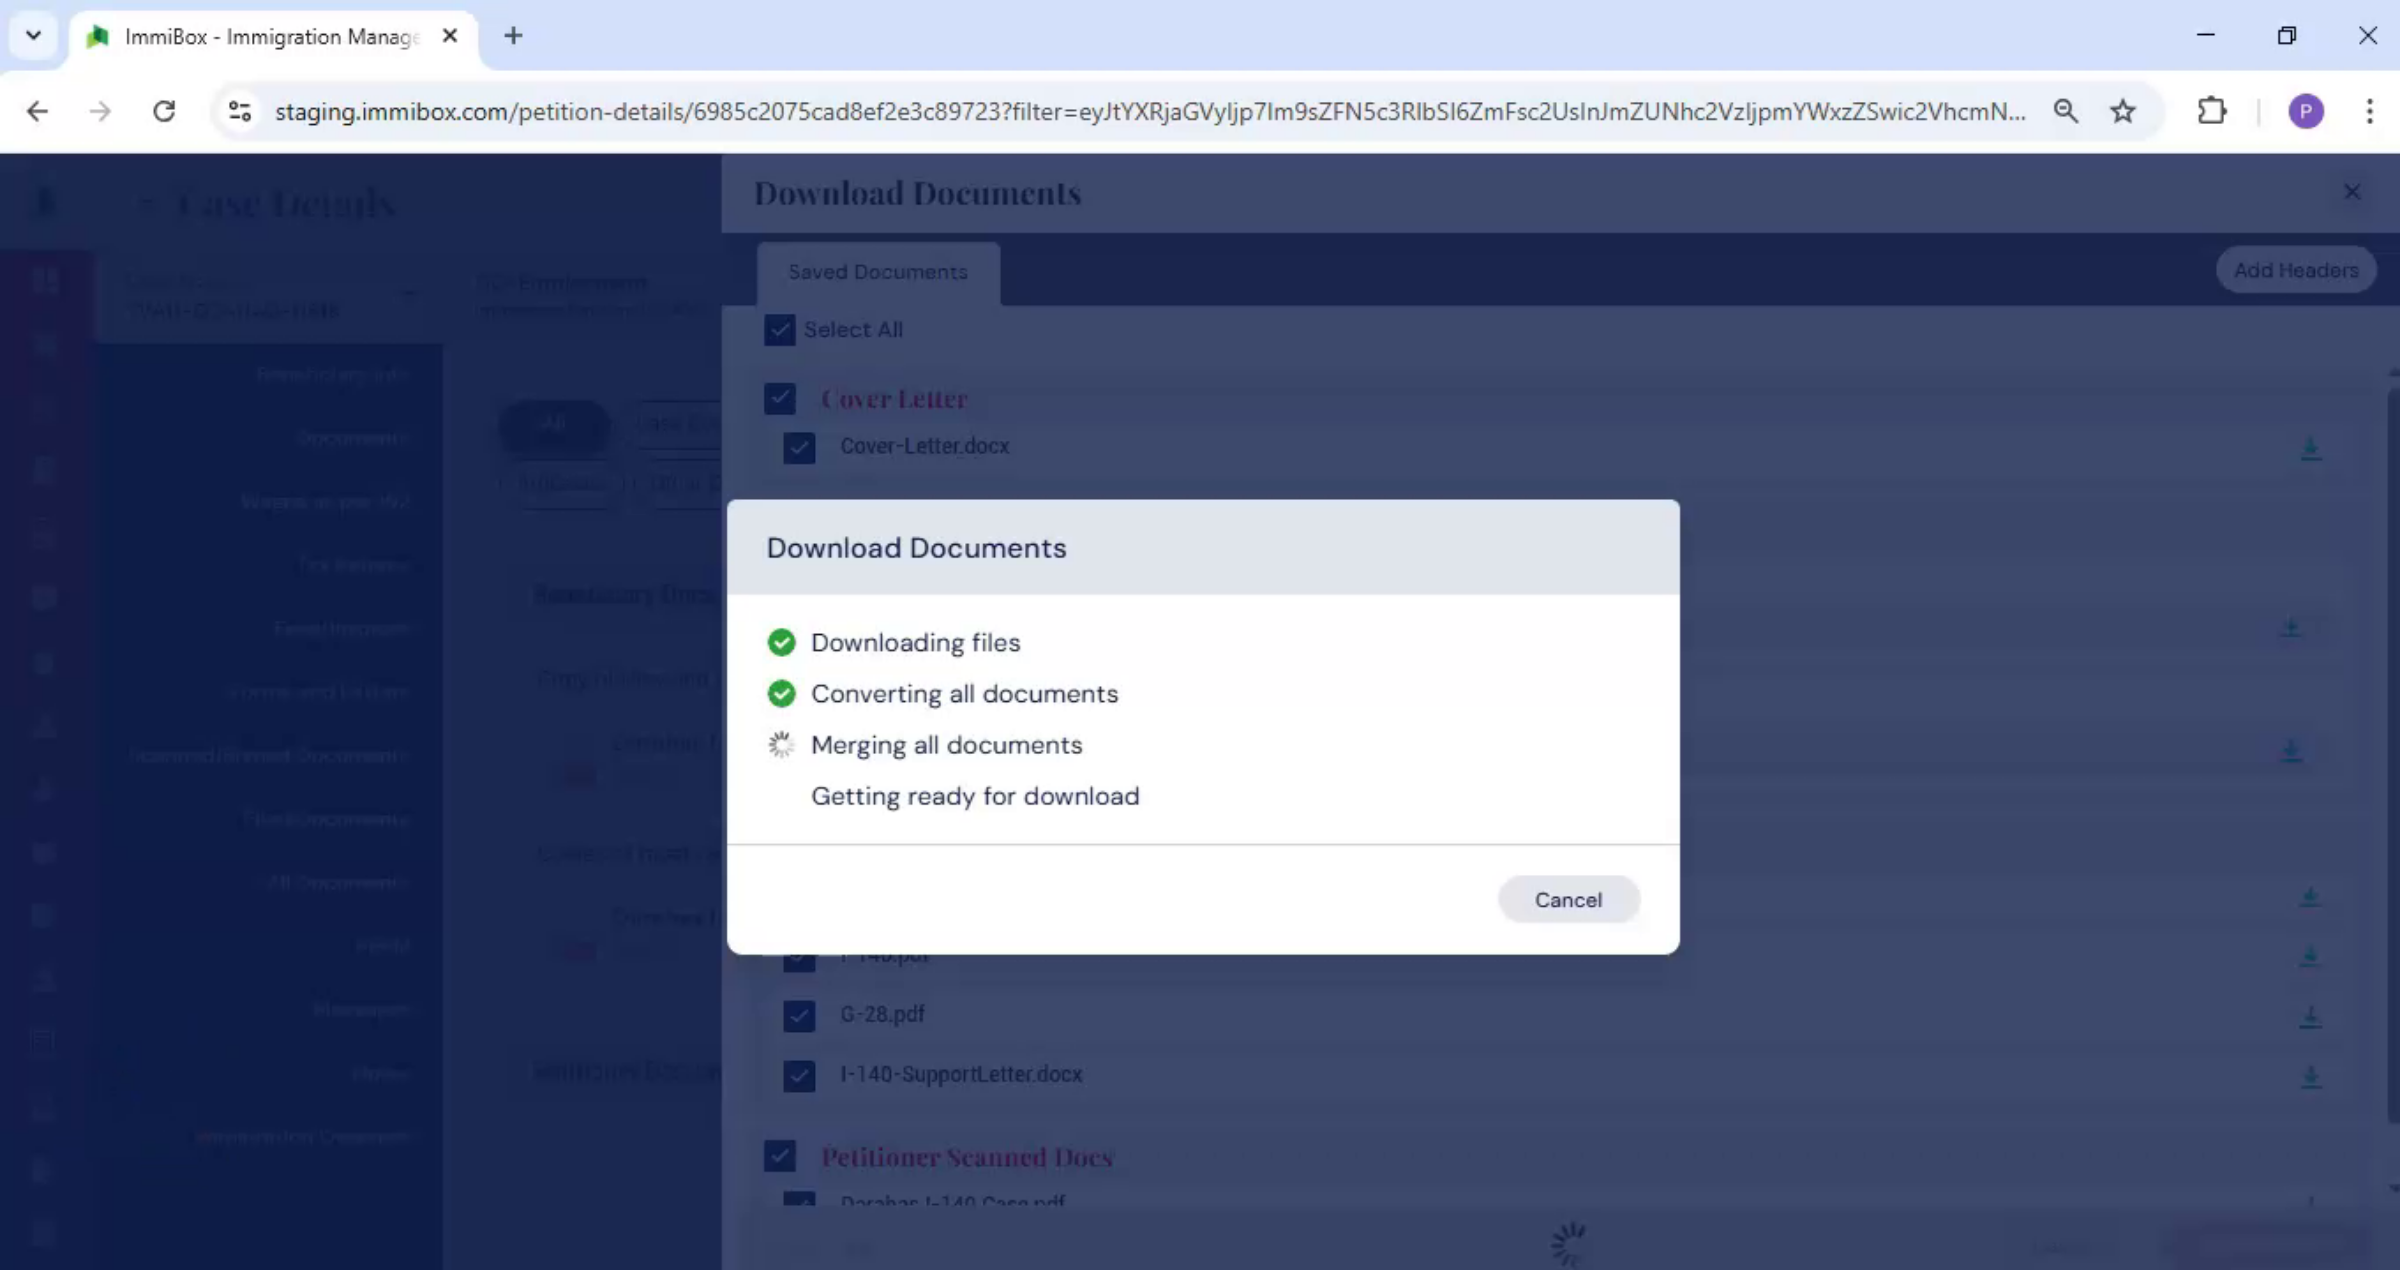
 * click the image to view enlarged
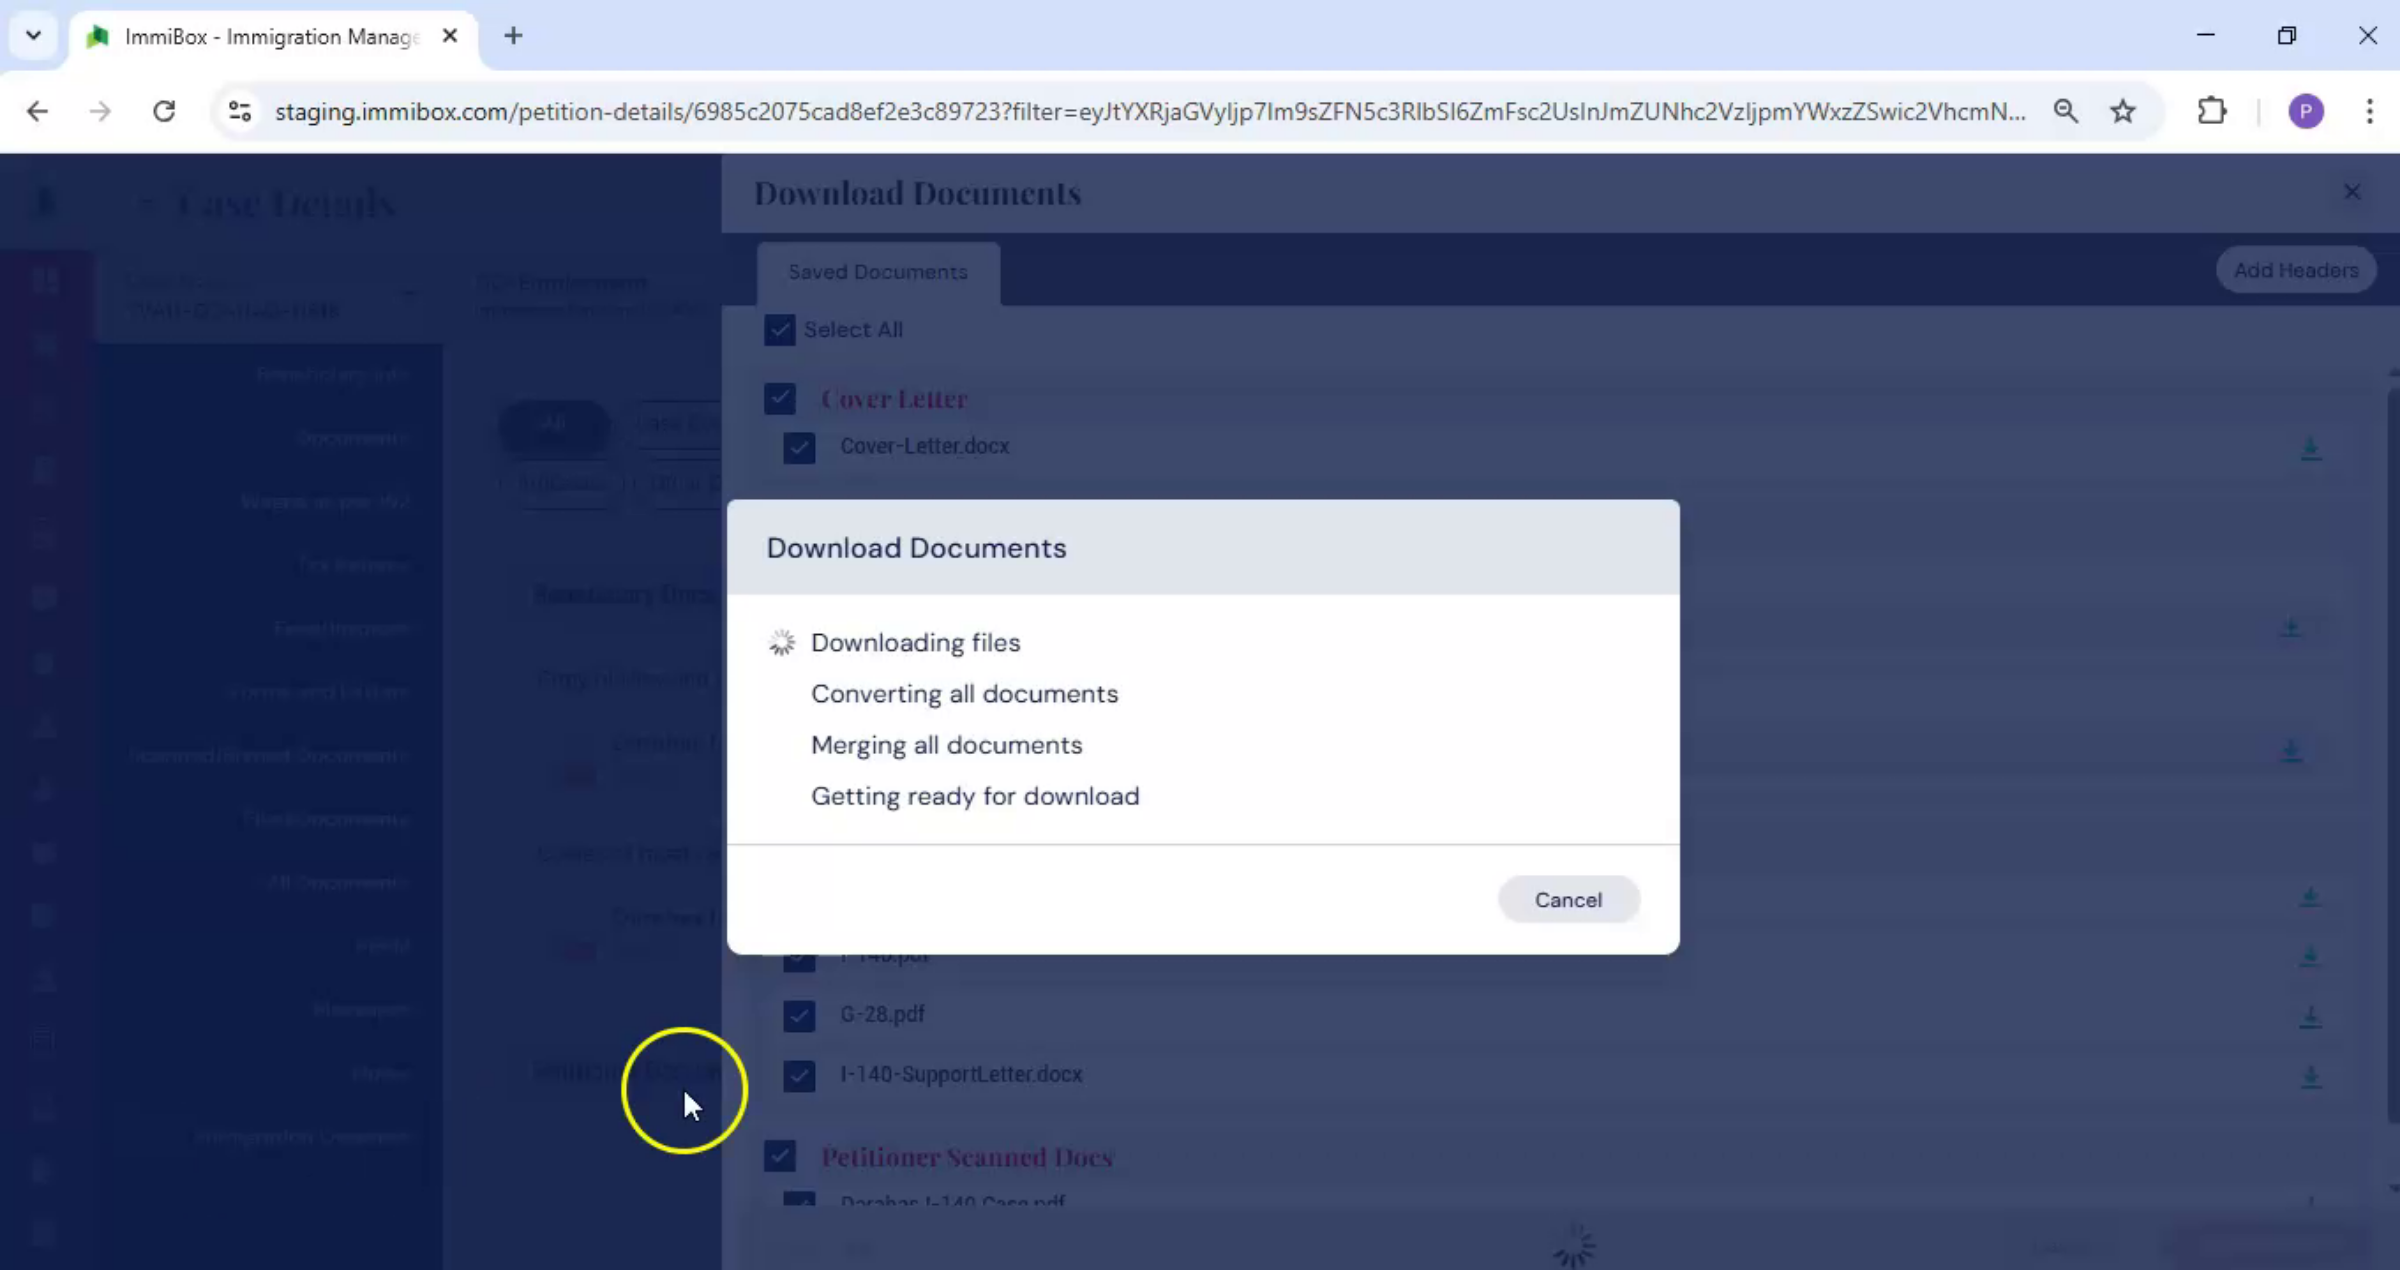
The system automatically creates and organizes the documents using the information already available in the case. You can select documents individually or use Select All to include all available documents. This may include cover letters, case documents, and other supporting files. Once the required documents are selected, click Download All. The selected documents are downloaded together.
41. Attorney Review And Filing
 * click the image to view enlarged
After downloading, the attorney reviews and signs the required documents. At this stage, the case is ready to be physically filed.
42. Filed Documents Management
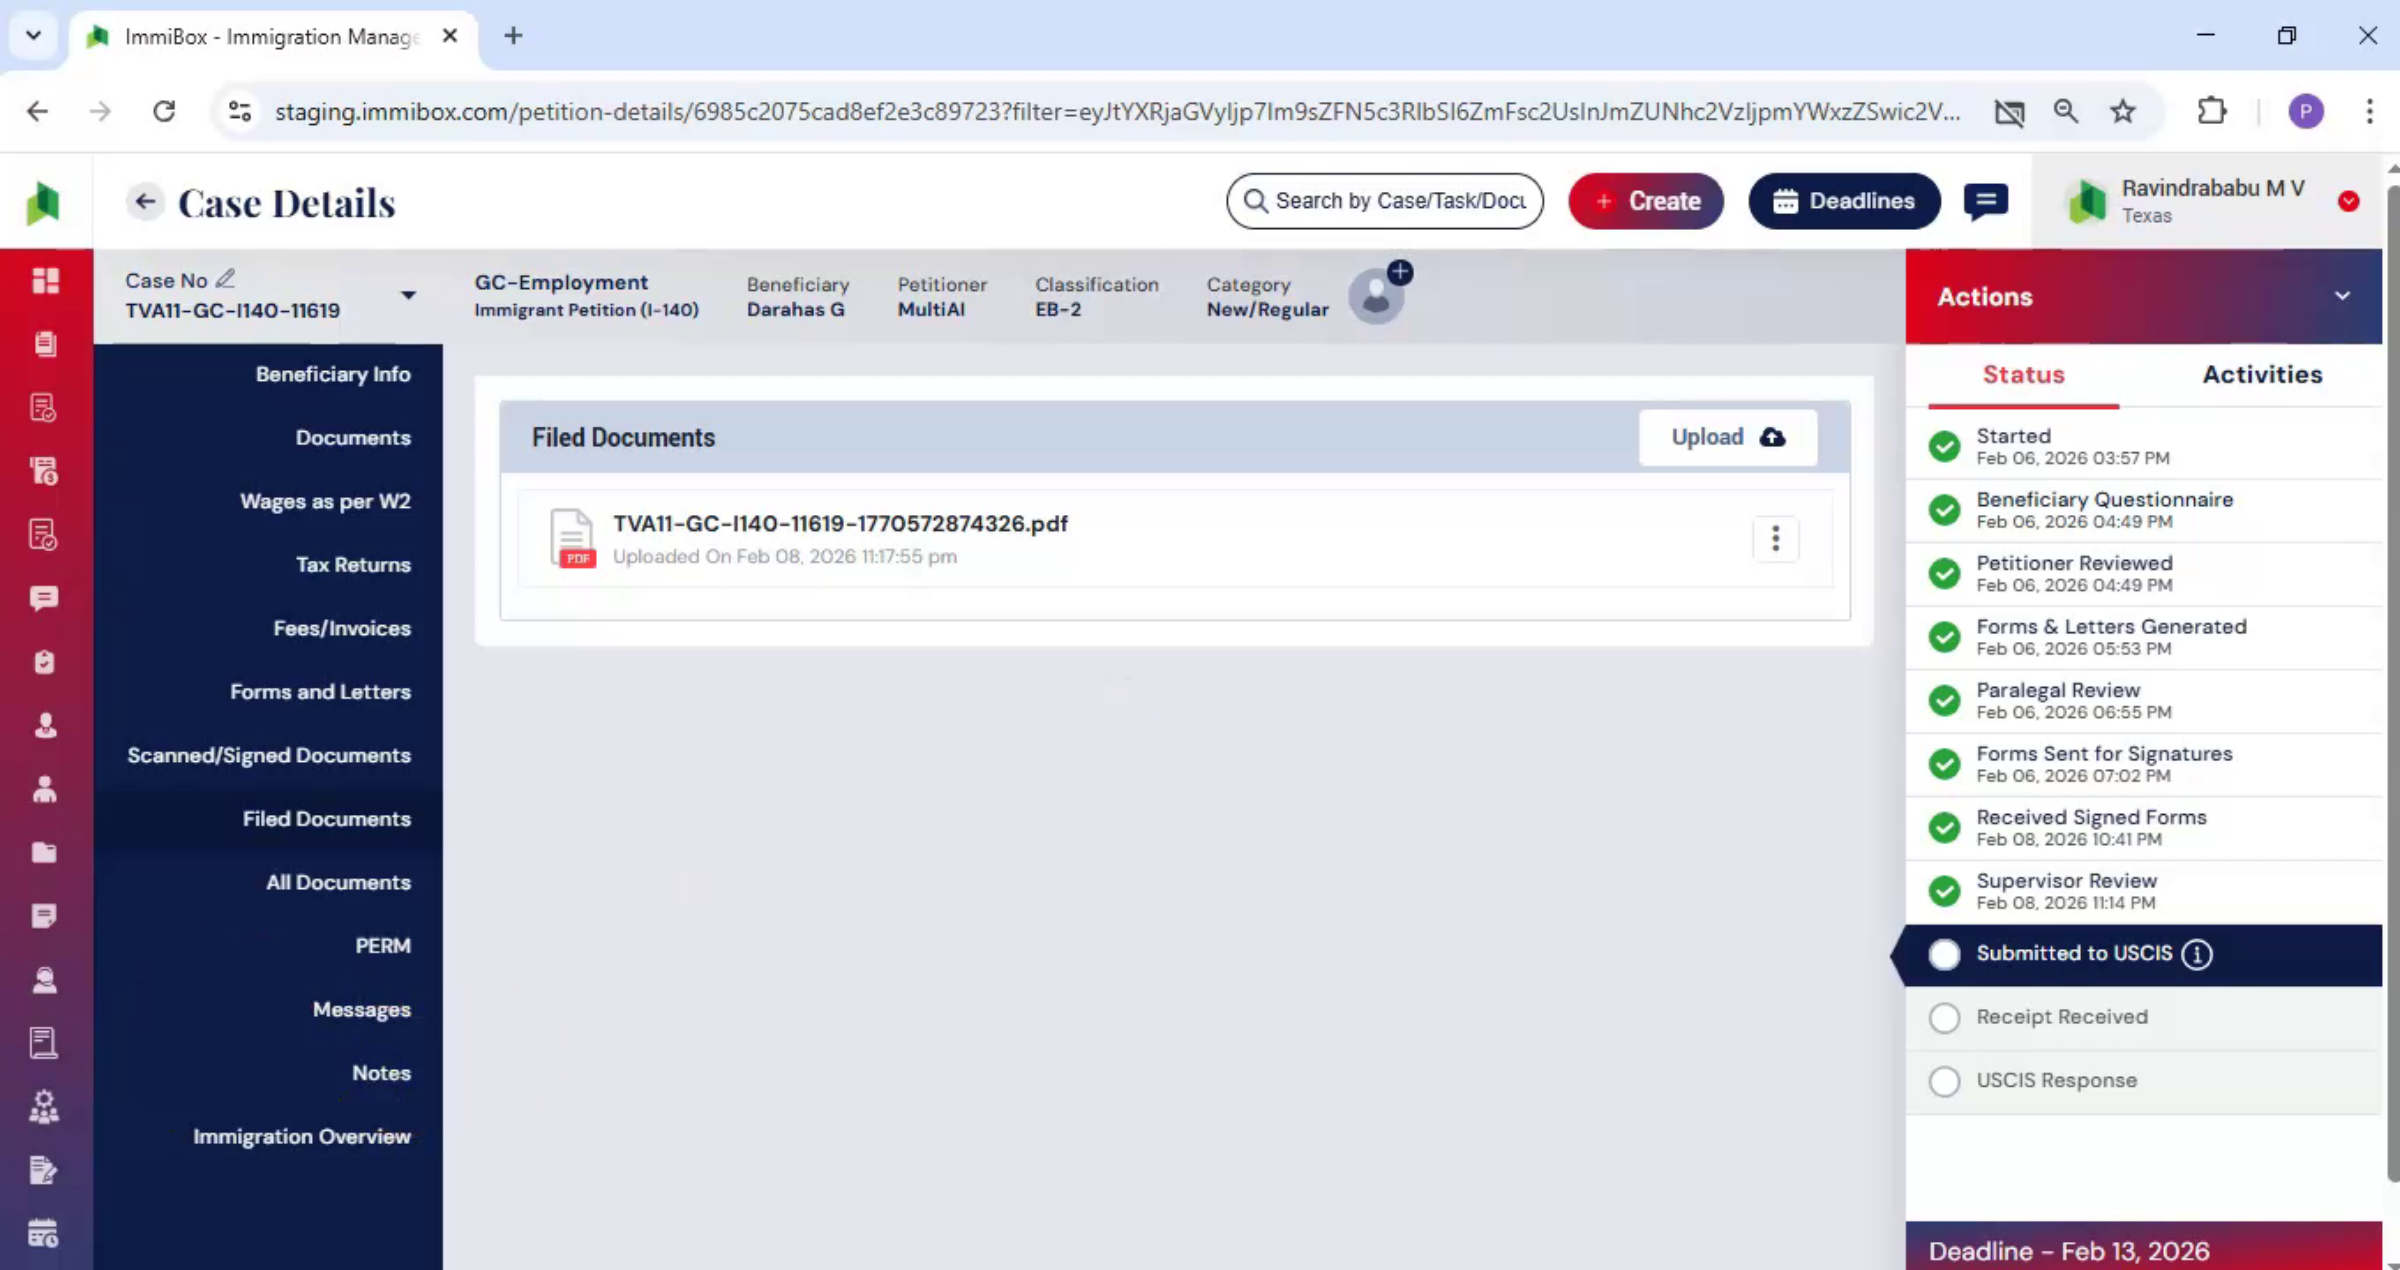
 * click the image to view enlarged
Then, navigate to Filed Documents. In the Filed Documents section, you can upload filed documents directly within the case. You can also view the filed documents on the screen and use the available options to download a copy of any filed document.
43. USCIS Submission Stage
 * click the image to view enlarged
The next stage is USCIS submission.
44. Submit To USCIS
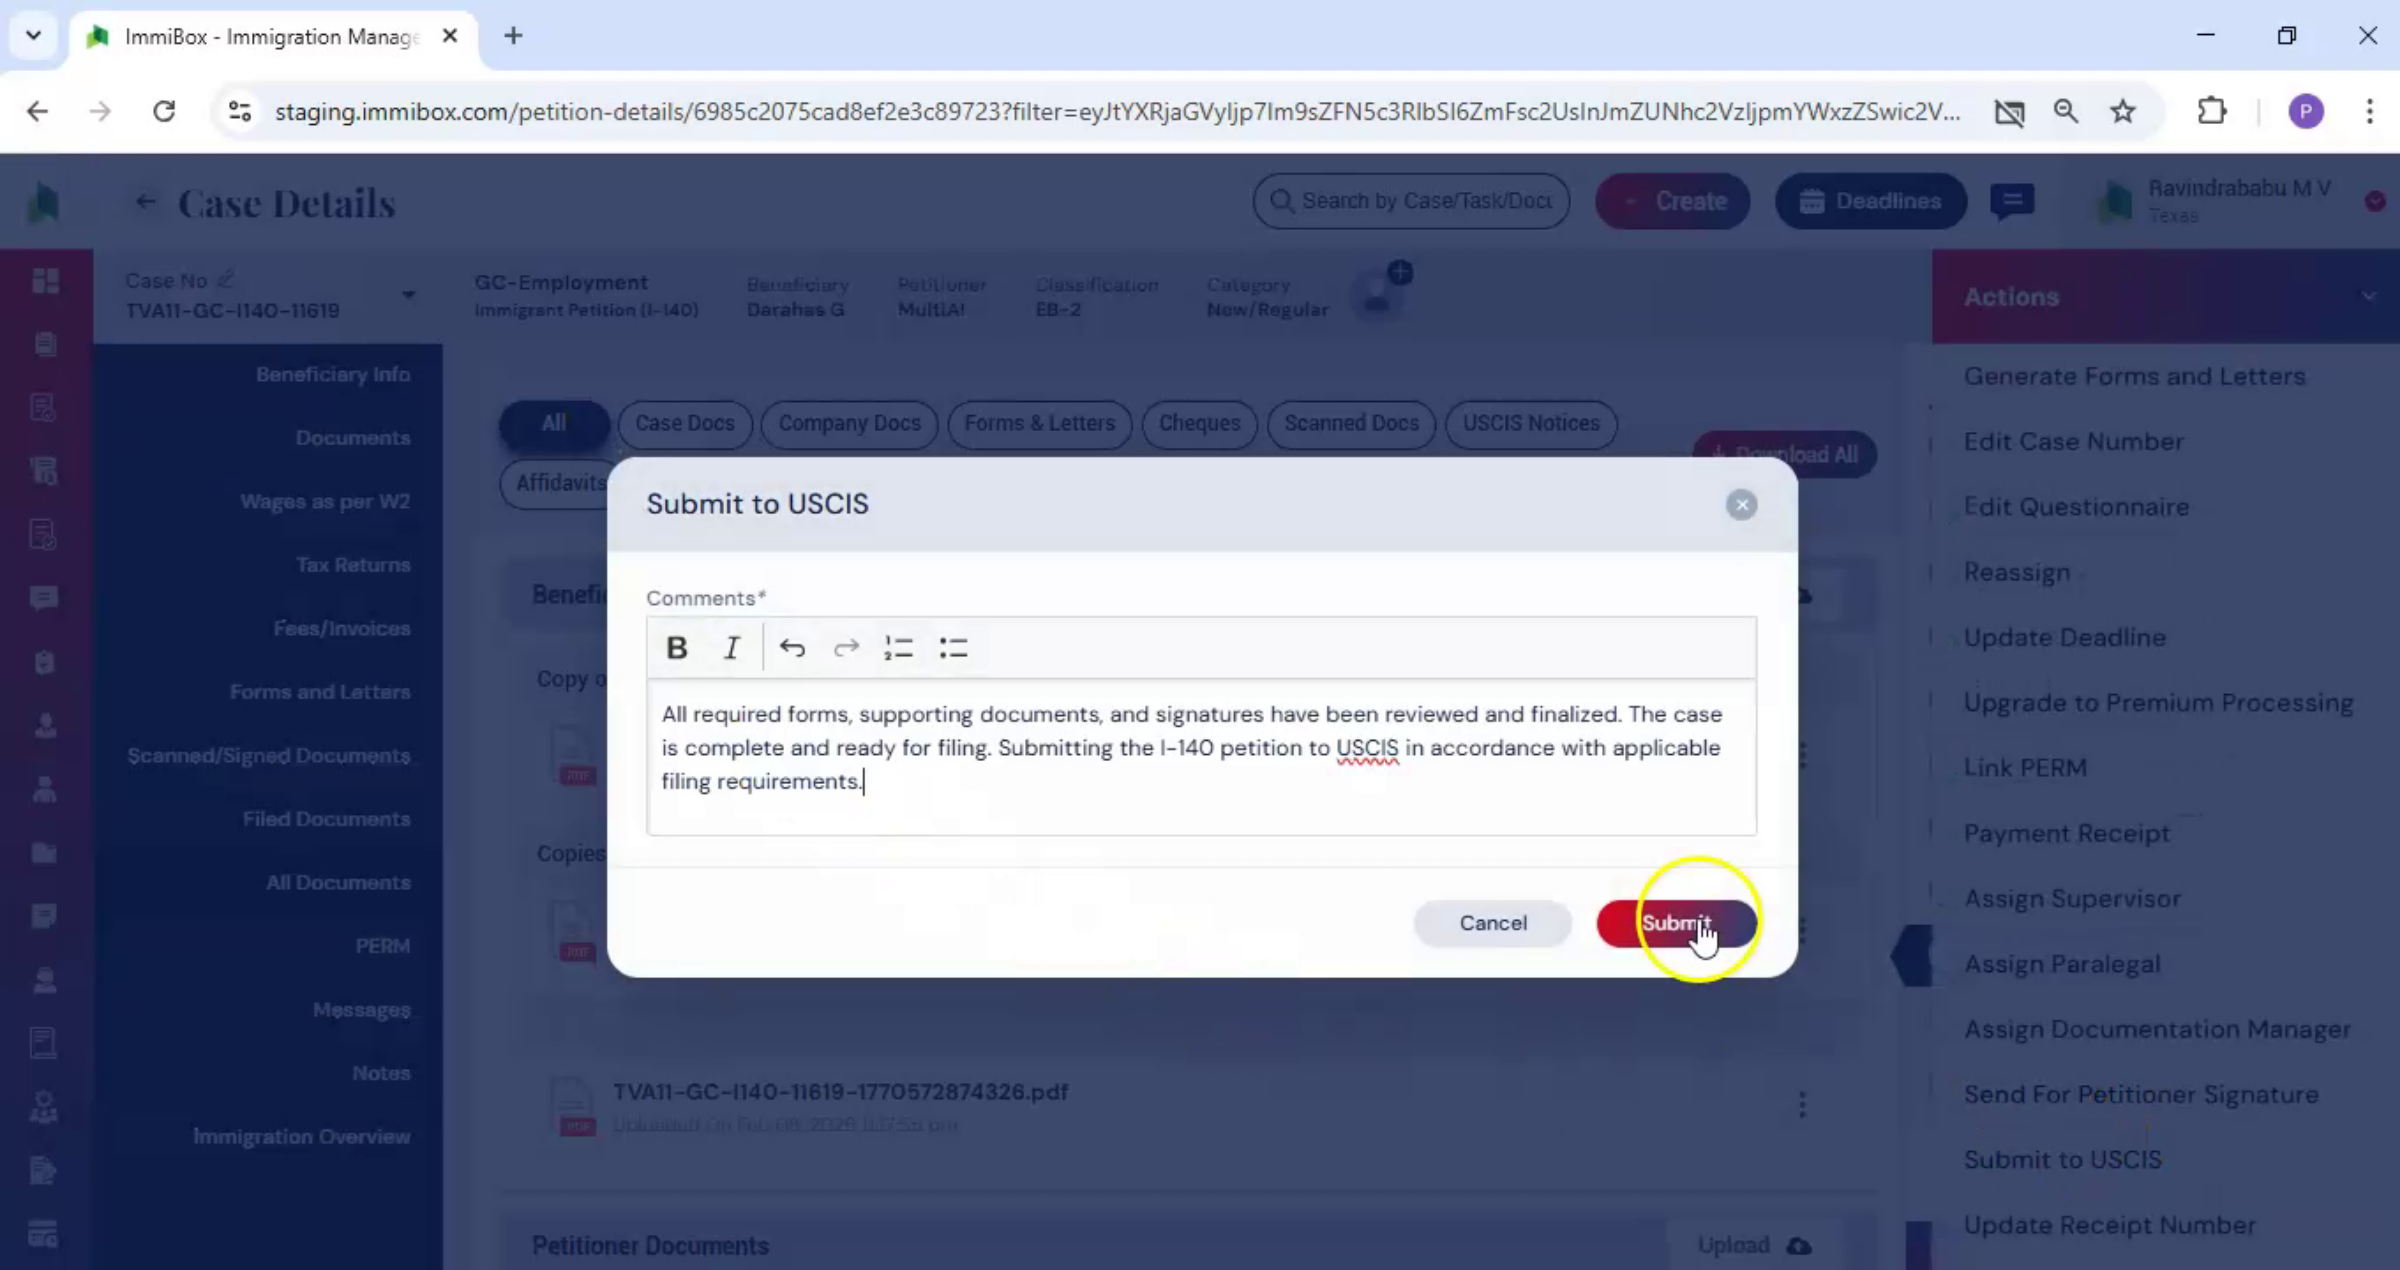
 * click the image to view enlarged
From the Actions menu, select Submit to USCIS. Add any remarks if required, and then click Submit.
45. Update Courier Tracking
 * click the image to view enlarged
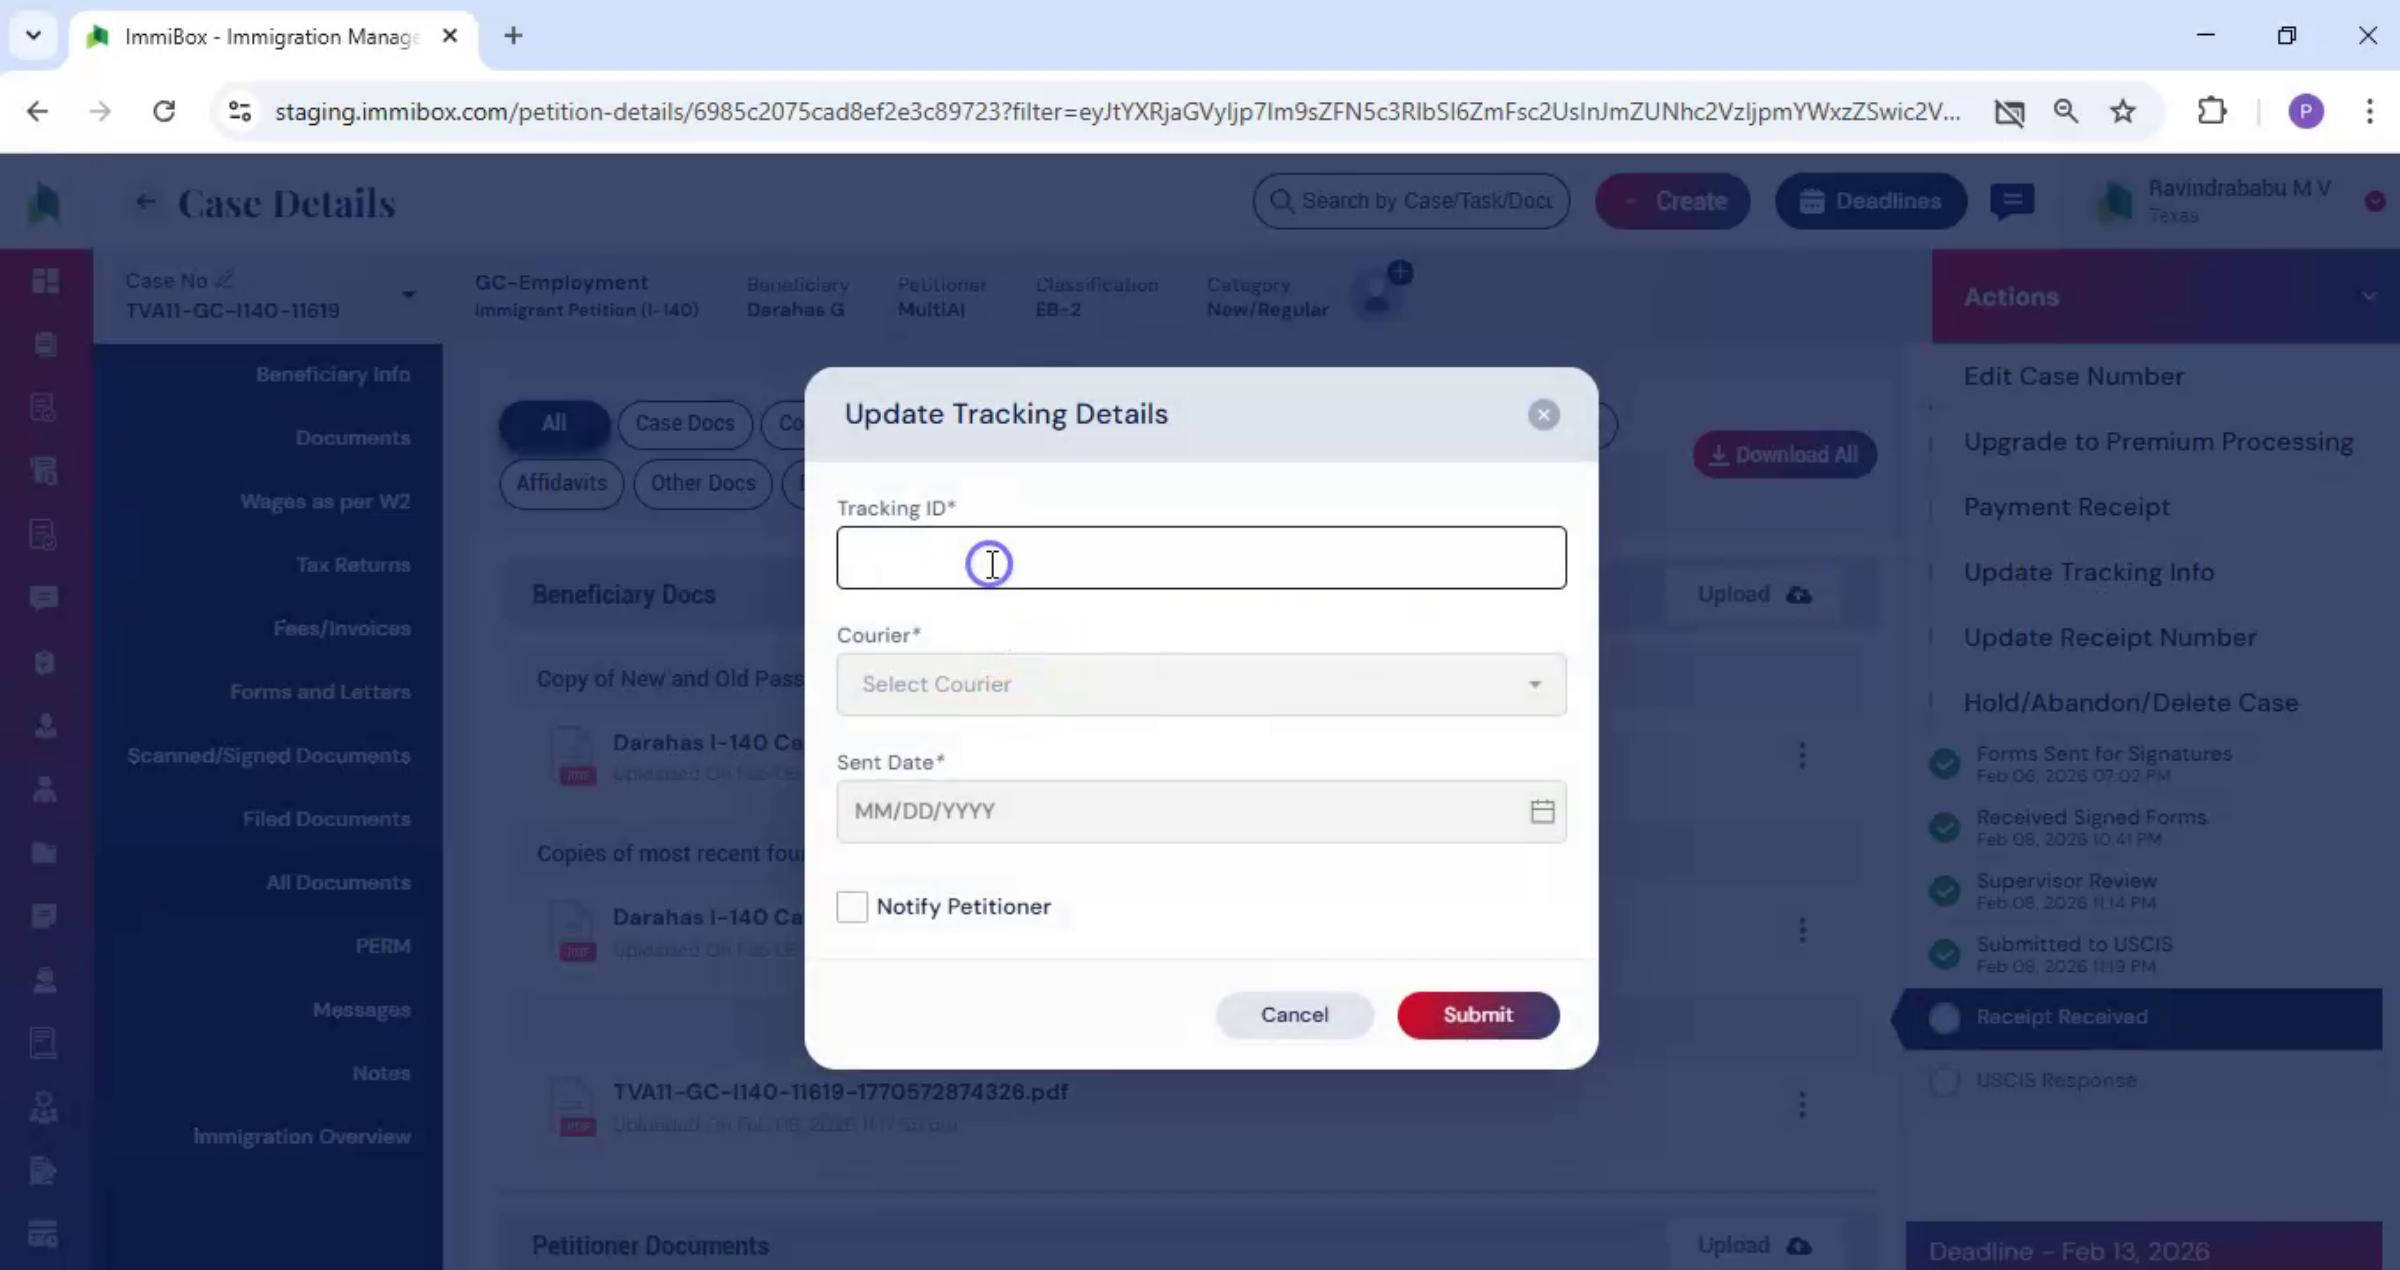
After sending the documents via Courier, the tracking details must be updated in ImmiBox. From the Actions menu, select Update Tracking Details. Enter the tracking information.
46. Notify Petitioner Tracking
 * click the image to view enlarged
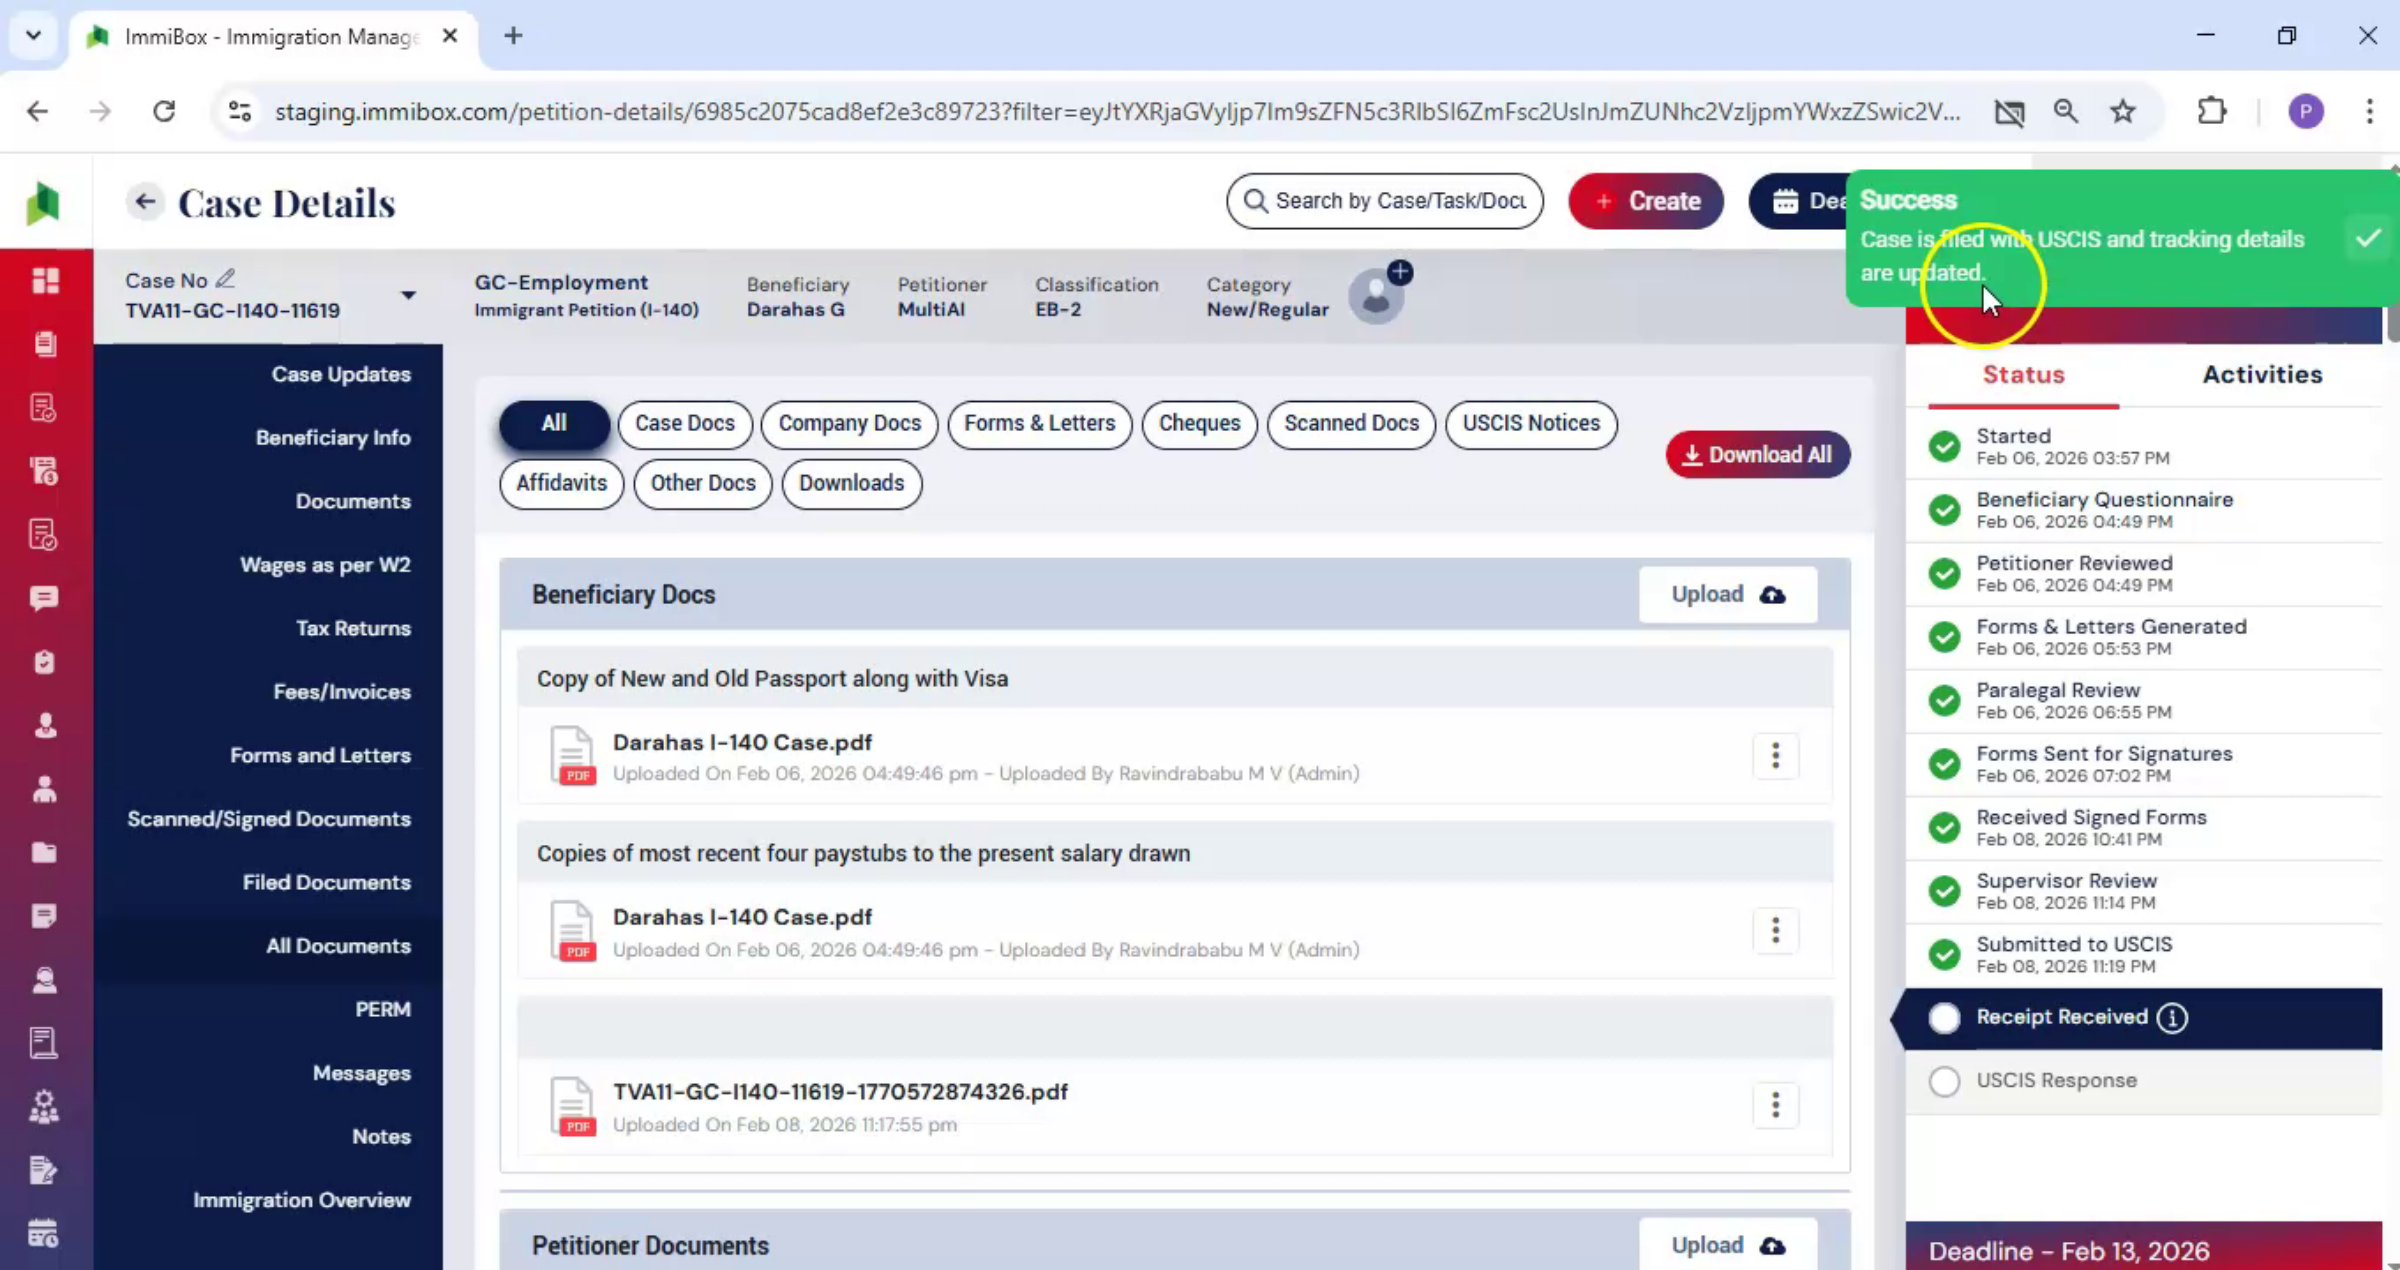
If you want to notify the petitioner, enable the Notify option, and then click Submit. The ImmiBox records the tracking information directly within the case.
47. View Updated Tracking Details
 * click the image to view enlarged
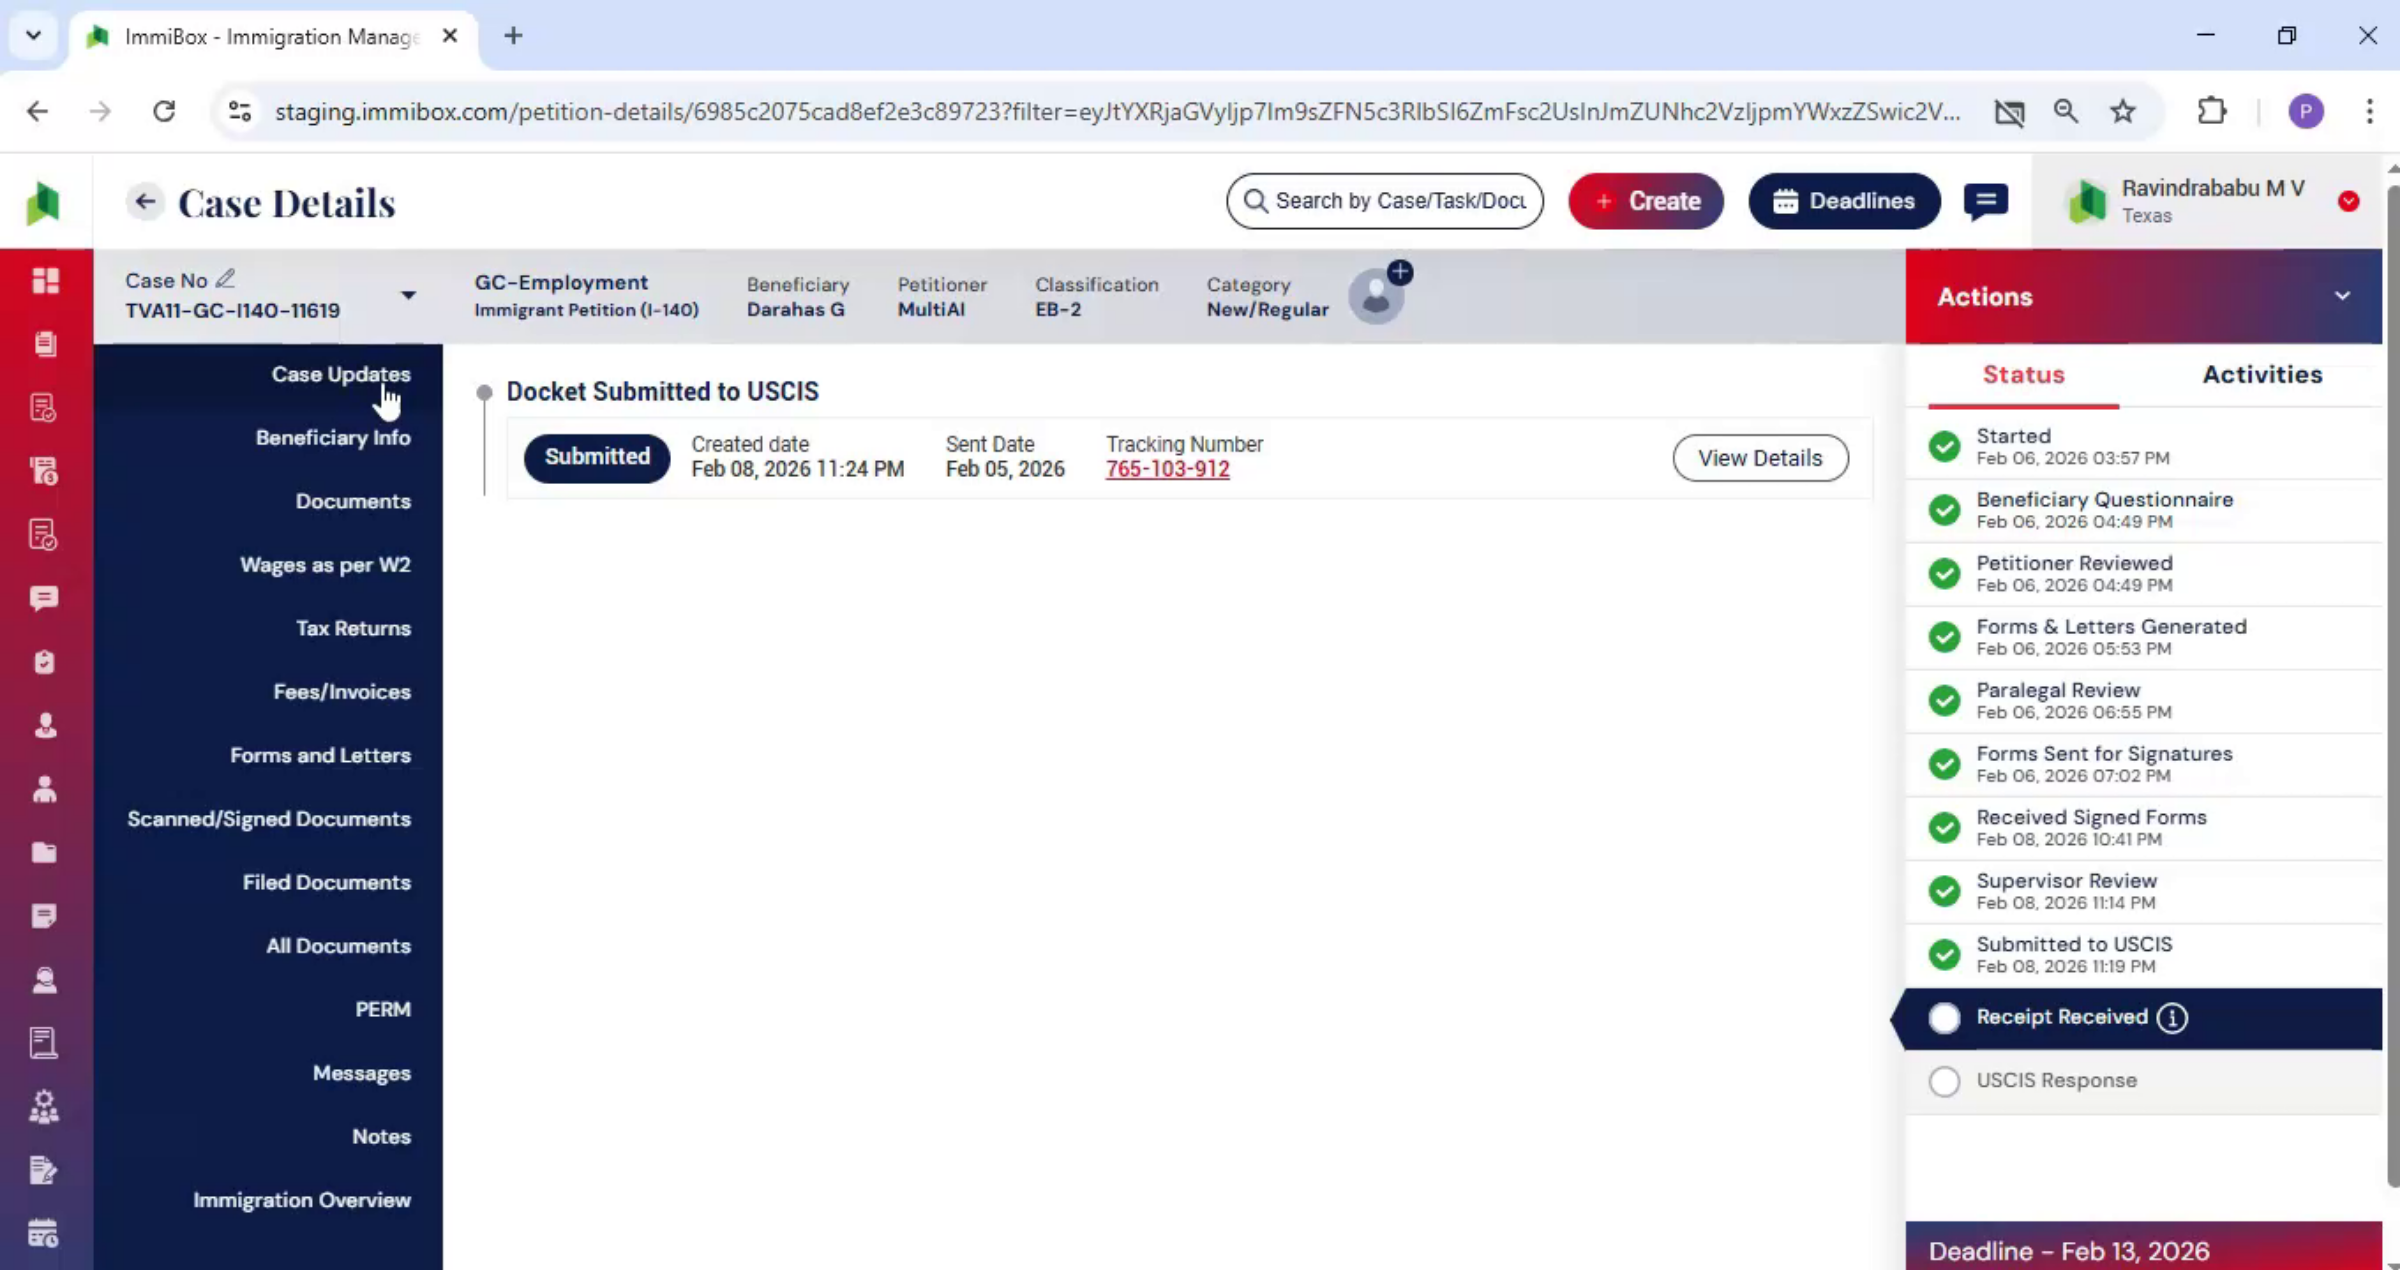
Then, Navigate to Case Update from the left-hand panel. Click Case Update to view the updated tracking details.
48. Track Case Progress
 * click the image to view enlarged
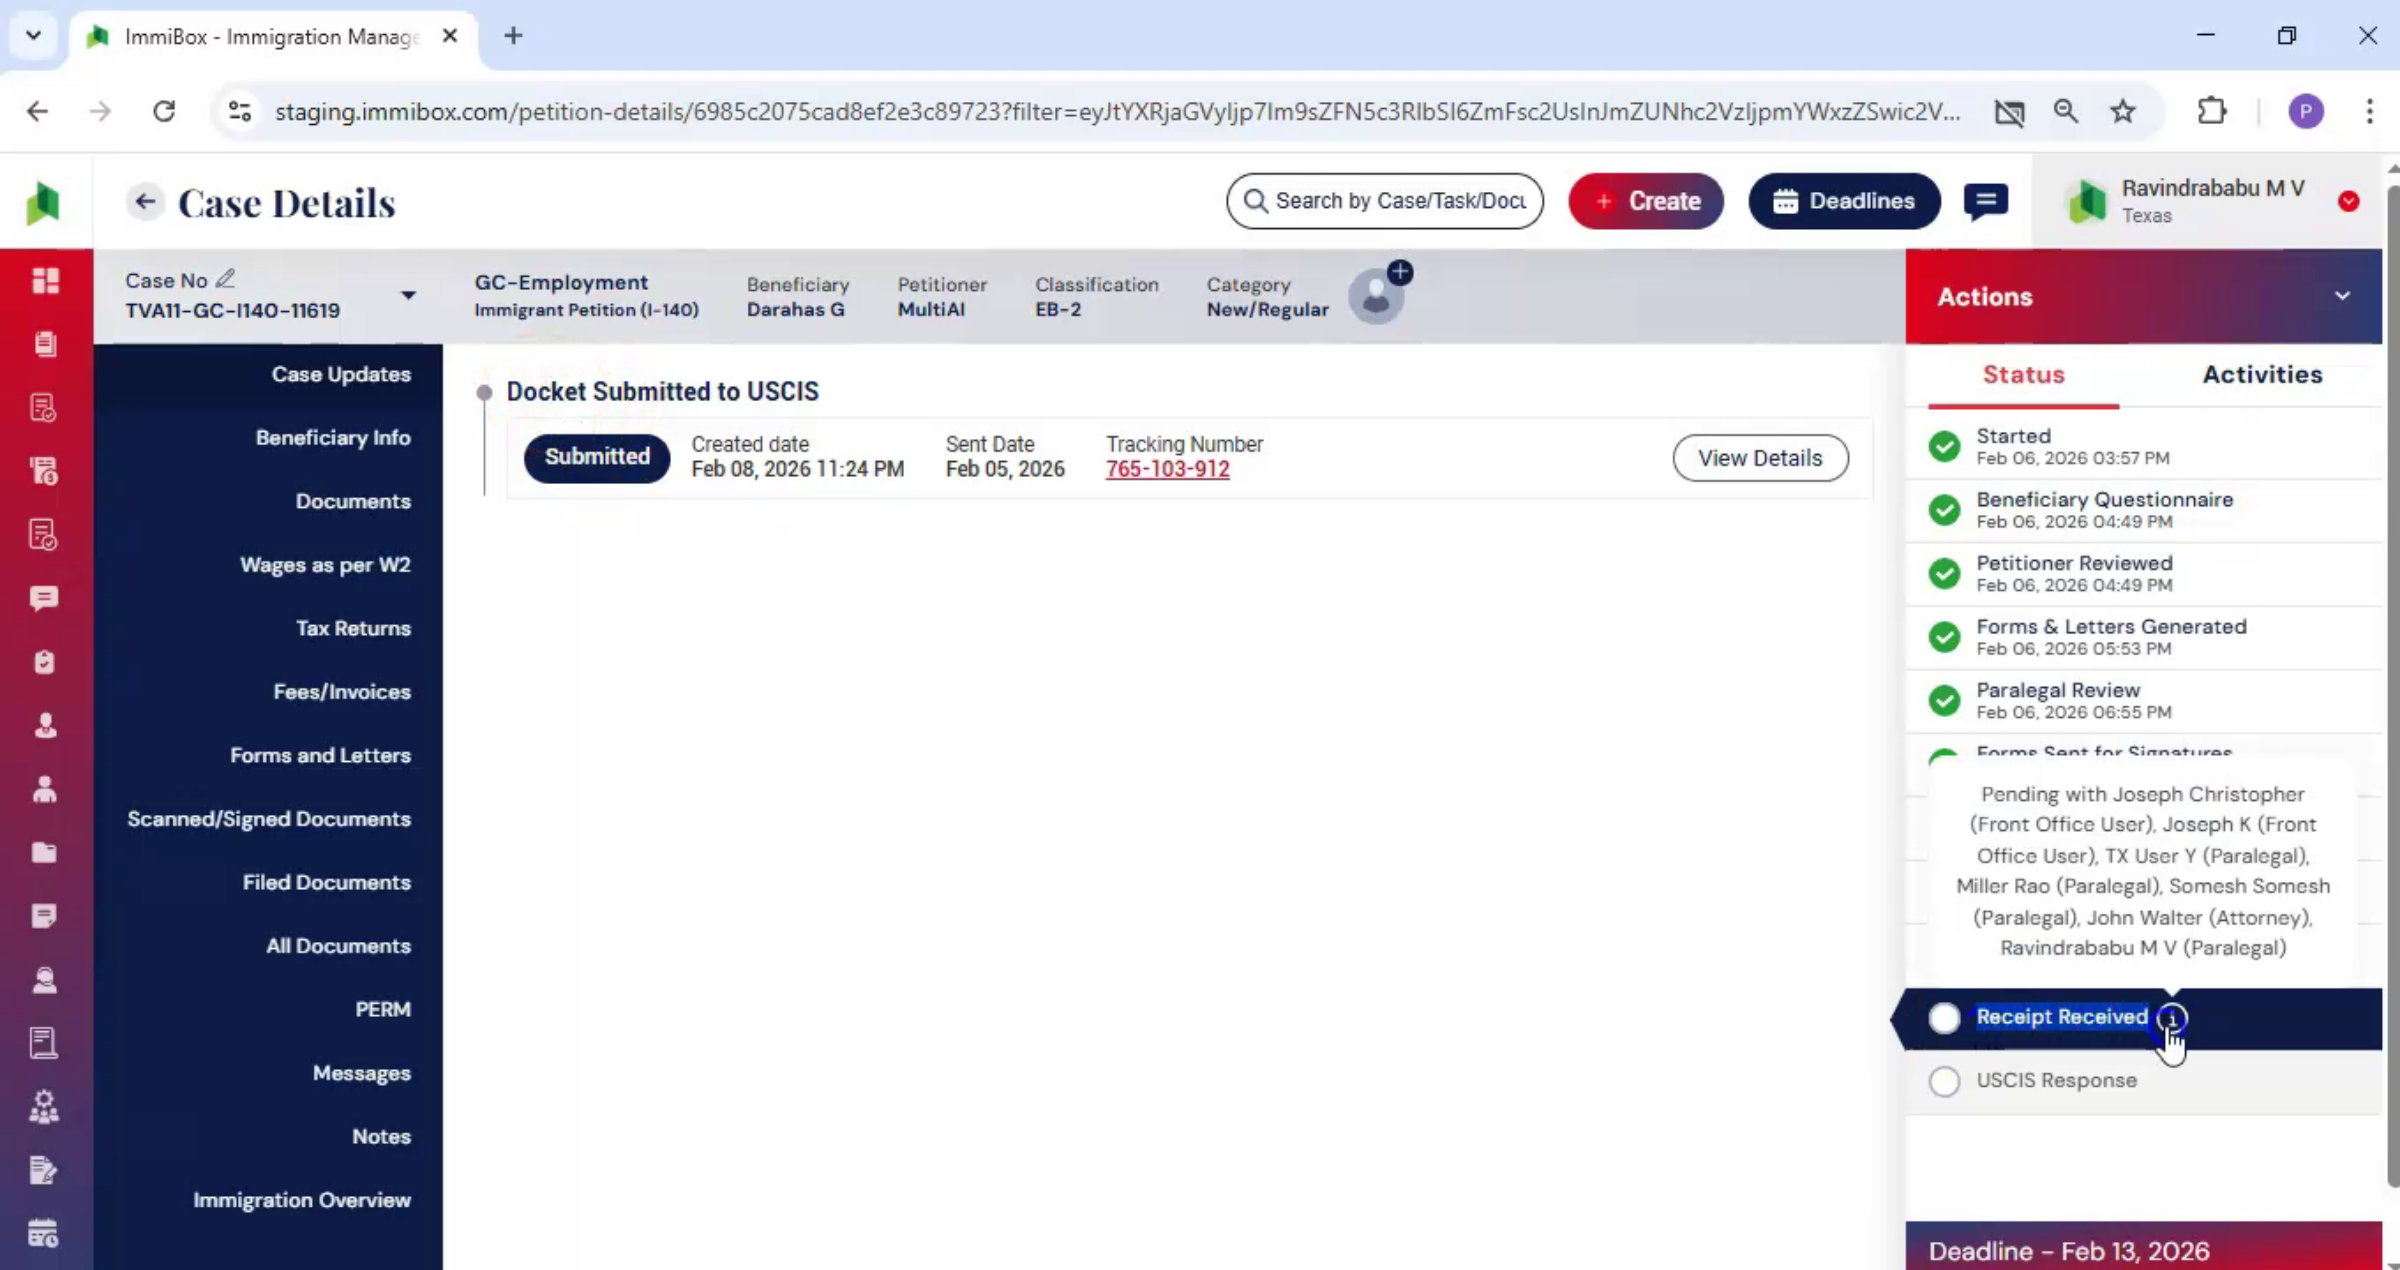
From here, Emmy box allows you to track the case as it moves forward.
49. Update Receipt Information
 * click the image to view enlarged
Once USCIS receives the case, the receipt information must be updated.
50. Enter Receipt Number
 * click the image to view enlarged
From the Actions menu, select Update Receipt Number. Enter the required details, upload the receipt, and click Submit.
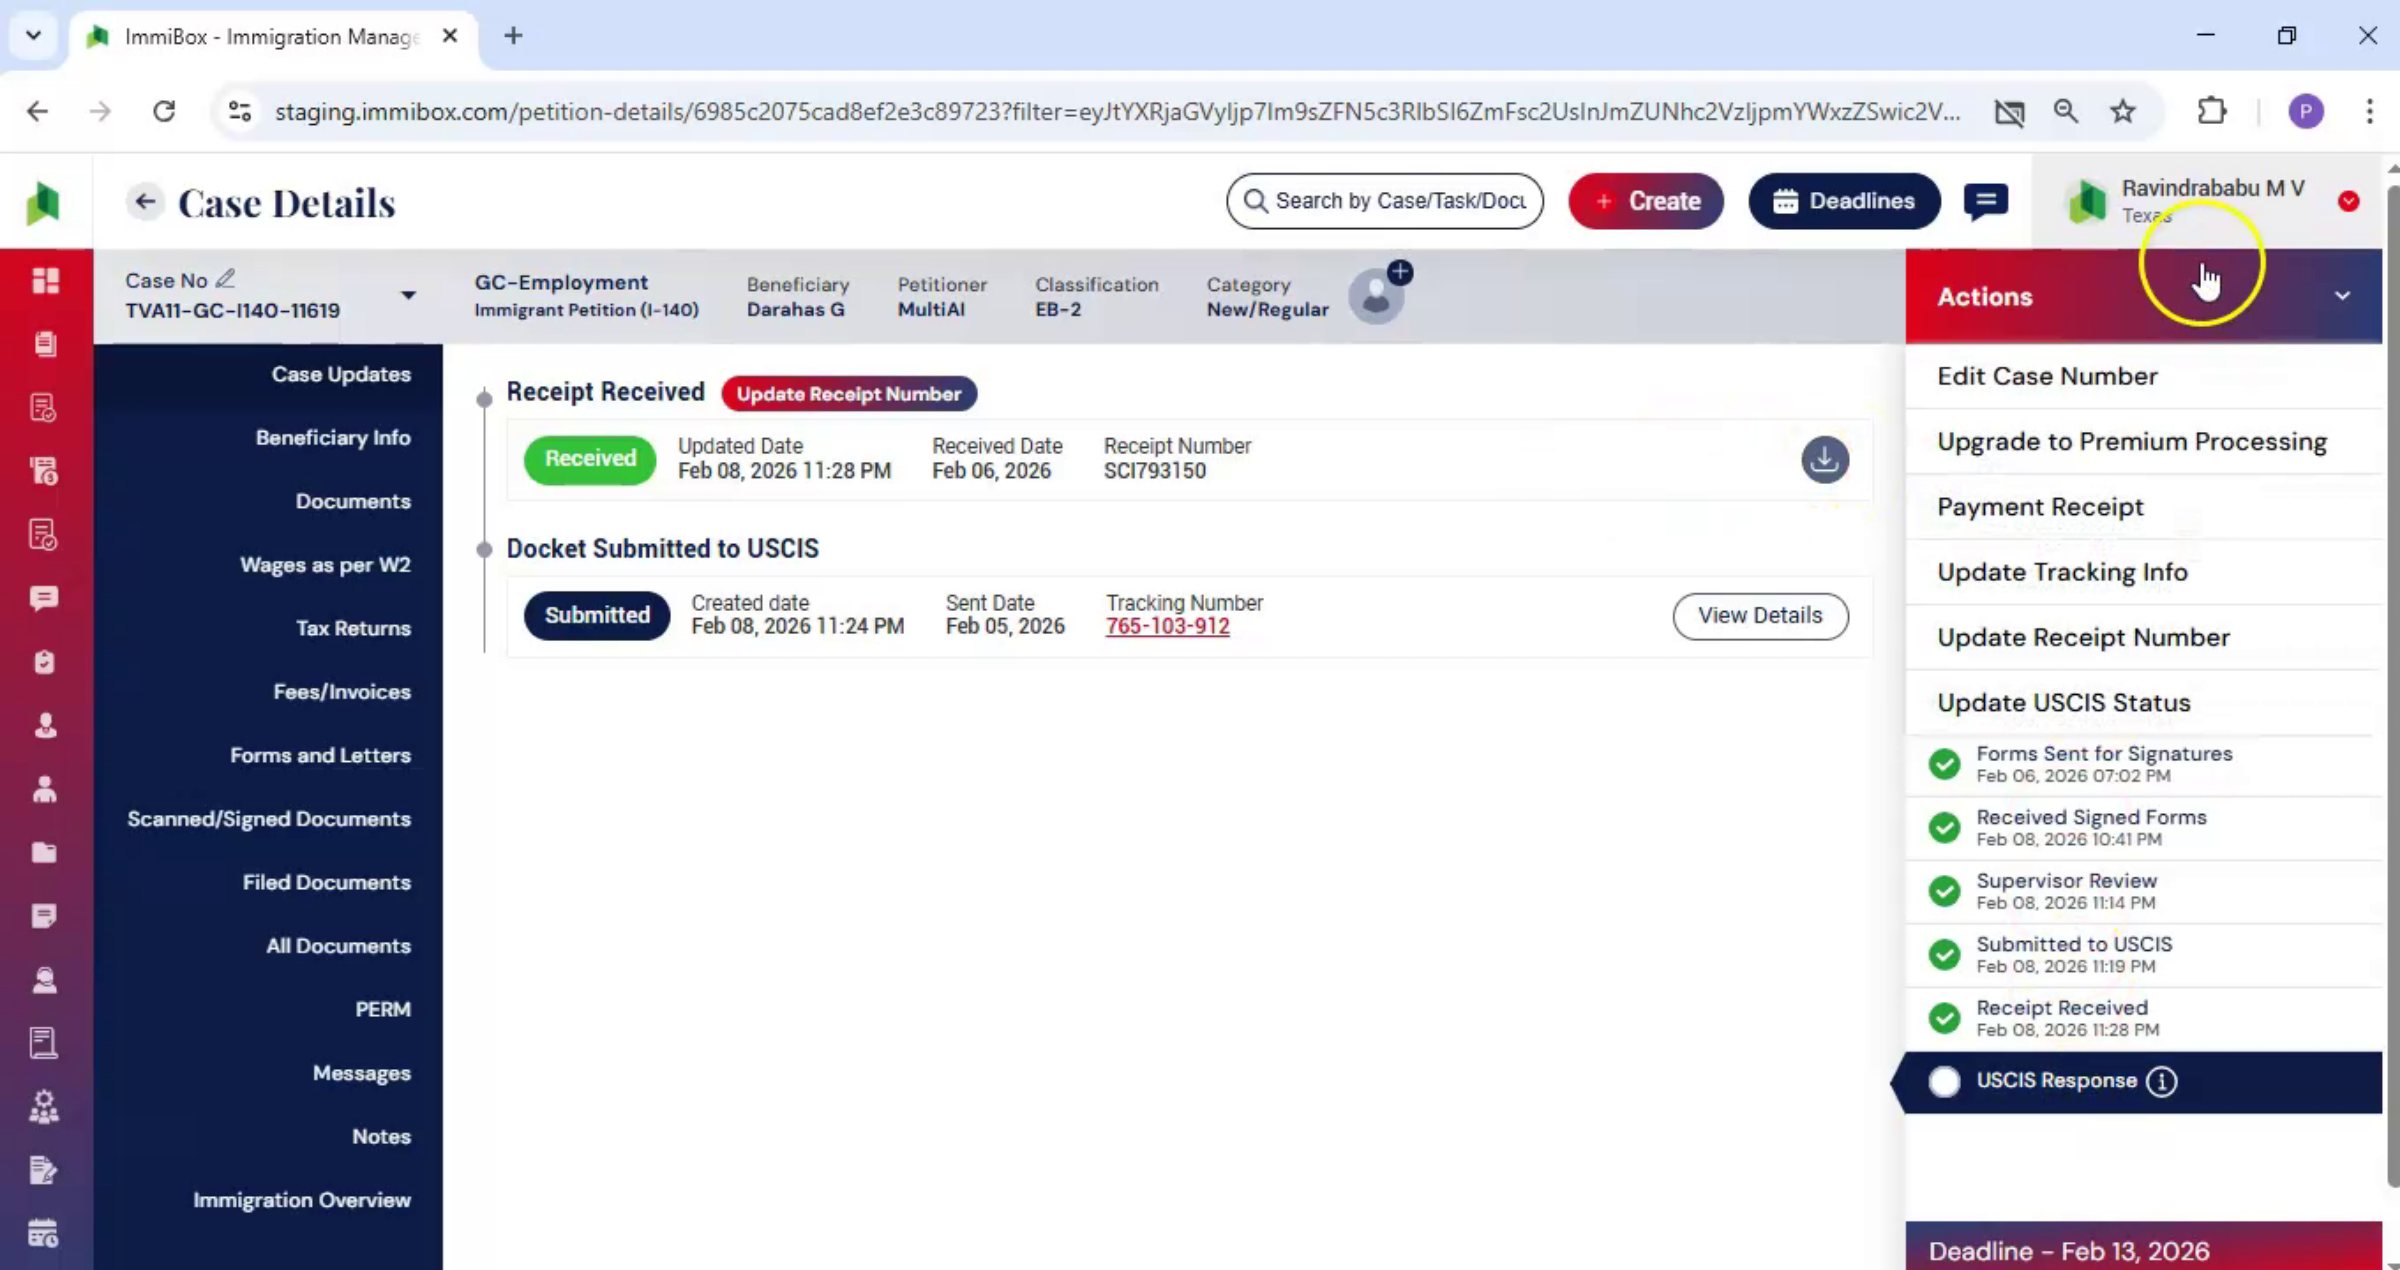
51. Receipt Details Display
 * click the image to view enlarged
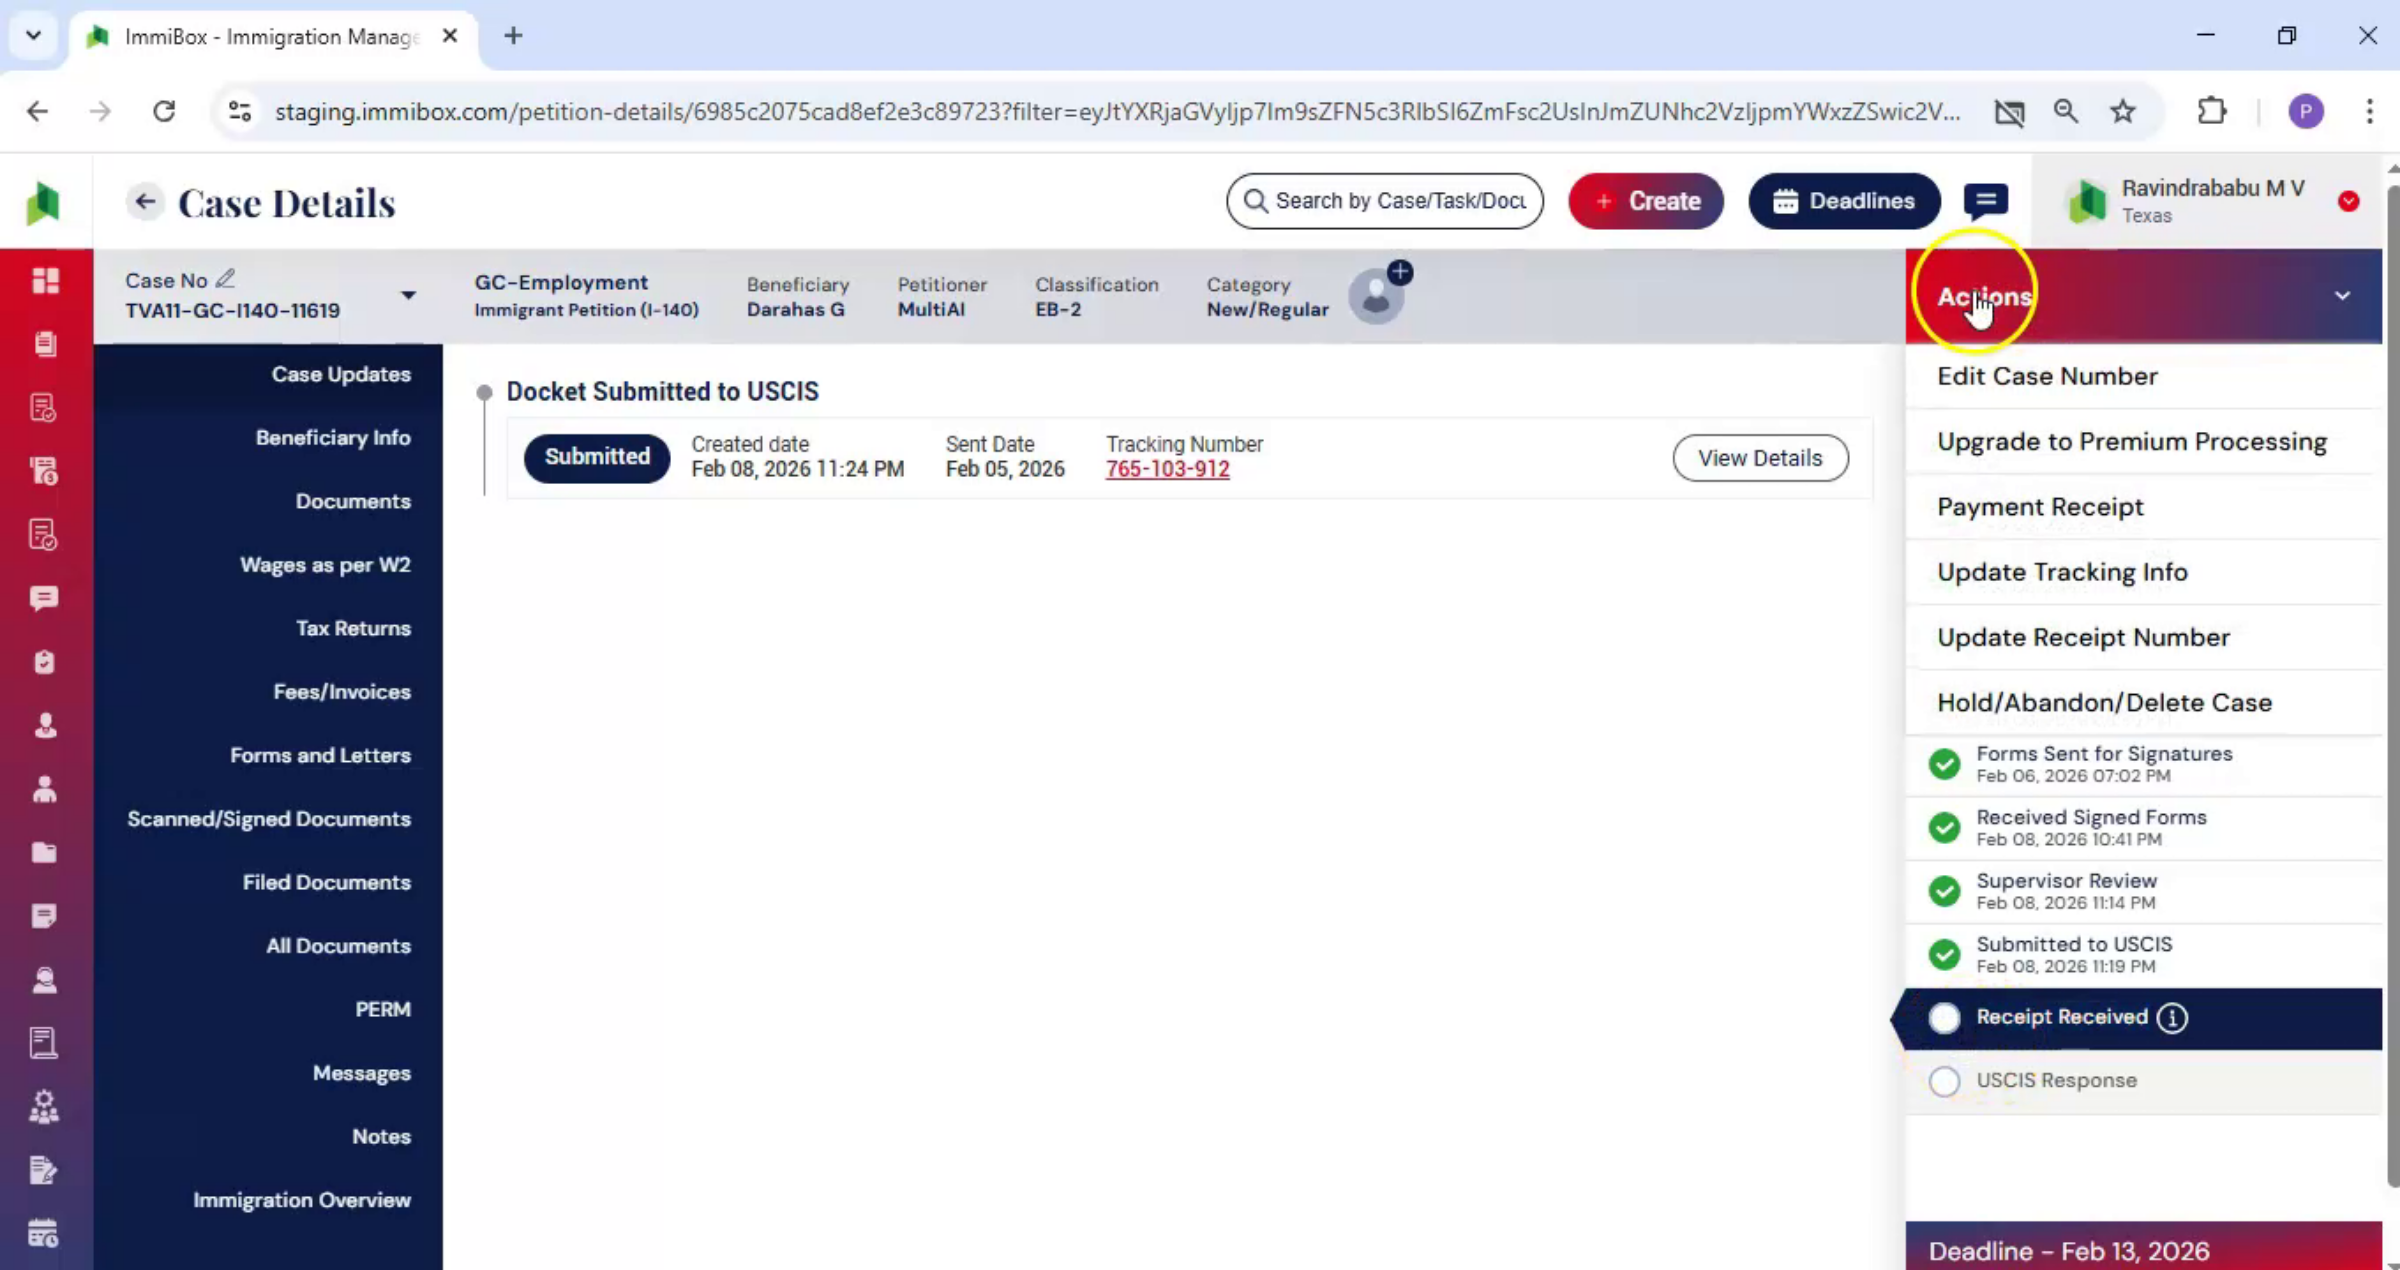
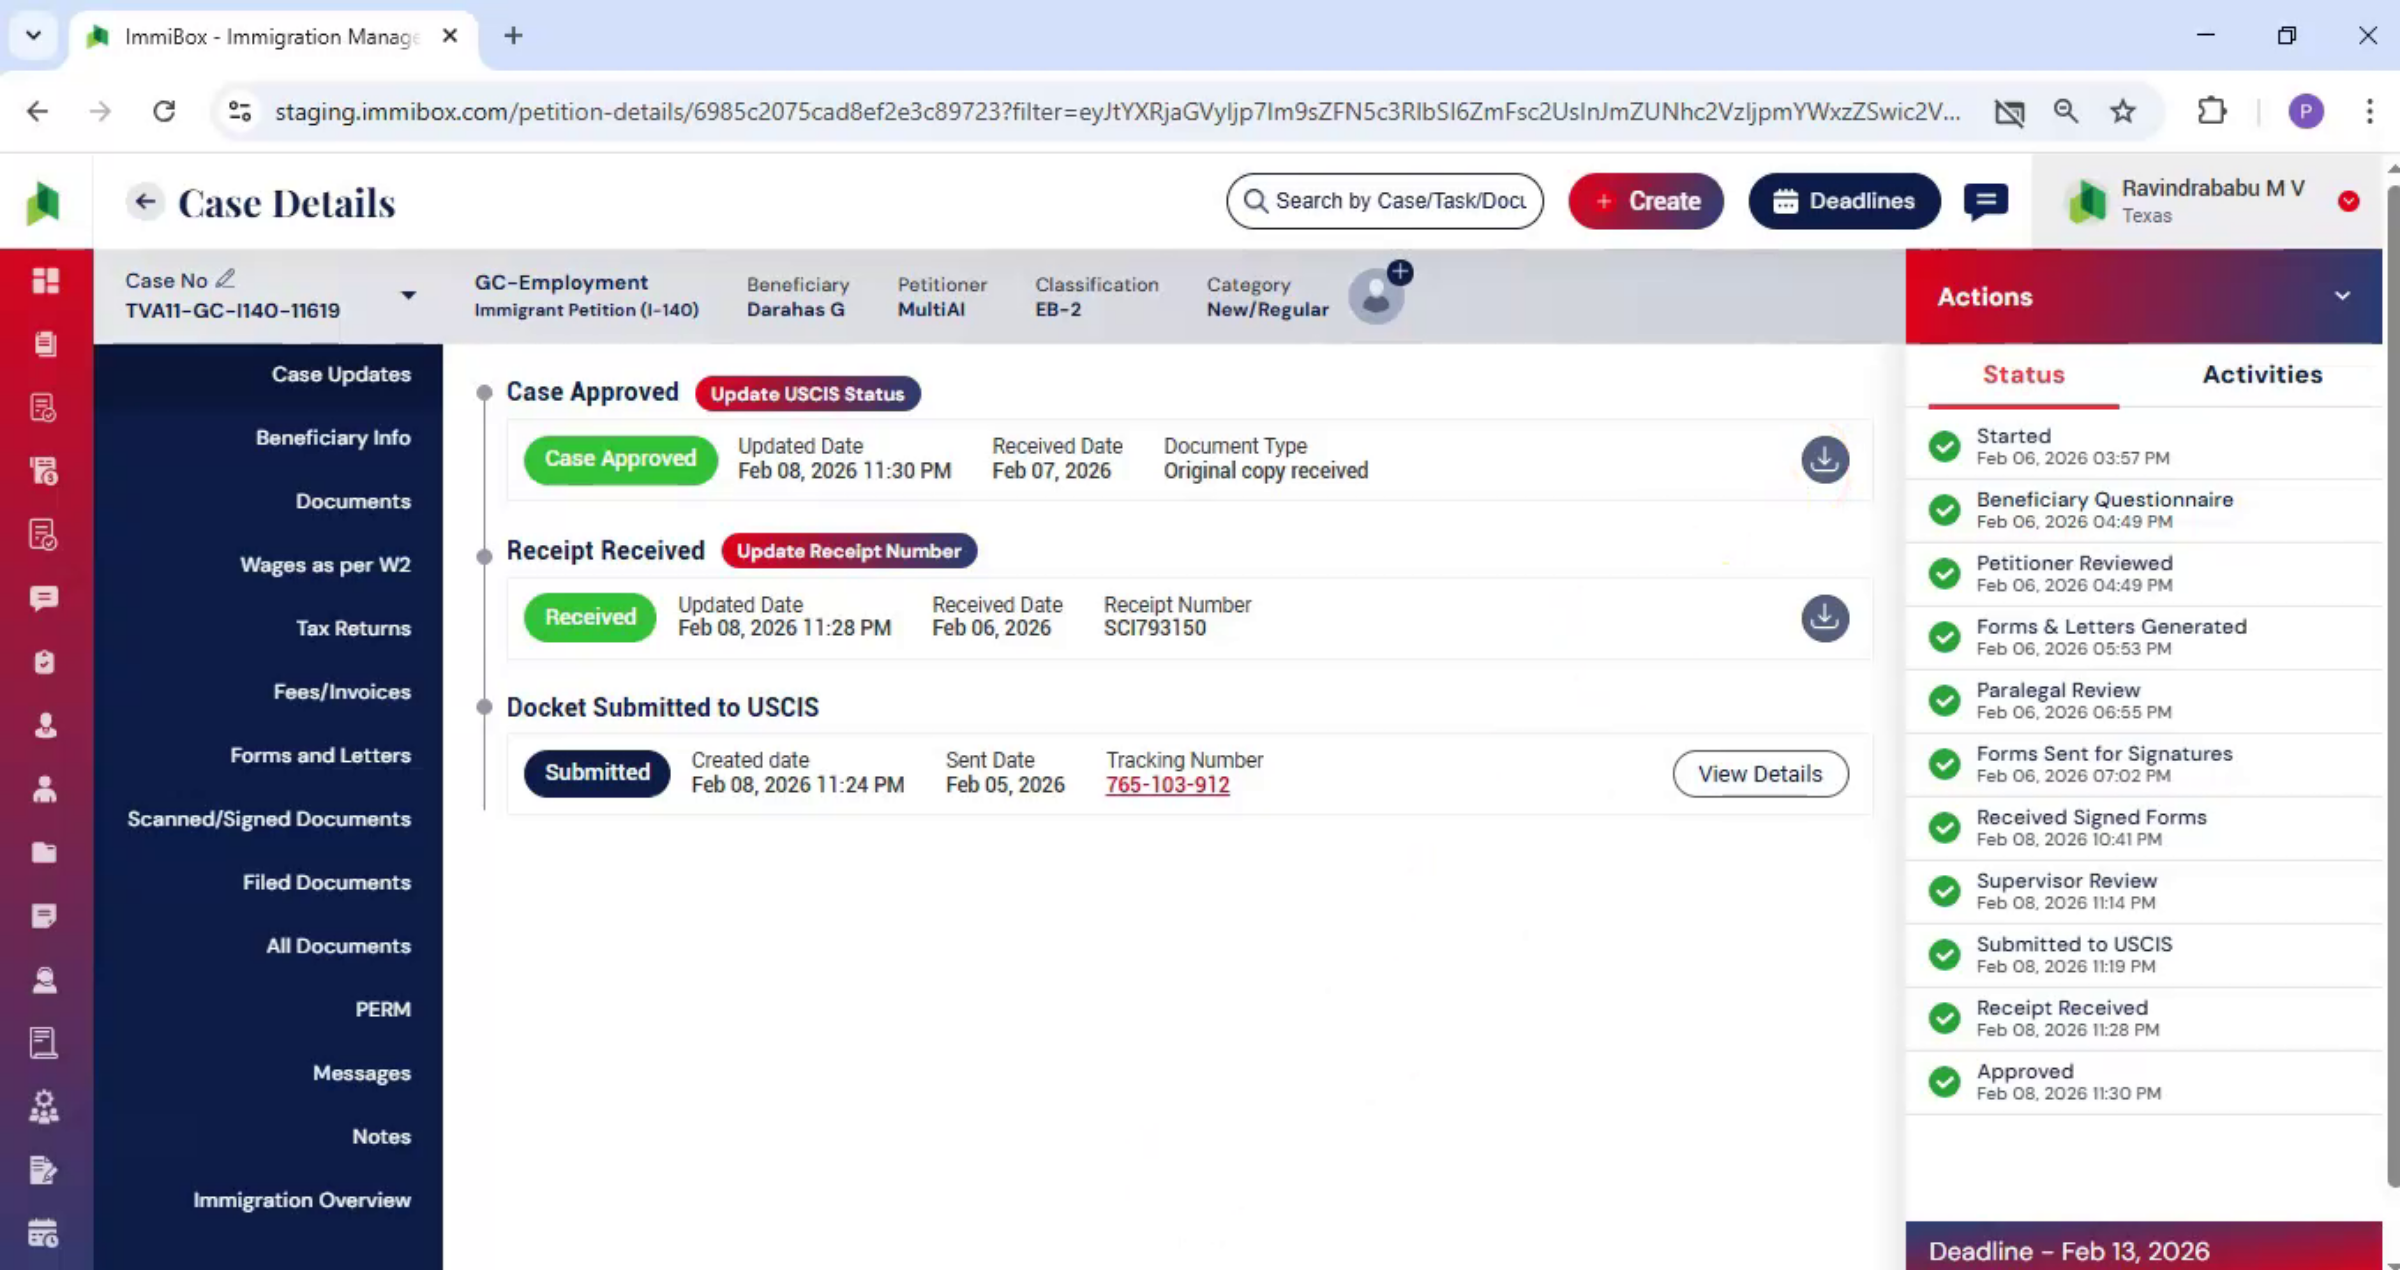
This information is updated in the Case Update section. ImmiBox displays the receipt details here, along with the uploaded receipt document. To record the final USCIS response,
52. Update USCIS Case Status
 * click the image to view enlarged
Go to the Actions menu and select Update USCIS Status. Choose the appropriate case status, such as Approved, Denied, Withdrawn, or RFE Received. Fill in the required details, upload the relevant document, add comments if needed, and click Submit.
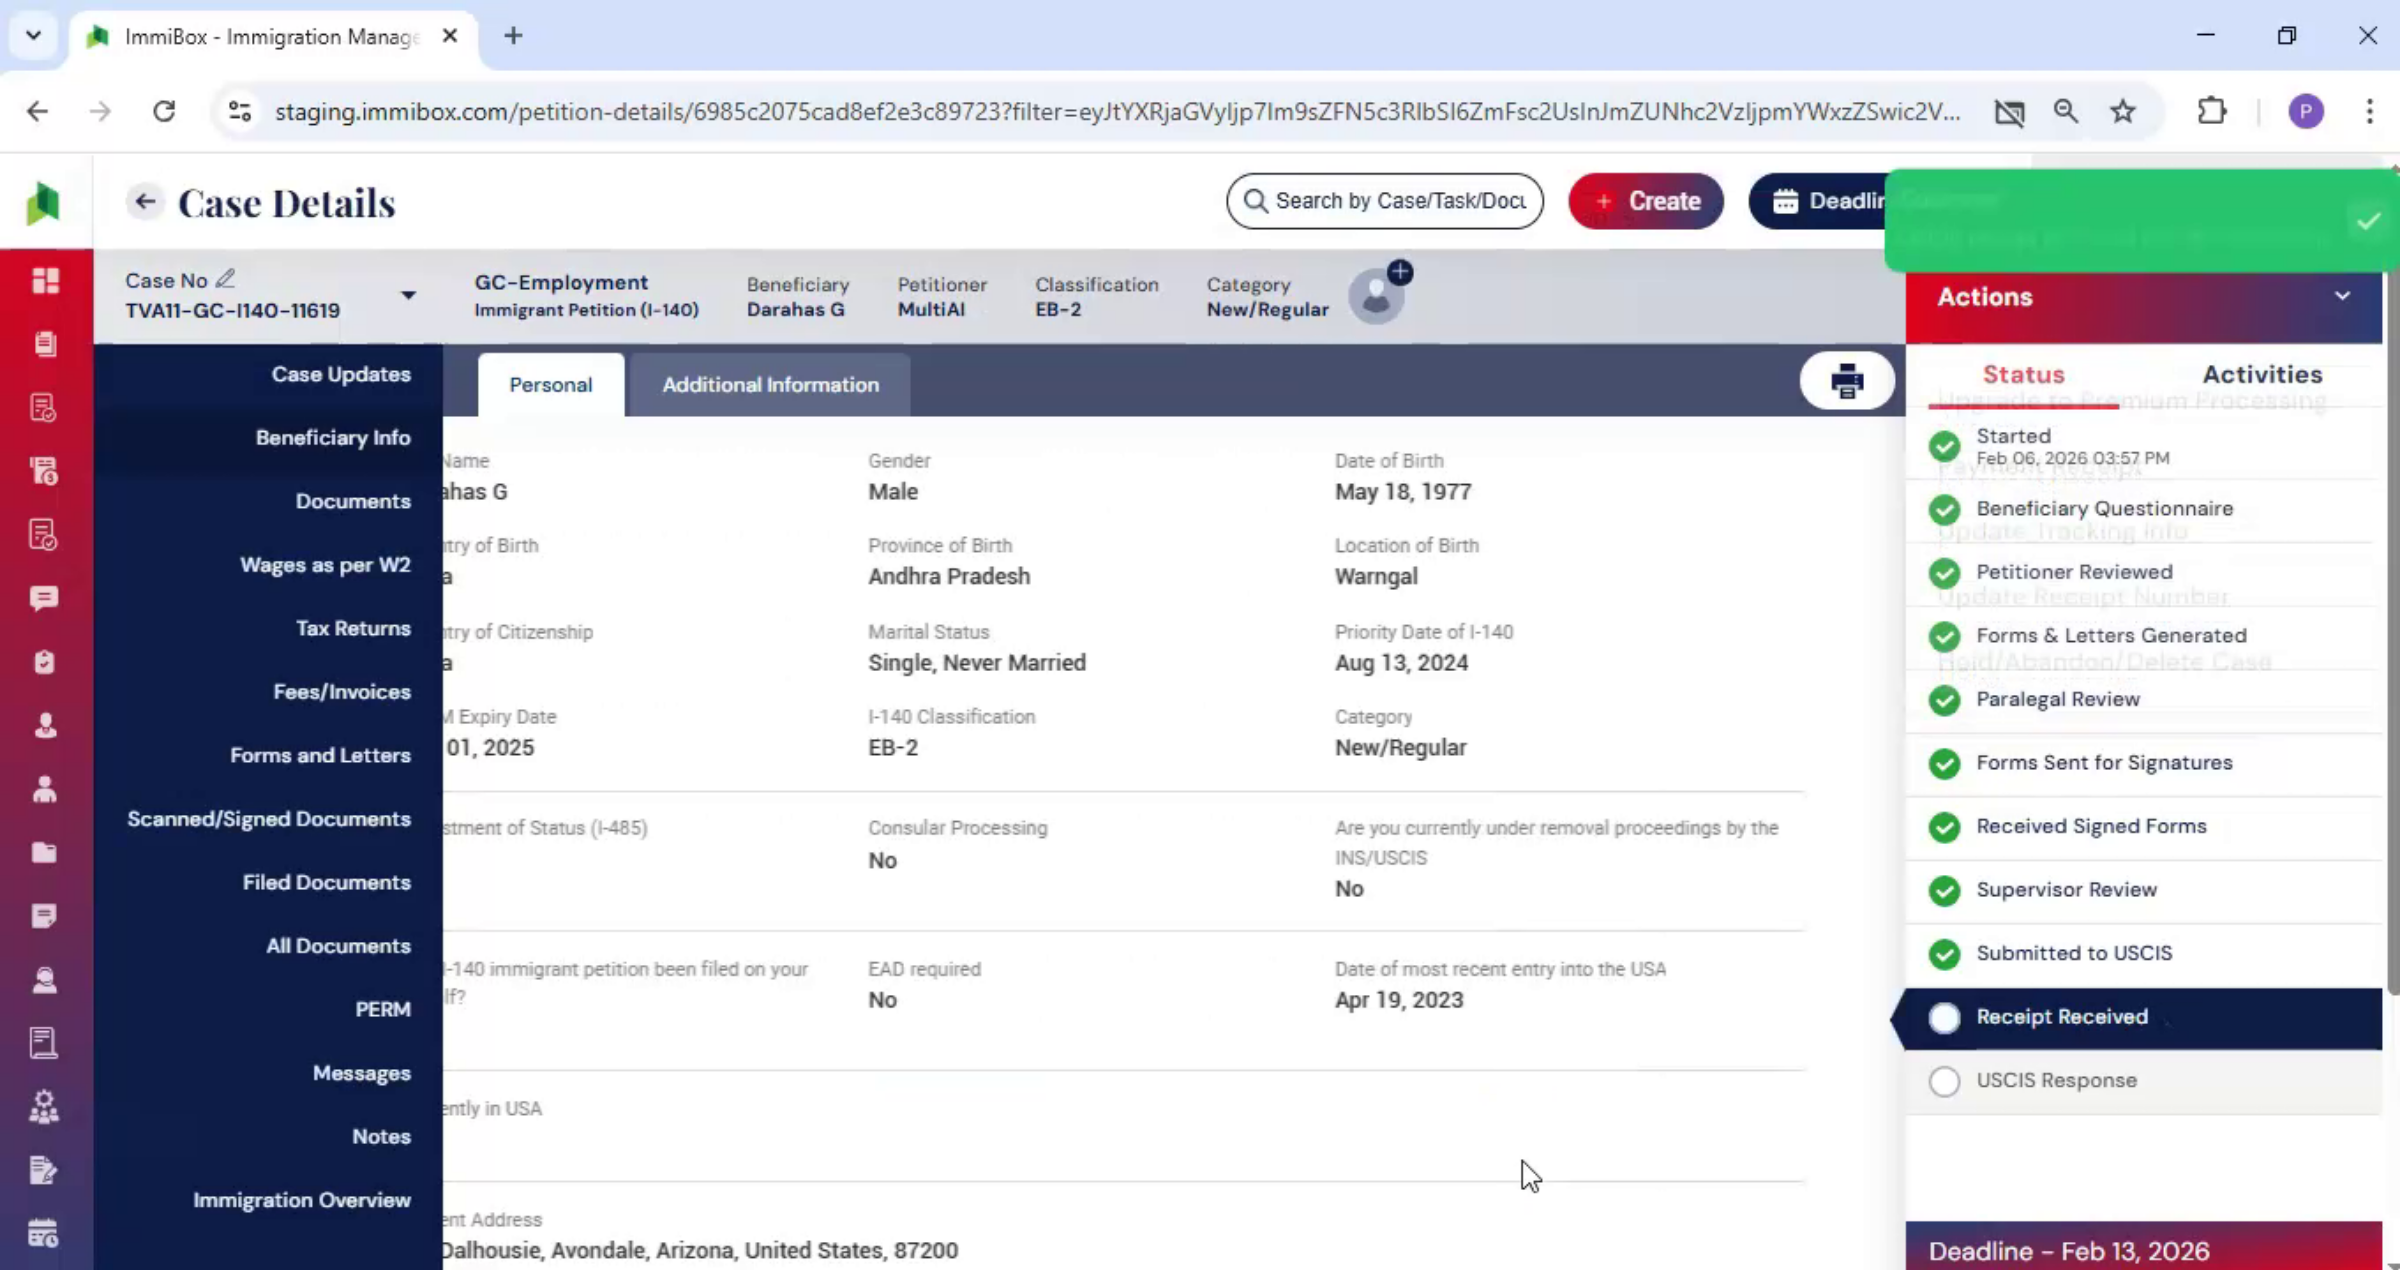
53. Case Status Tracking
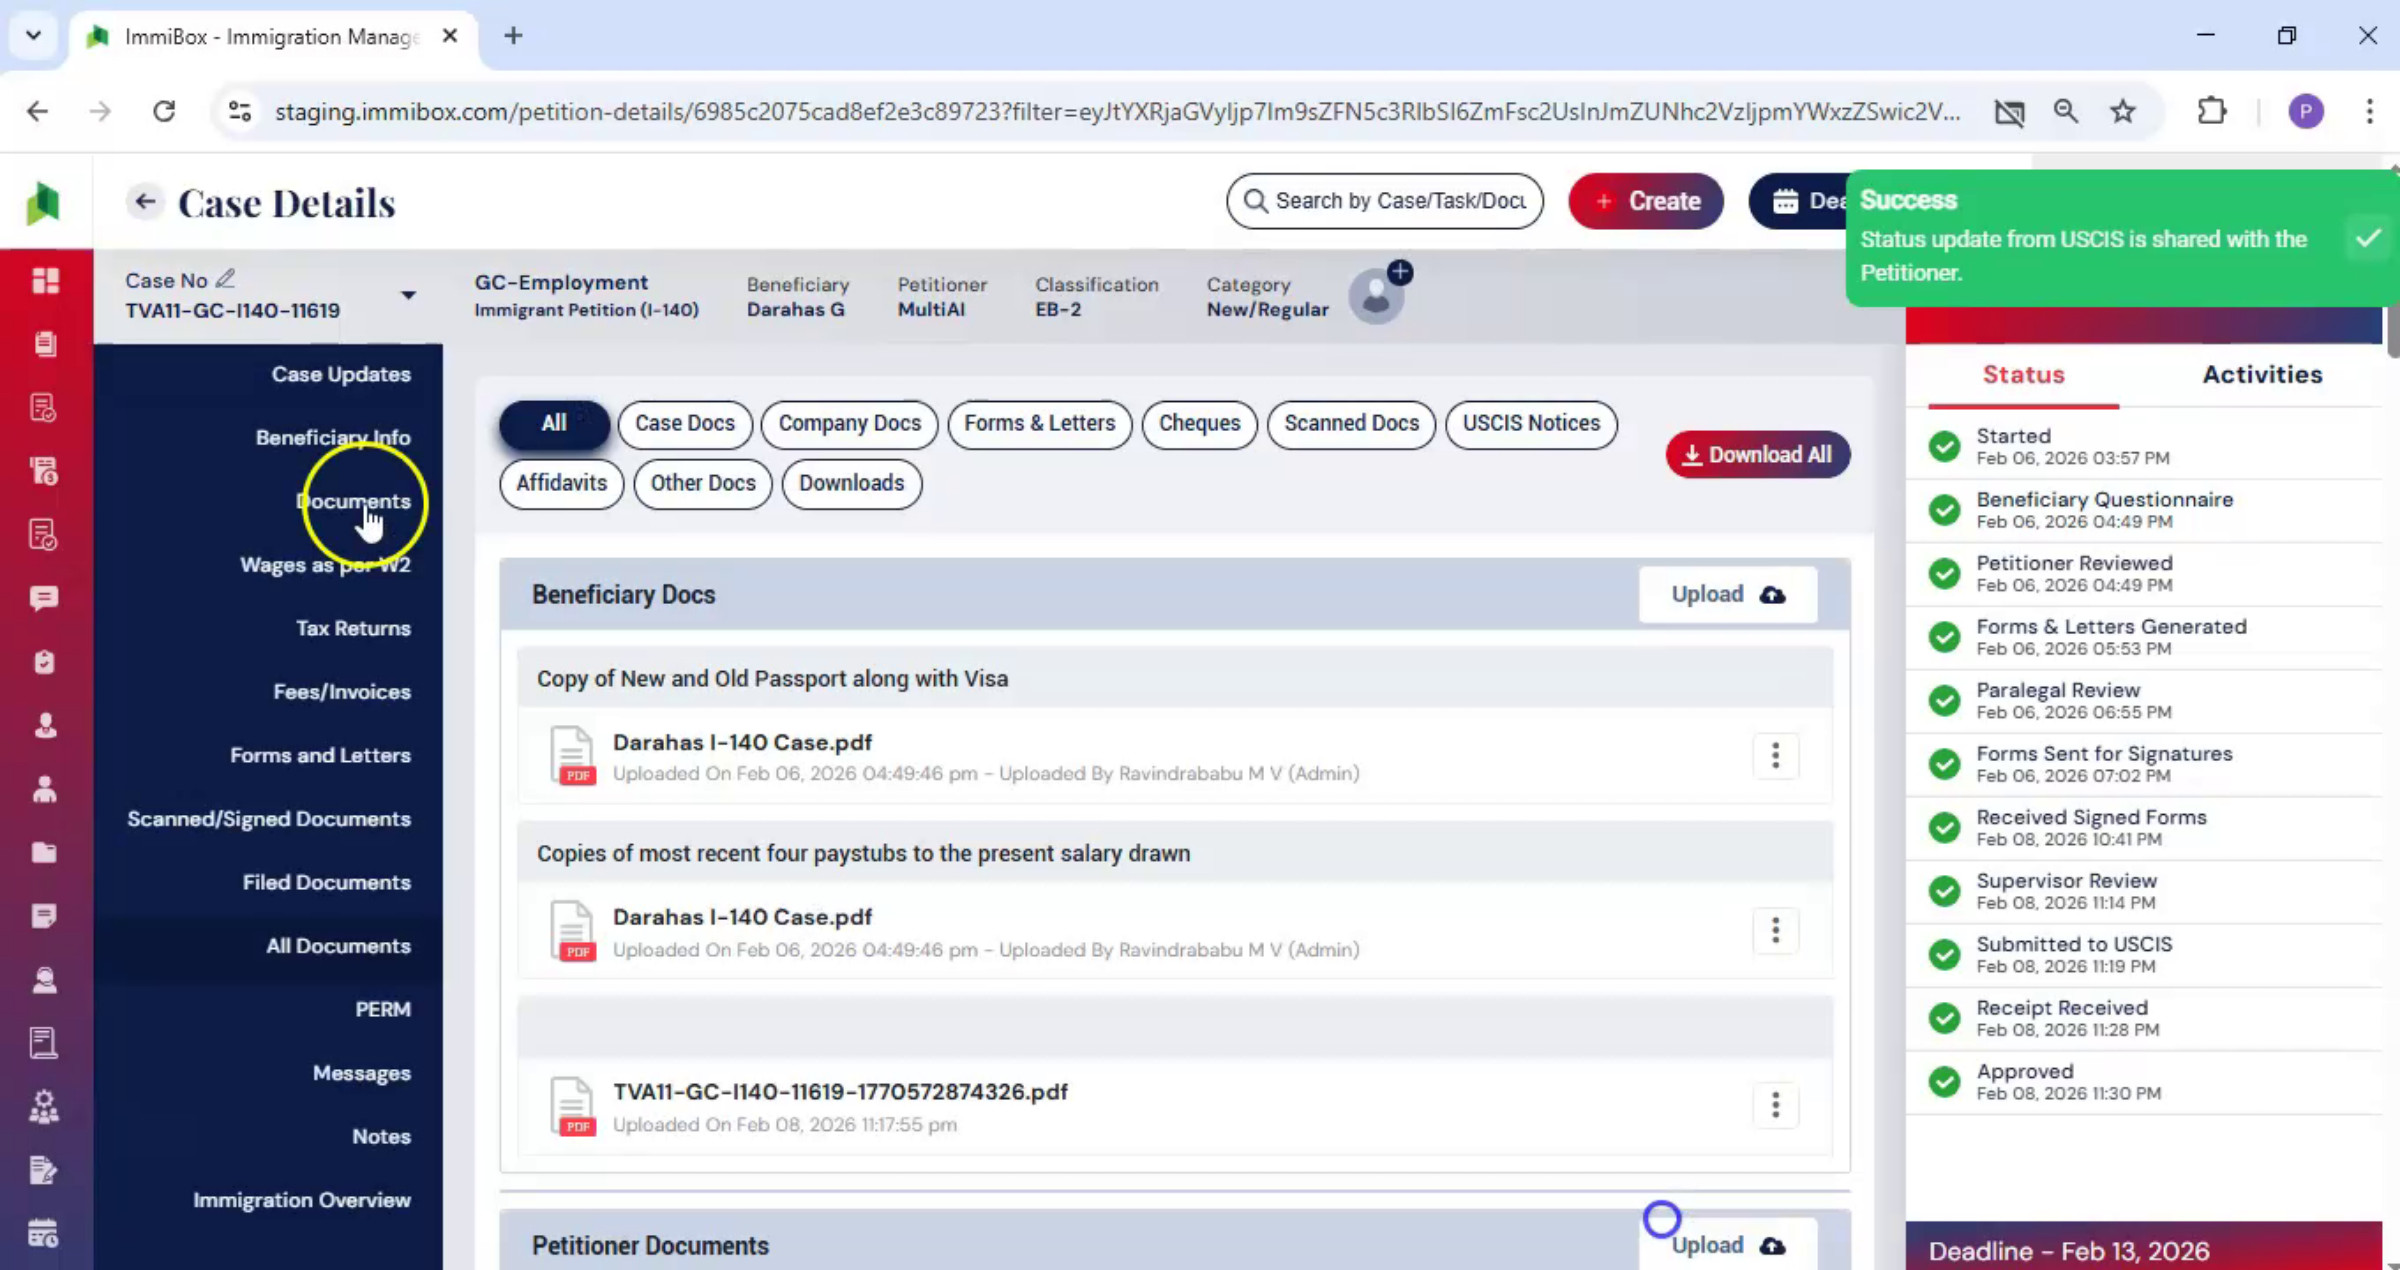 * click the image to view enlarged
On the left-hand side under the Case Update section, the case status is updated. ImmiBox continues to track the case and keeps all updates organized in one place.
54. Video Closing Remarks
 * click the image to view enlarged
Thank you for watching.

