

Managing PERM Filing Process Efficiently in ImmiBox
Overview
WelcomeThis video demonstrates the complete PERM filing process using ImmiBox, highlighting flexible options and workflow automation. It covers case creation, document management, role assignments, and filing procedures to ensure compliance and accuracy.
1. Introduction
 * click the image to view enlarged
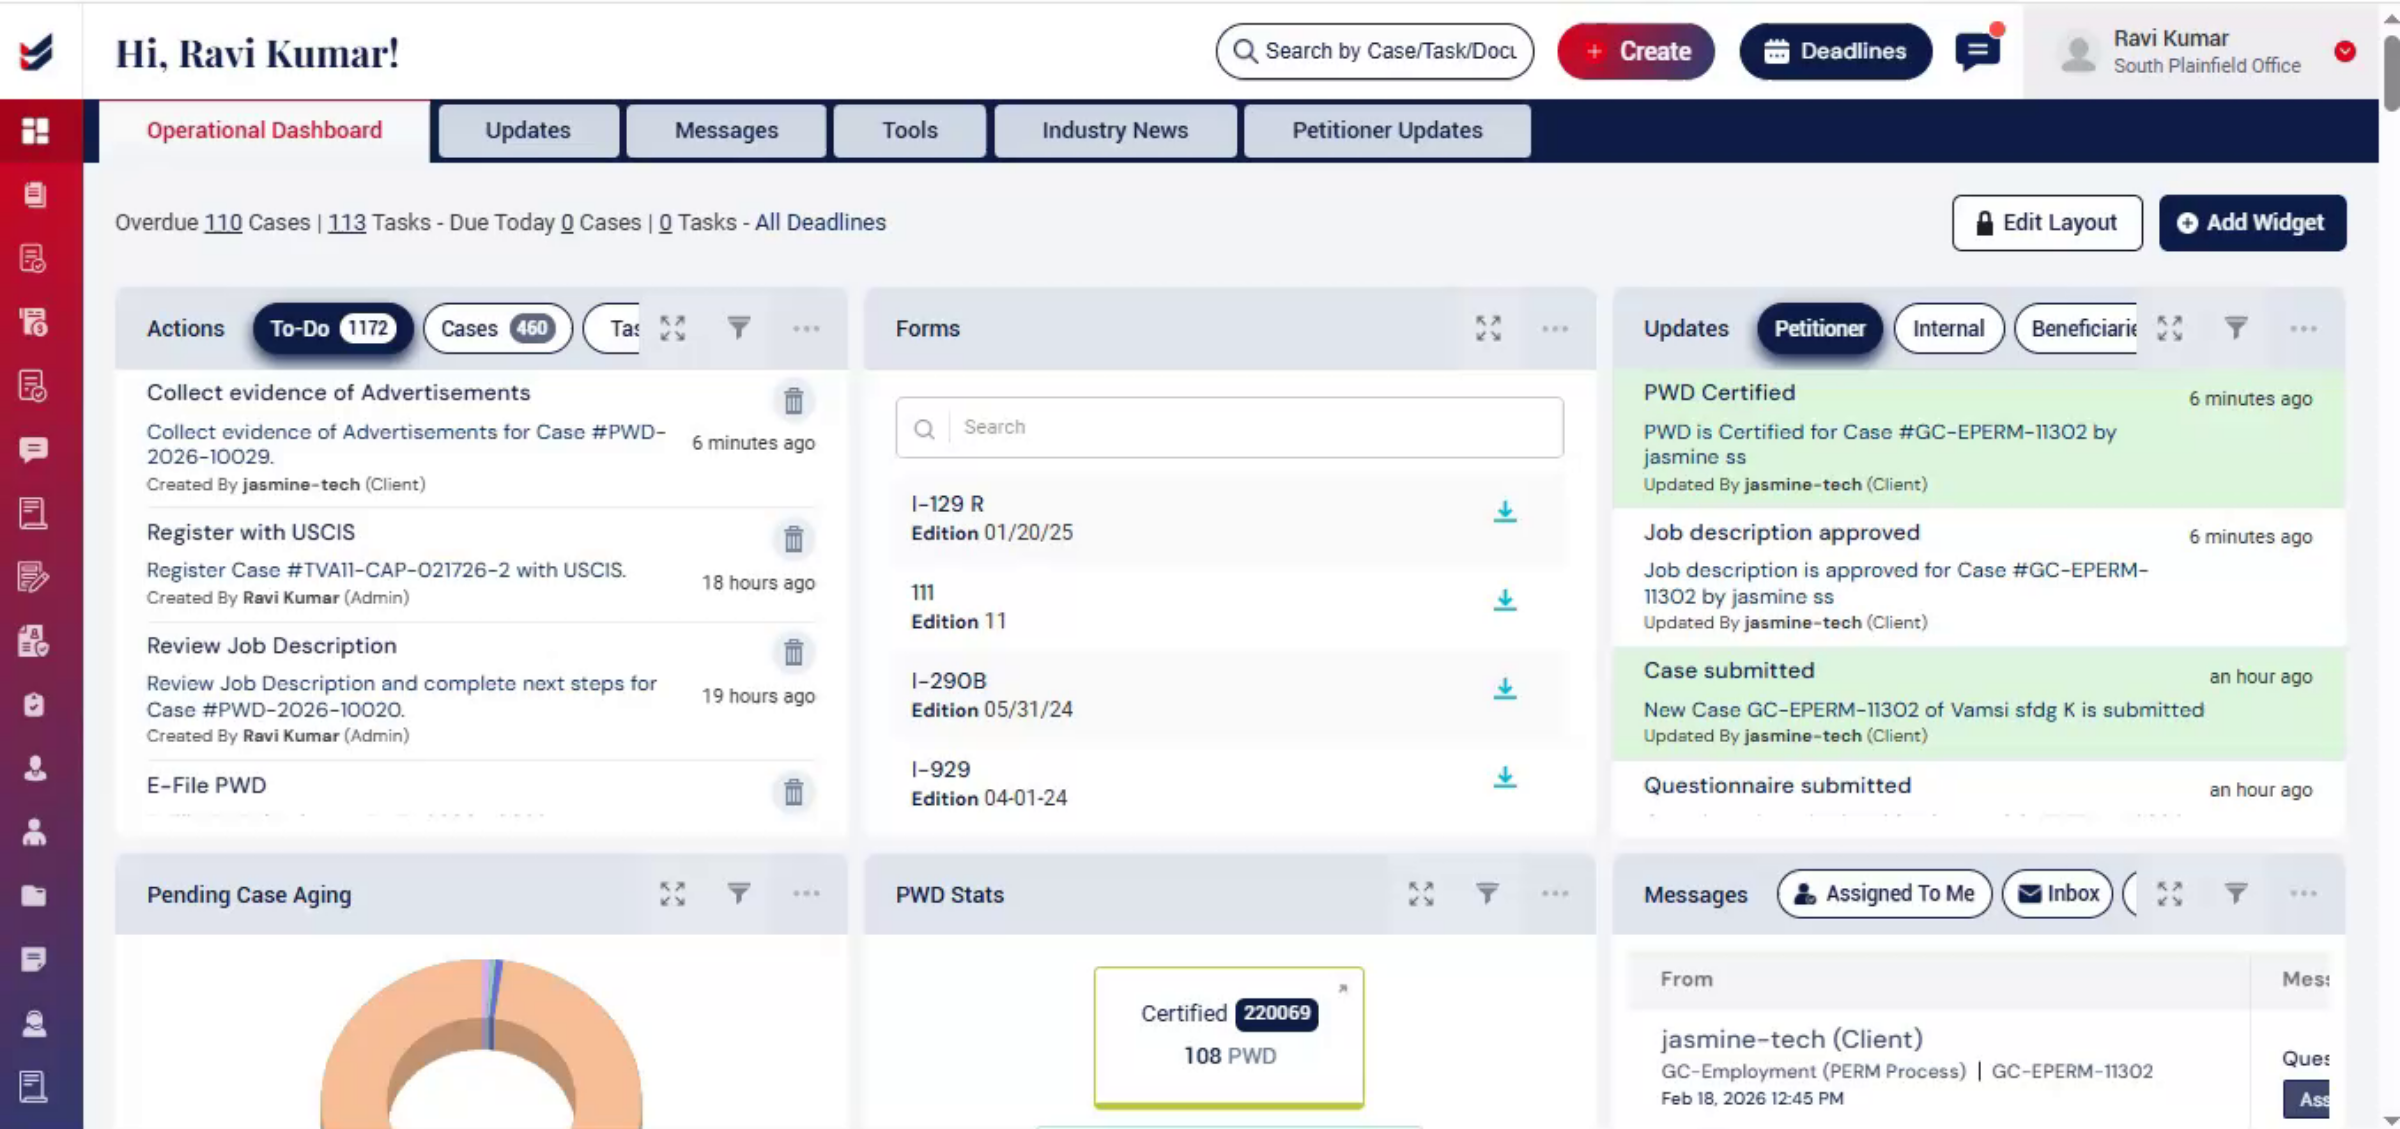
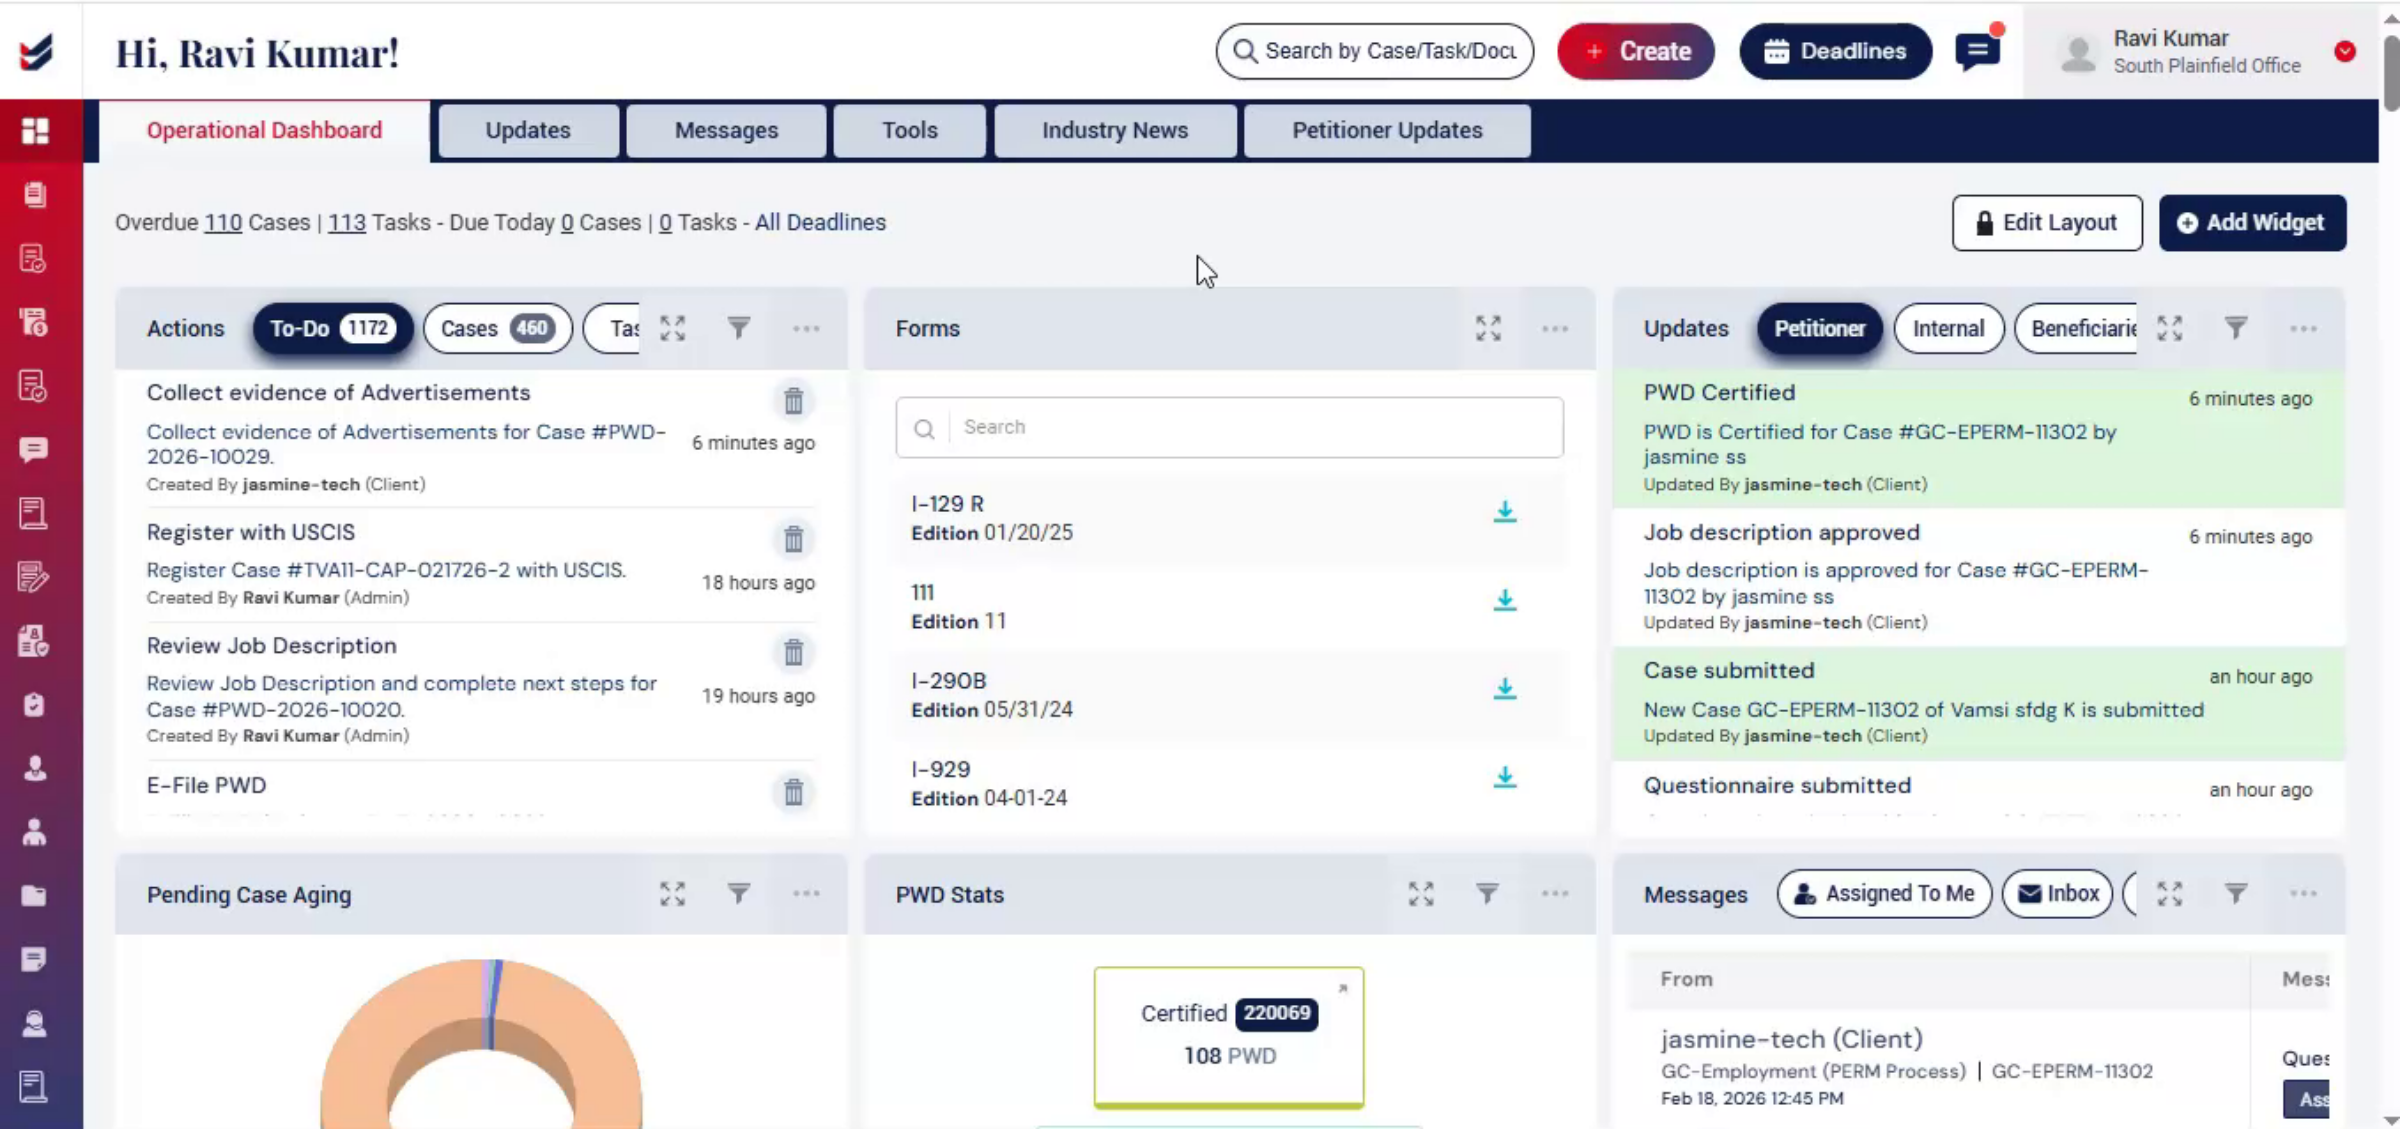
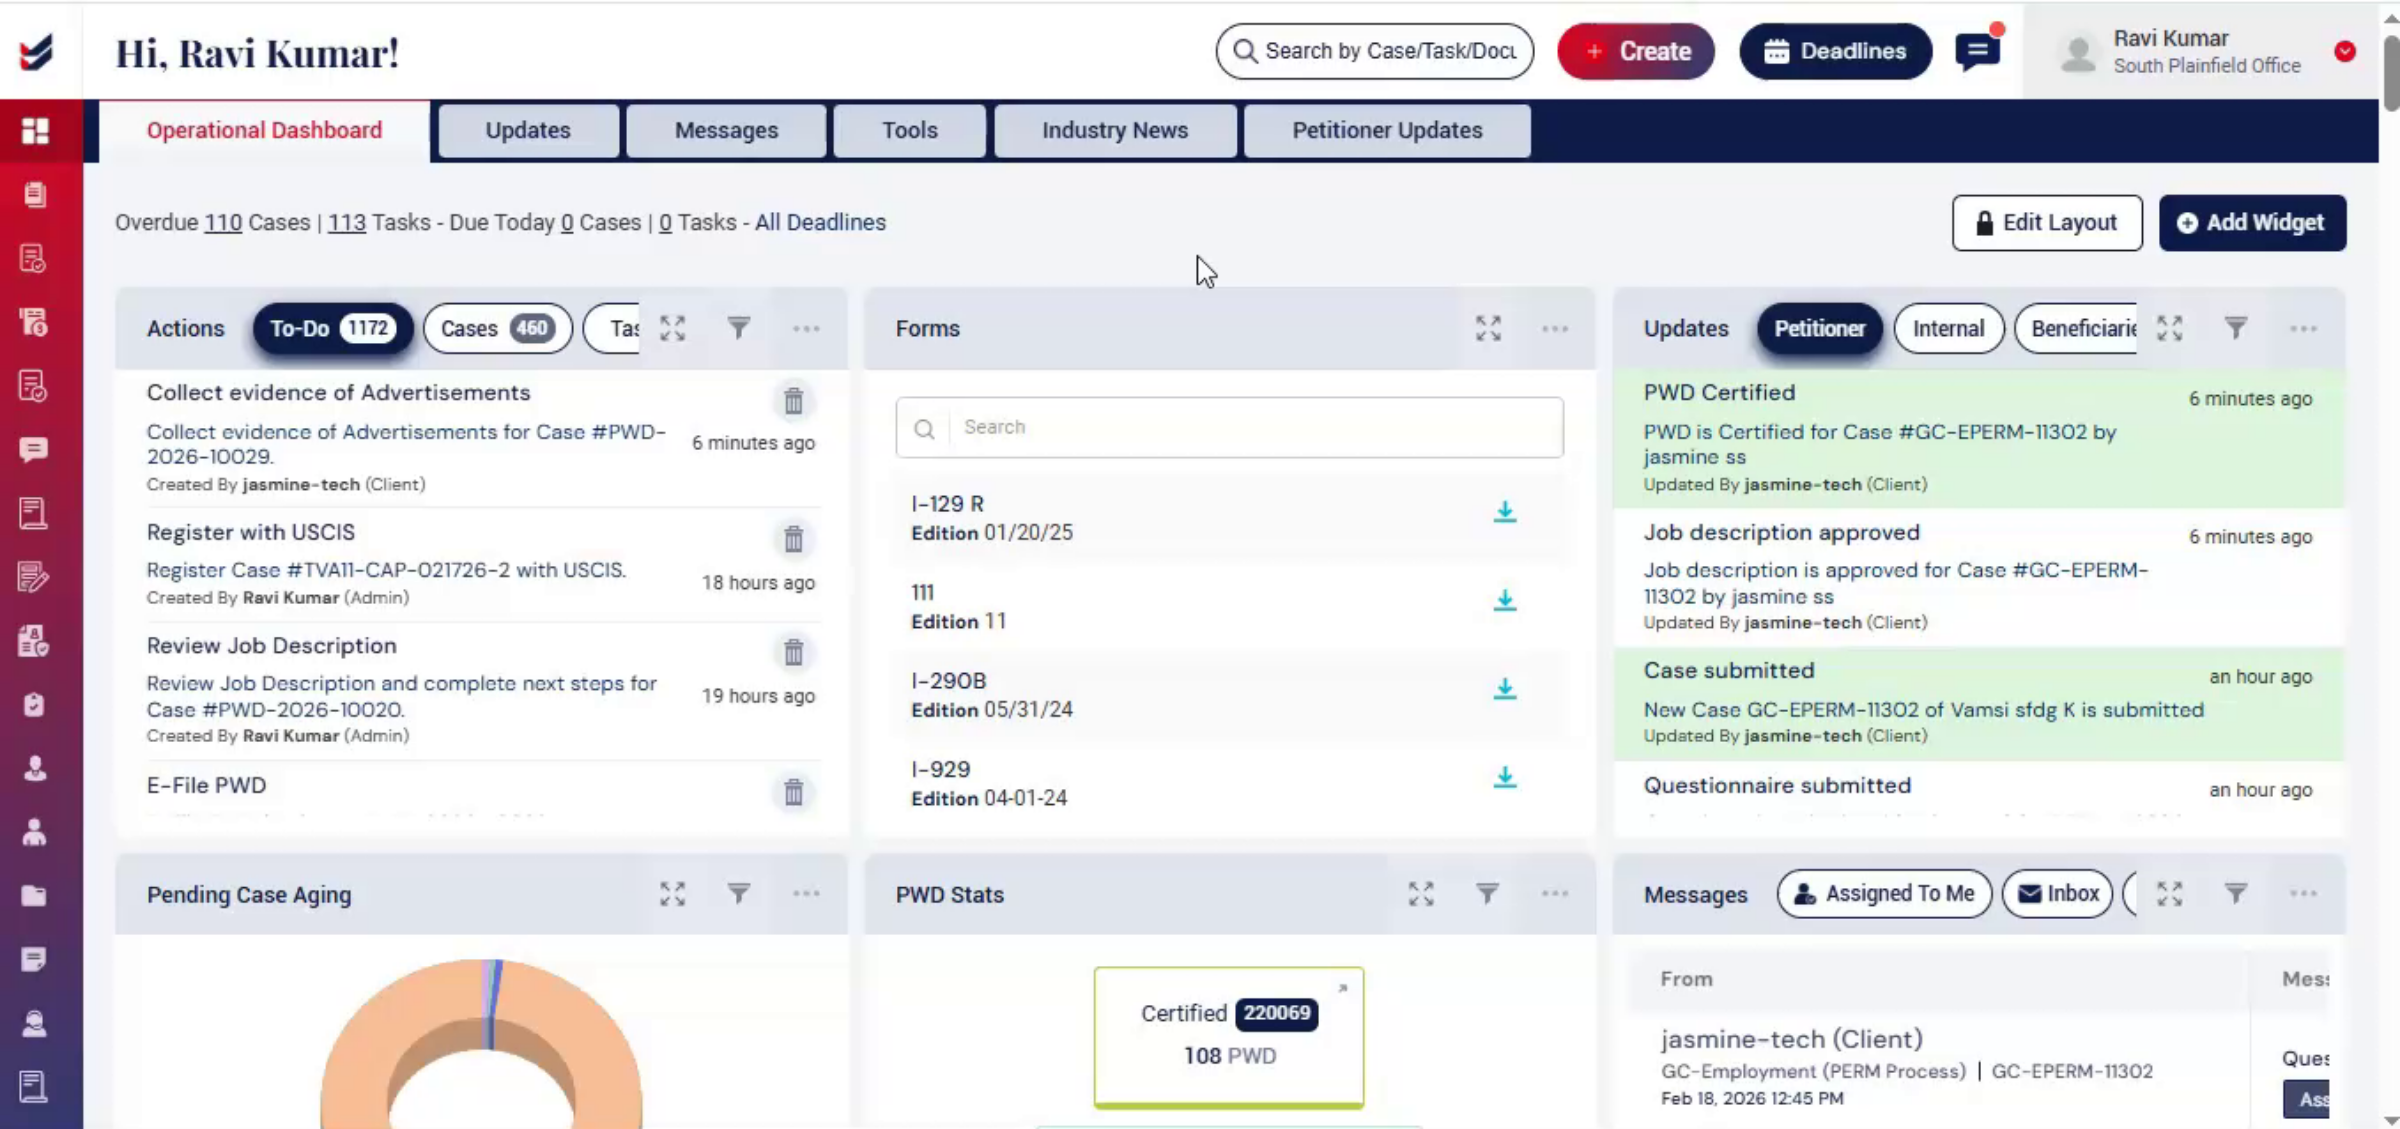
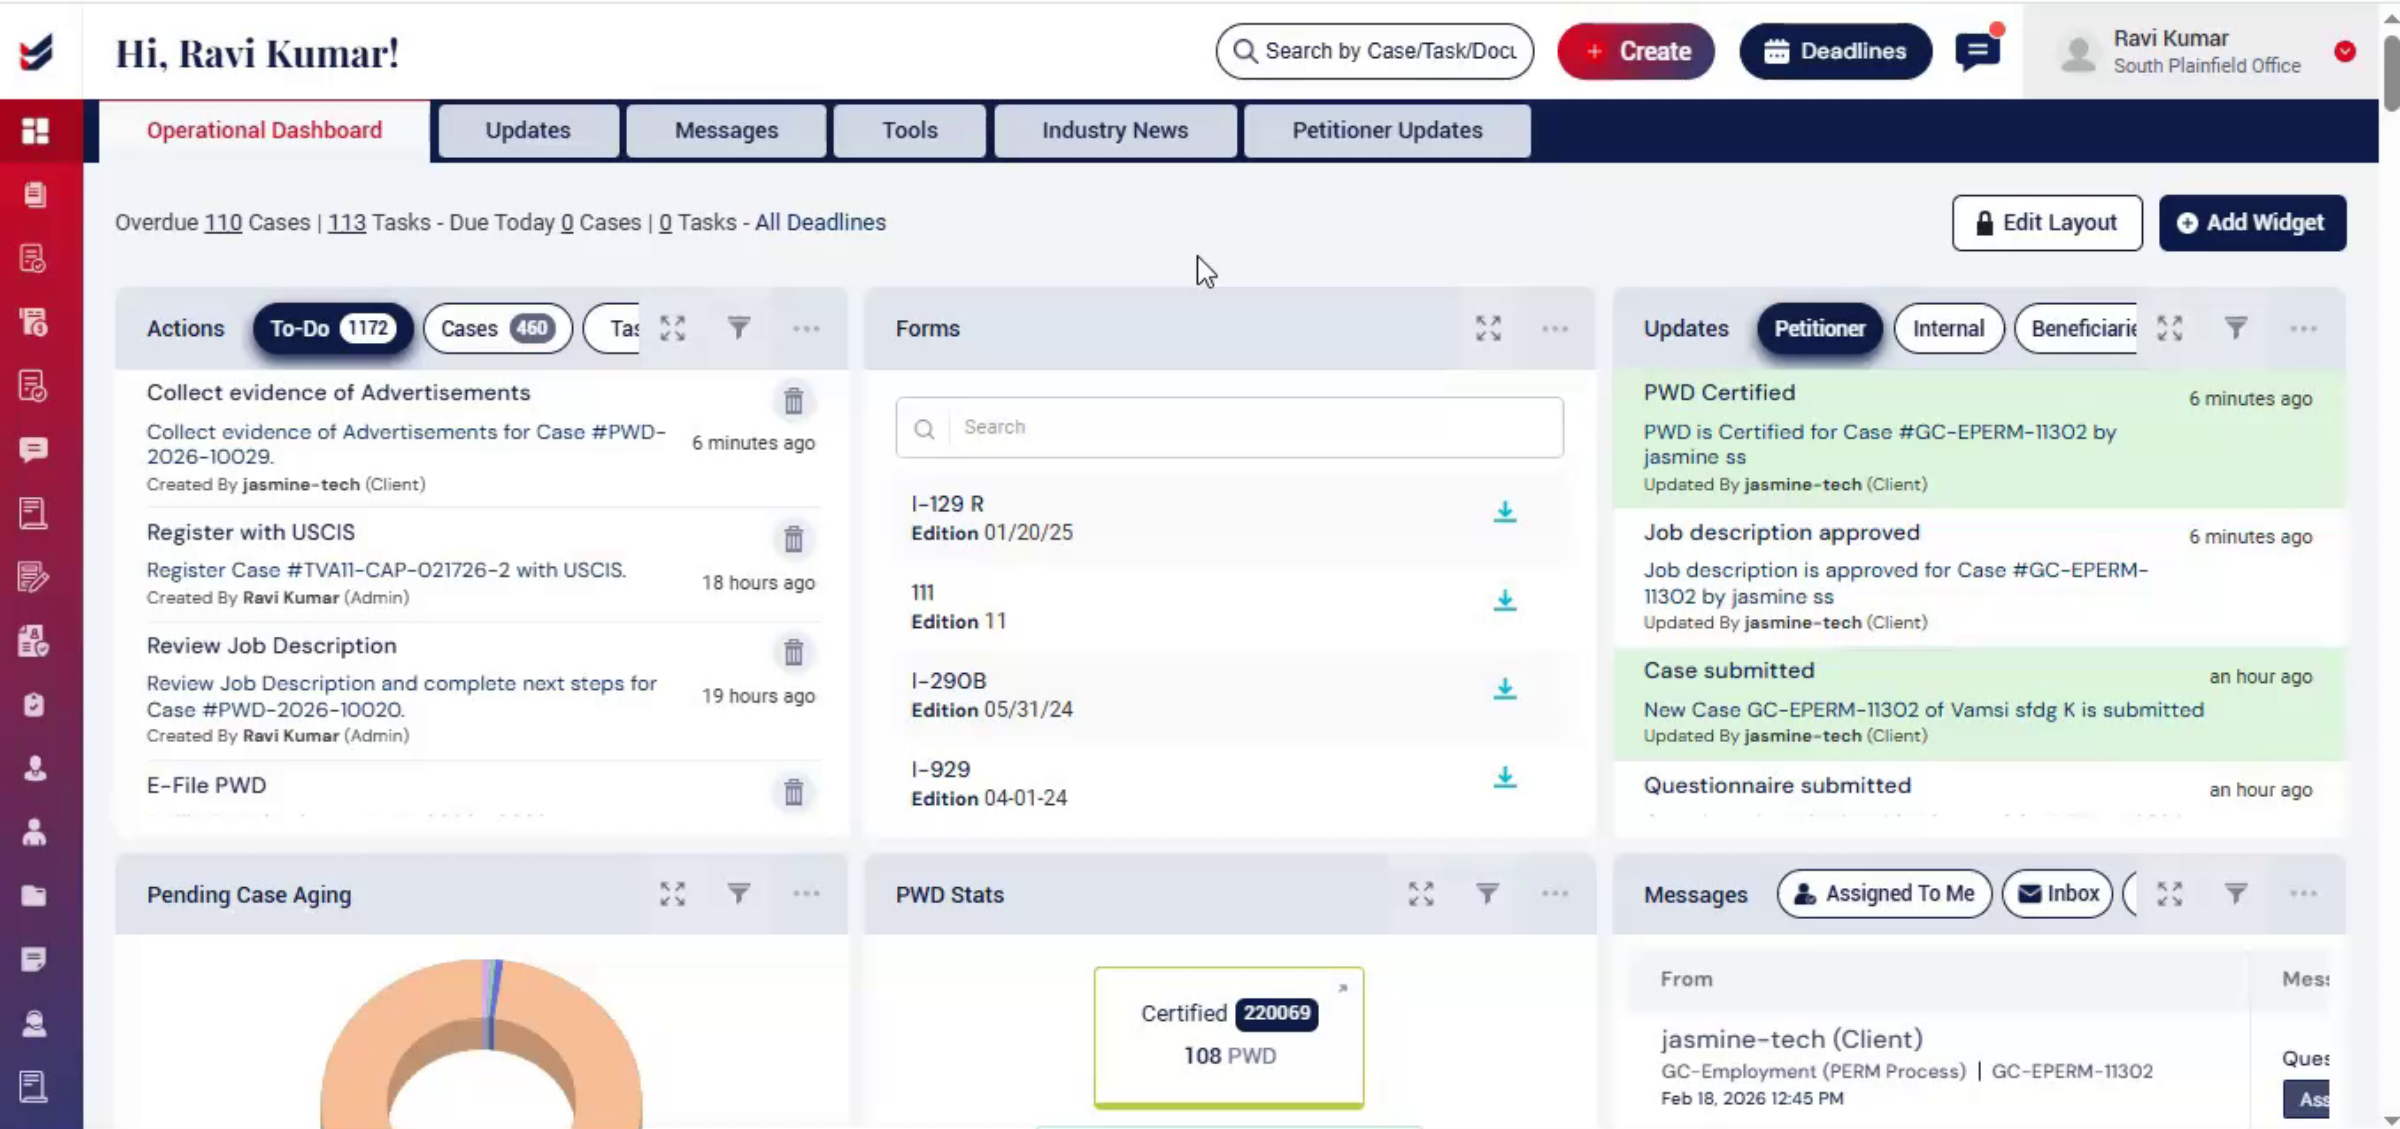
This video provides a complete guide to the PERM filing process in ImmiBox.
2. PERM Filing Options Overview
 * click the image to view enlarged
When handling PERM filing in ImmiBox, you have three flexible options. First, you can link an existing PWD that is already available in the system. Second, you can upload a filed or certified PWD while creating the PERM case. Third, if you don't have a PWD filed already, you can initiate the PWD directly within the PERM case.
3. Workflow Automation Benefits
 * click the image to view enlarged
Each selection activates specific workflow logic and automation, ensuring that the case status reflects real-time progress without repeating completed work.
4. Creating PERM Case Steps
 * click the image to view enlarged
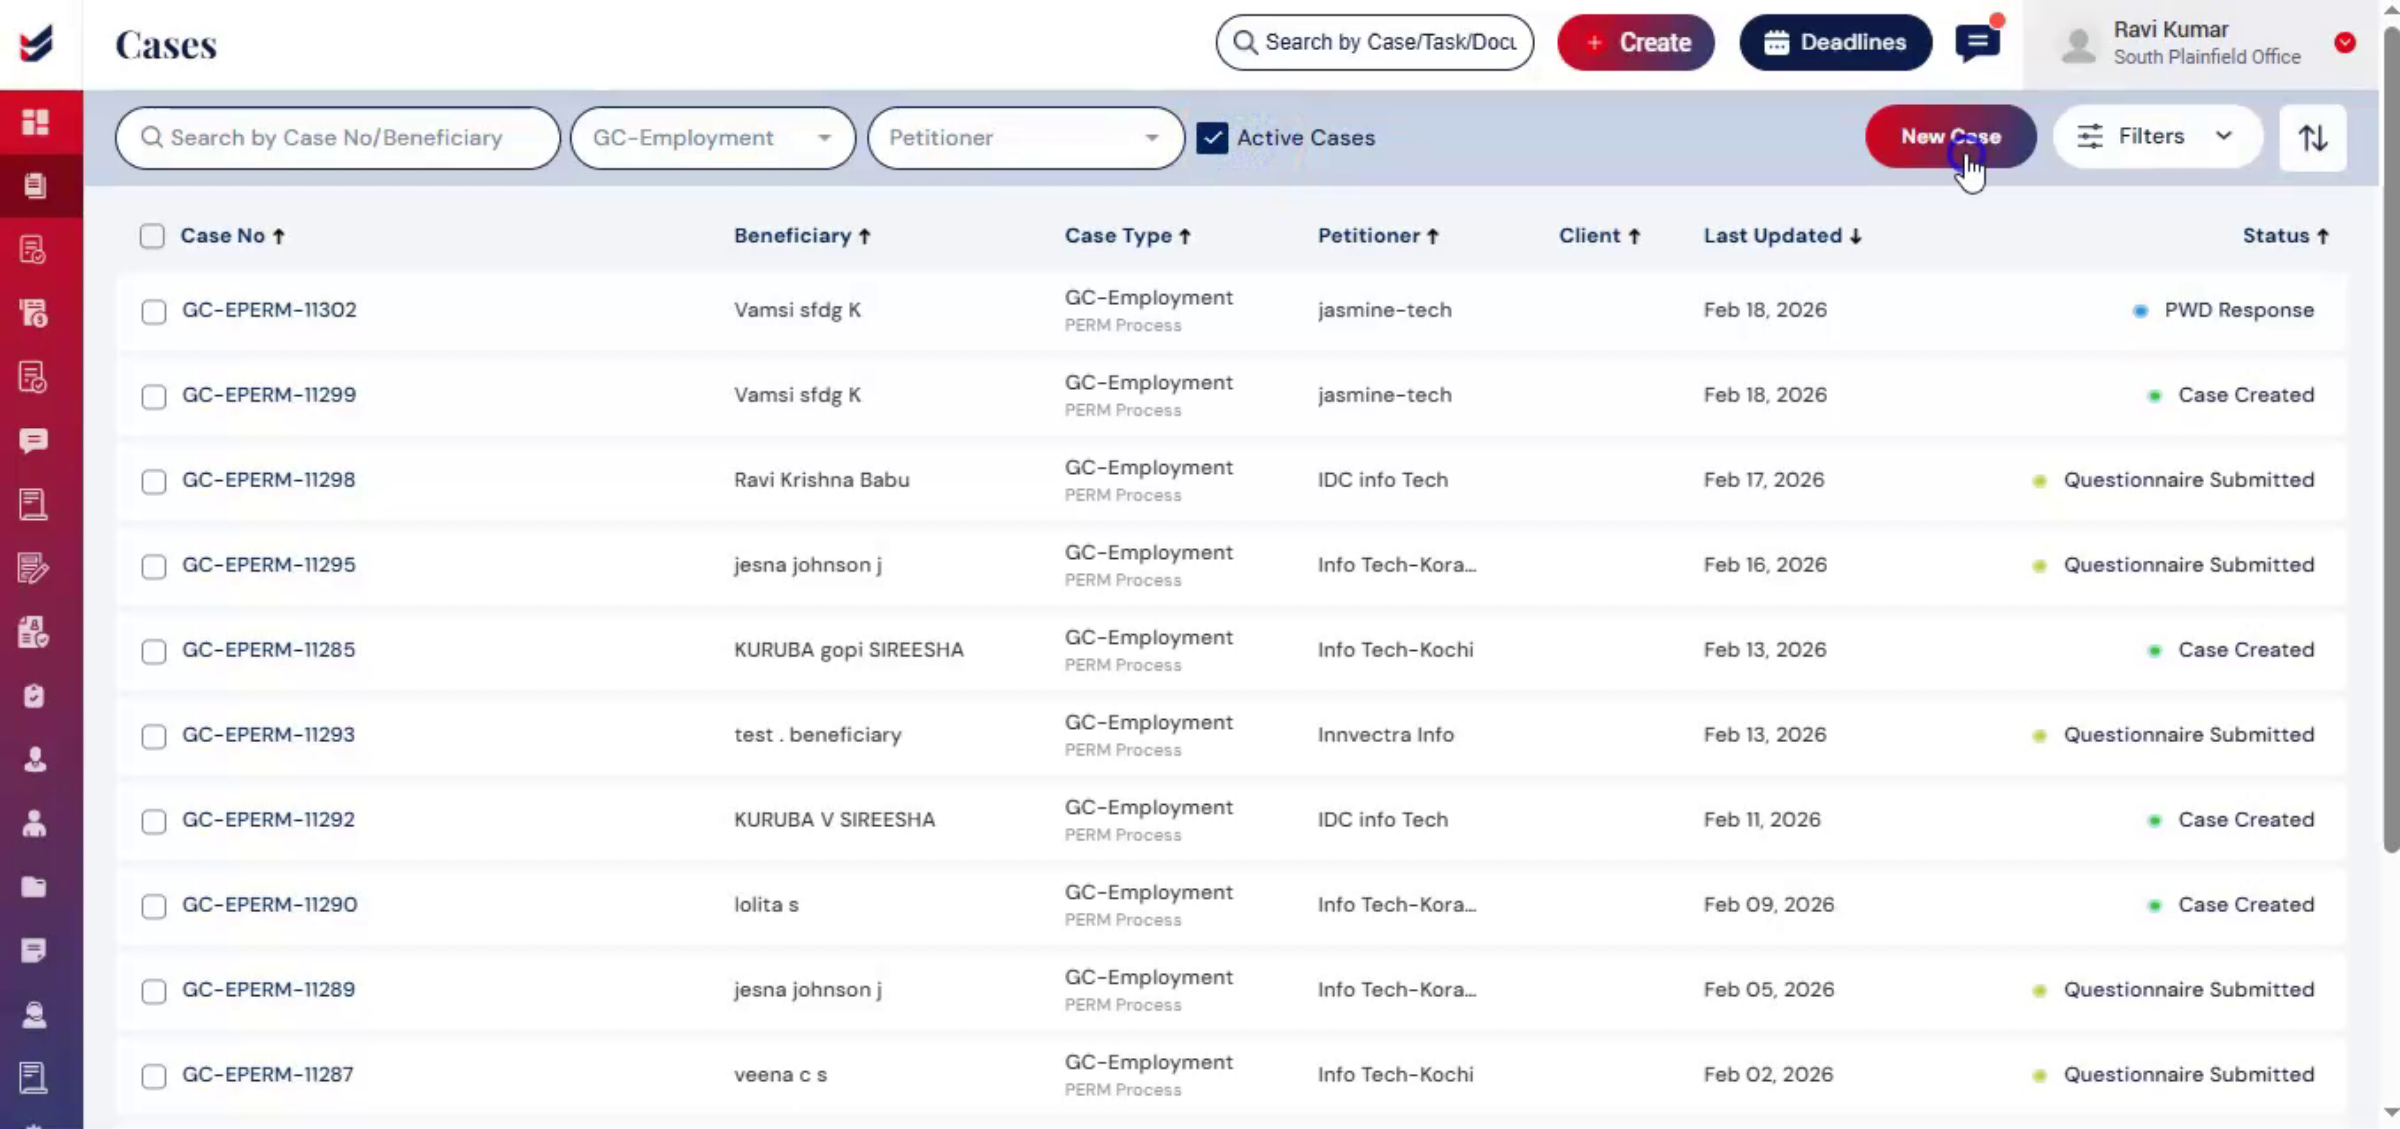
To create a PERM case, from the dashboard, click Create. Then choose a new case or navigate to the left side and click PERM. The PERM library cases will then appear on the screen.
5. PERM Case Search Features
 * click the image to view enlarged
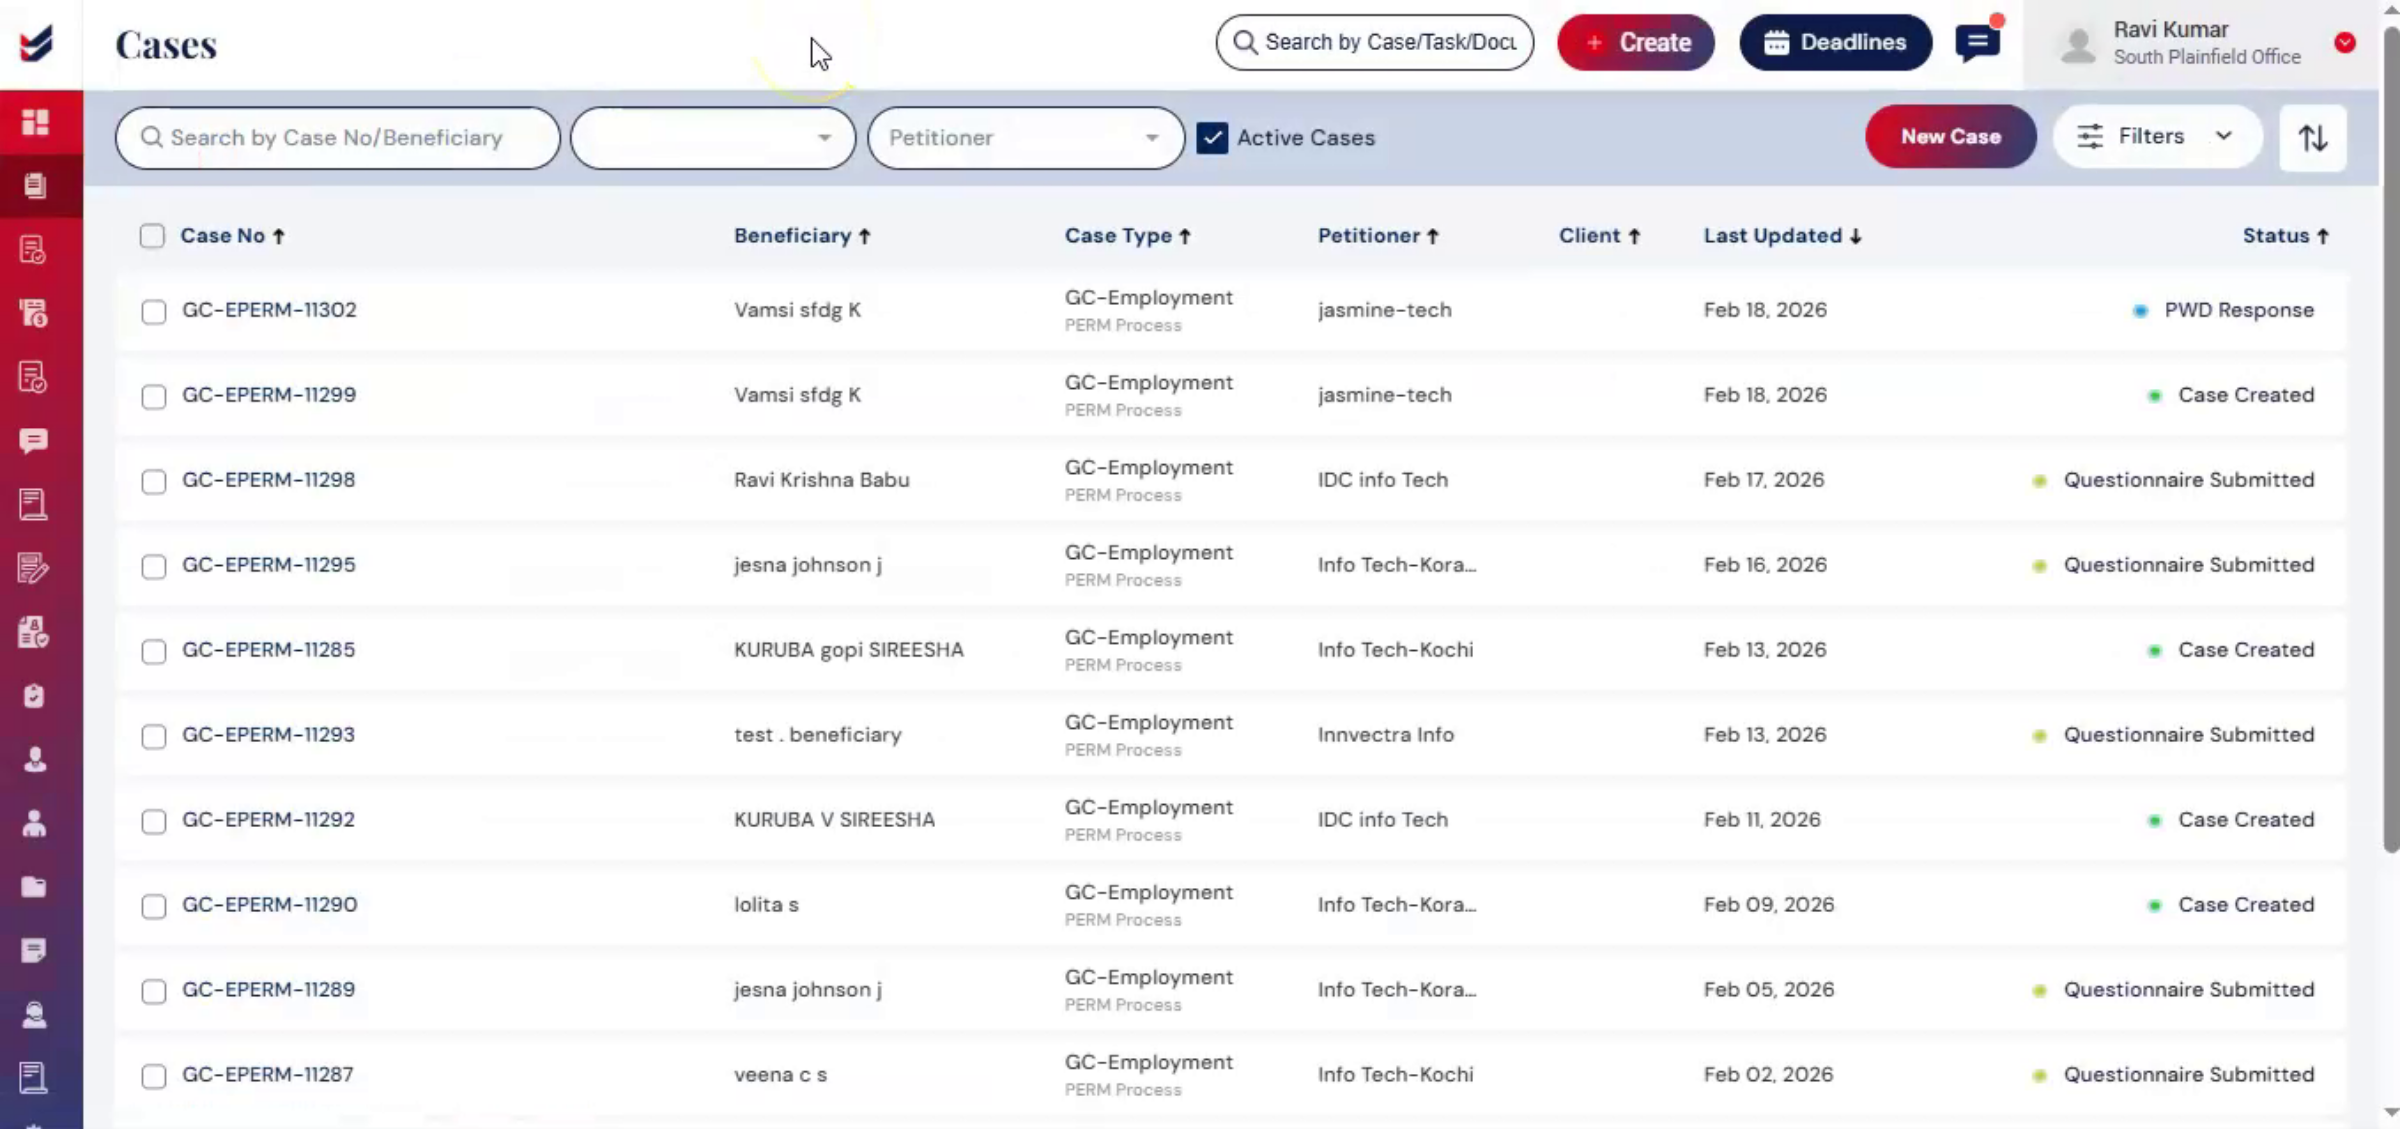
In the top menu, several search options are available. You can search for a case by entering the case number or beneficiary name. By default, the GC Employment Case Type tab is selected. Under the Petitioner tab, cases can be searched by selecting a specific petitioner. Next to it, the Active Cases checkbox allows you to display only currently active PERM cases.
6. New Case Creation Details
 * click the image to view enlarged
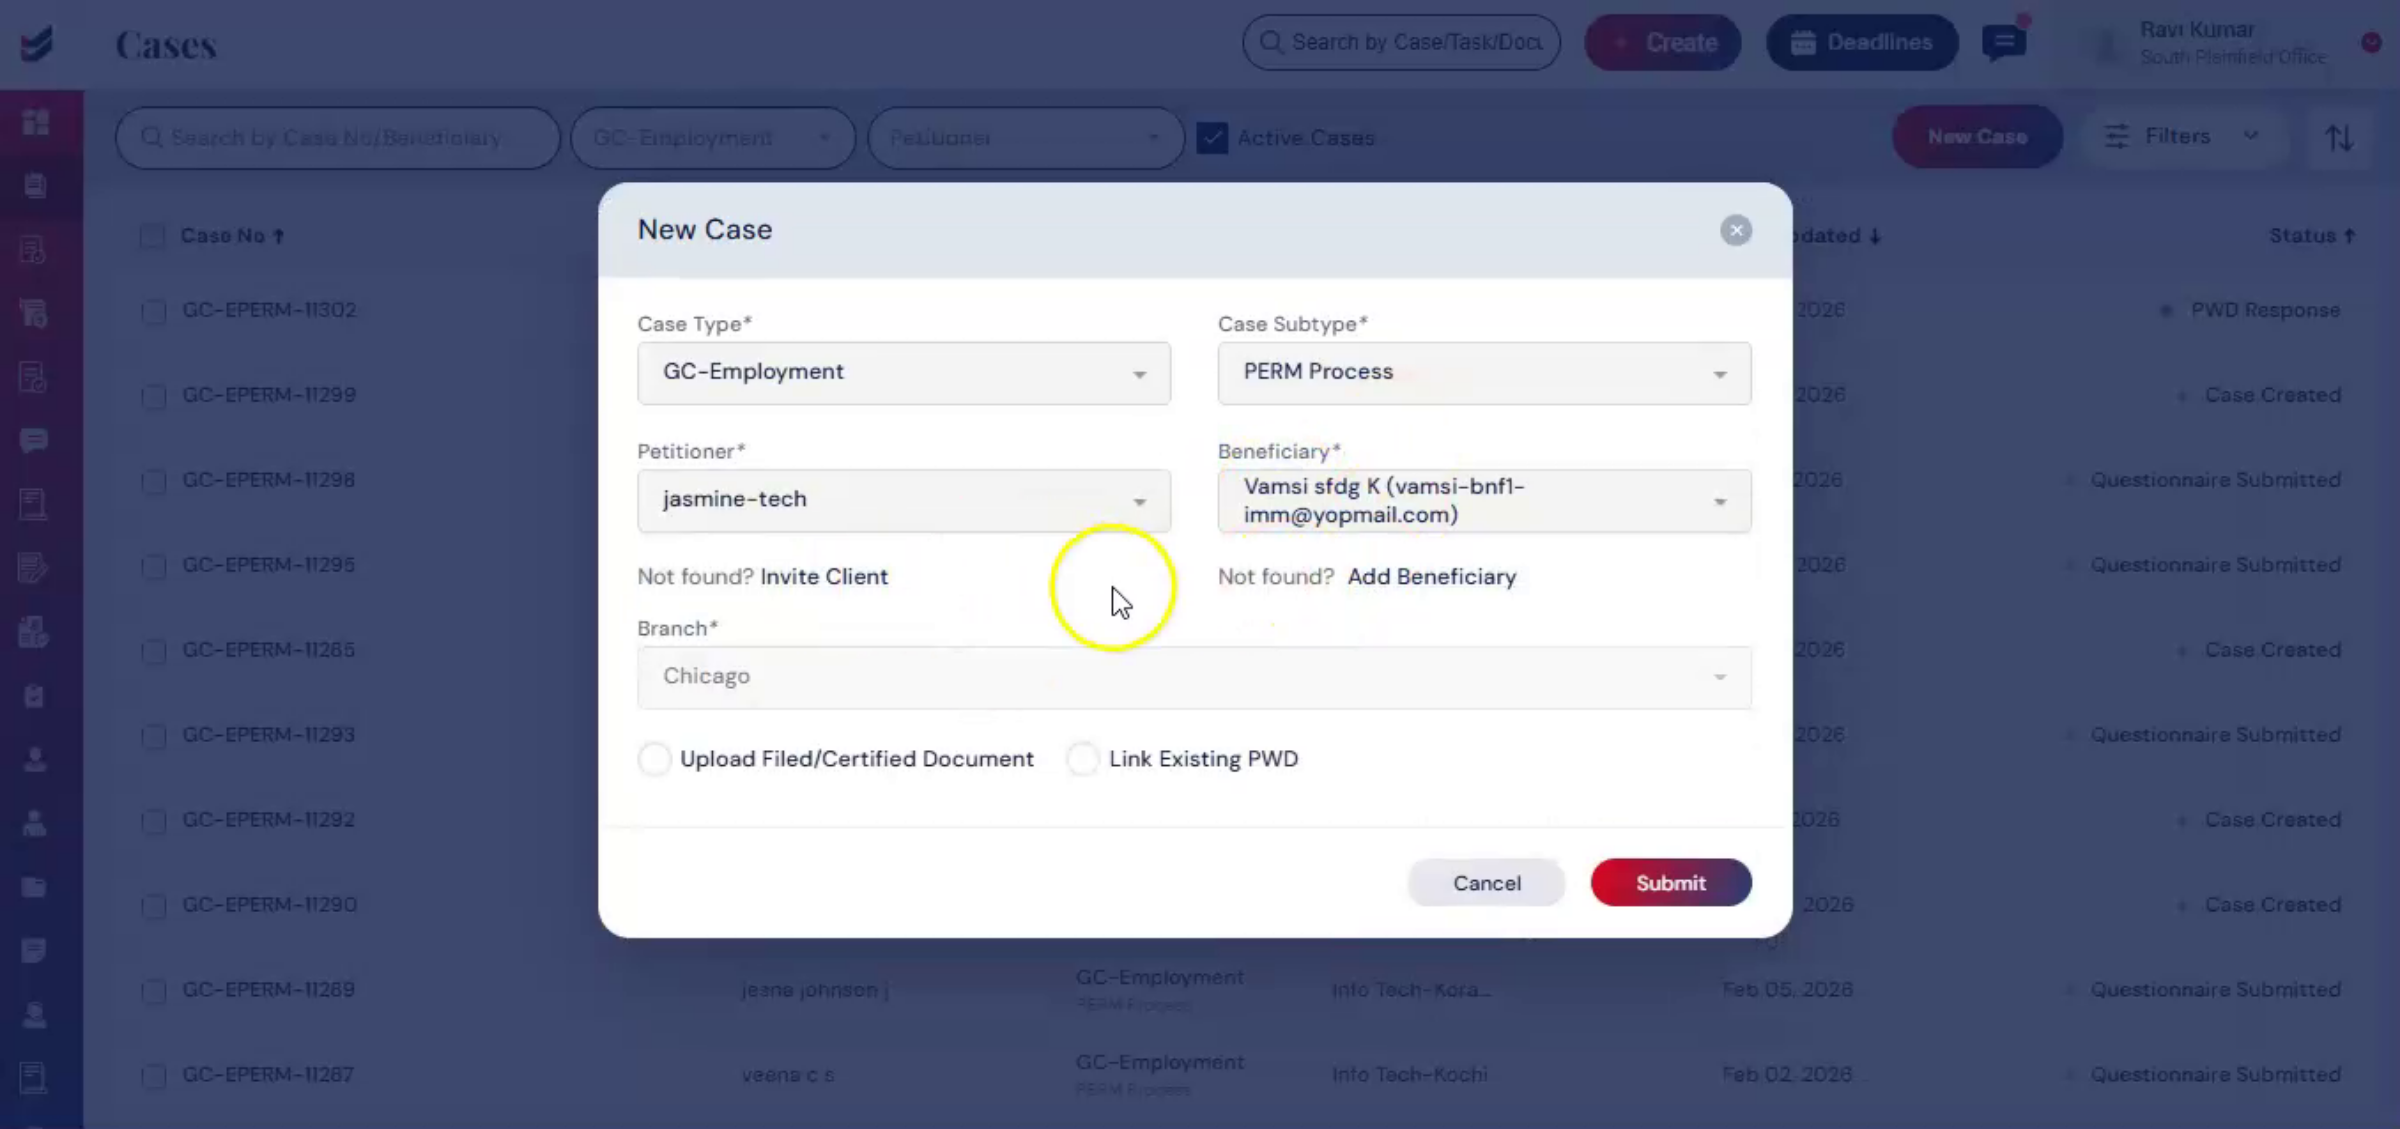
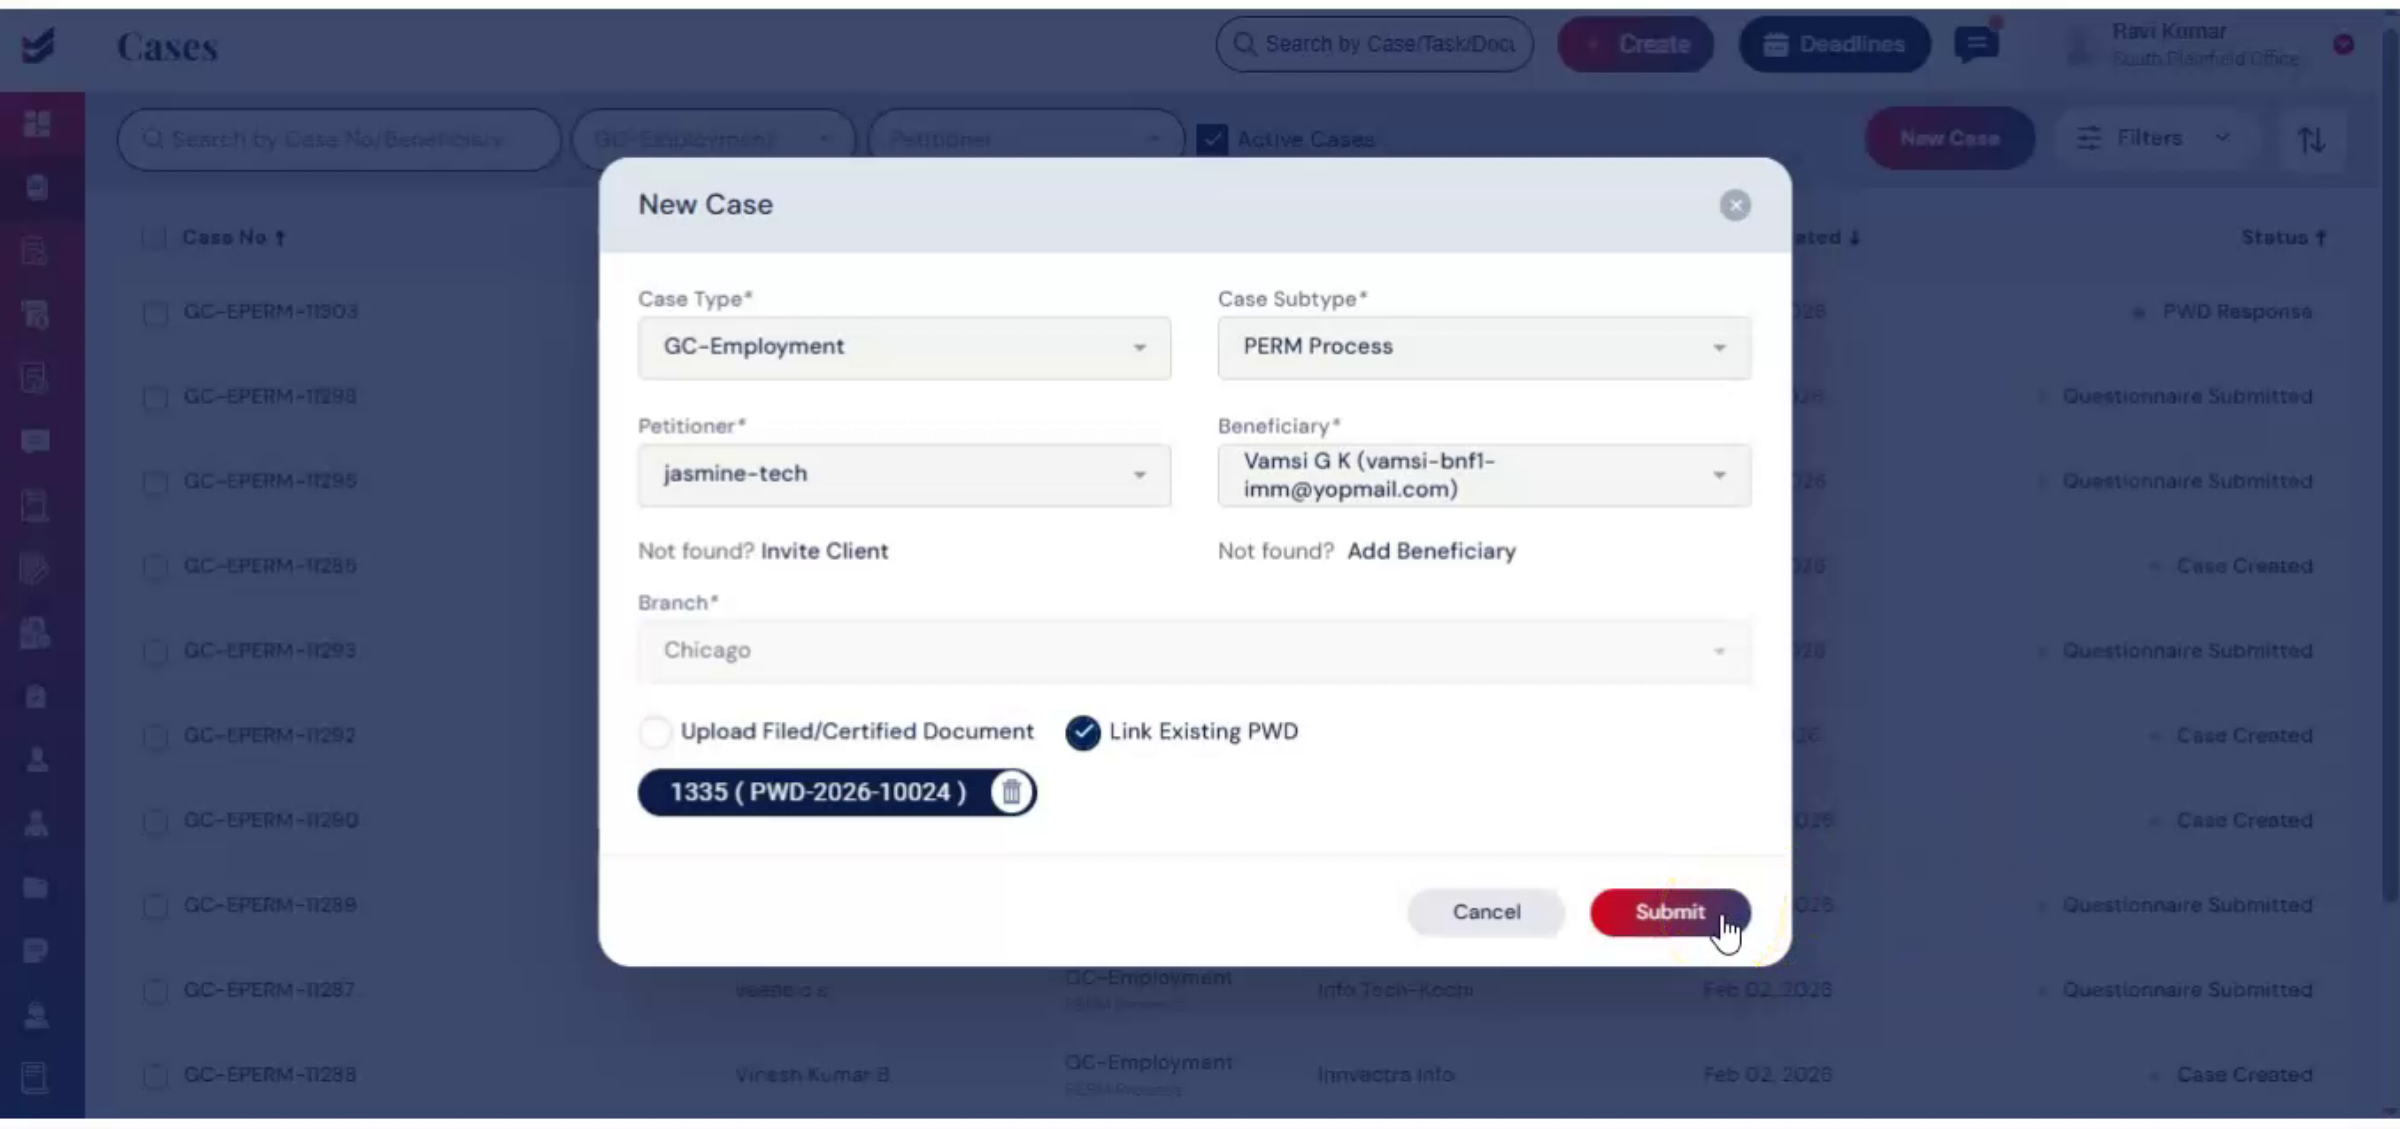
Click New Case. Select Case. Type GC Employment and Case Subtype PERM Process. Then enter the petitioner and beneficiary details.
7. Adding Petitioner Beneficiary
 * click the image to view enlarged
If they are not listed in the system, you may add them by following the adding clients guide. At the bottom of the case creation, you will see two key options. Upload filed or certified document means upload the PWD document that has been filed or certified. Link existing PWD means PWD existing in ImmiBox can be linked to this PERM filing.
8. Uploading Filed PWD Document
 * click the image to view enlarged
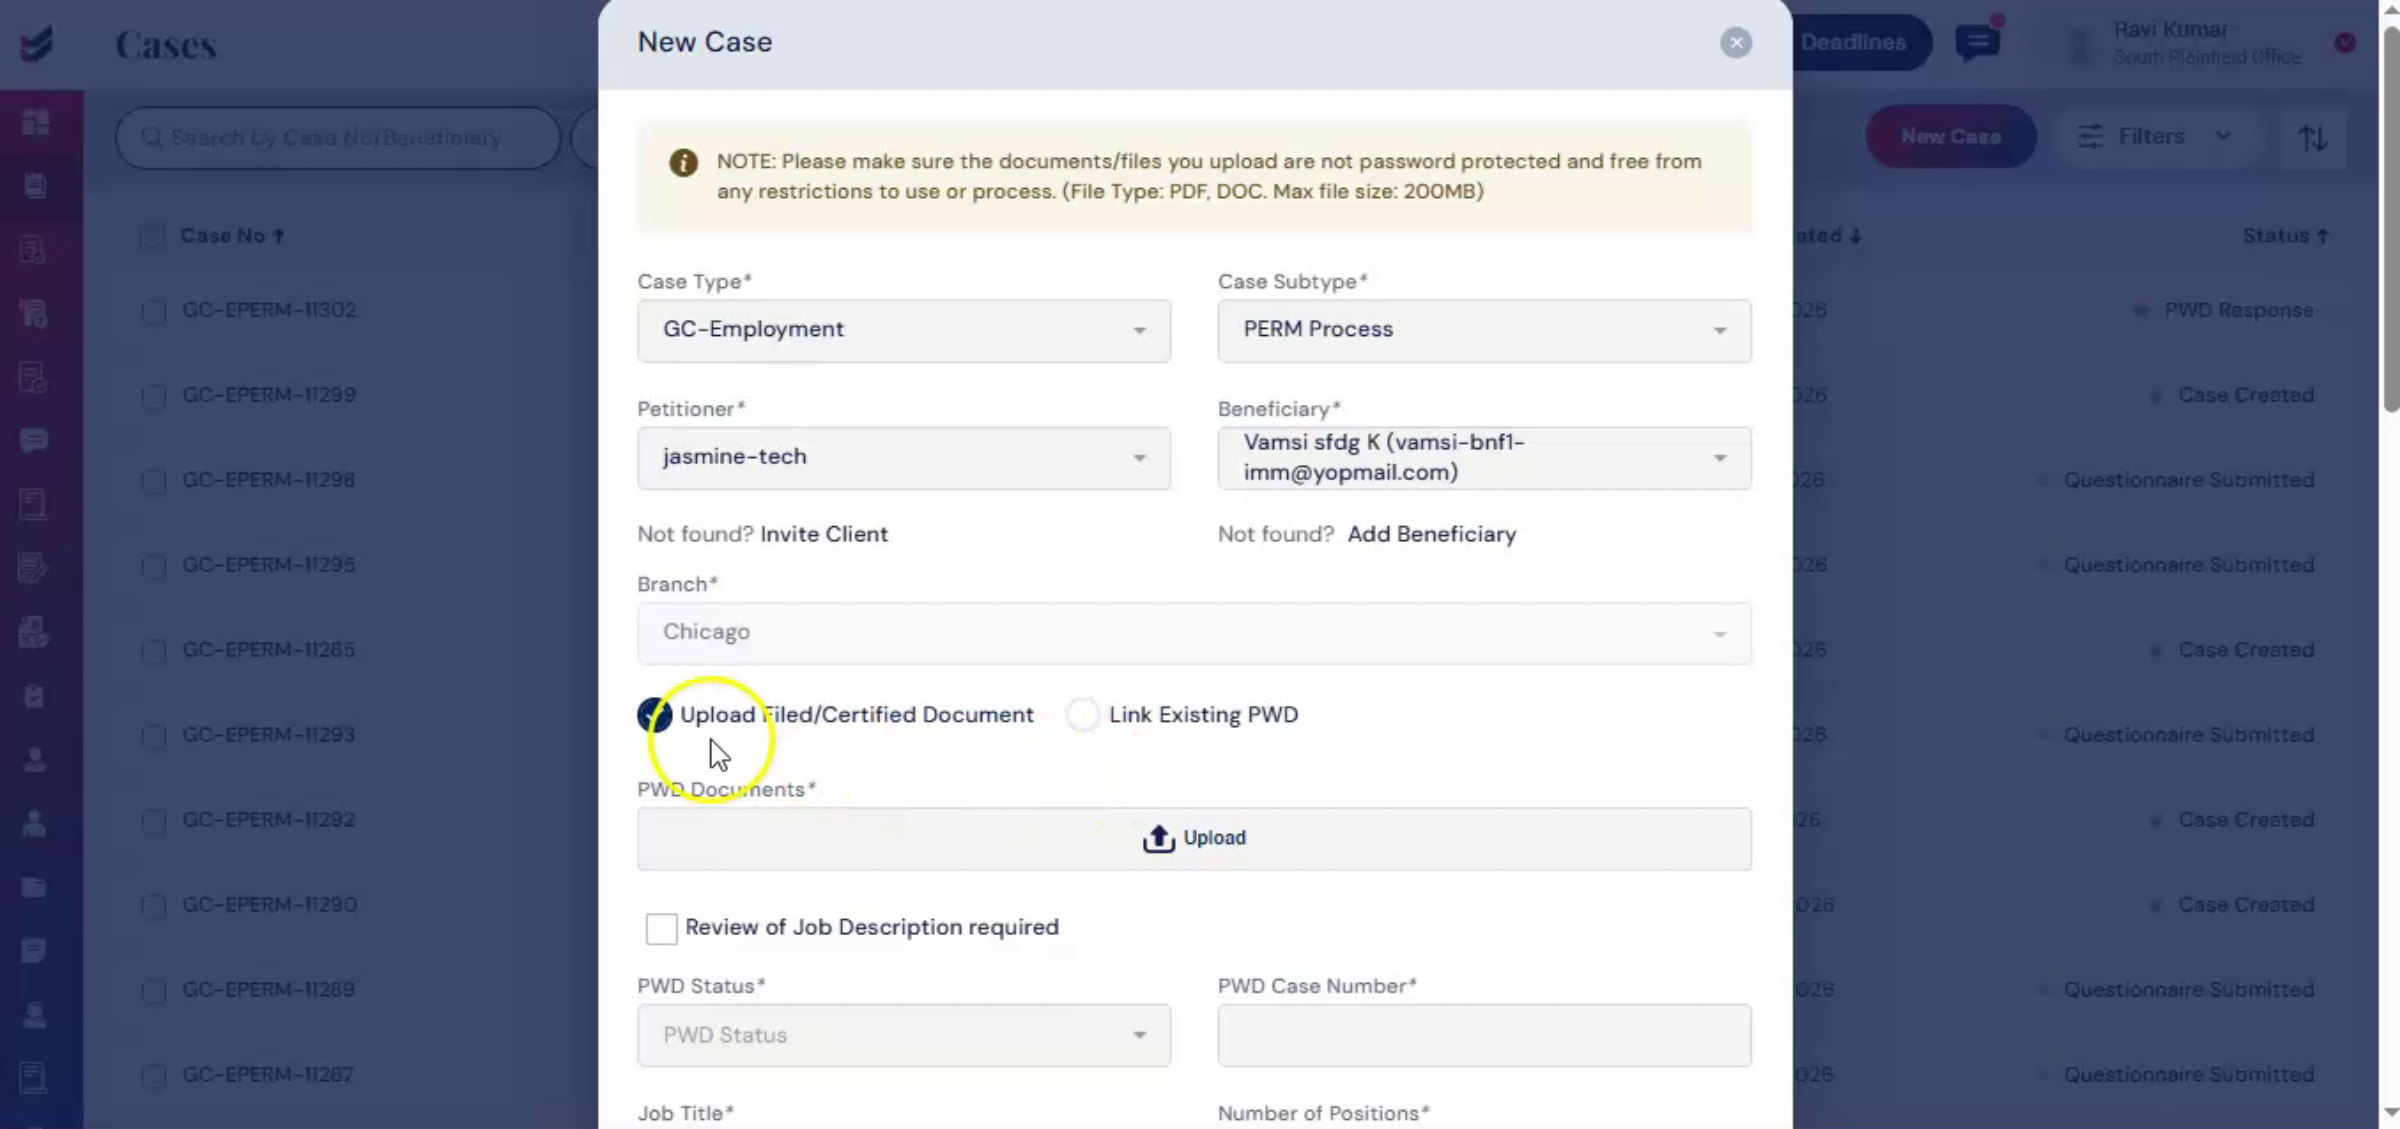
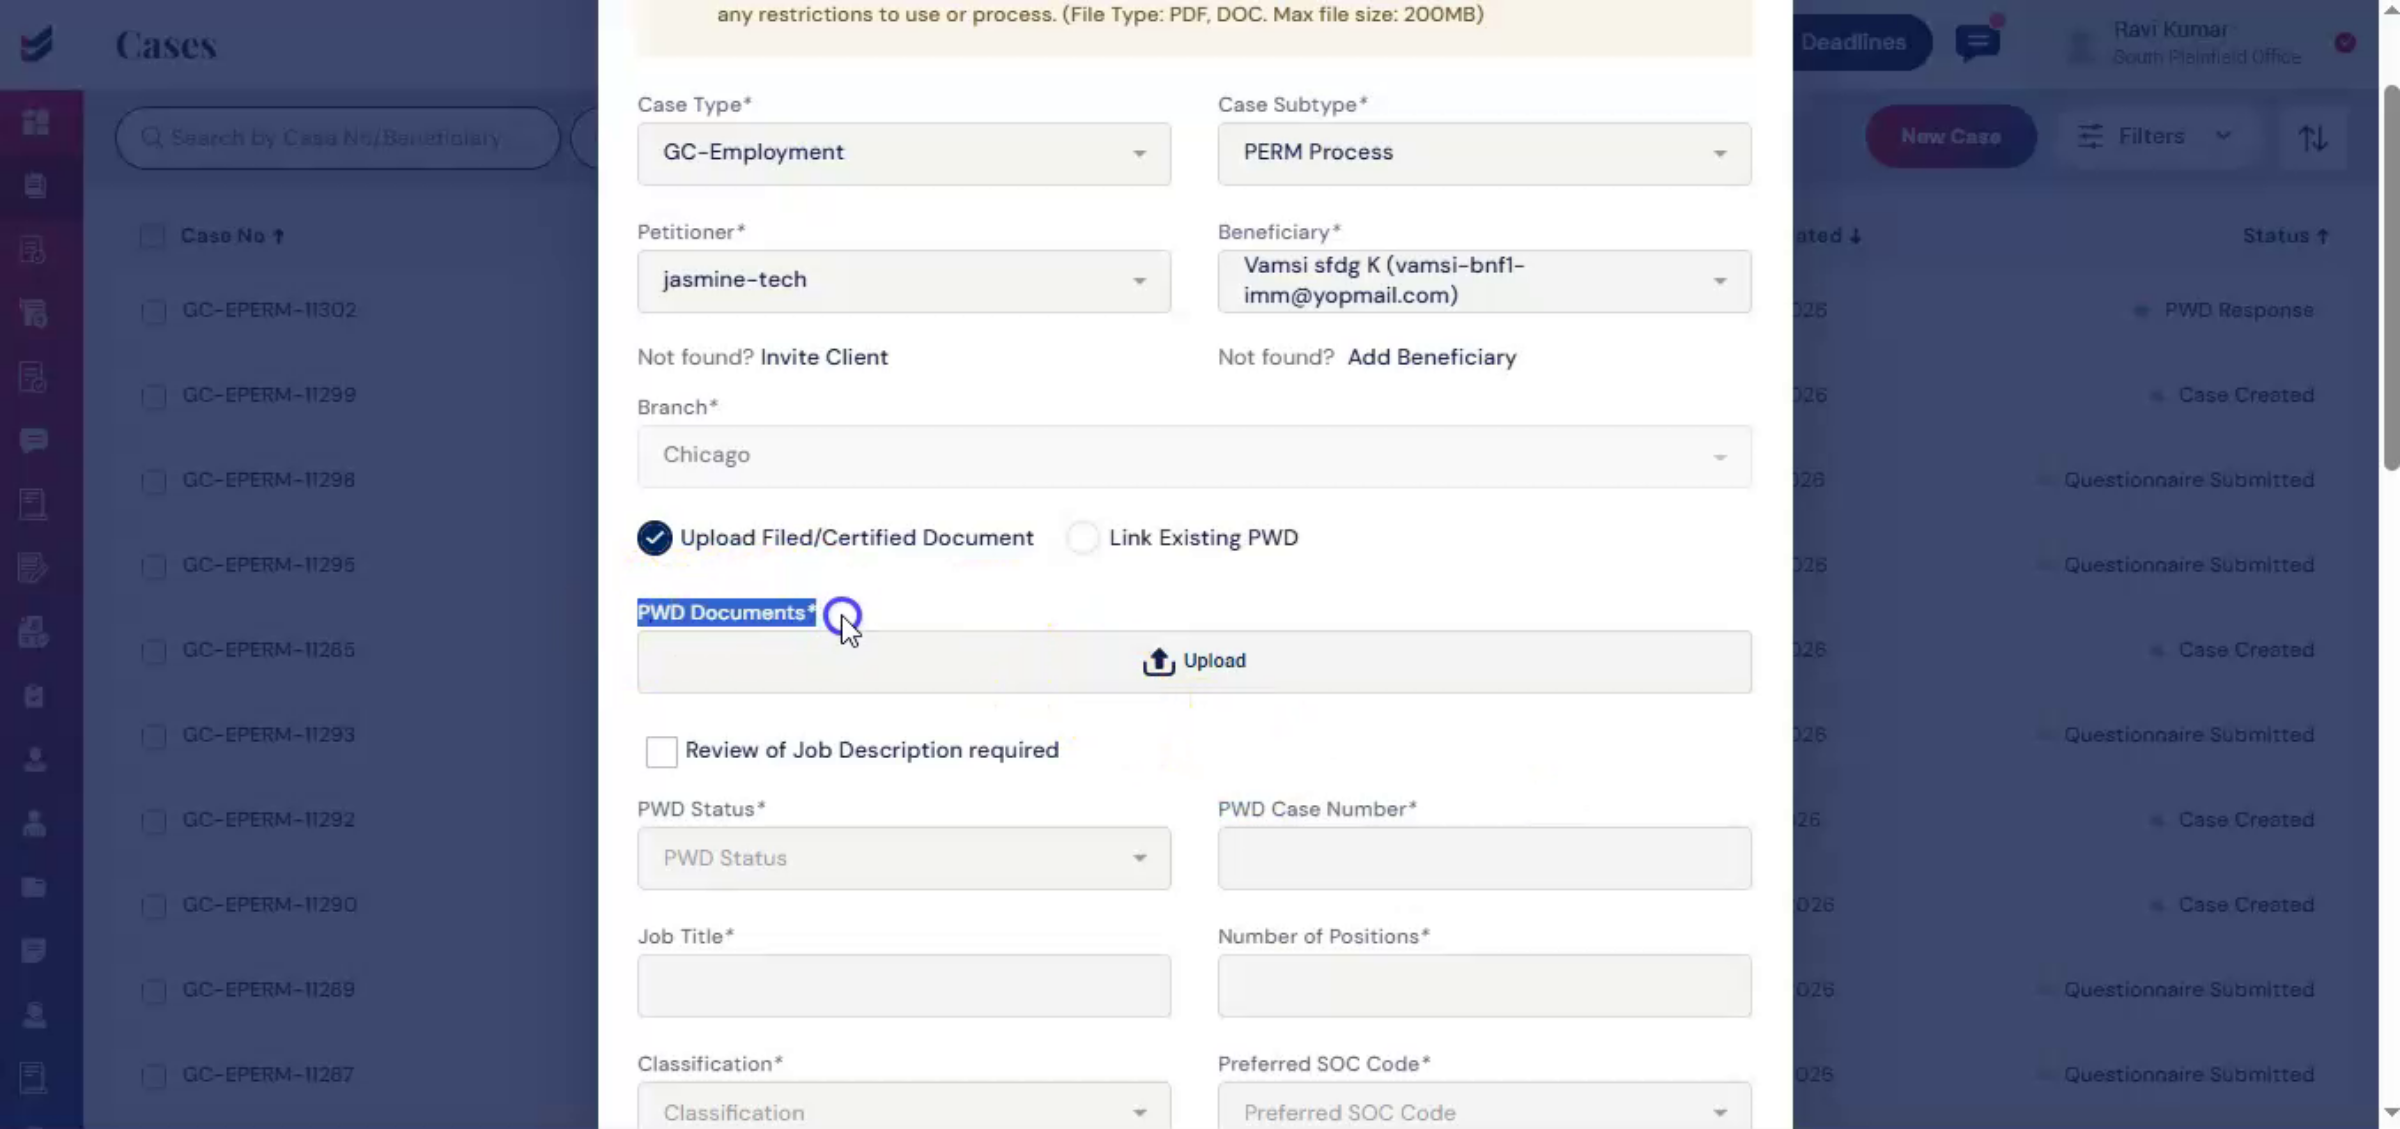
Case one, upload filed or certified document. In the upload section, upload the filed or certified PWD document.
9. Data Extraction From PWD
 * click the image to view enlarged
ImmiBox automatically extracts structured data and populates the related PERM fields, eliminating duplicate data entry and reducing manual errors. Since PERM relies on PWD data, this integration ensures consistency between both processes.
10. Job Description Review Checkbox
 * click the image to view enlarged
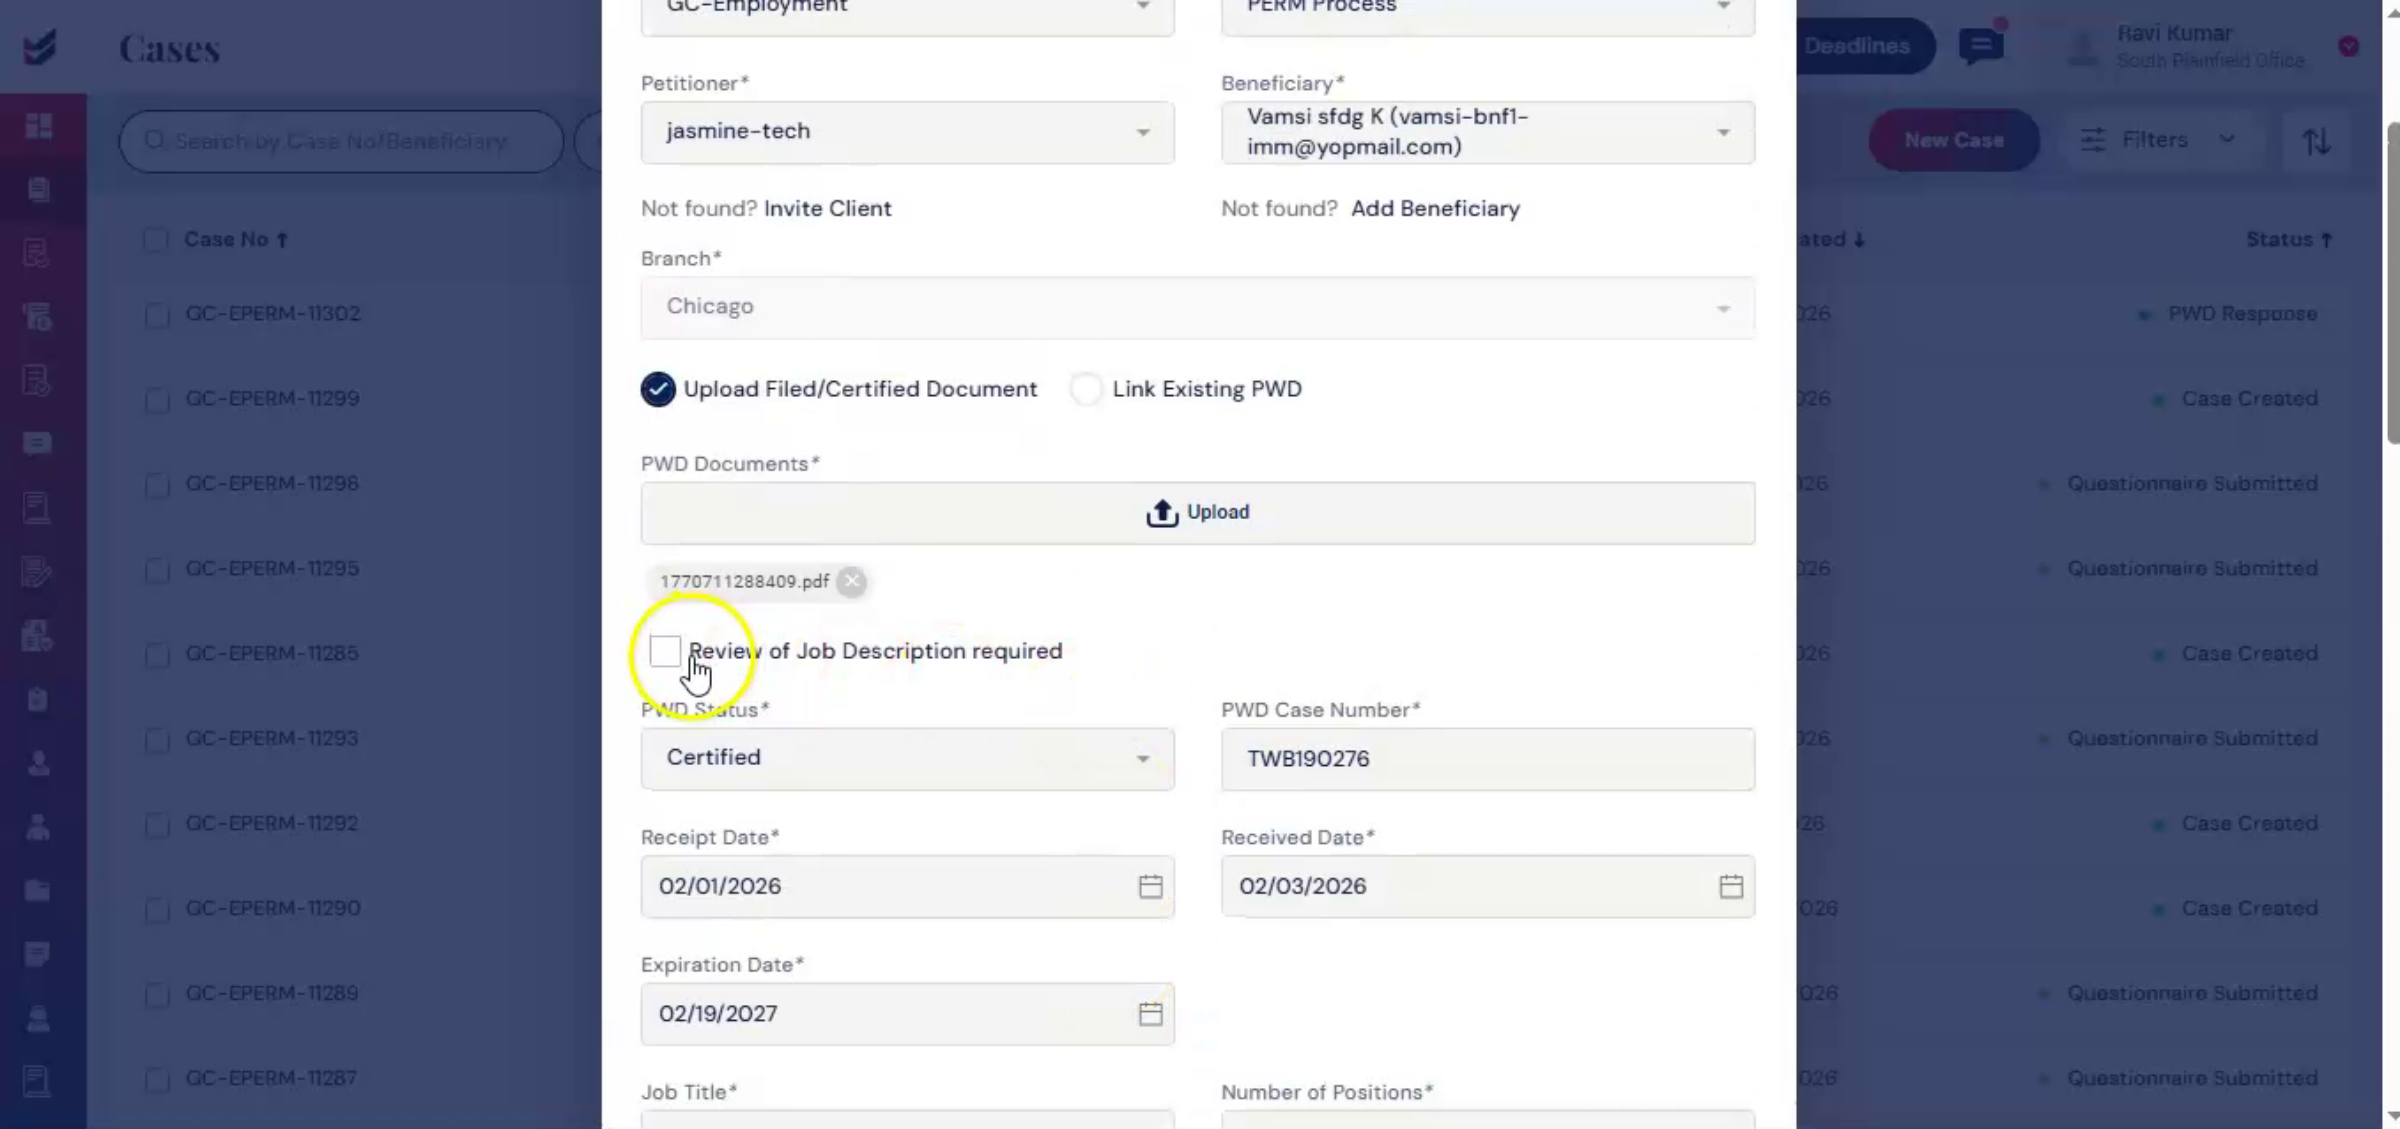
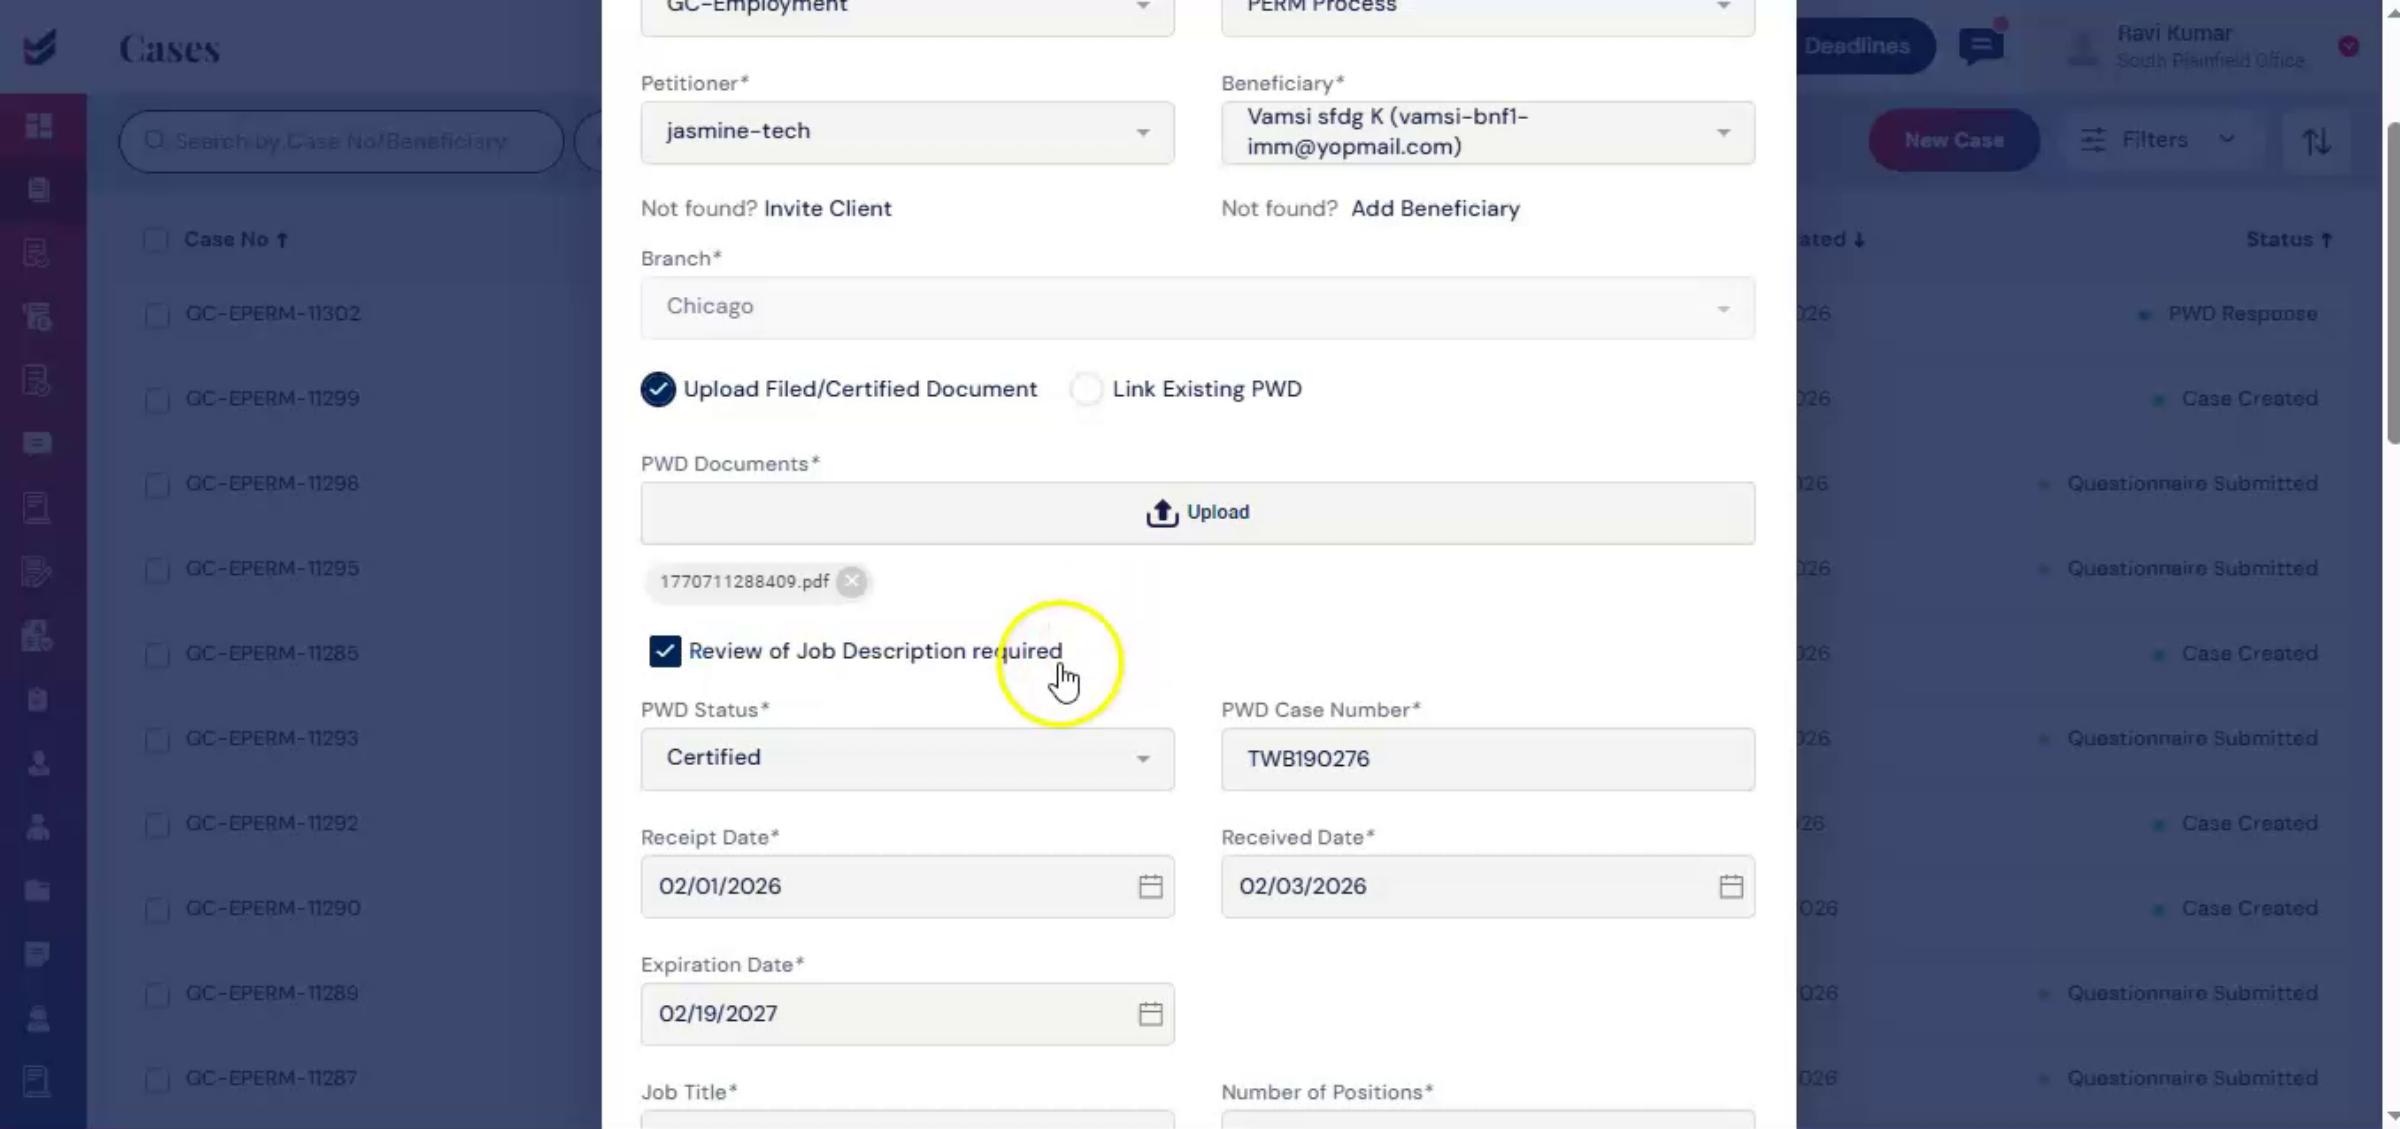
Below the upload section, you will see a checkbox labeled Review of Job Description Required. Selecting this checkbox sends the job description for review and acknowledgement during the job description stage. This ensures that job details are properly reviewed before proceeding.
11. Manual Data Entry Option
 * click the image to view enlarged
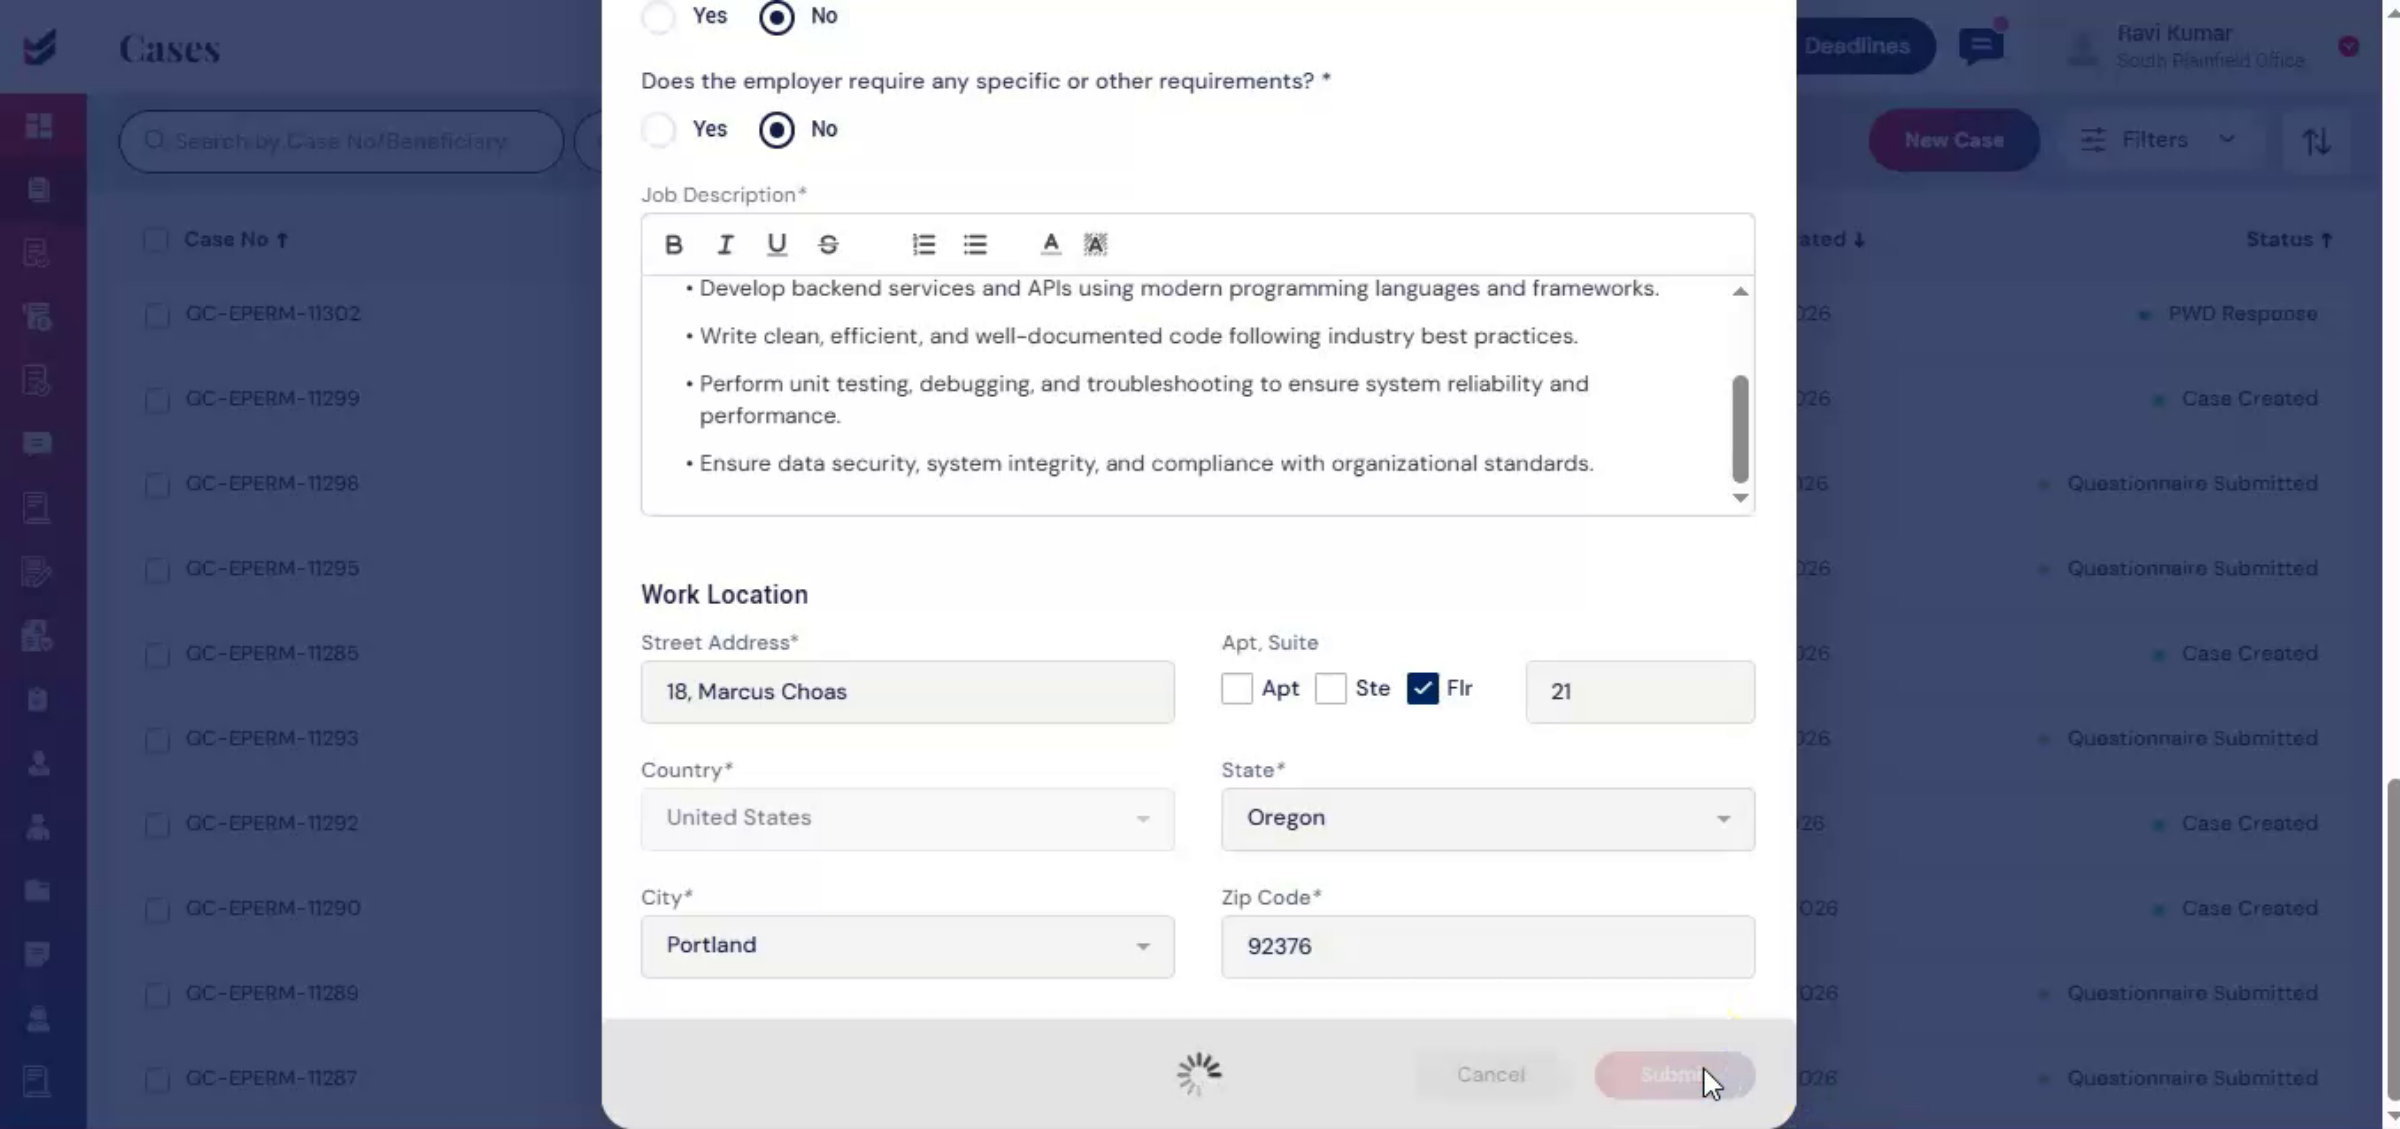
If any information is not auto-populated due to formatting limitations, it can be entered manually.
12. Submitting PERM Case
 * click the image to view enlarged
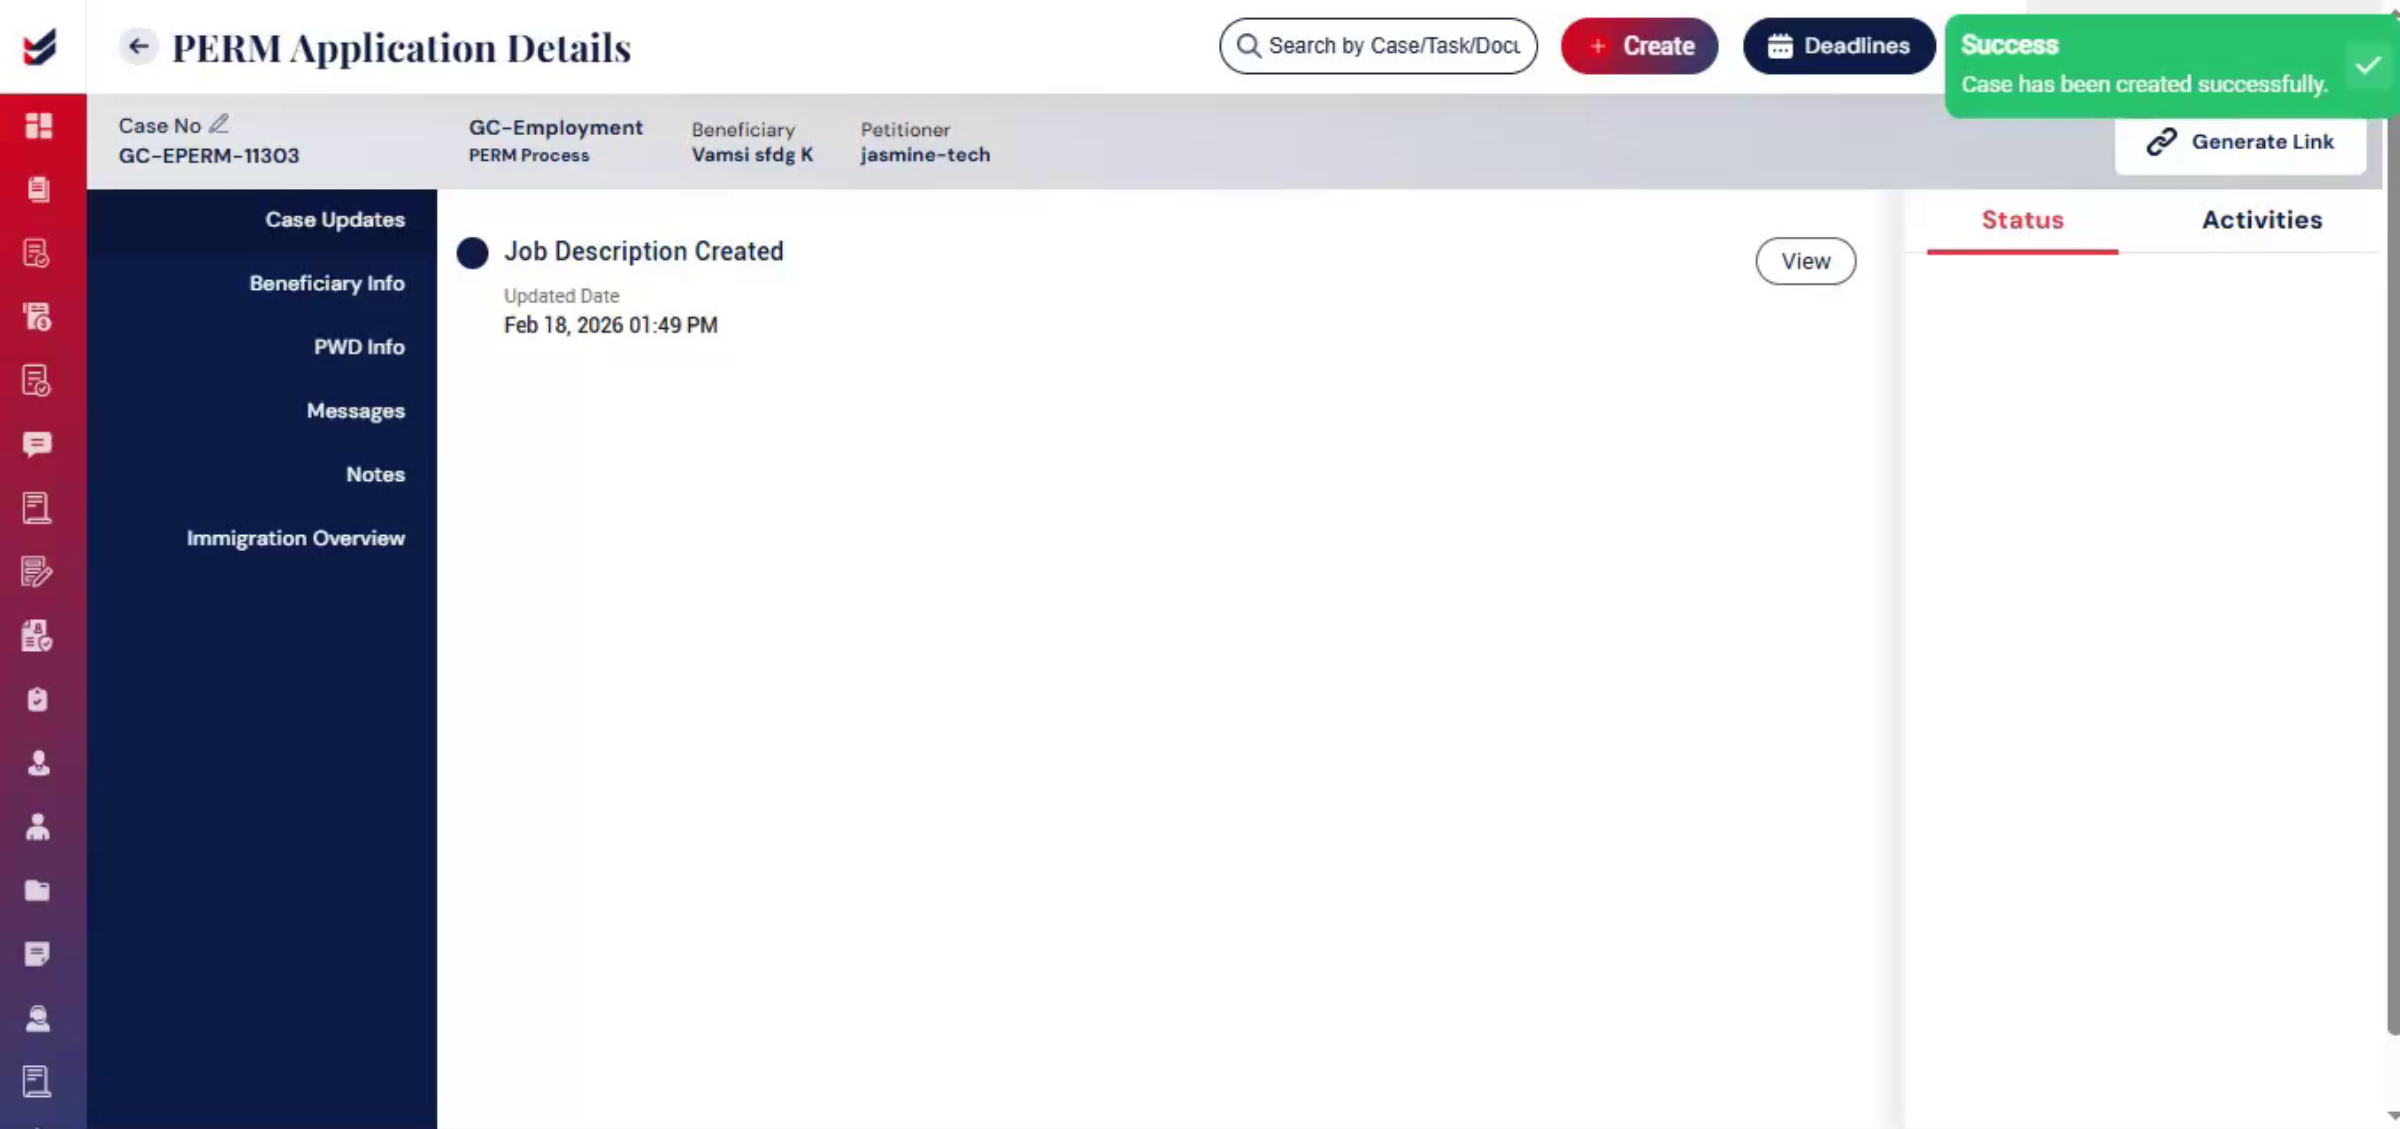
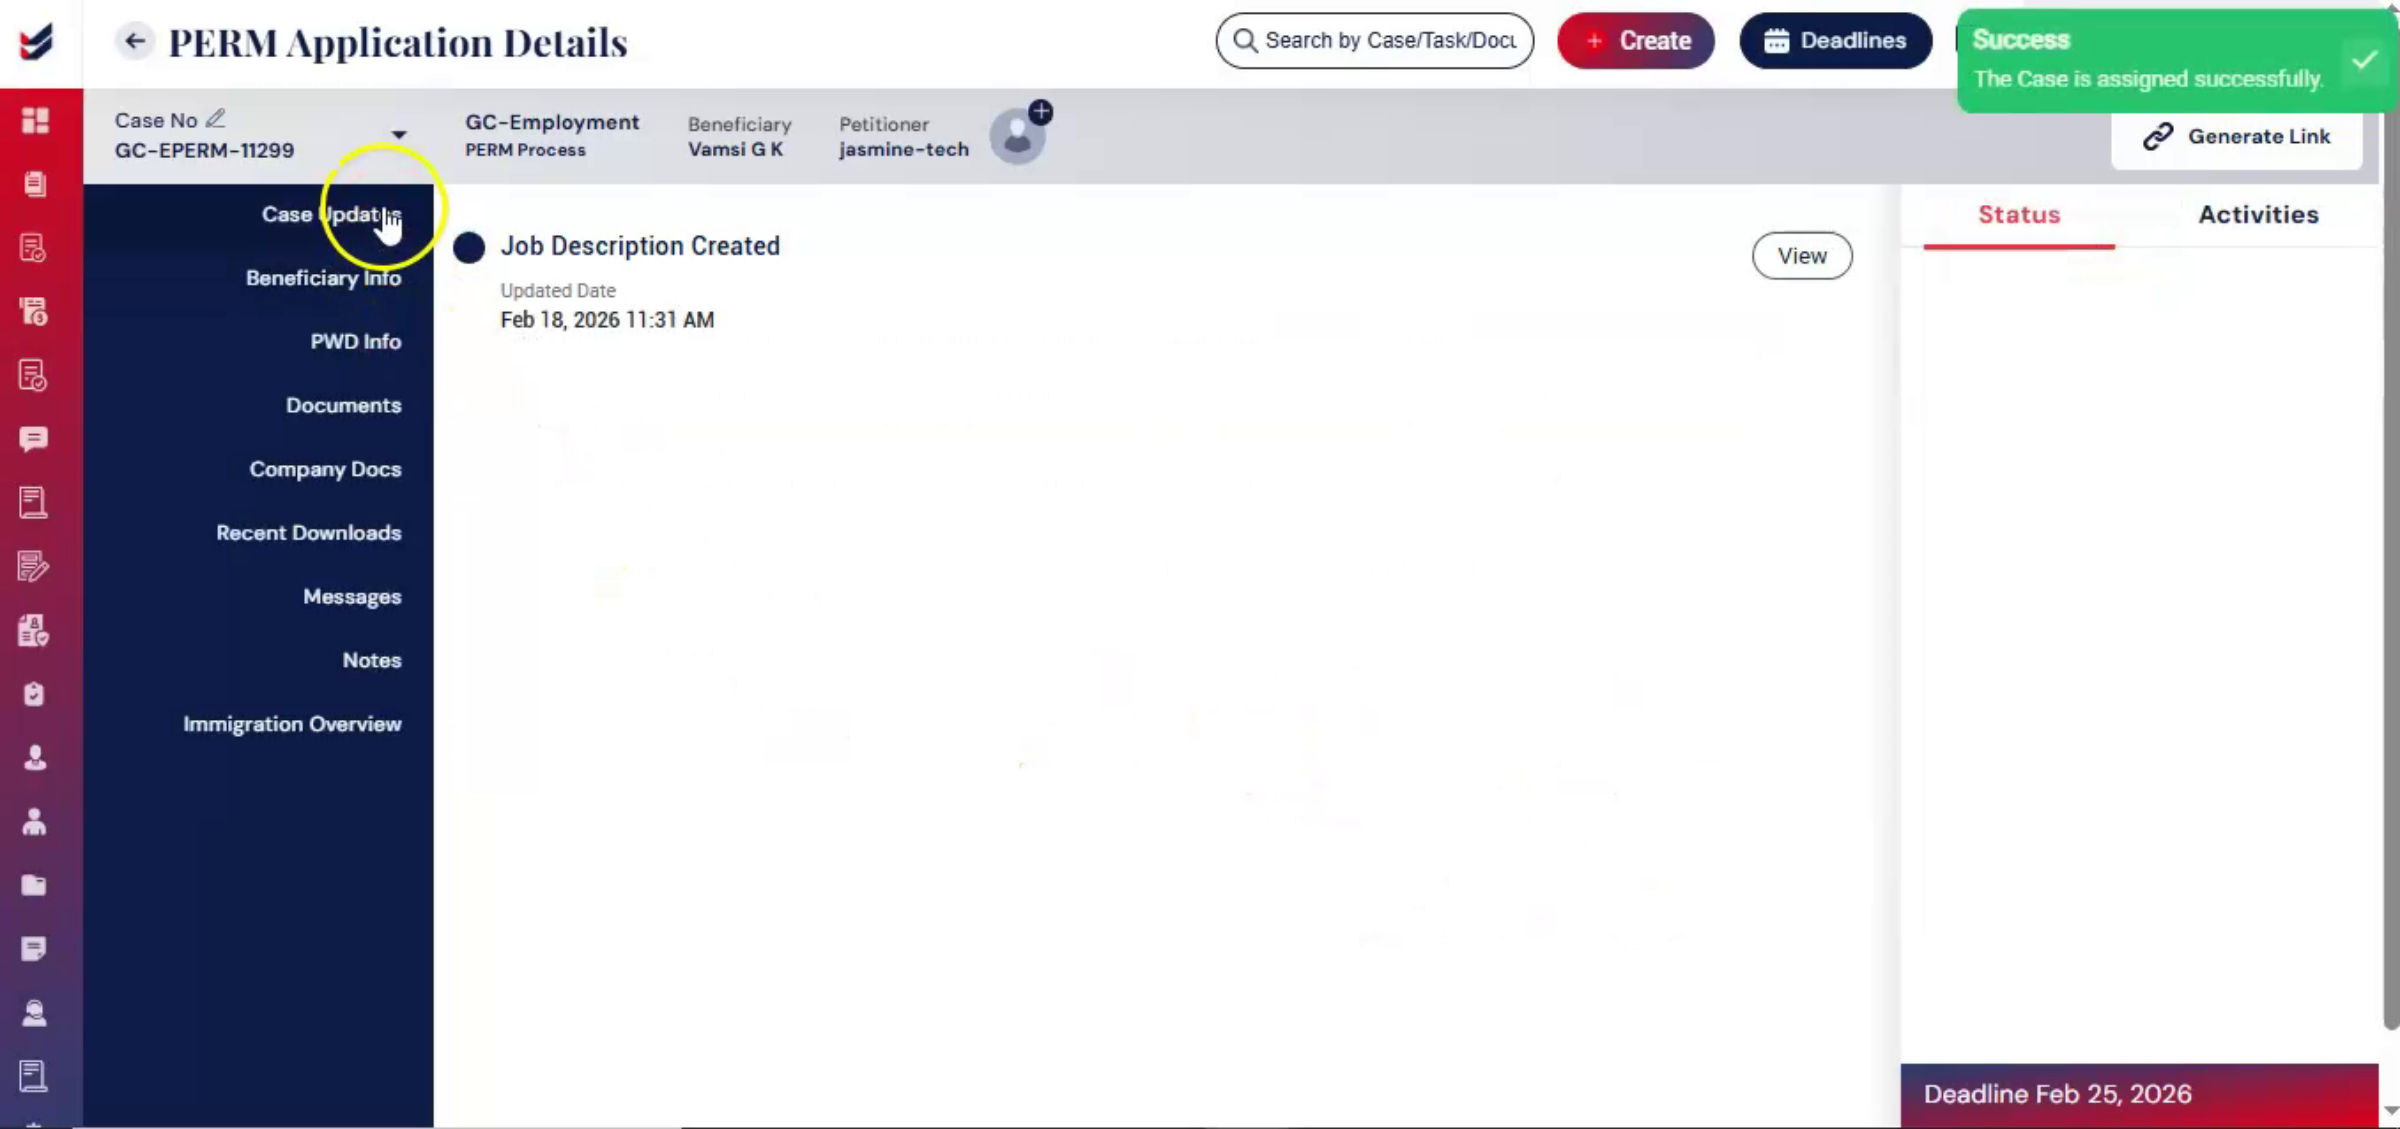
After reviewing all details, click Submit. You will be redirected to the PERM Application Details page.
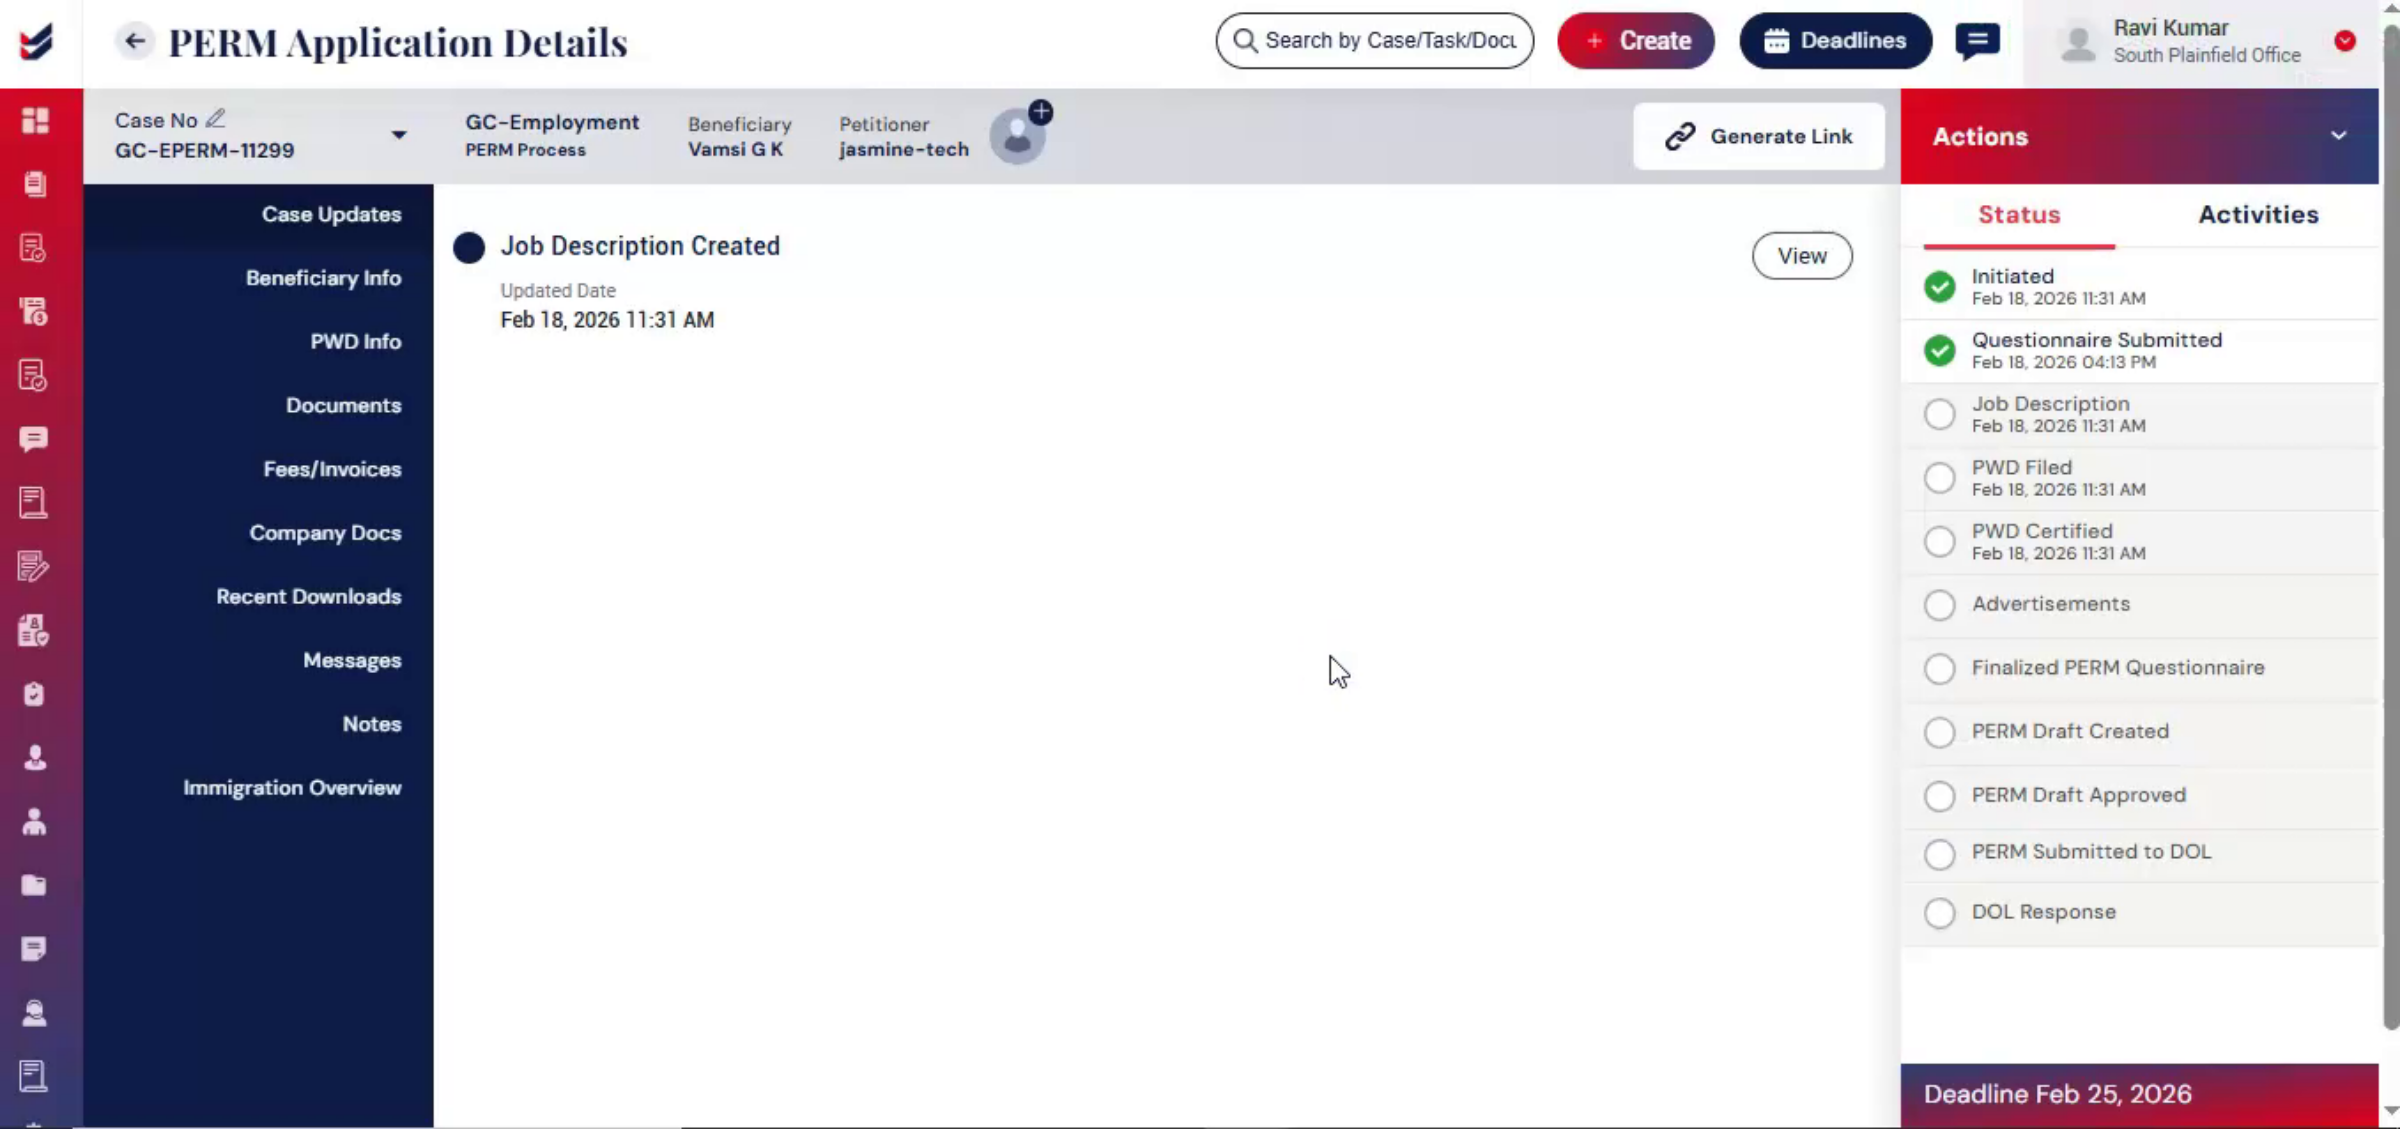
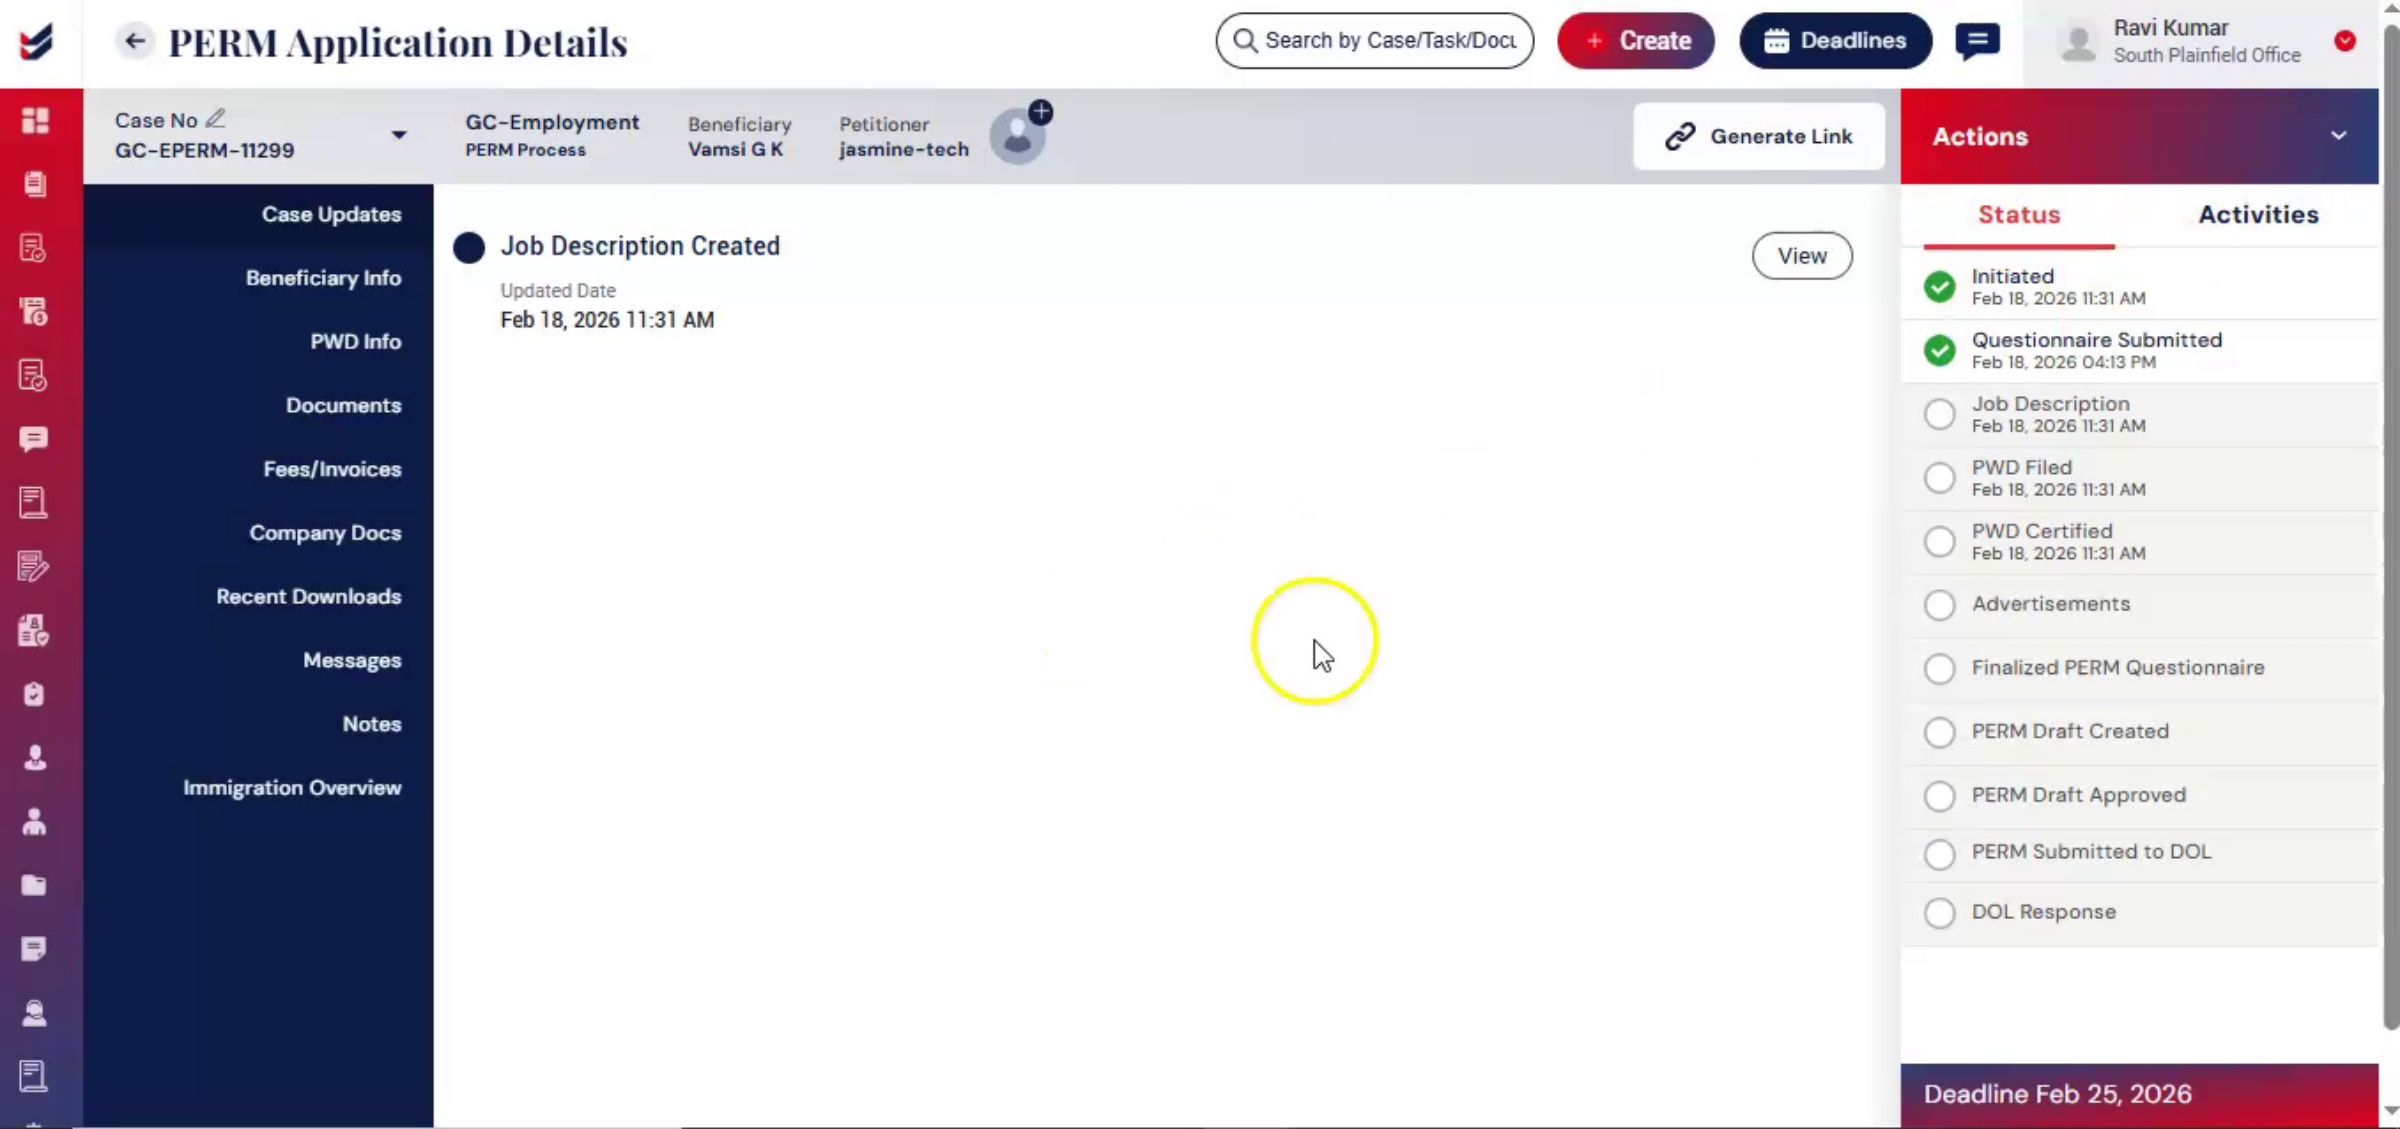
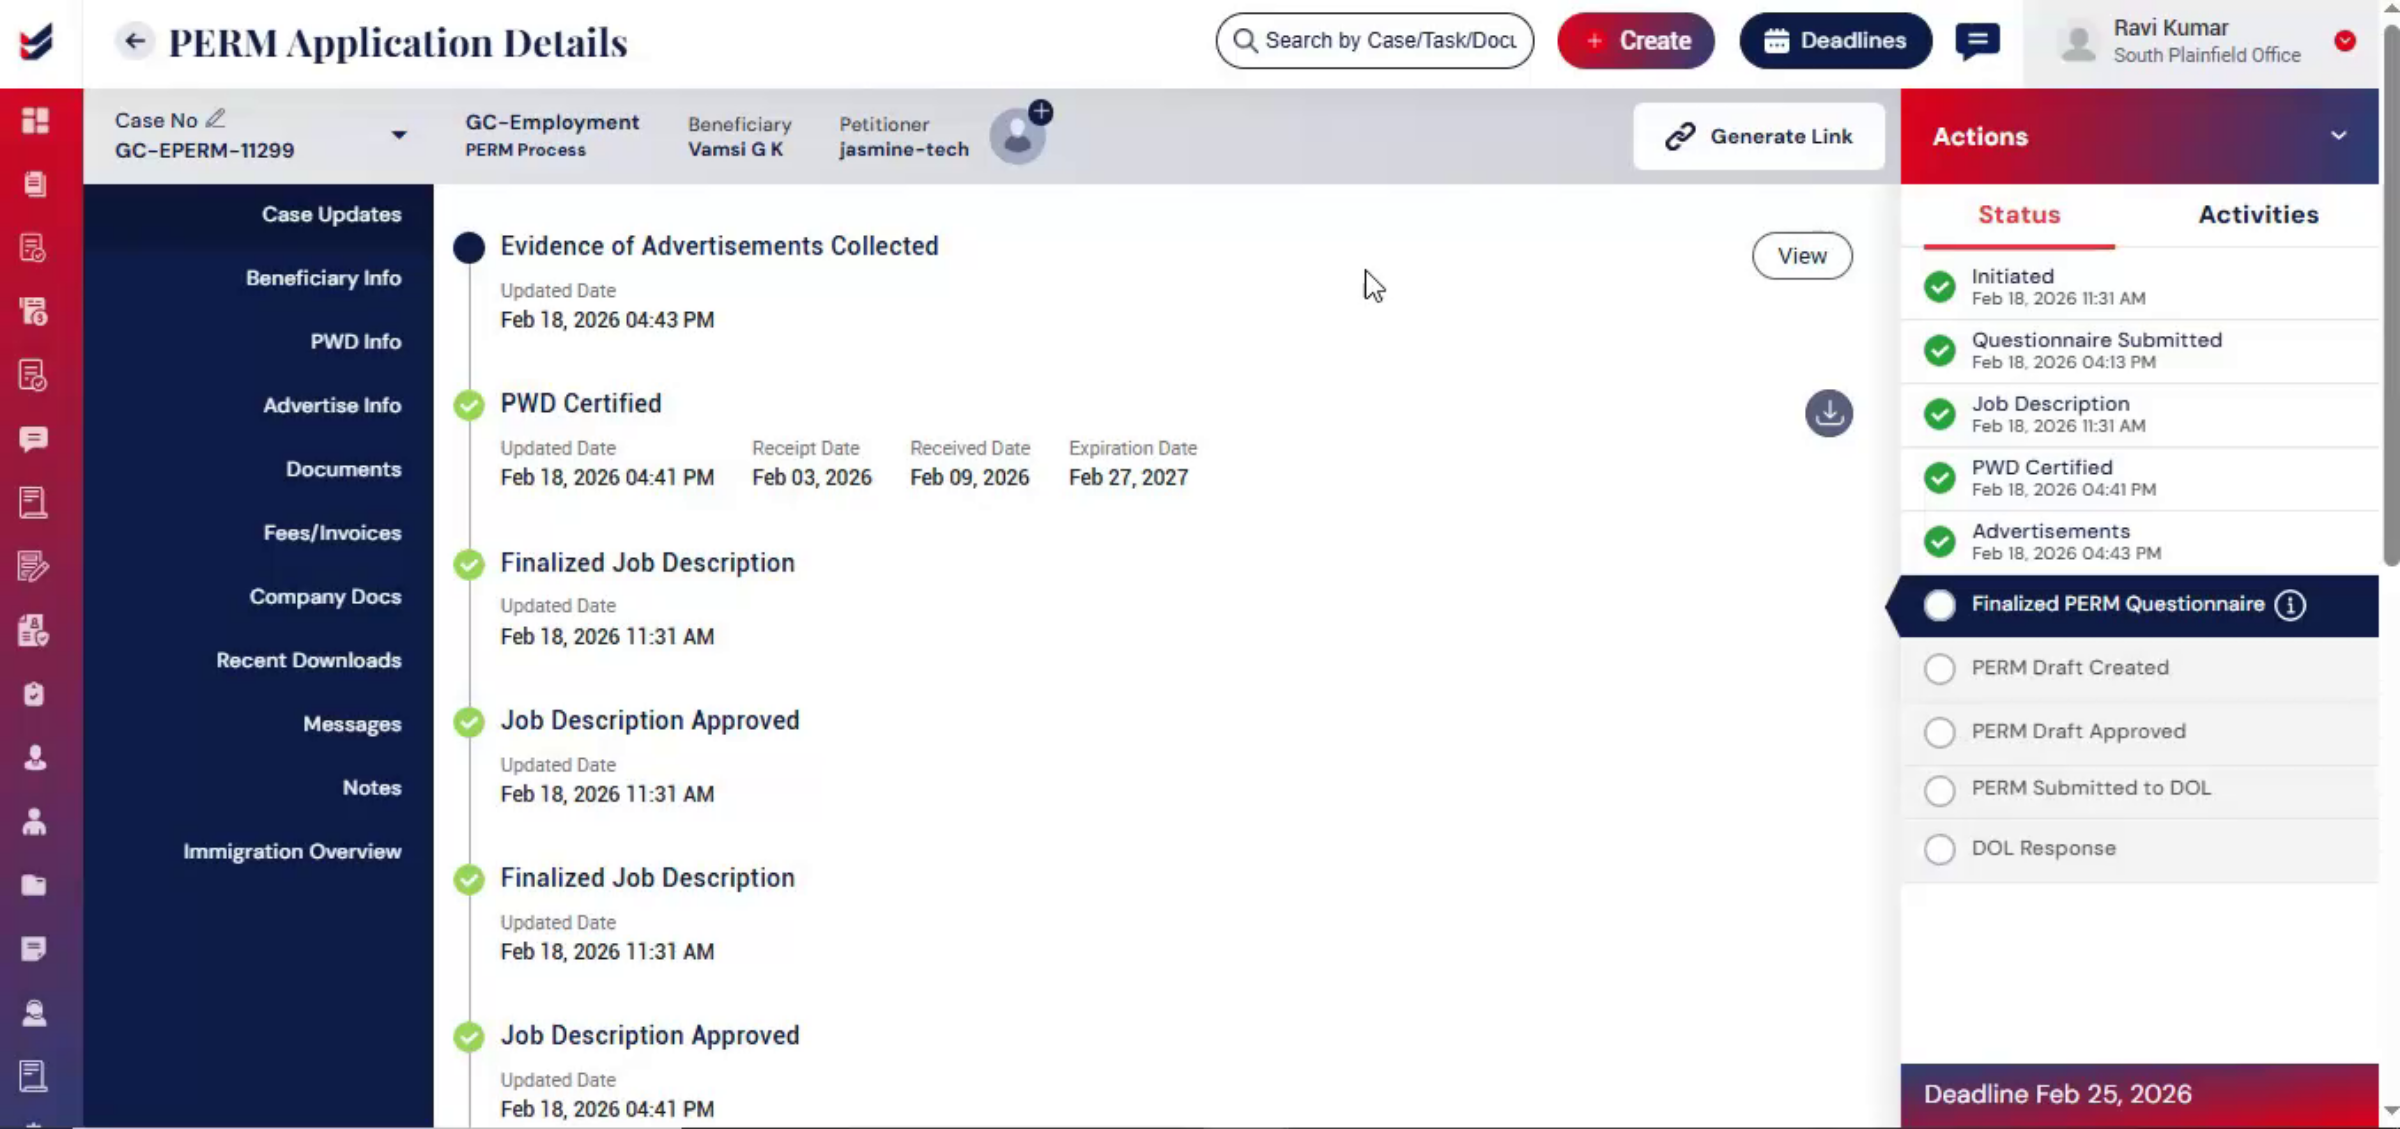
13. Automatic Stage Marking
 * click the image to view enlarged
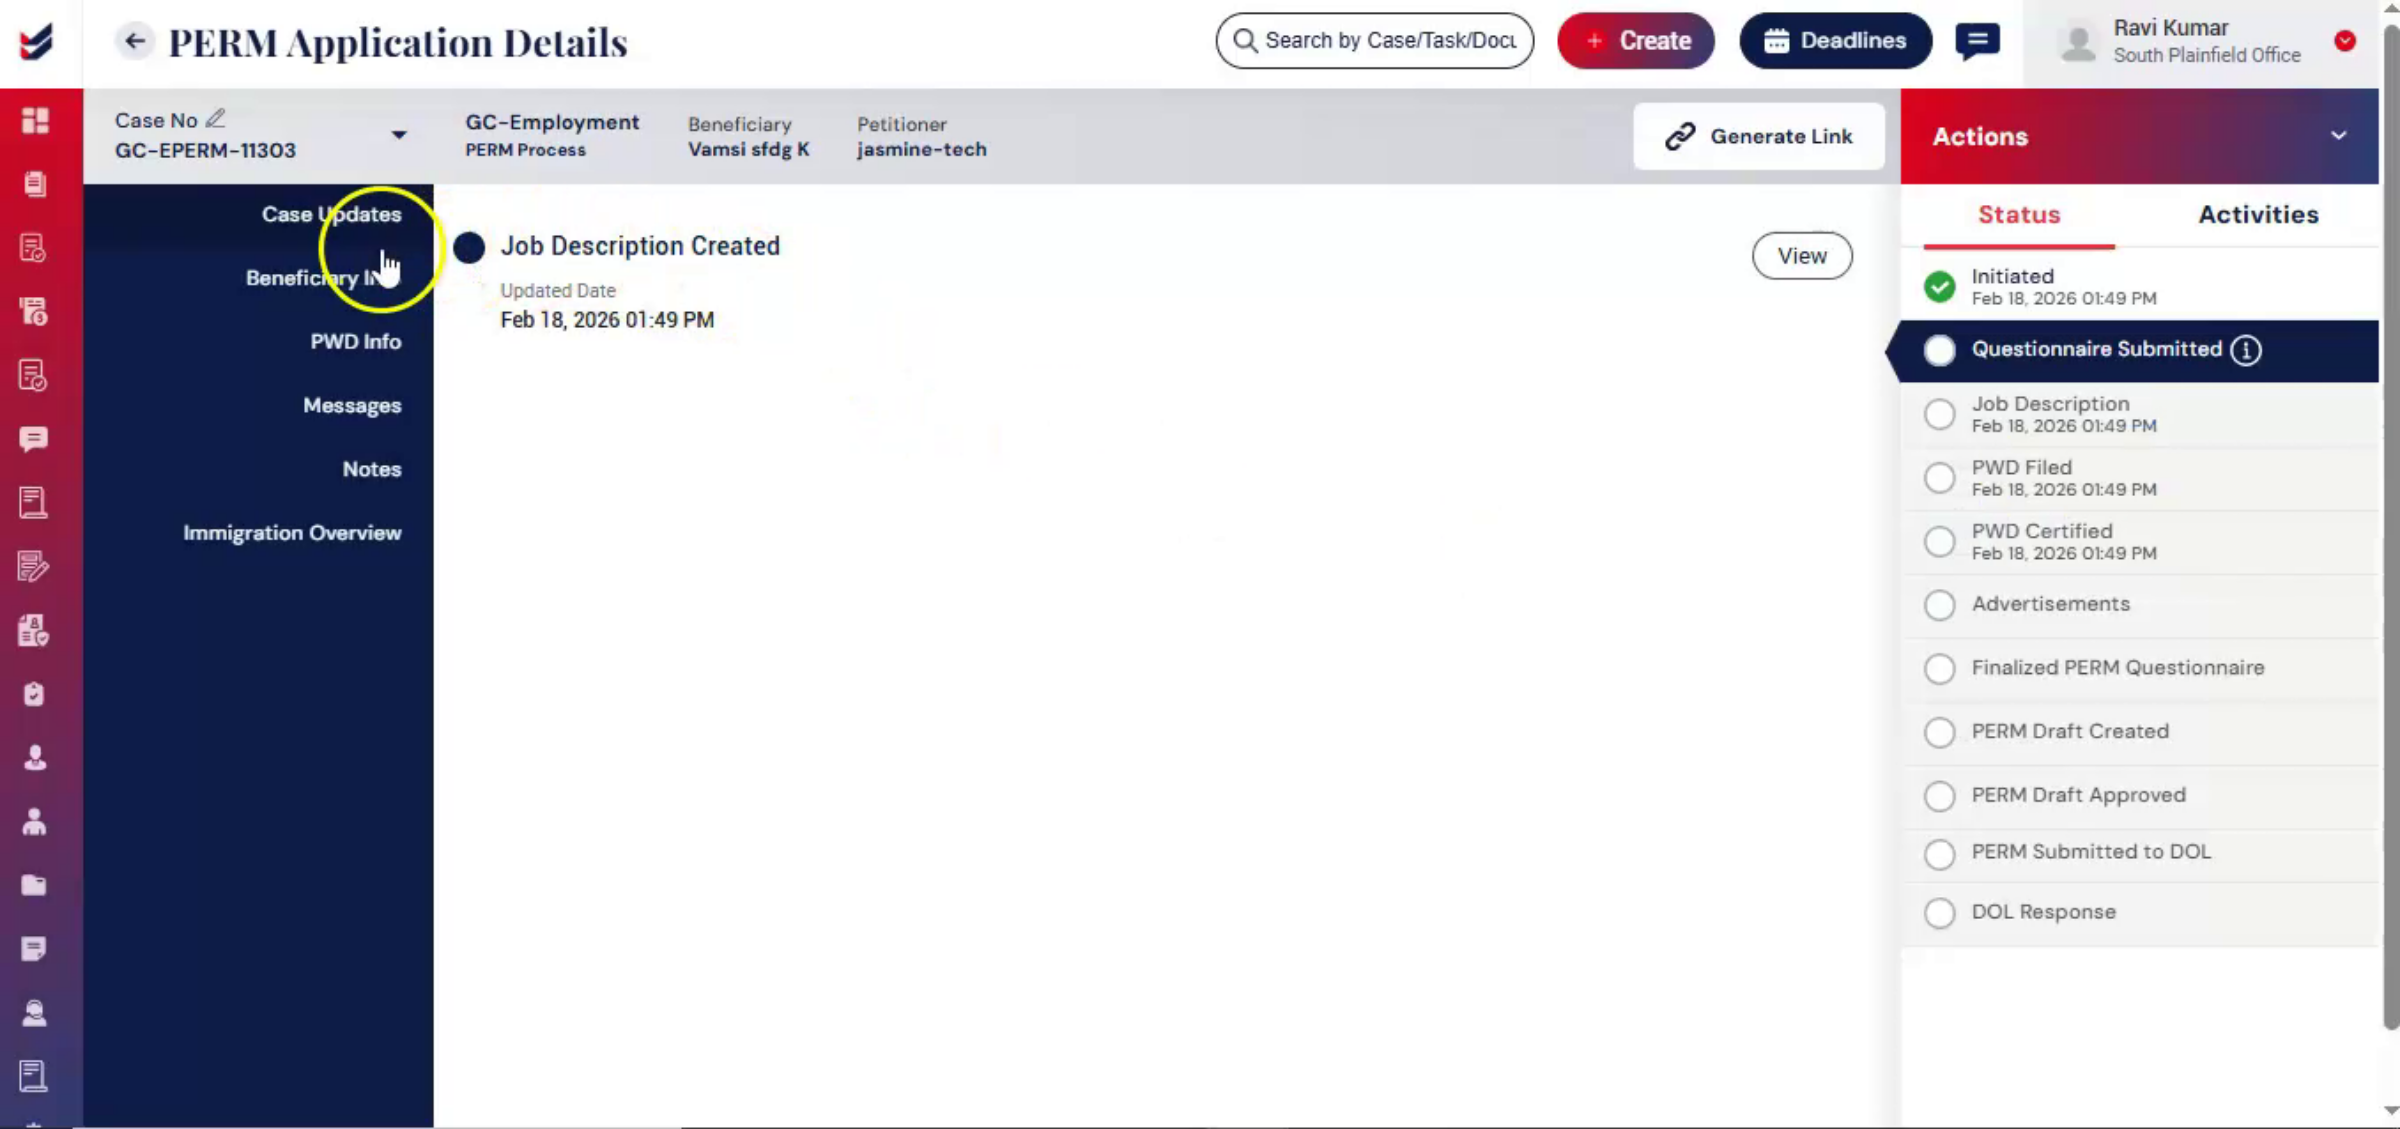
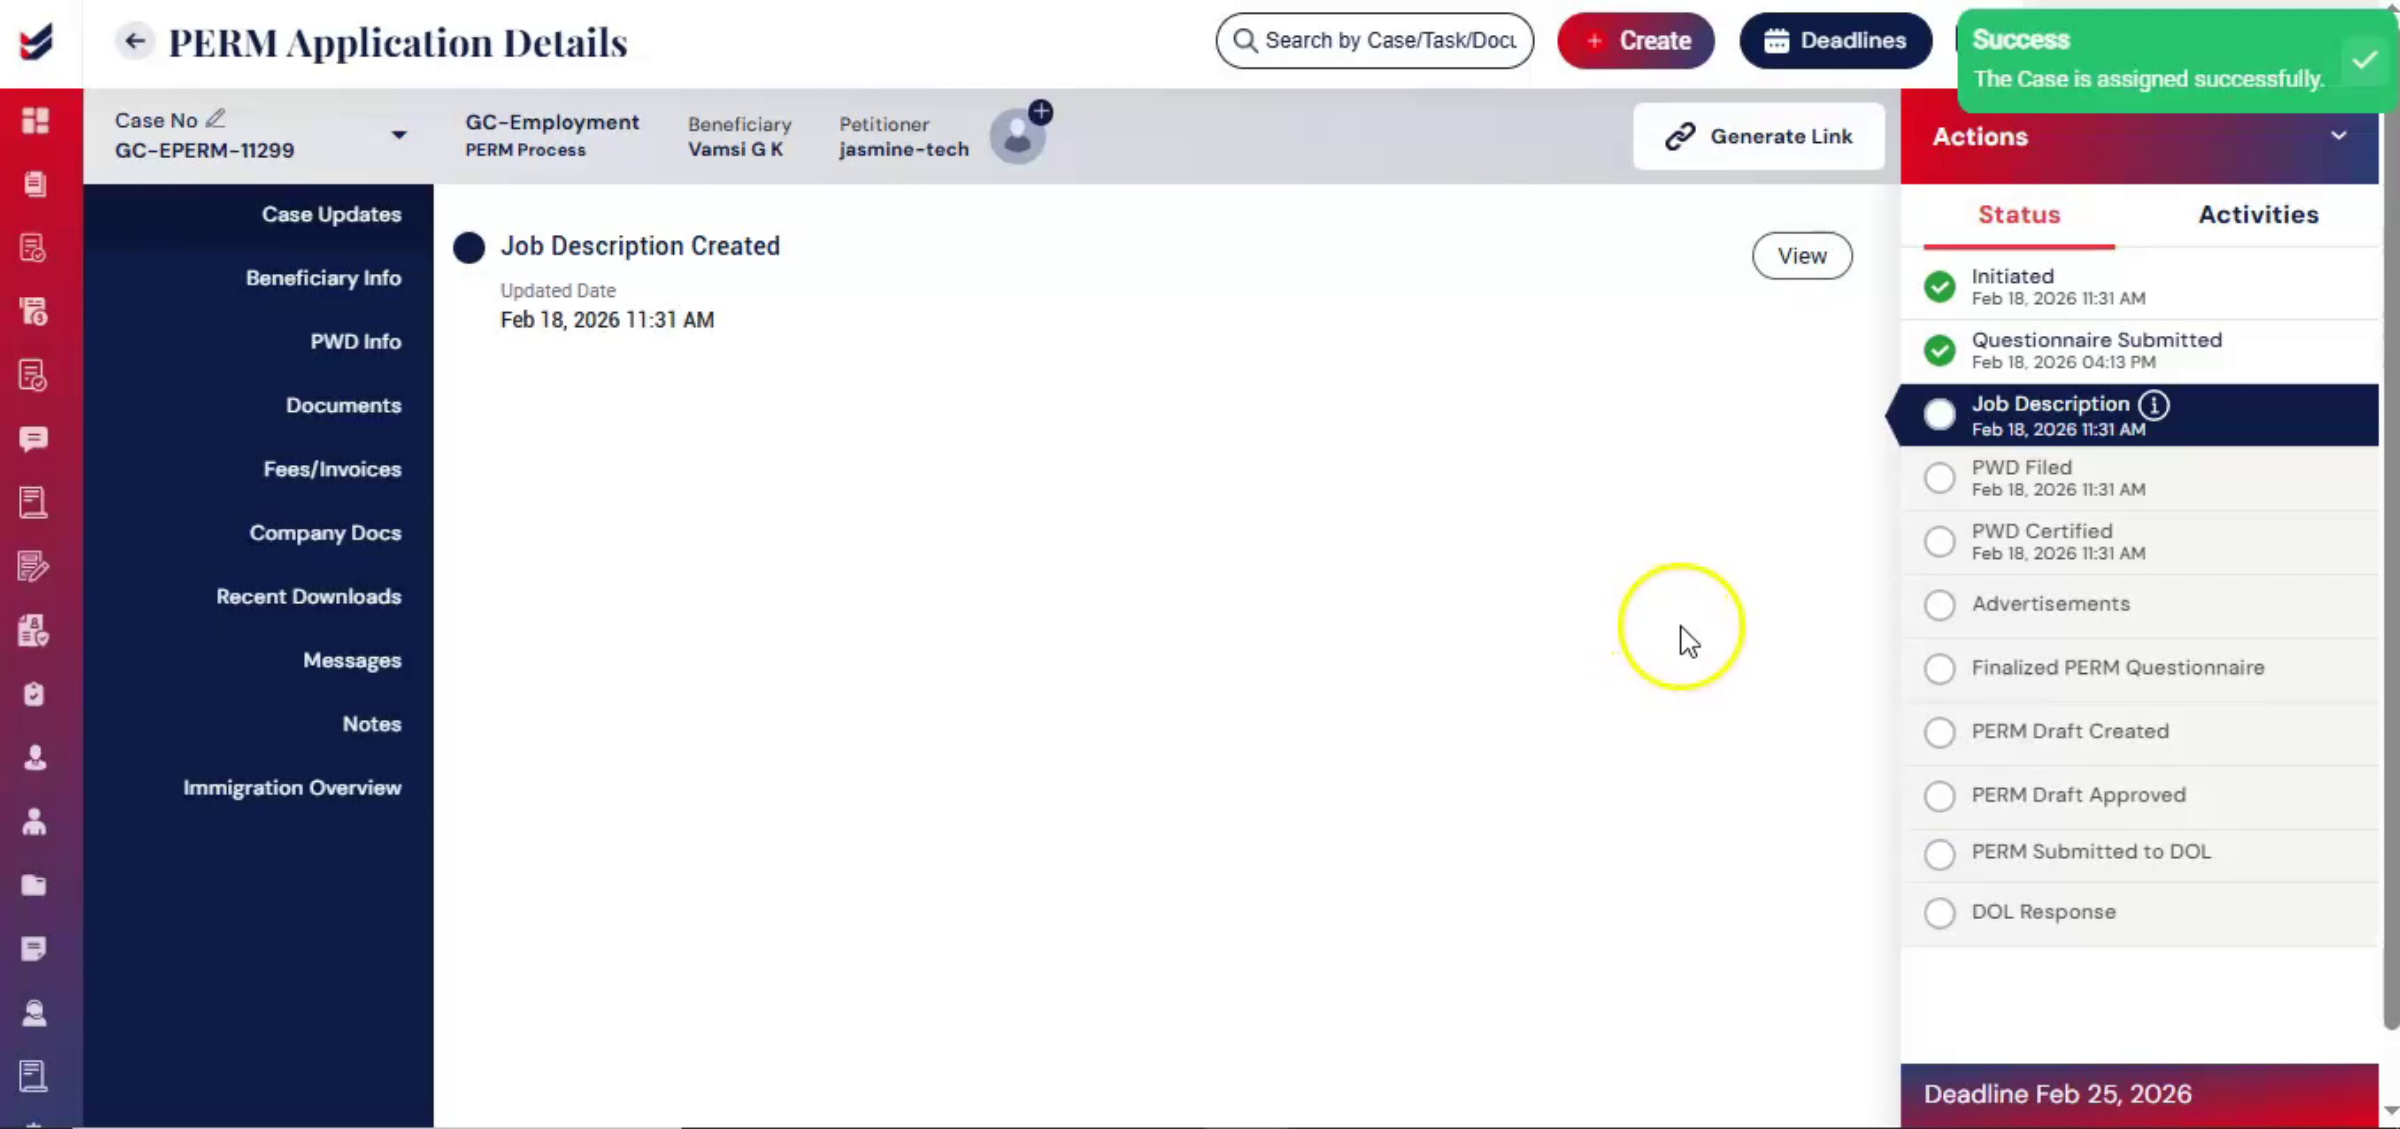
Once the case is created, ImmiBox automatically marks stages such as job description, PWD filed, or PWD certified as partially completed based on the uploaded document.
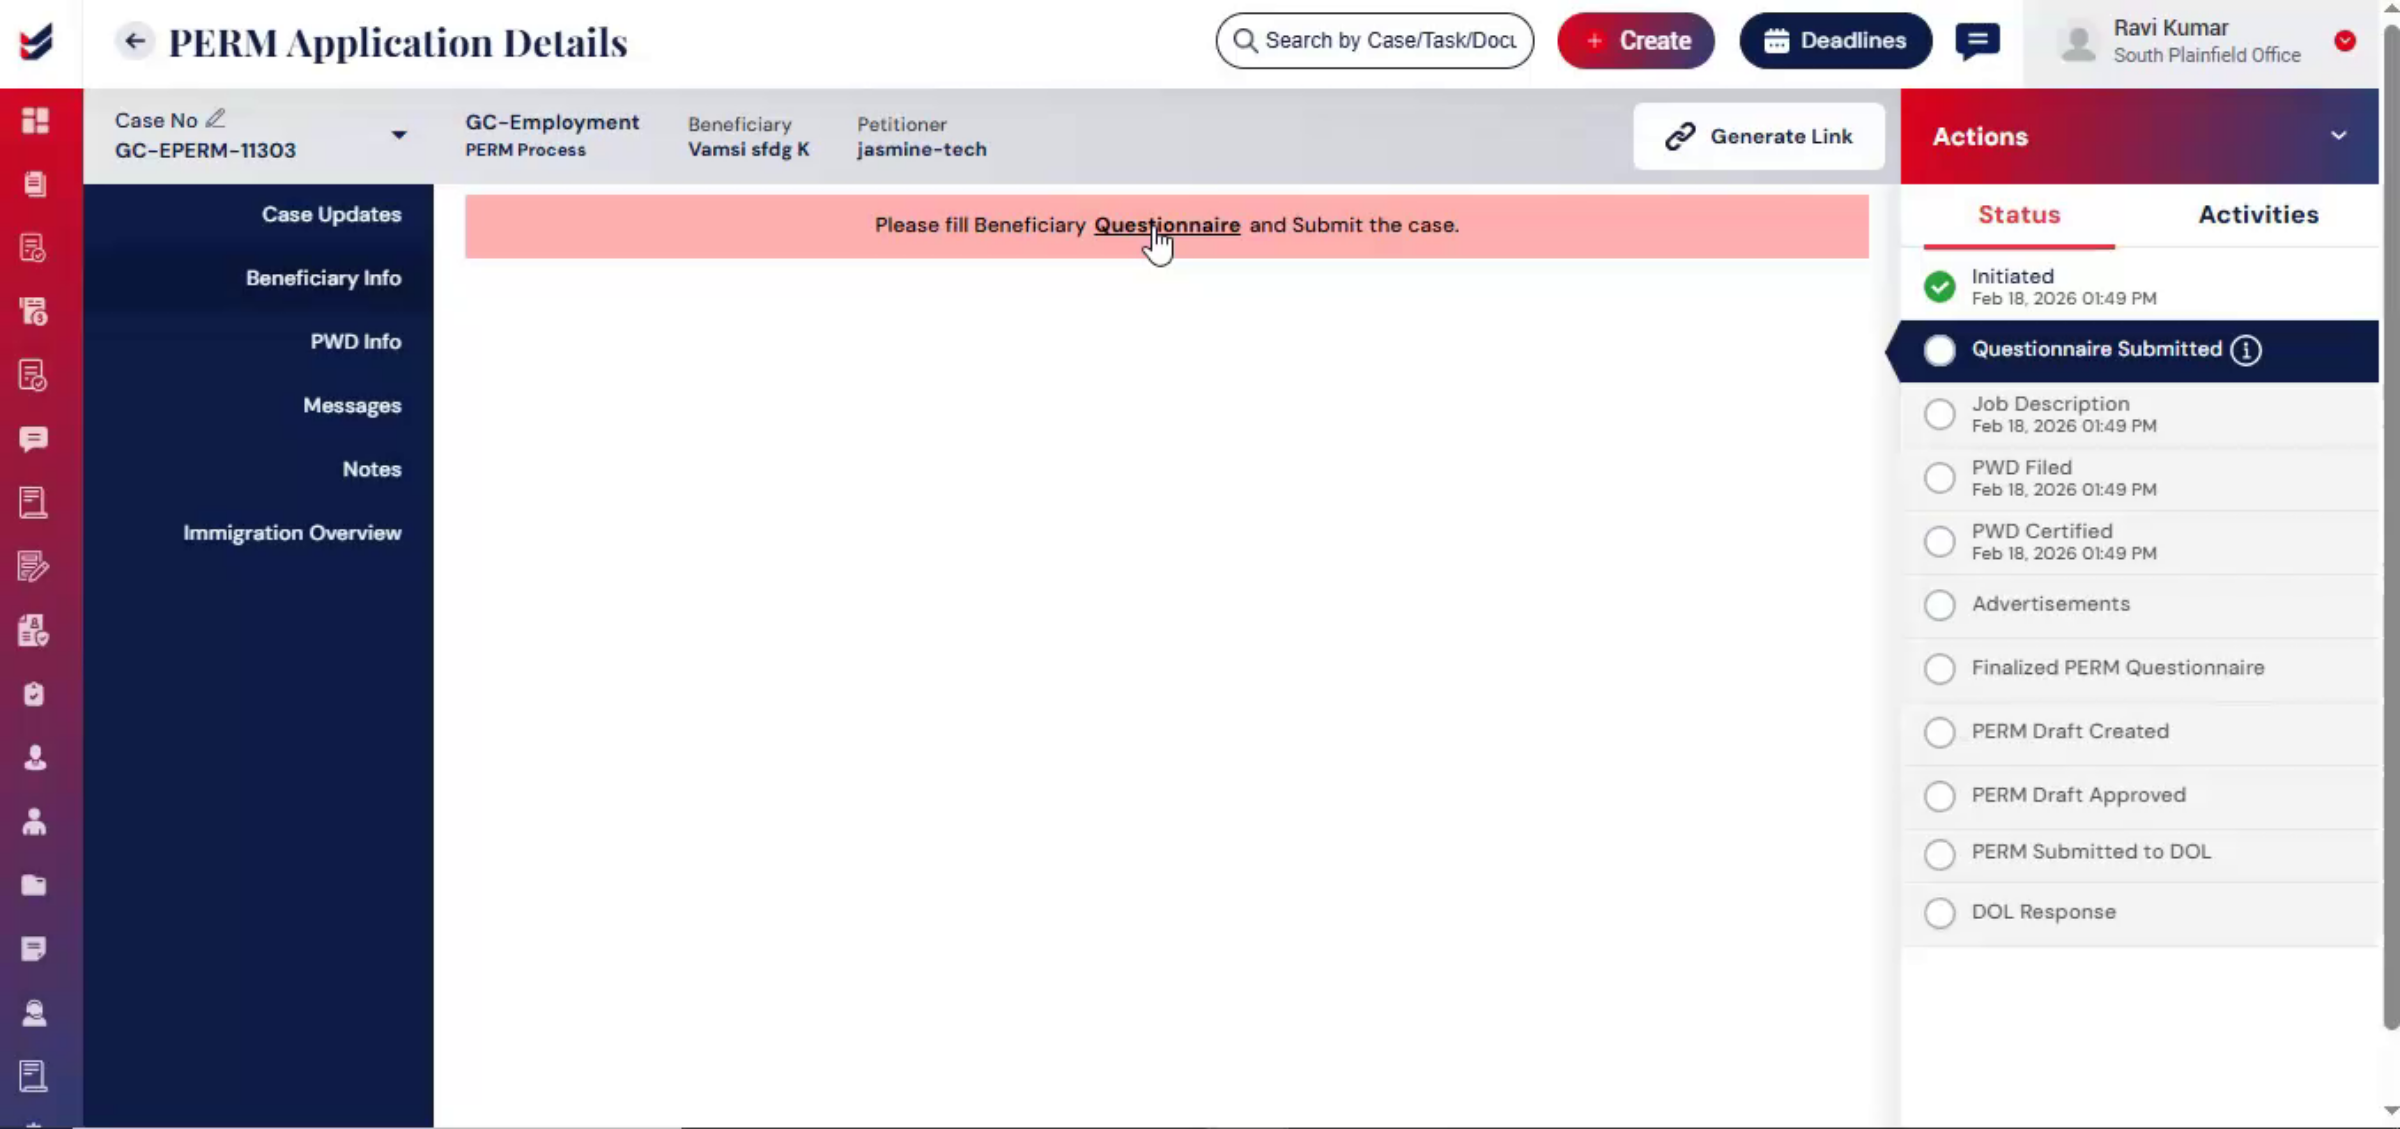
14. Beneficiary Questionnaire Access
 * click the image to view enlarged
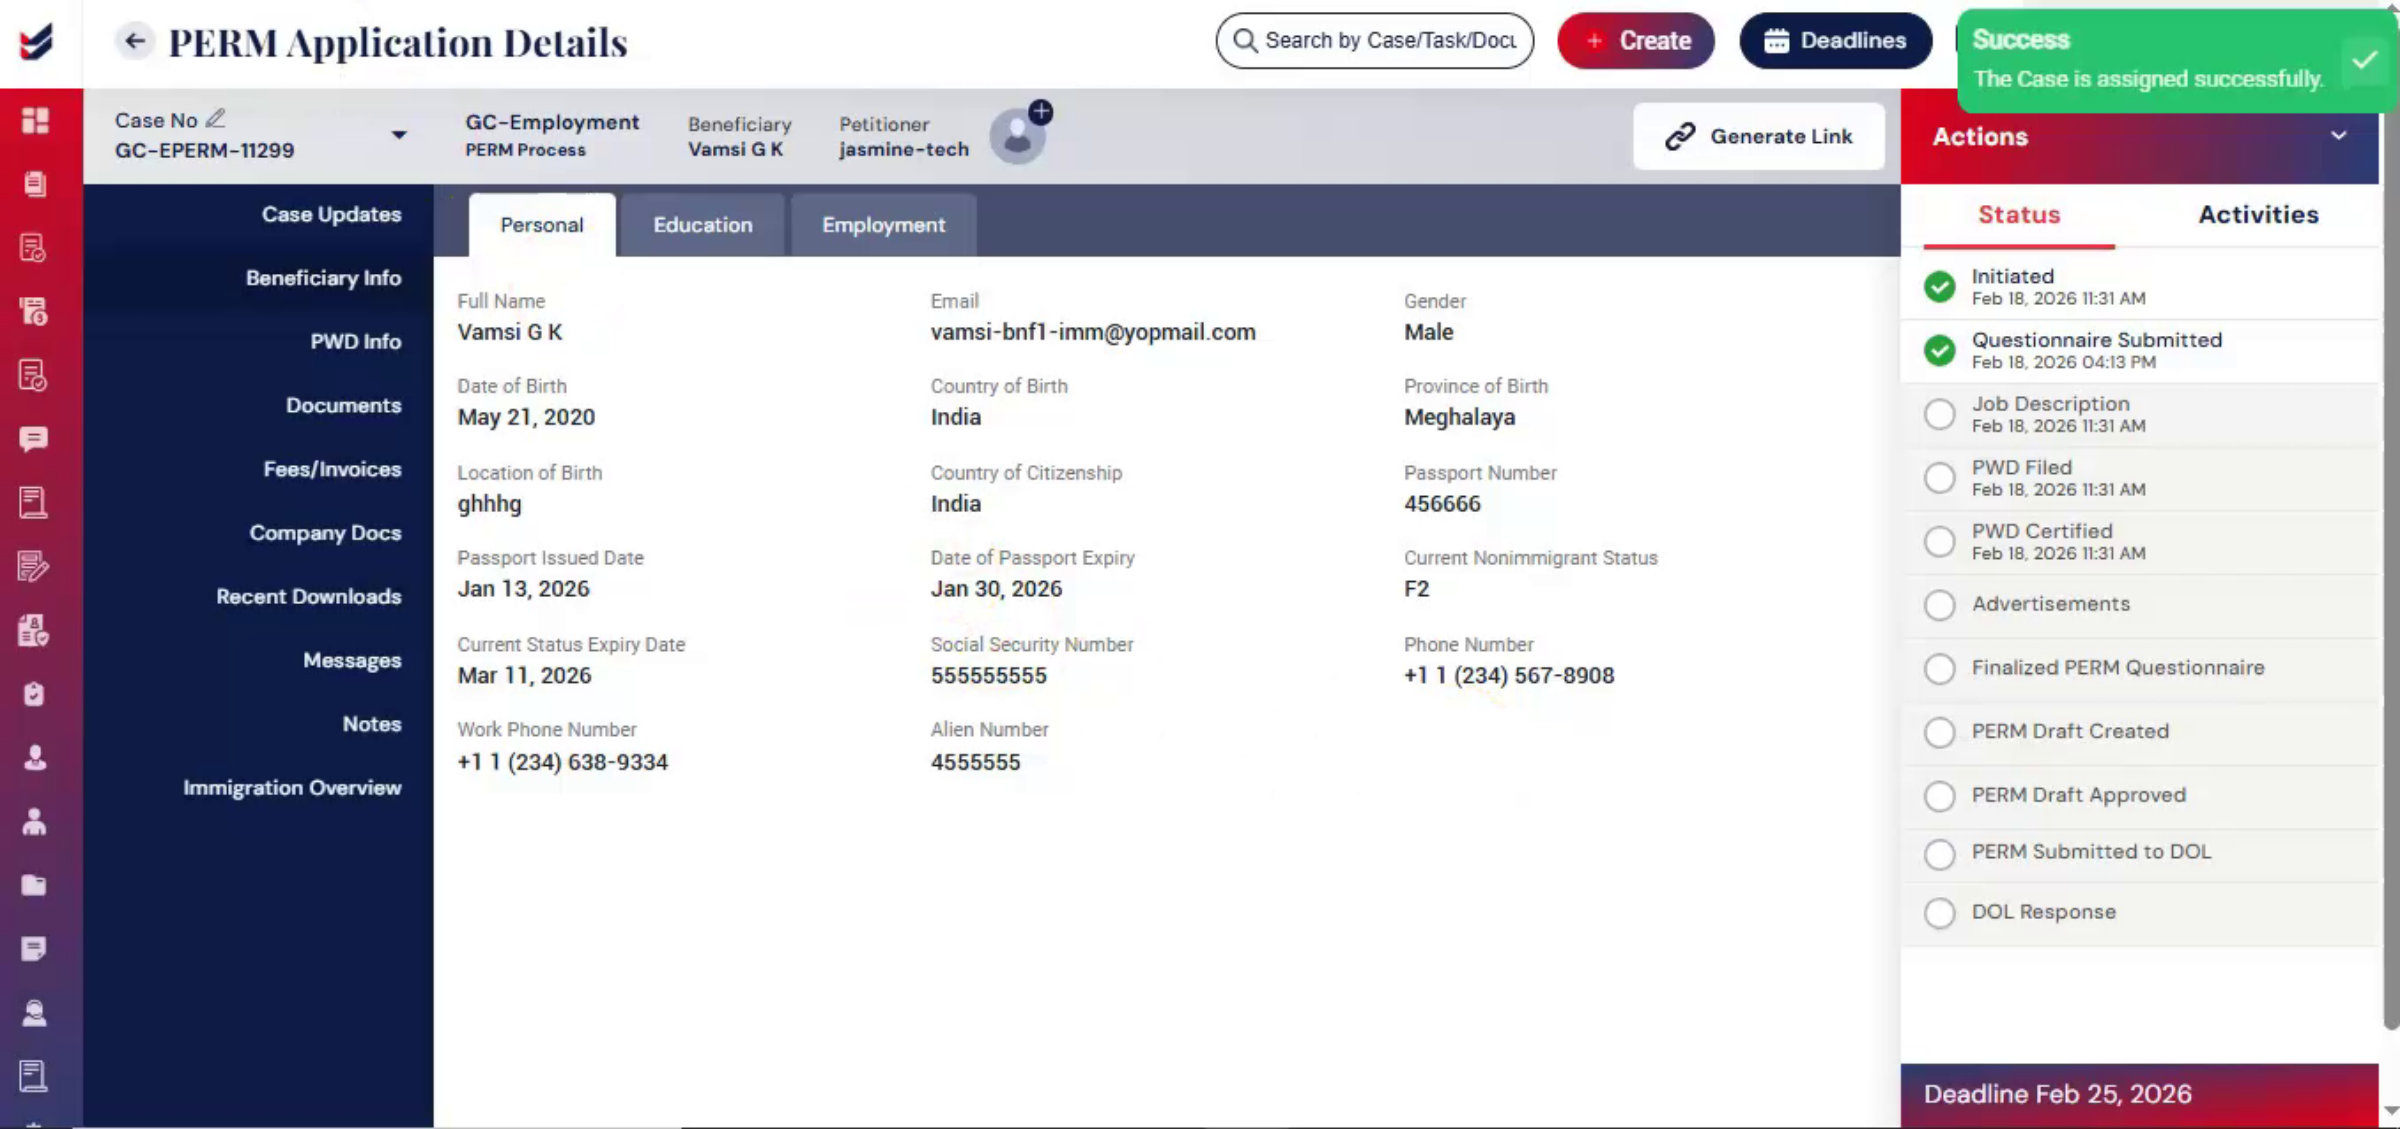
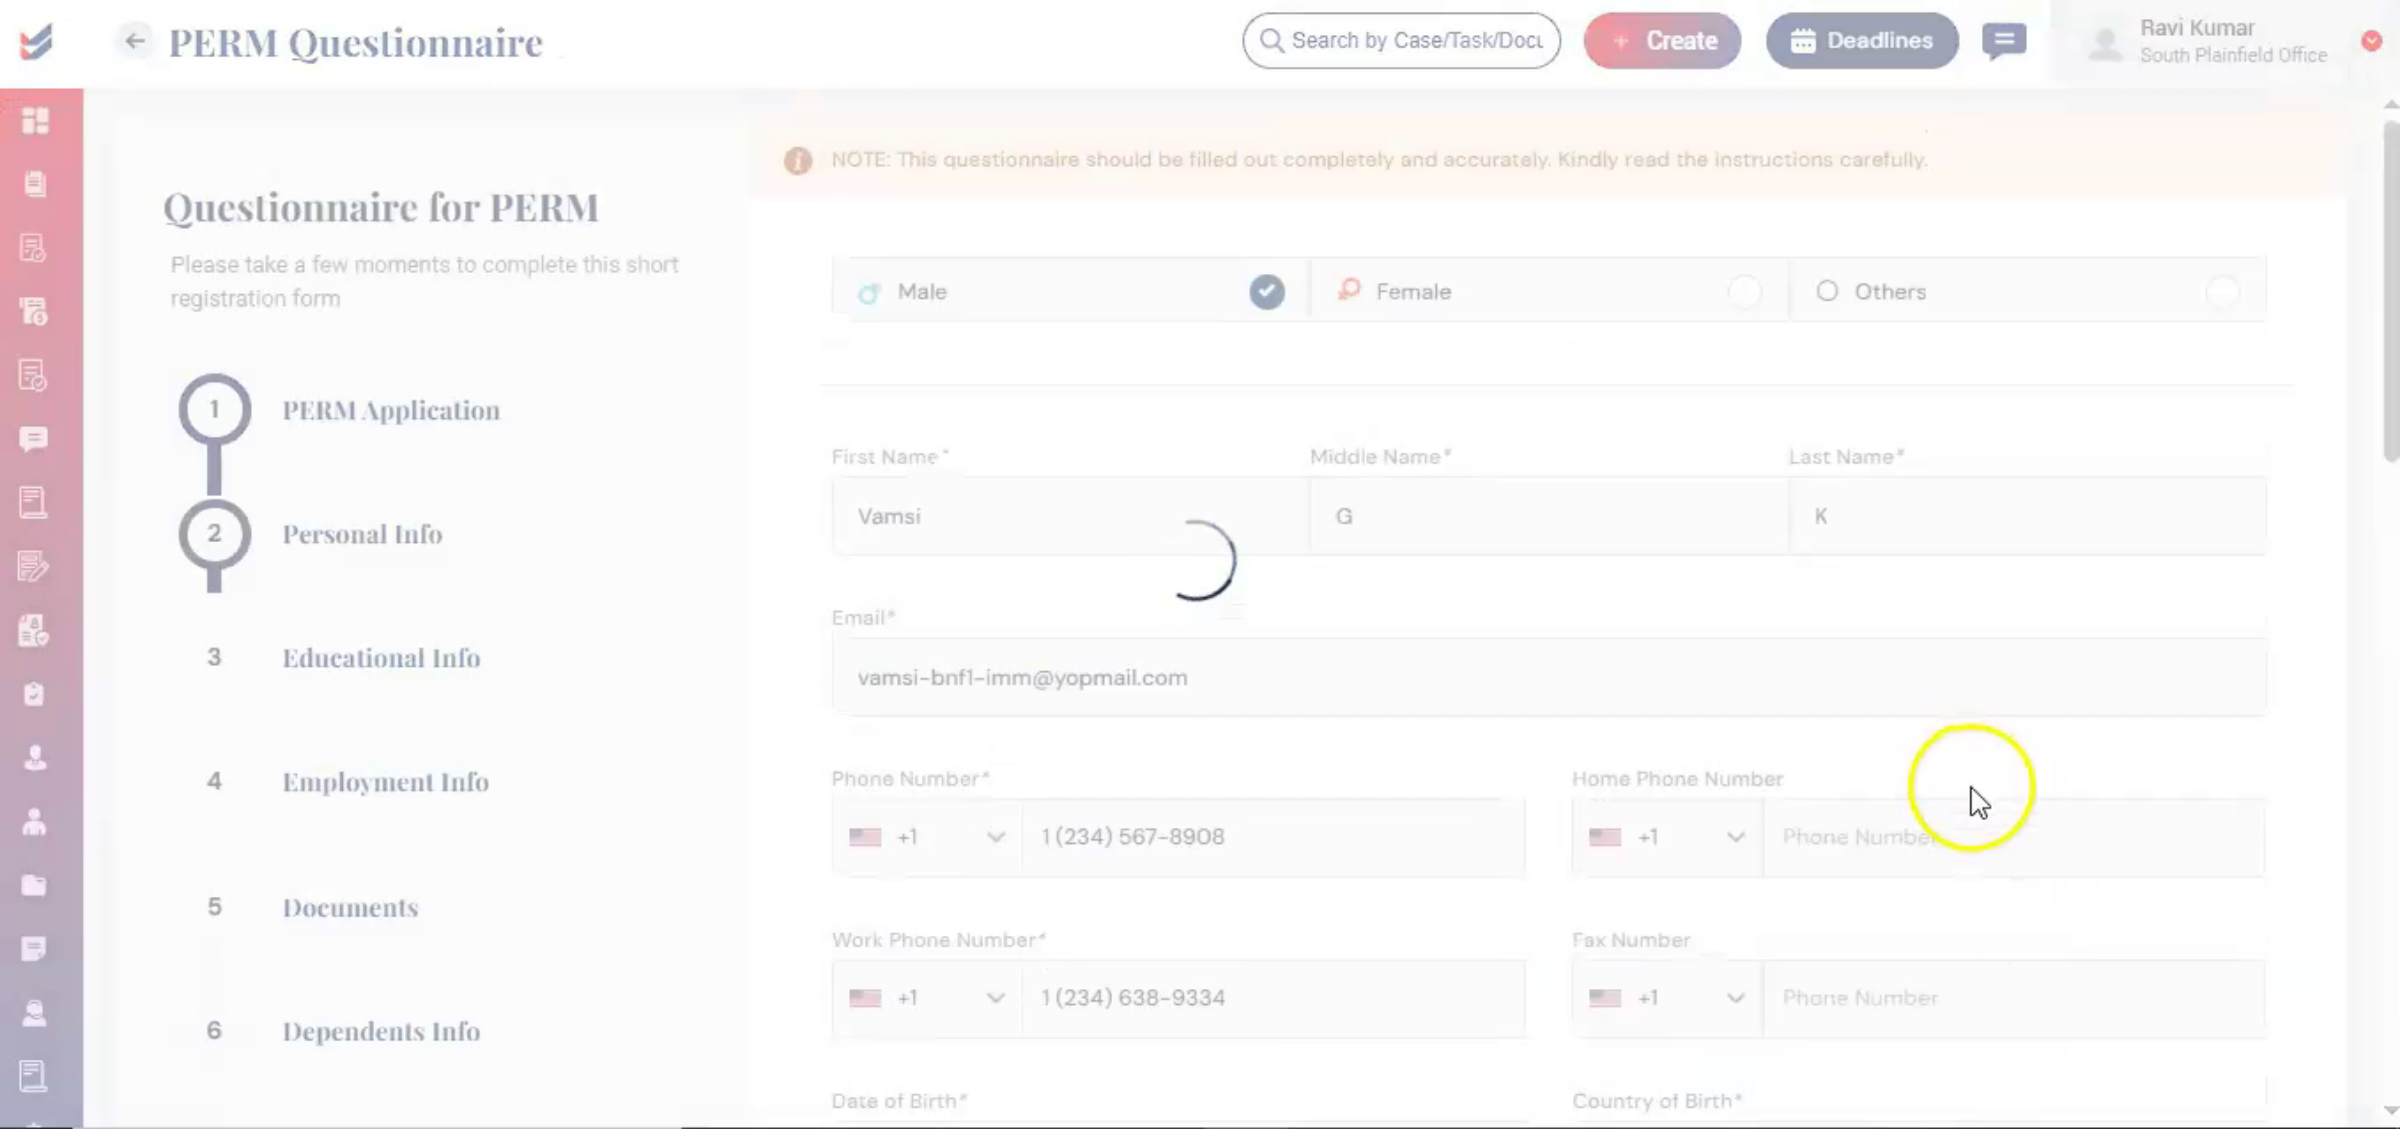
Beneficiary and job-related information are captured through a structured questionnaire module. The questionnaire can be completed by either the petitioner or the law firm by selecting the questionnaire link in the beneficiary section or by navigating actions and selecting edit questionnaire.
15. Editing Questionnaire Flexibility
 * click the image to view enlarged
The questionnaire remains editable until finalization. To make changes, navigate to actions and select edit questionnaire, allowing flexibility while maintaining controlled case progression.
16. Role-Based Workflow Management
 * click the image to view enlarged
Role-based workflow management is a core ImmiBox feature. This process can be configured by referring to the Workflow Management Documentation.
17. Assigning Paralegal Role
 * click the image to view enlarged
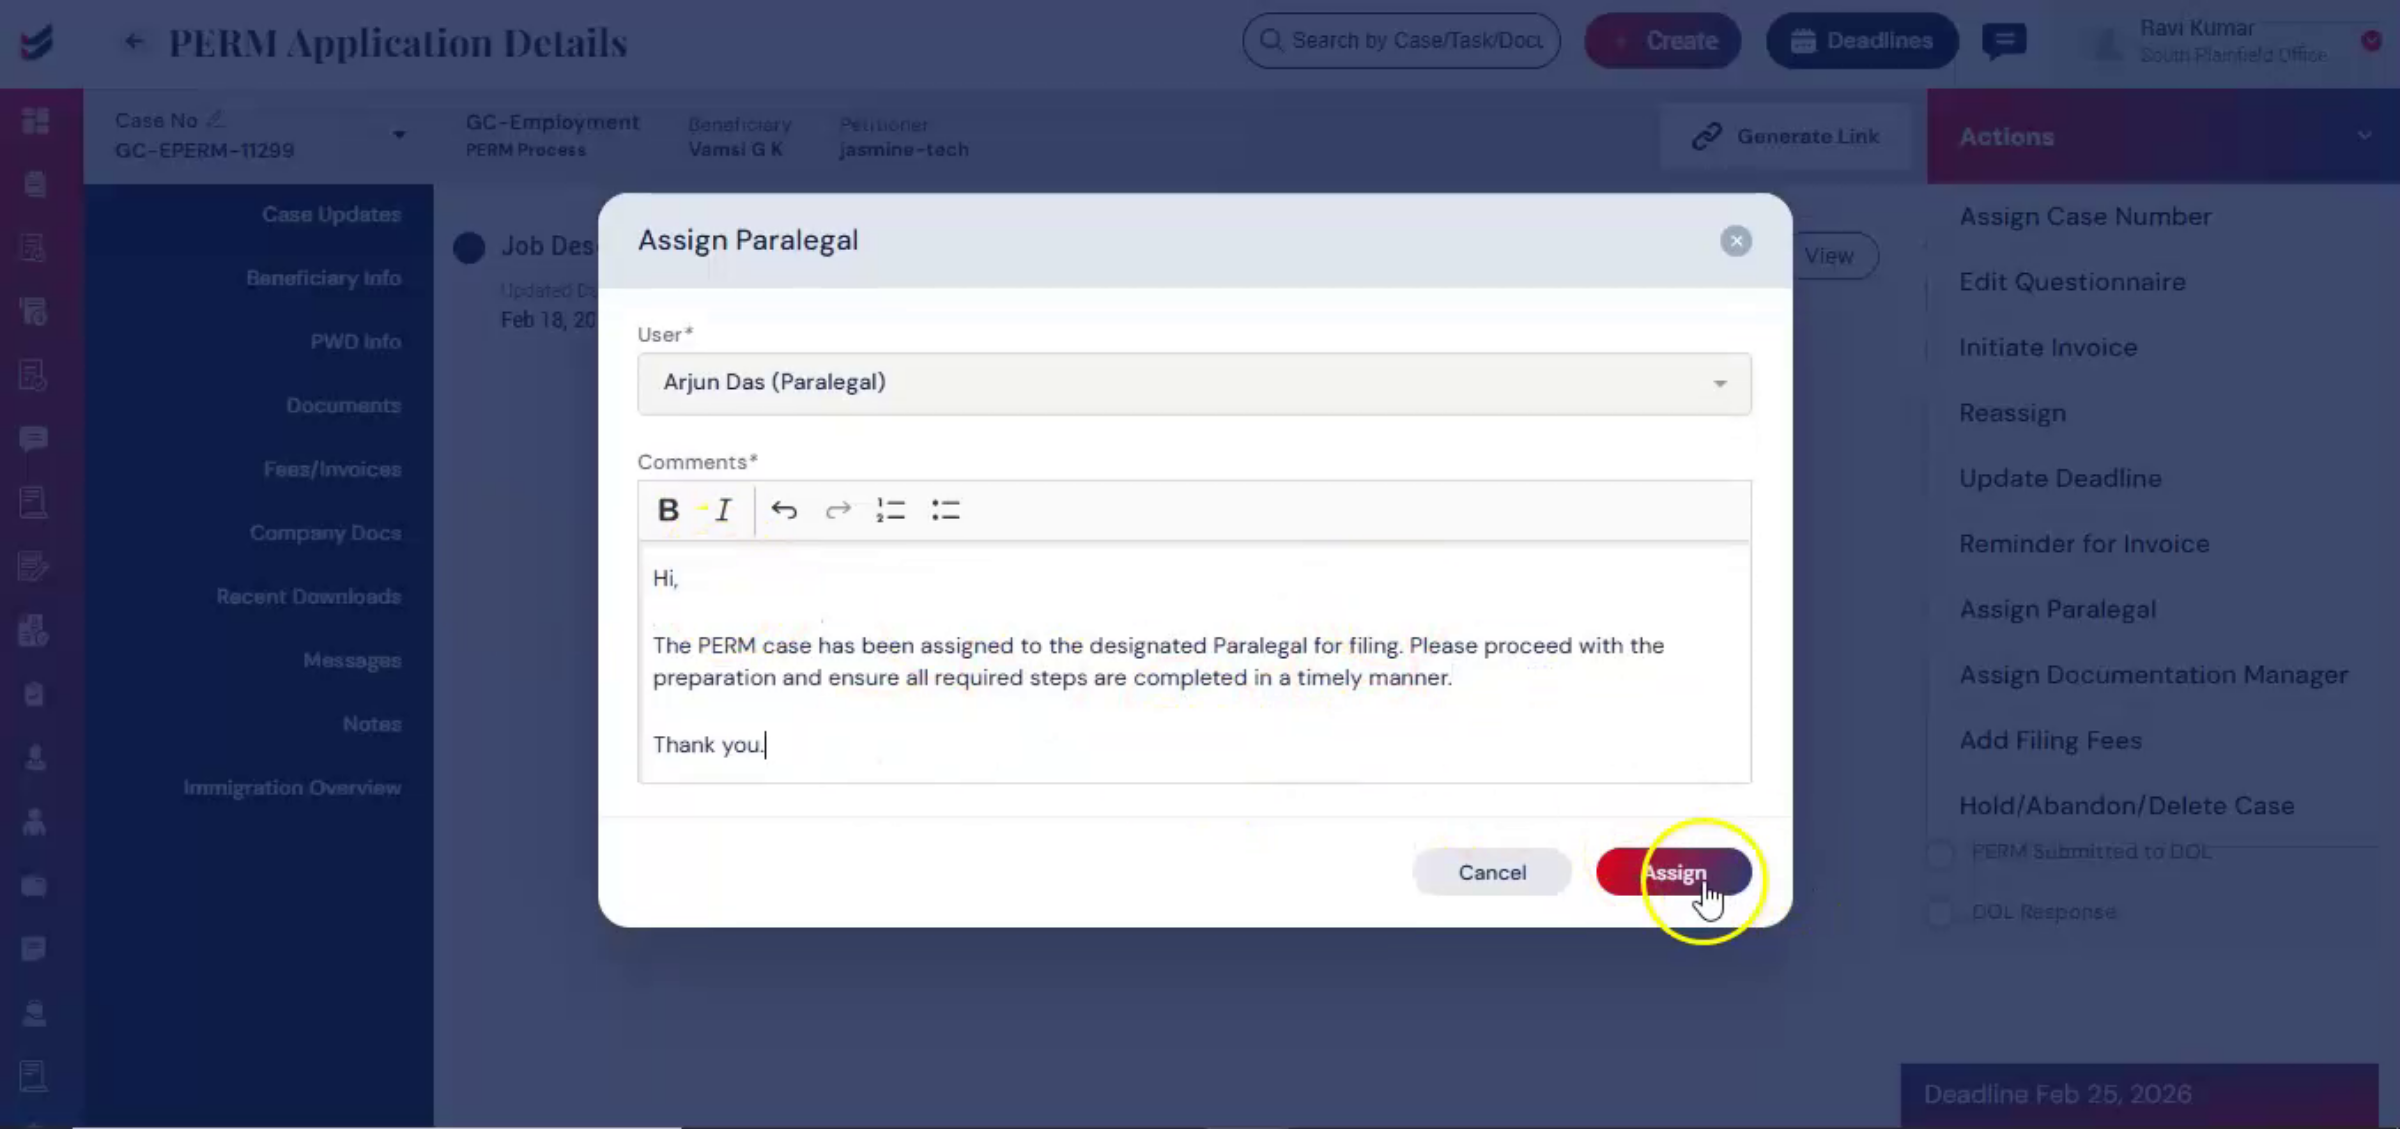
To proceed further. A paralegal can be assigned within the case to formally record, legal verification and move the case forward.
18. Paralegal Assignment Process
 * click the image to view enlarged
From Actions, select Assign Paralegal. Choose the user, add comments, and click Submit.
19. Legal Verification Accountability
 * click the image to view enlarged
This action records legal verification within the case and maintains accountability.
20. Compliance Stage Initiation
 * click the image to view enlarged
Once the paralegal is assigned, the case moves to the compliance stage. All recruitment records must be properly maintained.
21. Assigning Documentation Manager
 * click the image to view enlarged
To manage this process, documentation manager must be assigned. The documentation manager is assigned as per the current workflow, which can be updated by editing the workflow.
22. Documentation Manager Assignment
 * click the image to view enlarged
To assign, go to Actions and select Documentation Manager. Choose the user, add comments, and click Assign. This ensures proper record management and accountability within the case.
23. Job Description Review Activation
 * click the image to view enlarged
After assigning roles, the Job Description Review stage becomes active.
24. Requesting Internal Job Review
 * click the image to view enlarged
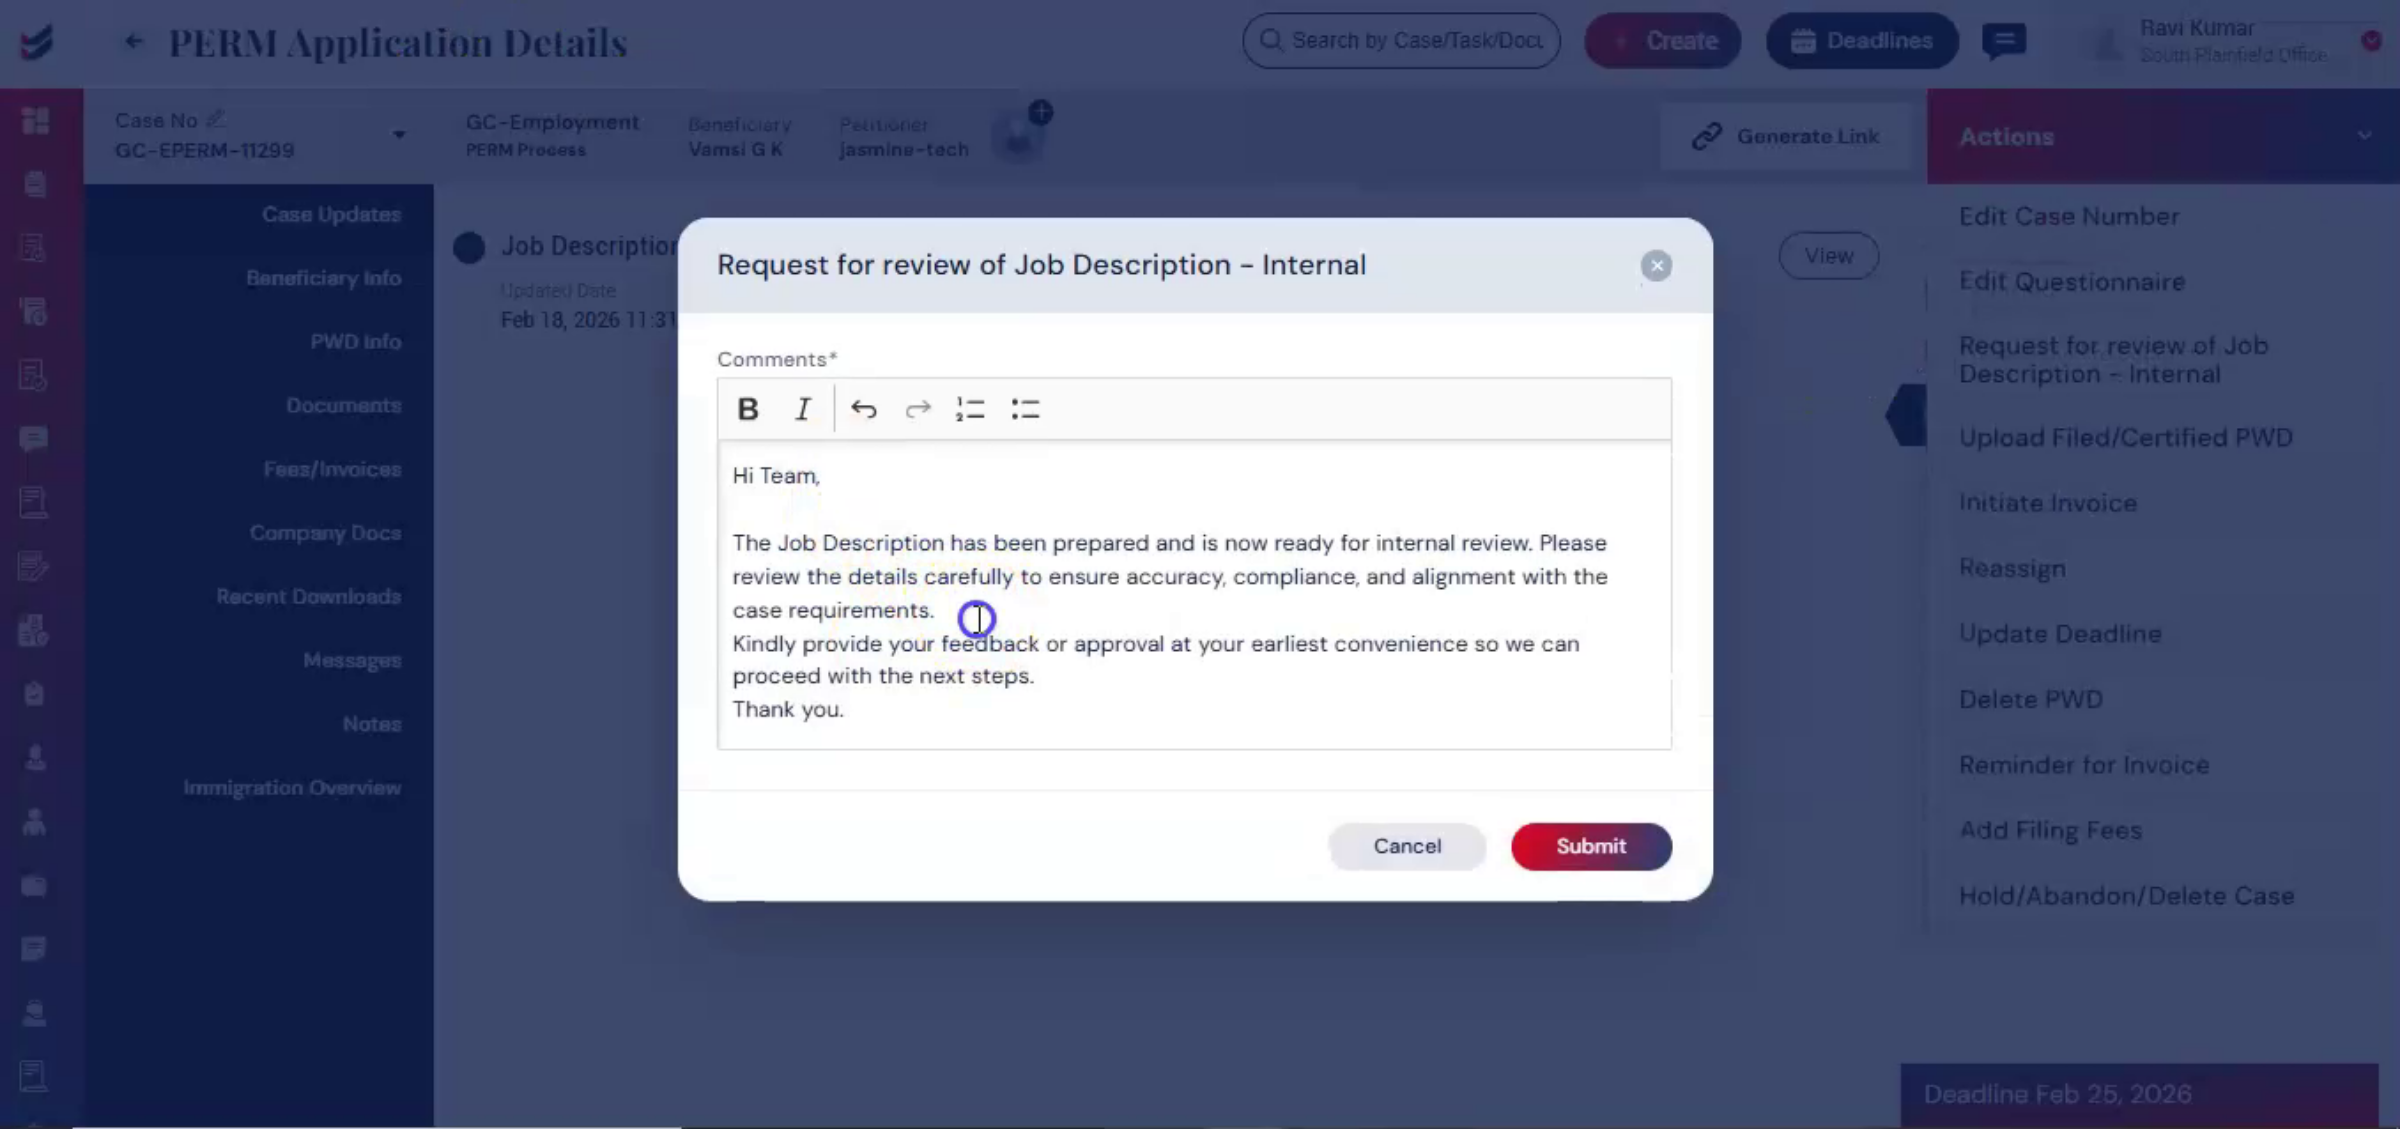
To initiate internal review, select Actions and click Request for Review of Job Description, Internal. Then, enter comments and click Submit.
25. Documentation Manager Review
 * click the image to view enlarged
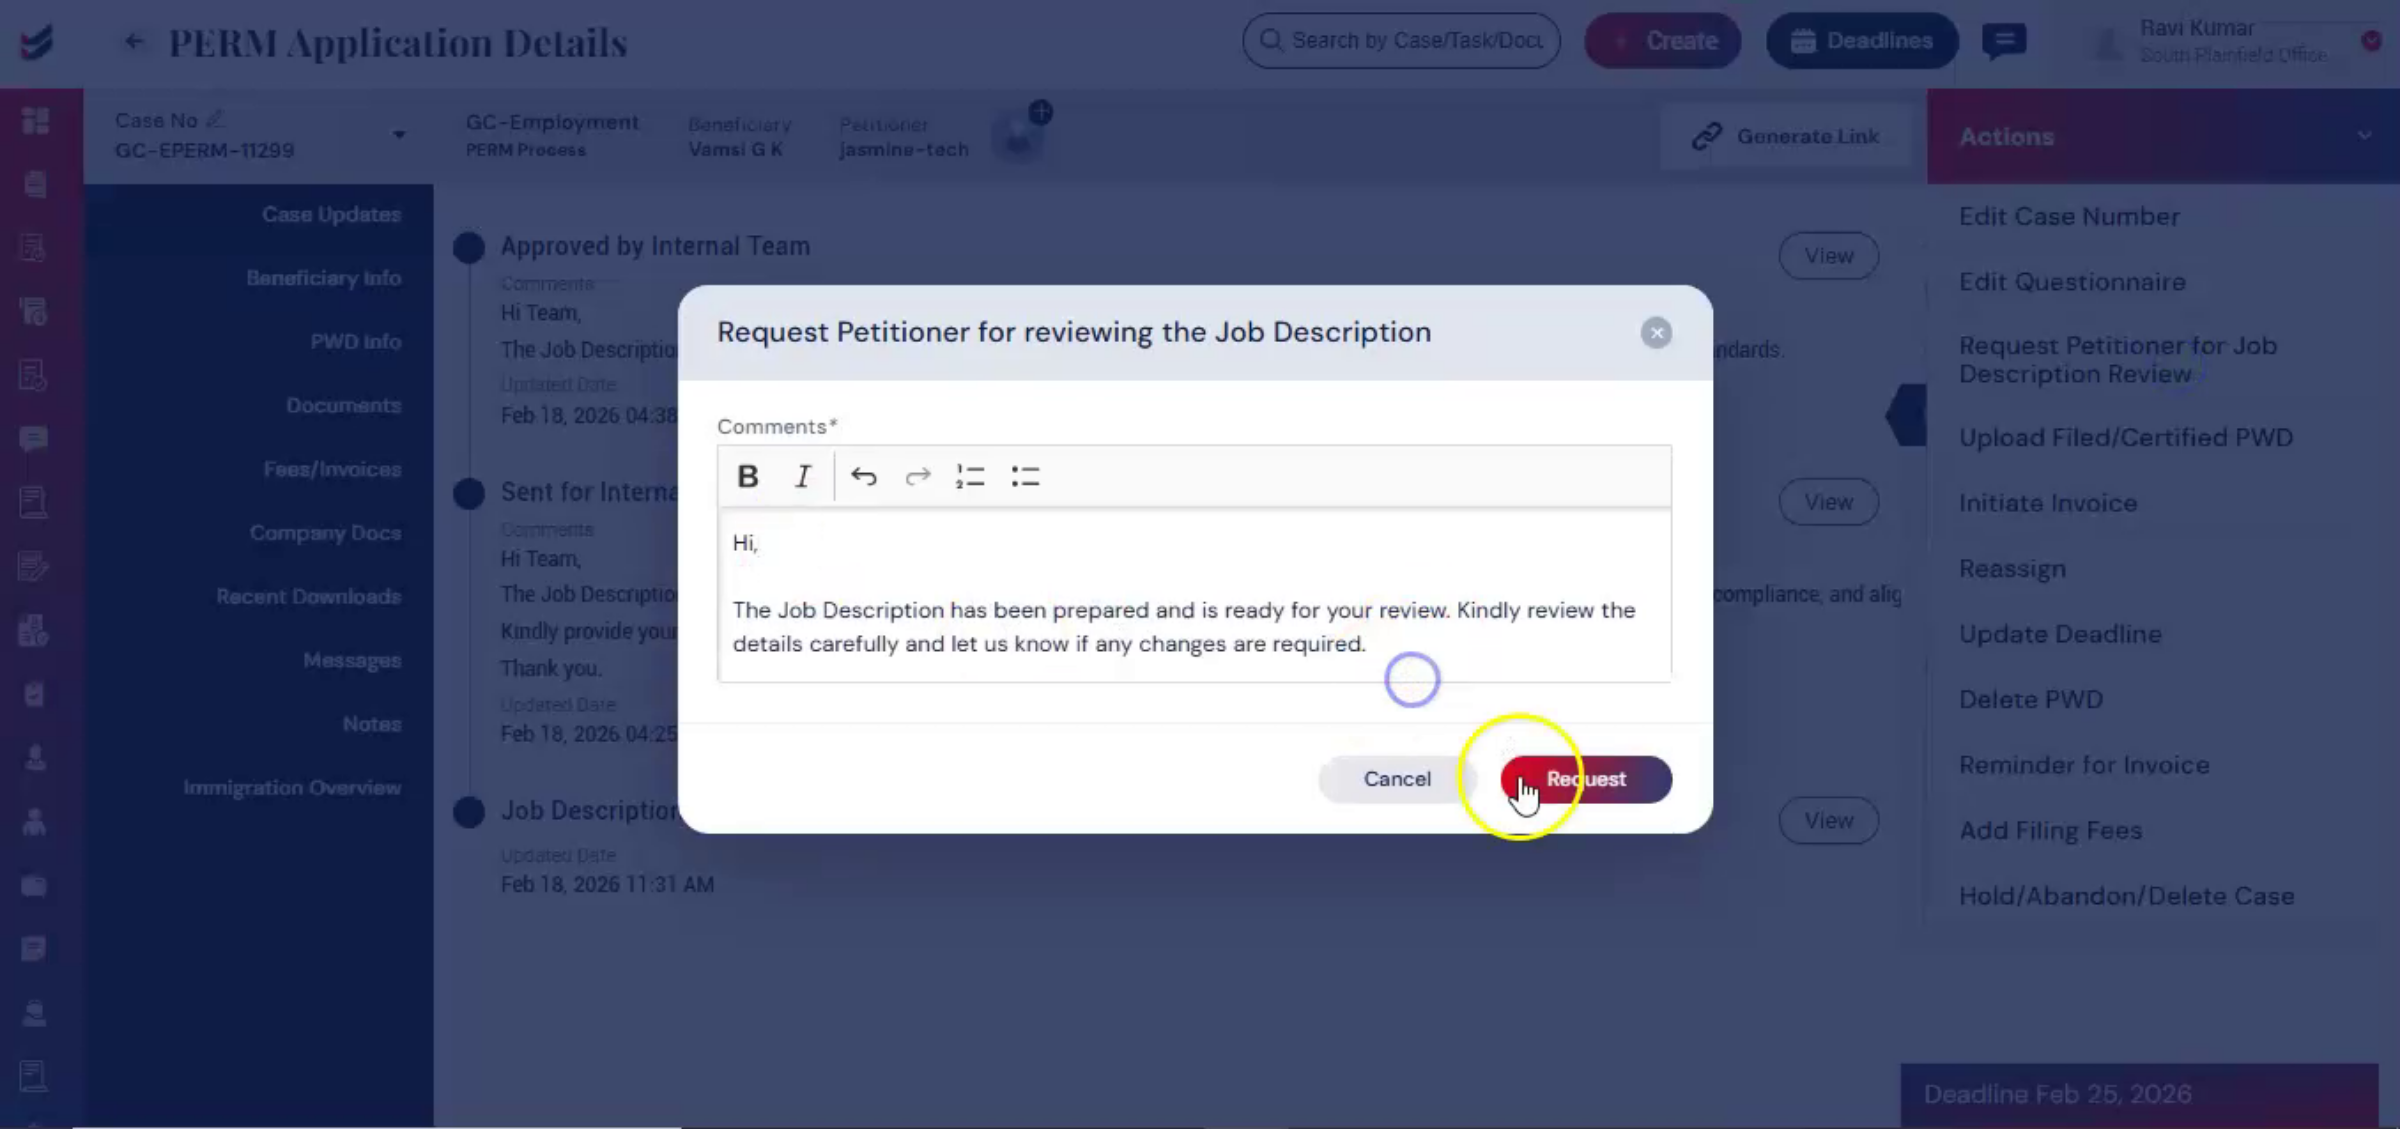
Now the assigned documentation manager reviews the job description from their ImmiBox portal. Once internally approved, the law firm may send it to the petitioner by selecting Request Petitioner for Job Description Review from Action.
26. Petitioner Job Description Approval
 * click the image to view enlarged
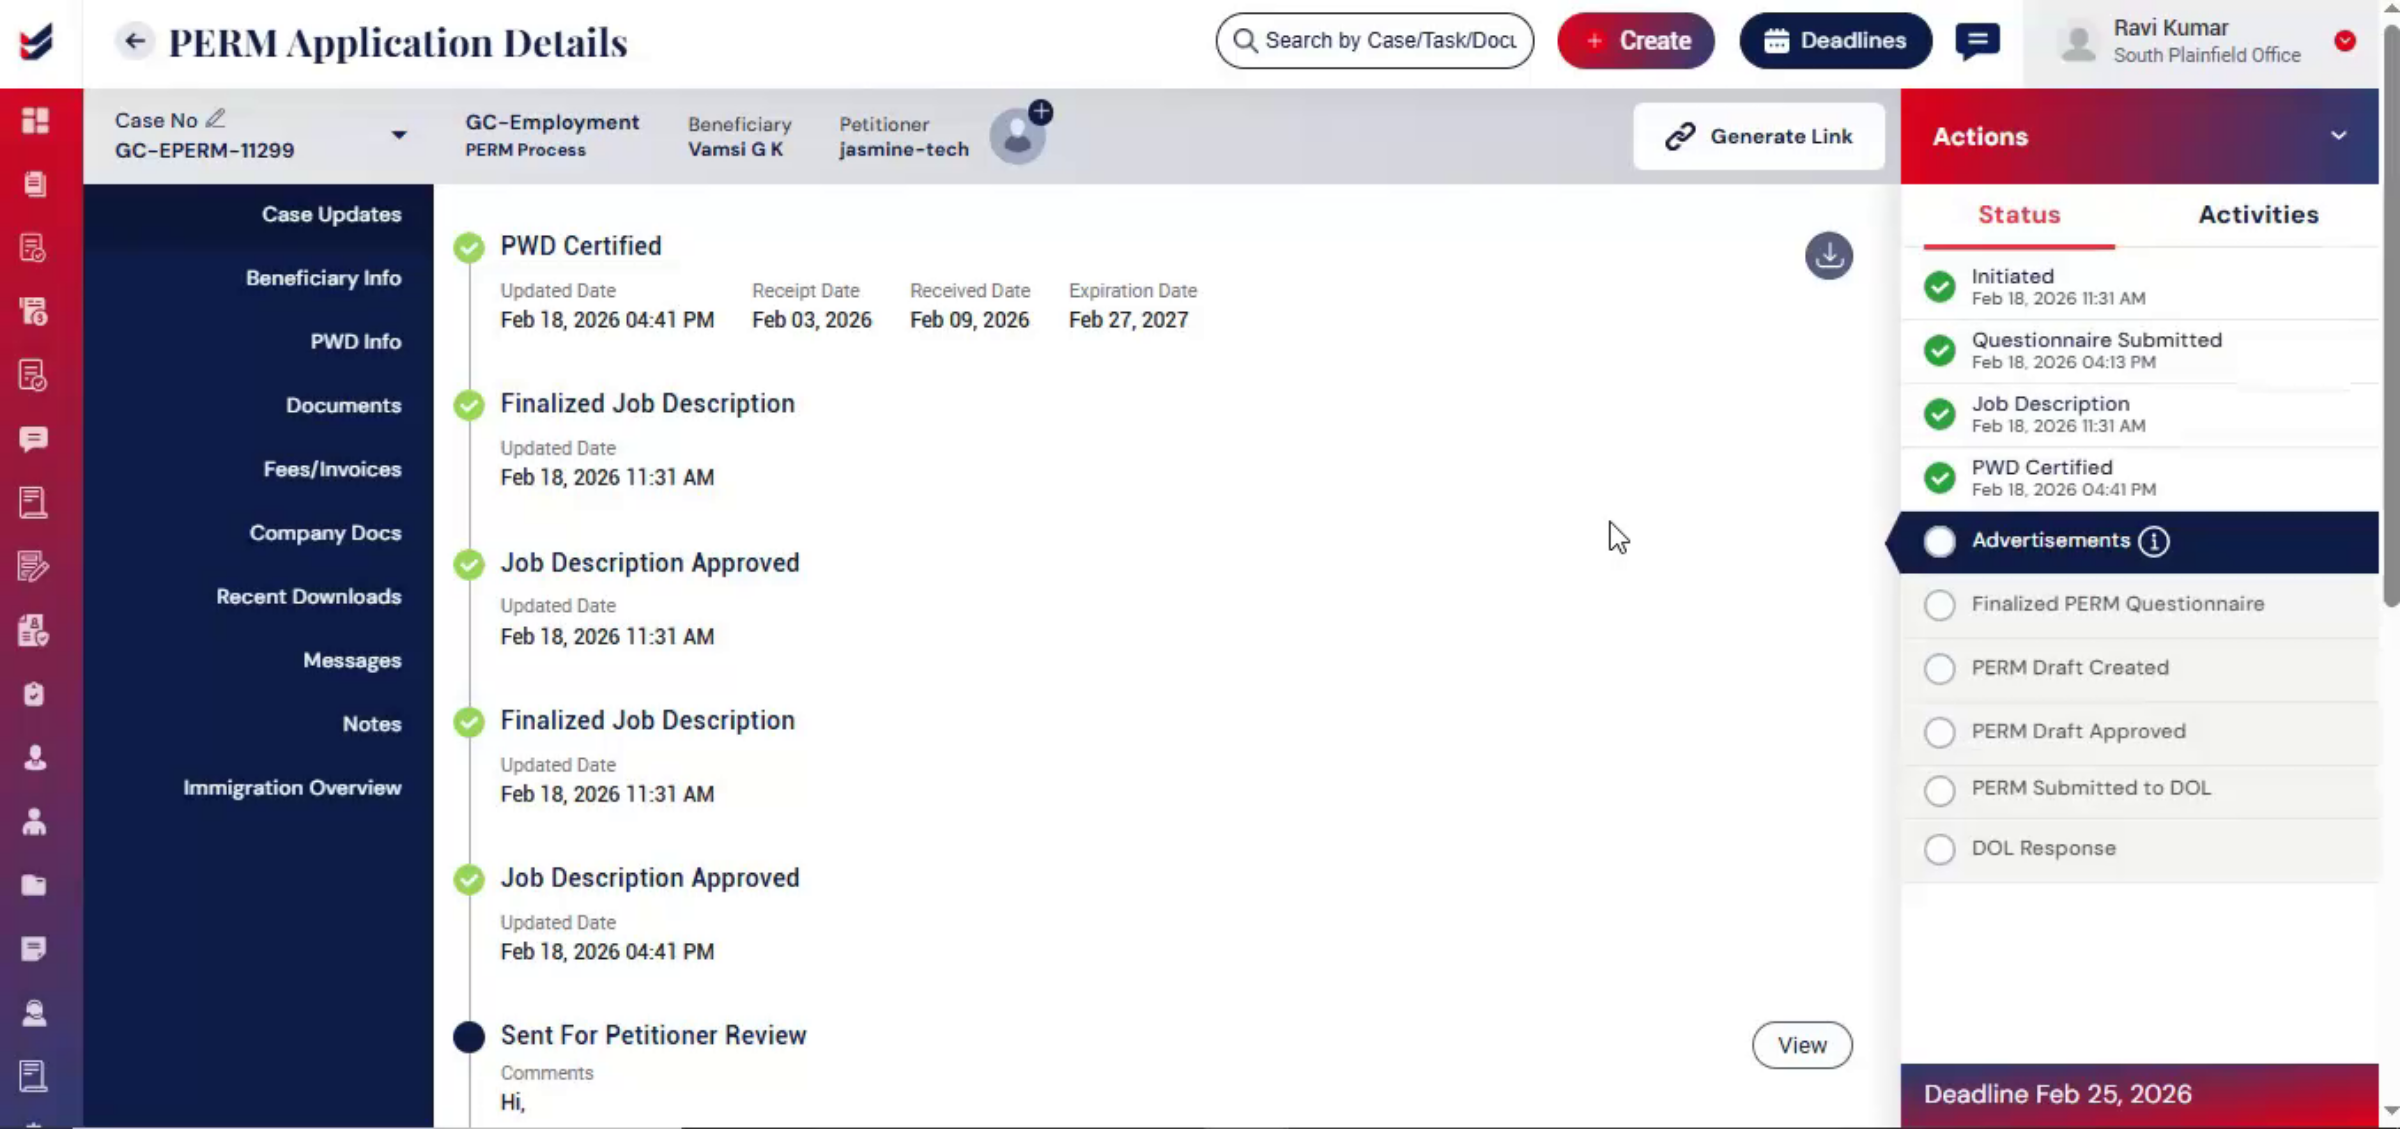
Once approved by both internal reviewers and the petitioner, the job description stage is successfully completed.
27. Review History And Accountability
 * click the image to view enlarged
ImmiBox ensures accountability, documentation of review history, and controlled progression before moving forward.
28. Job Description Approval Completion
 * click the image to view enlarged
After Job description approval, the workflow proceeds to the advertisement stage.
29. Advertisement Stage Start
 * click the image to view enlarged
All required audit file materials are organized and securely maintained within the case to ensure audit readiness. PERM regulations require proof of recruitment before filing.
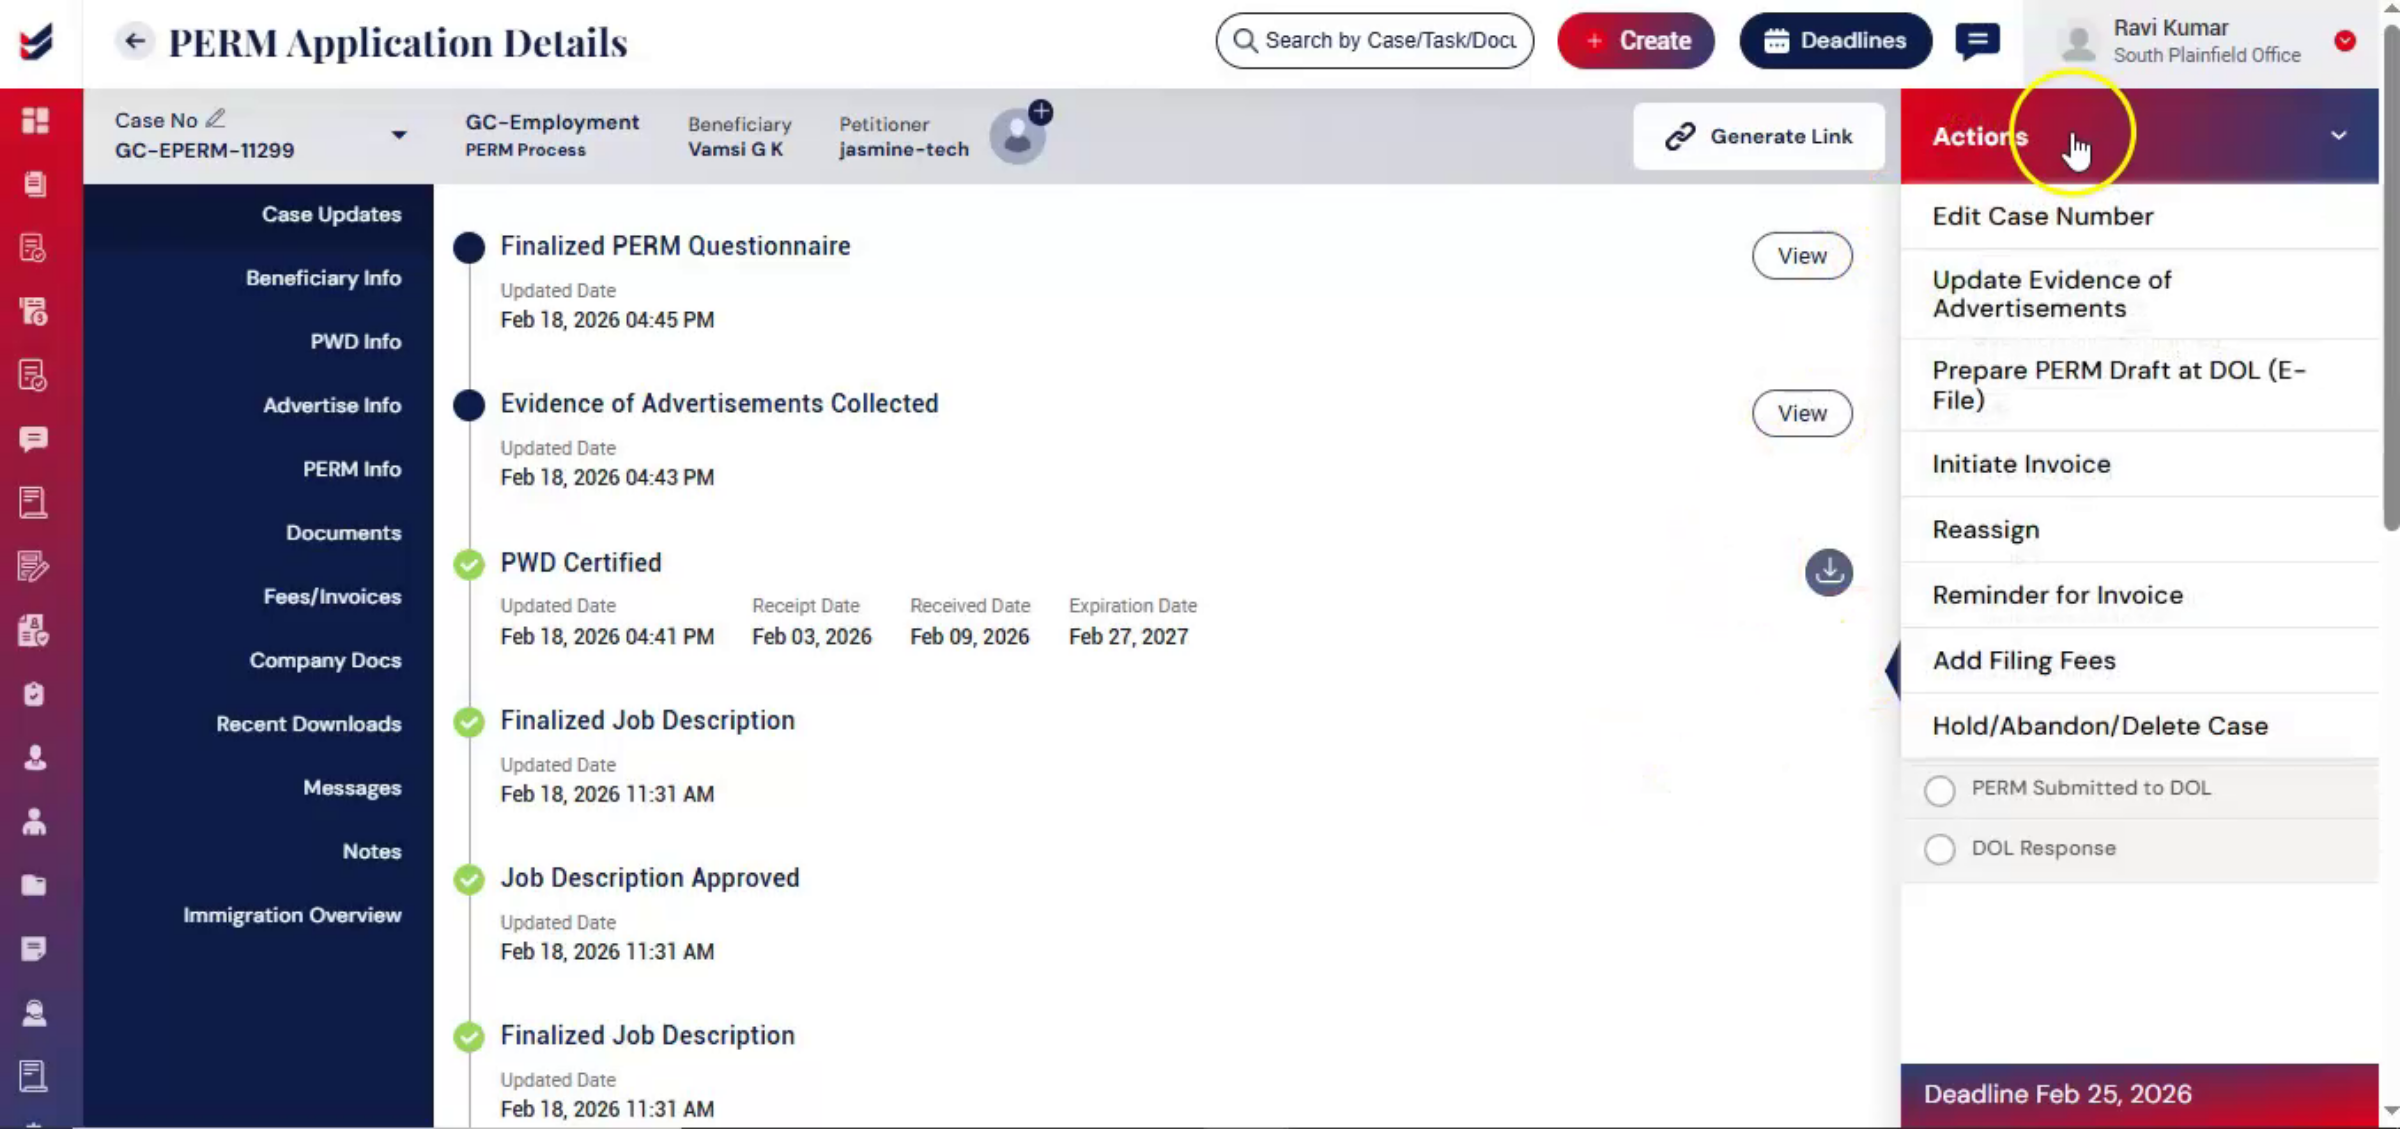
30. Updating Advertisement Evidence
 * click the image to view enlarged
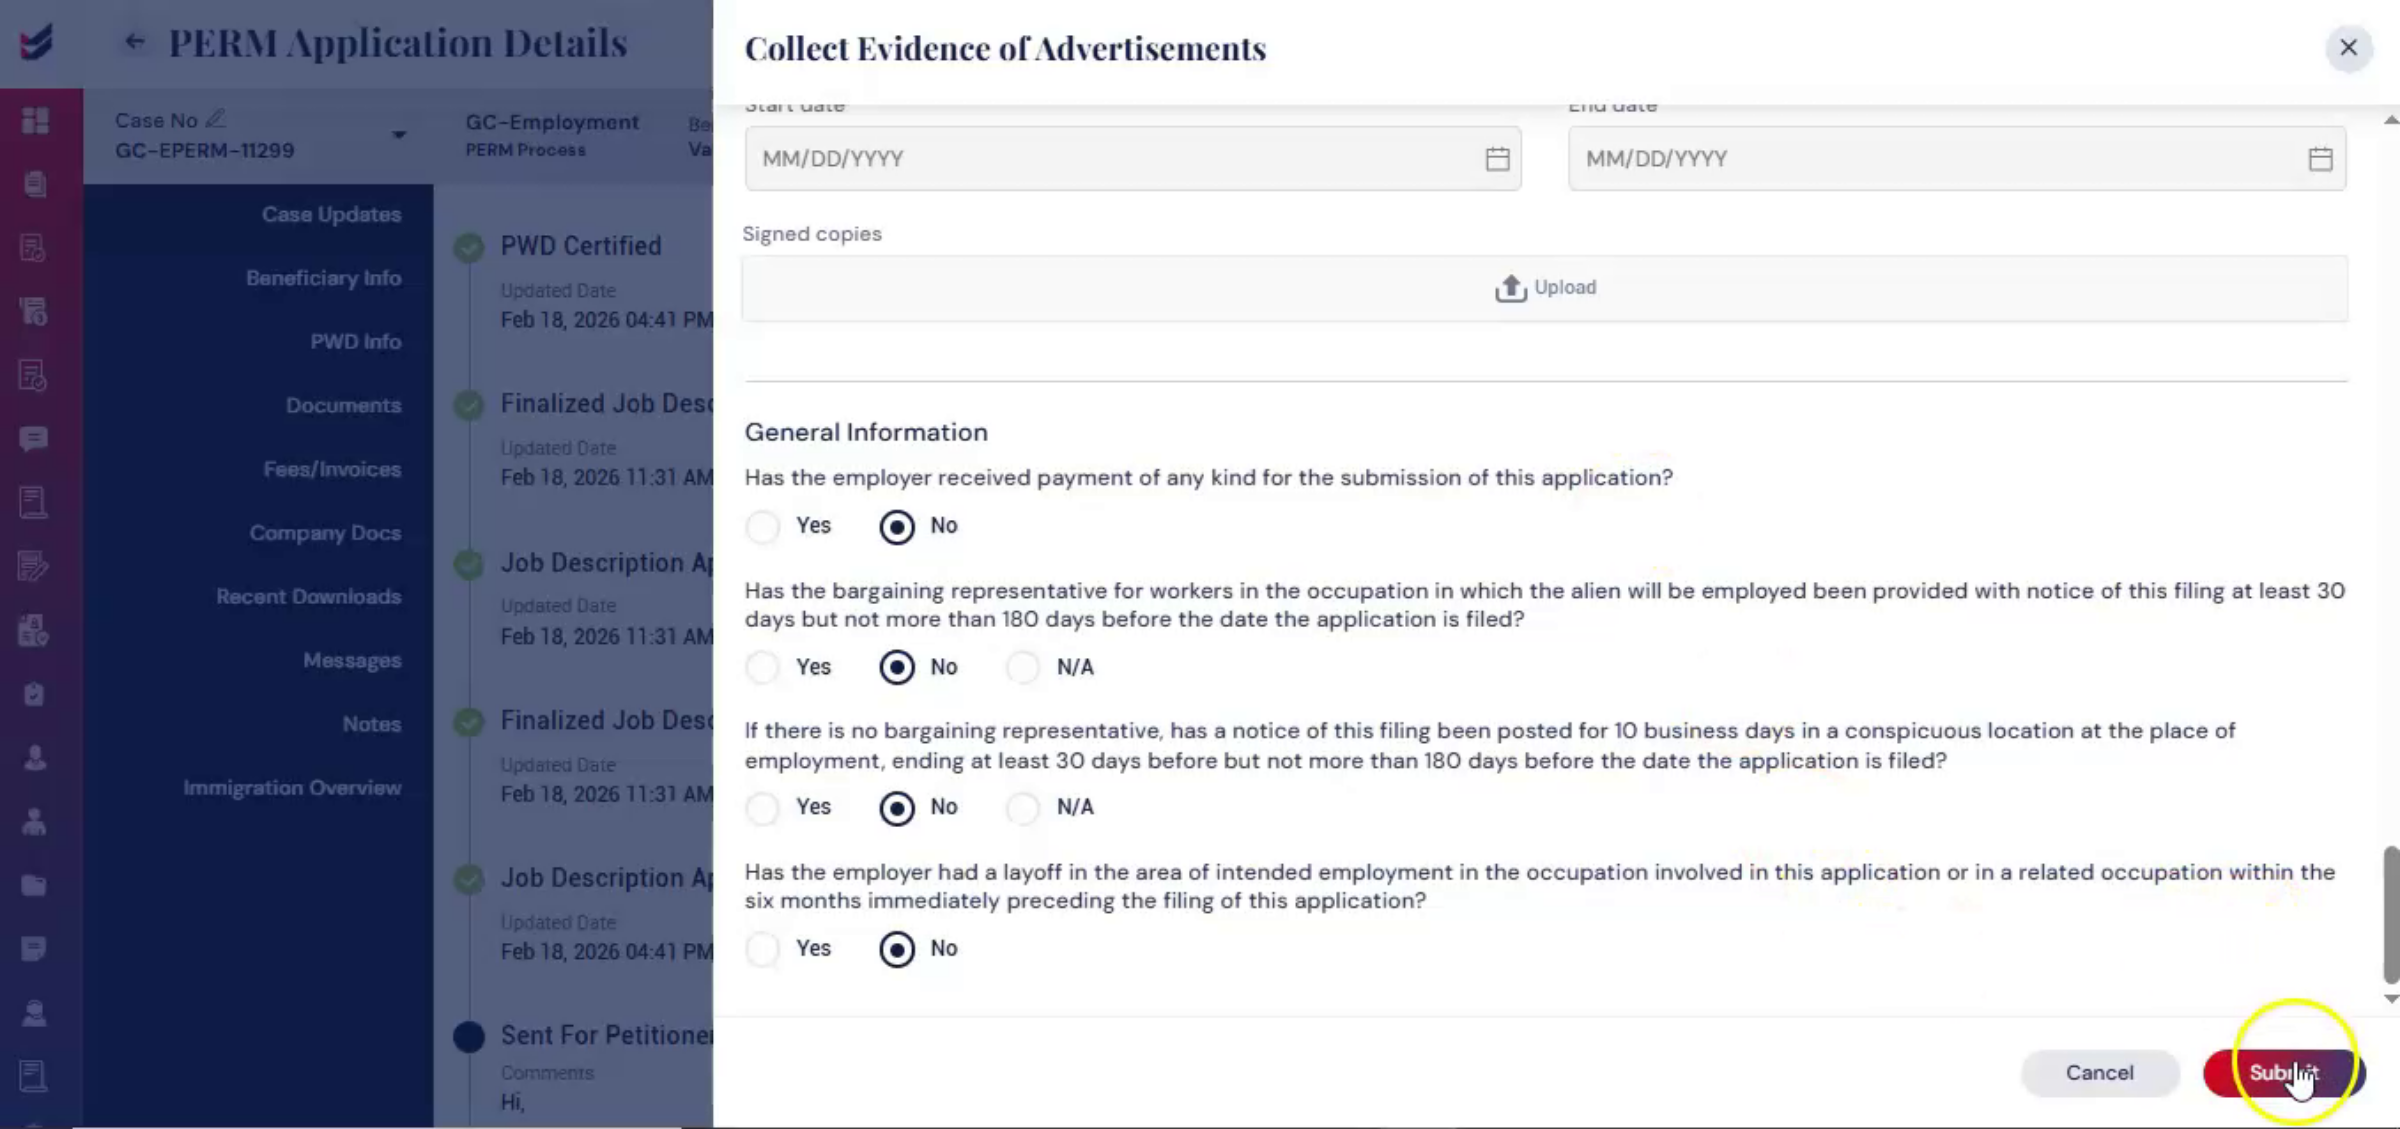
Within the case, select Actions and click Update Evidence of Advertisement. Then, enter occupation classification and advertisement timelines and click Submit to save the information.
31. Editing Advertisement Details
 * click the image to view enlarged
This evidence of advertisement can be edited later if needed through the same option. Before drafting begins, all collected data is reviewed and locked to ensure consistency between intake information and final filing details.
32. PERM Questionnaire Review Importance
 * click the image to view enlarged
It is important to have the PERM questionnaire reviewed and confirmed by the beneficiary and petitioner before filing. This ensures accuracy, prevents discrepancies, and reduces the risk of errors in the final submission.
33. Finalizing PERM Questionnaire
 * click the image to view enlarged
From Actions, select Review and Finalize PERM Questionnaire. Once finalized, the system locks the information to prevent inconsistencies during drafting.
34. Transition To Draft Preparation
 * click the image to view enlarged
After finalization, Immiox automatically transitions the case into draft preparation mode. To prepare the PERM draft for filing, navigate to Actions and click on Prepare PERM Draft.
35. PERM Draft Preparation Options
 * click the image to view enlarged
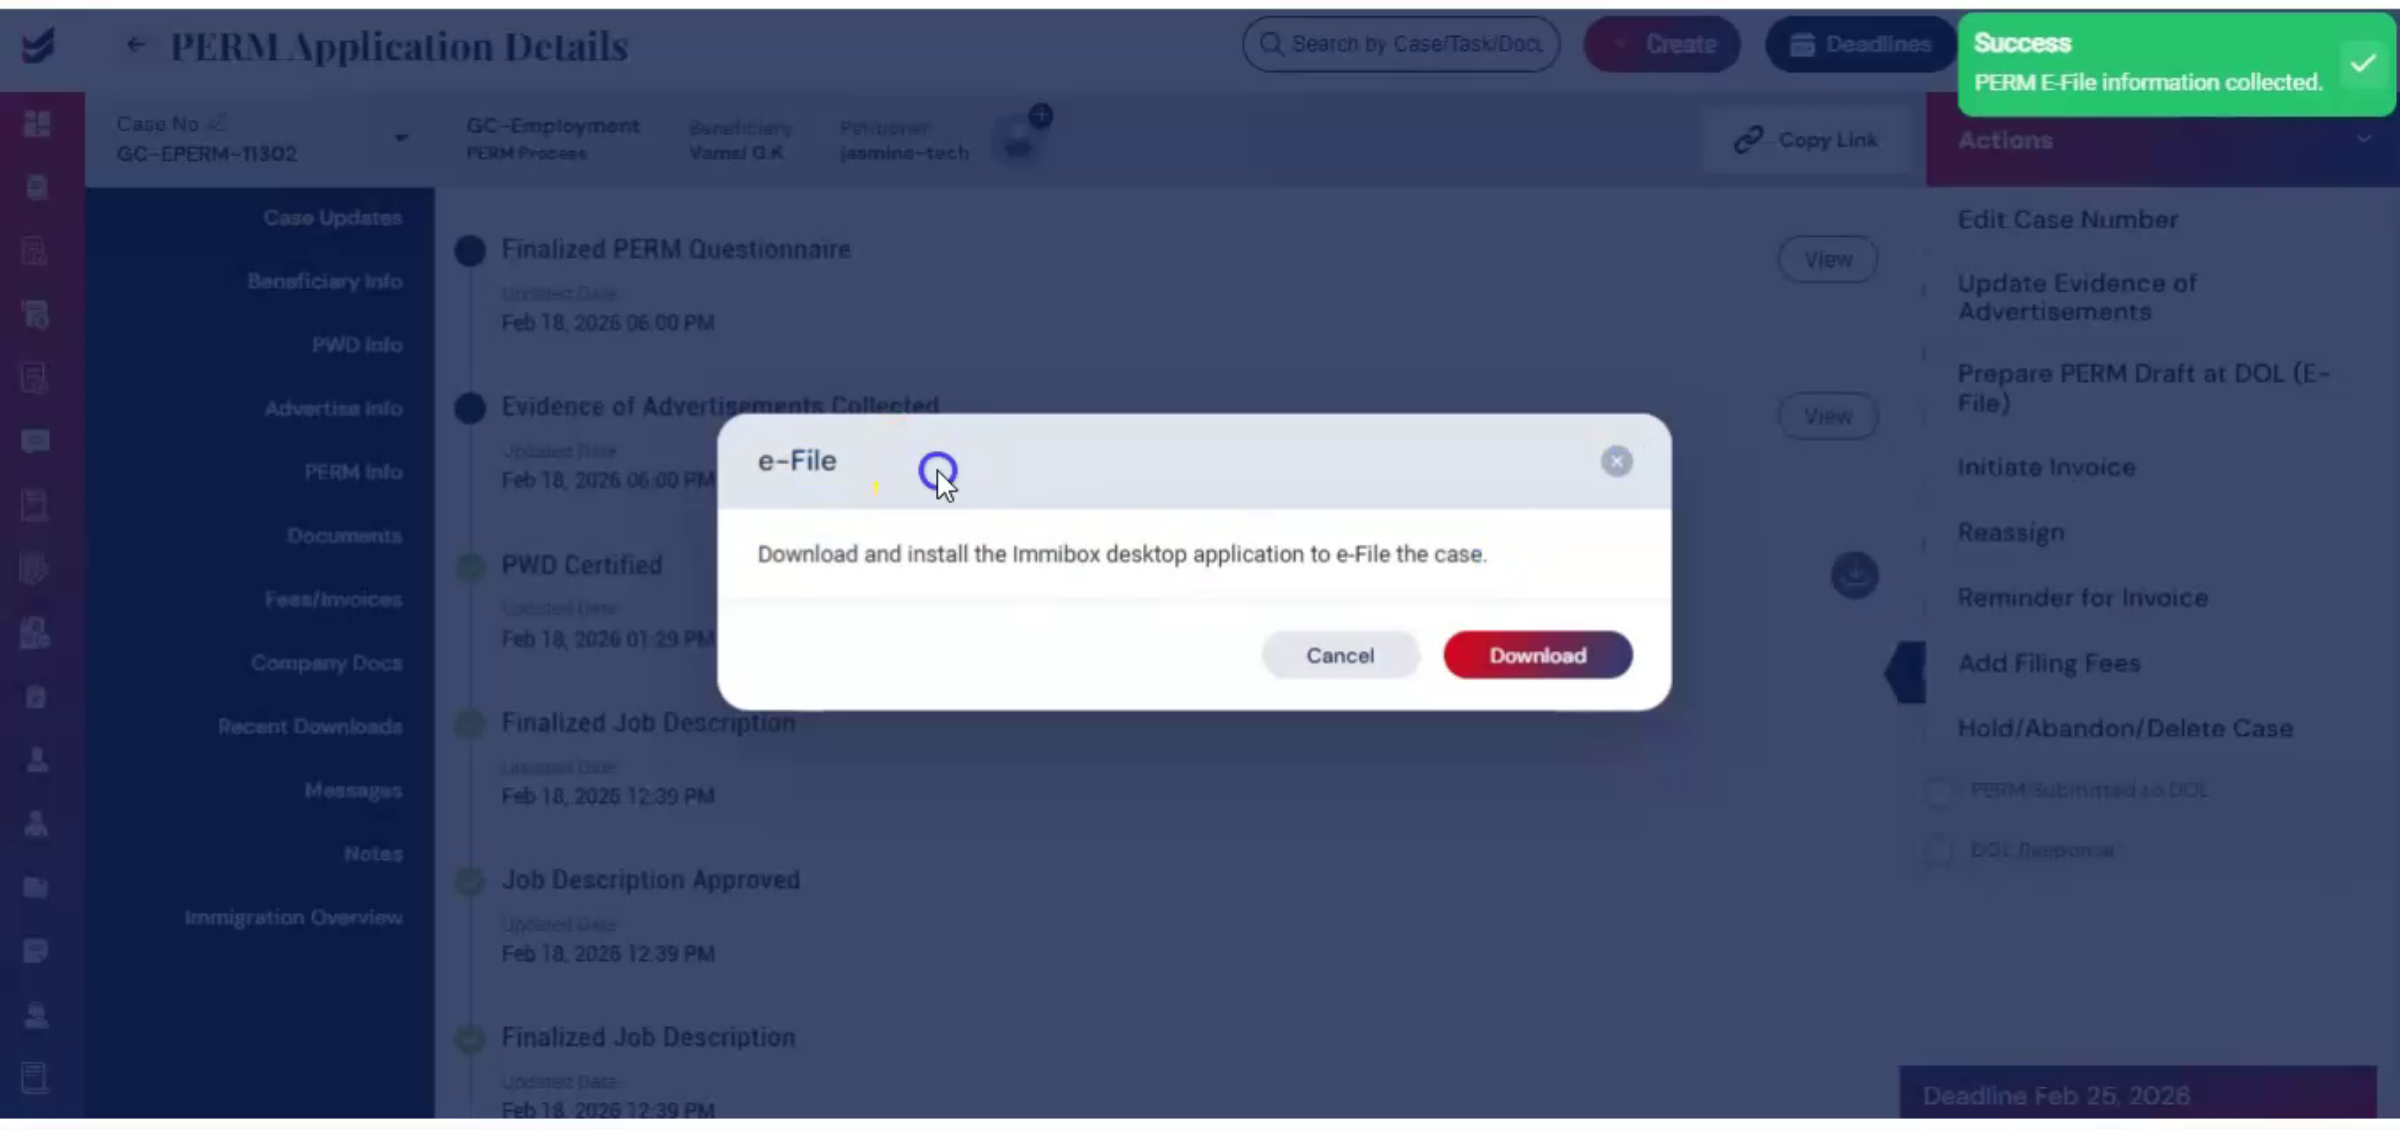
A dialog box will appear. From here you have two options. You may choose to e-file the case by downloading the ImmiBox desktop application. Or you may proceed with offline filing by entering the required details directly in the system. For e-filing through ImmiBox, select Download, then two forms will appear on the screen. Complete both forms carefully and click Submit.
36. E-Filing Desktop Application
 * click the image to view enlarged
After submission, a pop-up will prompt you to download the ImmiBox desktop application. Once installed, the case can be filed directly through the application.
37. E-Filing Guide Reference
 * click the image to view enlarged
For detailed, step-by-step. Instructions on the e-filing process, please refer to the dedicated e-filing guide.
38. Offline Filing Data Entry
 * click the image to view enlarged
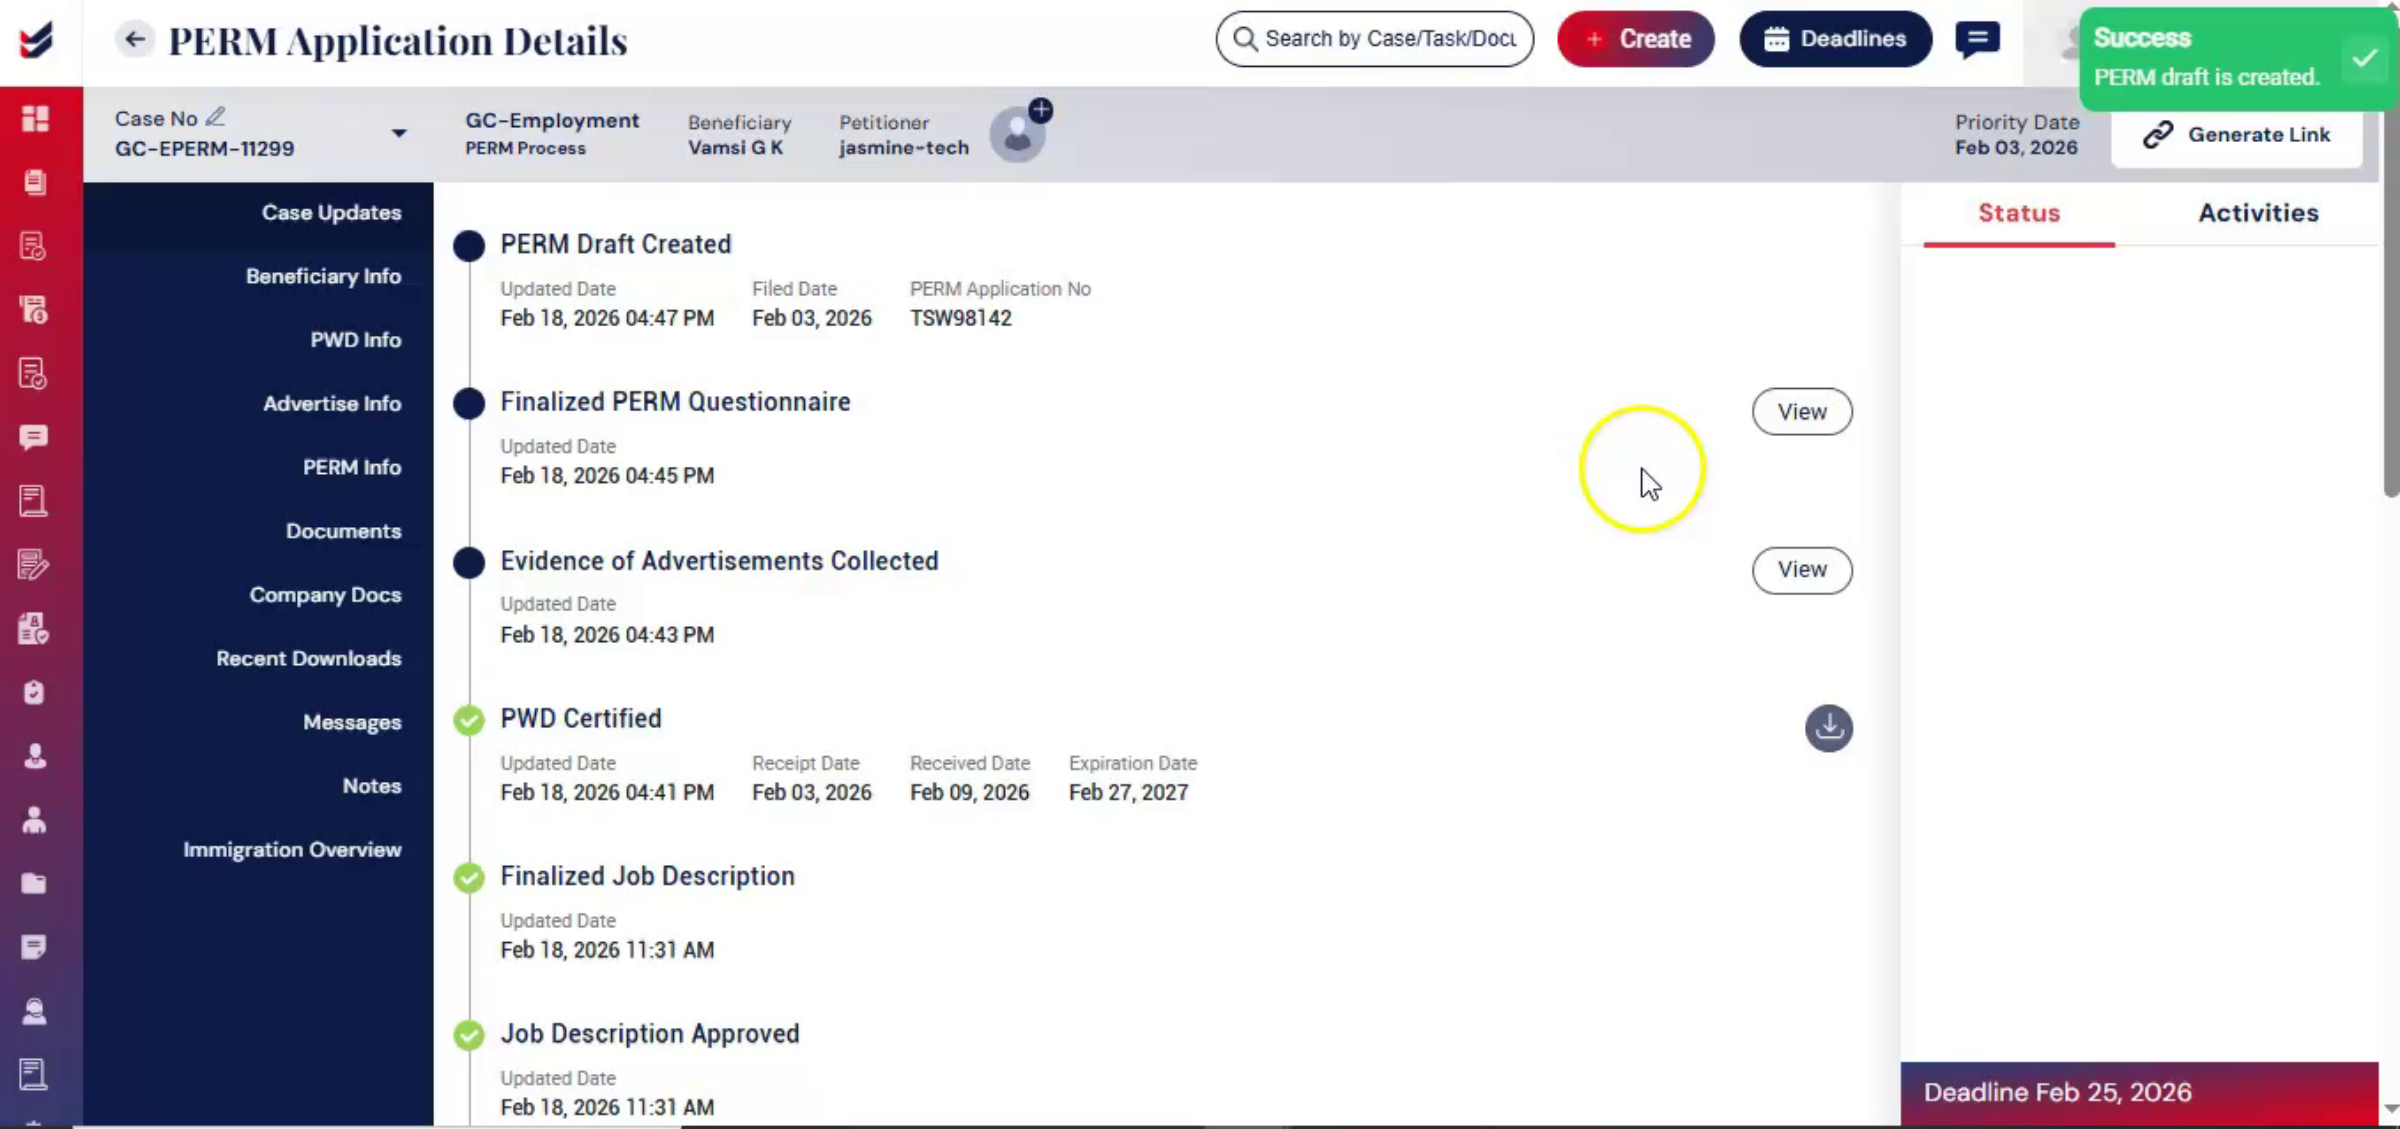
If the case is filed offline, the required filing details can still be entered into the system. This ensures proper tracking and accurate status updates throughout the process. Once the PERM draft is prepared, it needs to be downloaded from USCIS and sent through the portal for final review.
39. PERM Draft Review Process
 * click the image to view enlarged
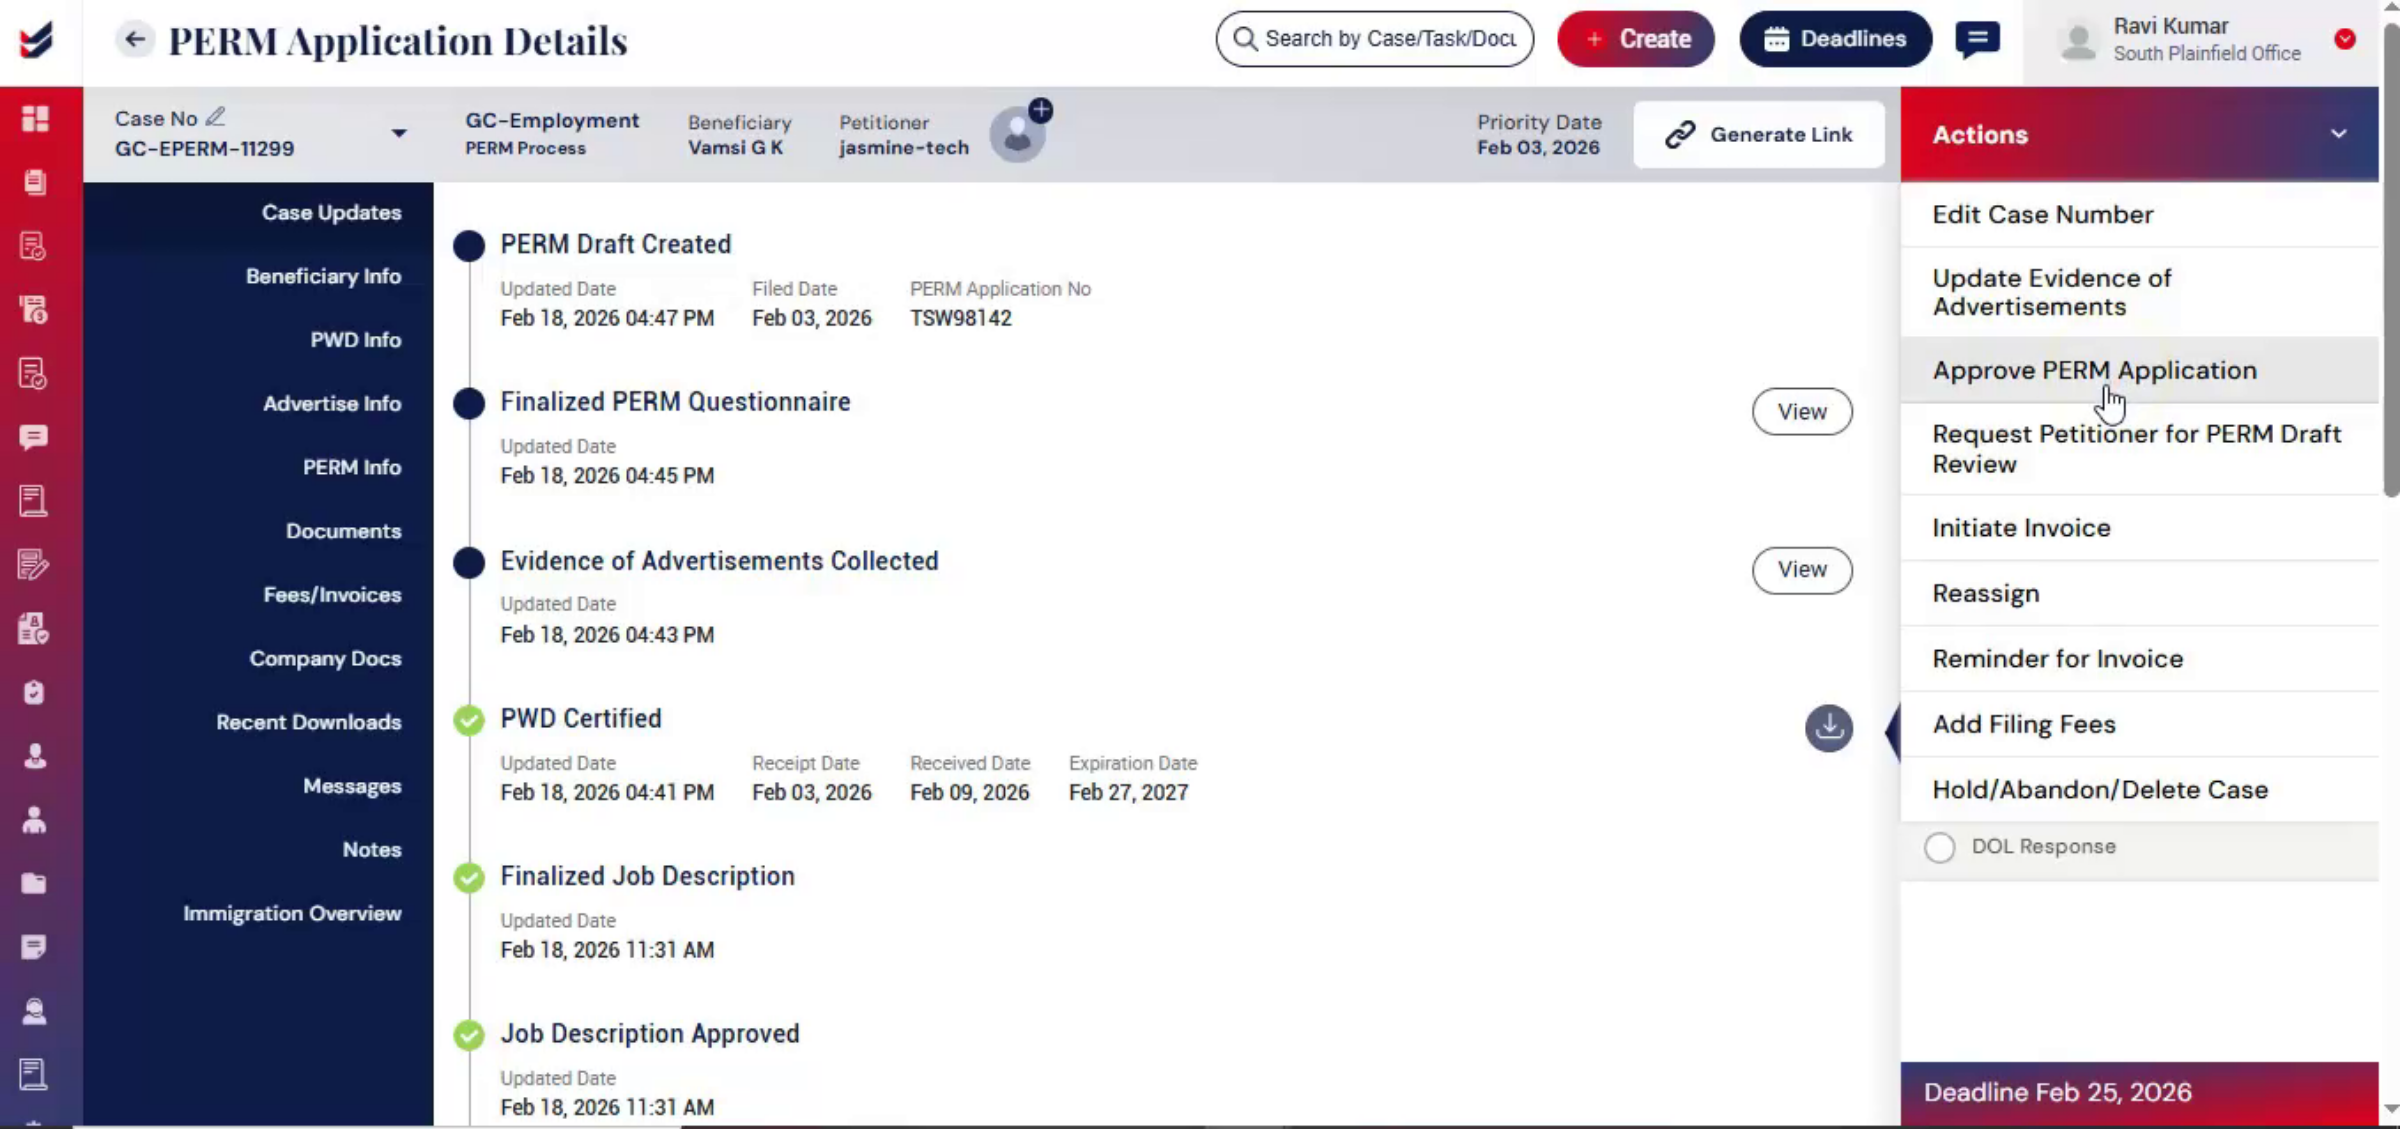
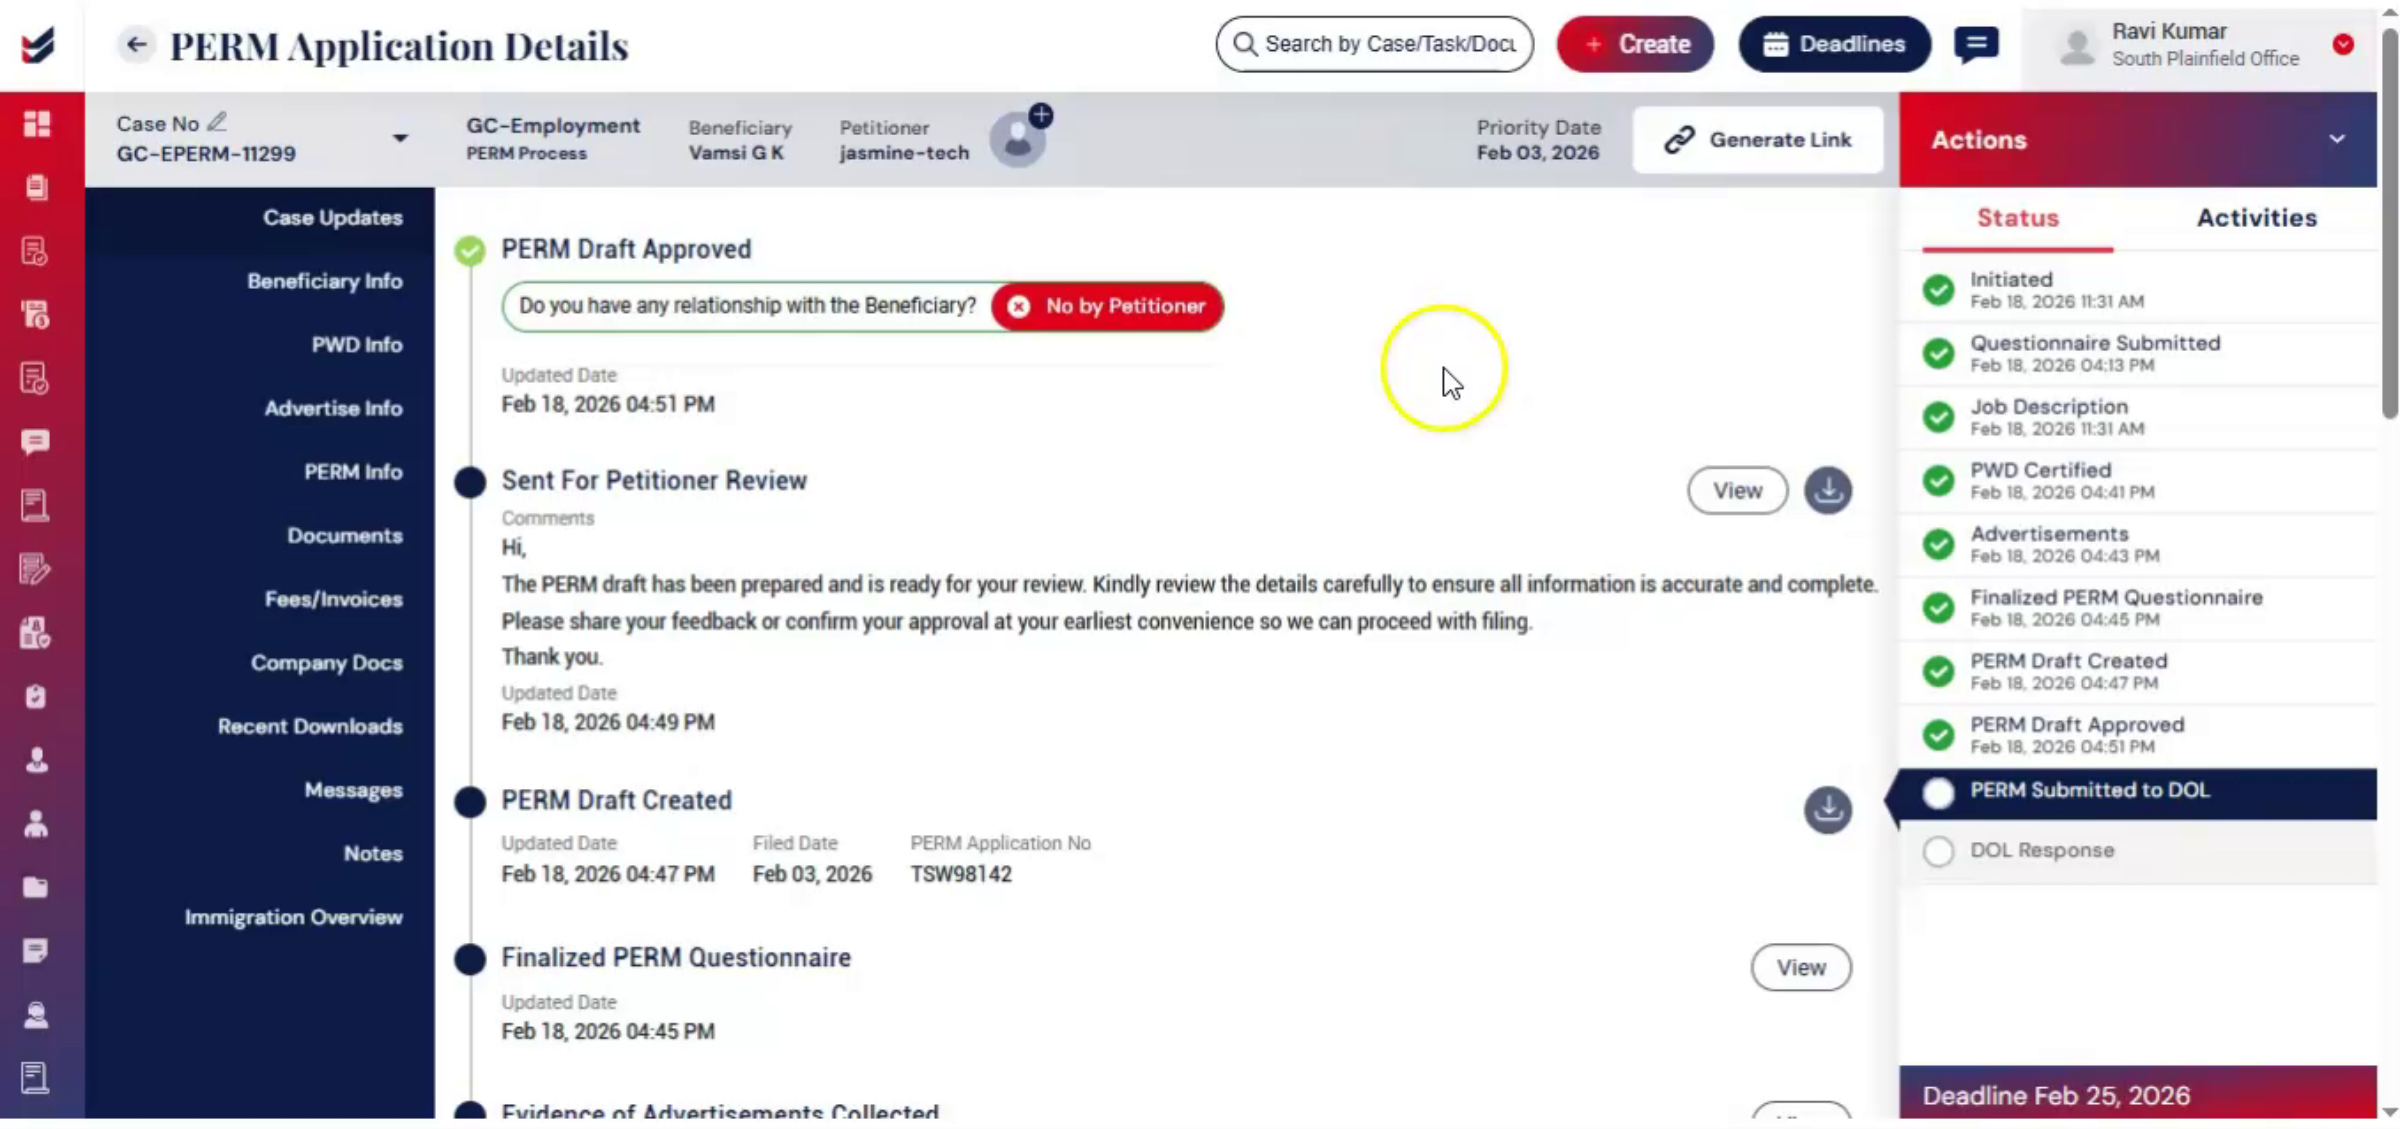
After this, the case moves into review. From the Actions menu, you can either approve the PERM application internally or send it to the petitioner for draft review. The petitioner may suggest changes or they may approve the draft.
40. Petitioner Review Questions
 * click the image to view enlarged
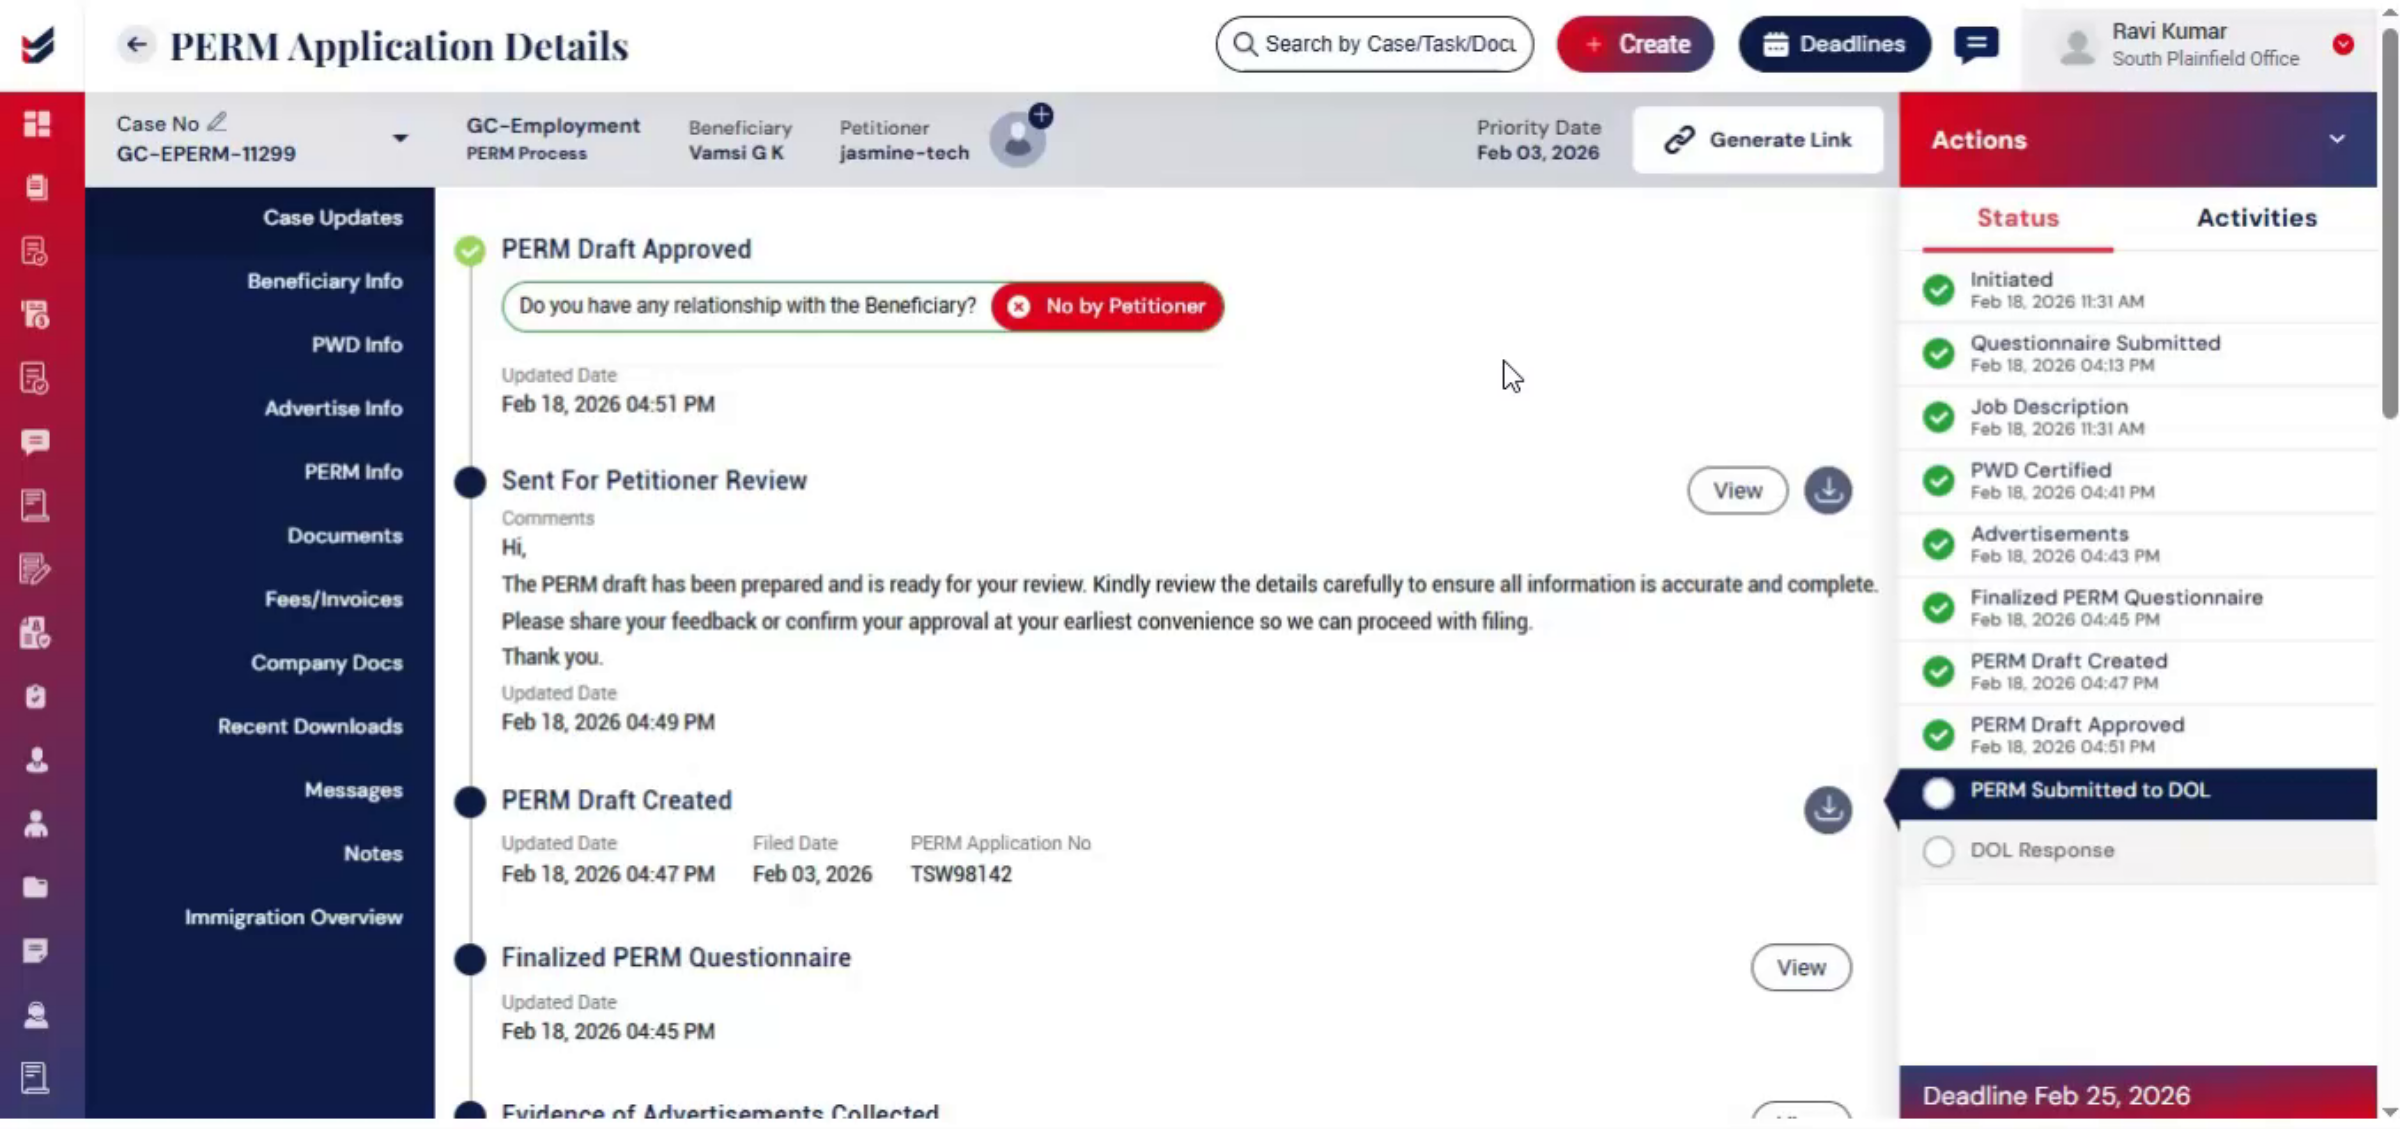
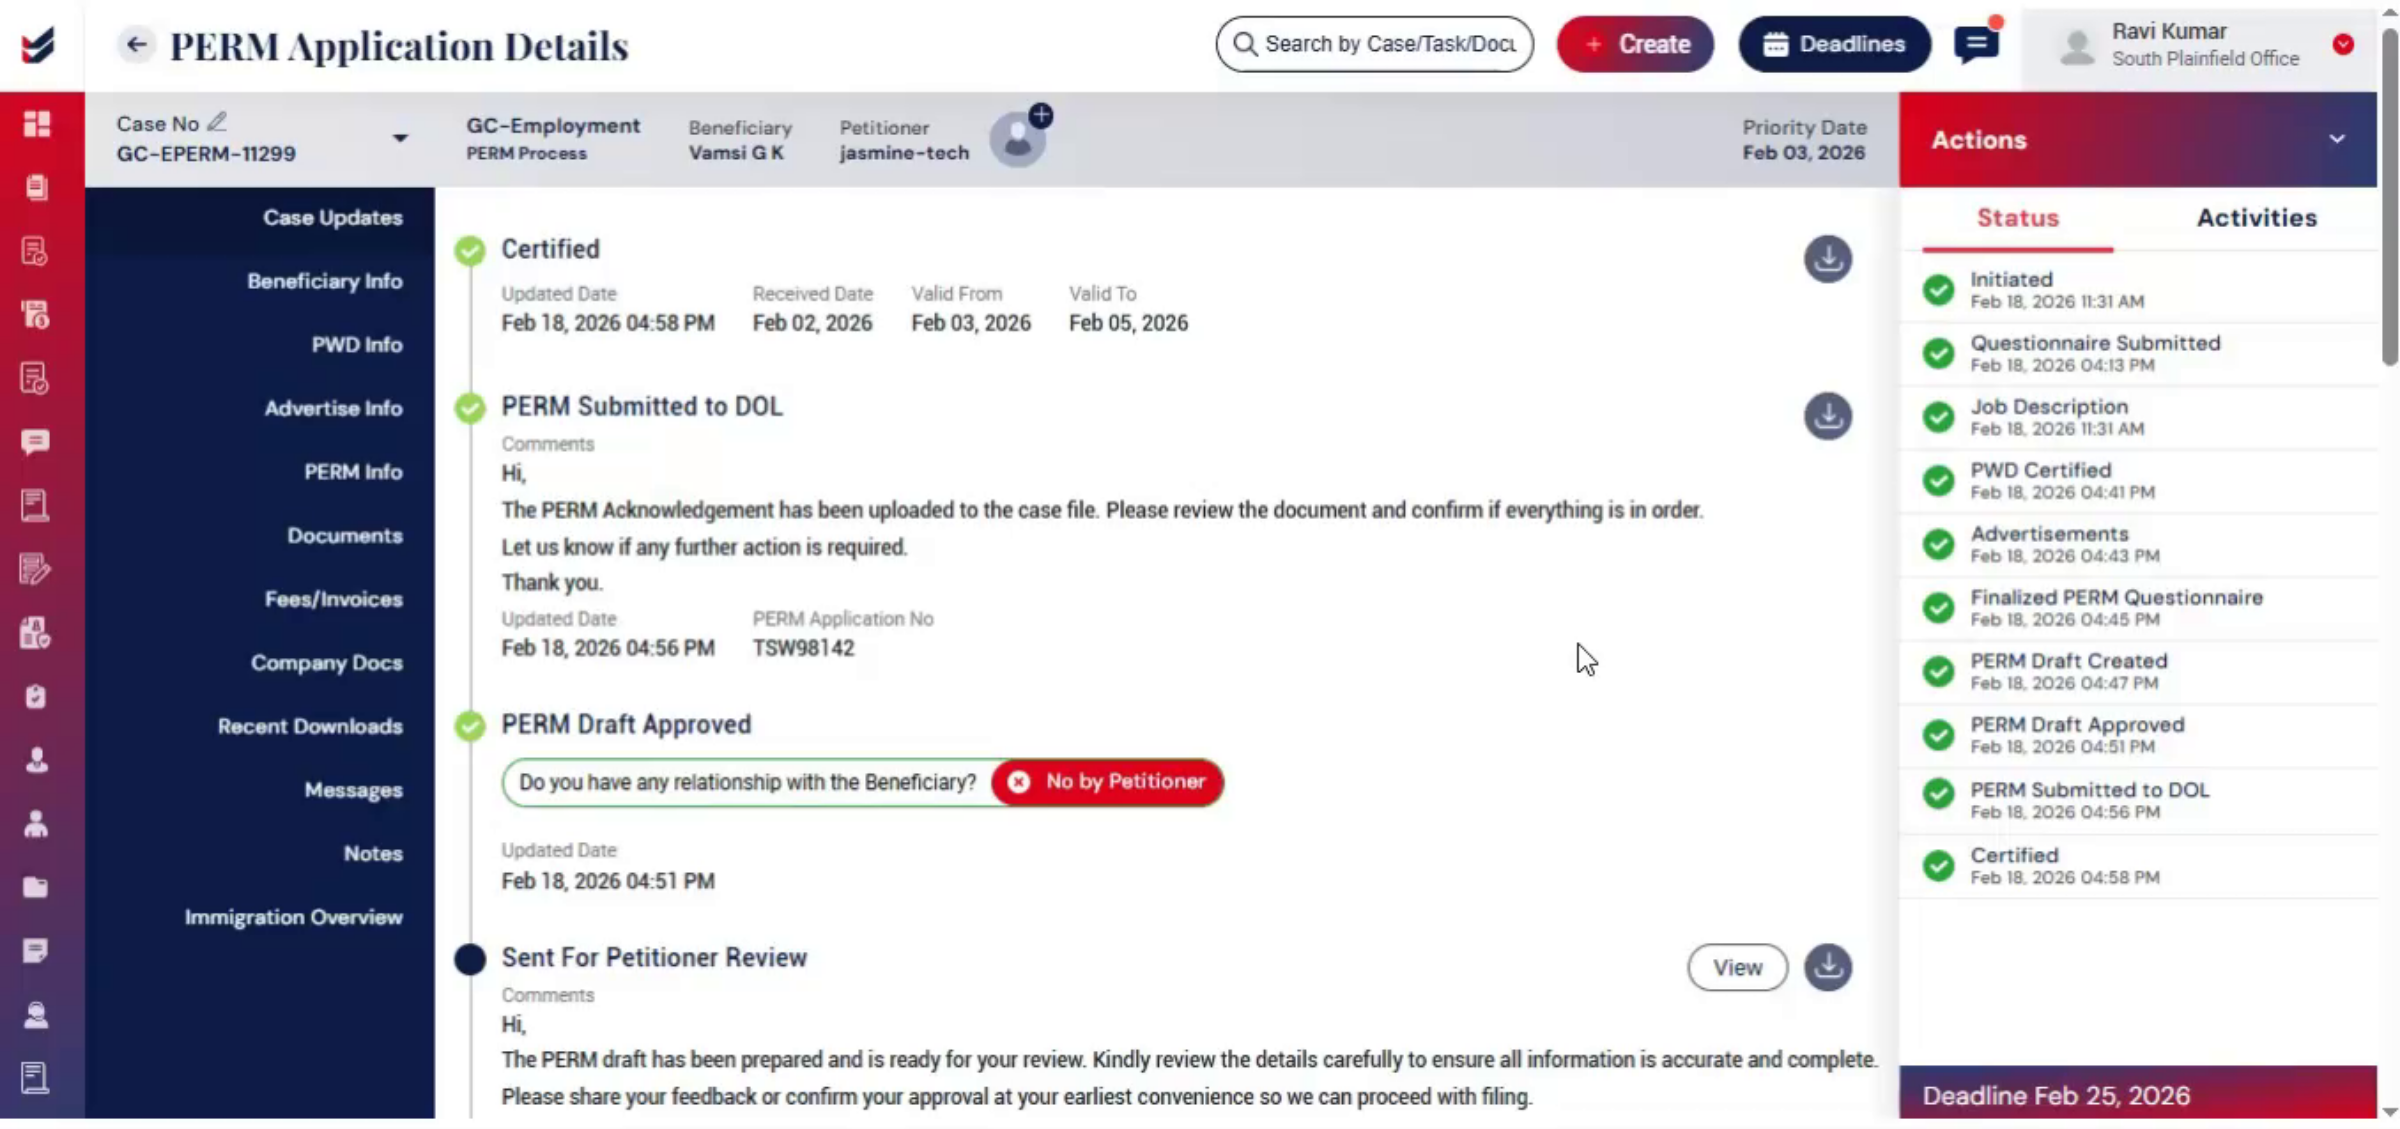
Approving the draft confirms that it has been reviewed for accuracy. During review, the petitioner will be asked if they have any relationship with the beneficiary.
41. Law Firm Review Responsibilities
 * click the image to view enlarged
If the petitioner answers yes, the portal allows you to capture additional details. The law firm will review this information carefully to ensure disclosure requirements are met and confirm that the application is accurate before moving forward.
42. Approval Notification Process
 * click the image to view enlarged
Once approved, the law firm receives notifications. This approval represents authorization to proceed with filing and confirms that the draft has been reviewed for accuracy.
43. PERM Application Filing Ready
 * click the image to view enlarged
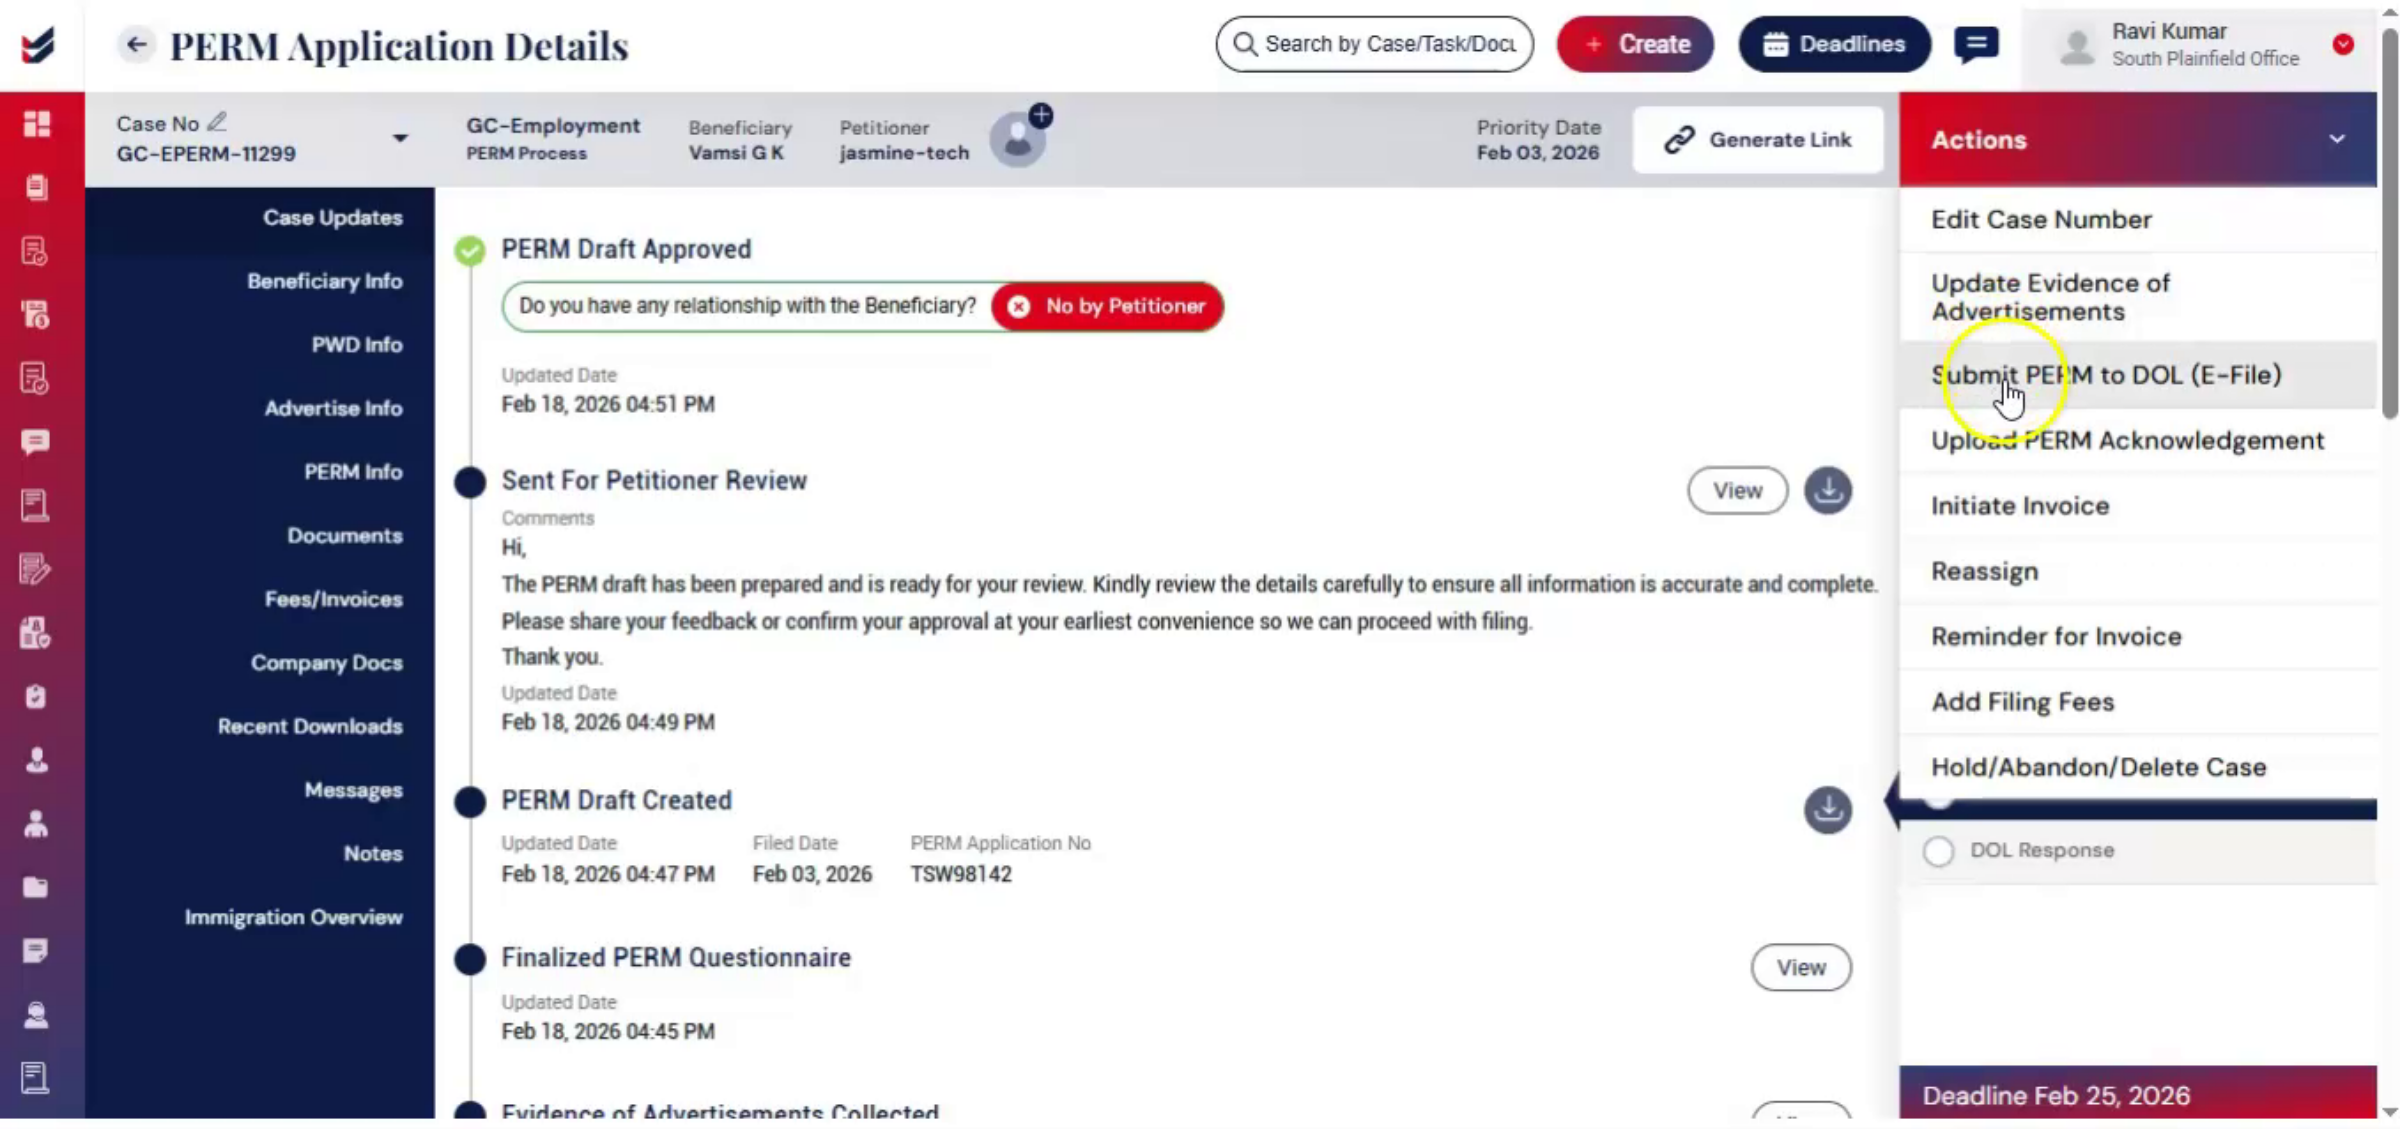
Once internally approved, the PERM application is ready for official submission. To file, navigate to Actions and click Submit PERM to DOL.
44. Filing Verification Steps
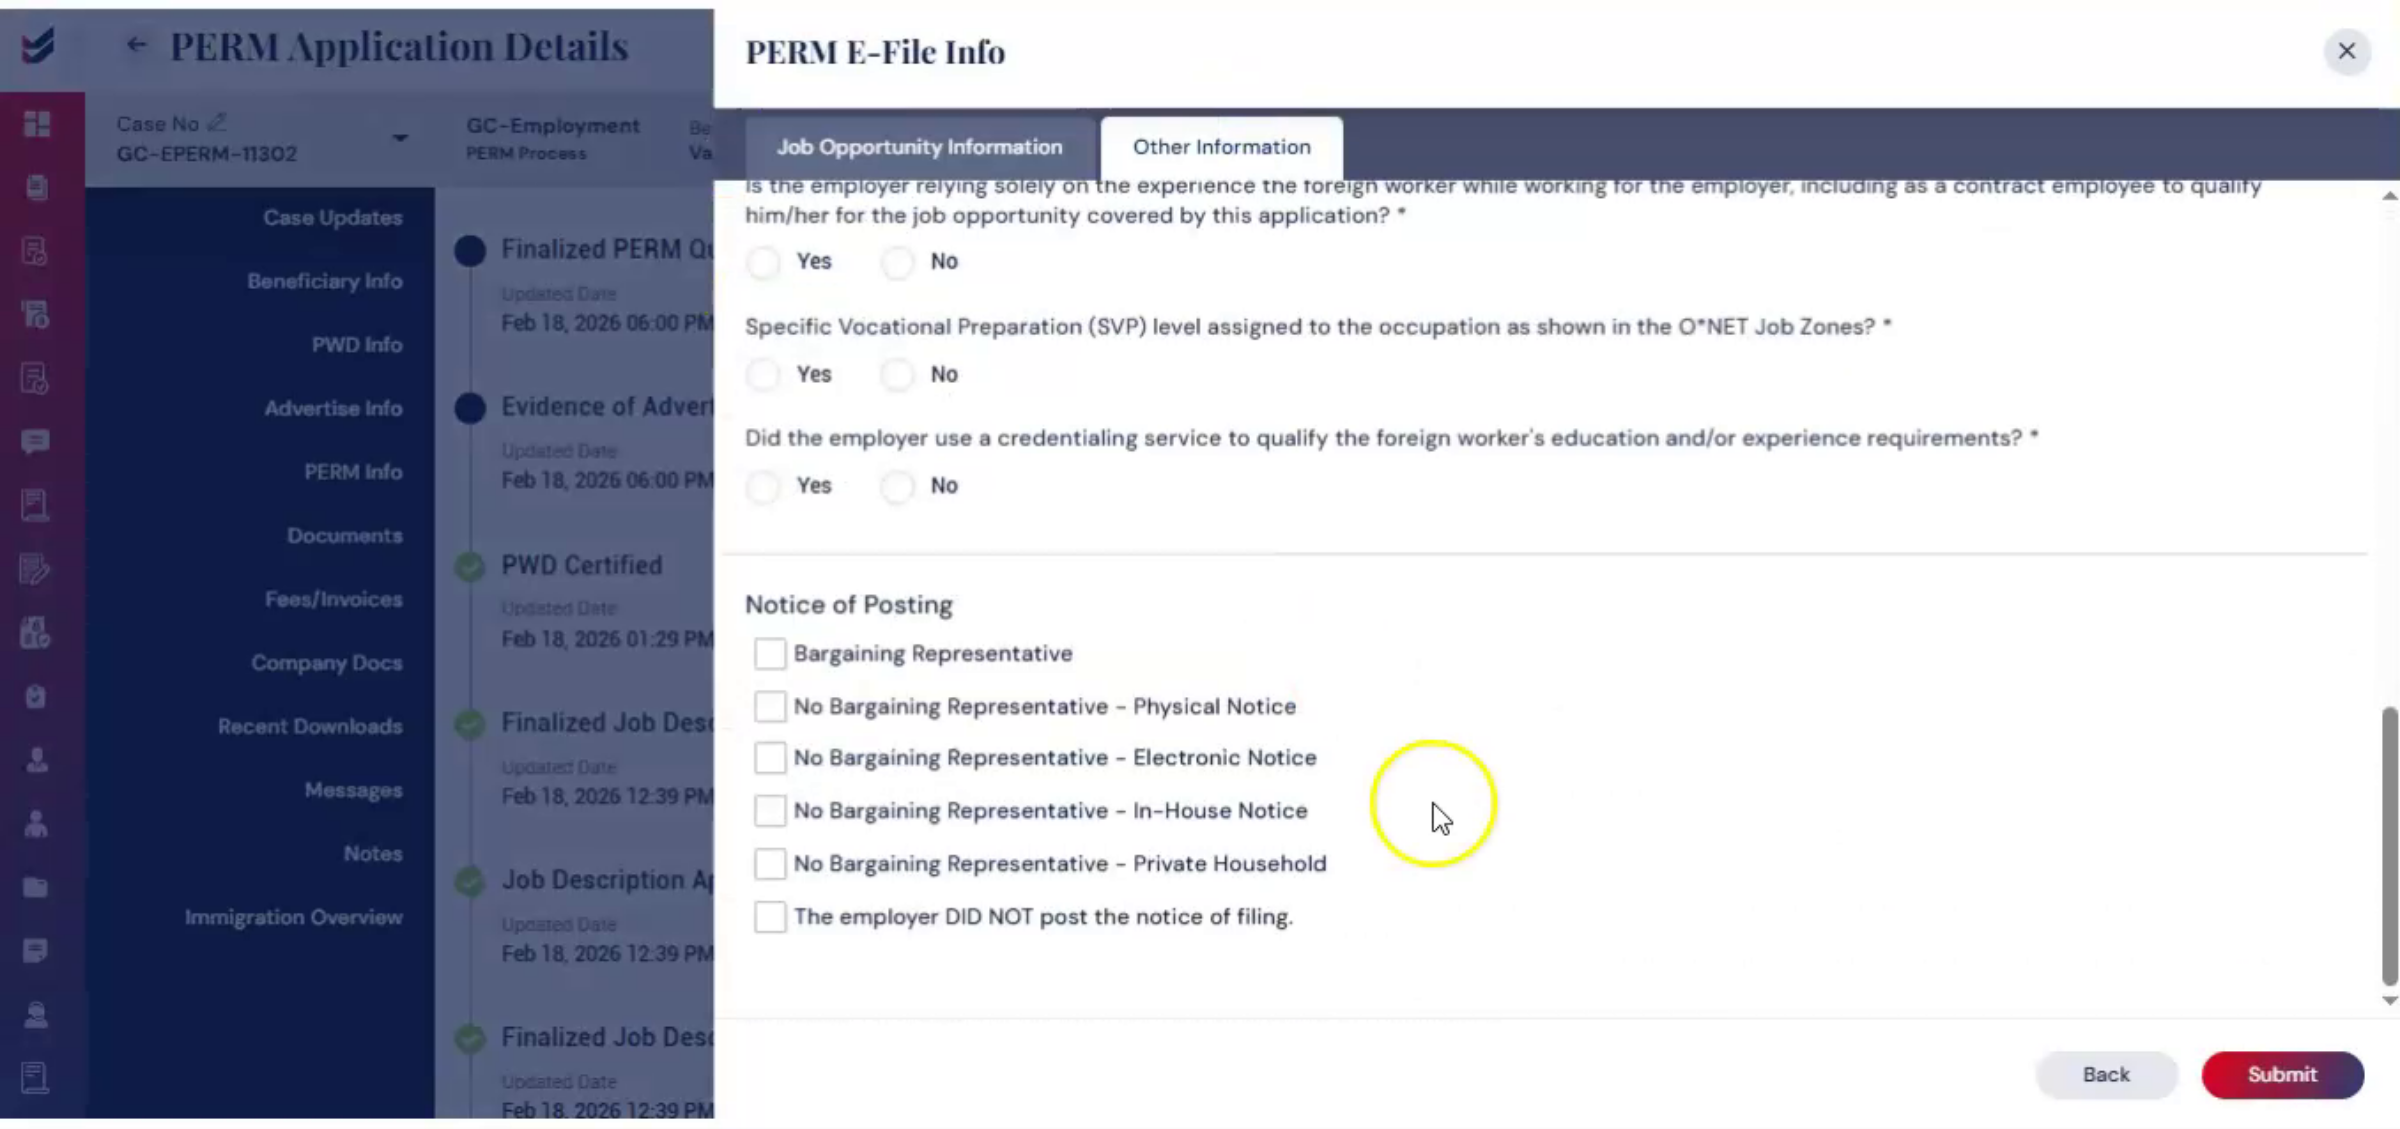
 * click the image to view enlarged
Then carefully verify the job opportunity and related information. If the PERM case was filed offline, the acknowledgement receipt and filed date can be entered so that ImmiBox can continue to monitor and record case updates accurately.
45. Uploading Filing Acknowledgement
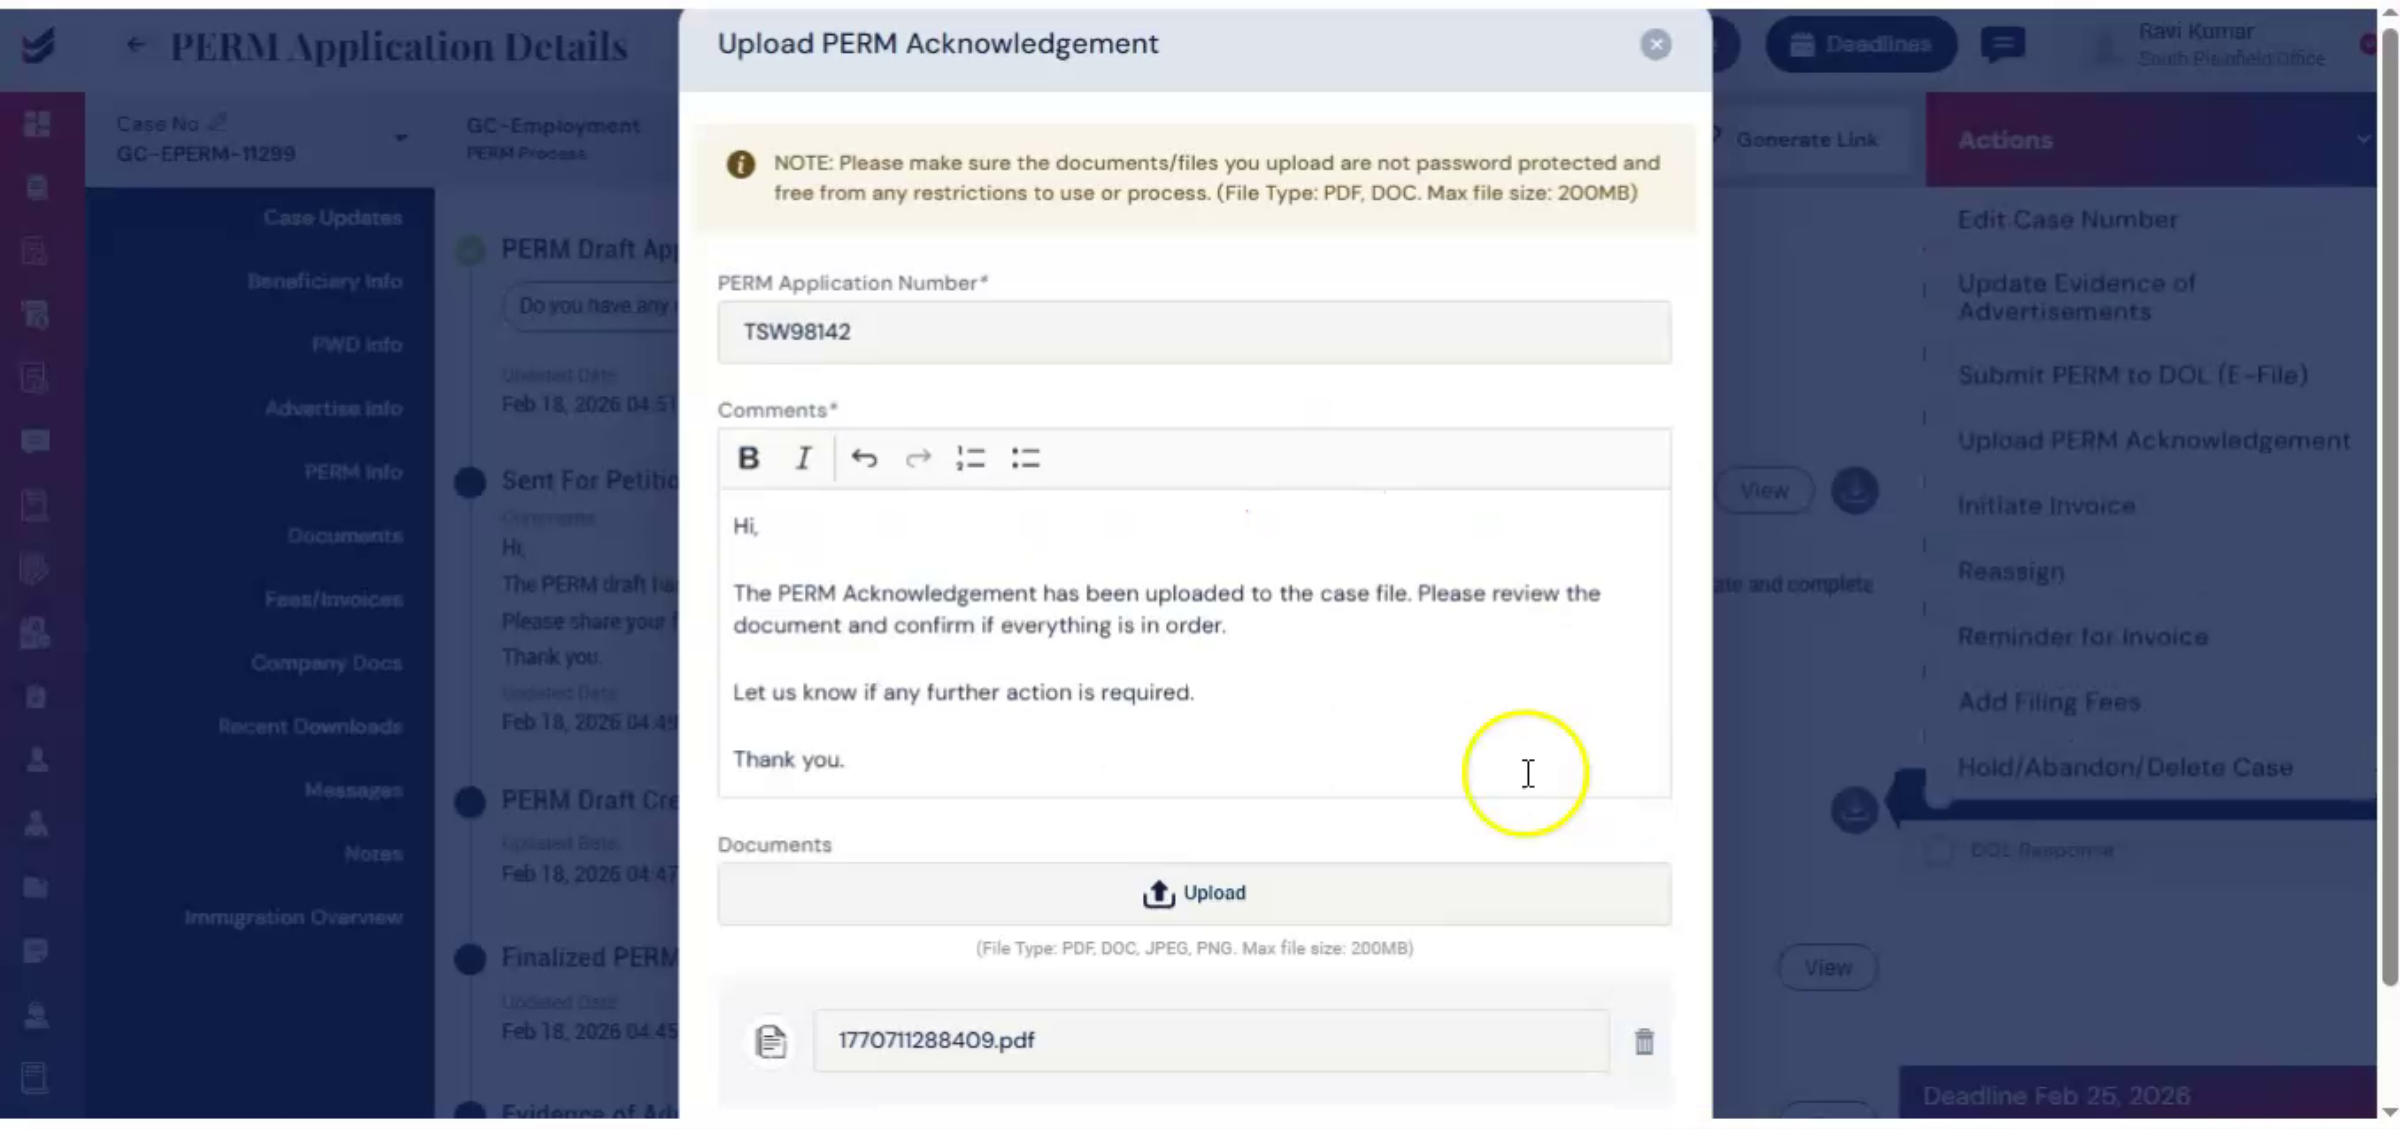
 * click the image to view enlarged
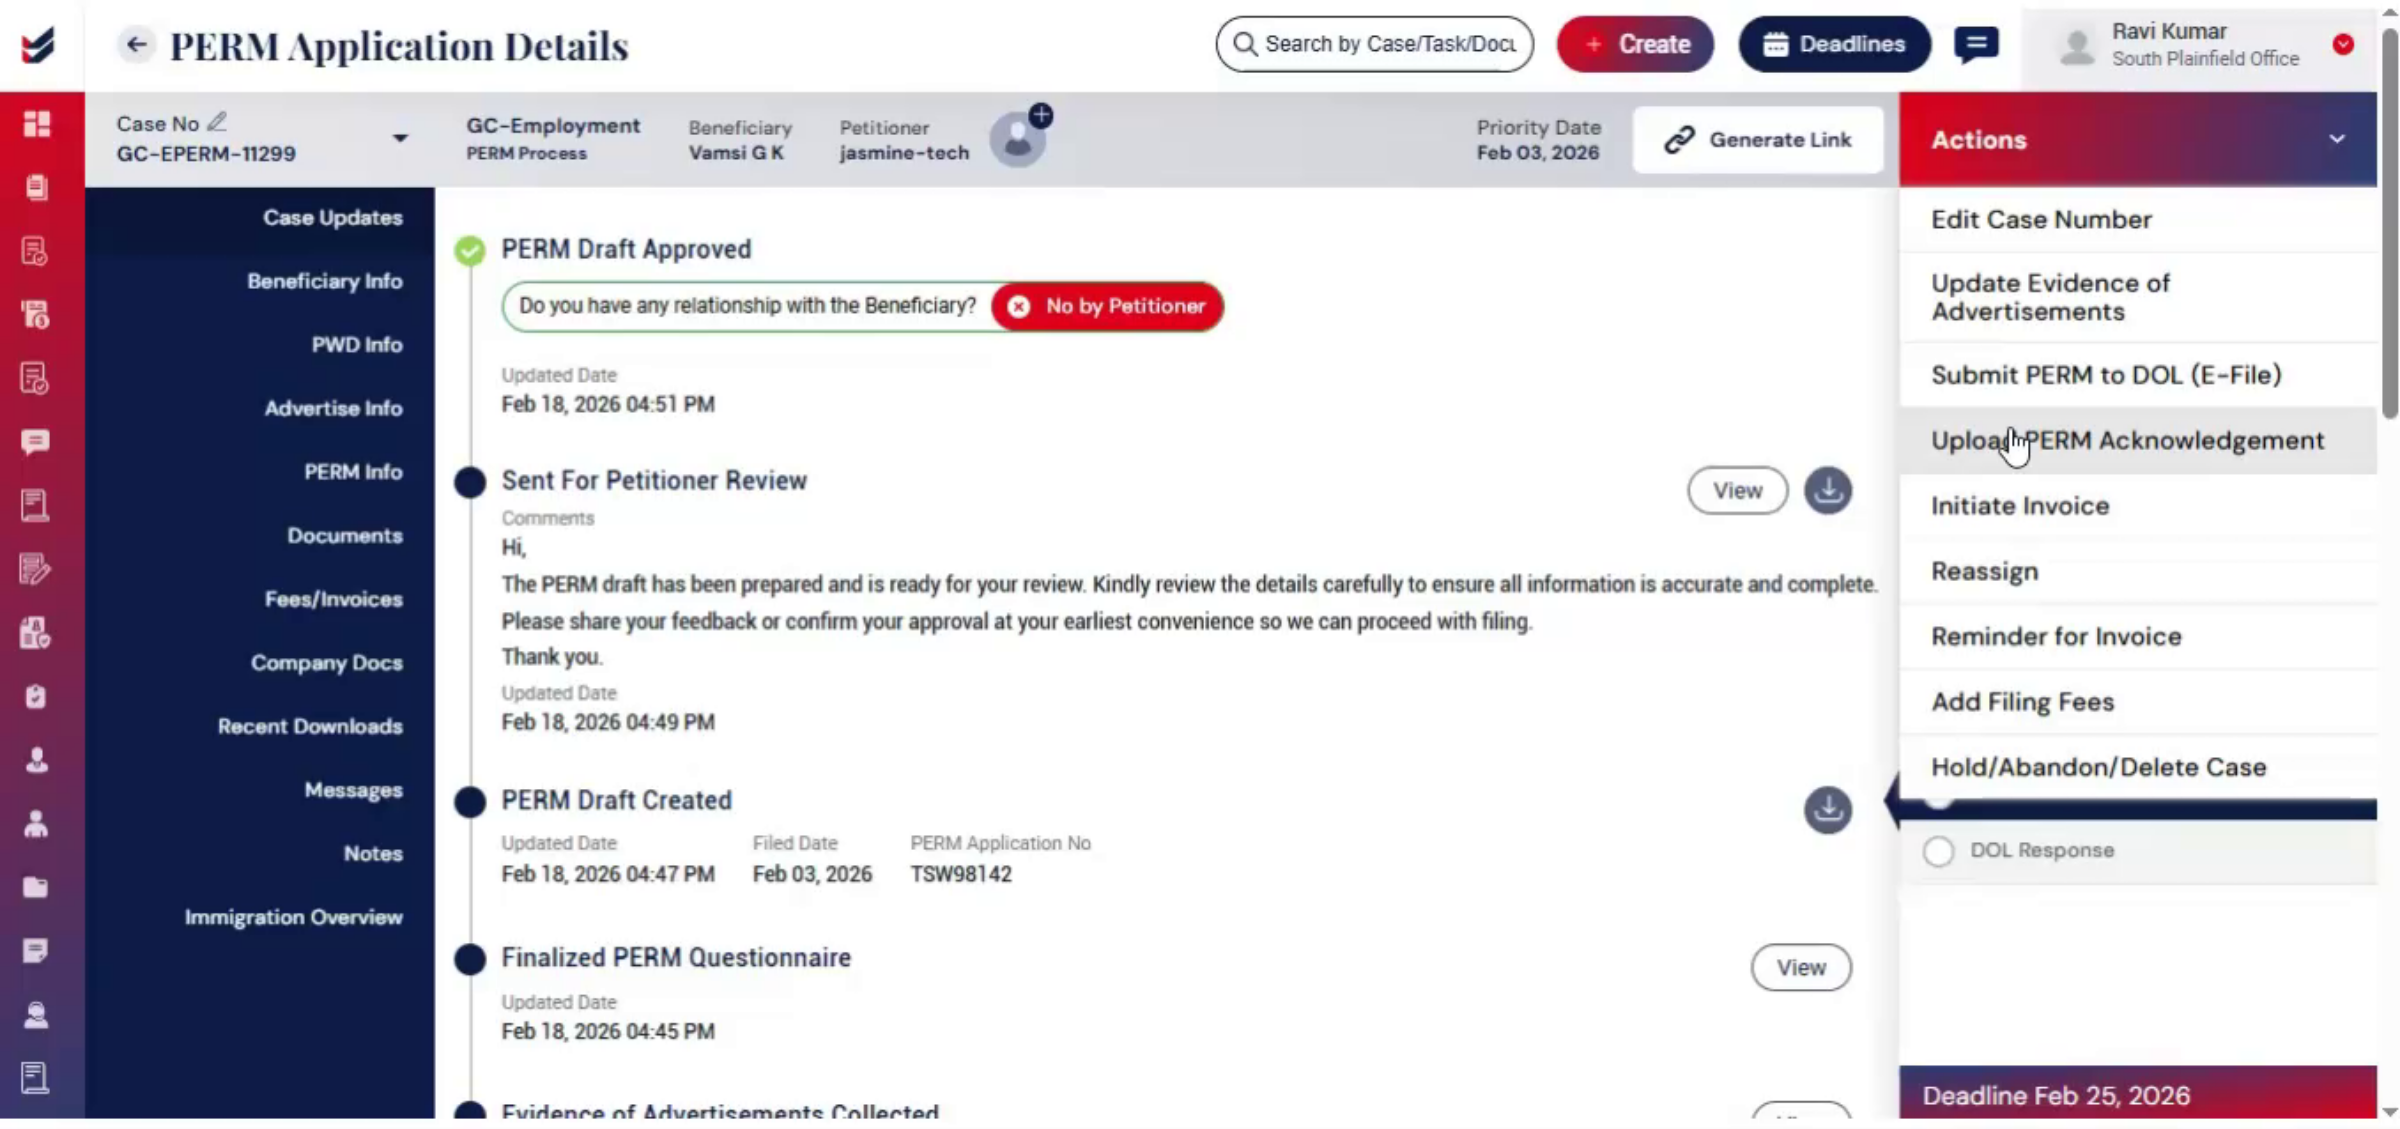
After successful filing, select Upload PERM. Acknowledgement under Actions. Store the acknowledgement within the case. This allows receipt details to be recorded and DOL processing updates to be tracked.
46. Record Keeping And Status Updates
 * click the image to view enlarged
These steps are for record keeping and tracking purposes only and do not represent a second submission. When a decision is issued, such as certification, audit, or denial, the status may update automatically.
47. Updating DOL Response Status
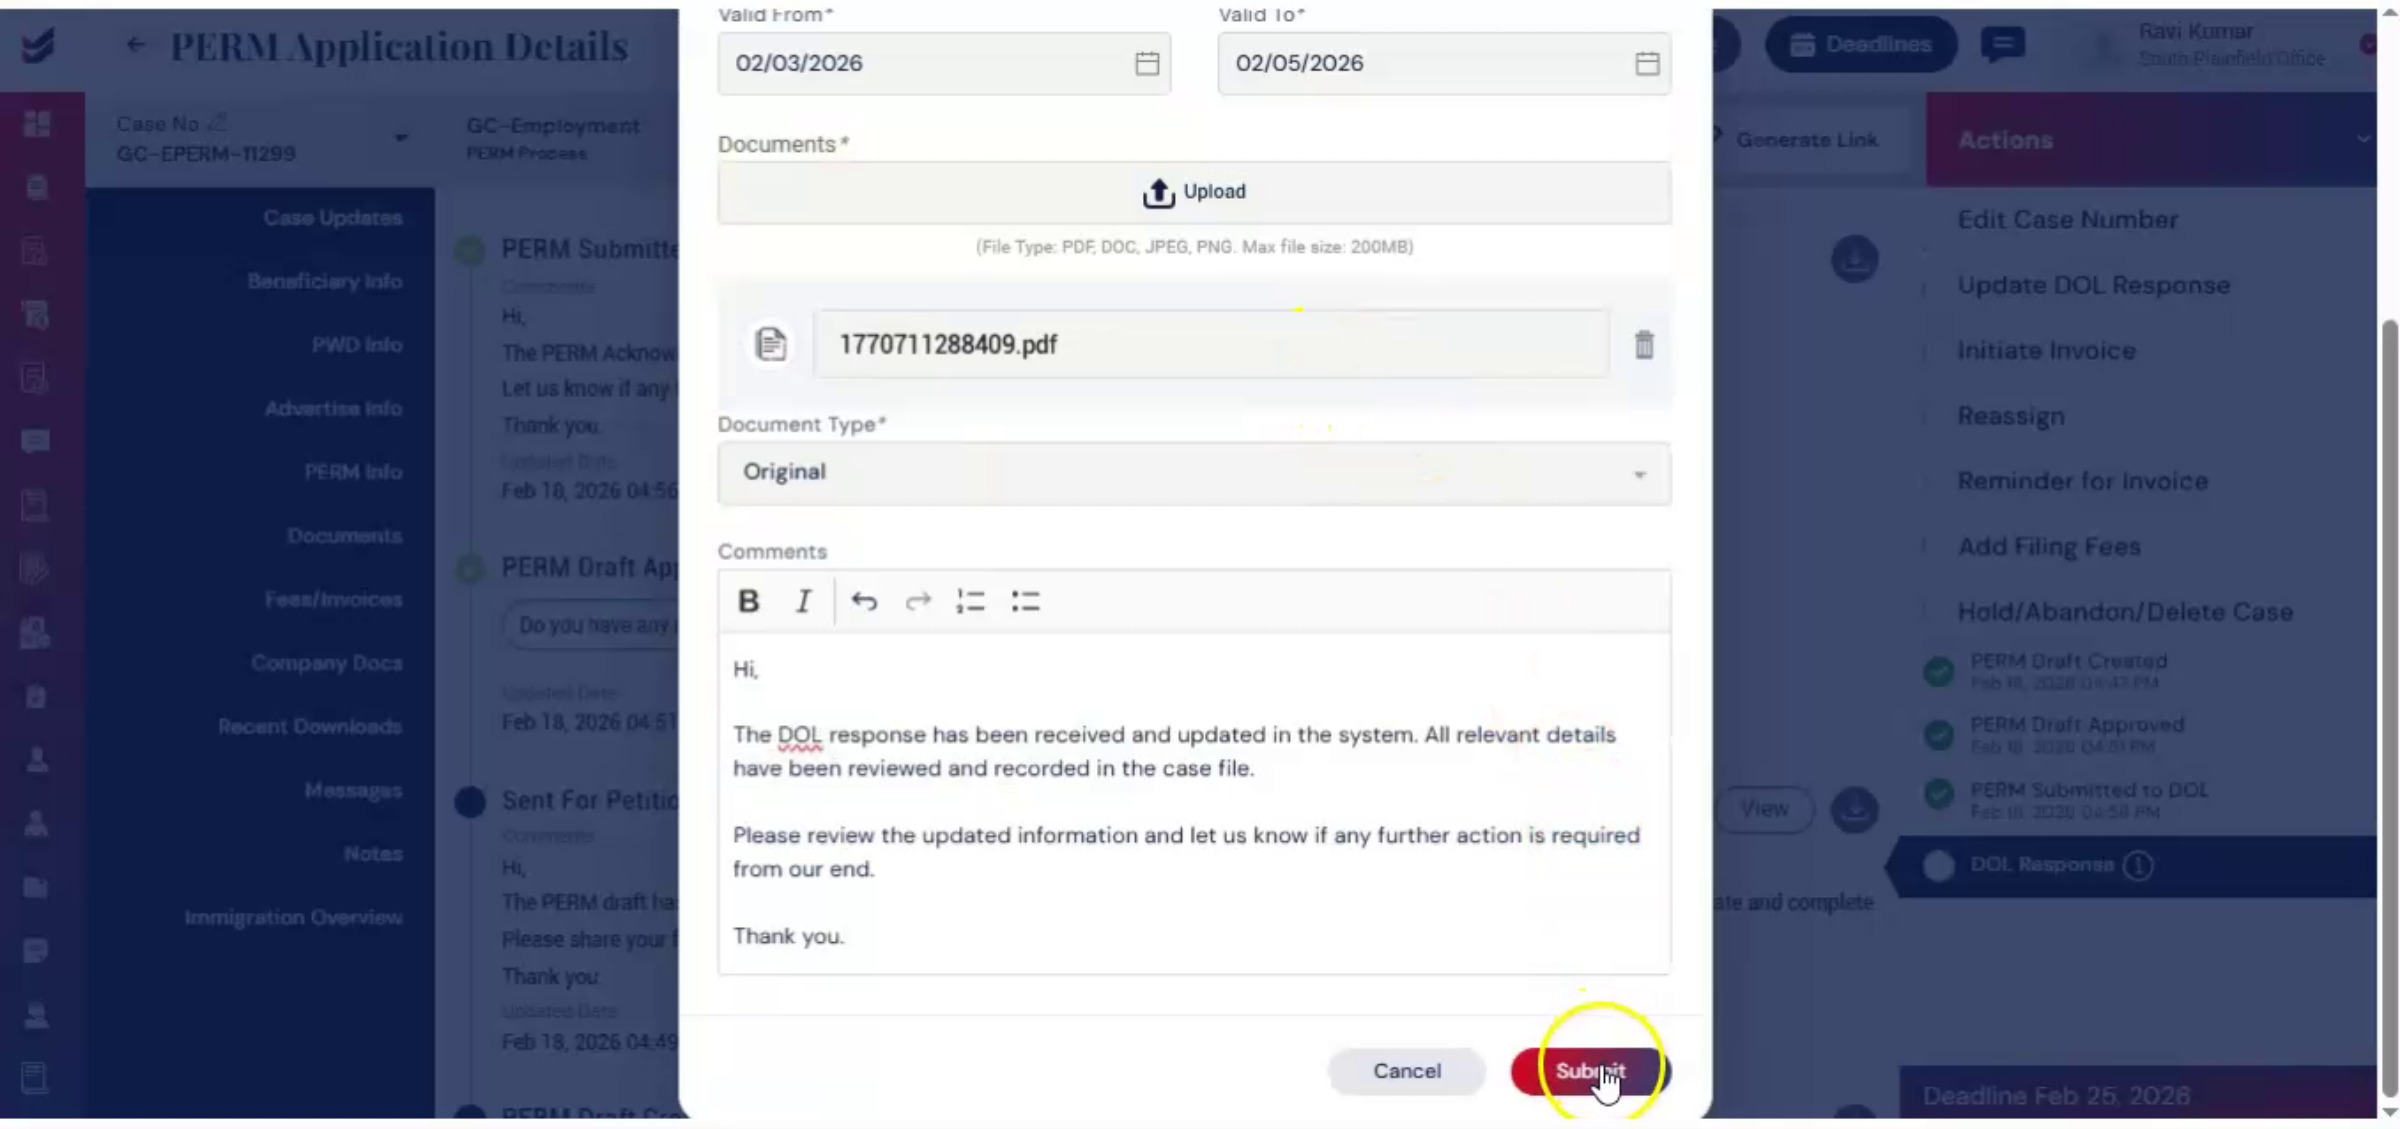
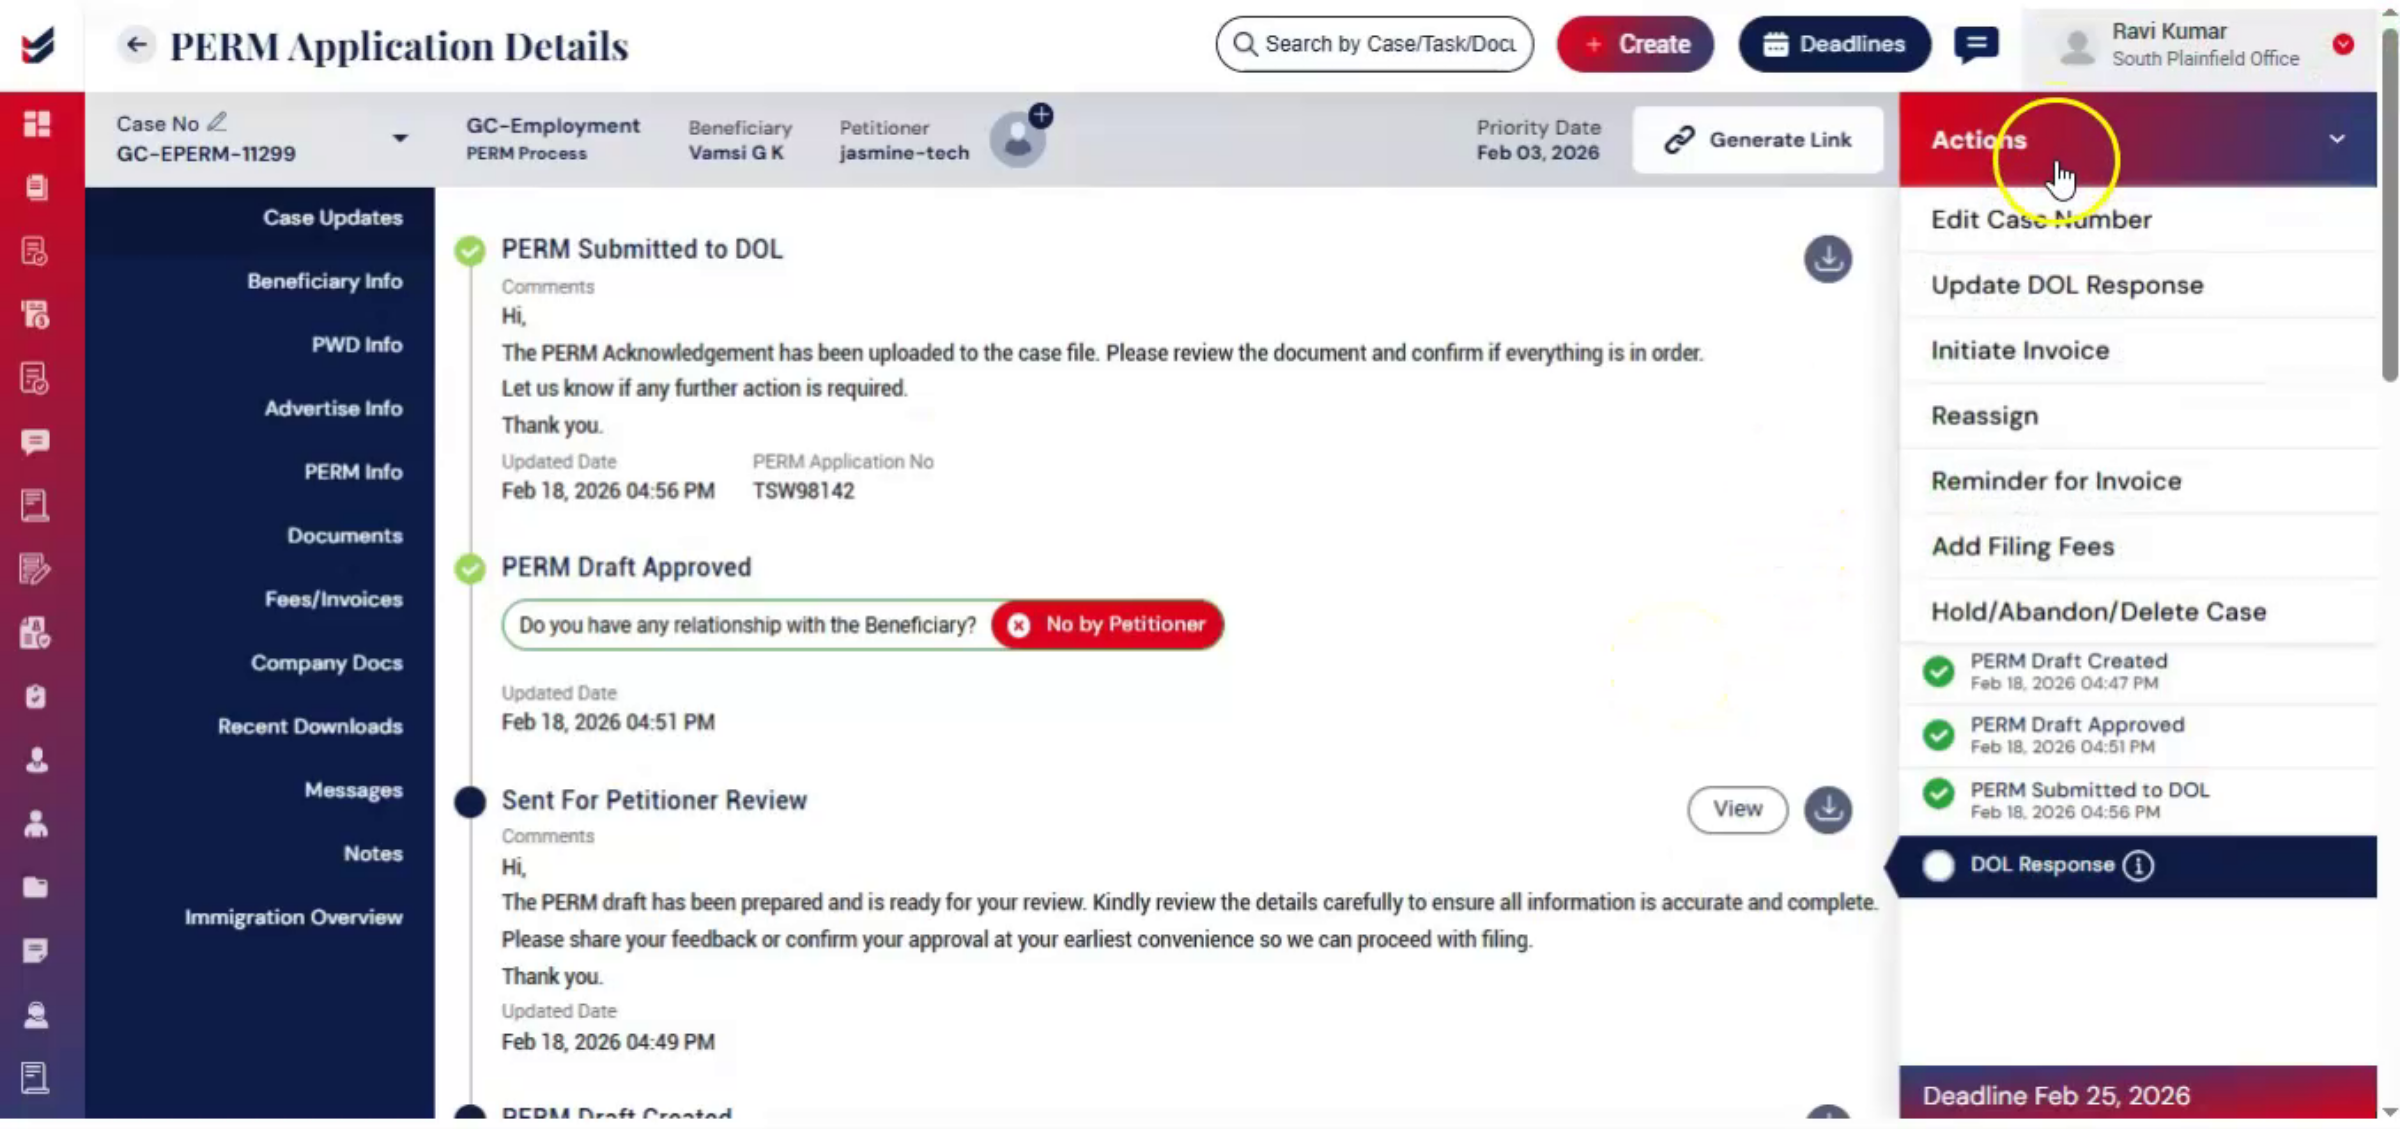 * click the image to view enlarged
It can also be updated manually through Actions, then click Update, DOL Response. Upload the relevant notice, allow the system to extract available information, and submit.
48. Linking Existing PWD Process
 * click the image to view enlarged
Case 2. When Link Existing PWD is selected, the Link PWD window opens, allowing you to search for available PWD cases using case number, PWD number, location, job title, or SOC code. Once the correct PWD is identified, click Link PWD and then submit to attach it to the PERM case.
49. PWD Data Integration Benefits
 * click the image to view enlarged
ImmiBox reads linked PWD data and automatically updates the PERM workflow, marking related stages like job description and PWD certified as internally completed for audit readiness. This eliminates duplicate work, ensures consistency between PWD and PERM data, and keeps the case moving smoothly.
50. ImmiBox Automation Features
 * click the image to view enlarged
Throughout the process, ImmiBox delivers automation, structured workflows, secure record management, compliance tracking, role-based accountability, and real-time status updates, improving efficiency, accuracy, and transparency for law firm operations.
51. Video Closing Thanks
 * click the image to view enlarged
Thank you for watching.

