

Creating and Managing LCA Filings using ImmiBox
Overview
Welcome! In this video, we will learn how to create and manage Labor Condition Applications (LCA) using ImmiBox.
1. Introduction
 * click the image to view enlarged
The LCA is a Department of Labor compliance filing that documents job classification, employer details, and work location information before certain employment-based petitions can be filed.
2. ImmiBox LCA Lifecycle Features
 * click the image to view enlarged
ImmiBox streamlines the entire LCA lifecycle, from drafting and filing to tracking and case linking, ensuring accuracy, structured documentation, and transparency.
3. Navigating To LCA Library
 * click the image to view enlarged
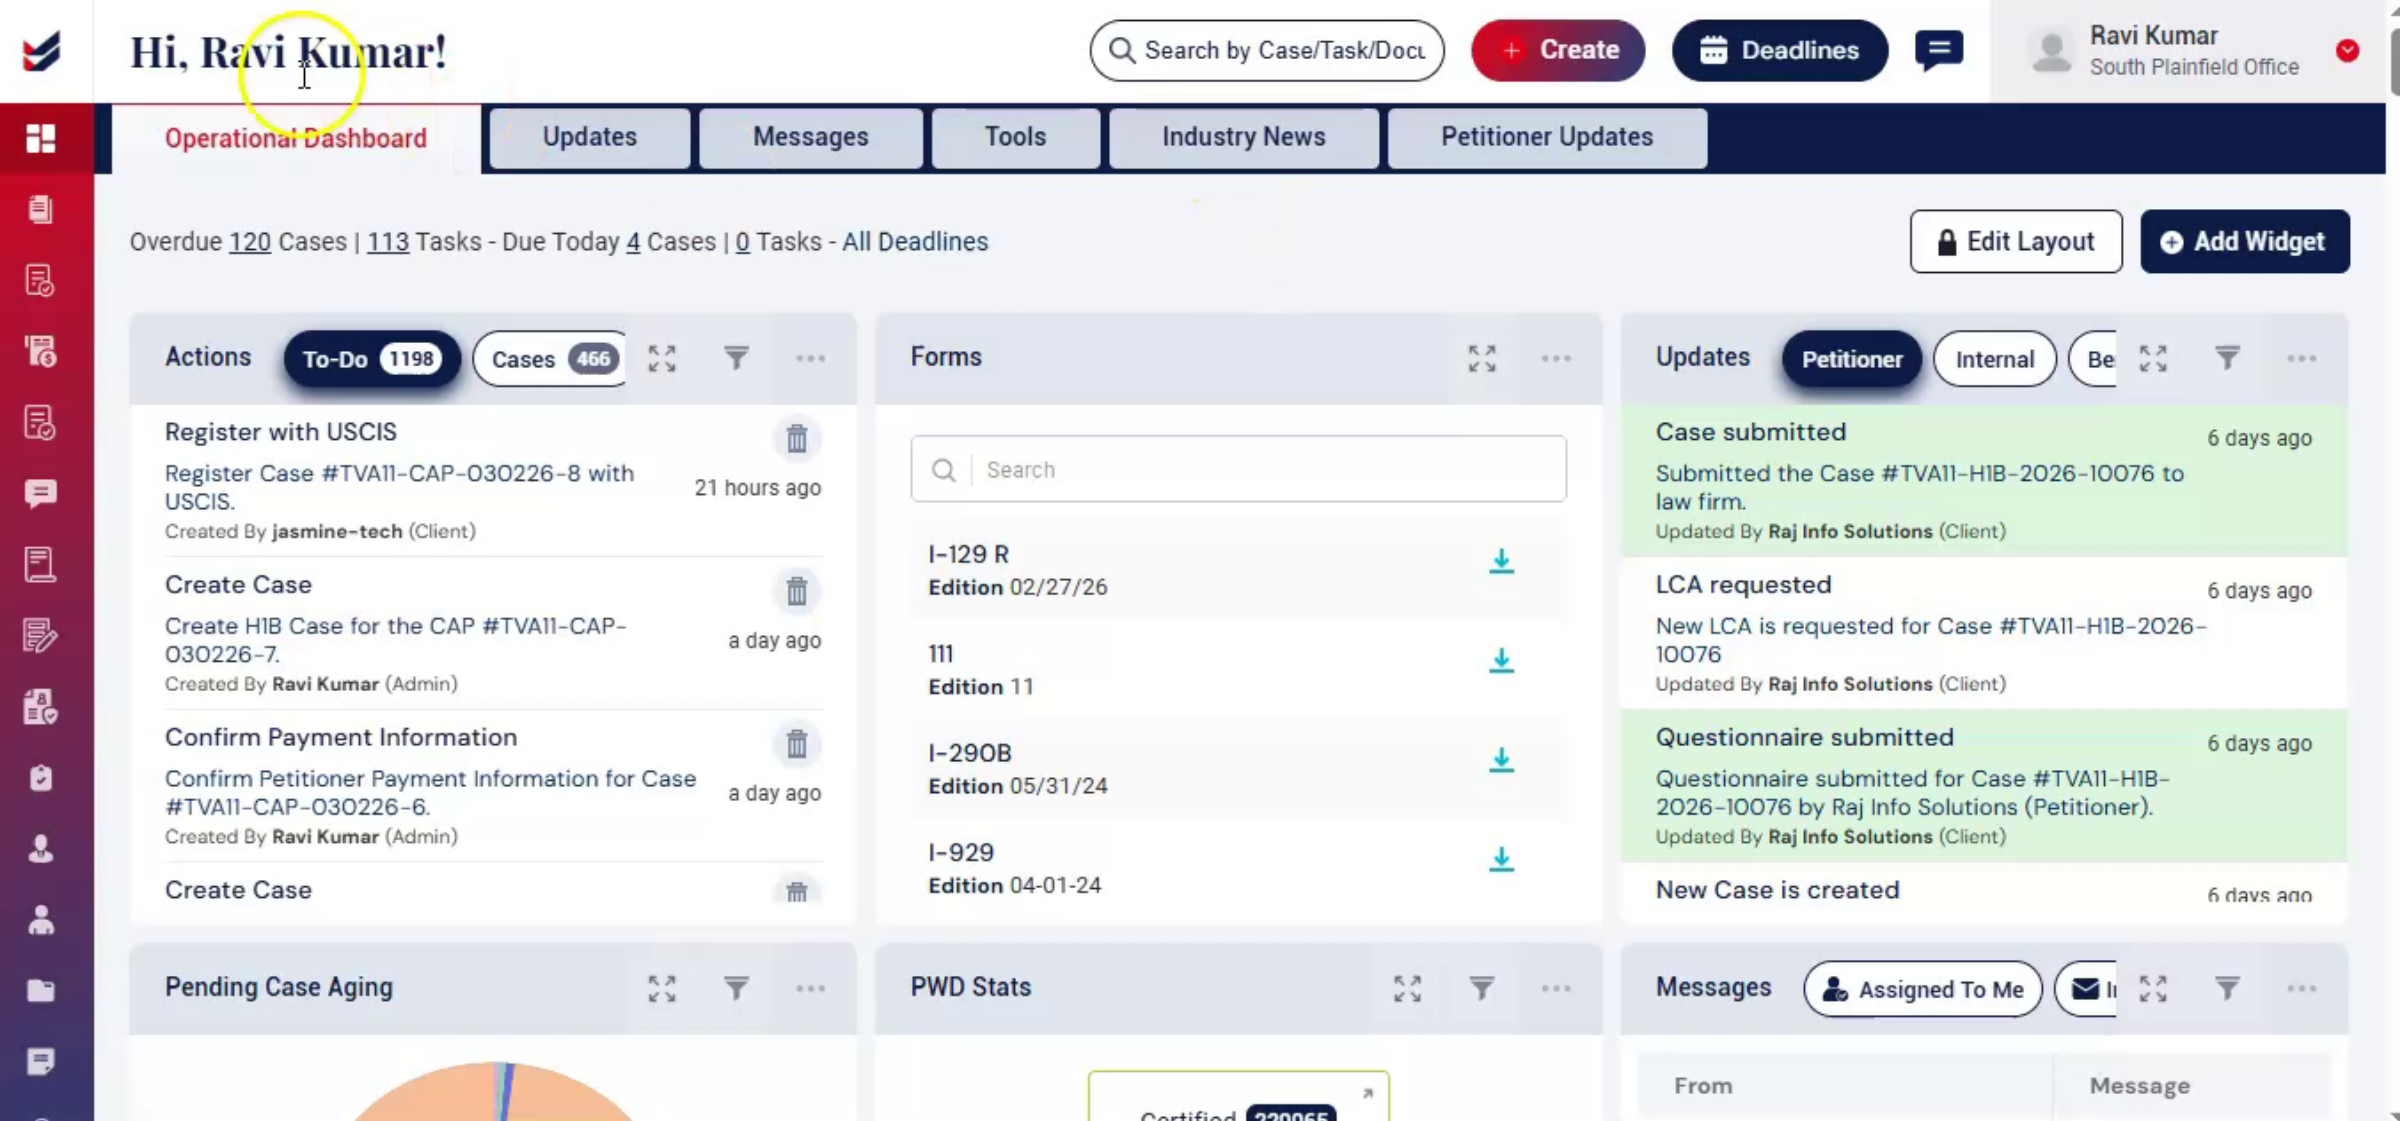
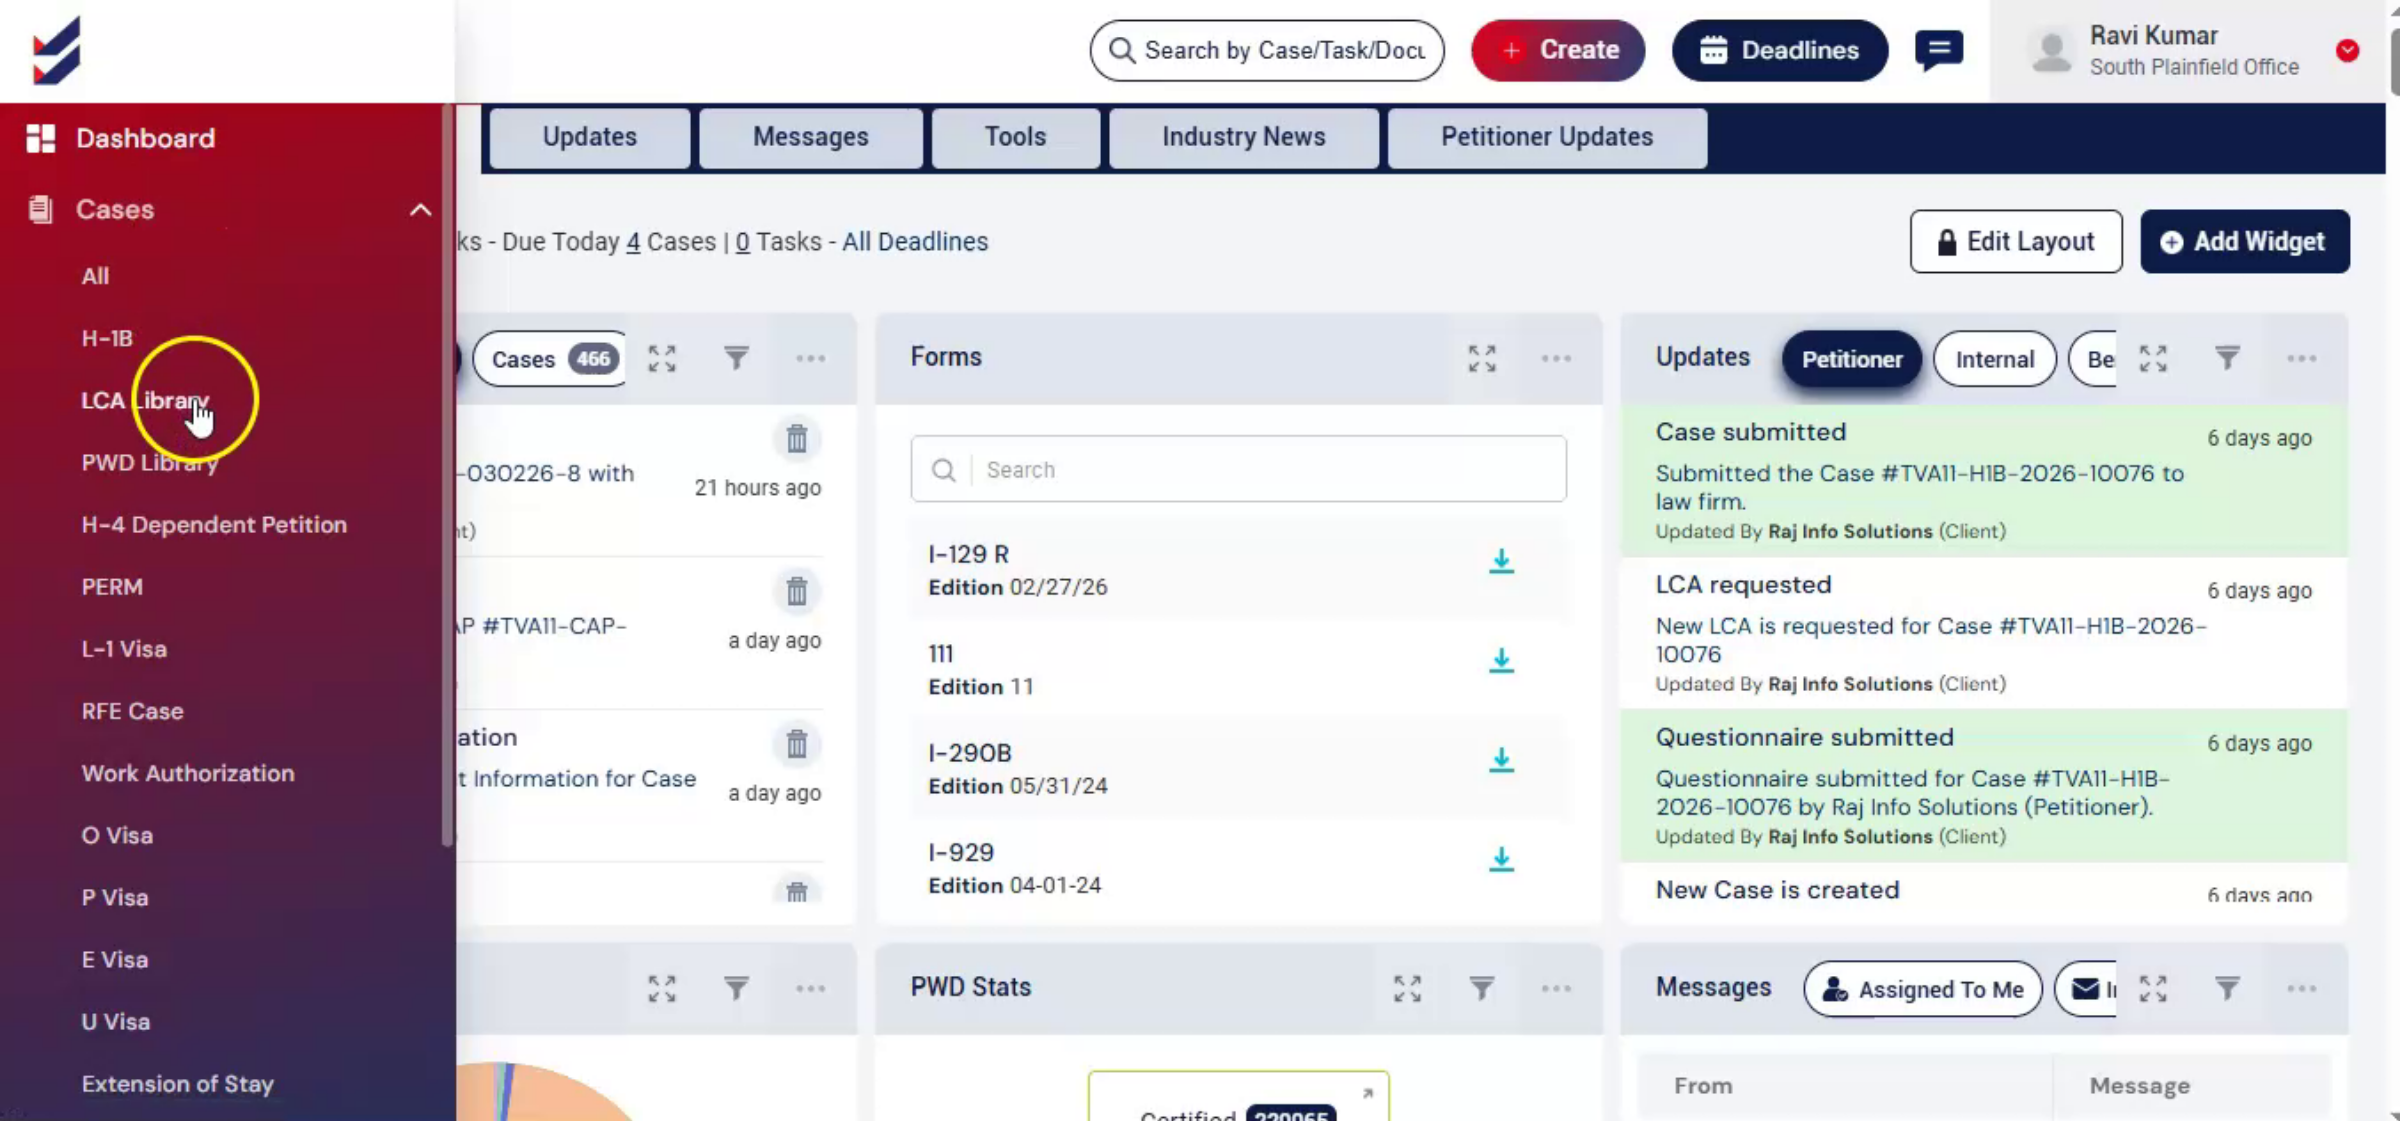
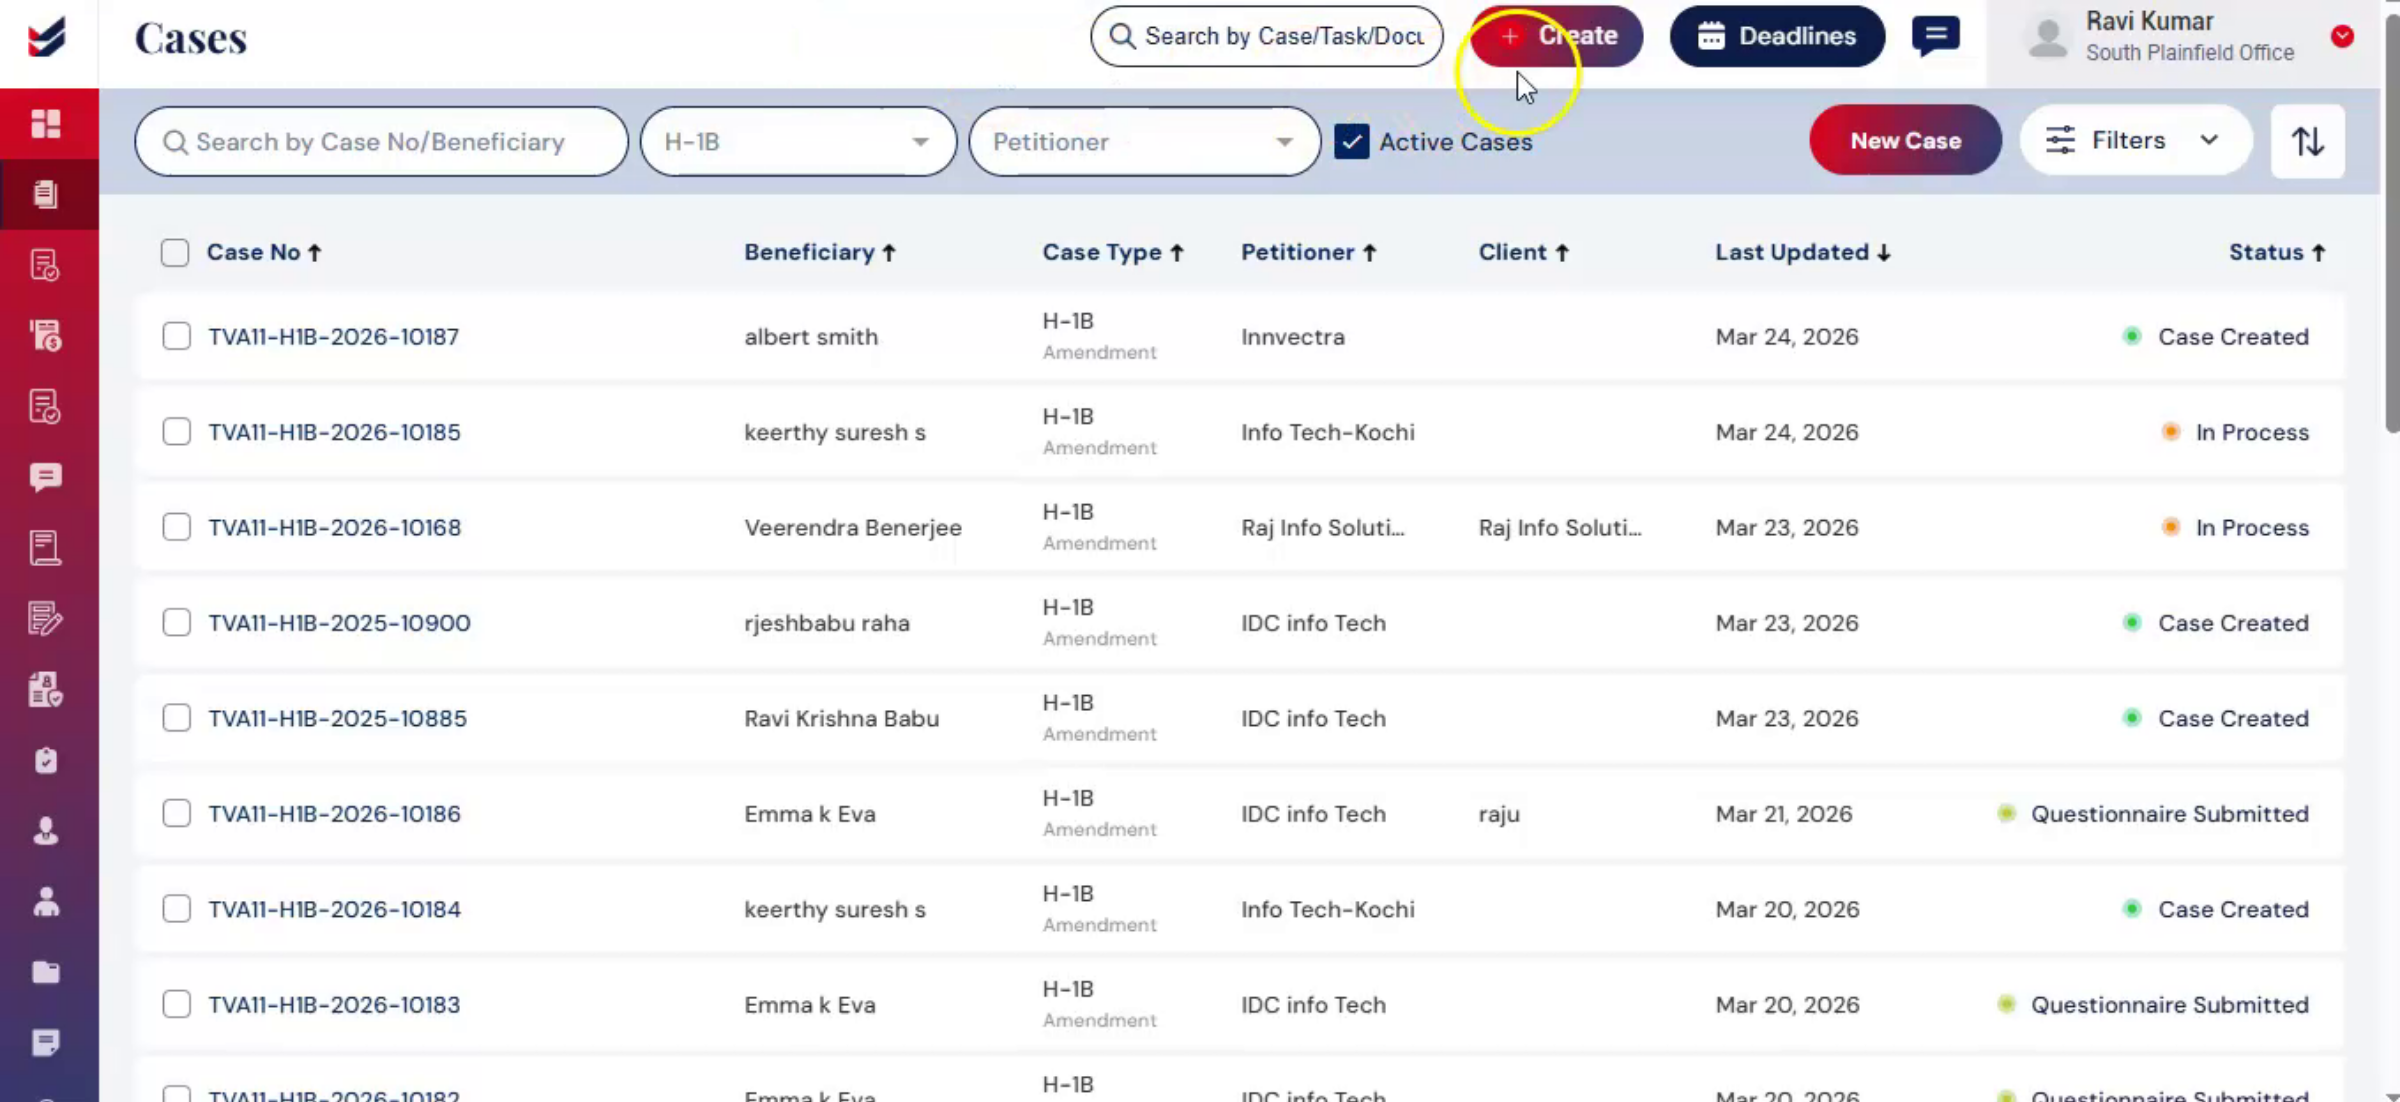
To create a new LCA, from the dashboard, navigate to the Cases tab. Select LCA Library.
4. Managing LCAs And Search Filters
 * click the image to view enlarged
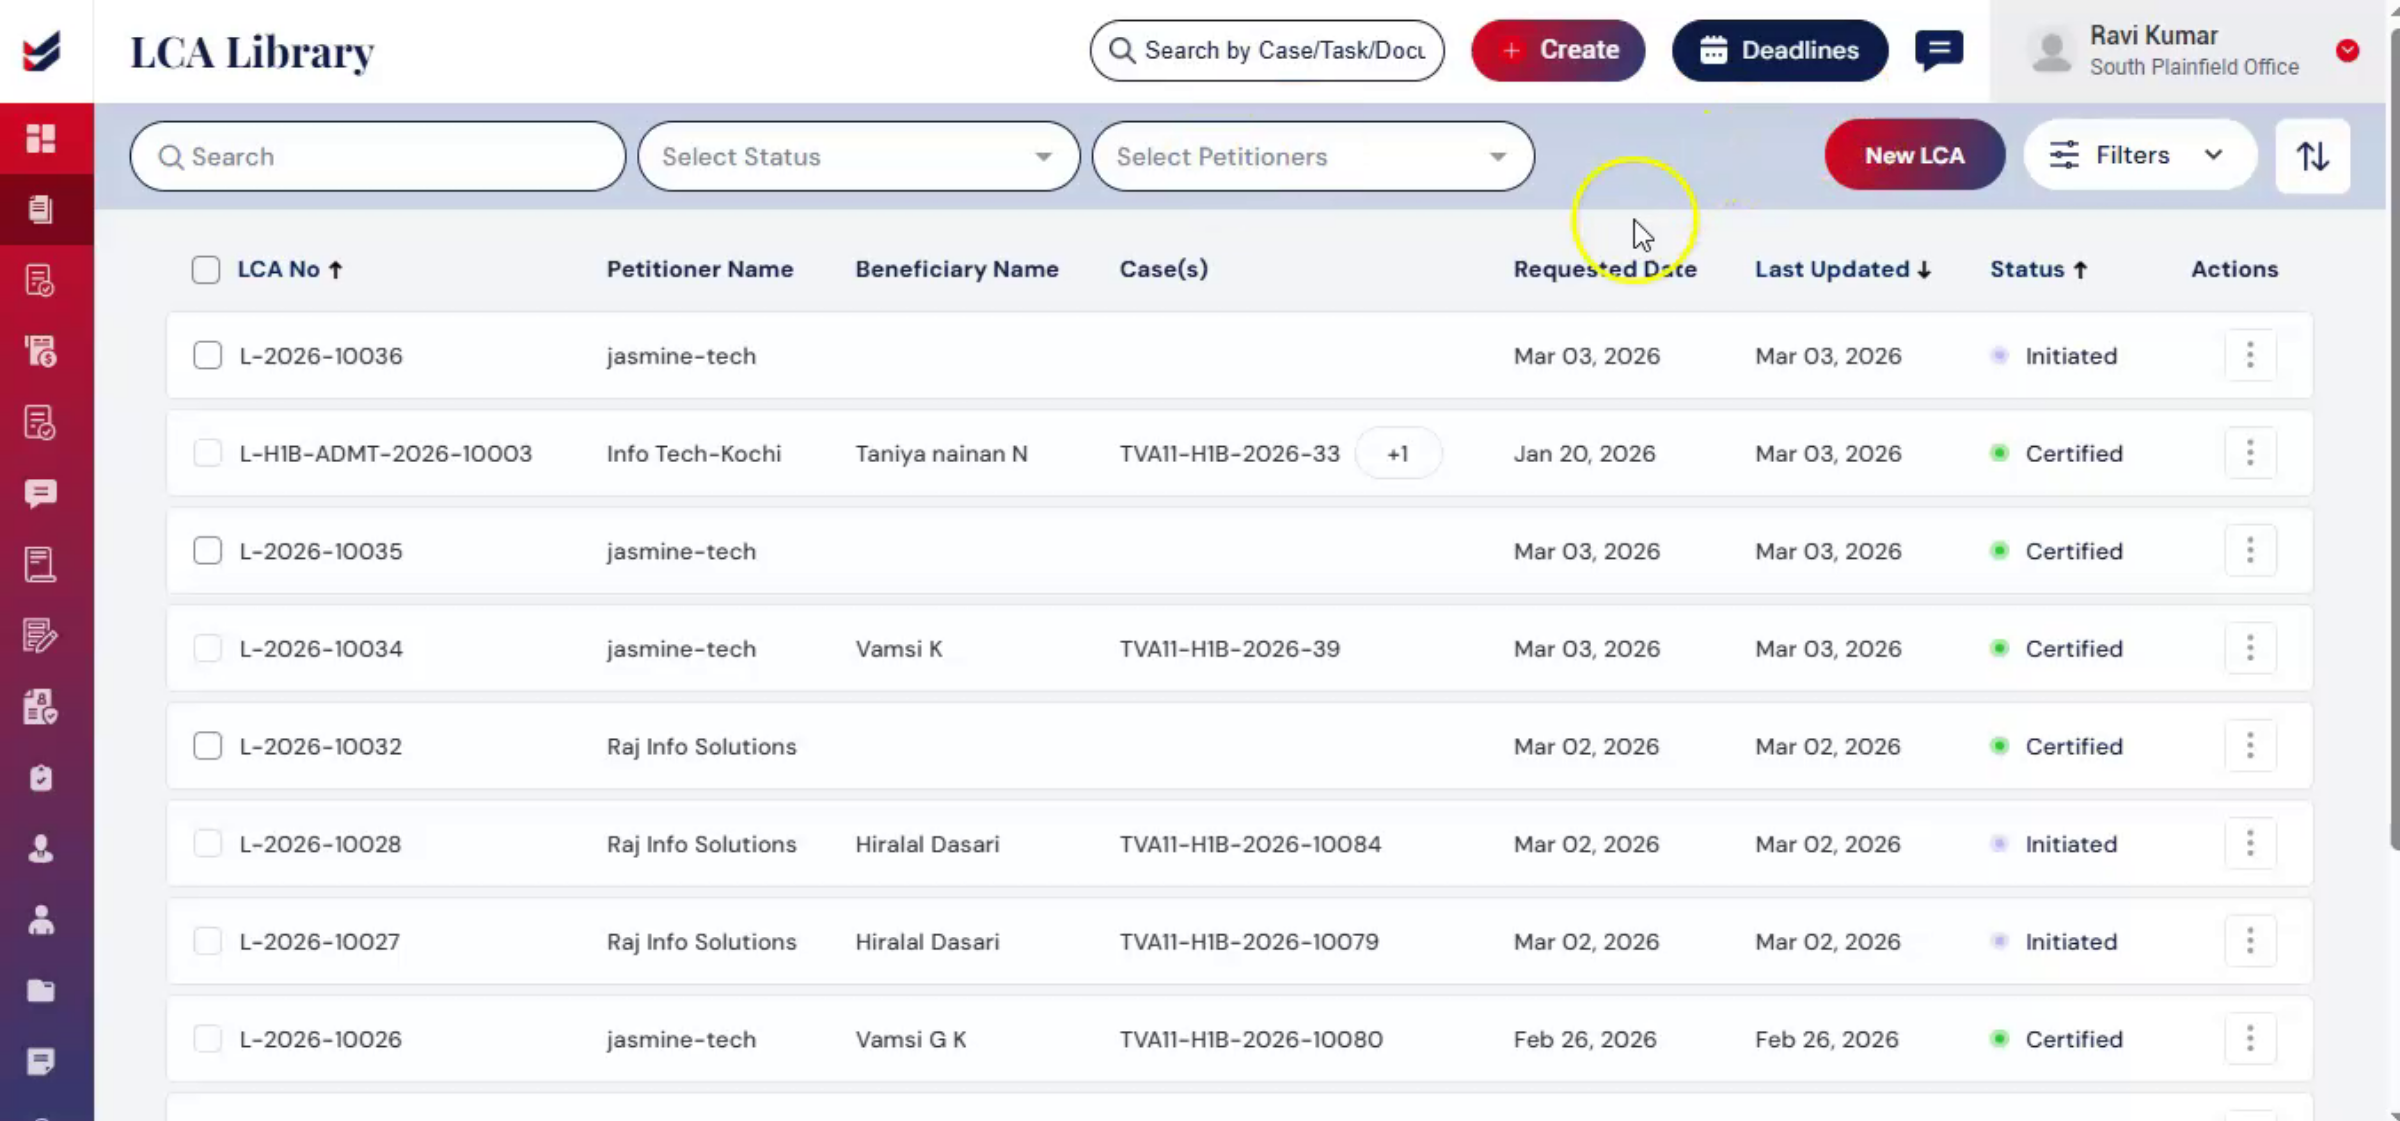
In the LCA Library section, you will see options to manage existing LCAs, including: a Search Bar to quickly locate records by case number Use the Select Status dropdown to filter LCAs by their current status. Select Petitioner dropdown to filter by employer or petitioner. To create a new LCA, click New LCA on the right-hand side.
5. Creating New LCA Options
 * click the image to view enlarged
Alternatively, click Create from the main menu and select New LCA from the drop-down list. Then a dialog box will appear on the screen.
6. Request Or Upload LCA
 * click the image to view enlarged
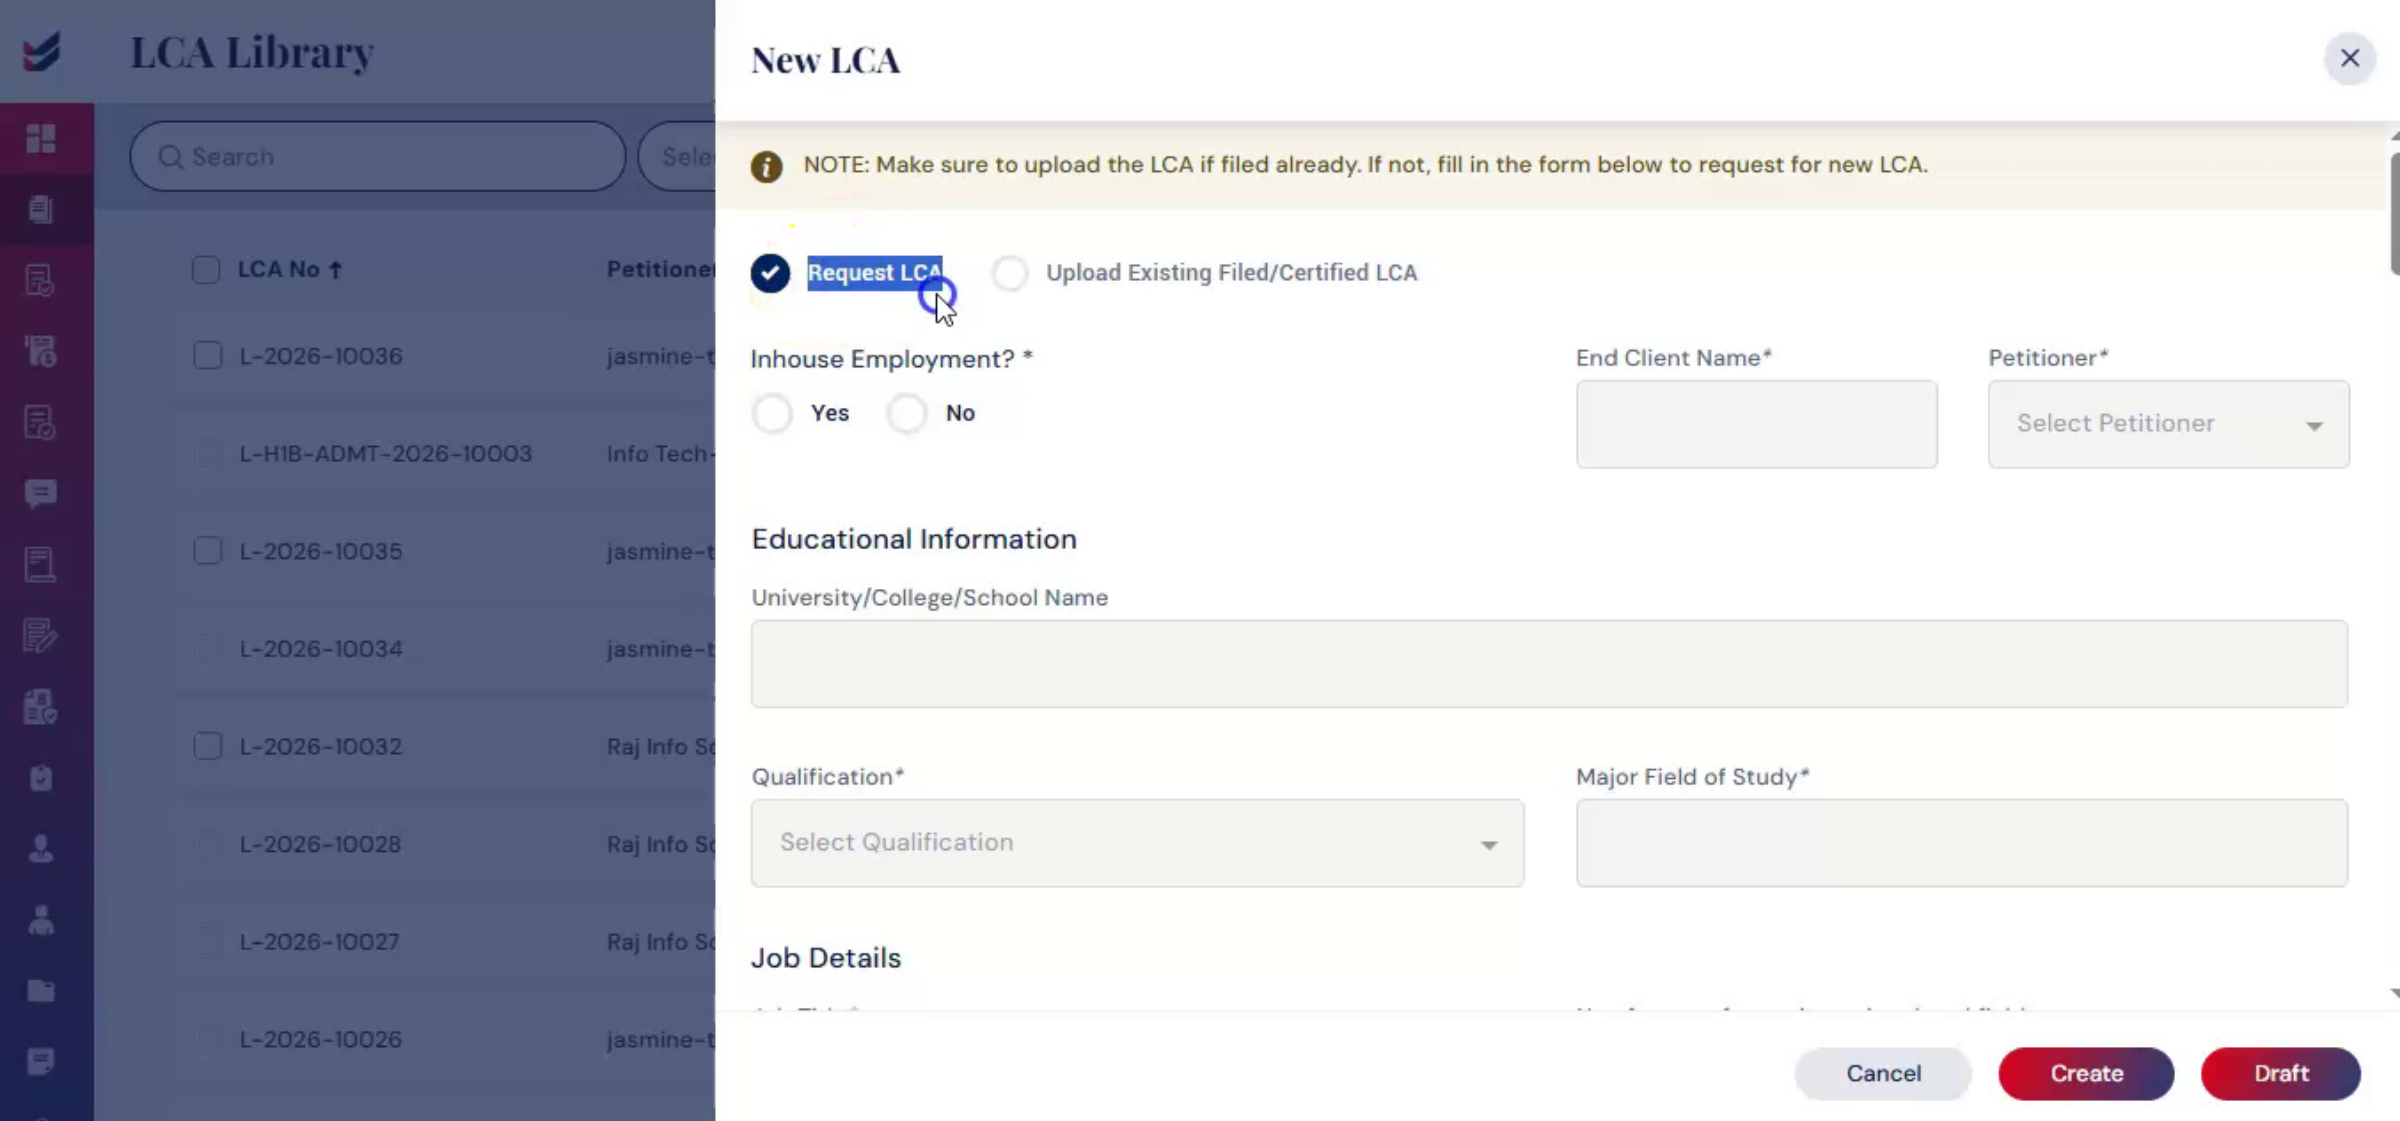
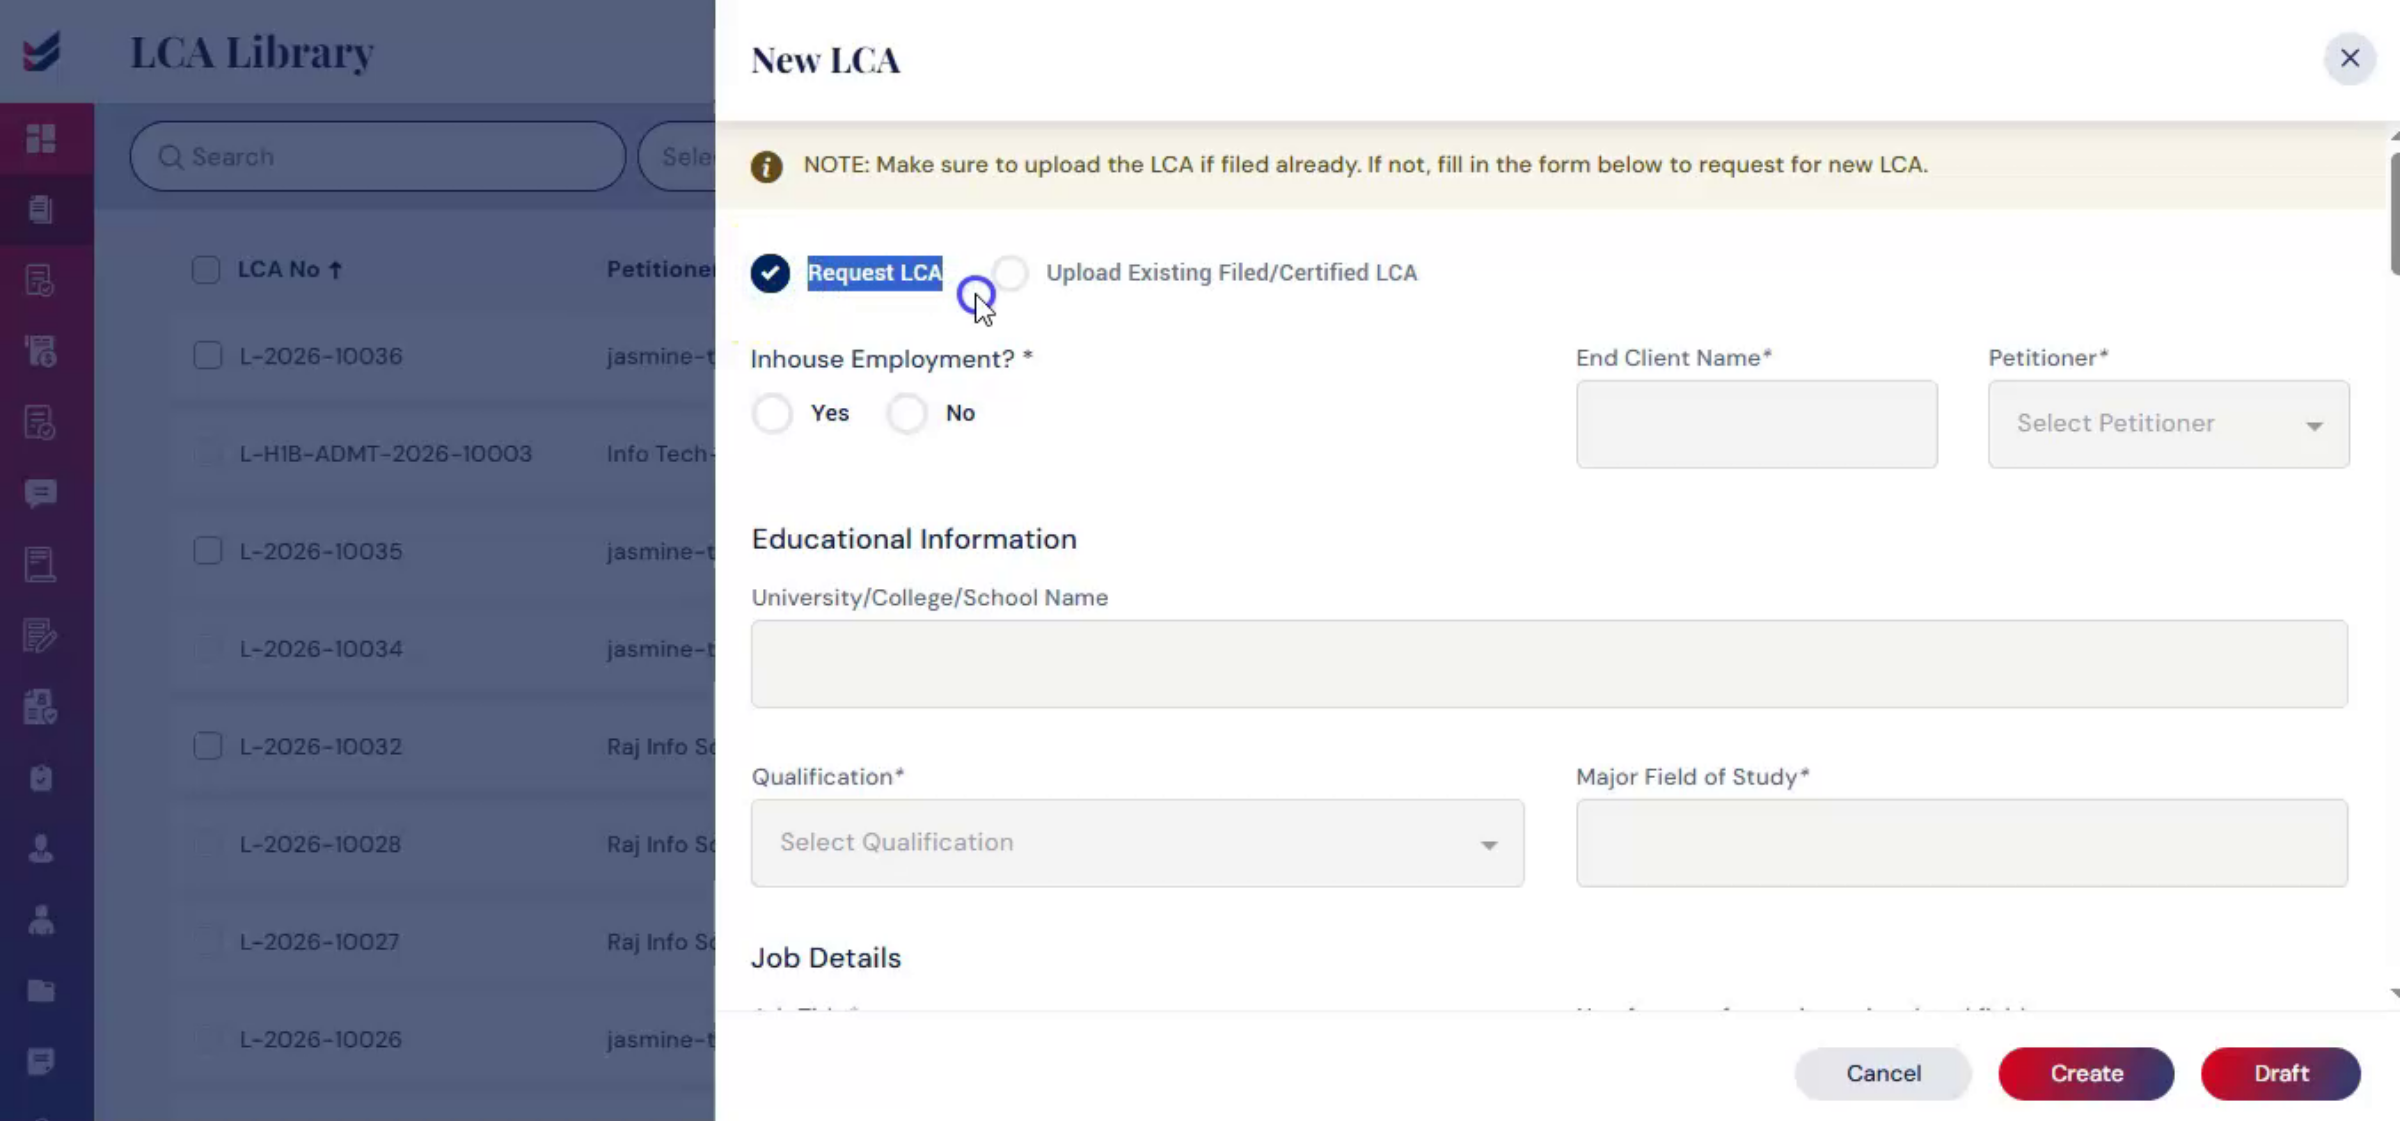
You will see two options. First one is Request LCA, which means to prepare and file a new LCA. Second one is Upload Existing Filed or Certified LCA, which means to upload and manage a previously filed LCA.
7. Case Example Request LCA
 * click the image to view enlarged
Let's see. Case 1, Request LCA.
8. Preparing New LCA In ImmiBox
 * click the image to view enlarged
Selecting Request LCA allows you to prepare a new LCA directly within ImmiBox. Complete all required sections carefully. Enter employer details and client information. Provide the job title, SOC code, and detailed job duties.
9. Job Duties and Work Location Entry
 * click the image to view enlarged
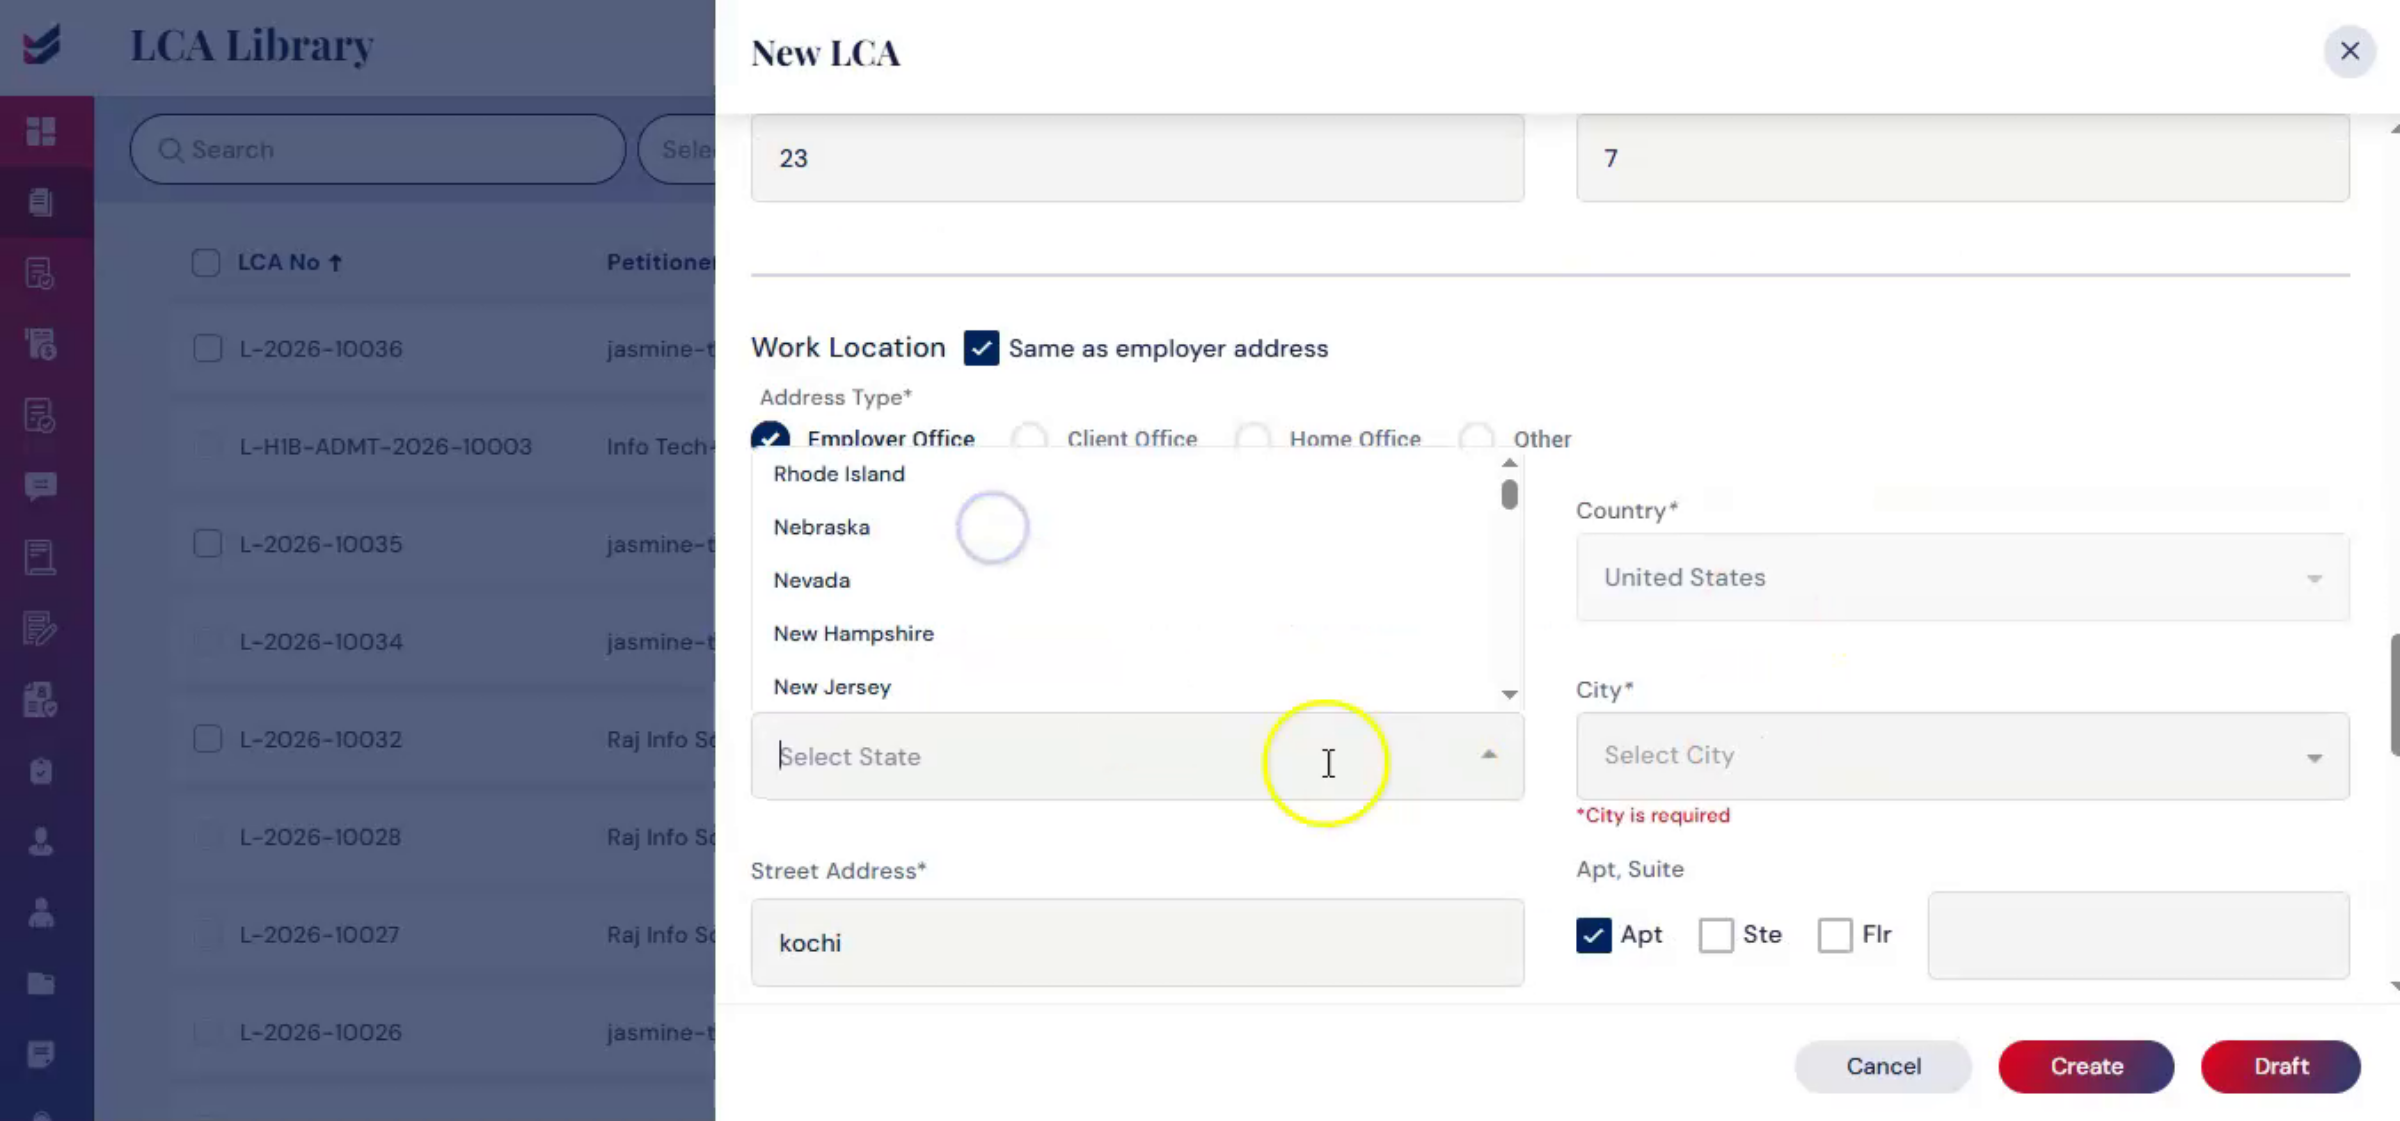
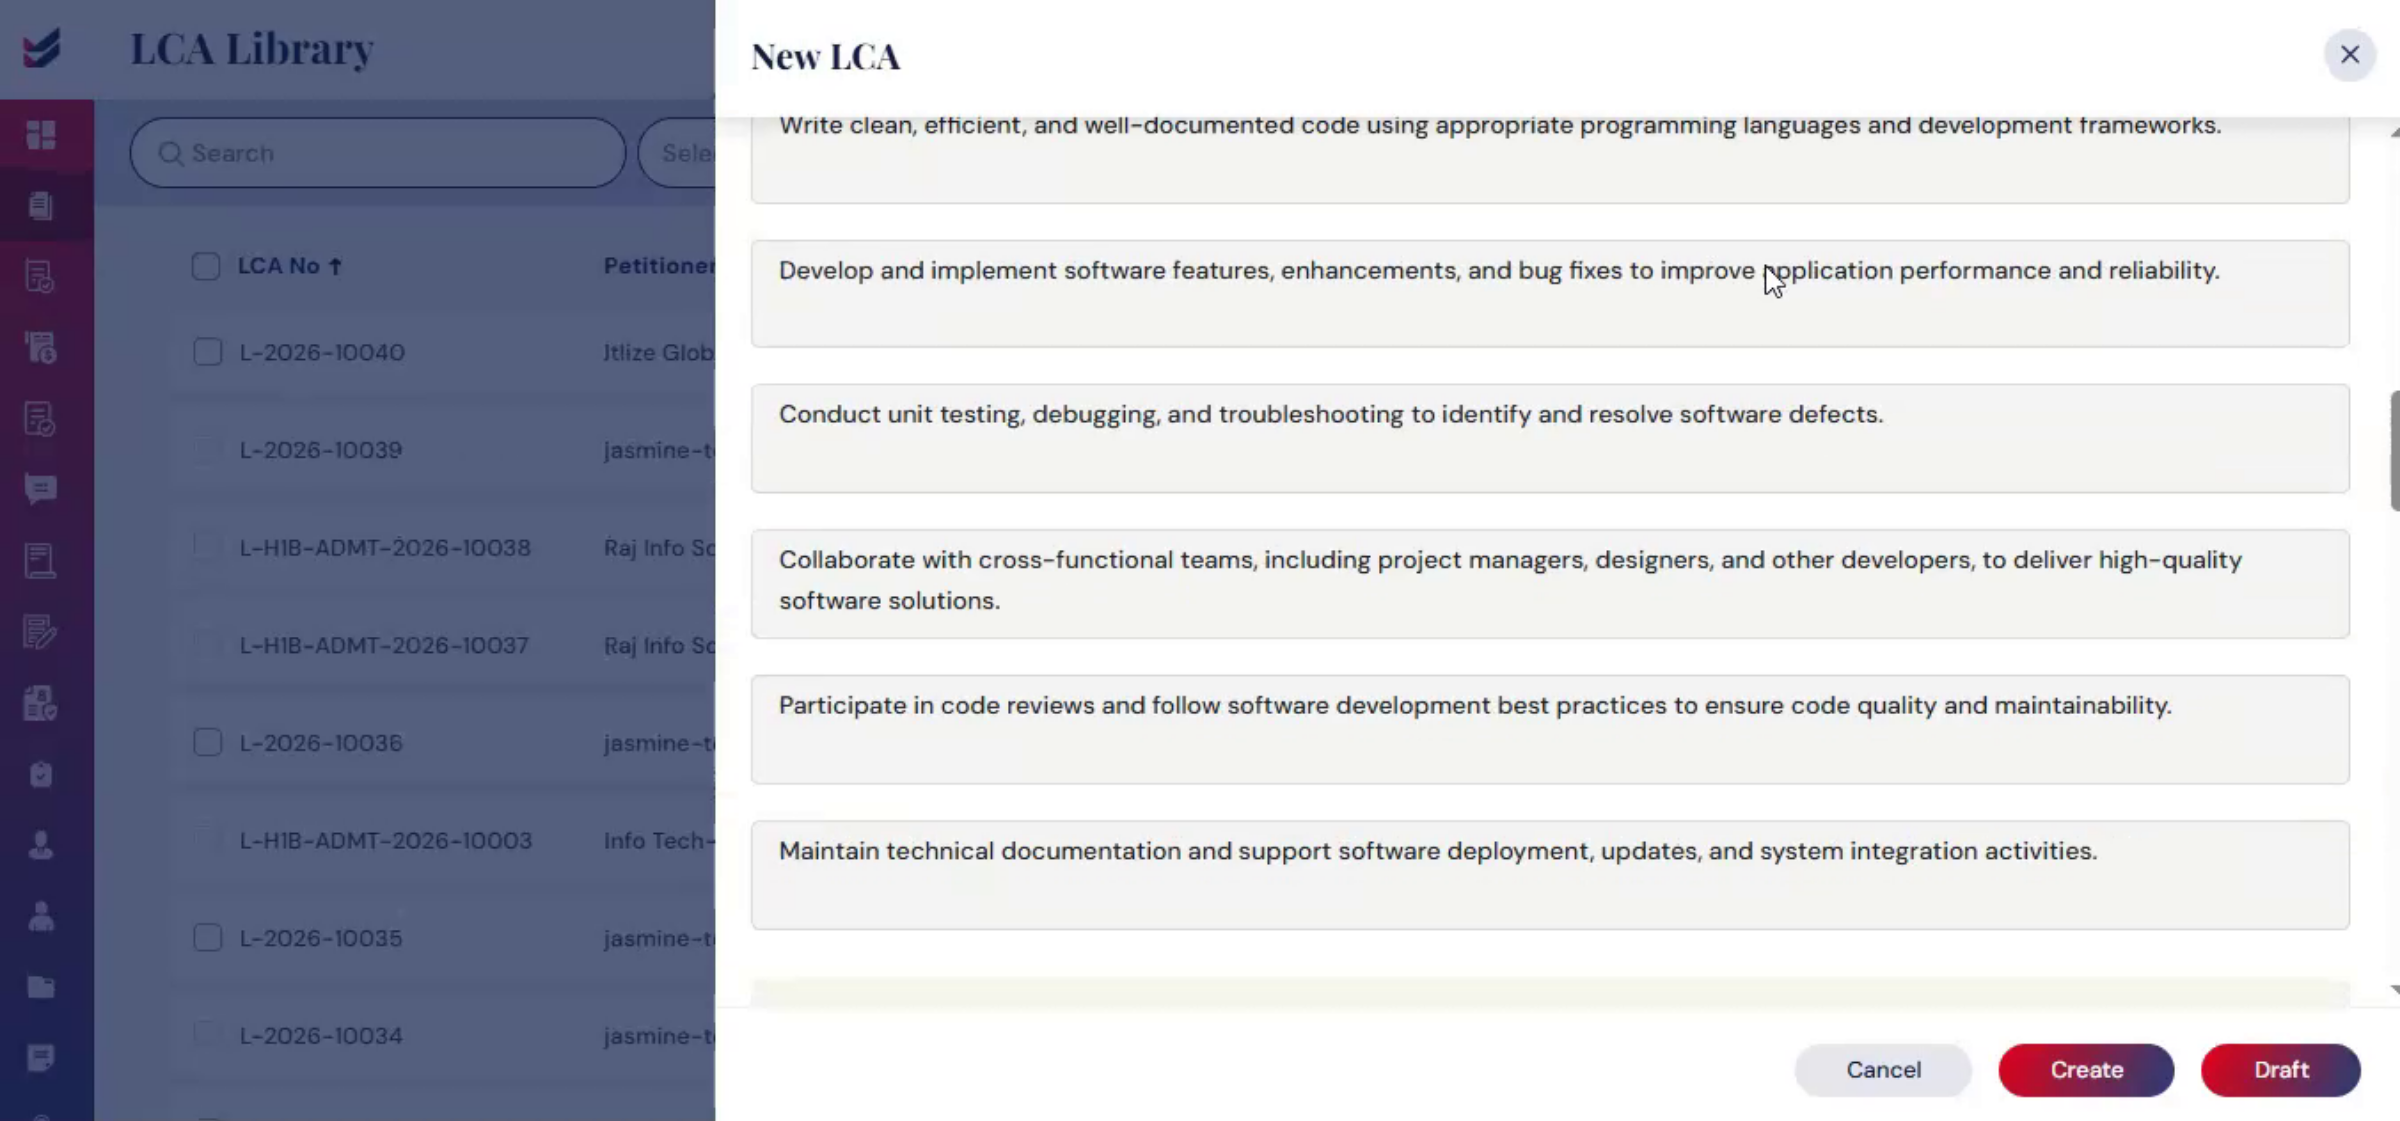
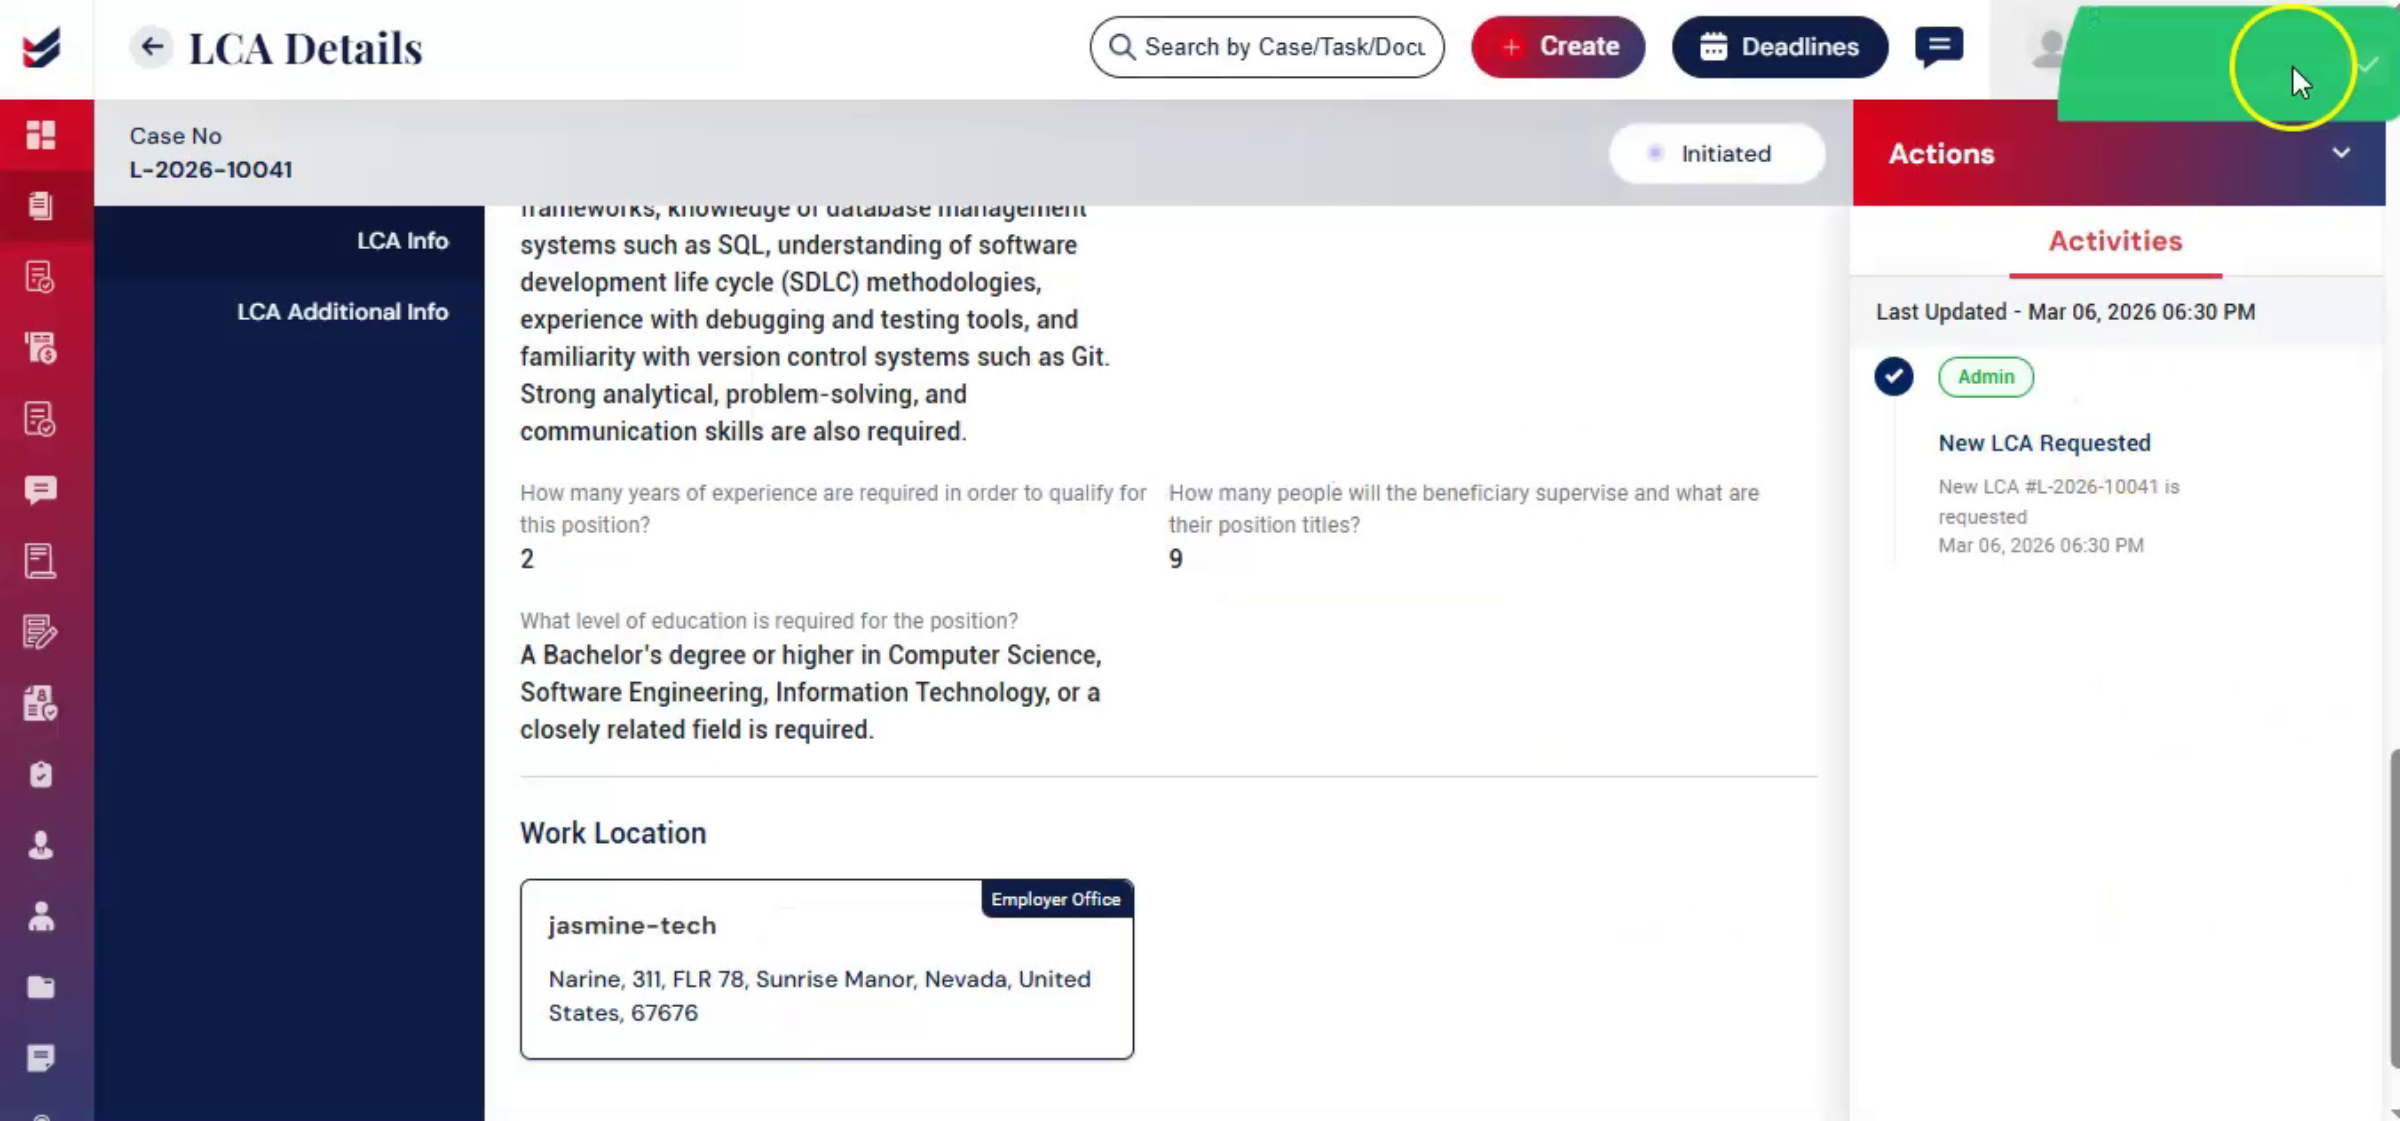
In the Job Duties section, provide a clear description to clearly define the role ensure proper classification. Next, enter the primary work location.
10. Adding Multiple Work Locations
 * click the image to view enlarged
In work location, the system will automatically extract the employer office location from the given data. If there are multiple work locations, click Add under the Work Location section and include each additional address. Accurate location reporting is important for proper documentation.
11. Completing Fields And Uploading
 * click the image to view enlarged
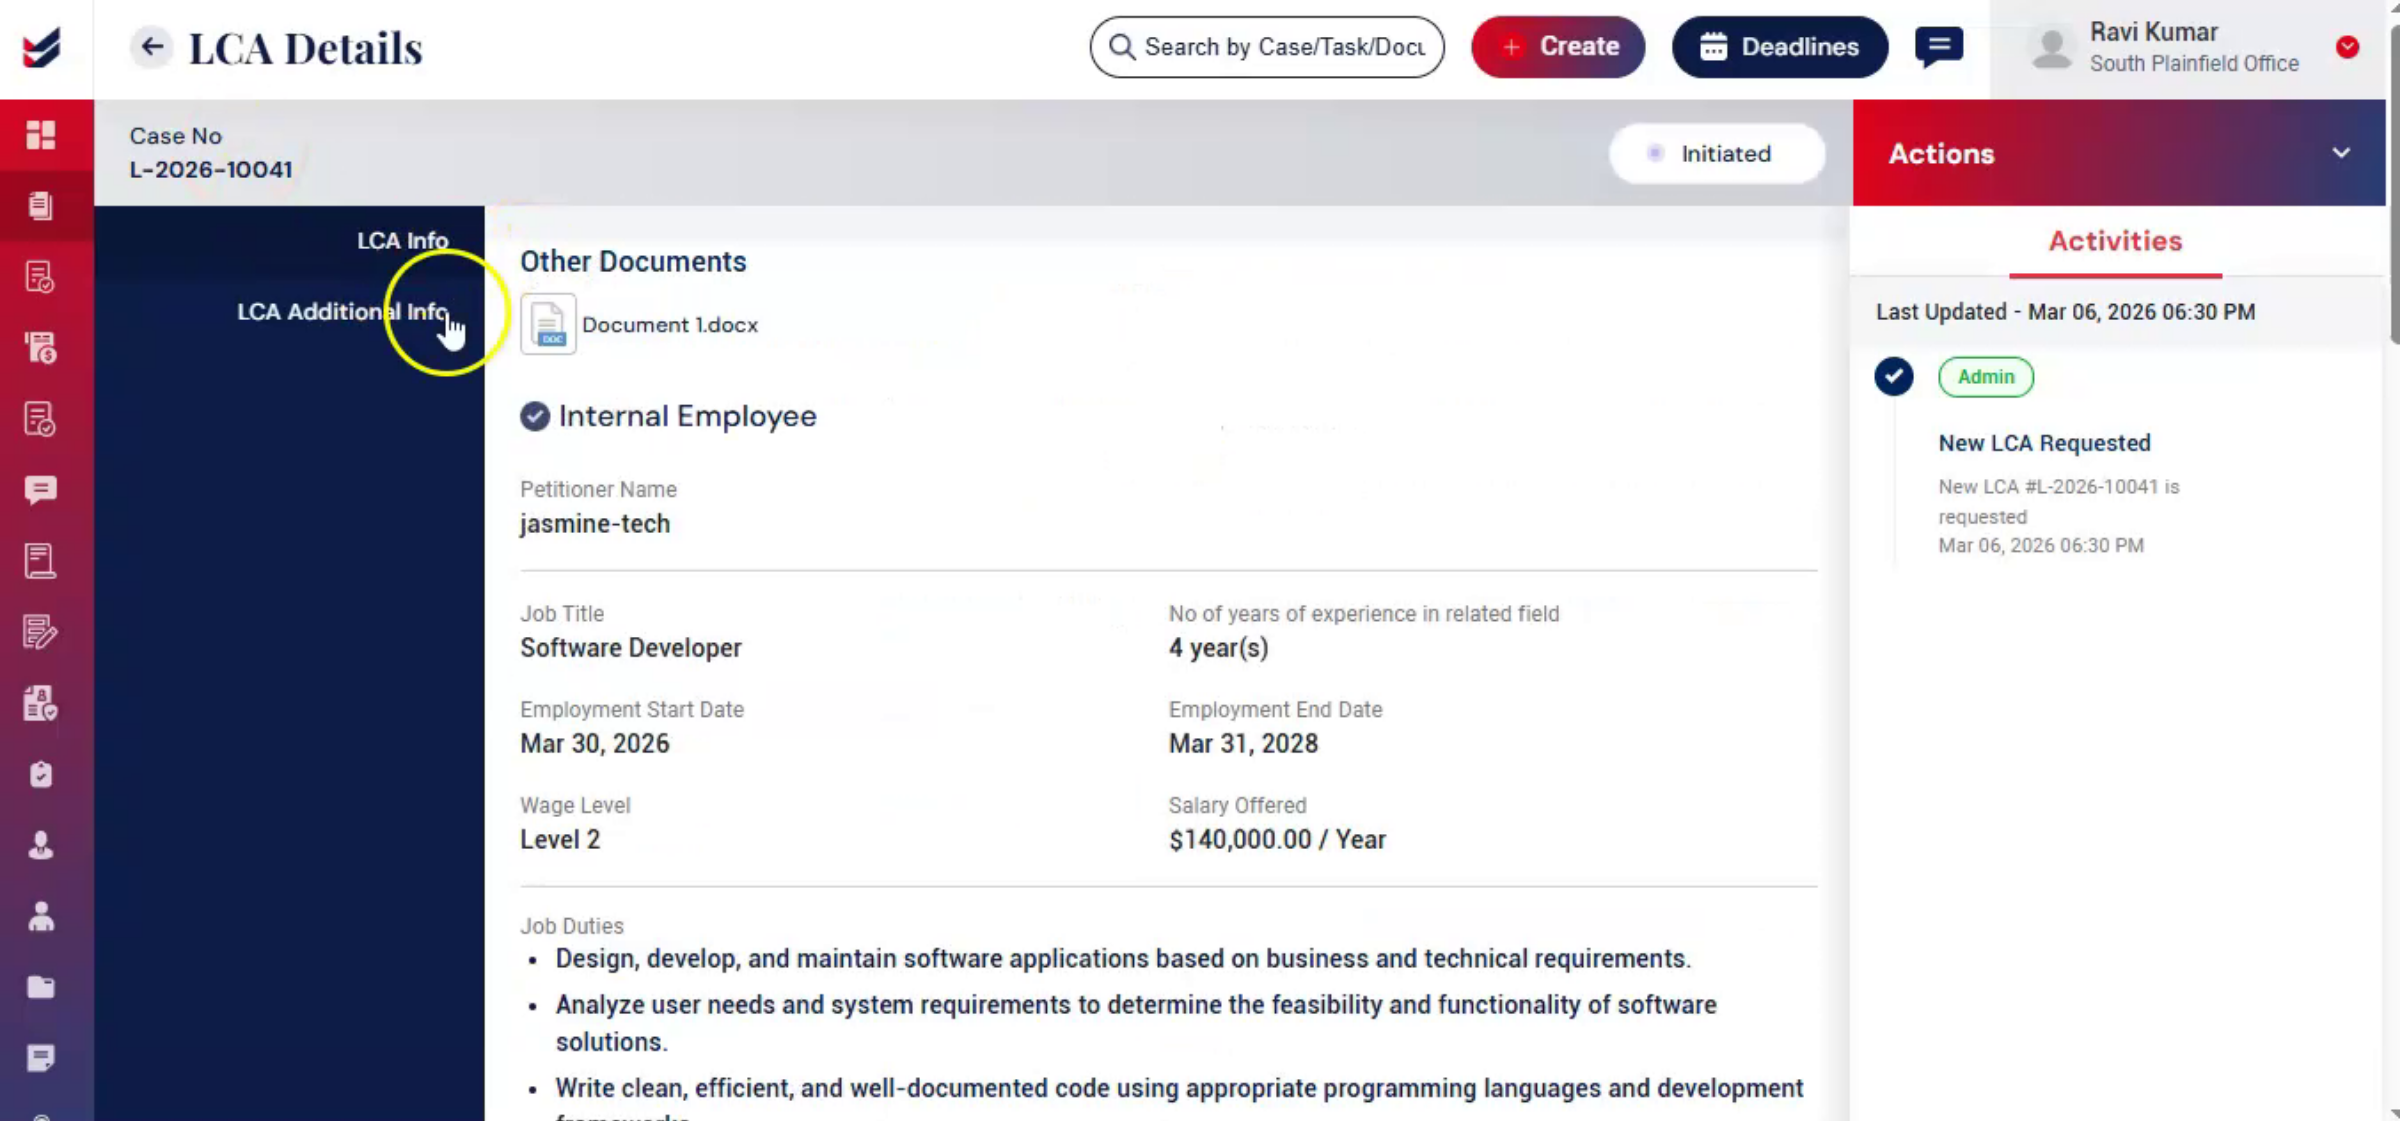
Complete all remaining required fields and upload supporting documents in the Other Documents tab. Once all required information is entered, click Create.
12. LCA Details Page Overview
 * click the image to view enlarged
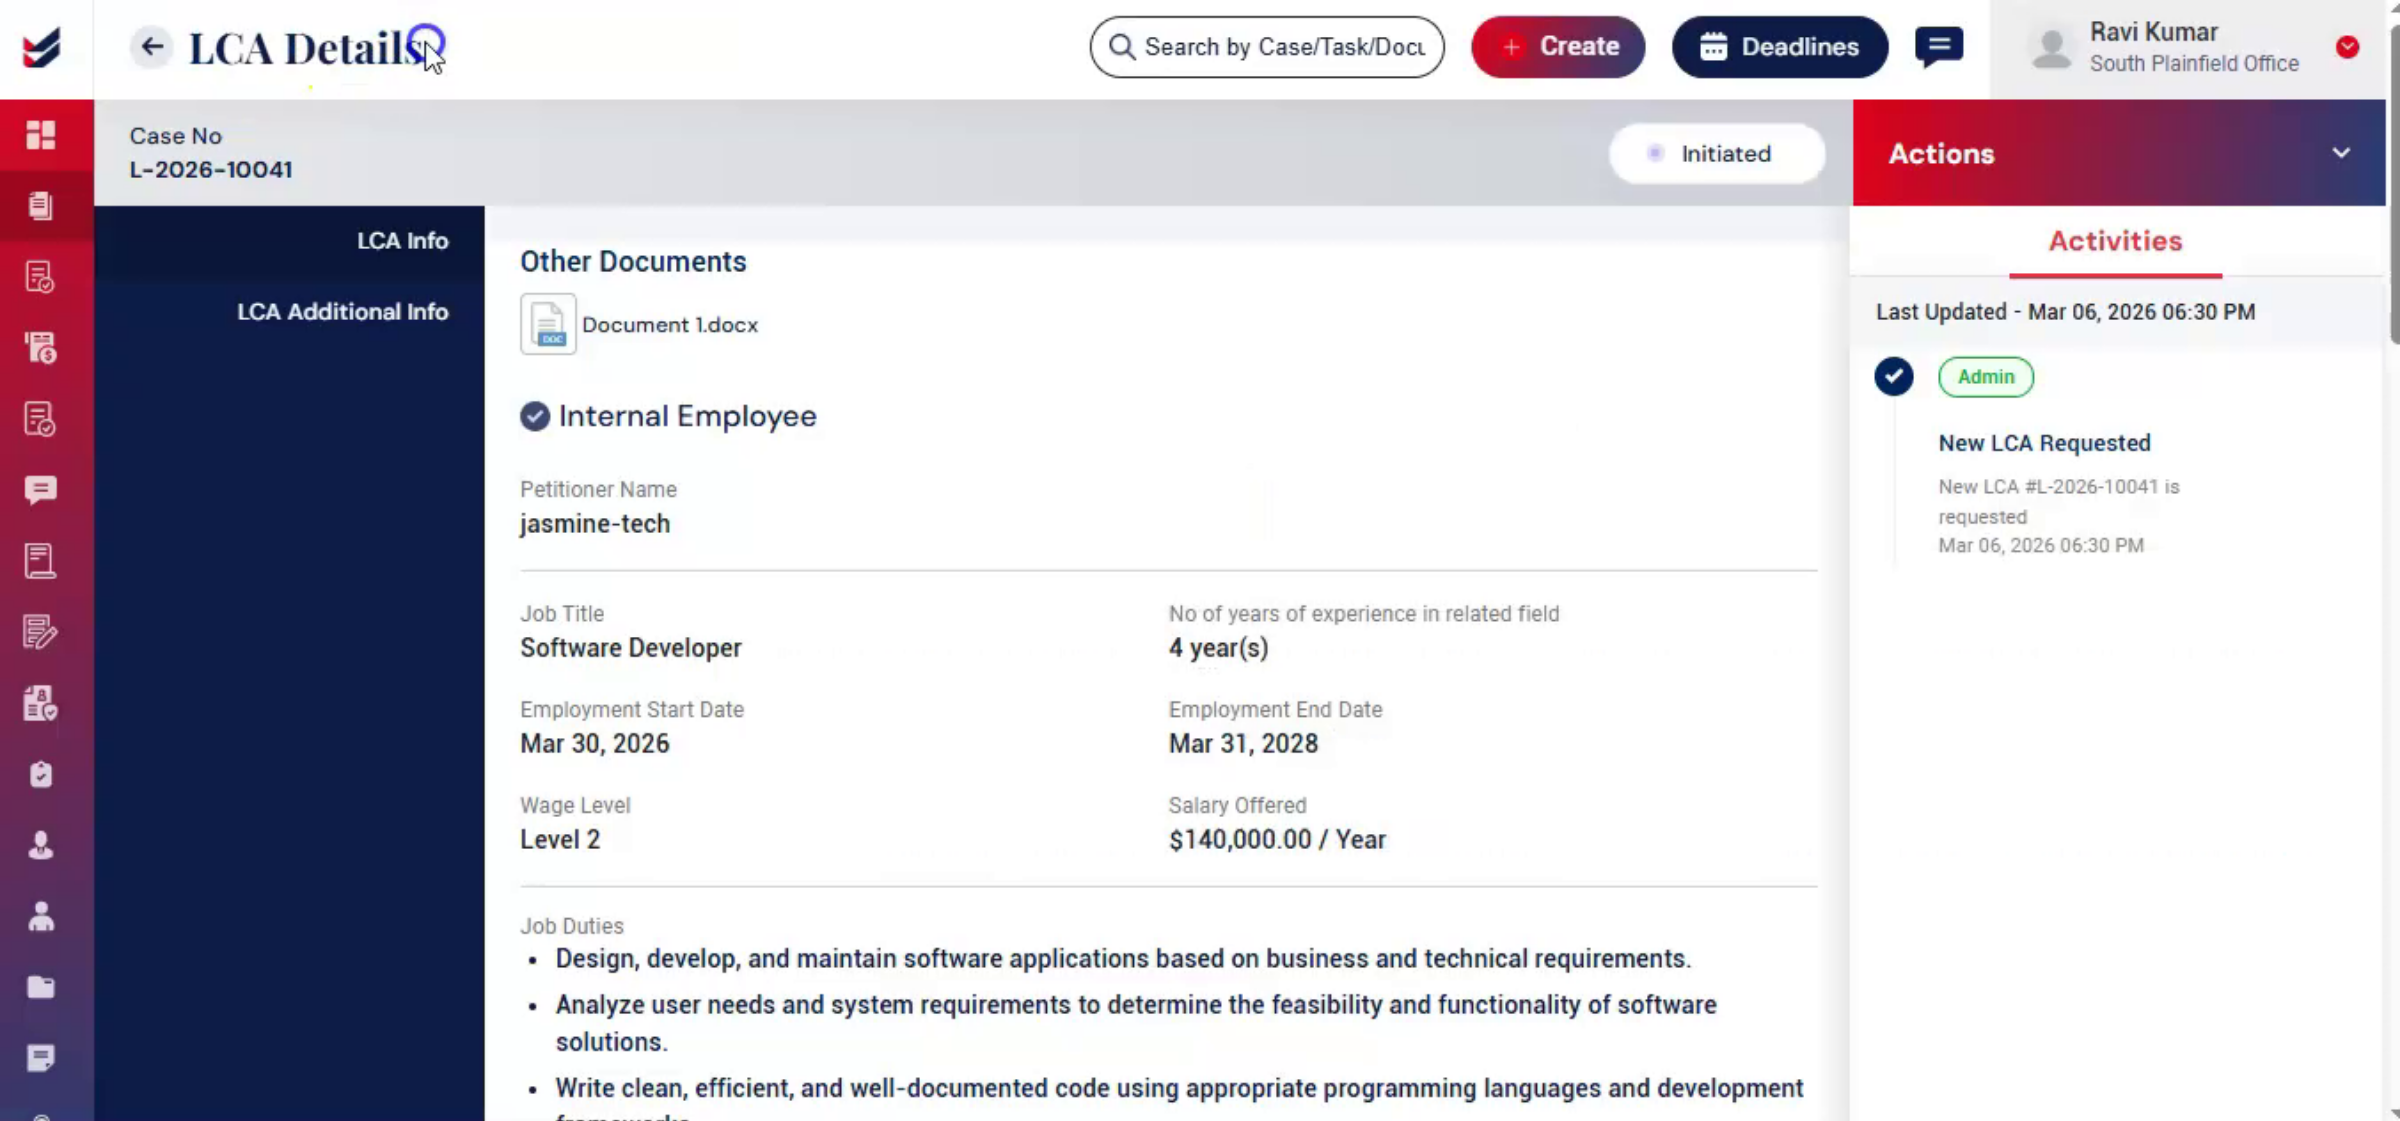
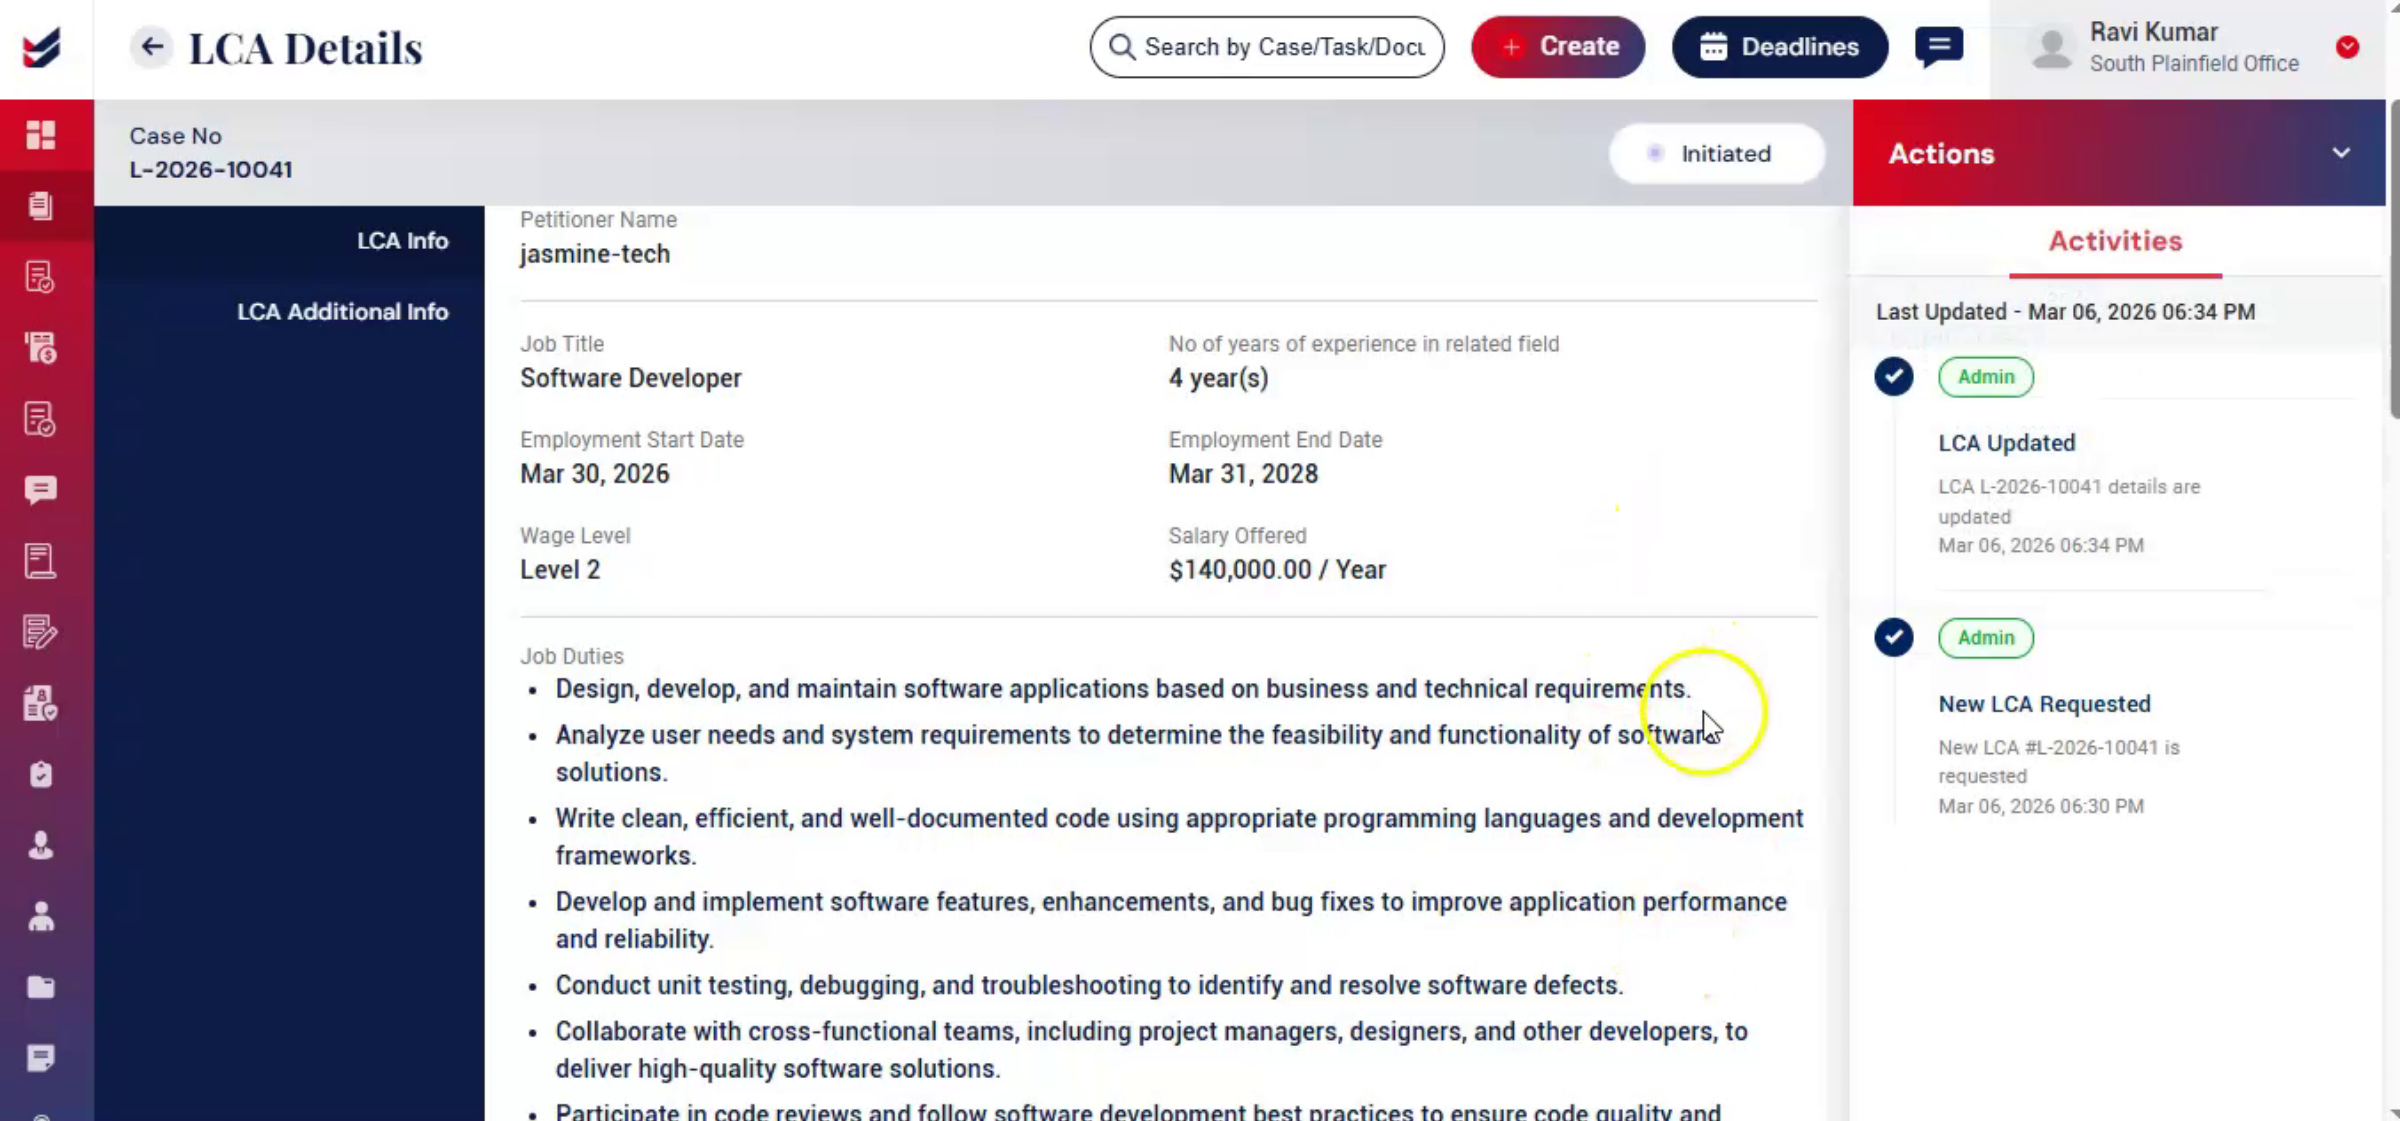
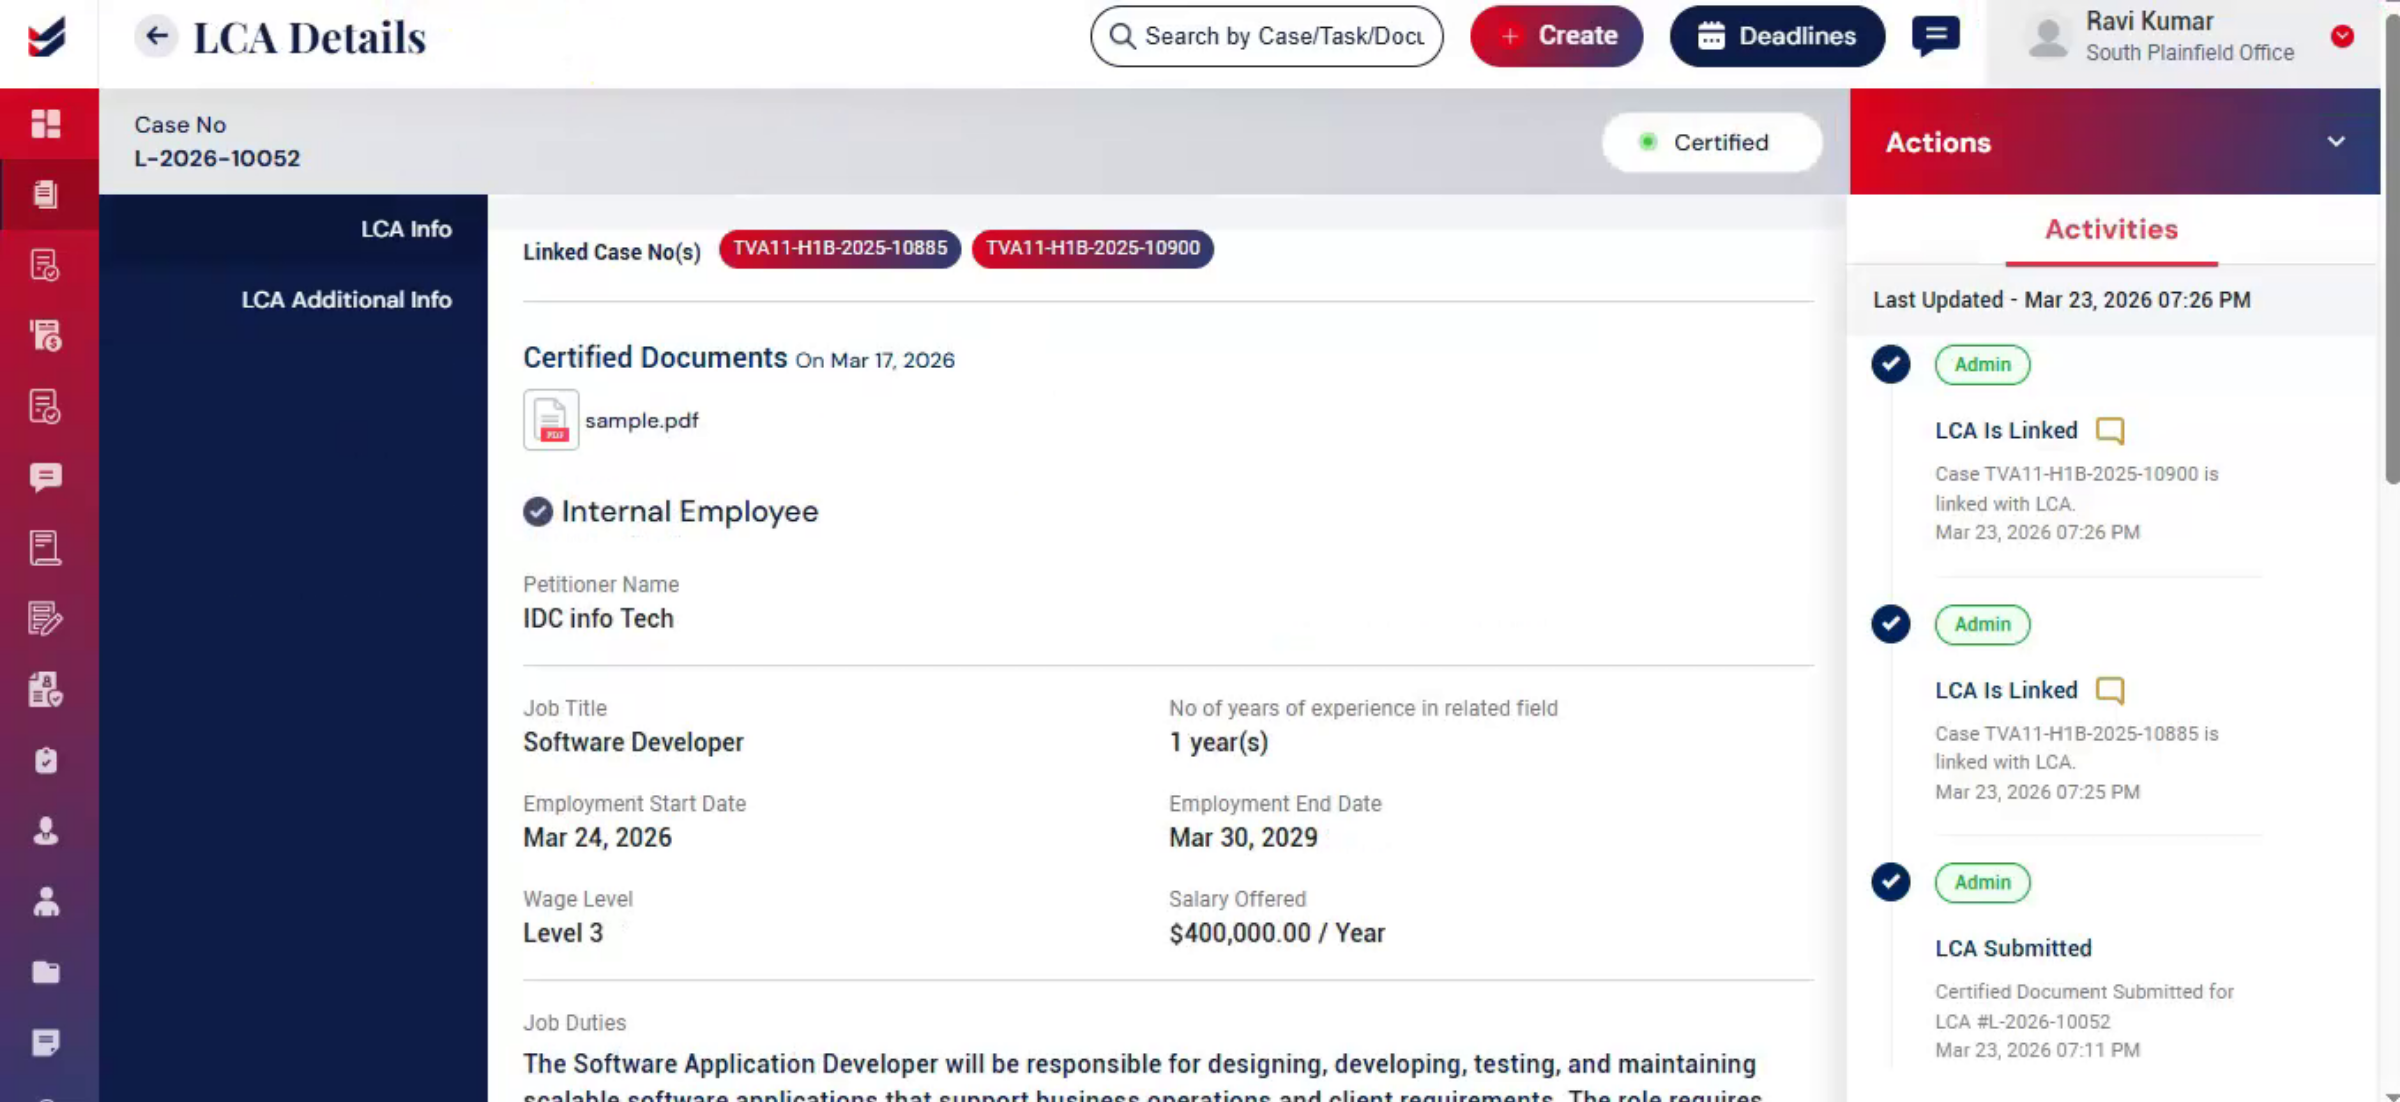
Then, on the LCA details page, all entered information appears under the LCA info section.
13. Editing And Updating LCA
 * click the image to view enlarged
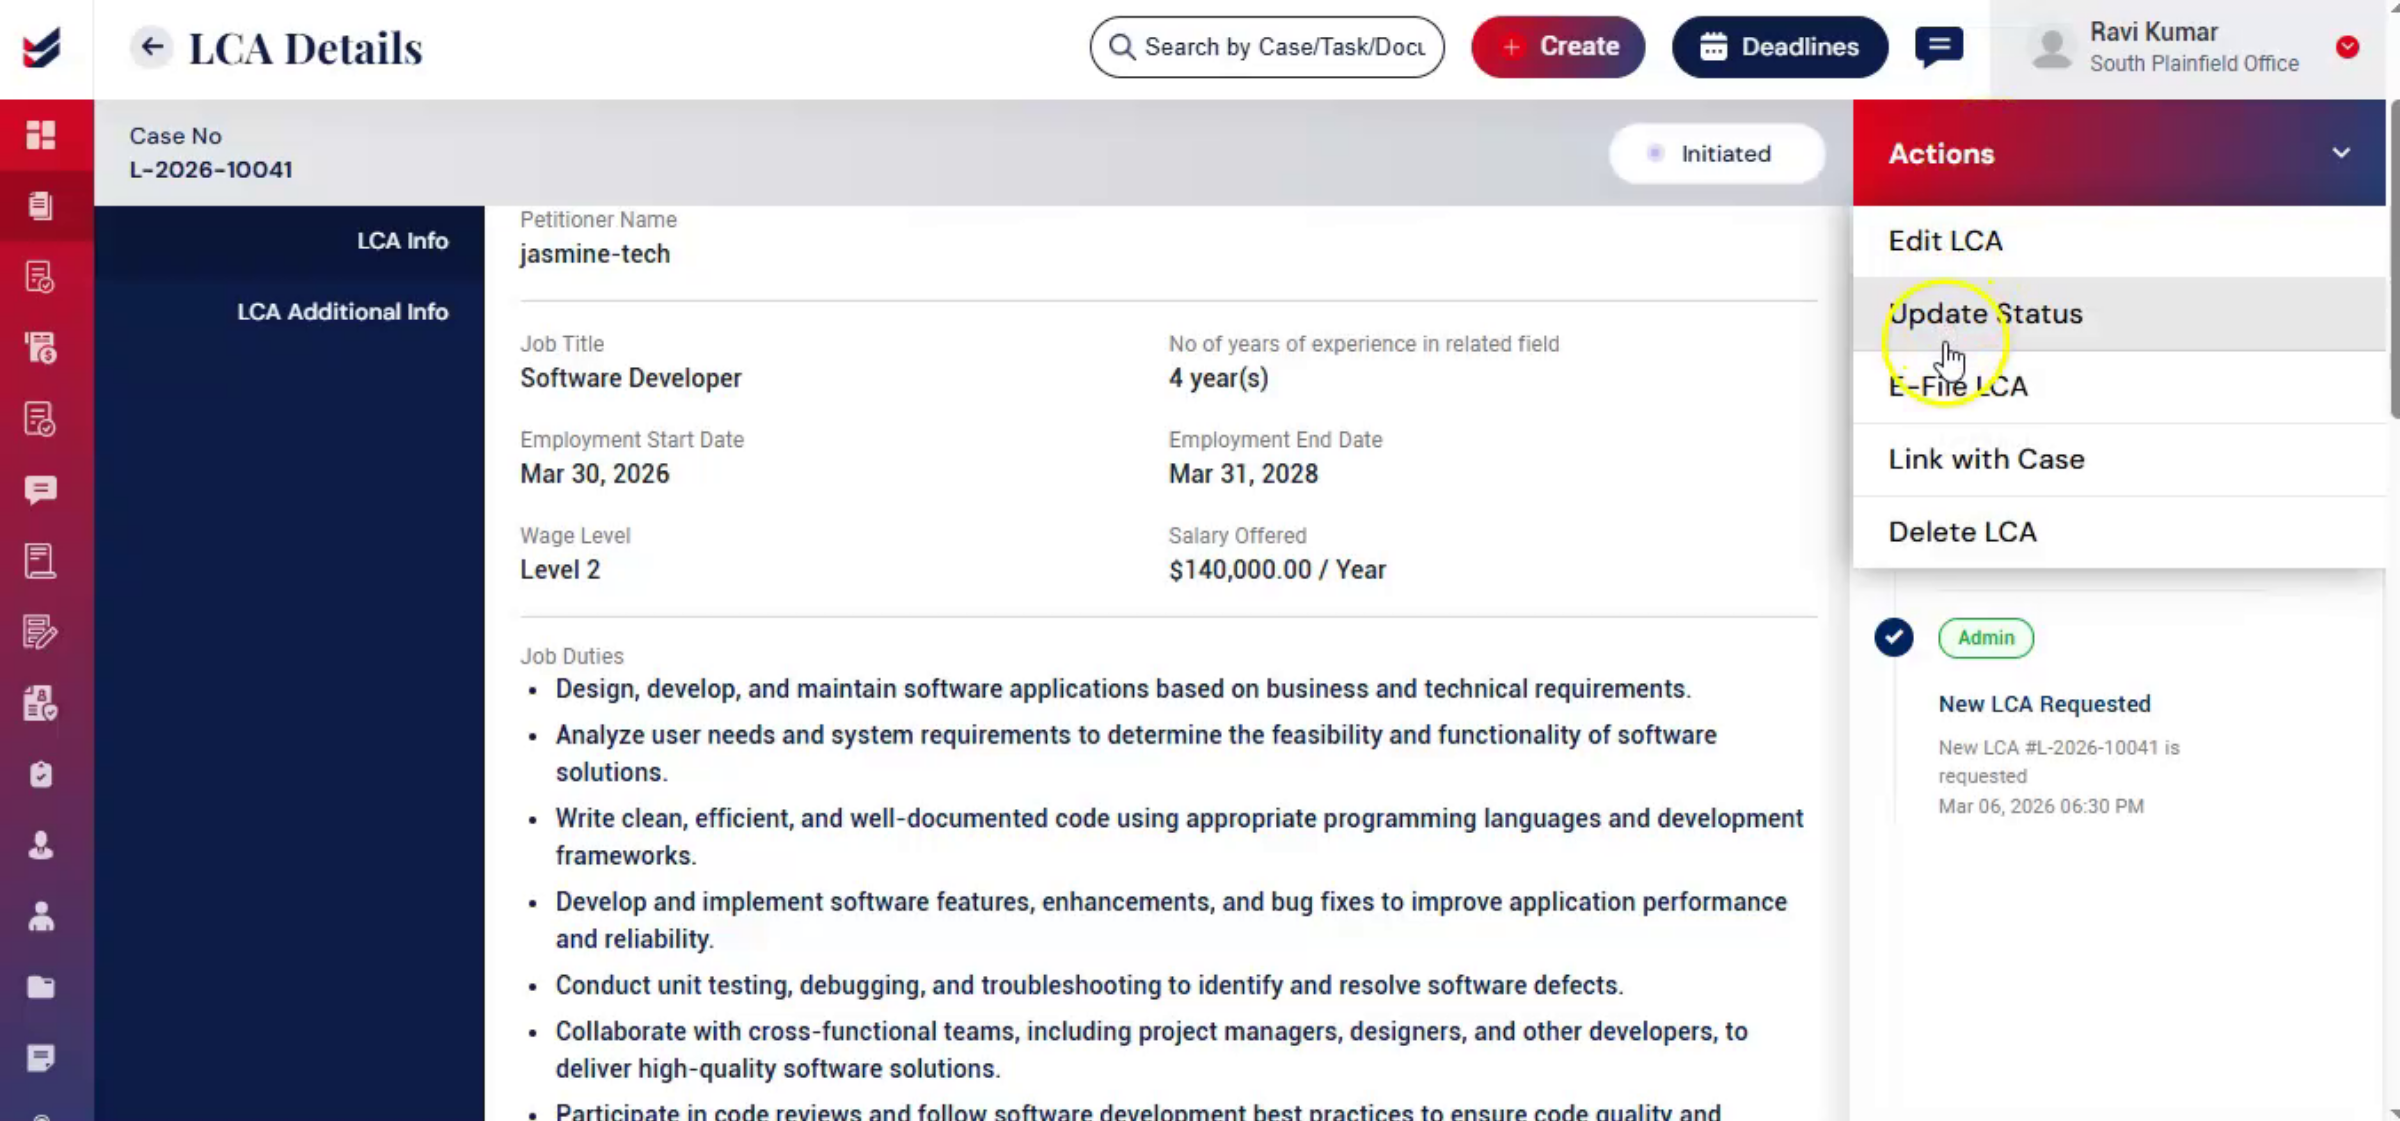
If changes are needed, go to Actions and click Edit LCA. Make the required changes and click Update.
14. Saving Updates And Filing
 * click the image to view enlarged
All updates are saved within the system for tracking and record keeping purposes. Once the draft is complete, you may proceed with filing.
15. ImmiBox Filing Methods
 * click the image to view enlarged
ImmiBox supports two filing methods: e-file through ImmiBox, or Offline Filing.
16. E-Filing LCA Process
 * click the image to view enlarged
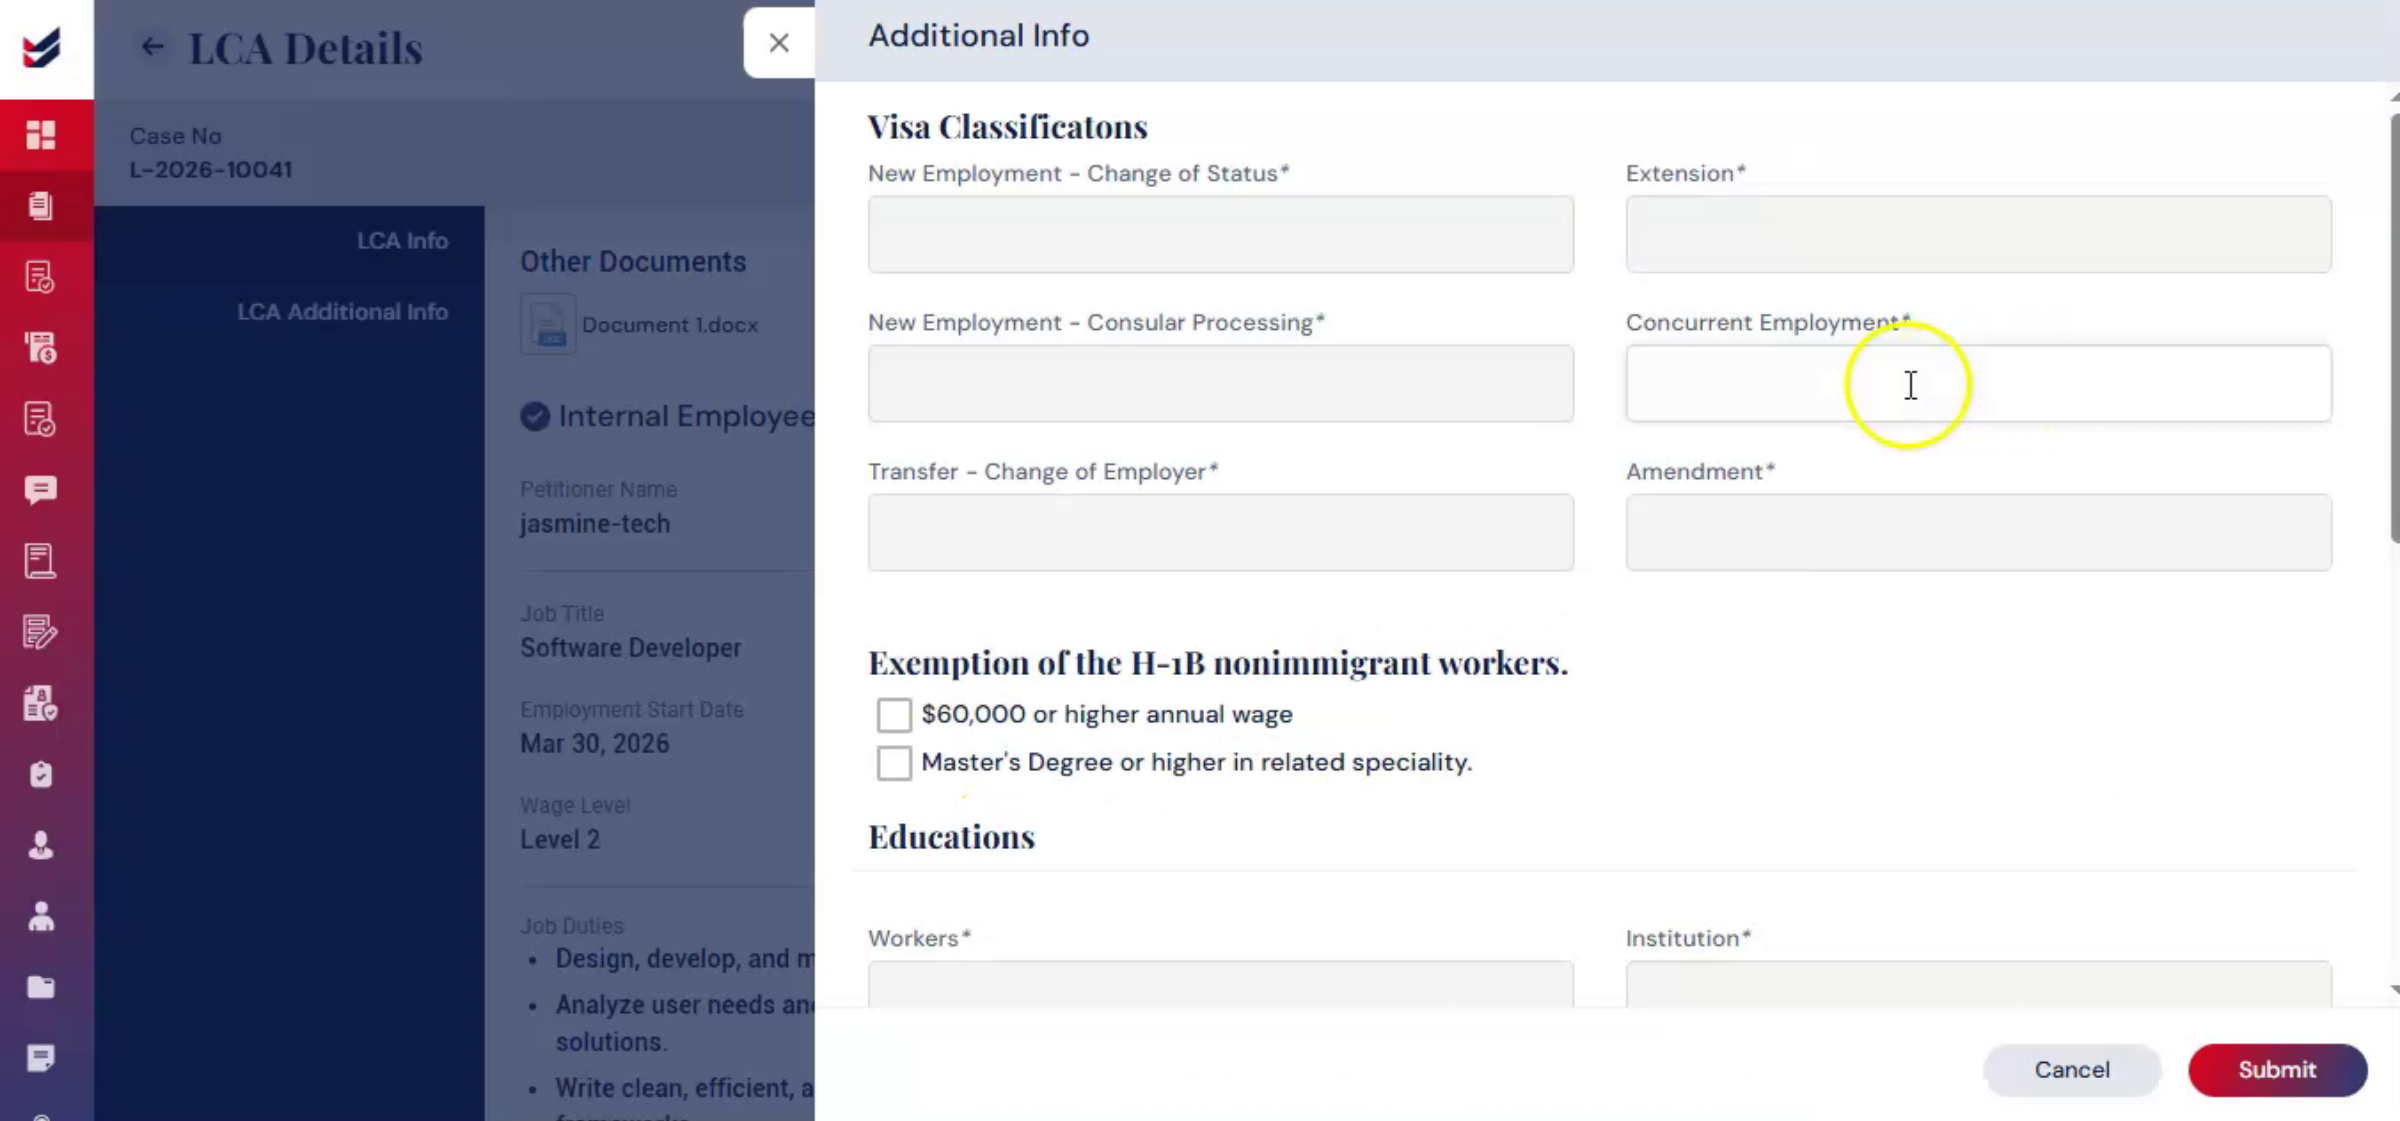
To e-file the LCA, using ImmiBox, go to Actions, select e-file LCA. Then, an additional information form will appear.
17. Completing E-Filing Submission
 * click the image to view enlarged
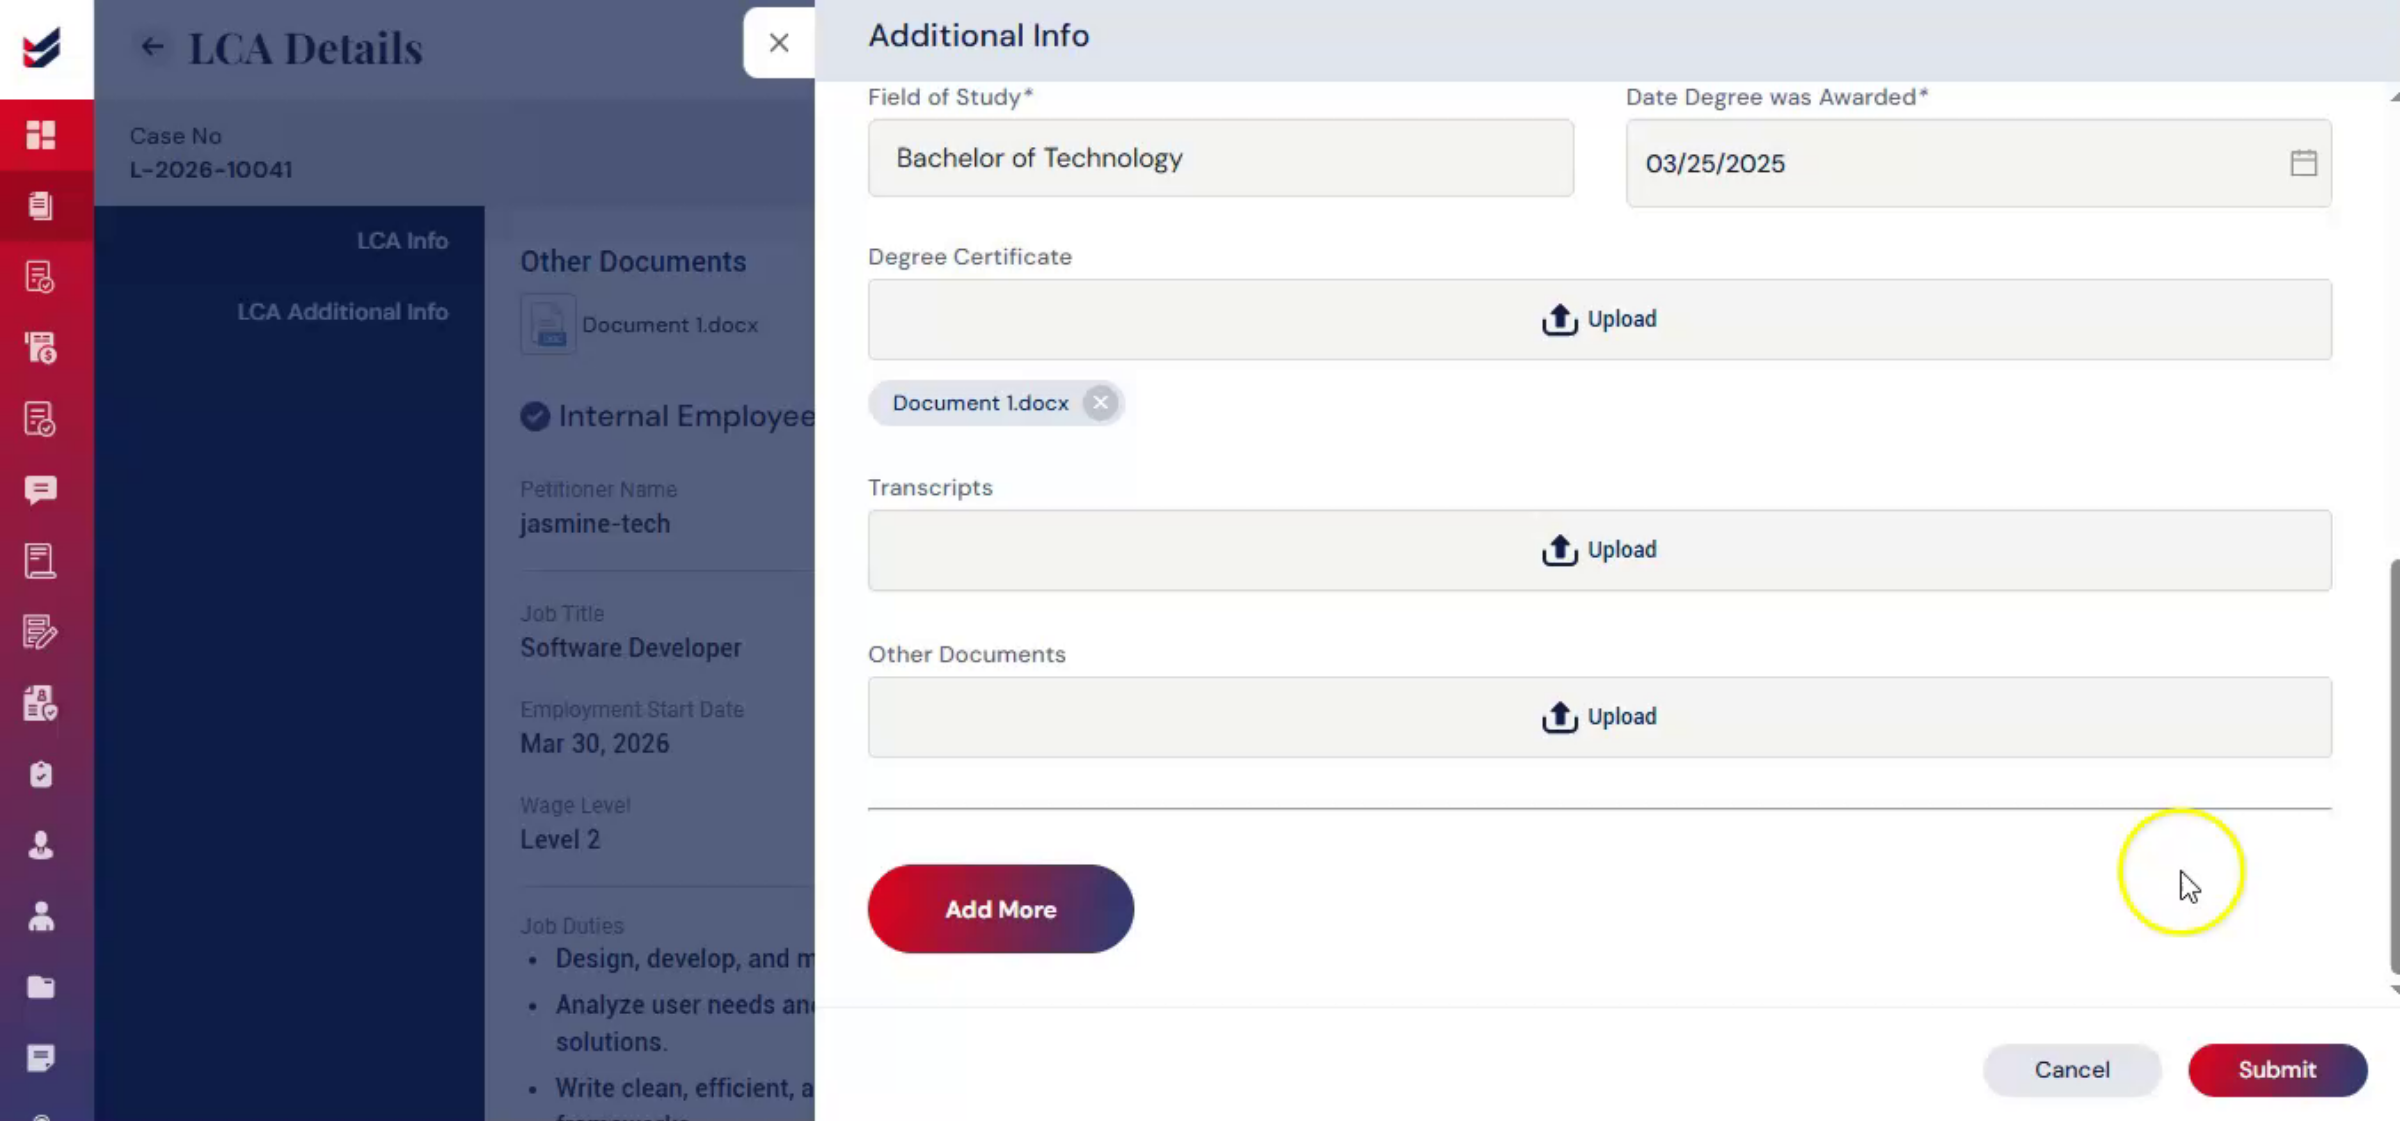
Complete the required fields such as visa classification, education details, other filing related information, upload at least one supporting document. To add additional education details for the worker, click Add More.
18. Assign Attorney Dialog Appearance
 * click the image to view enlarged
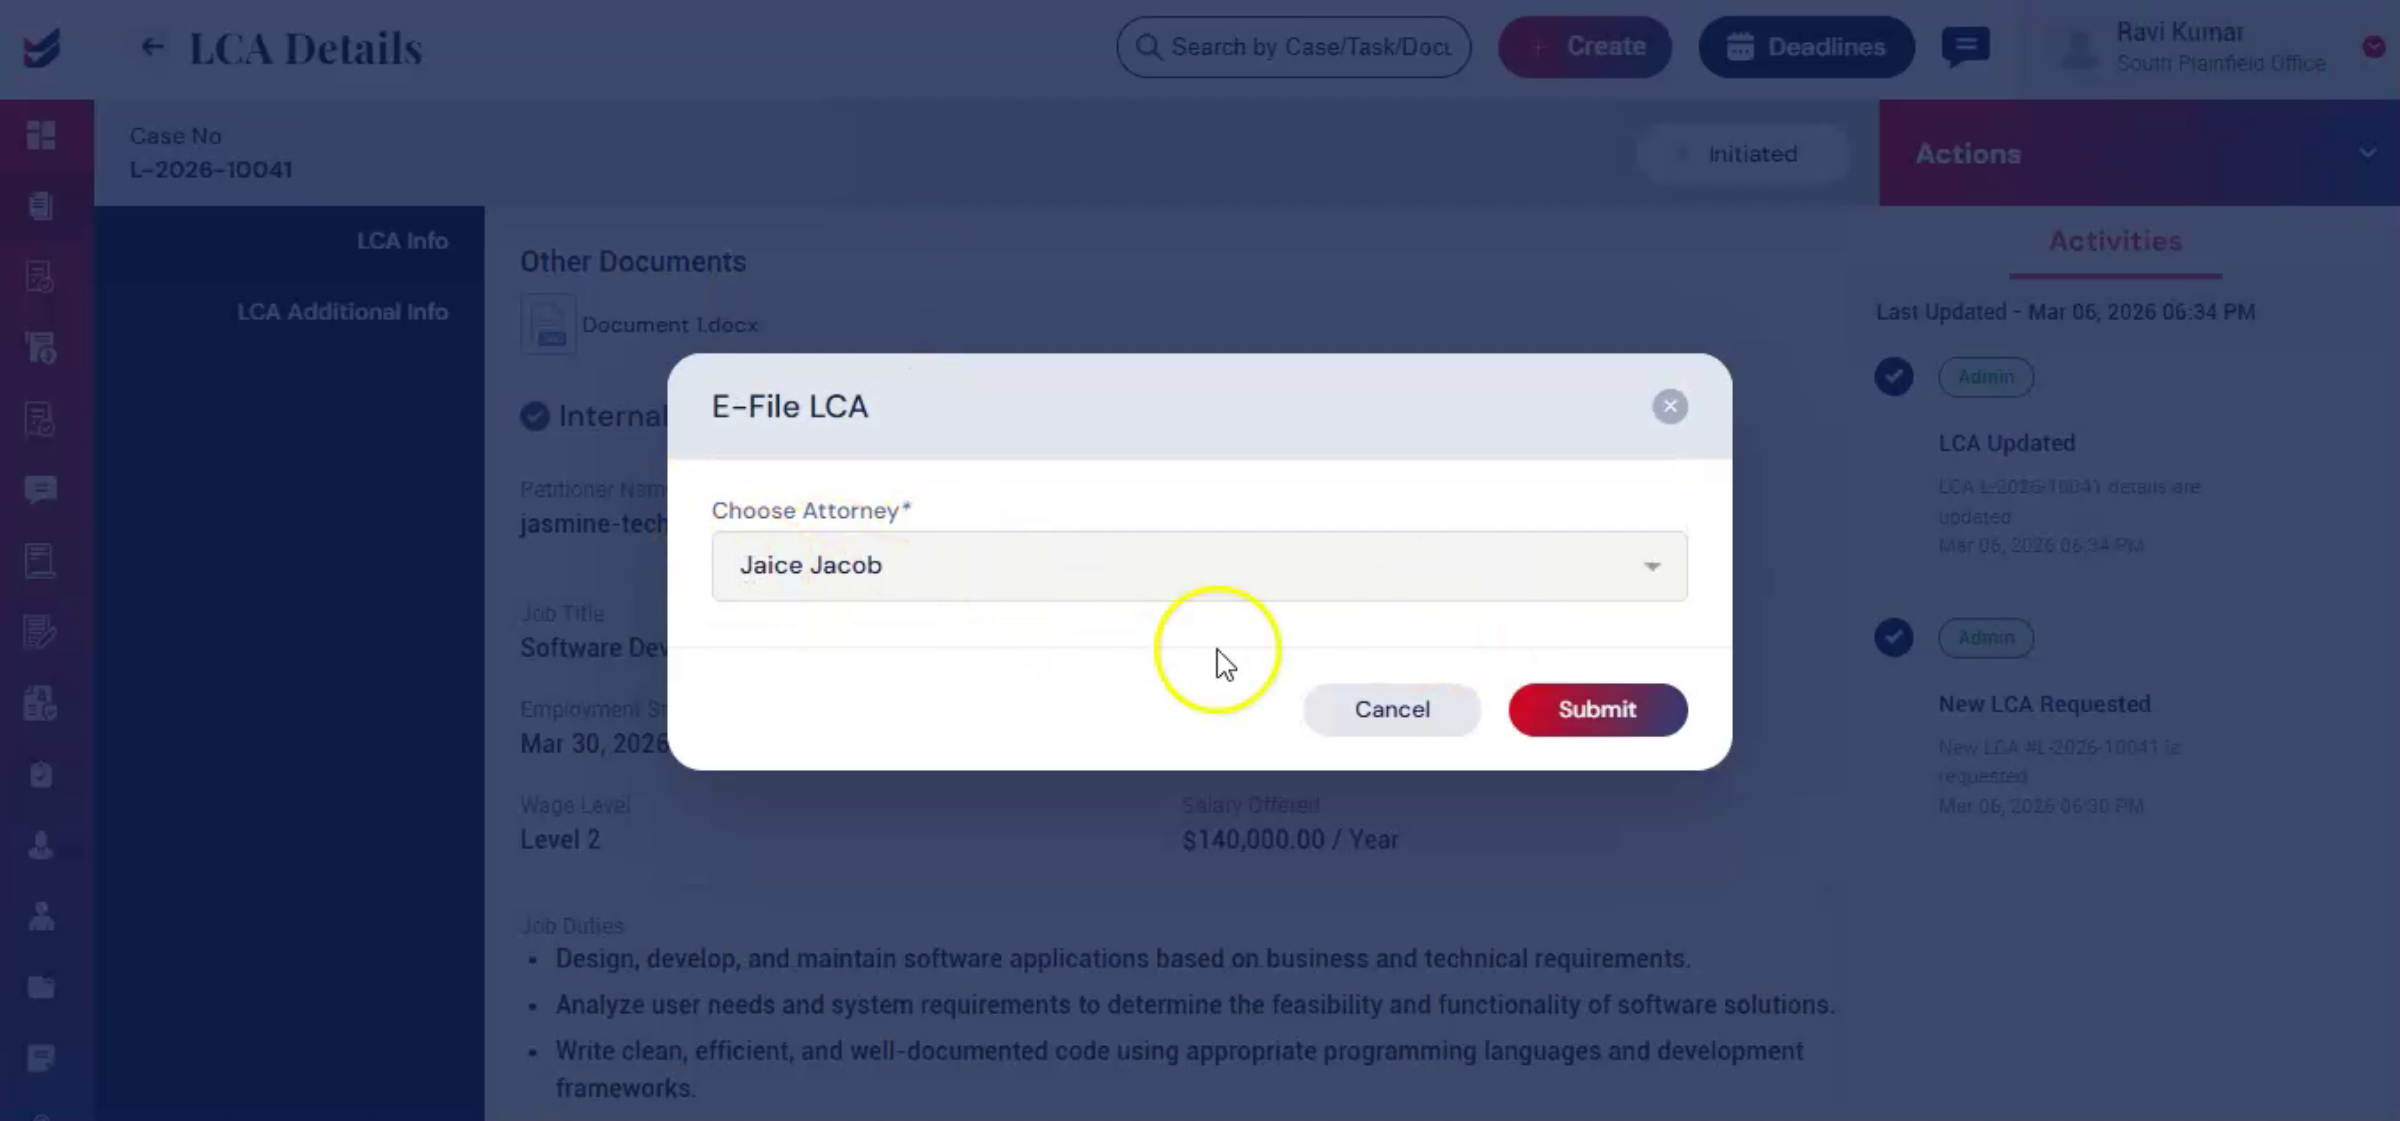
Once completed, click Submit. Then, the Assign Attorney dialog box appears. Select the responsible attorney from the list and confirm submission.
19. ImmiBox Installation Prompt
 * click the image to view enlarged
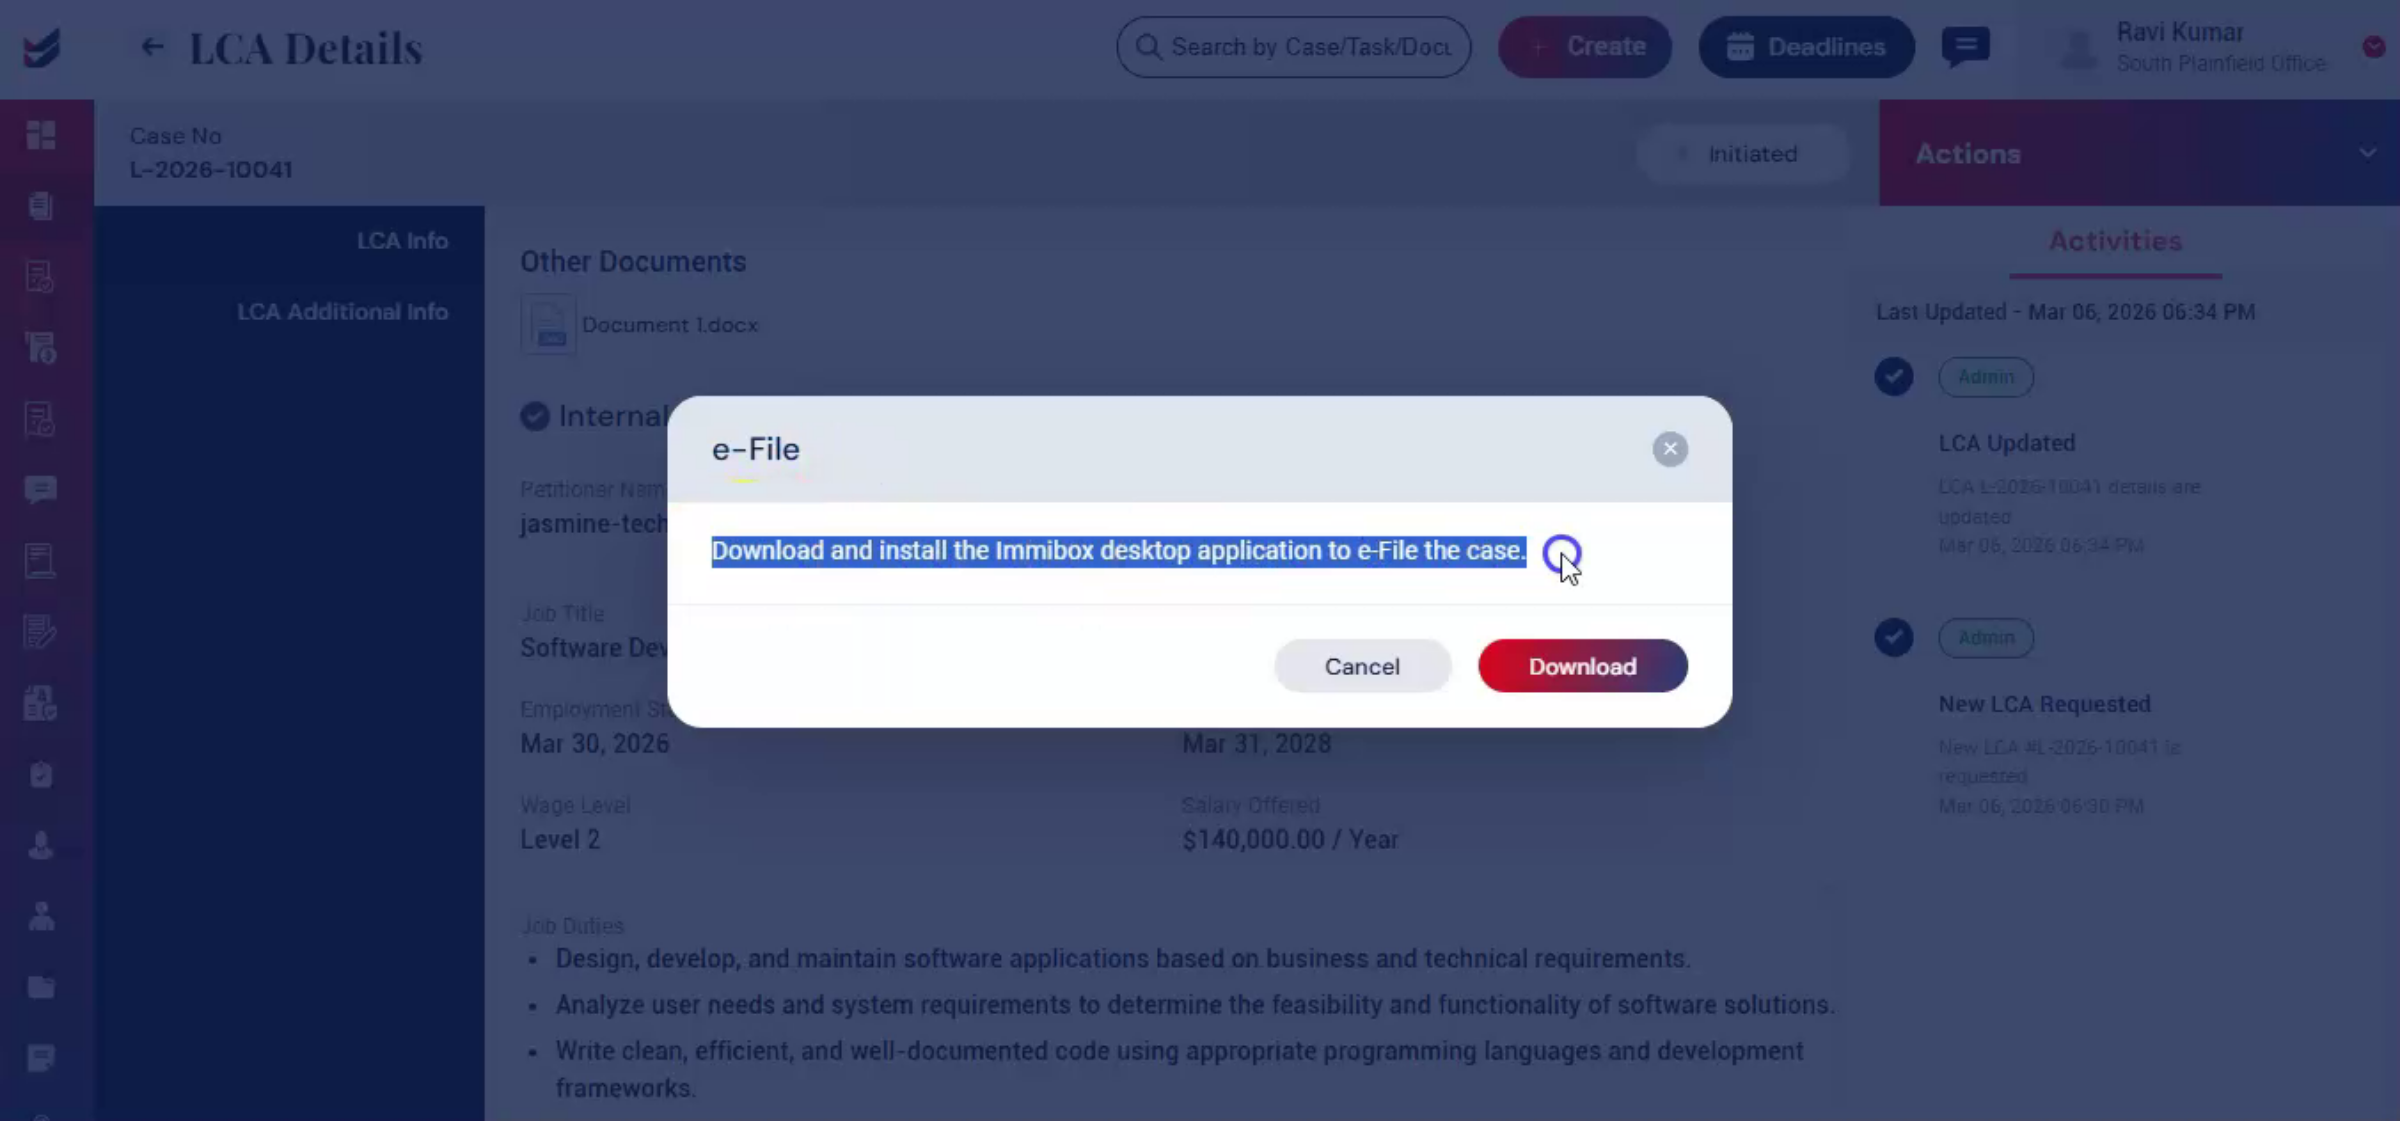
After confirmation, the system will prompt you to install the ImmiBox desktop application, which allows you to complete the filing process securely.
20. E-Filing Guide Reference
 * click the image to view enlarged
For detailed instructions, refer to the dedicated e-filing guide.
21. LCA Filing Outside ImmiBox
 * click the image to view enlarged
If the LCA is filed outside ImmiBox, the record can still be maintained within the system. On the right side, under Activities, you can view all the related details.
22. LCA Additional Info
 * click the image to view enlarged
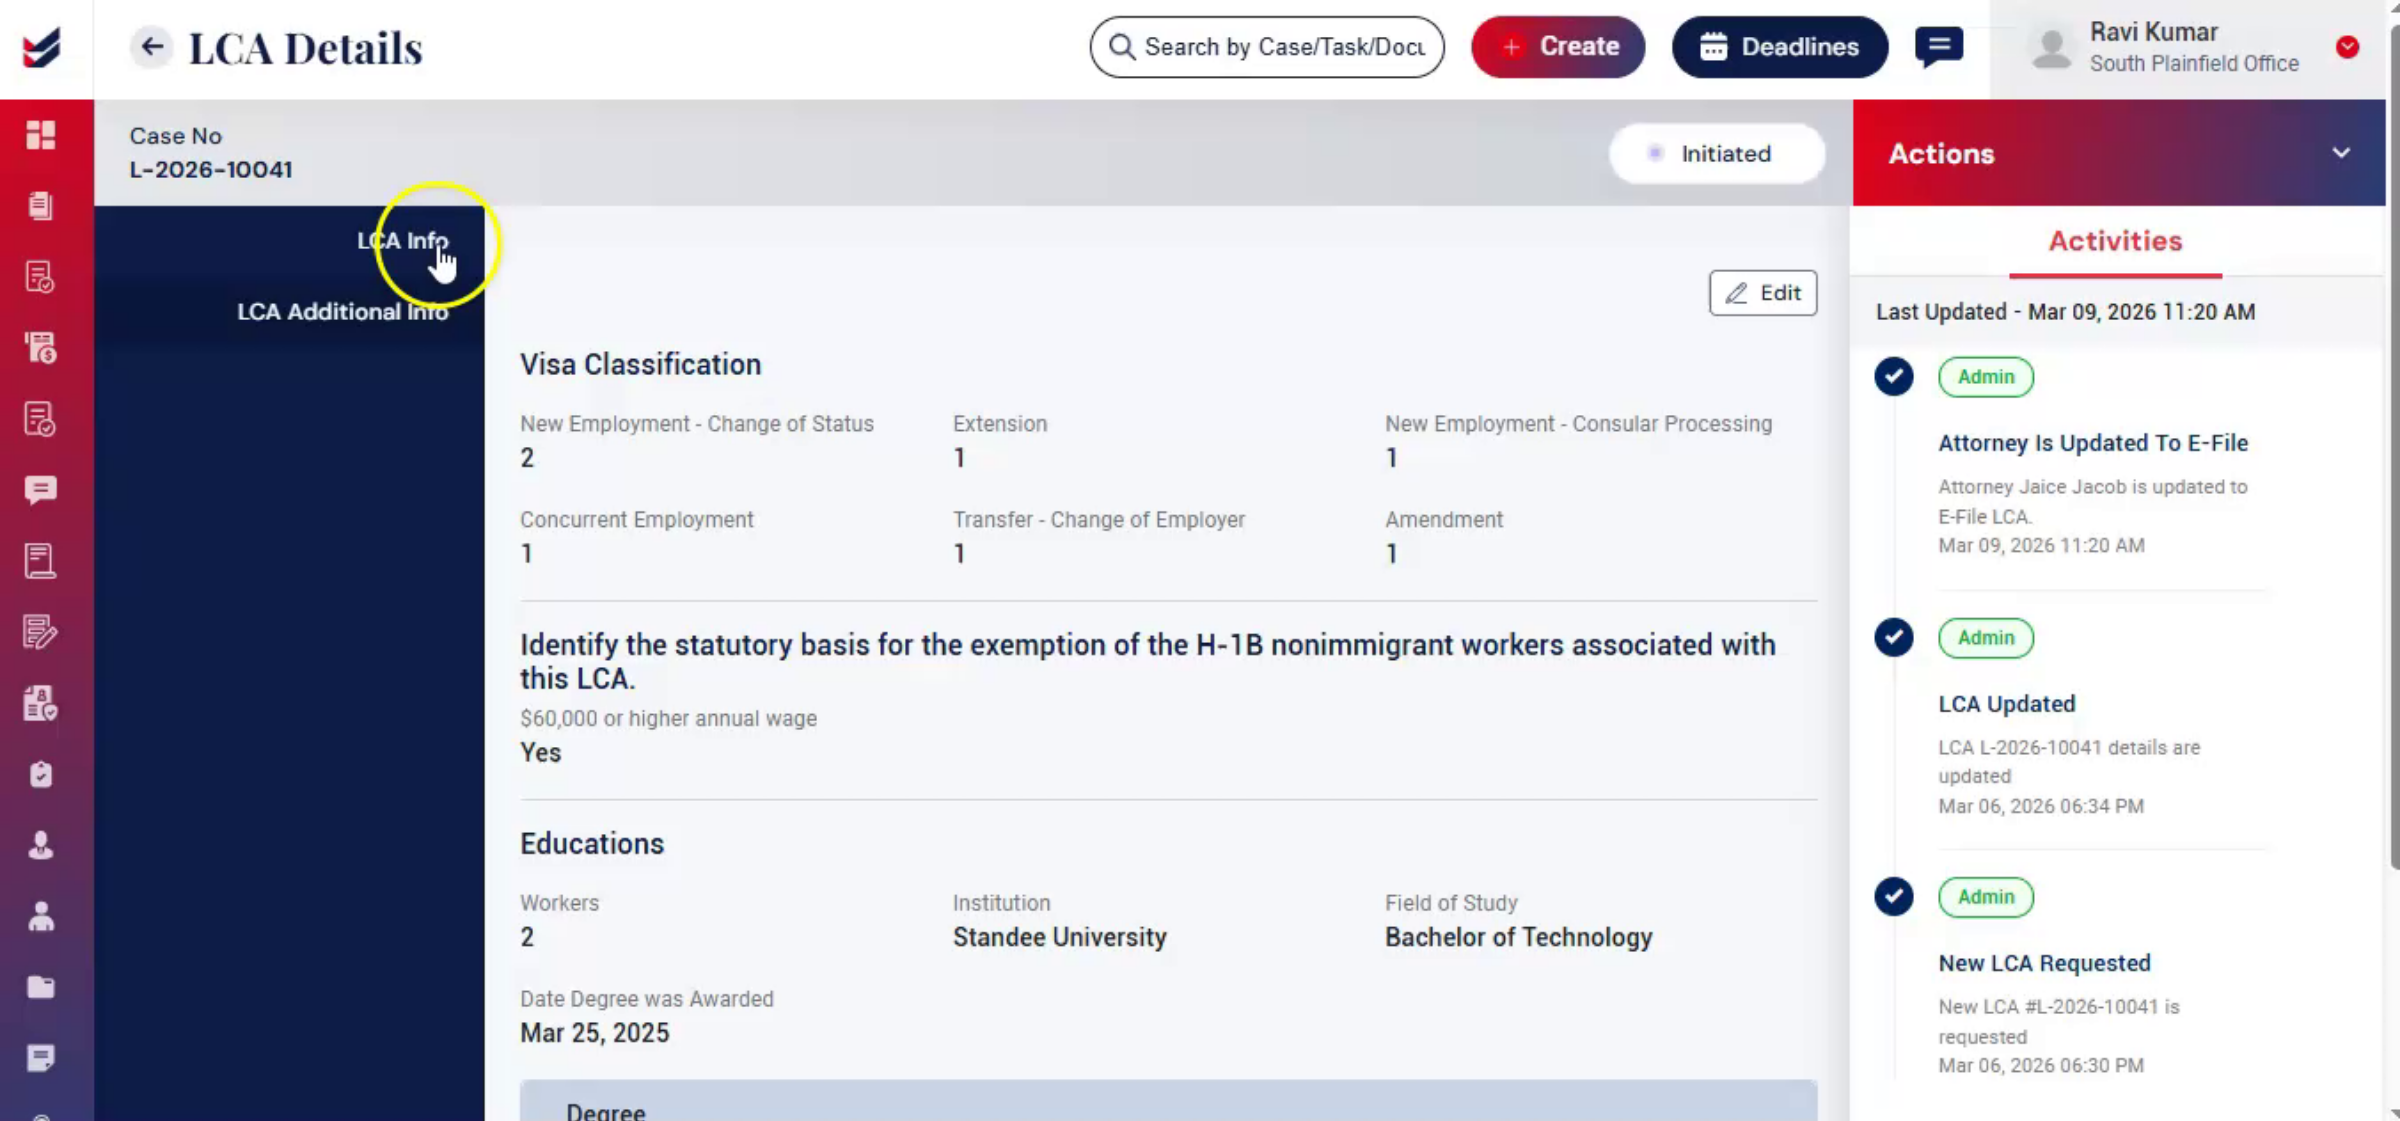
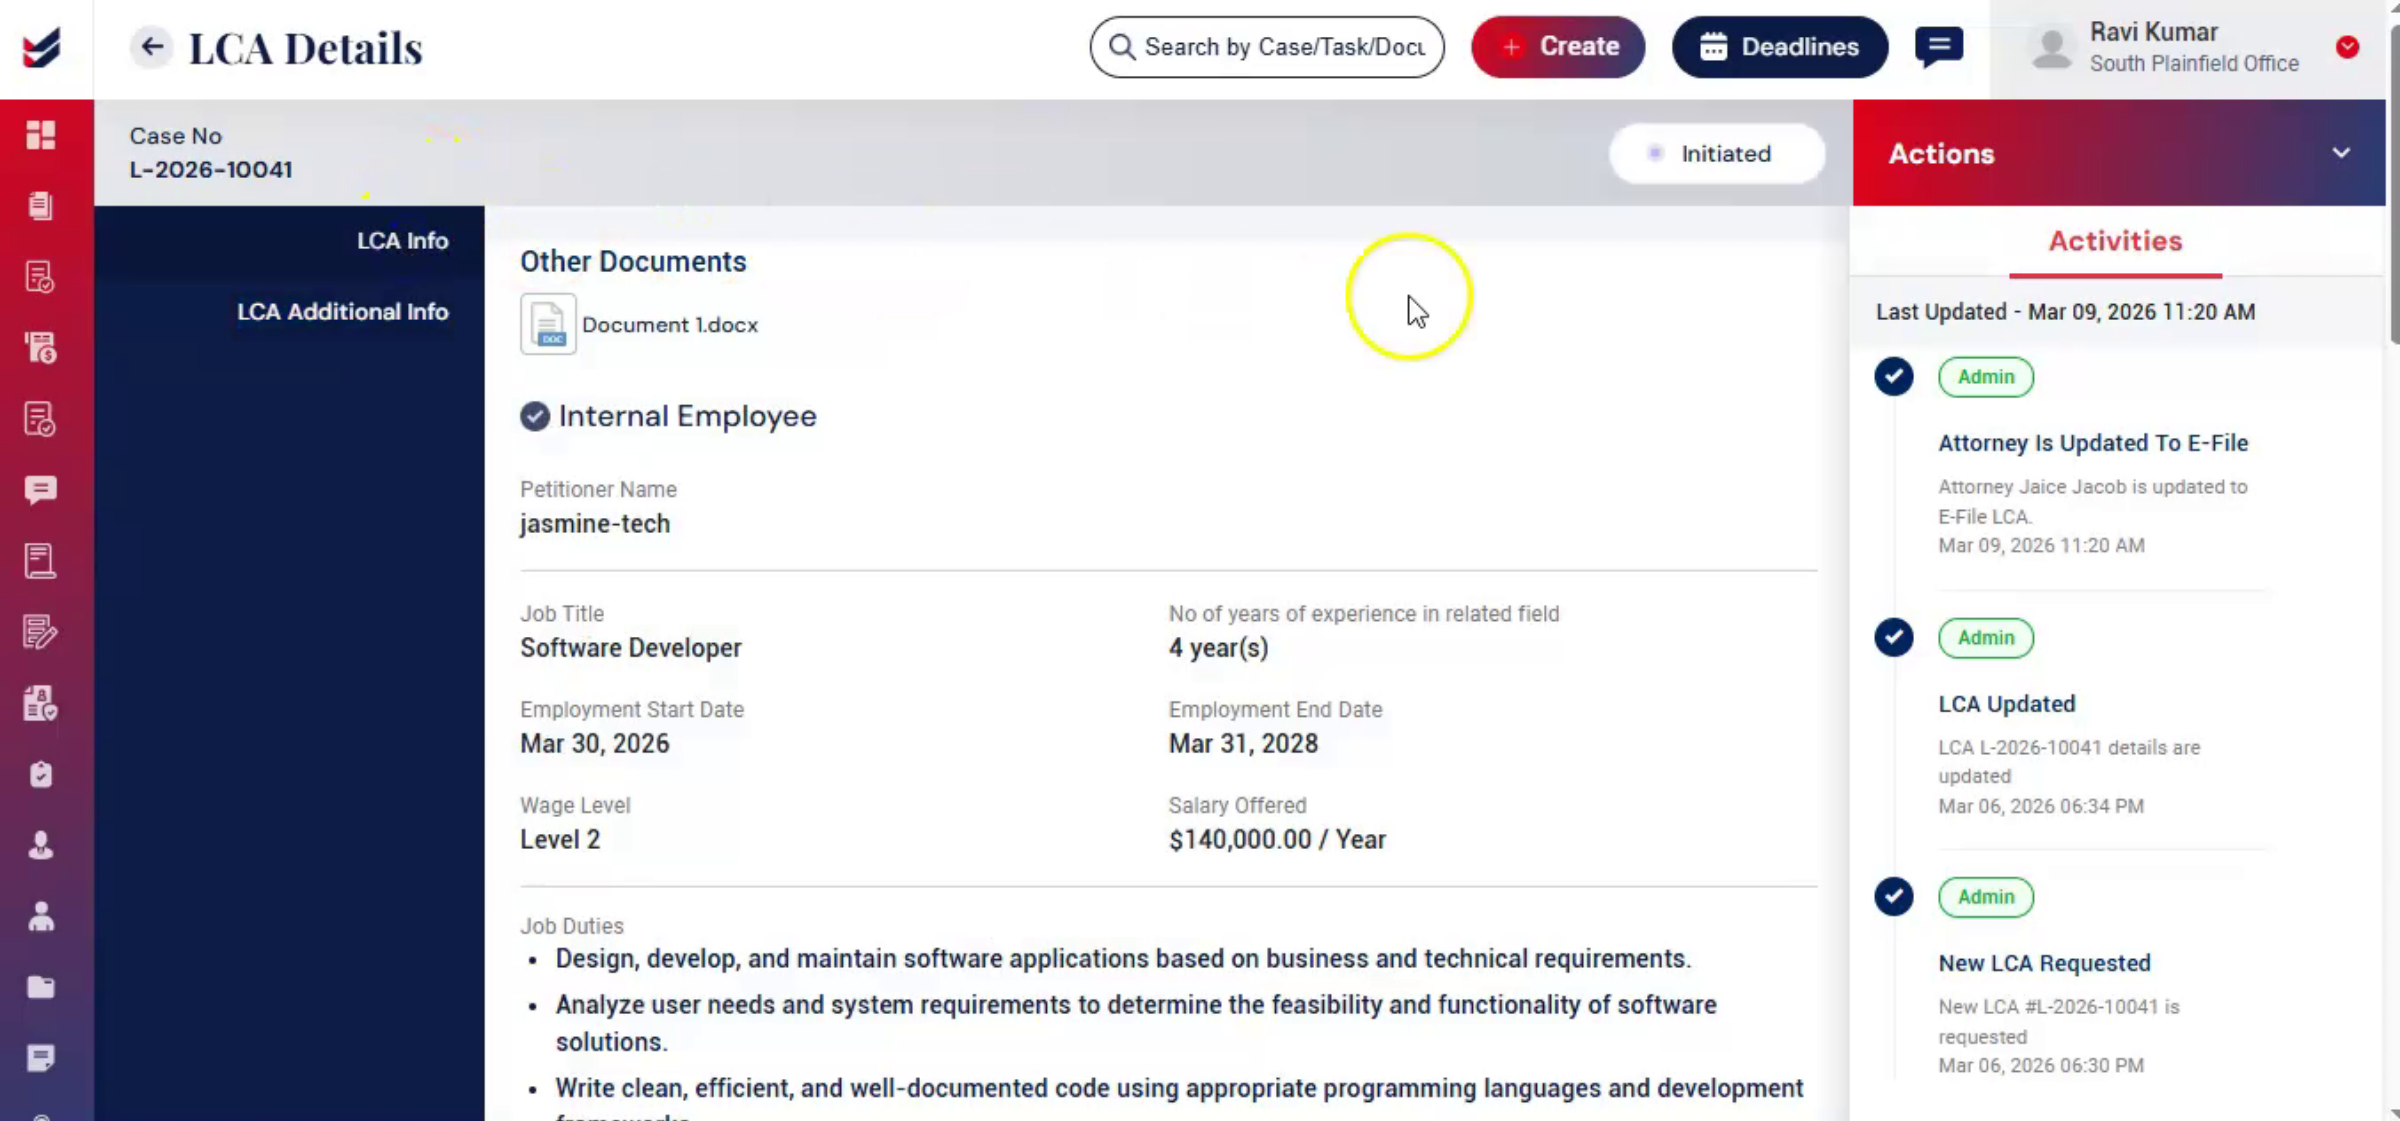
In LCA Additional section you will find the additional information's, that you have entered during e-file. You can edit it, by clicking on Edit option.
23. Update Status
 * click the image to view enlarged
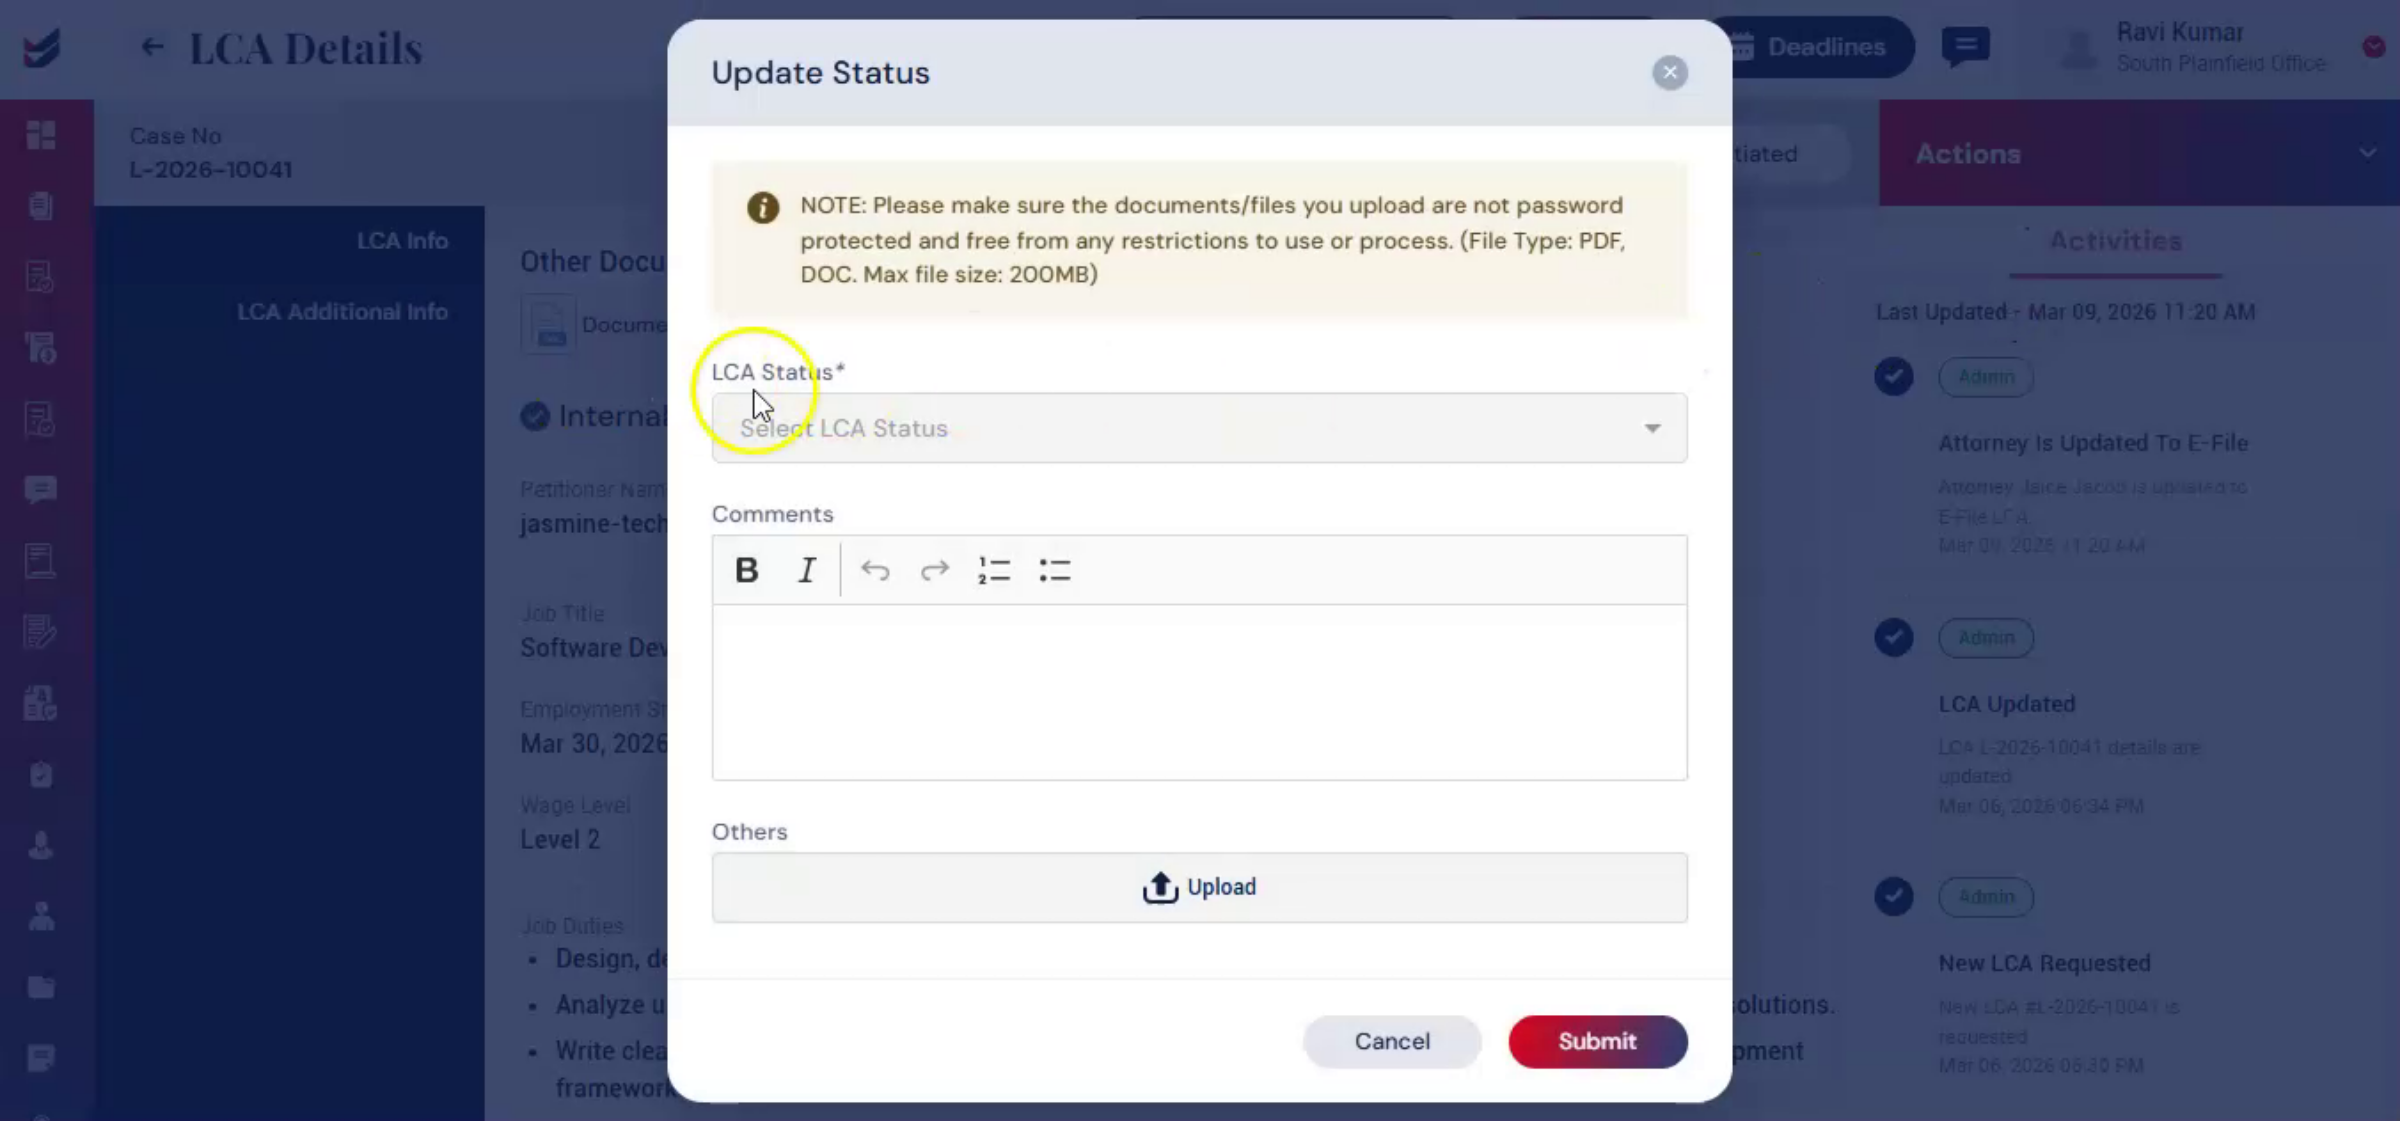
If the LCA is filed outside ImmiBox, the record can still be maintained in the system. During the process, you can update the status manually. Go to Actions and click Update Status.
24. LCA Case Status Updation
 * click the image to view enlarged
Now, enter all the required details and select the status, such as Filed, Certified, or Received RFE. Upload the document, and the system will automatically extract the relevant details. You can also enter the details manually if needed. Add comments and click Submit.
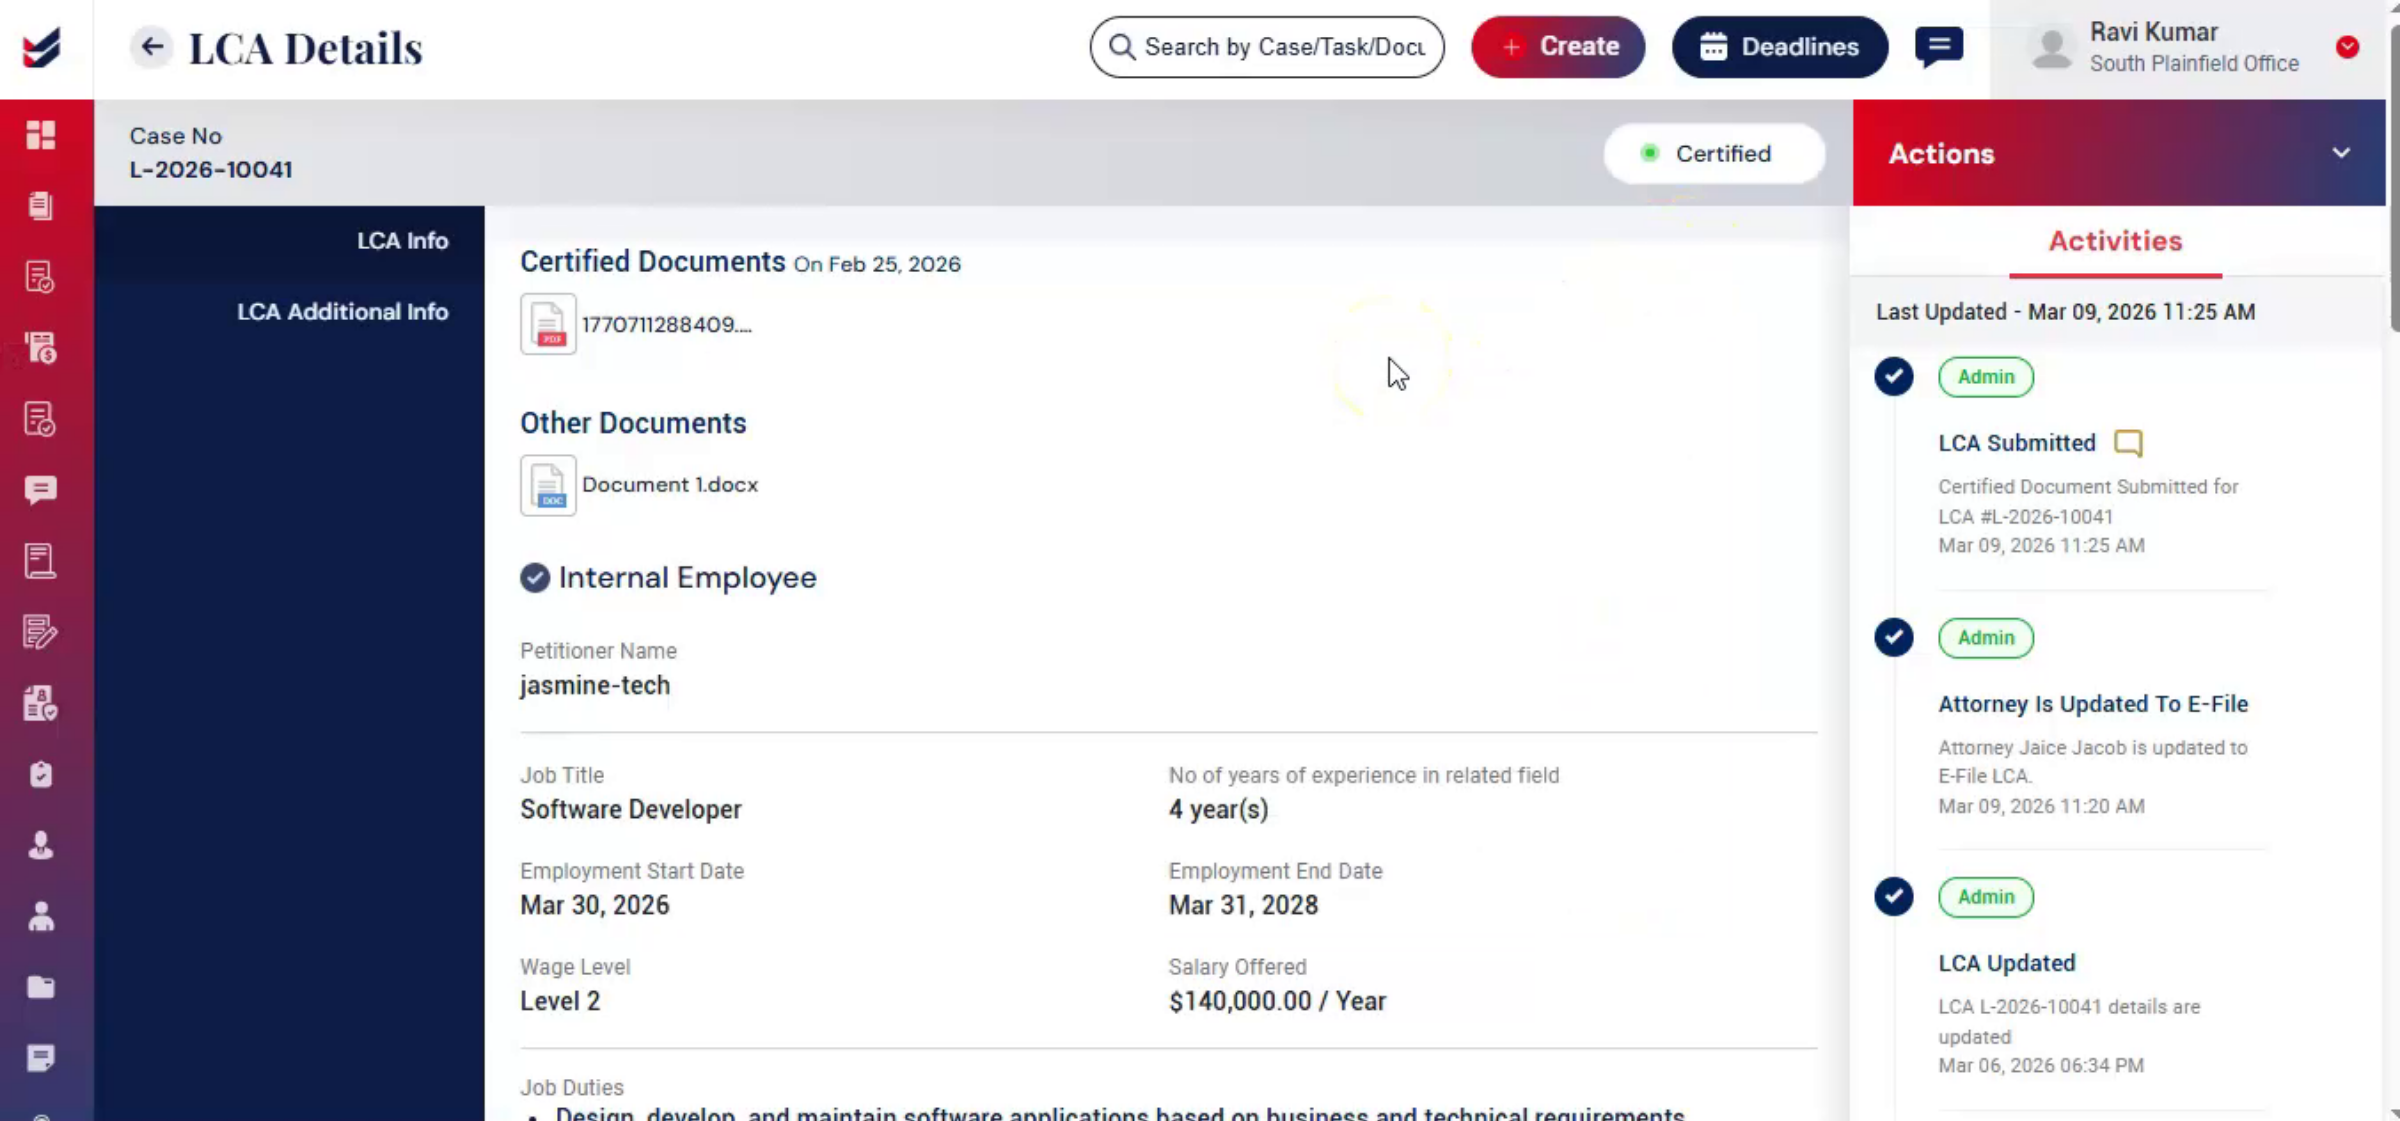
25. LCA Info Section Updated
 * click the image to view enlarged
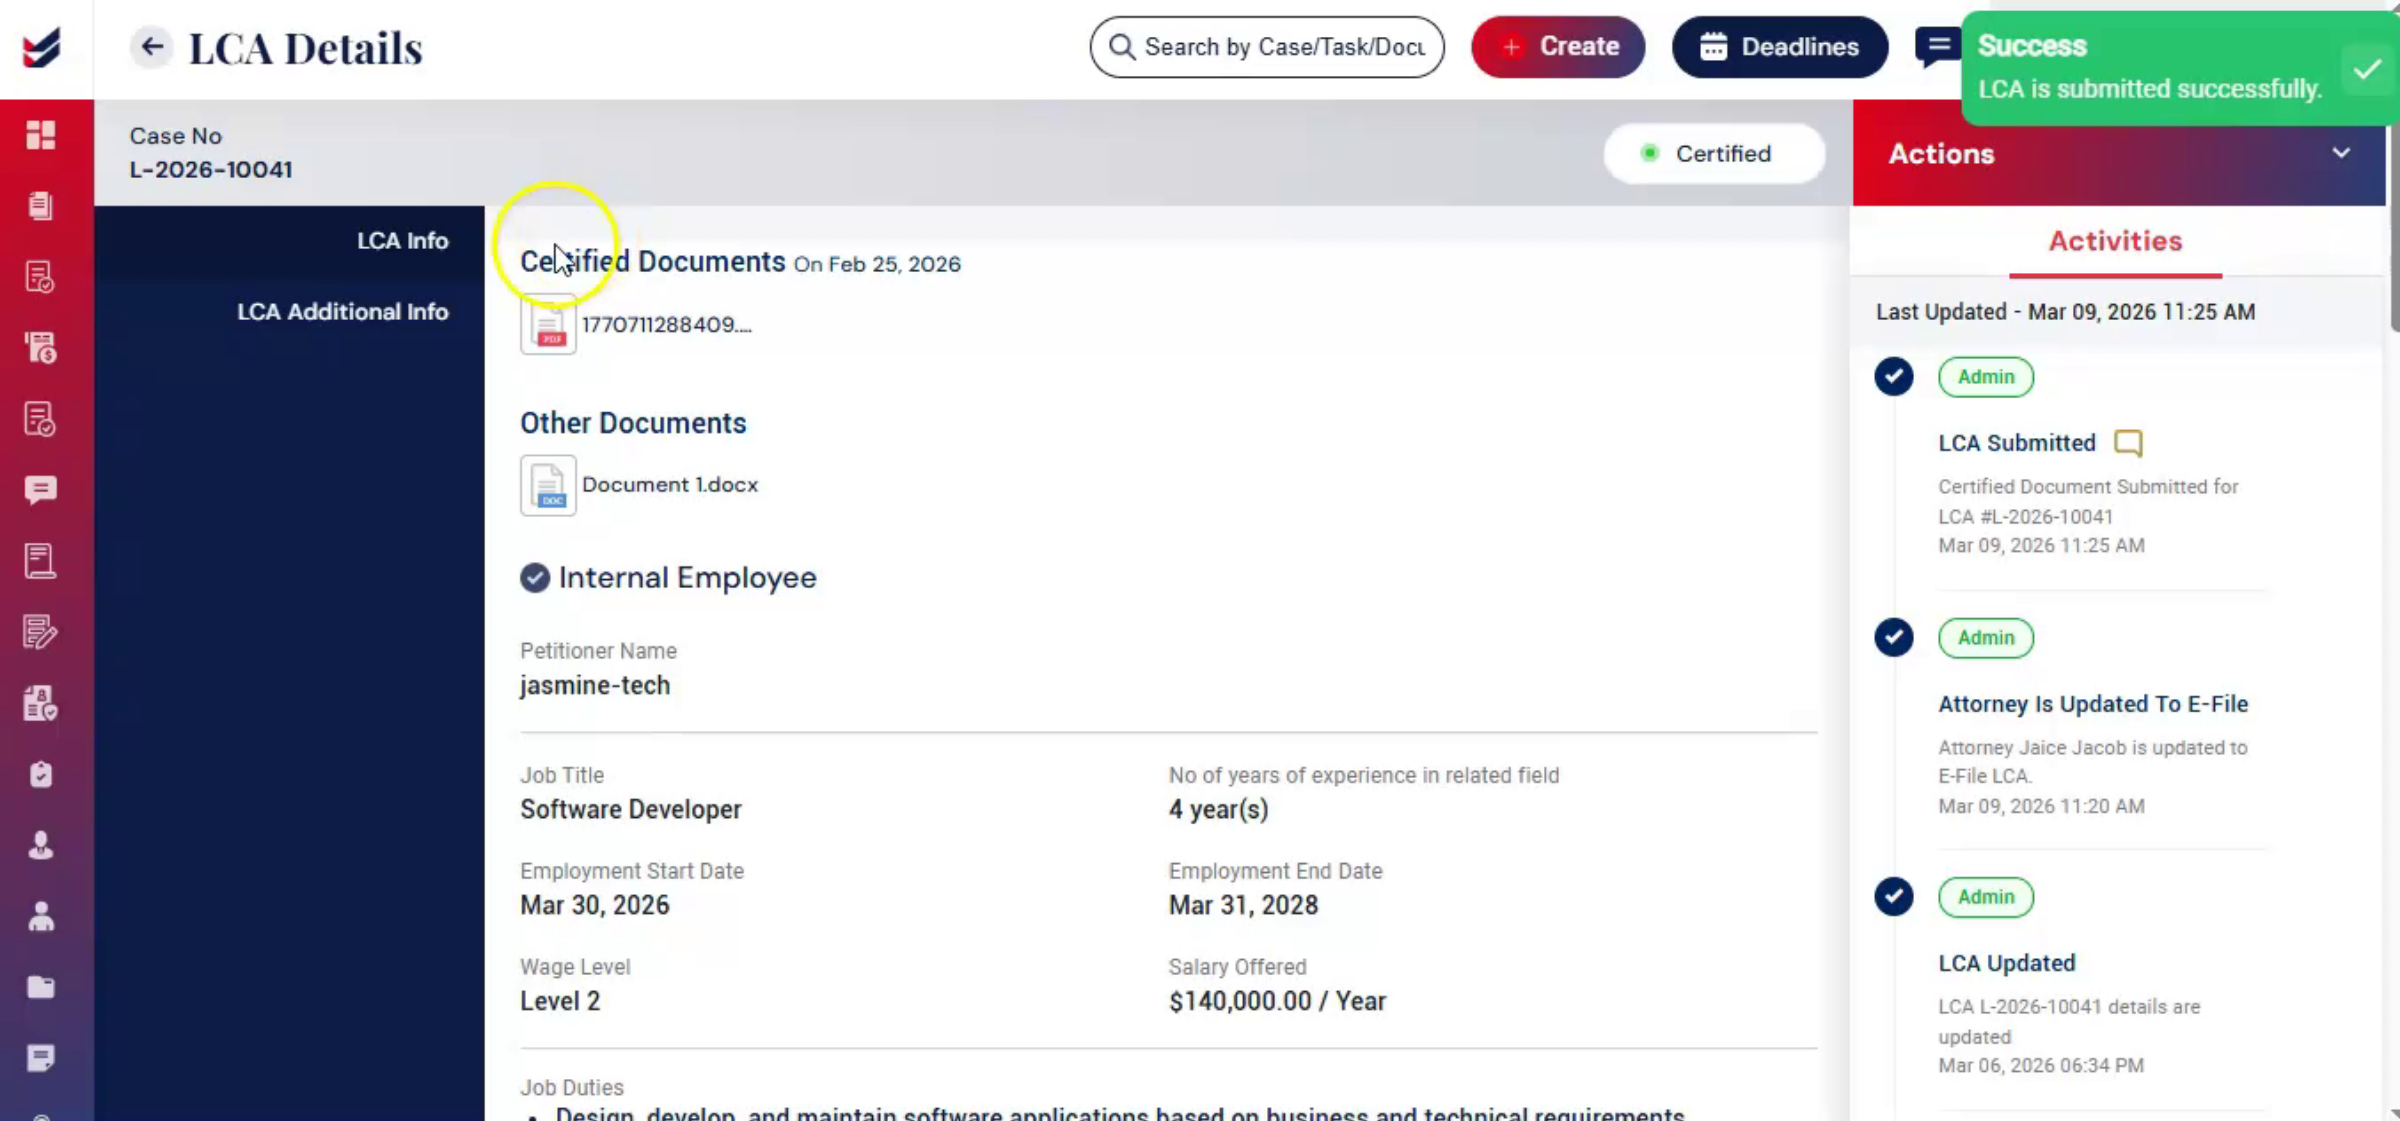
Once you submit the LCA status, the system updates it. In the LCA Info section, the uploaded document and selected status are visible. If certified, it will show as Certified, confirming the update.
26. Link LCA with a Case
 * click the image to view enlarged
ImmiBox allows you to link the LCA with a case for easier tracking. Go to Actions, select Link with Case, enter the case number, add relevant notes, and click Link with Case. This keeps the record complete and organized.
27. Let See Case - 2
 * click the image to view enlarged
Let See LCA Case - 2: Upload Existing Filed or Certified LCA.
28. Uploading Existing Filed LCA
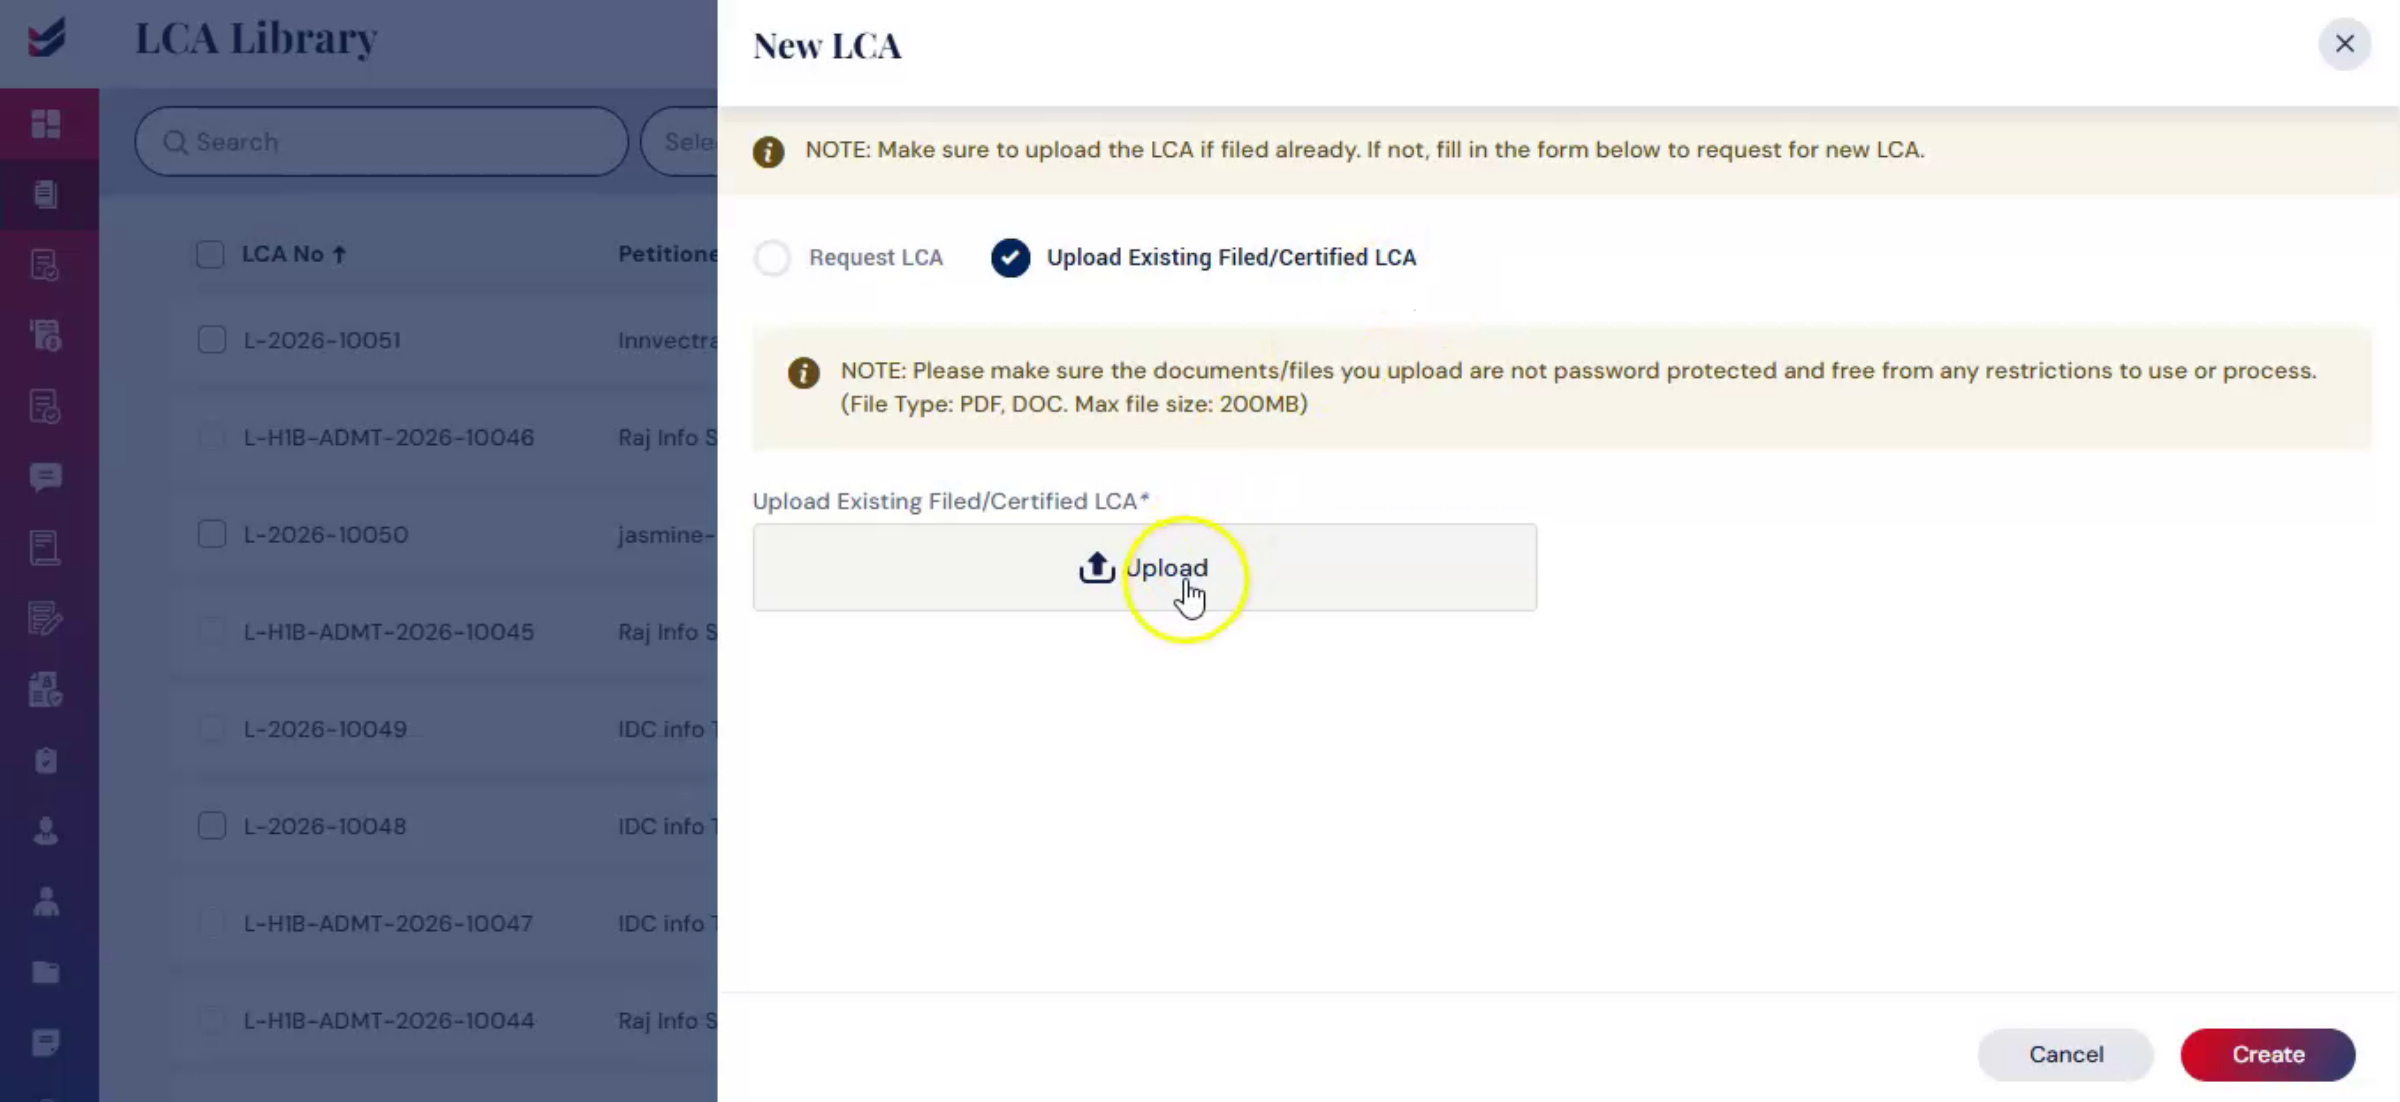 * click the image to view enlarged
Select Upload Existing Filed/Certified LCA and upload the document. ImmiBox automatically extracts available data from the uploaded LCA and pre-populates the relevant fields. Review the extracted information, manually complete any missing fields, and click Create. You will be redirected to the LCA Library, where the newly uploaded LCA is stored.
29. Access and Manage LCA
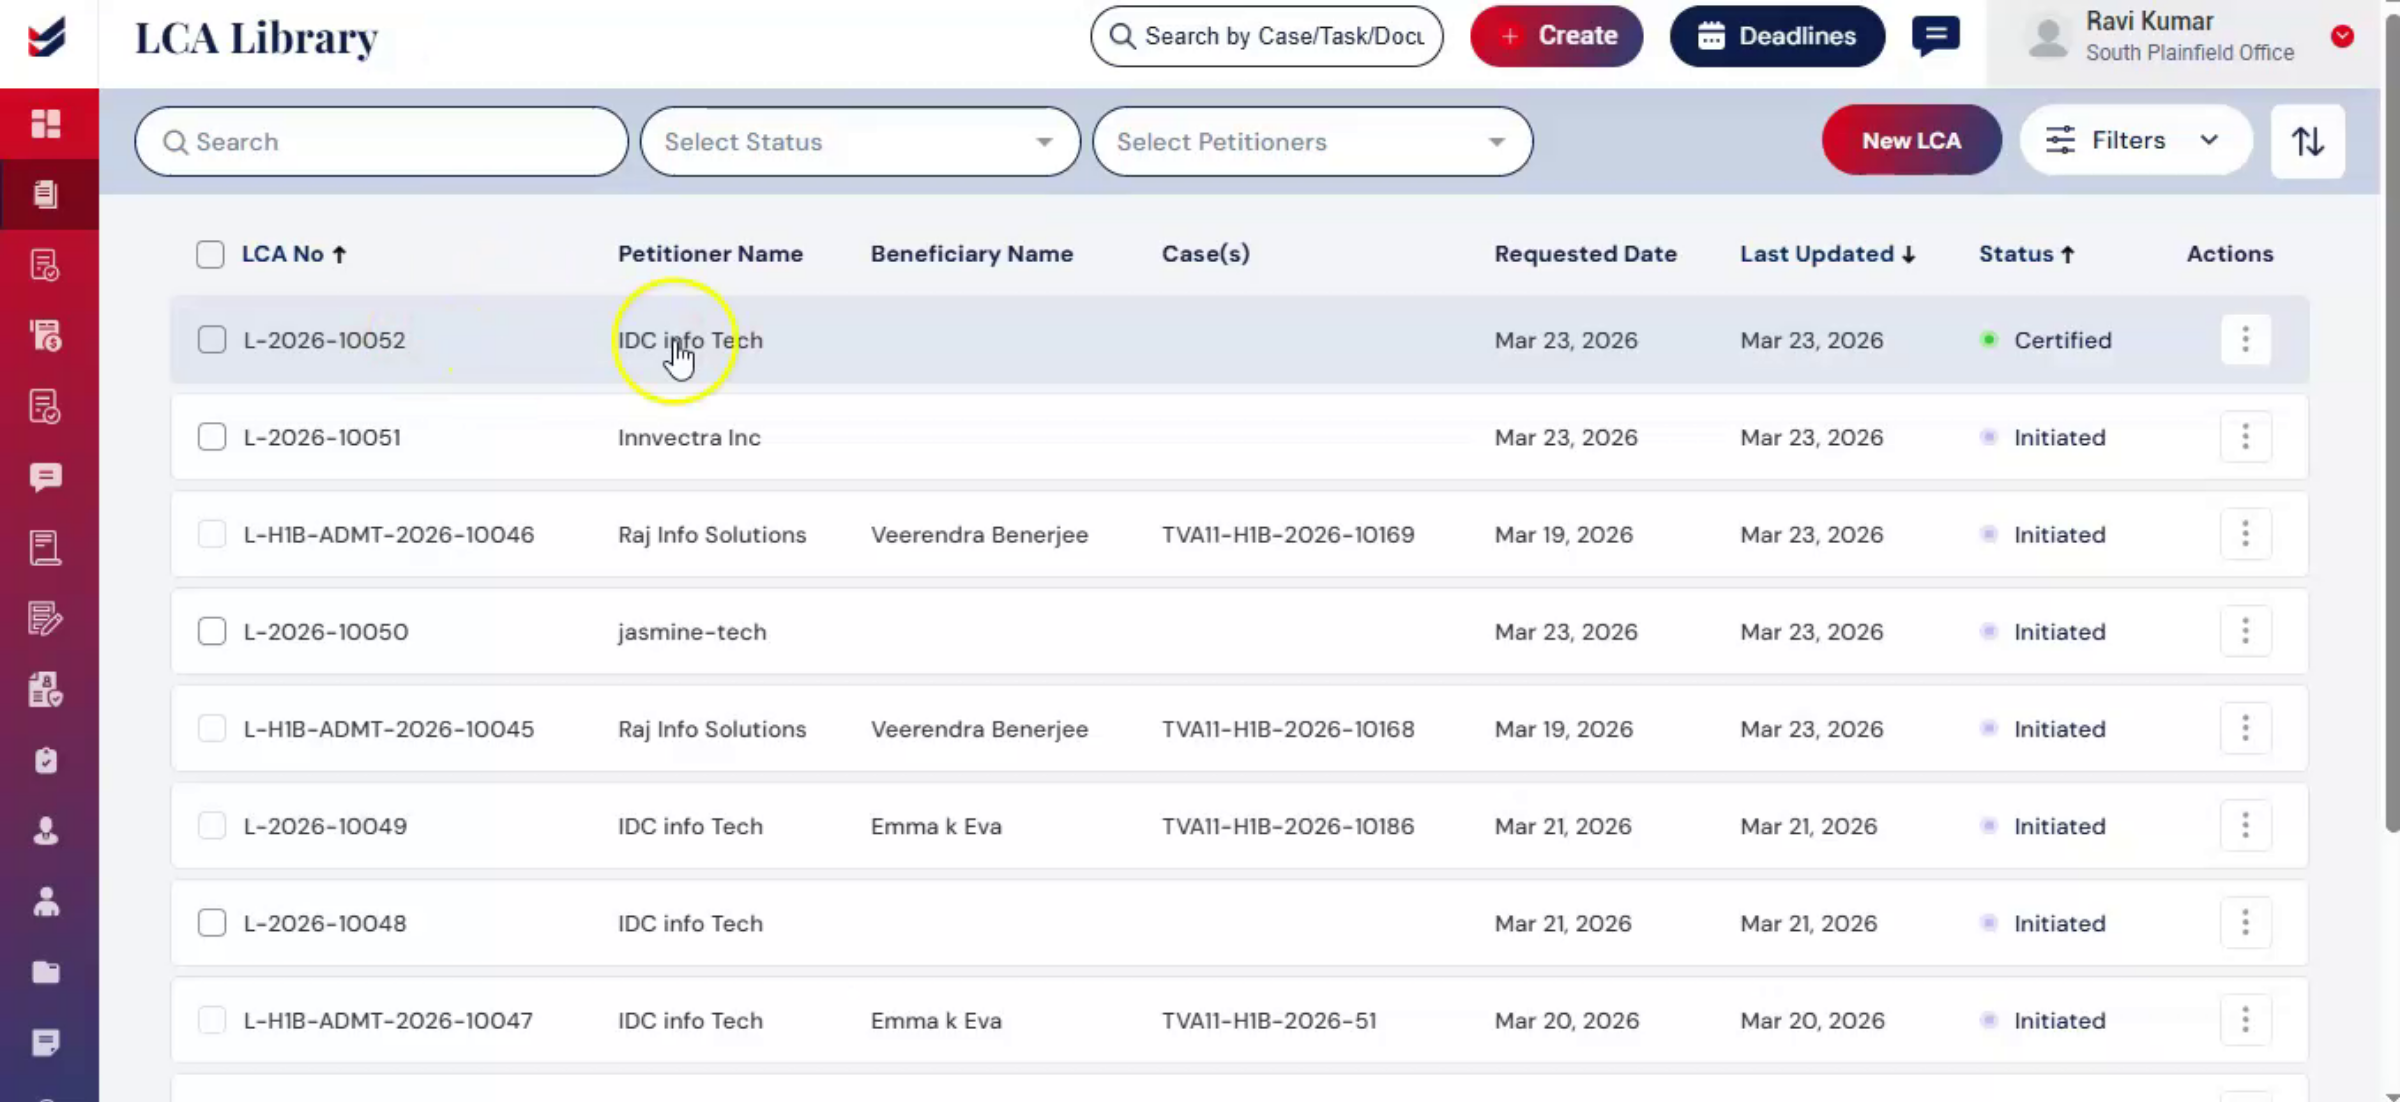 * click the image to view enlarged
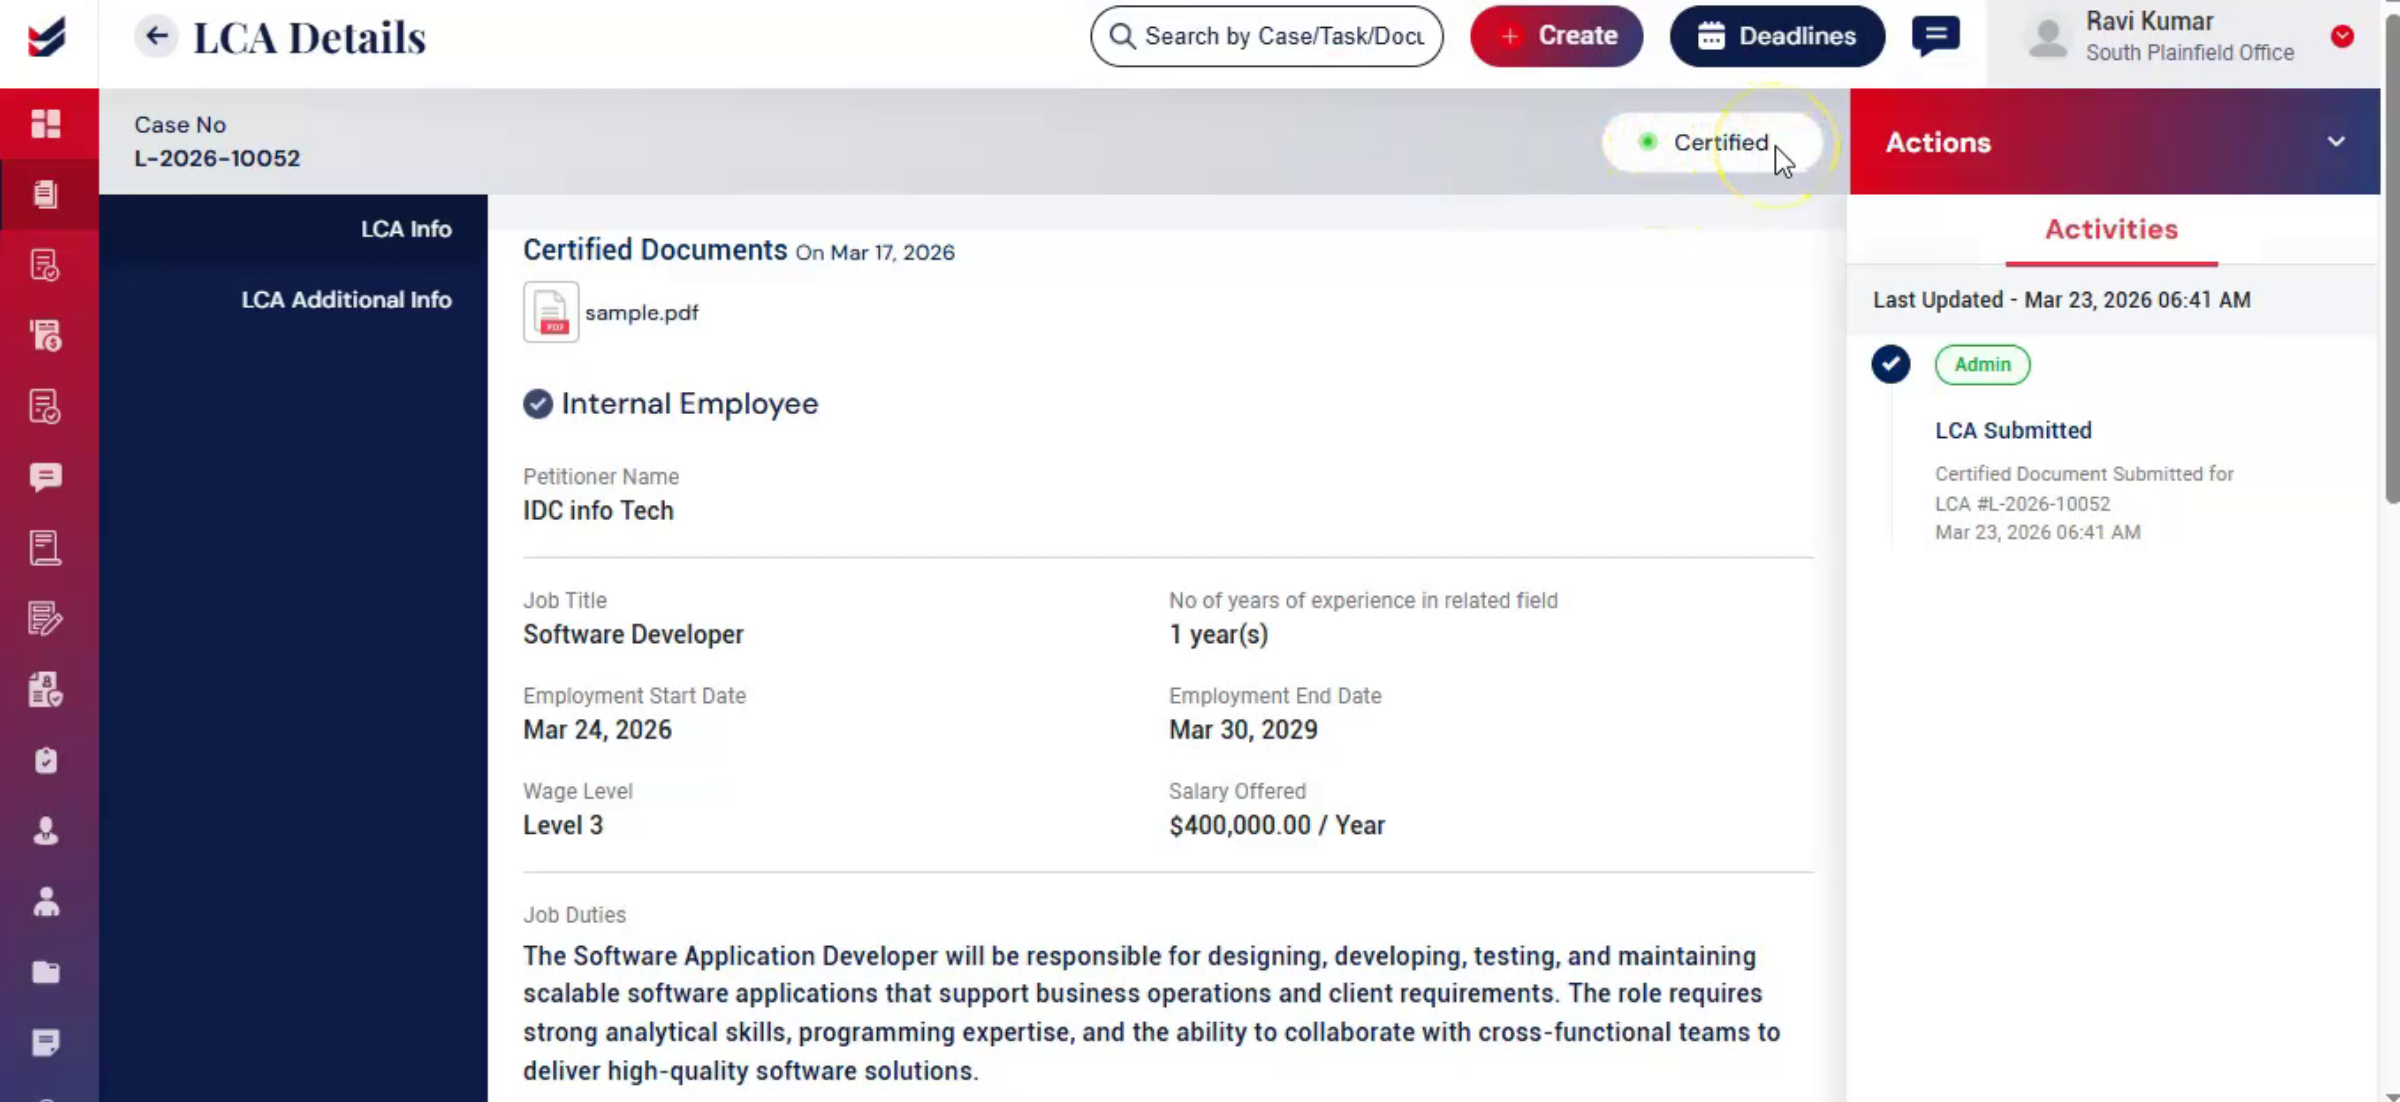
Click on the specific LCA to open LCA Detail Page. This page provides a complete view of all information related to the LCA.
The Activities section displays a detailed log of all actions performed on the LCA, helping you track changes and maintain transparency.
If there are any updates to the LCA status, navigate to Actions and select Update Status. For example, if a previously filed LCA has now been certified, you can update the status by uploading the certified document and entering the required details. Then click on Submit.
The update will be saved, ensuring the LCA record remains accurate and up to date.
You can link the LCA with a case to associate it with the relevant case record for further processing and tracking.
30. Link LCA with Case
 * click the image to view enlarged
To associate the LCA with one or more cases, click Actions and select Link with Case from the dropdown menu. A dialog box will appear where you can enter or select the case numbers, you want to link with the LCA.
You can link multiple cases to a single LCA, depending on the applicability of the LCA to those cases. Add relevant notes and click on Link with Case.
The selected cases will now be linked with the LCA.
Click on linked case number to redirect you to its Case Details Page for quick access. Here, you will notice that the LCA stage is marked as completed, indicating that the LCA has been successfully linked and processed for that case.
When you navigate back to the LCA Detail Page, you will also see an entry under the Activities section indicating that the LCA has been successfully linked with the selected cases, providing a clear record of the action.
31. Create LCA Directly from a Case
 * click the image to view enlarged
You can also create an LCA directly from within a Case. Click Create and select a new Case. Here, select H-1B as case type, enter all the required details and click Submit.
Once the case is created, you will be redirected to the Case Details Page, where you will see the LCA stage marked as Pending.
Click on the LCA option from the left-hand side, and you will see options—Request LCA or Upload Filed/Certified LCA.
Select the appropriate option.
For example, if you choose Request LCA, fill in all the required details including Job details, similar to the previous process. After entering the details Click on Submit.
Once submitted, your LCA will be created or initiated for the case.
This is how you can easily generate an LCA within a case, making the process seamless and efficiently integrated within ImmiBox.
32. LCA Note
 * click the image to view enlarged
Once the LCA information is saved, the LCA record is created and stored in the system, allowing you to view, manage, and link it with relevant cases.
All LCAs—whether created independently or from a case—are automatically listed in the LCA Library, where they can be accessed and managed at any time.

