

Manage Invoices in ImmiBox
Overview
Welcome! This video will help you understand the Invoices functionality in detail. This includes generating and issuing invoices for cases and other activities like Consultation as well.
1. Invoice Sections Overview
 * click the image to view enlarged
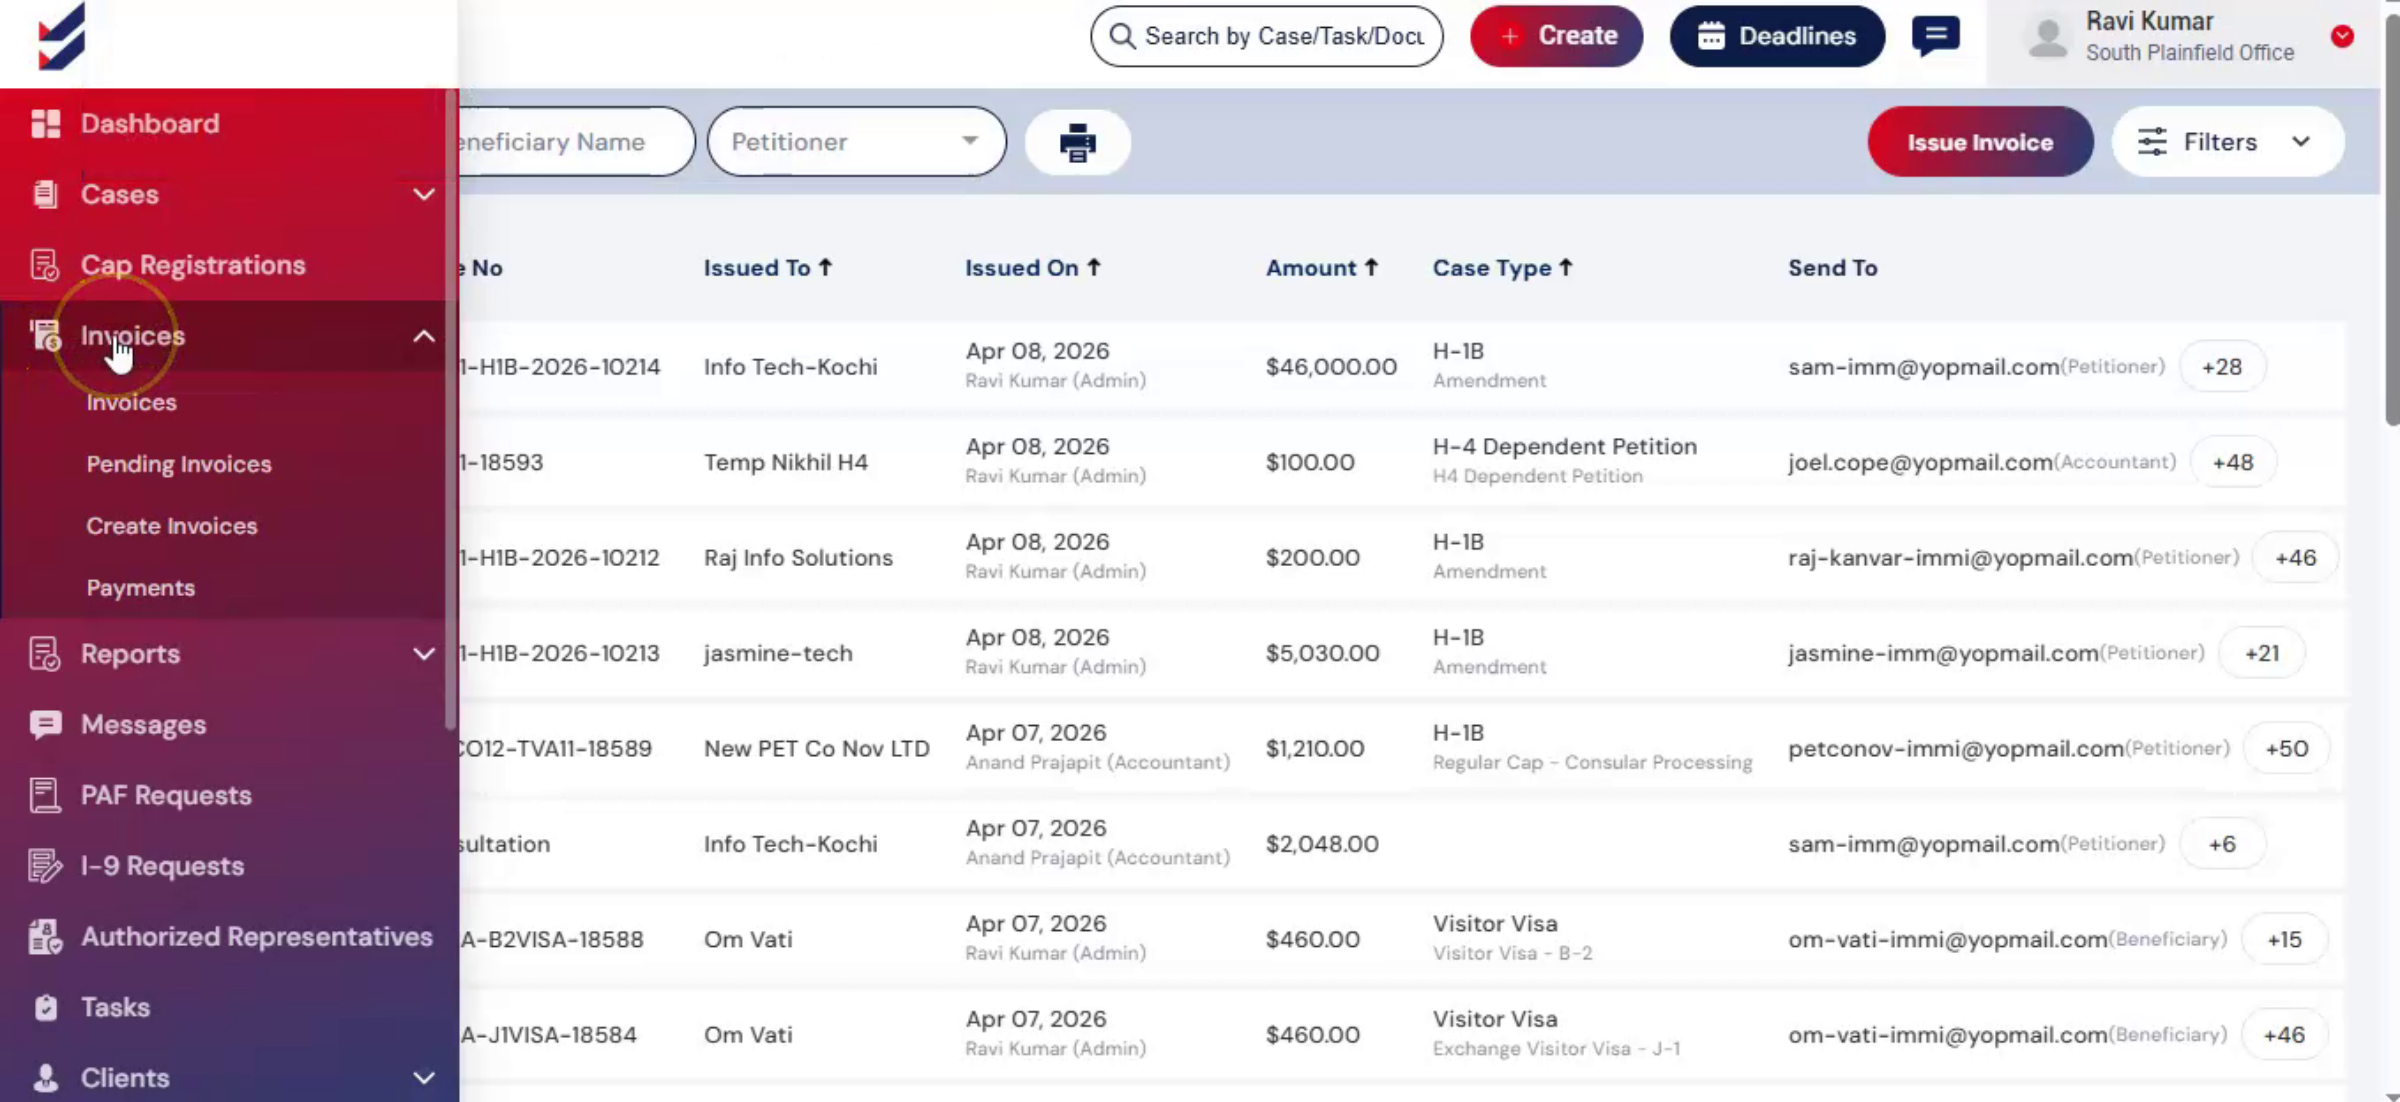
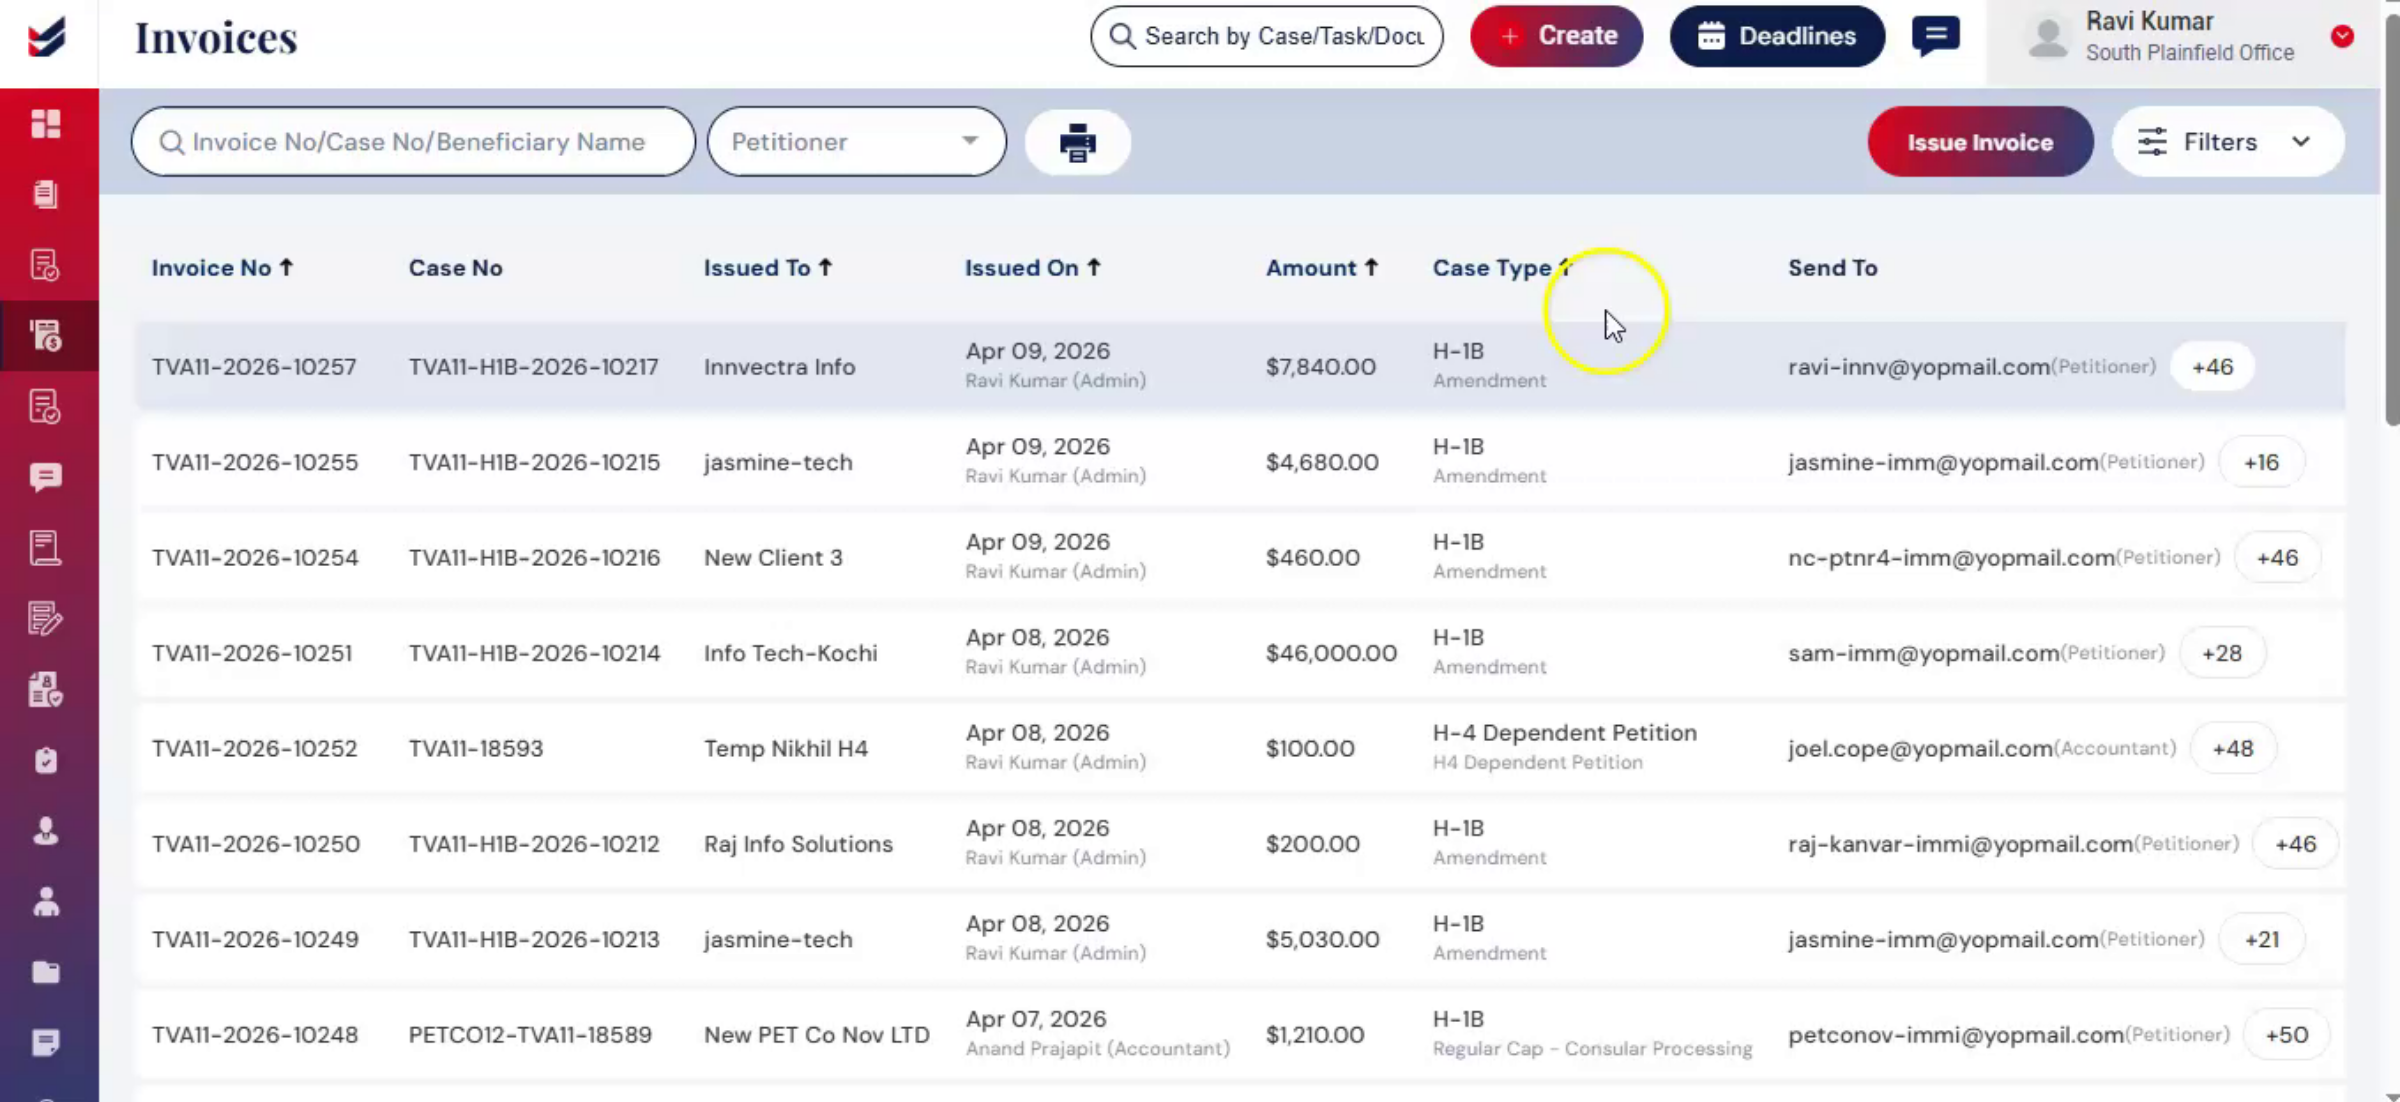
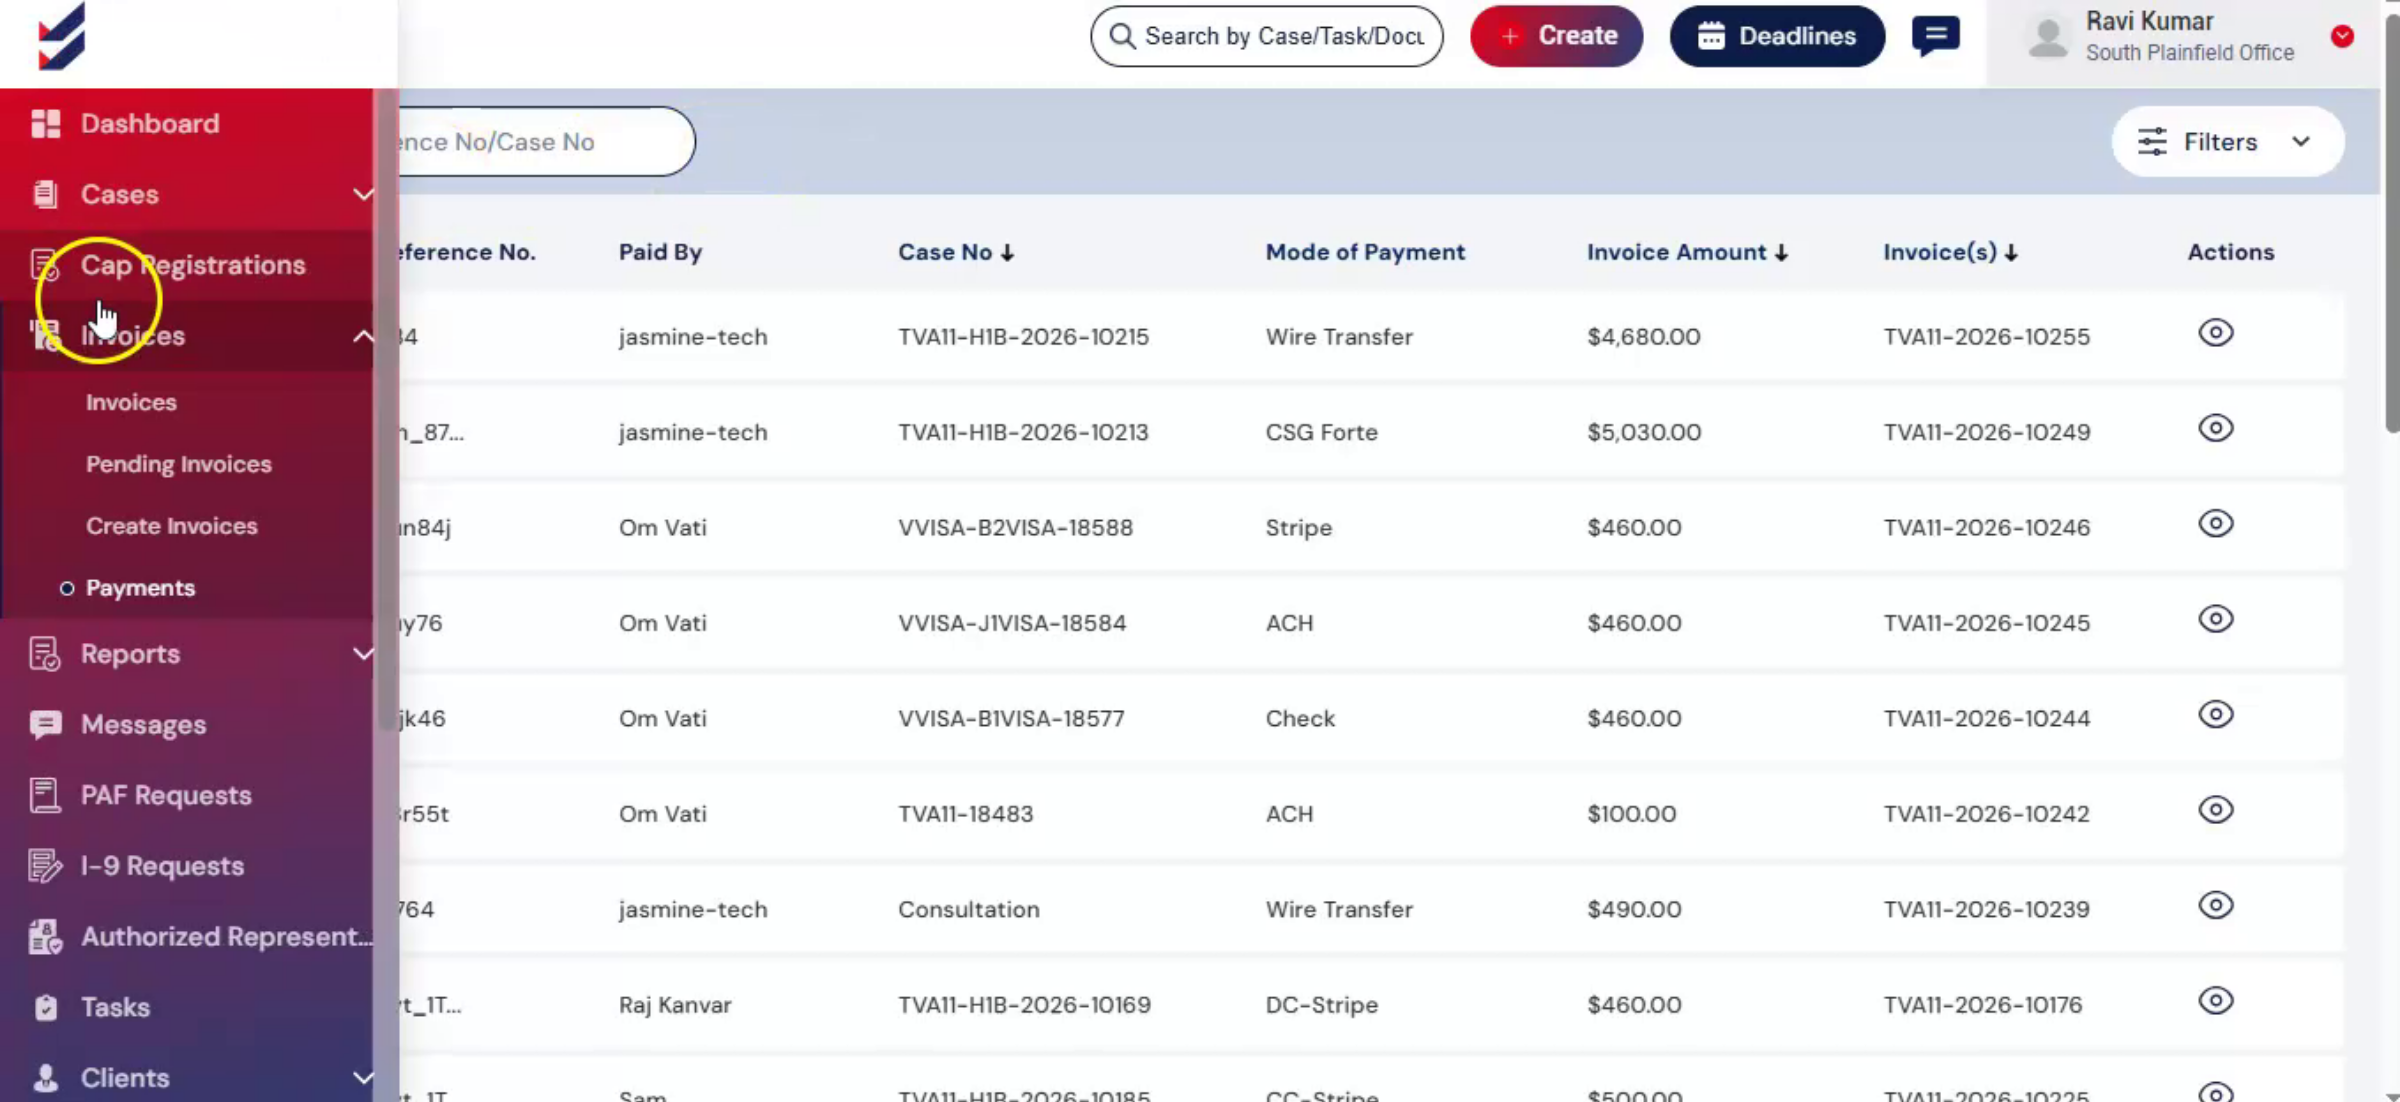
ImmiBox organizes invoices into four simple sections:
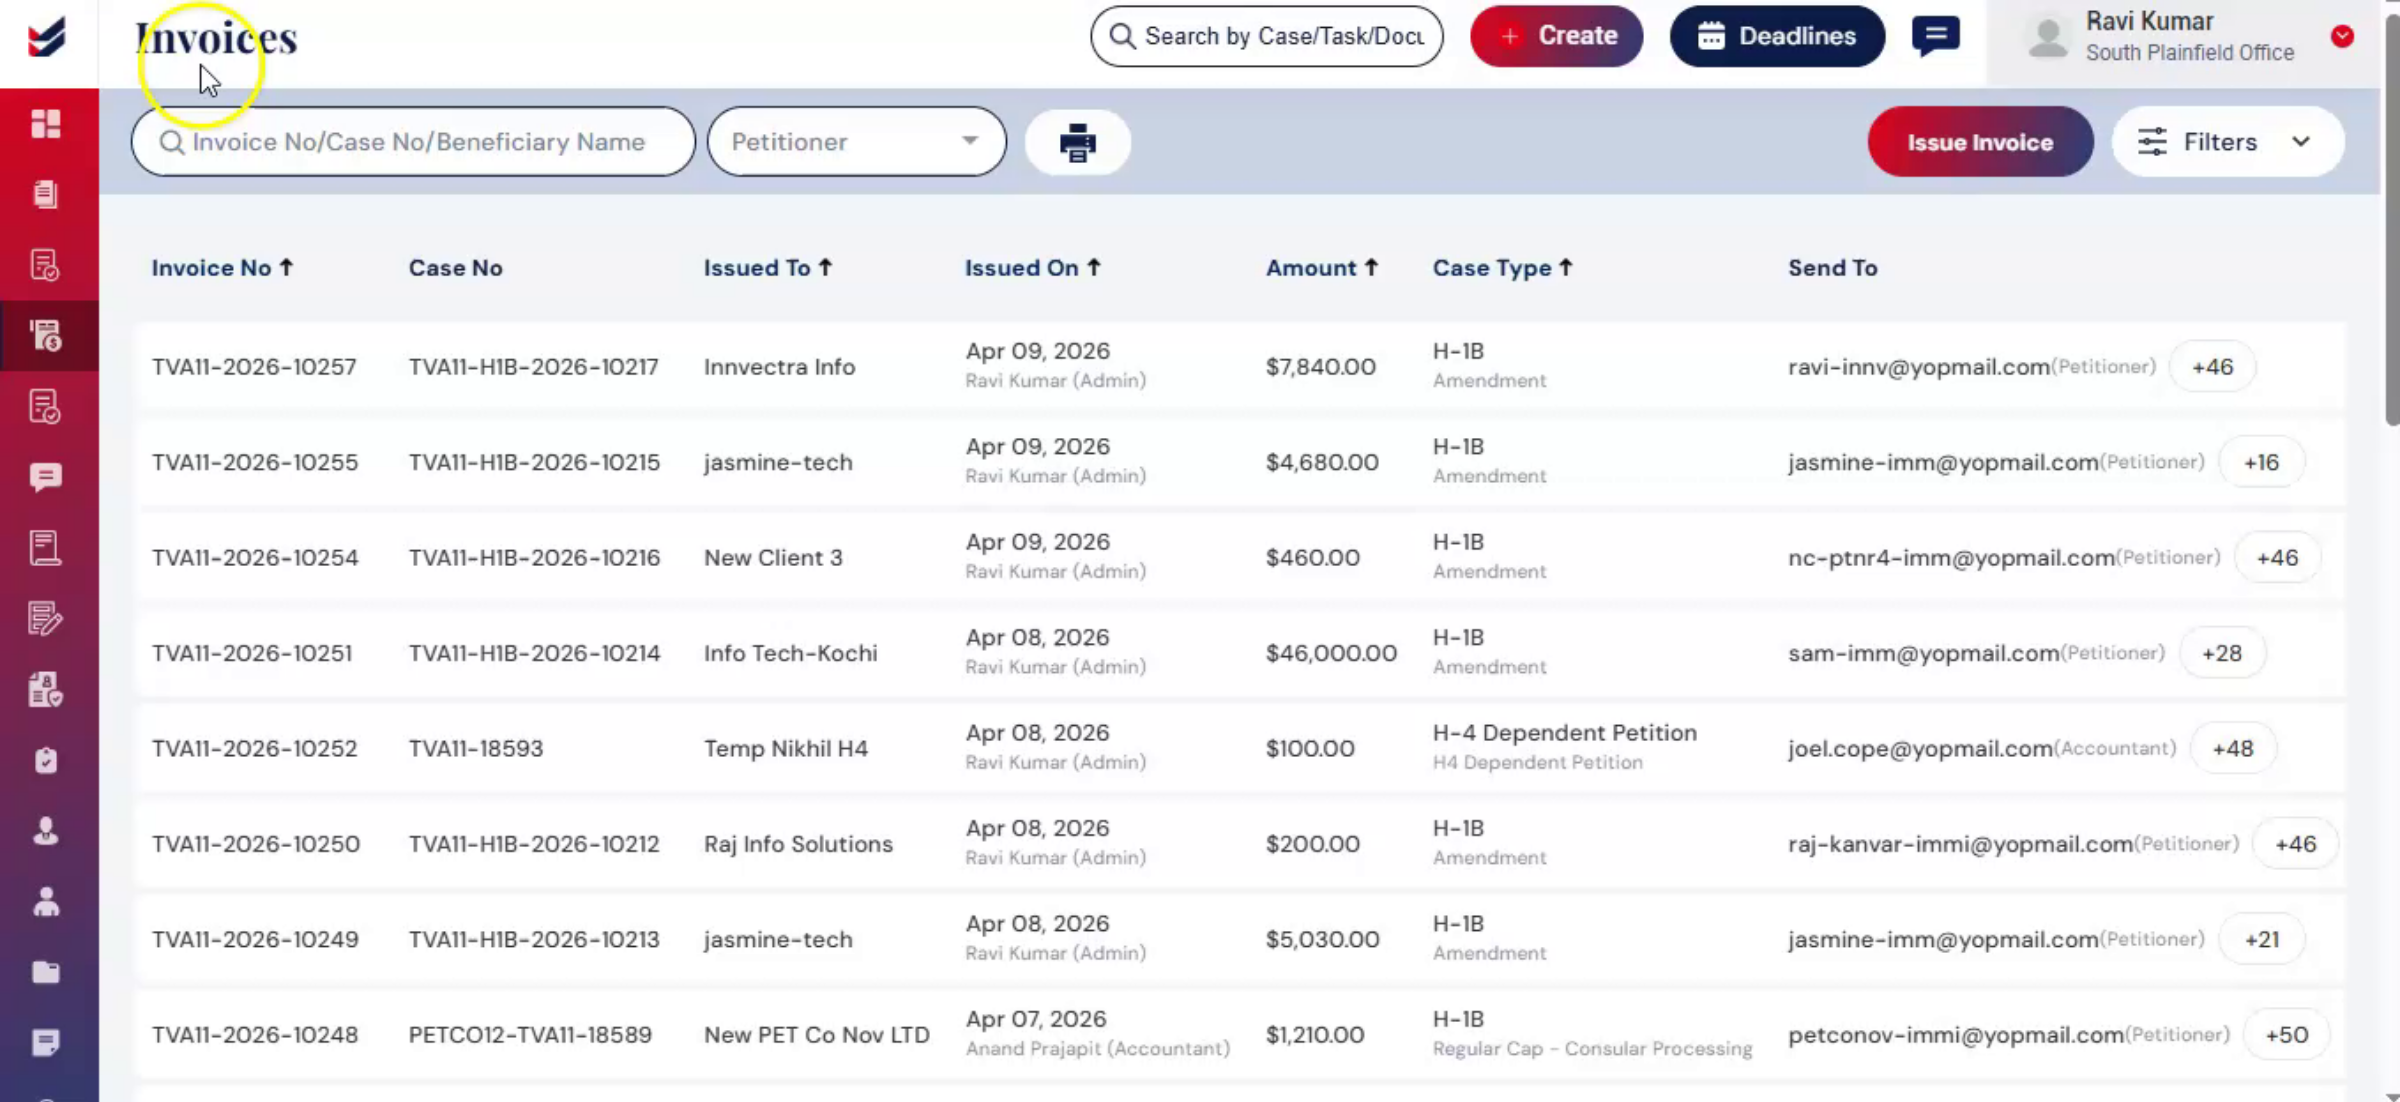
Invoices – View all issued invoices.
Pending Invoices – Whoever is working on the case can initiate / intimate others to issue invoices. All such initiated invoices are displayed here for further actions including issuing the invoice.
Create Invoices – Create new invoices for a particular case by searching. Also, create custom invoices for offline cases or other activities besides cases.
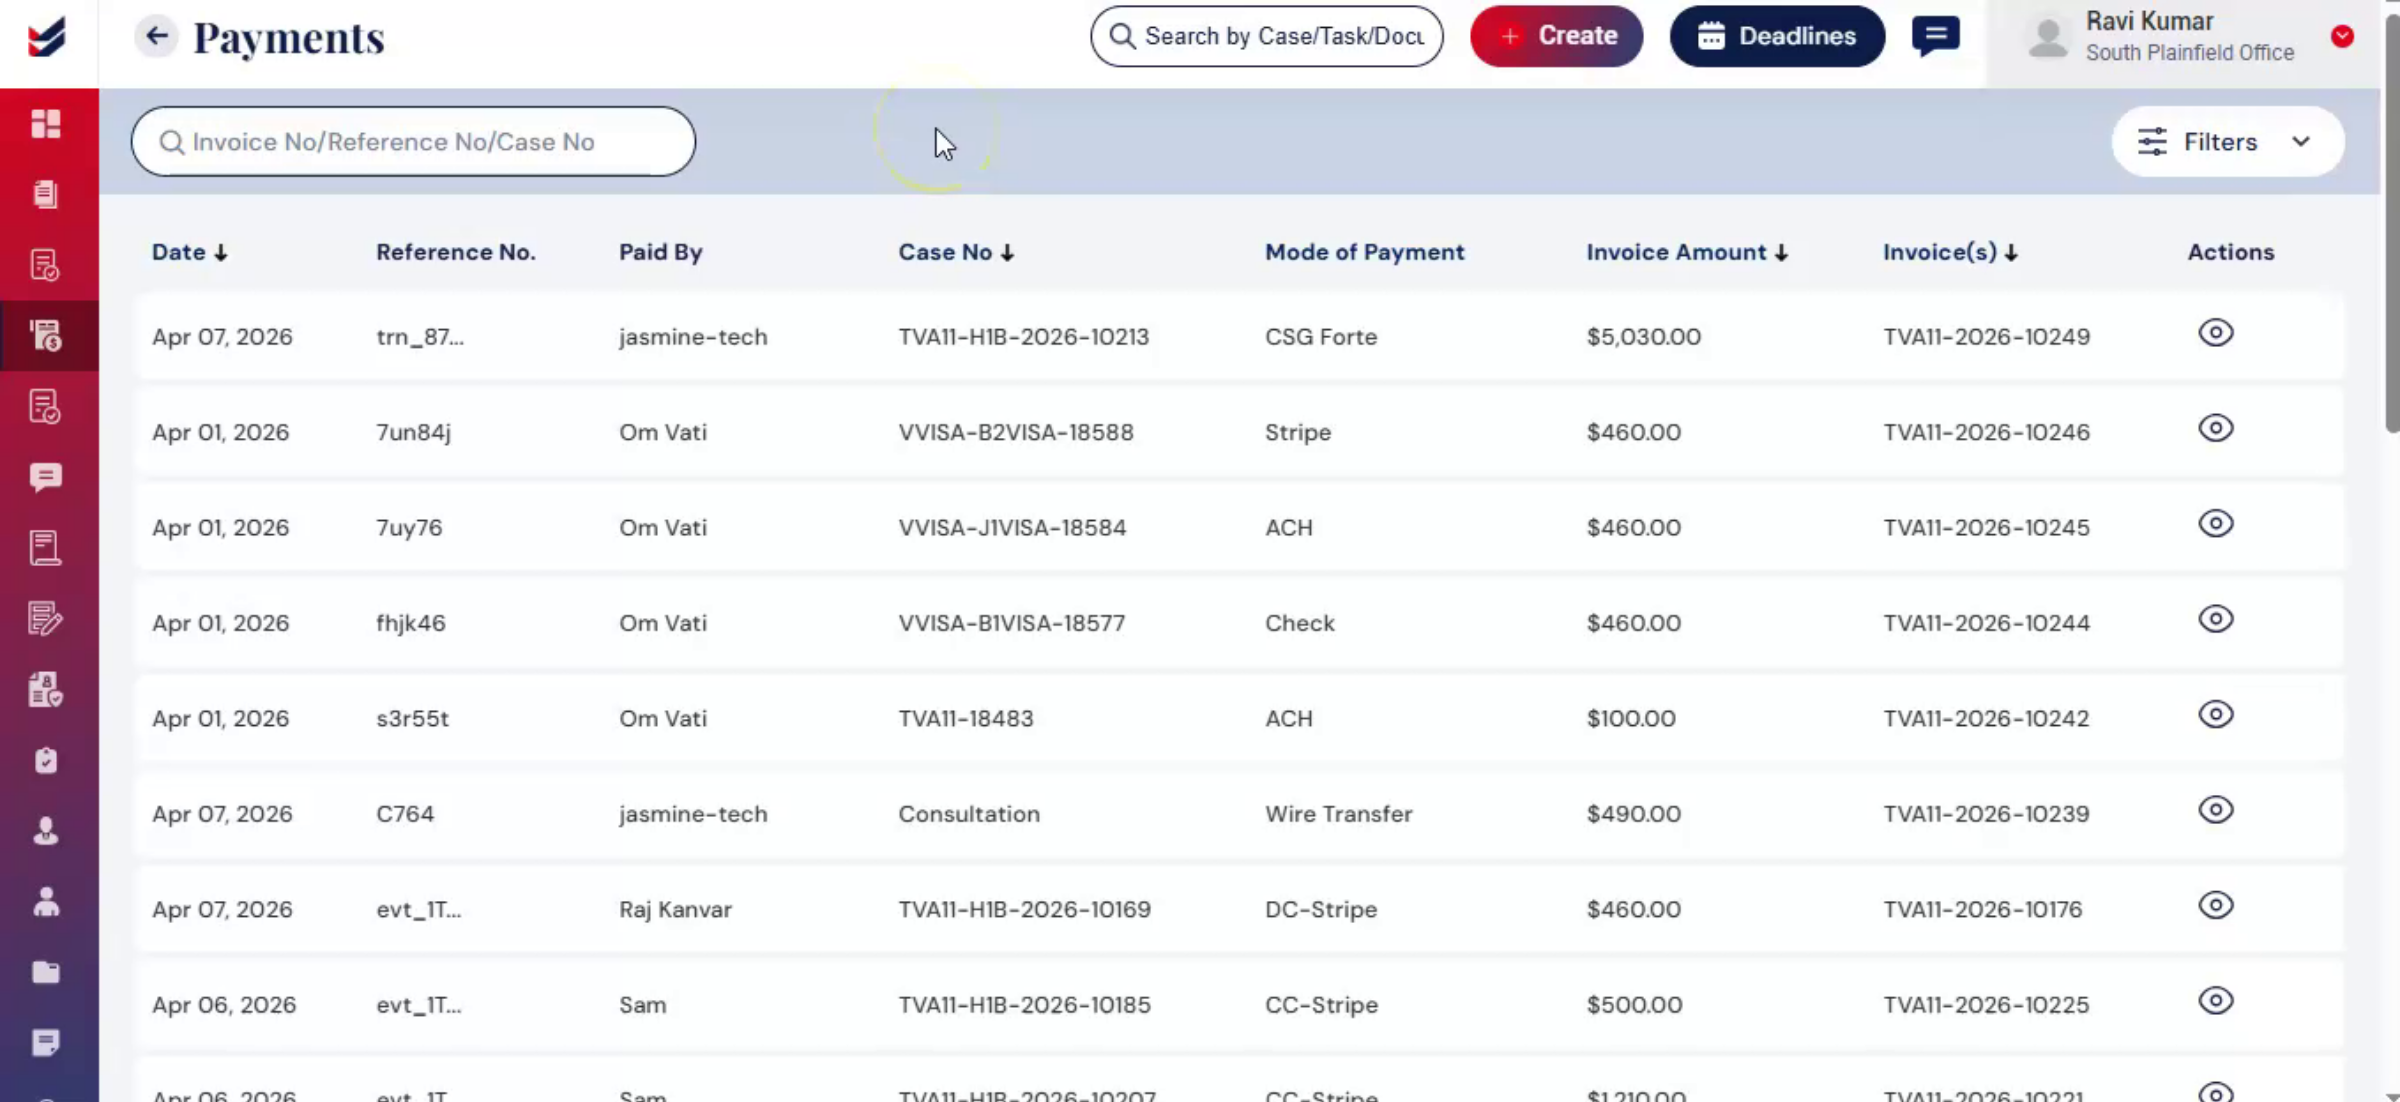
Payments – All the payments made by clients through the integrated payment gateway against an invoice or direct payments will be listed here. These payments can be just for invoice specific, for multiple invoices together or for some other offline activity. These can be directly linked to one or more invoices.
Together, these sections help you manage the entire invoice lifecycle in one place. Further details can be covered in the following sections.
2. Issuing an Invoice
 * click the image to view enlarged
Let’s start with issuing an invoice.
During the case processing, a paralegal, attorney, or any internal user can initiate an invoice to trigger billing.
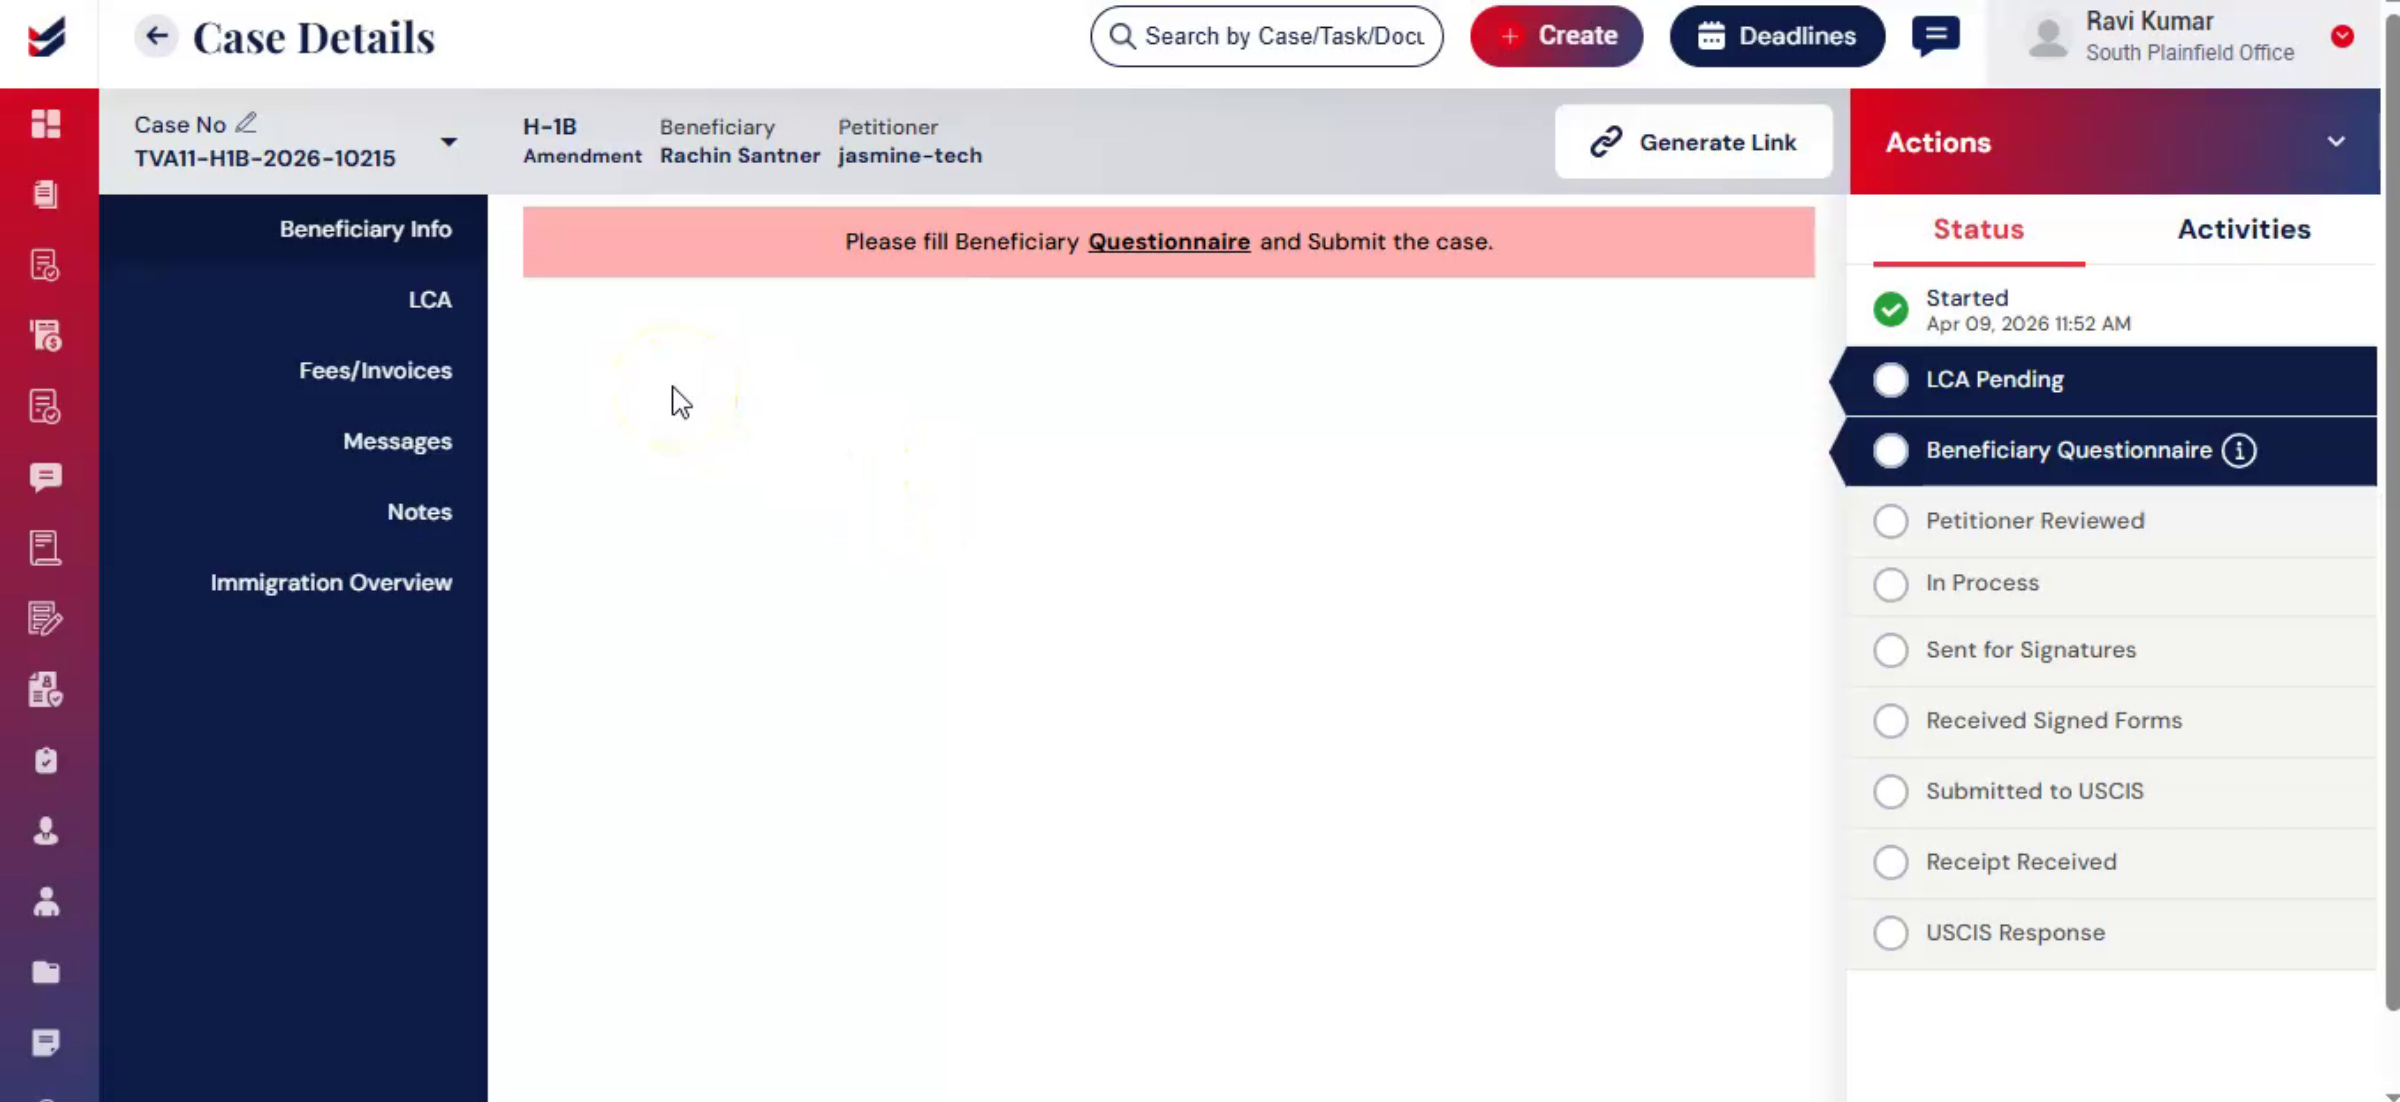
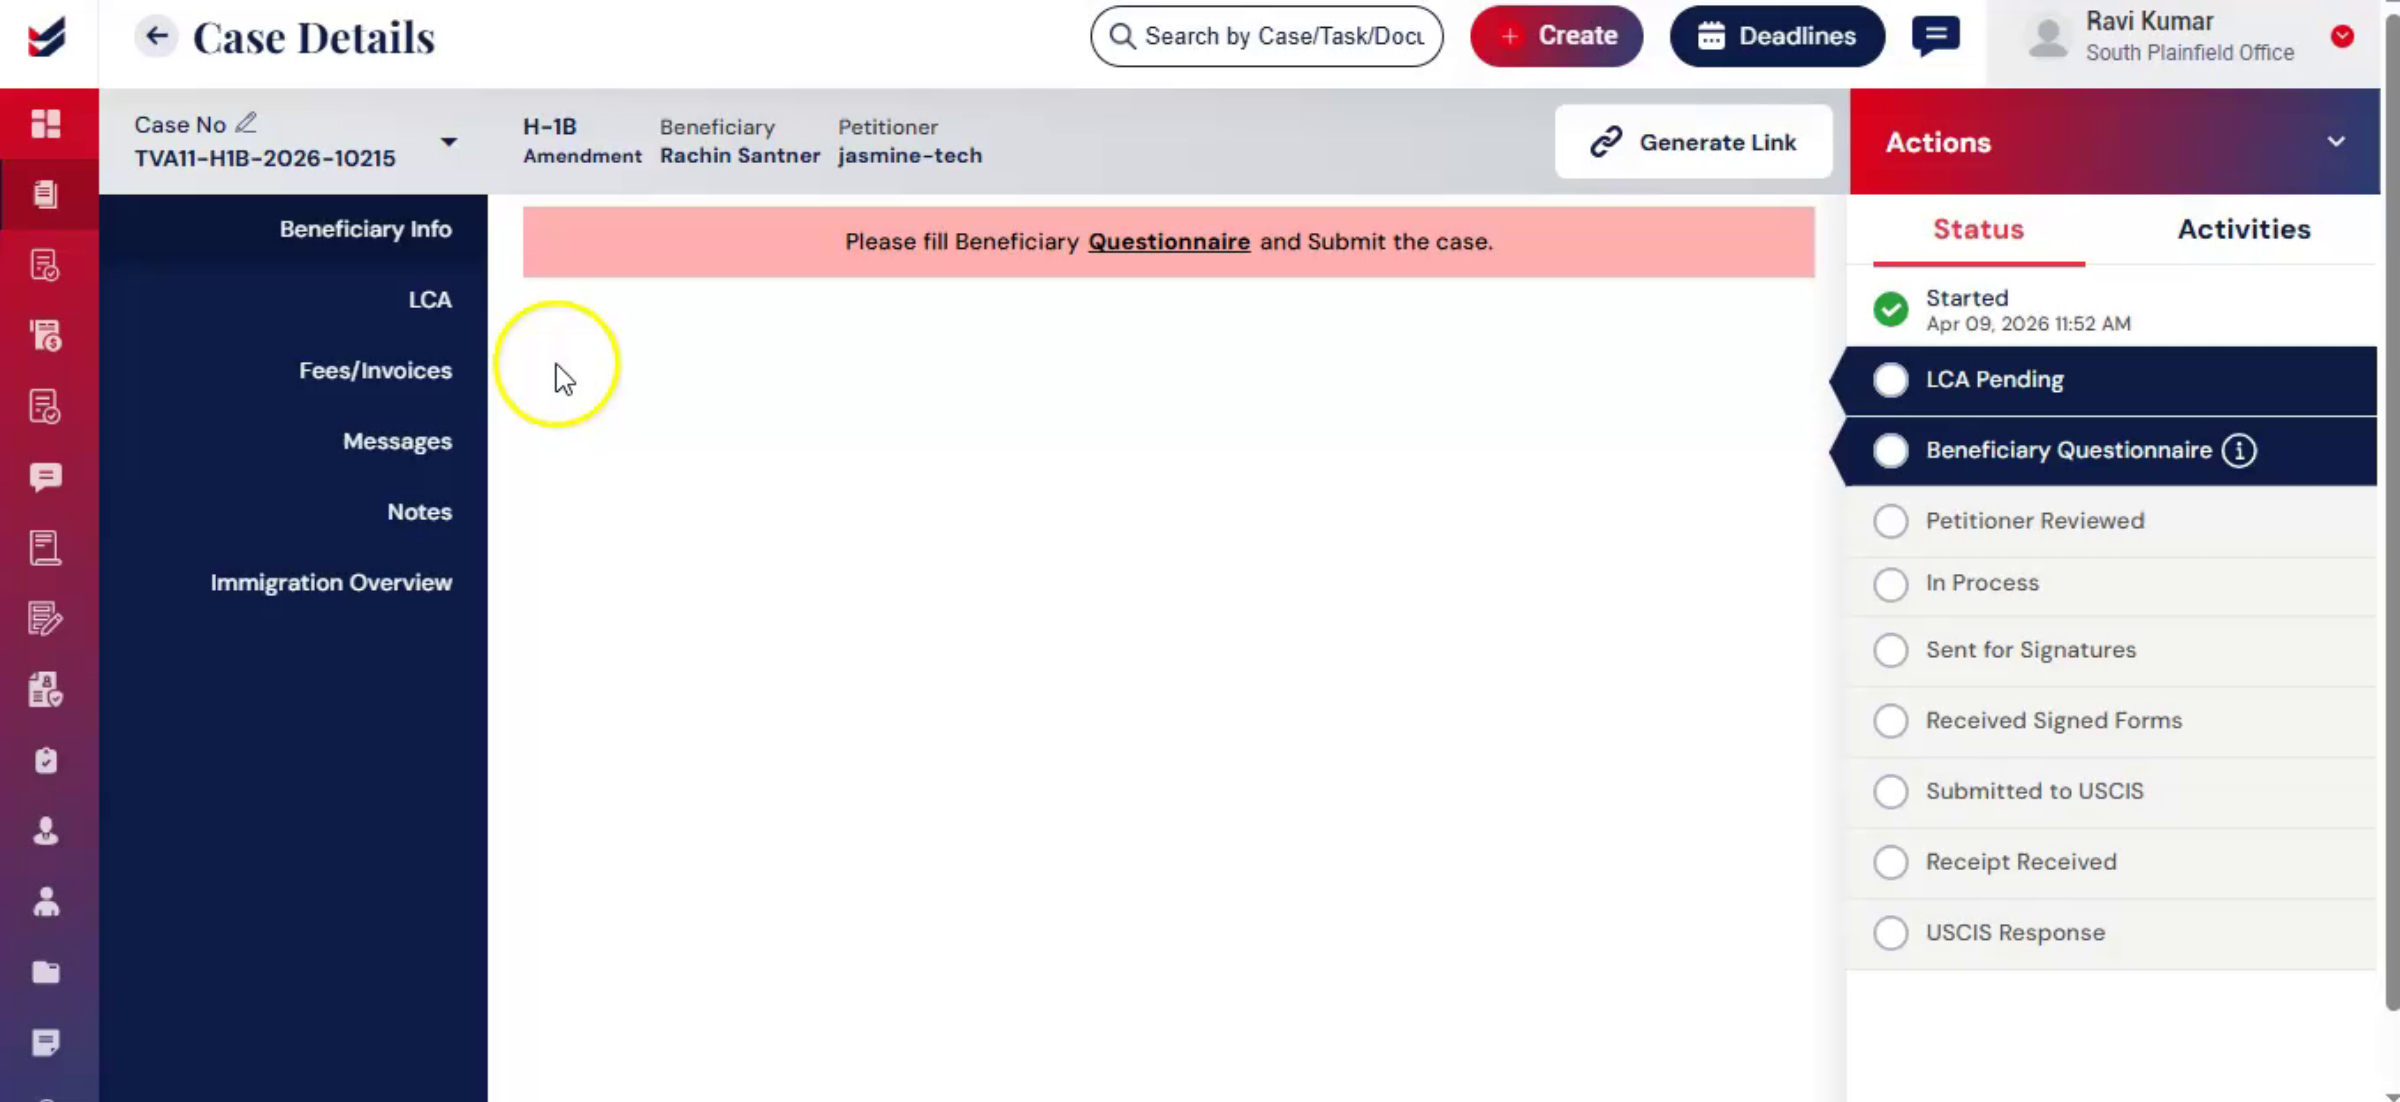
To issue invoice from Case Details page:
If the user knows the fee structure or would like to add all applicable fees to the invoice, they can Go to the Fees/Invoices section in the left sub menu.
Click the button ‘Add Fee’ and select all applicable fees.
When selected, the fee description and chargeable fee will be shown.
Please note that these Fee Descriptions and corresponding Fees are all configured under 'Settings. You may review the ‘Fee Management’ section separately.
The user can even change the fee applicable for this case as desired to override the default configuration.
On need basis, the user can also apply discounts or even add custom fees.
The user can either ‘Save the Fees’ or ‘Issue Invoice’.
Alternatively, the user can select Initiate Invoice from the Actions menu, if the user does not want to issue the invoice directly and assign this task to another responsible user.
Add comments and click Submit.
3. Initiate Invoice
 * click the image to view enlarged
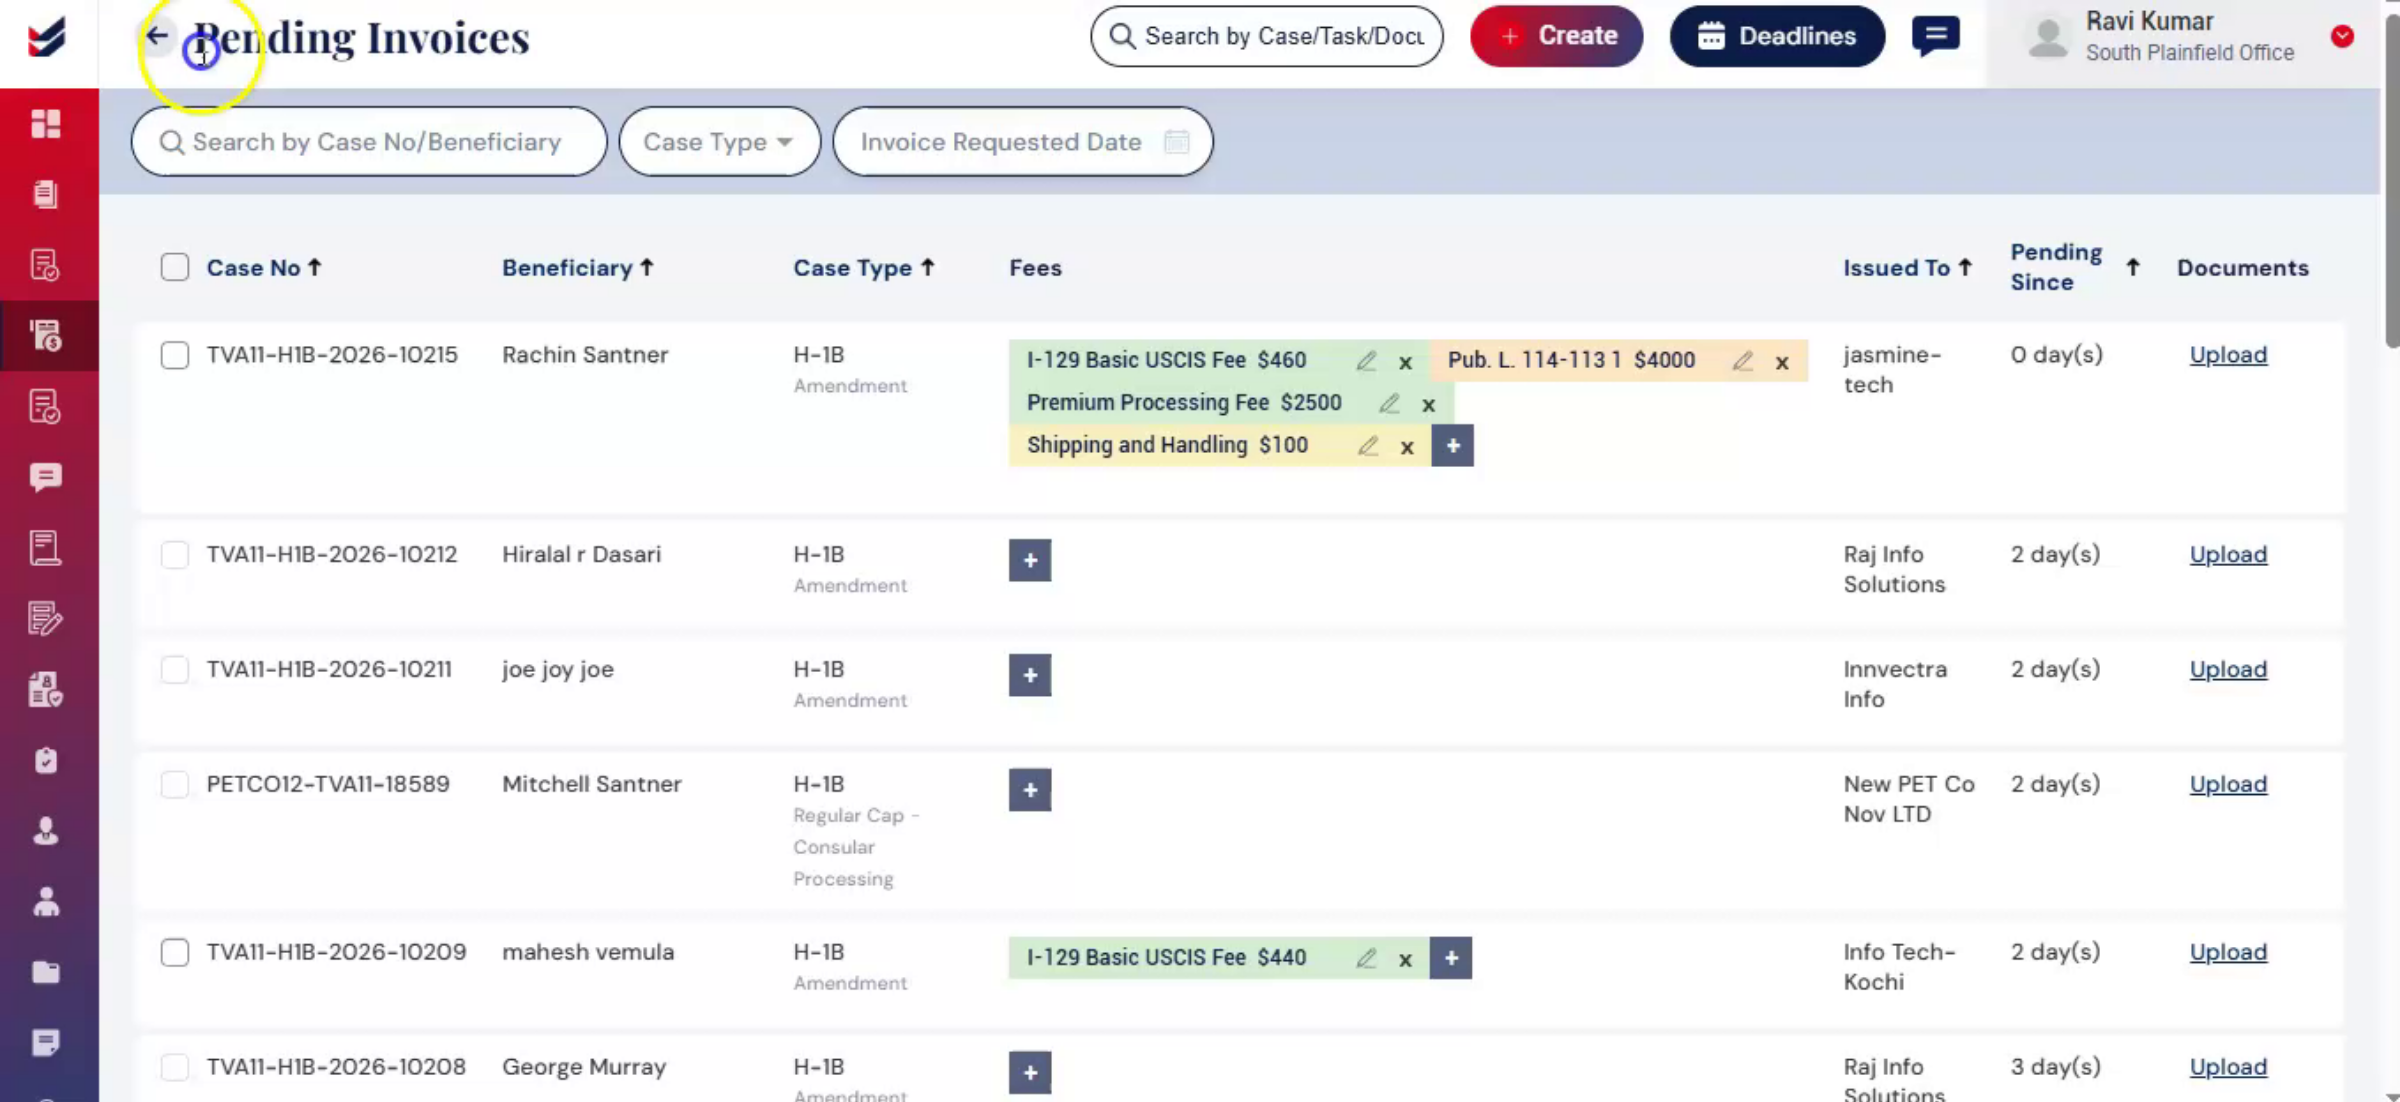
Once an invoice is initiated, it gets recorded in the Pending Invoices section.
A notification is sent to the accountant or assigned user as per workflow configuration.
Now, the accountant reviews and issues the invoice from ‘Pending Invoices’ section.
If the Fees are saved in the Case Details, they will appear as is in the ‘Pending Invoices’ section. However, these are all editable before issuing the invoice.
If the invoice is issued directly,
The invoice will be sent to the clients directly.
The invoice is available under Invoices section. The same invoice is accessible in the Case Details, under Fees/Invoices section.
Note that invoices are accessible only to the users who has permissions and Clients who are responsible to pay them. Invoices are not accessible to Beneficiaries in general.
4. Create Invoice
 * click the image to view enlarged
One can also create invoices directly.
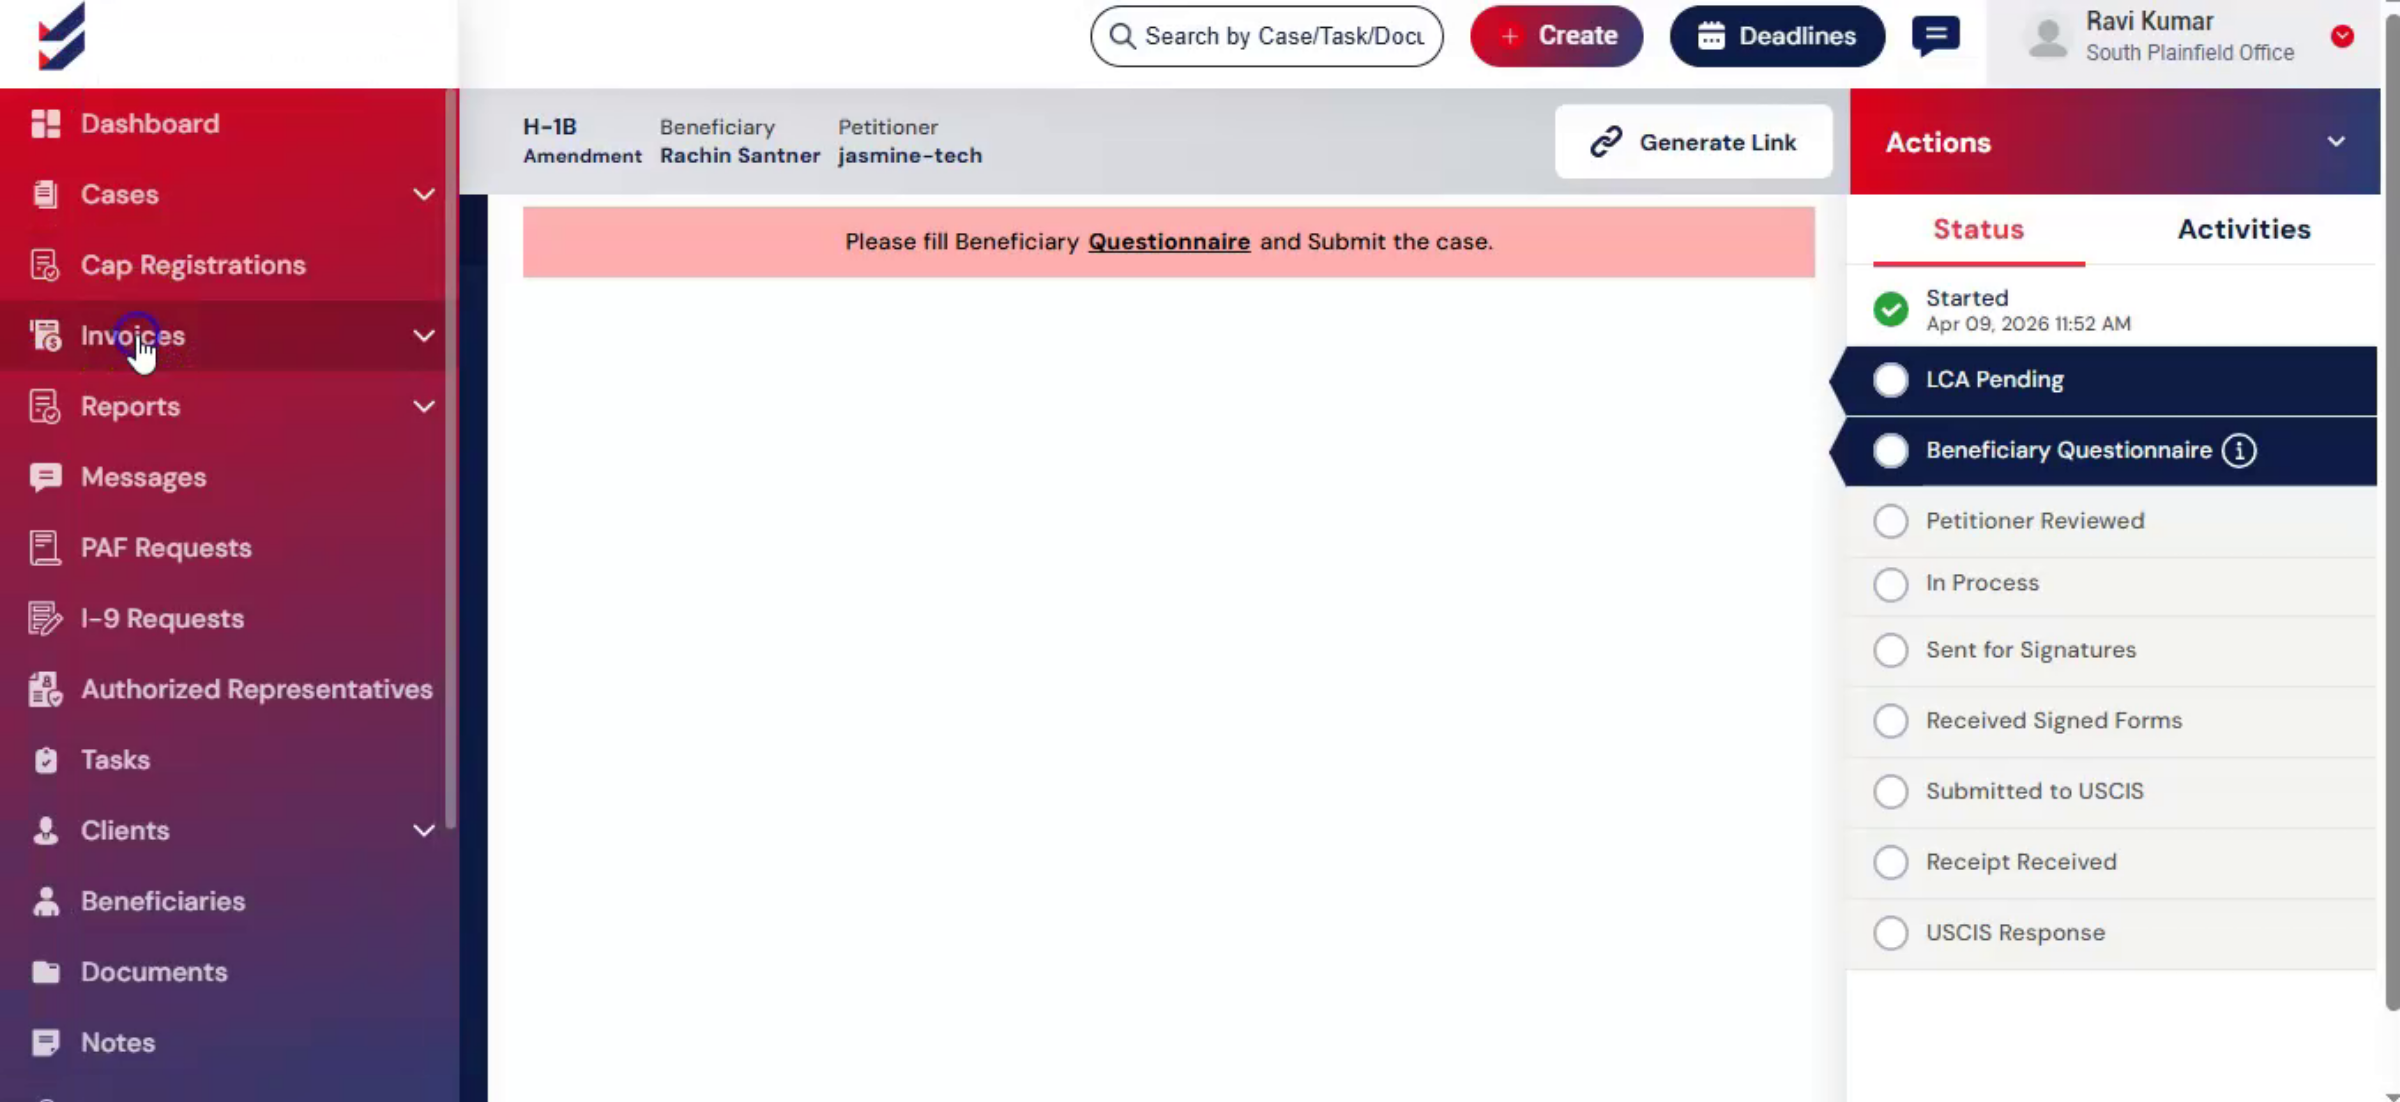
Go to the Invoices tab and select Create Invoices.
Search for the case using filters, then select the required case.
Add fees, edit amounts, and apply discounts.
Click Issue Invoice.
“Using the Custom Invoices option, one can create invoices for consultations or external services by selecting a client and adding fees.”
All created invoices, including custom invoices, are stored in the Invoices section.
5. Managing Payments
 * click the image to view enlarged
Once an invoice is issued, payment handling is seamless. Make sure the payment gateway integrated into ImmiBox.
The client receives an email with a Pay Now or a link option. Clicking on the 'Pay Now’ button will navigate to the payment gateway page that will help clients to process the payments in either Credit Card, Debit Card or ACH.
When payment is completed, it’s automatically recorded in the system.
For offline payments, one can record them manually in two ways:
6. From Case Detail Page
 * click the image to view enlarged
From case Details page.
Go to the fees invoices section.
Click details to open the case payment Details page.
On the right hand side, click payment receipt.
Enter the payment information, and click submit.
7. From Invoices Section
 * click the image to view enlarged
From Invoices Section:
Go to the Invoices page.
Select the required invoice from the list.
Open Invoice Details page.
Click Payment Receipt.
Enter the details and click Submit.
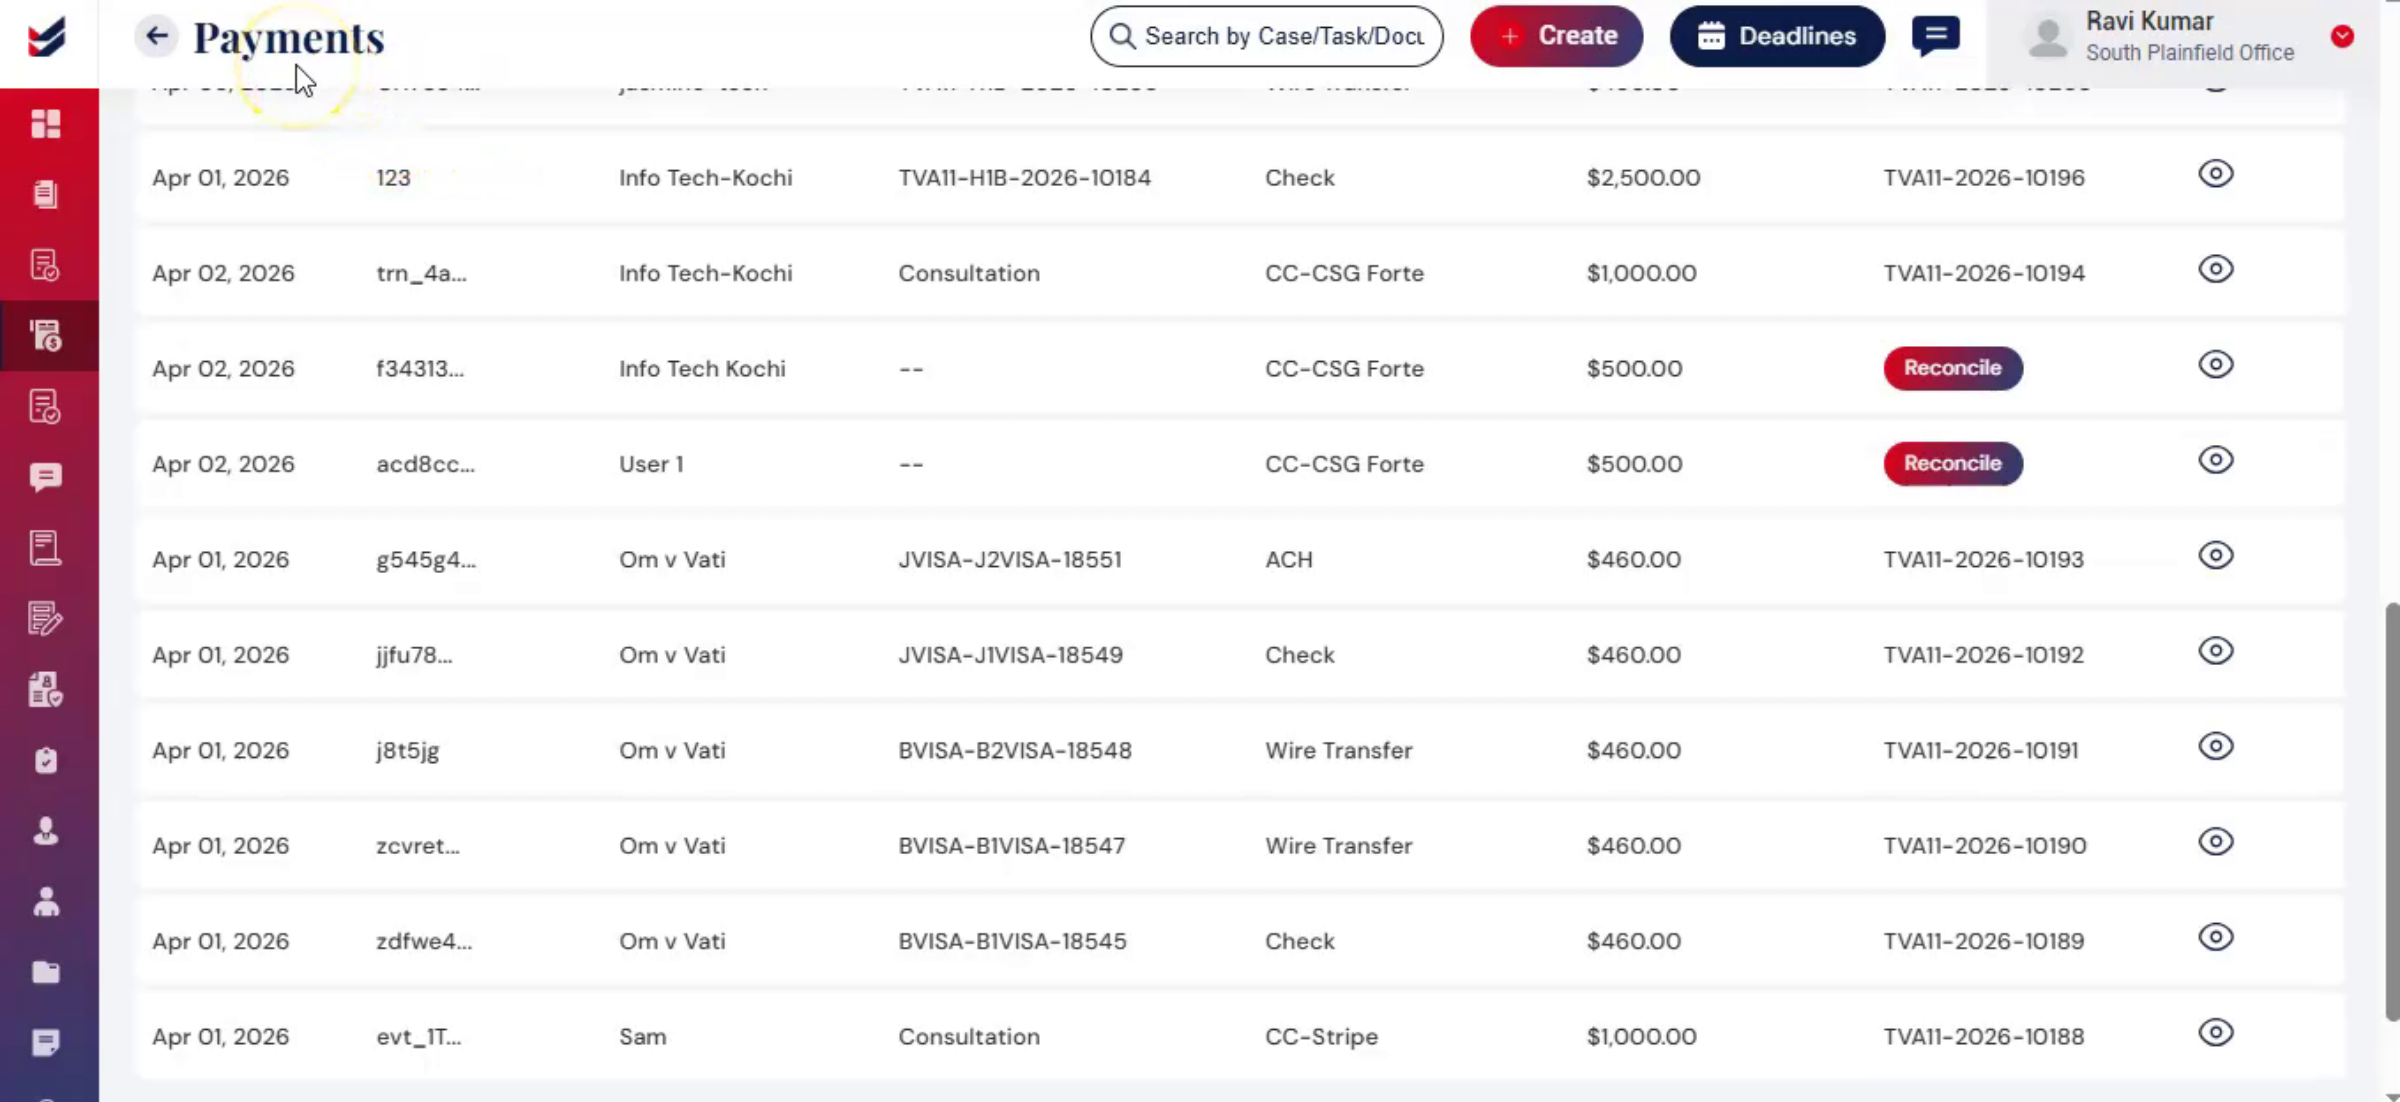
8. Reconcile Payments
 * click the image to view enlarged
If a client makes a combined payment for multiple invoices, it may not be automatically allocated and expect the Reconciliation done manually.
Here, one can manually assign certain Invoices to the Payment received to match the amount received and receivable.
Go to the Payments page,
Select the payments with ‘Reconcile’ button.
On the Payment Details page, click Adjust Payment and assign the amount to the relevant Invoices as needed.
This ensures that all transactions are accurate and properly tracked.
If a payment is received directly from the client, normally the system will identify and match the client automatically, if that client is already available in the system.
9. Client Review the Payment
 * click the image to view enlarged
After the law firm issues an invoice, the Client receives an email with Invoice as an attachment.
The email includes a Pay Now button and a downloadable invoice, which also has a payment link.
Clicking Pay Now redirects the petitioner to the Payment Gateway page in ImmiBox, where they can select a payment method, enter their details, and complete the payment.
Once successful, a confirmation email is sent, and the payment is automatically reflected in the Payments section.
Please note that the ‘Pay Now’ button and Payment Link will be available only if the Payment Gateway is fully integrated within ImmiBox. This is being handled by third party and PCI DSS compliant provider, it is fully reliable and secure.
10. Conclusion
 * click the image to view enlarged
With ImmiBox, you can manage invoicing from start to finish — initiation, issuance, and payment tracking, reconciliation — all in one place.

