

CAP Registration - Petitioner Using ImmiBox
Overview
Welcome! This video demonstrates the complete process of CAP registration using ImmiBox, highlighting key steps and features for accuracy and compliance. It covers beneficiary data management, wage validation, and legal review to ensure a smooth registration experience.
1. Introduction To CAP Registration
 * click the image to view enlarged
In this video, we'll walk you through how to complete CAP registration using ImmBox. CAP registration is a structured, time-sensitive process.
2. CAP Registration Requirements
 * click the image to view enlarged
It requires accurate beneficiary information, proper wage validation, law firm oversight, and USCIS tracking.
3. ImmiBox Features Overview
 * click the image to view enlarged
ImmiBox is designed to guide users through each step with built-in checks, automation, and communication tools, making the process efficient, compliant, and transparent.
4. CAP Registration Options
 * click the image to view enlarged
ImmiBox allows CAP registration to be completed either by the law firm or directly by the petitioner, while keeping data organized, auditable, and secure.
5. Starting CAP Registration
 * click the image to view enlarged
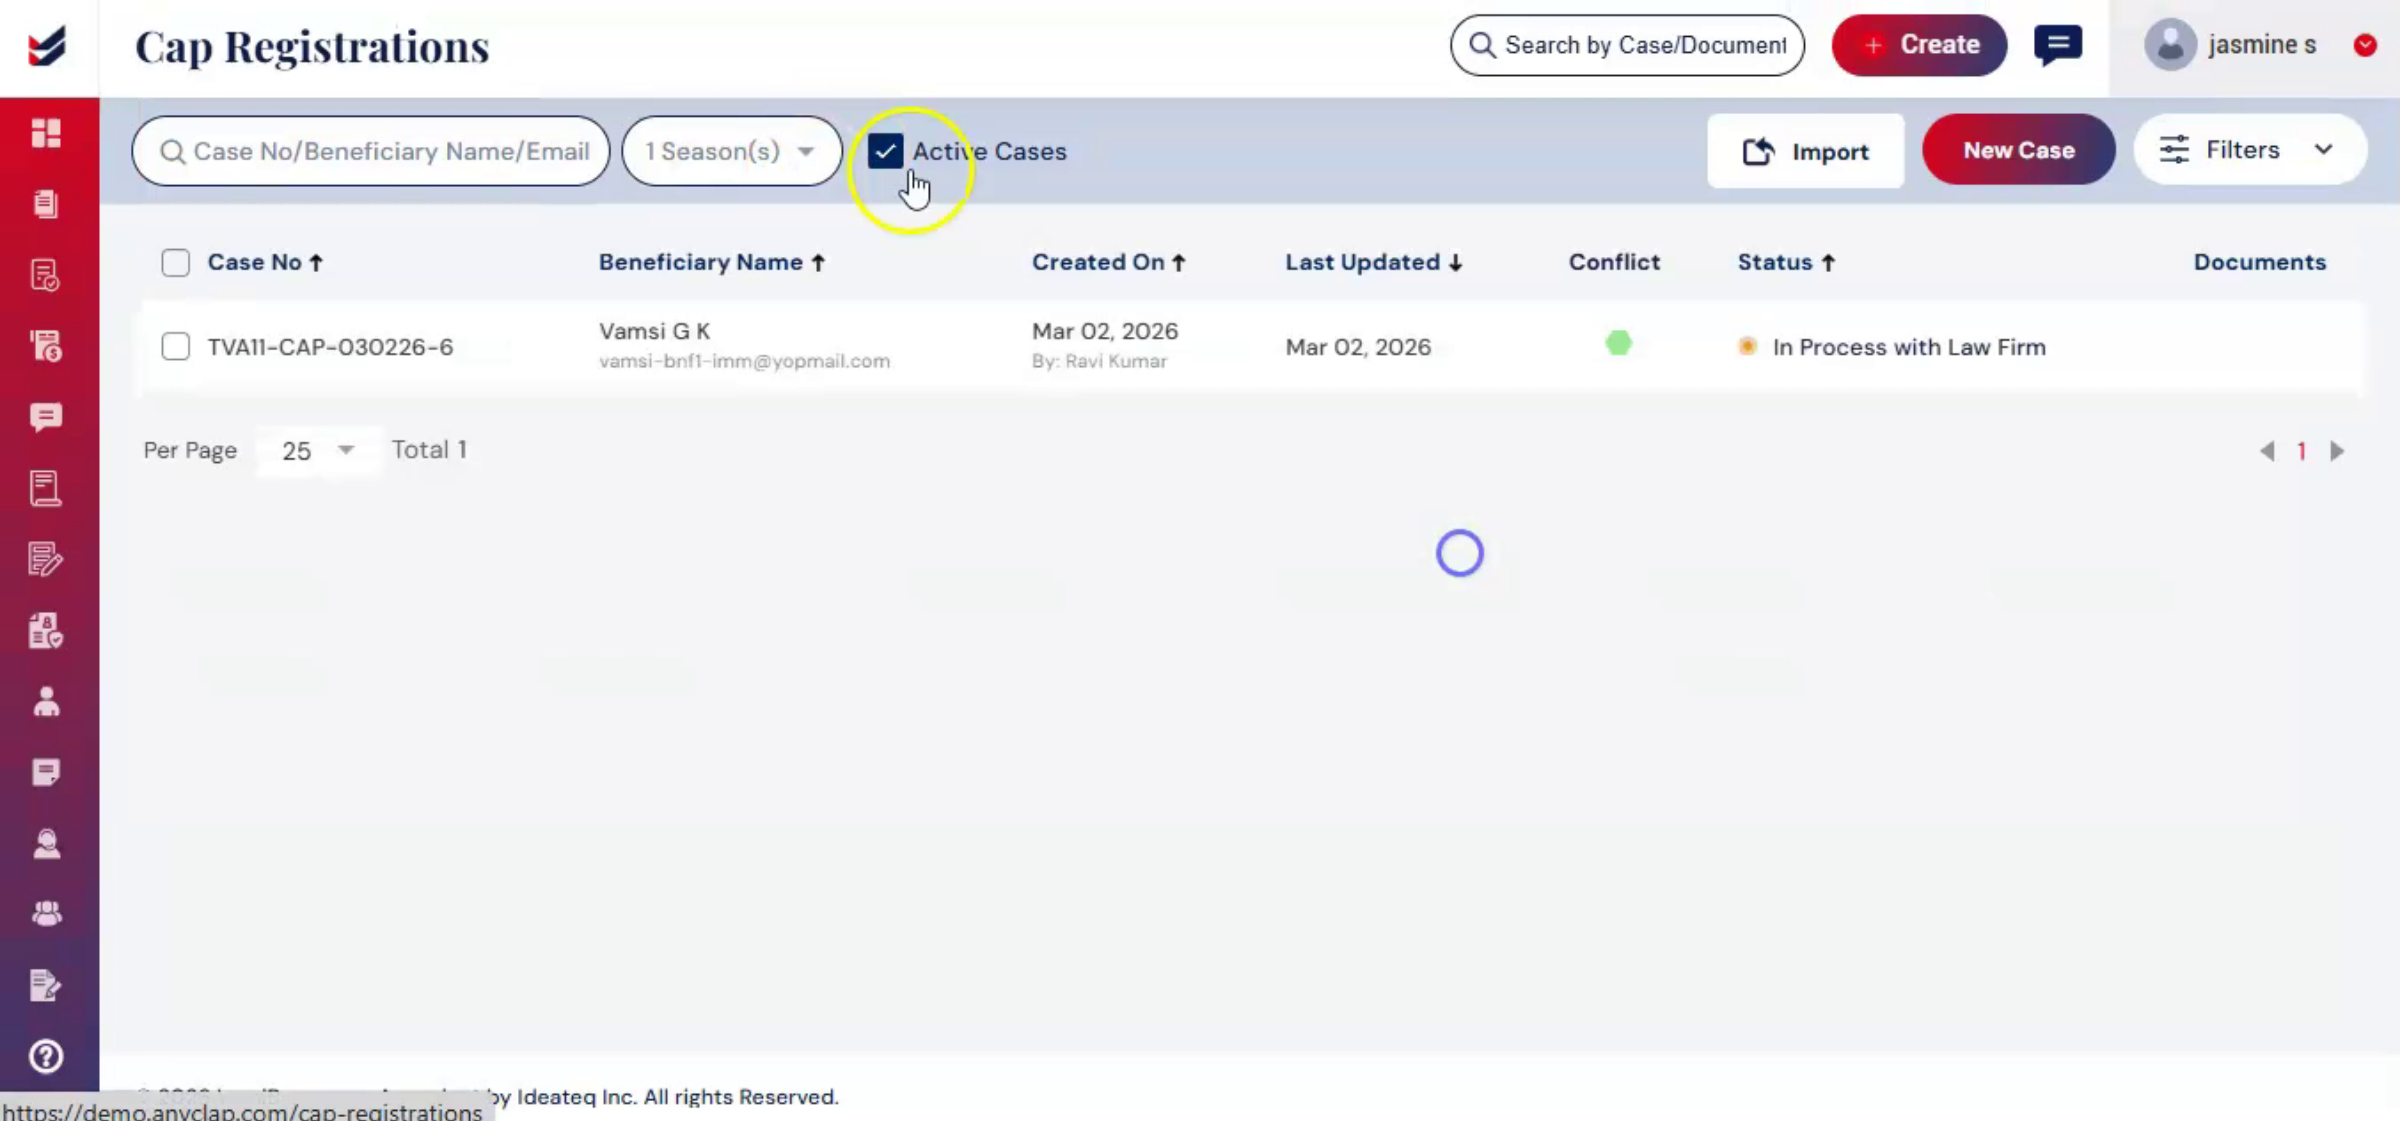
To create a cap registration from a petitioner profile from the dashboard. Navigate to the cap, registration table.
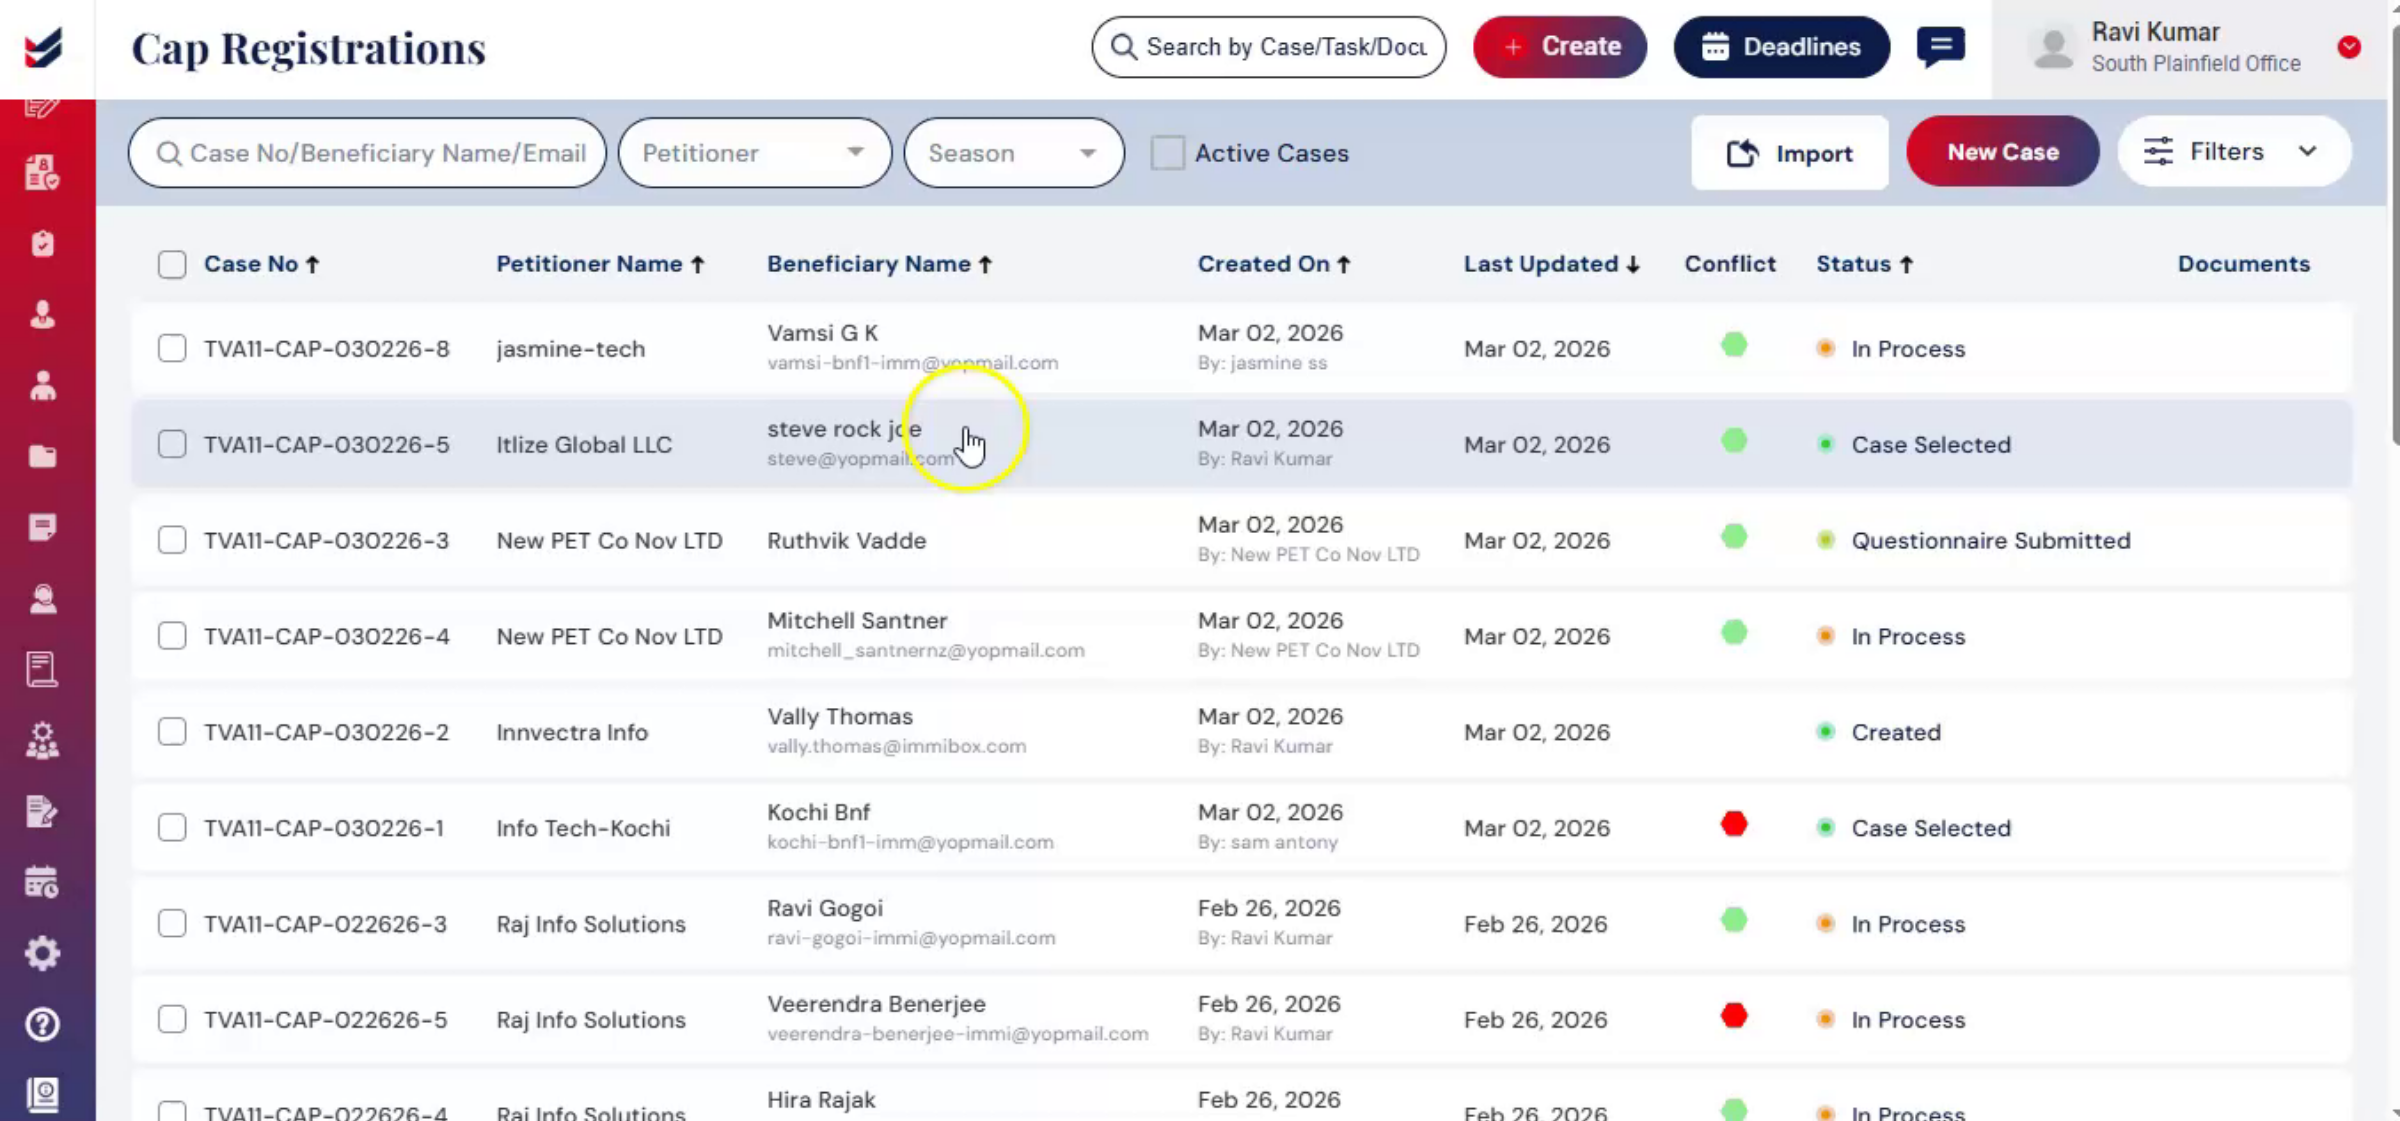
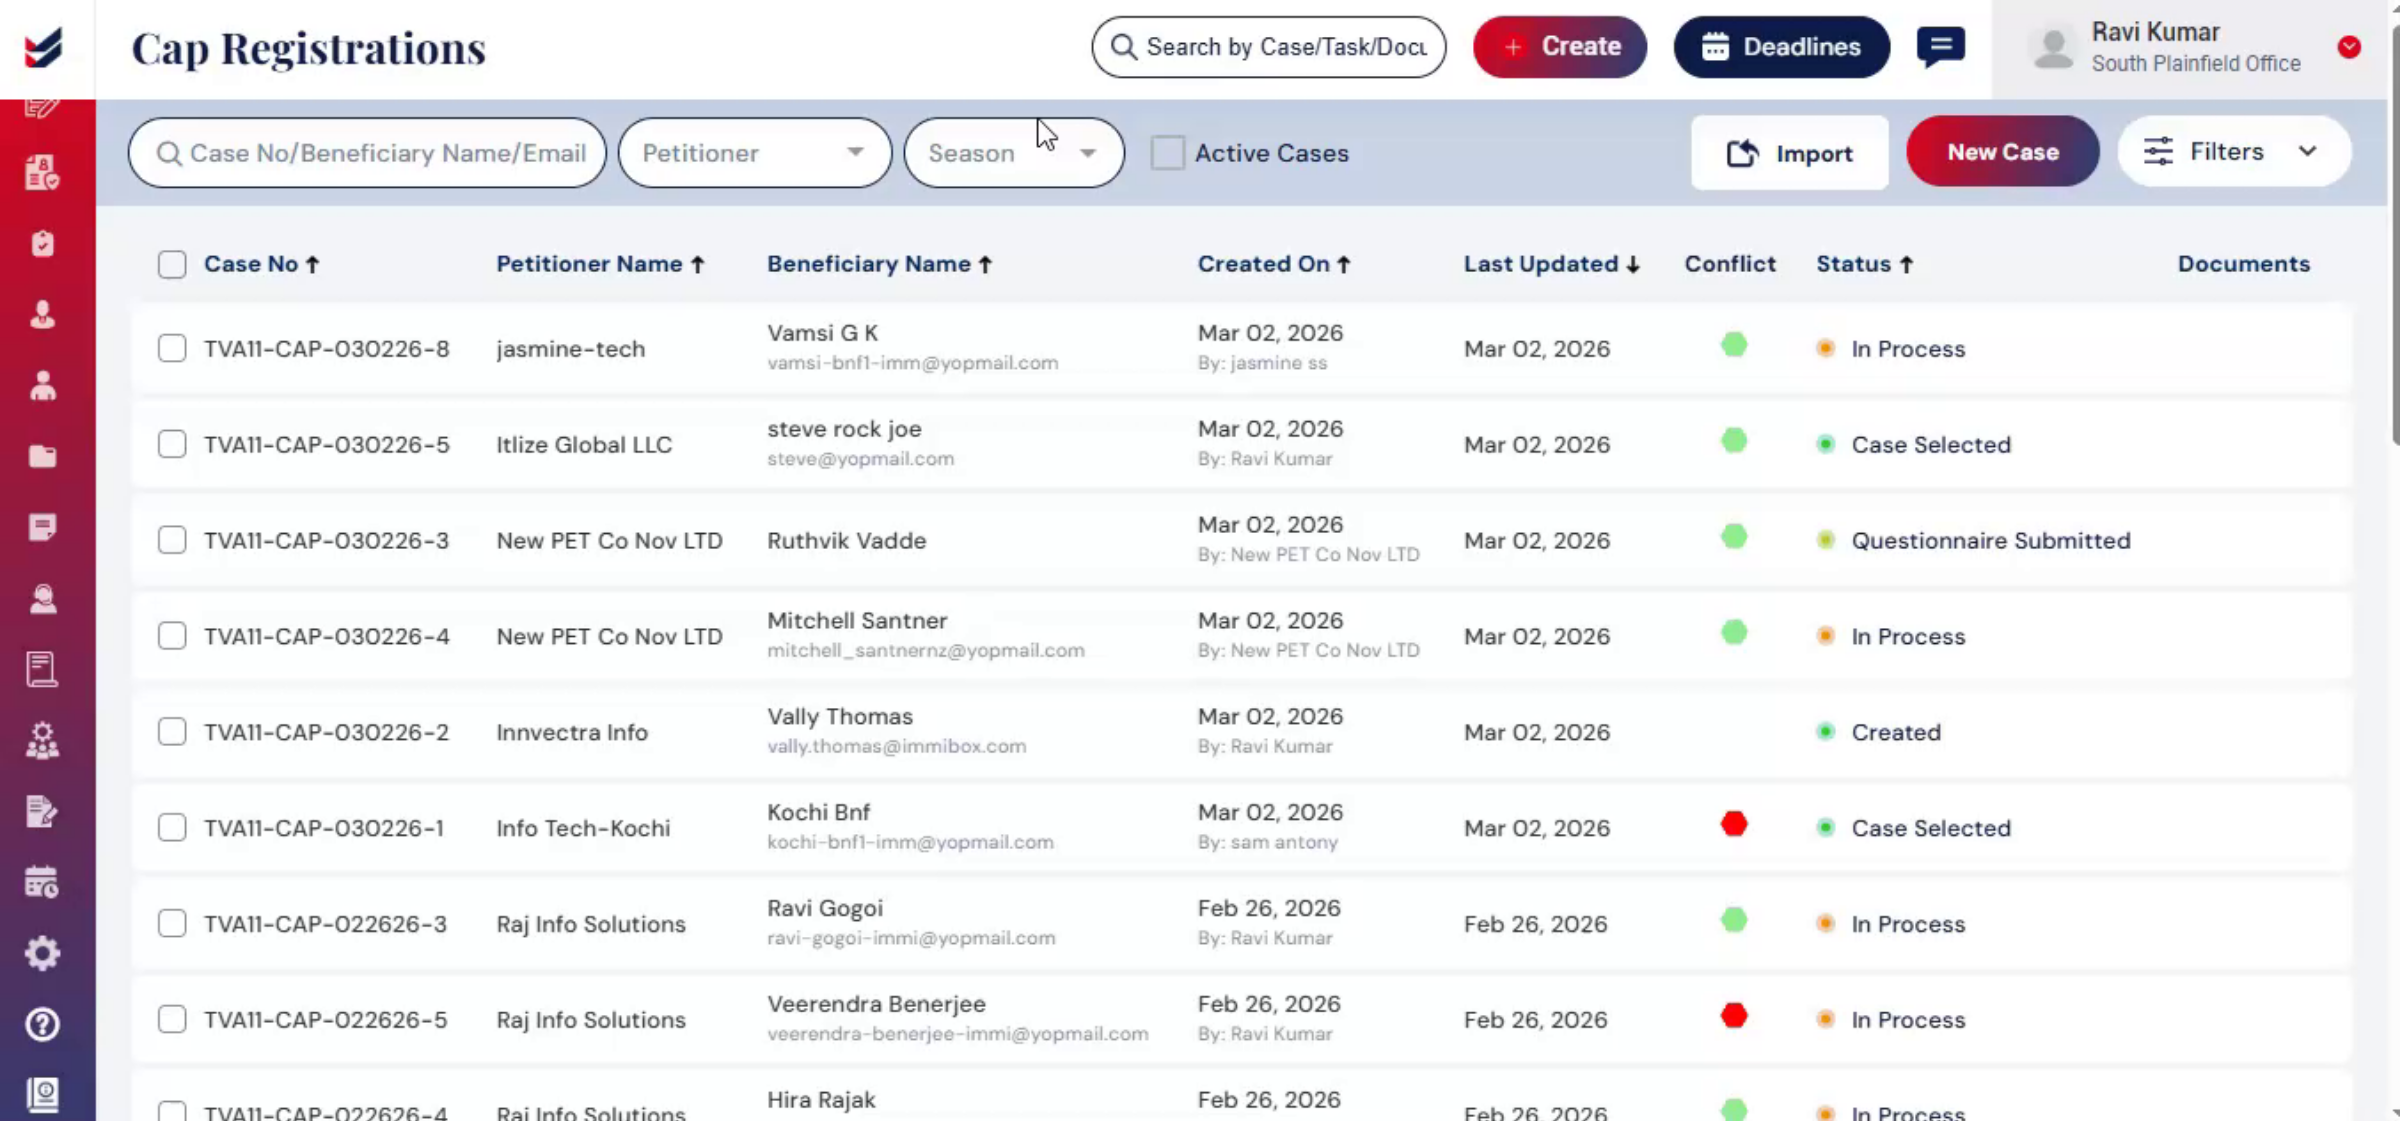
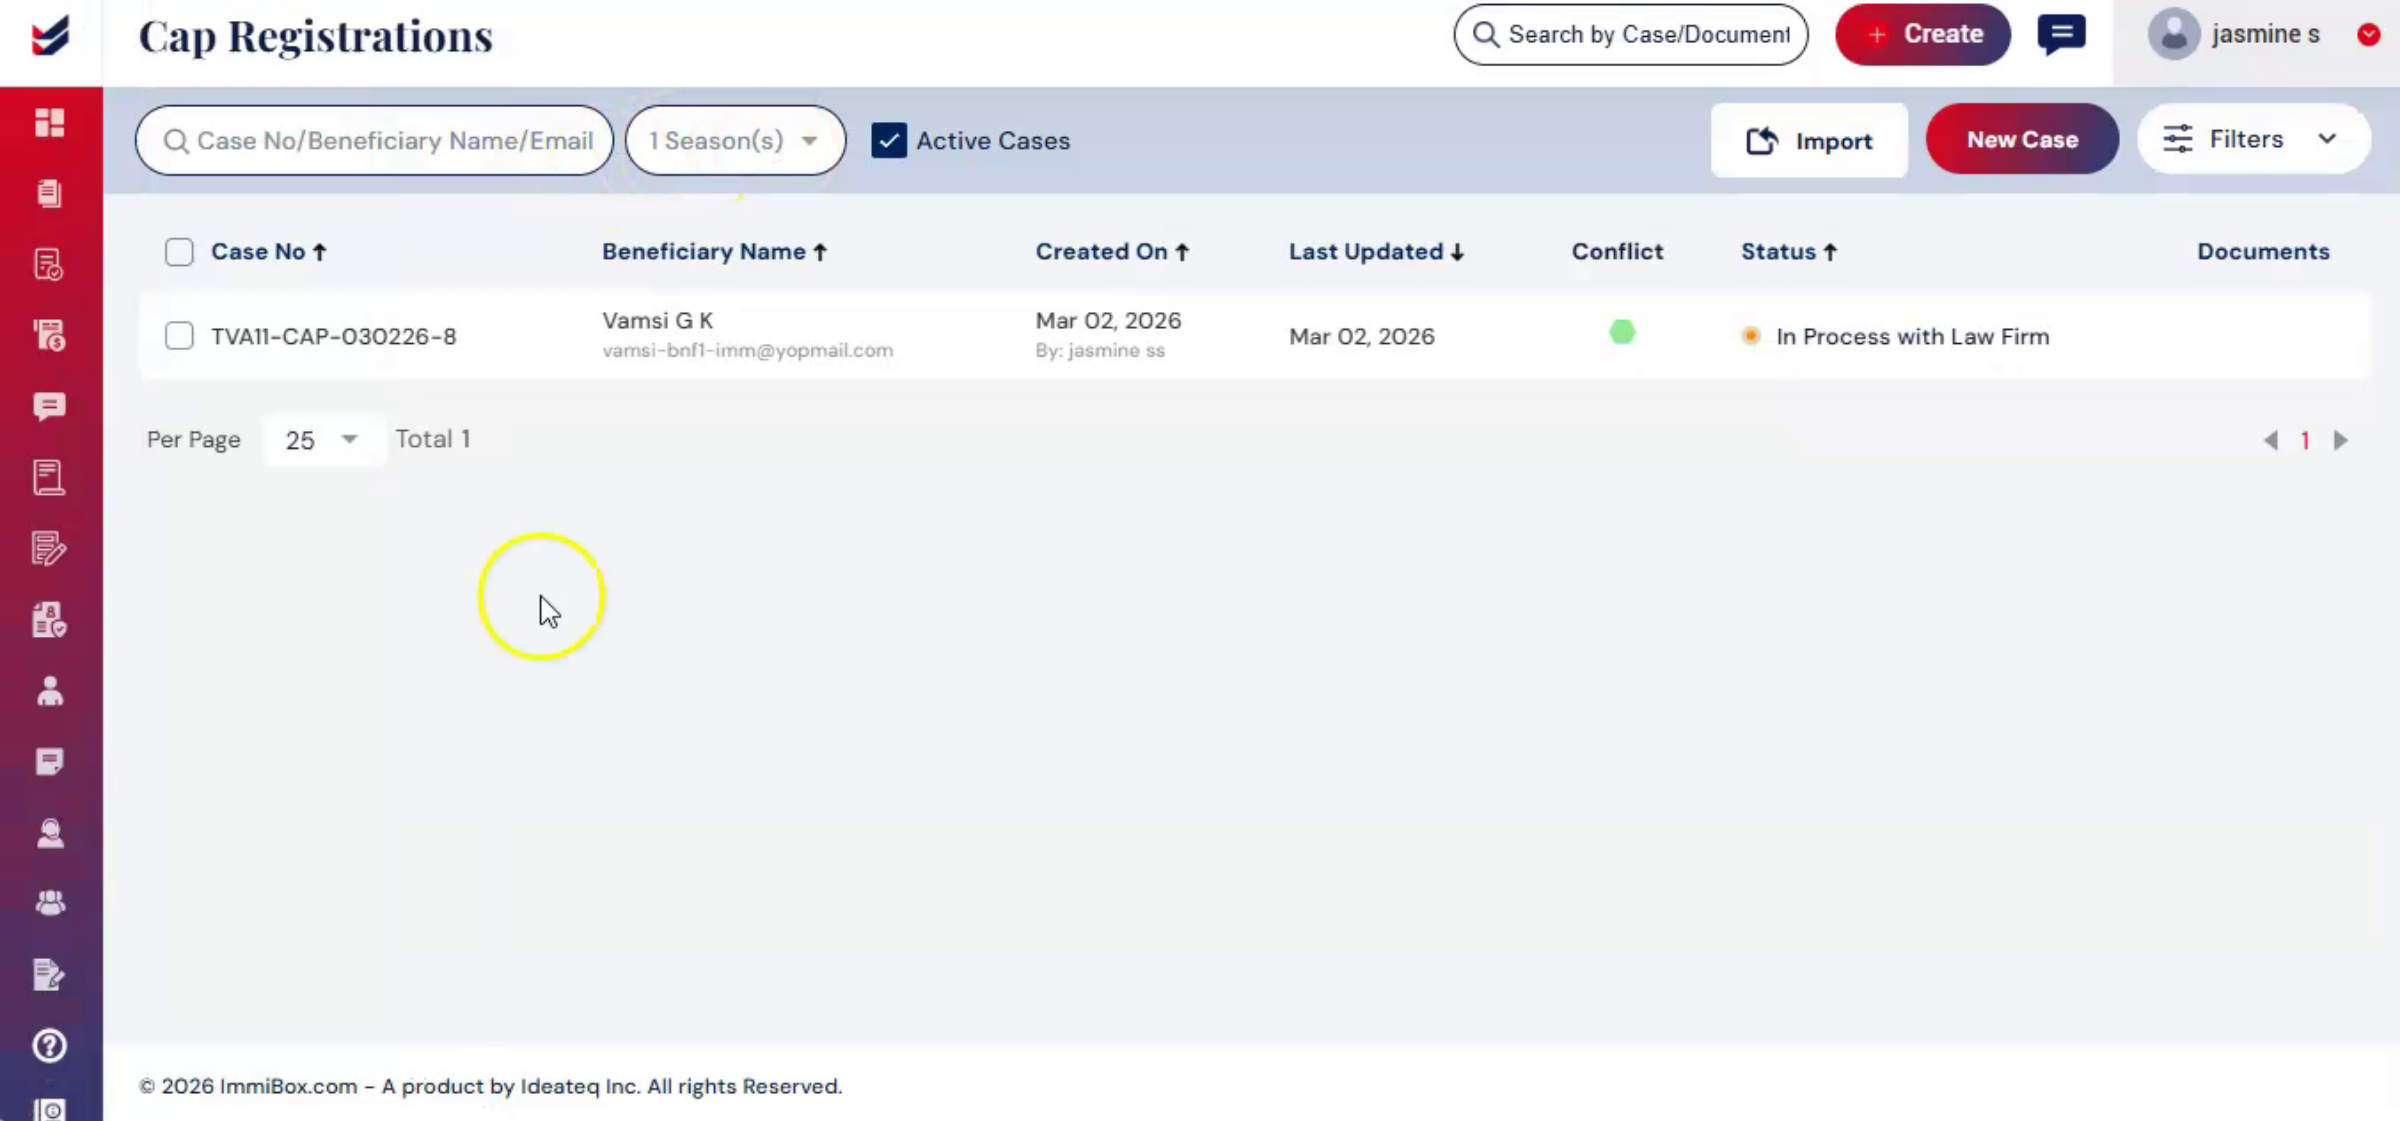
6. Managing Cases Options
 * click the image to view enlarged
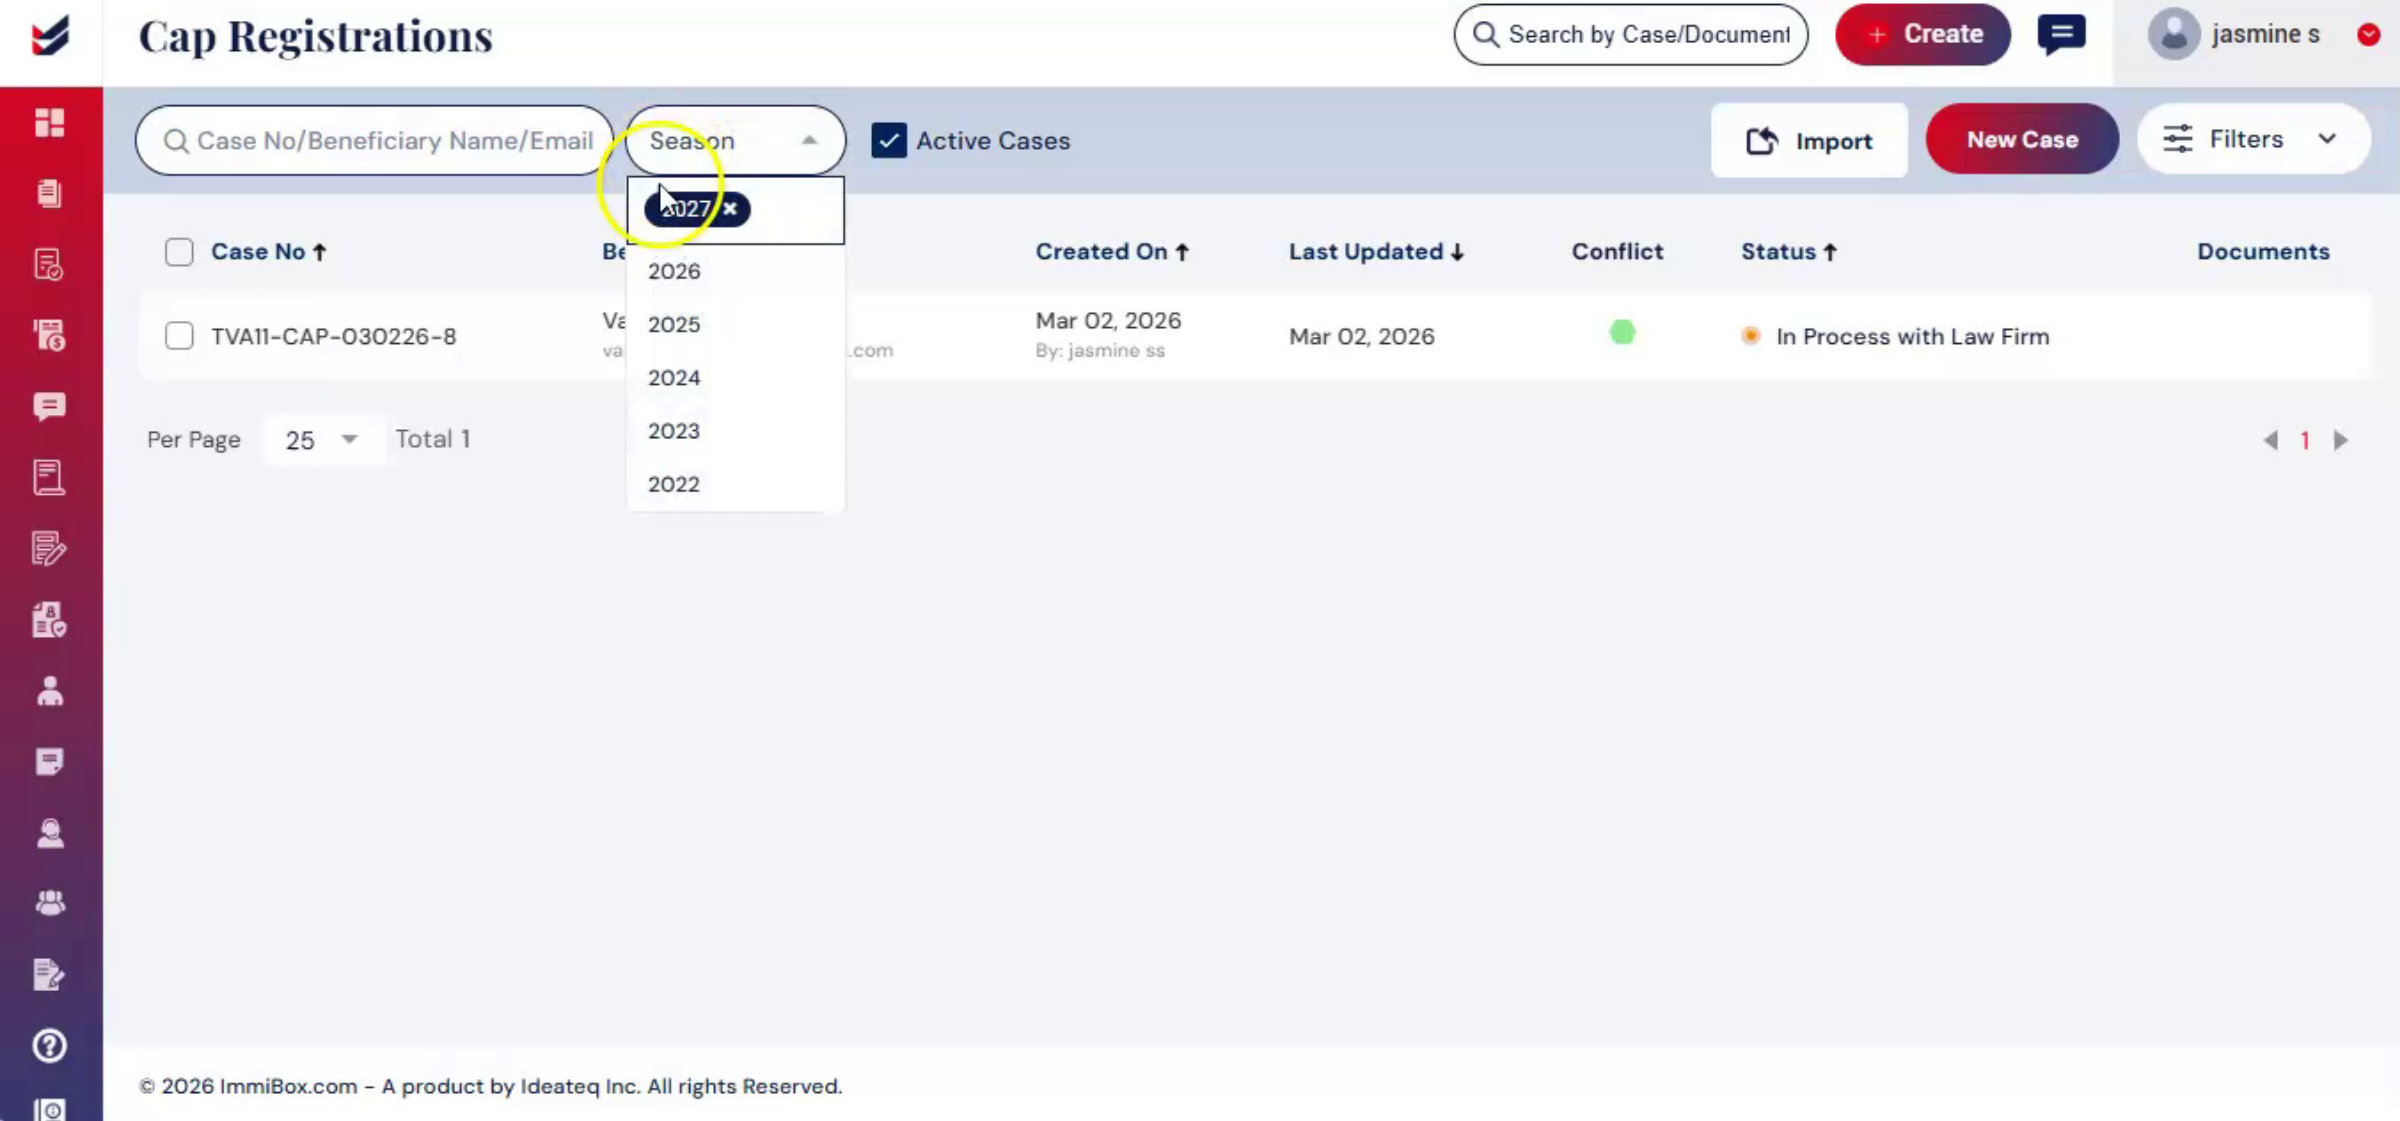
In the CAP Registration section, you will see options to manage cases, including Search bar to locate cases by Case Number, Beneficiary Name, or Email. Season filter is Select the registration year.
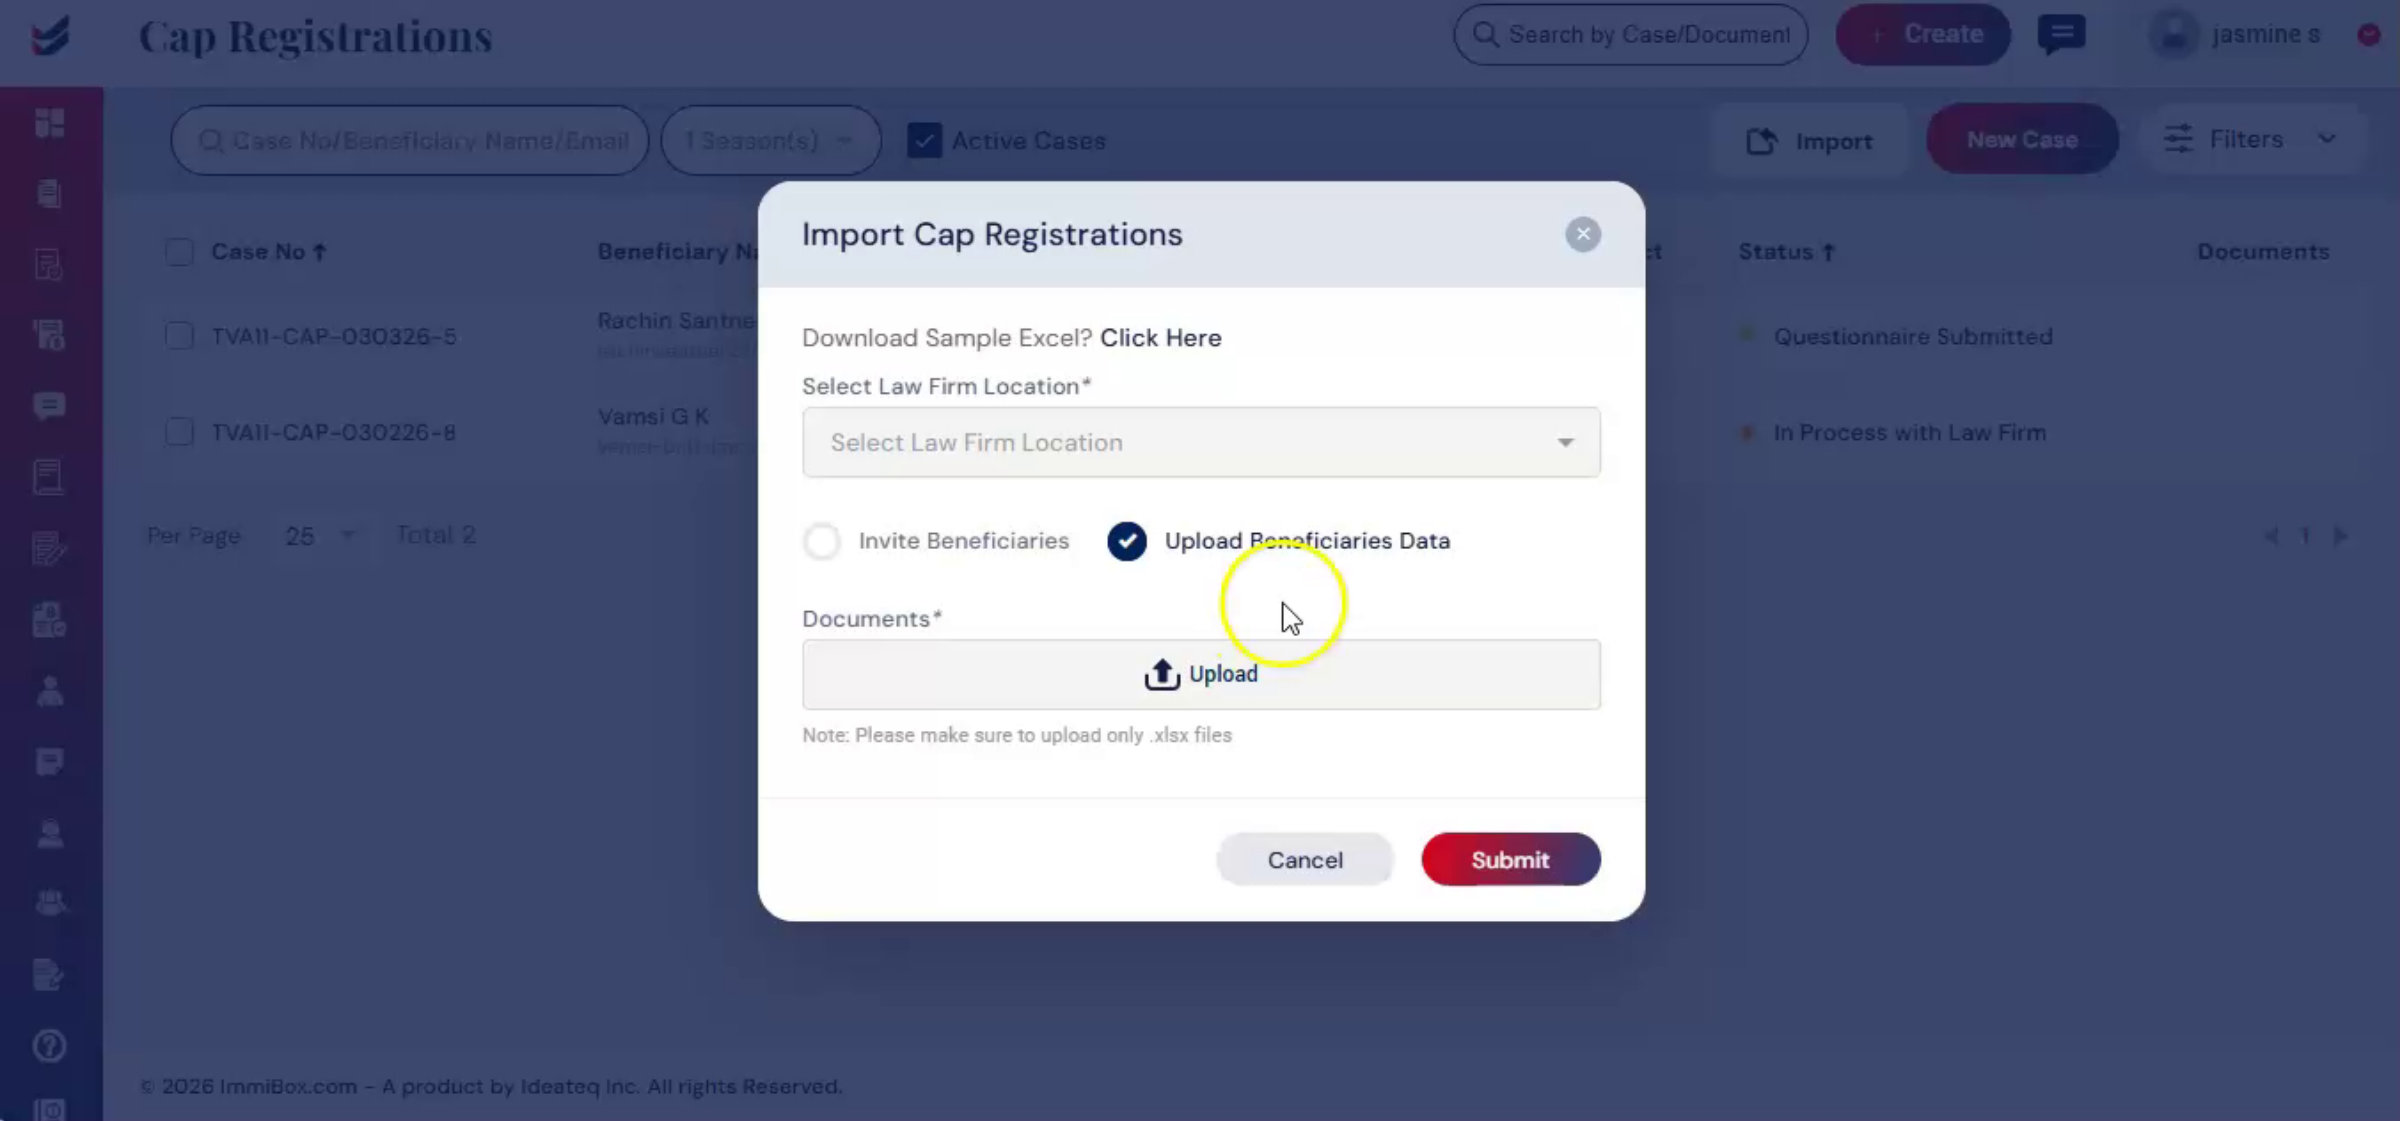
7. Importing Beneficiary Data
 * click the image to view enlarged
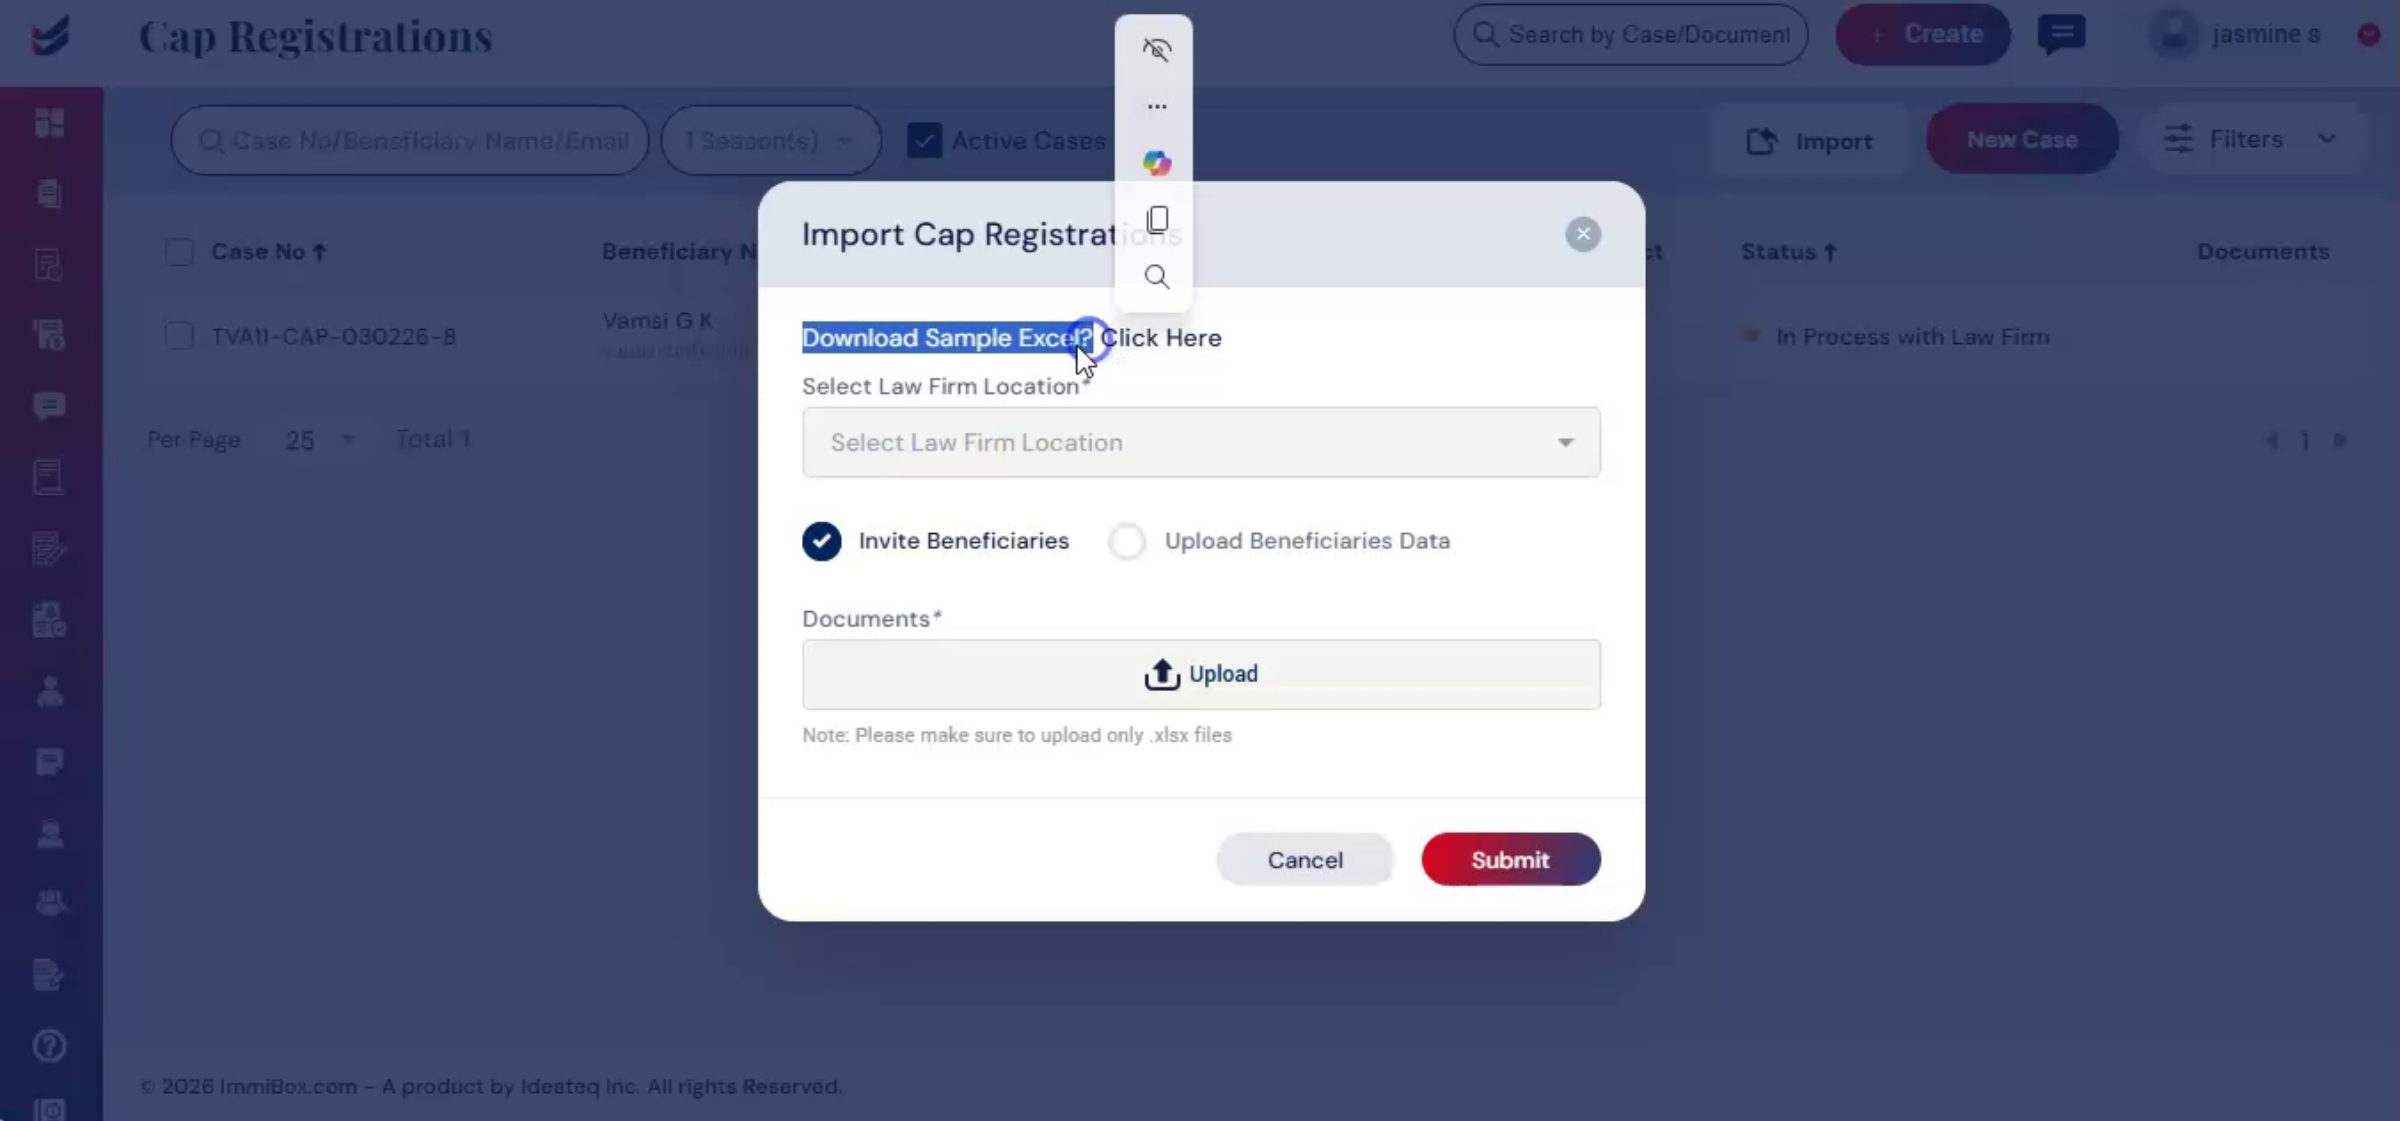
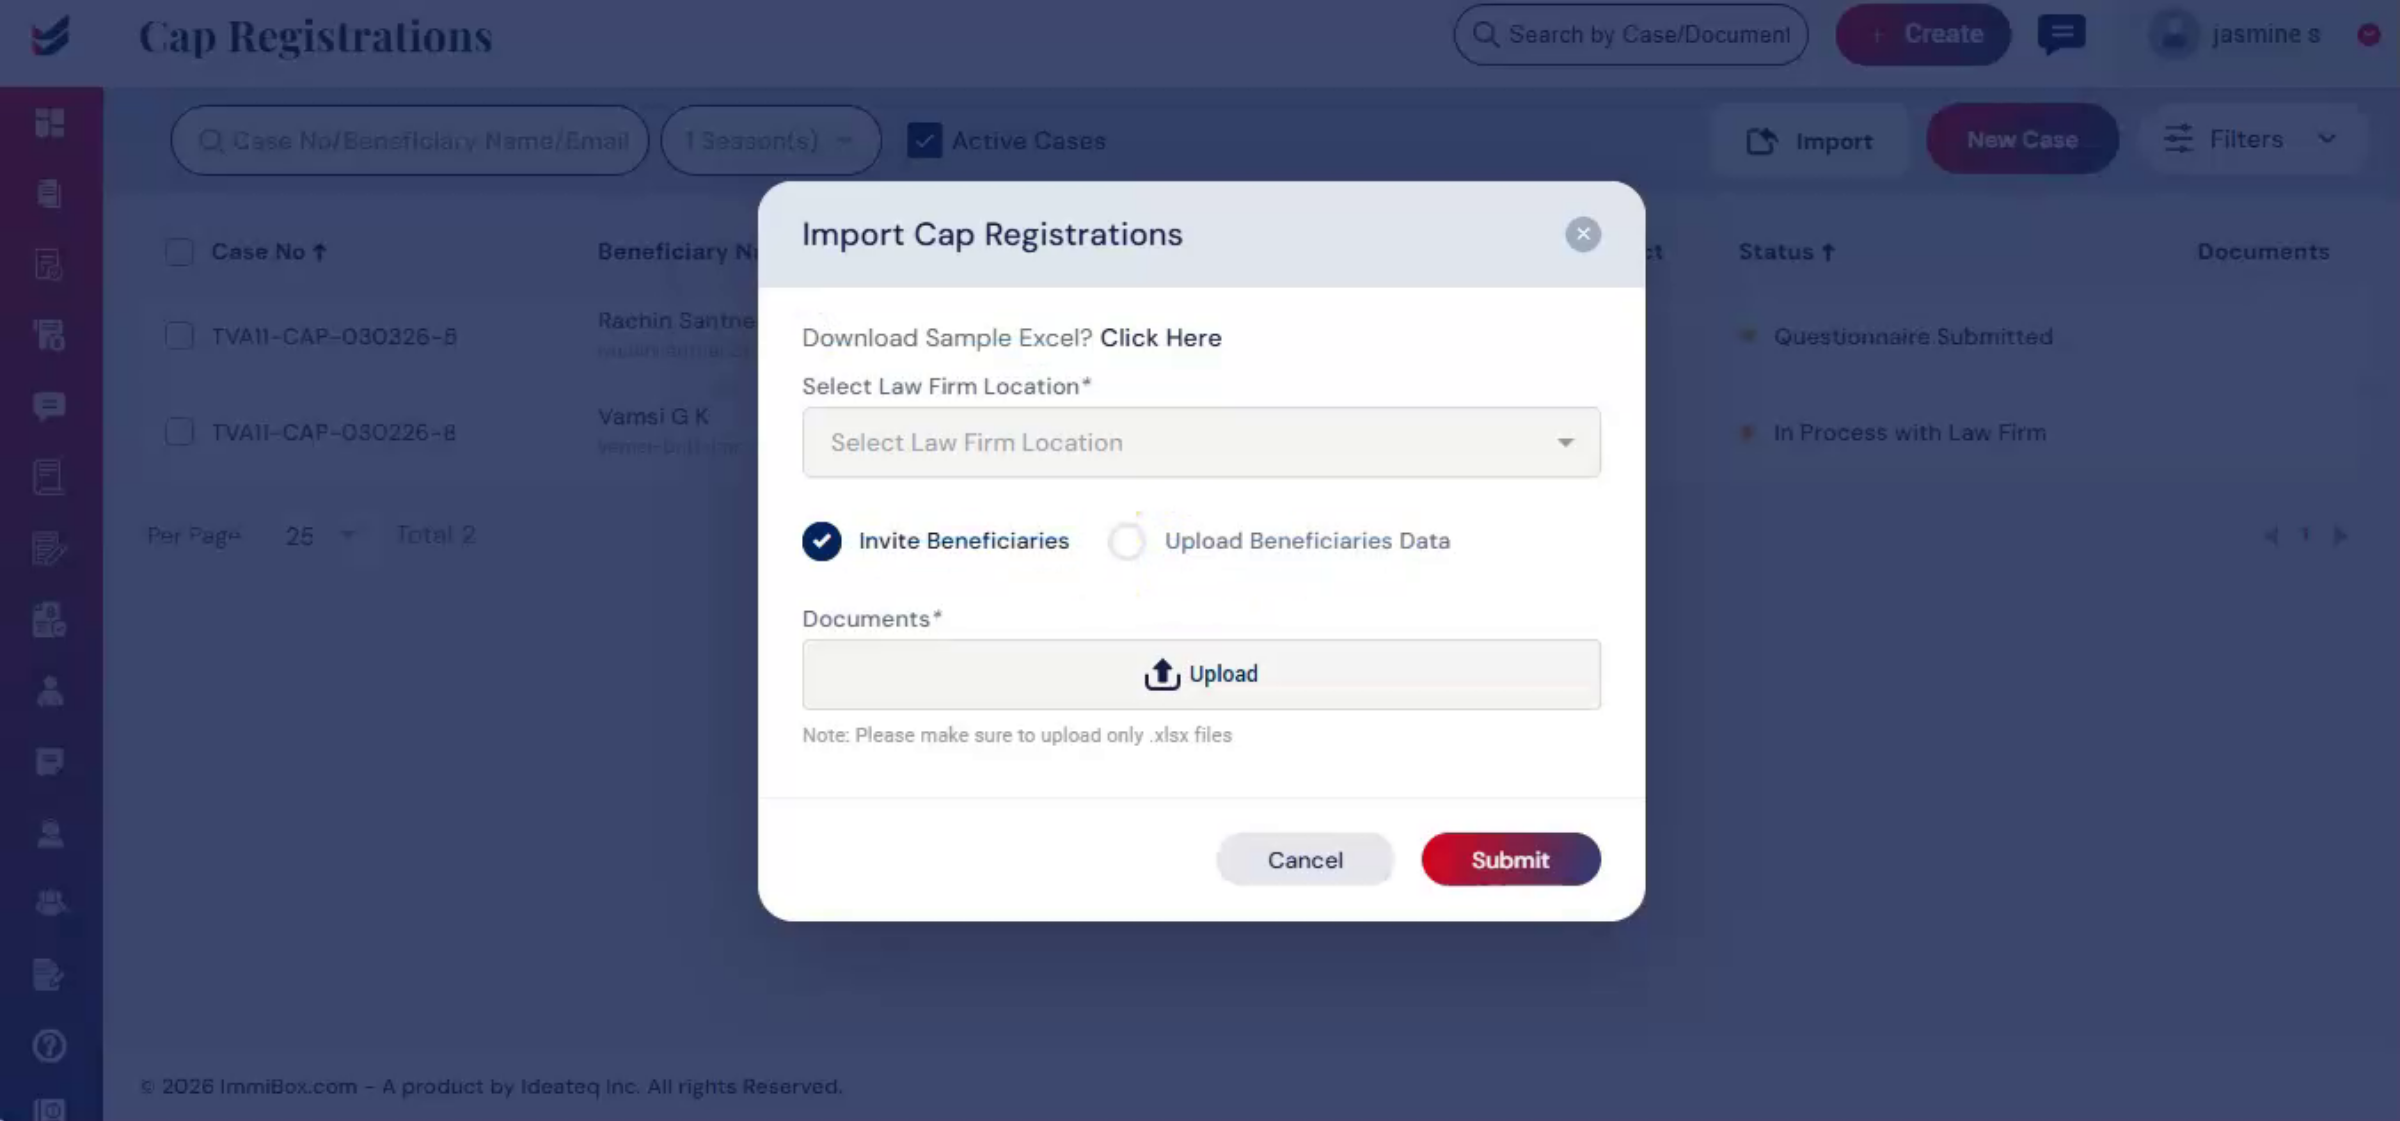
The import option allows you to upload a bulk of beneficiary information using a properly formatted Excel file. To view the required format, click on Download Sample Excel.
8. Beneficiary Data Upload Methods
 * click the image to view enlarged
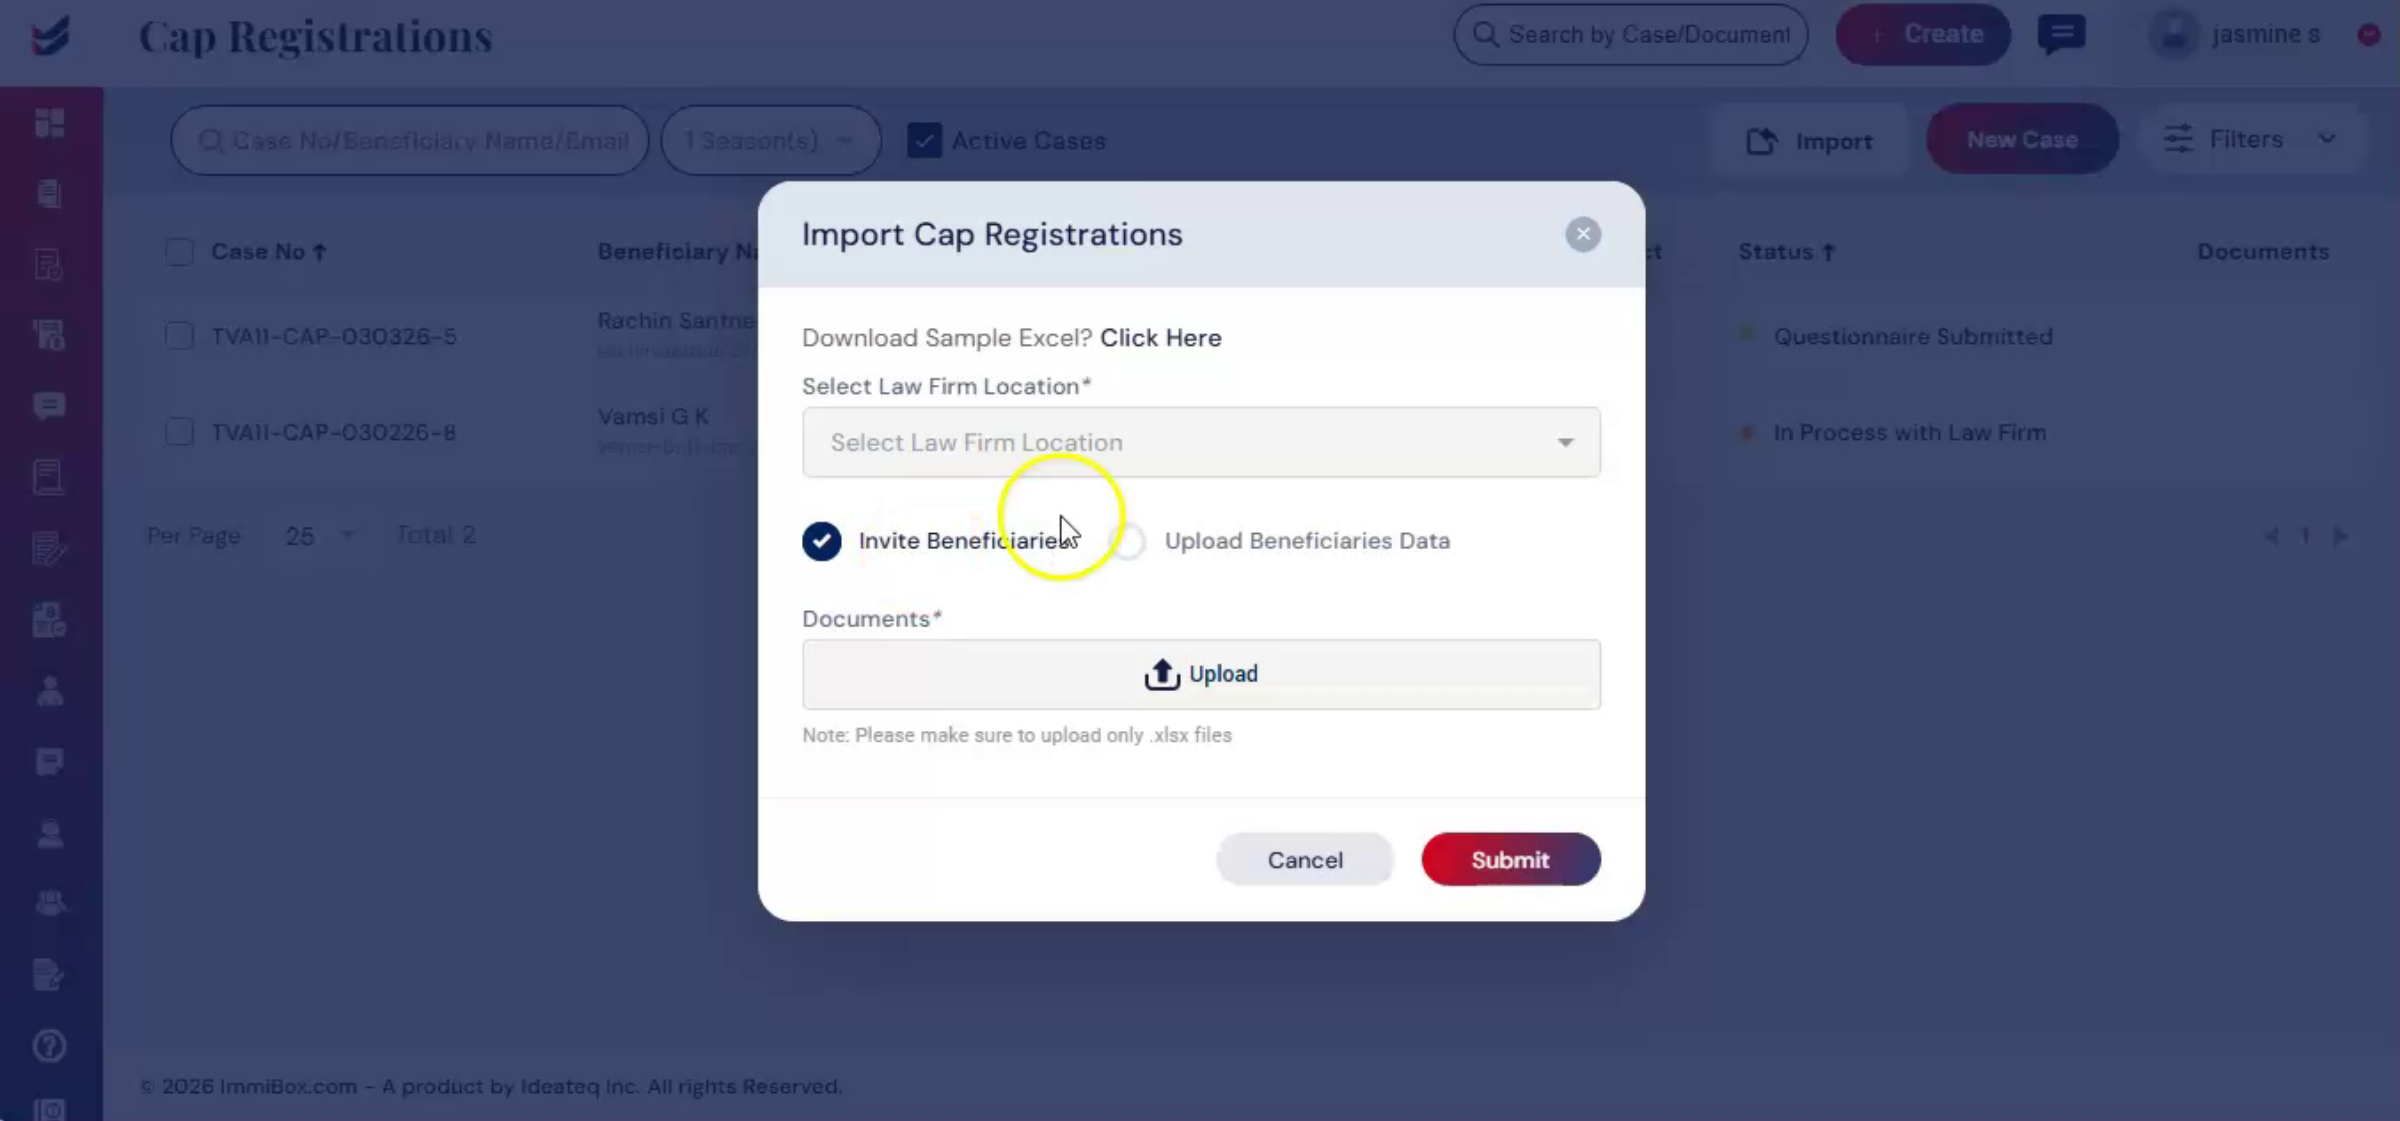
There are two options with different formats, invite beneficiaries or upload beneficiaries data.
9. Inviting Beneficiaries Process
 * click the image to view enlarged
For invite beneficiaries, you provide the beneficiaries' first and last name, email, and other details in the Excel file. The beneficiary questionnaire link is then automatically sent to their mail.
10. Uploading Beneficiary Details
 * click the image to view enlarged
For upload beneficiaries data, you enter detailed information in the Excel sheet according to the required format, including first and last name, email, date of birth, country of citizenship, and other details.
11. Automatic Data Extraction
 * click the image to view enlarged
Once submitted, ImmiBox automatically extracts this information and fills out the personal details of beneficiary questionnaires. After uploading the document, click submit to add all beneficiaries to the CAP registration.
12. Creating New CAP Case
 * click the image to view enlarged
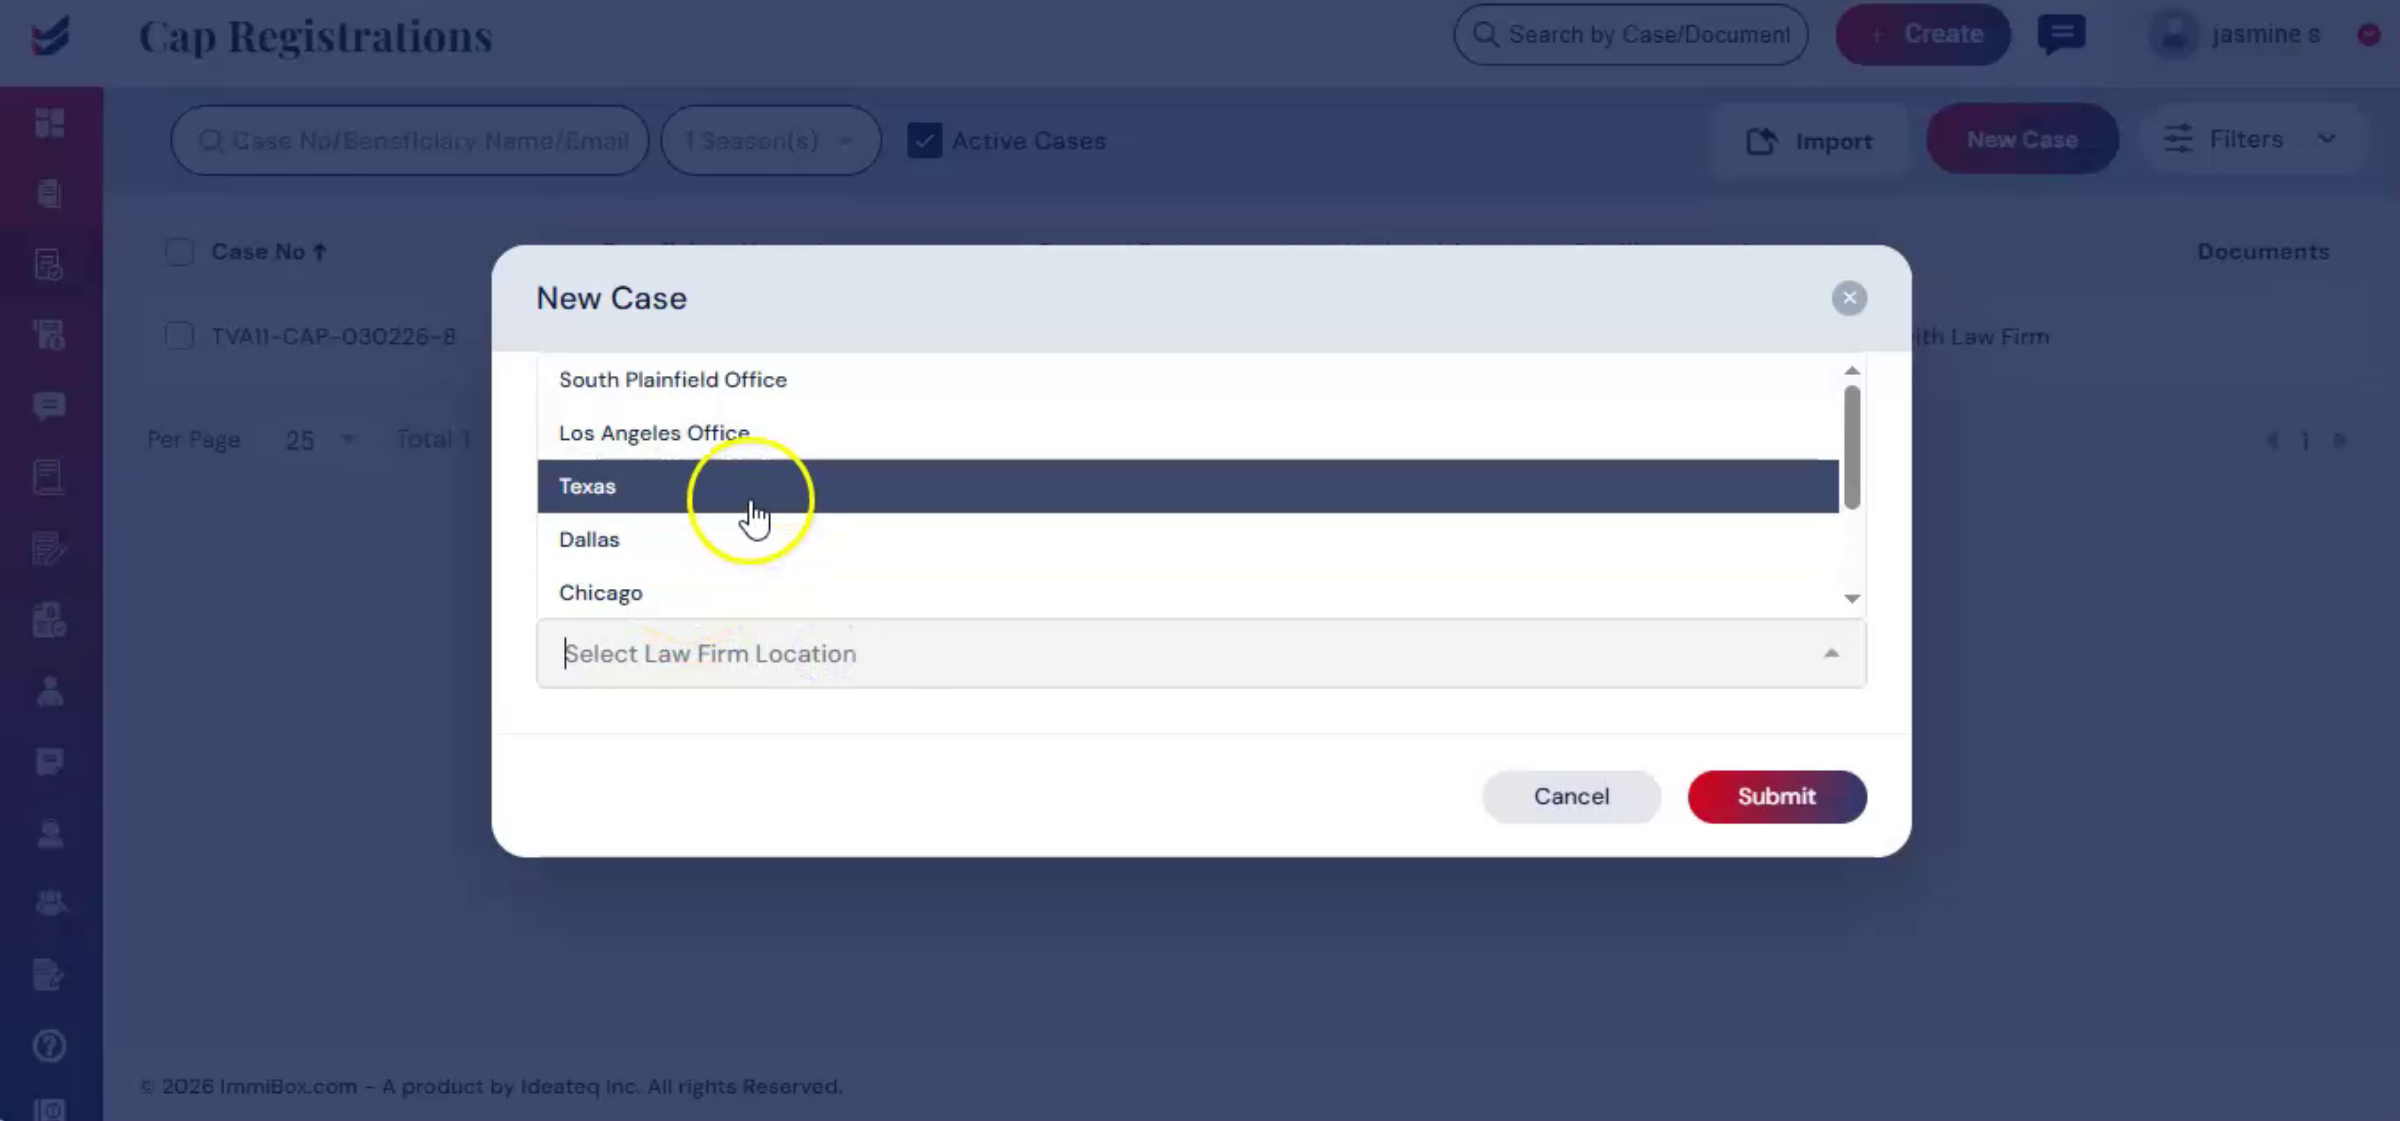
In the CAP registration section, click New Case. Alternatively, click Create from the main menu and select CAP Registration from the drop-down list. The CAP Registration dialog box will appear on the screen.
13. Selecting Beneficiary For Case
 * click the image to view enlarged
Select the beneficiary. If the beneficiary has not been added, please refer to the Adding Beneficiary Guide. Click submit.
14. CAP Registration Detail Page
 * click the image to view enlarged
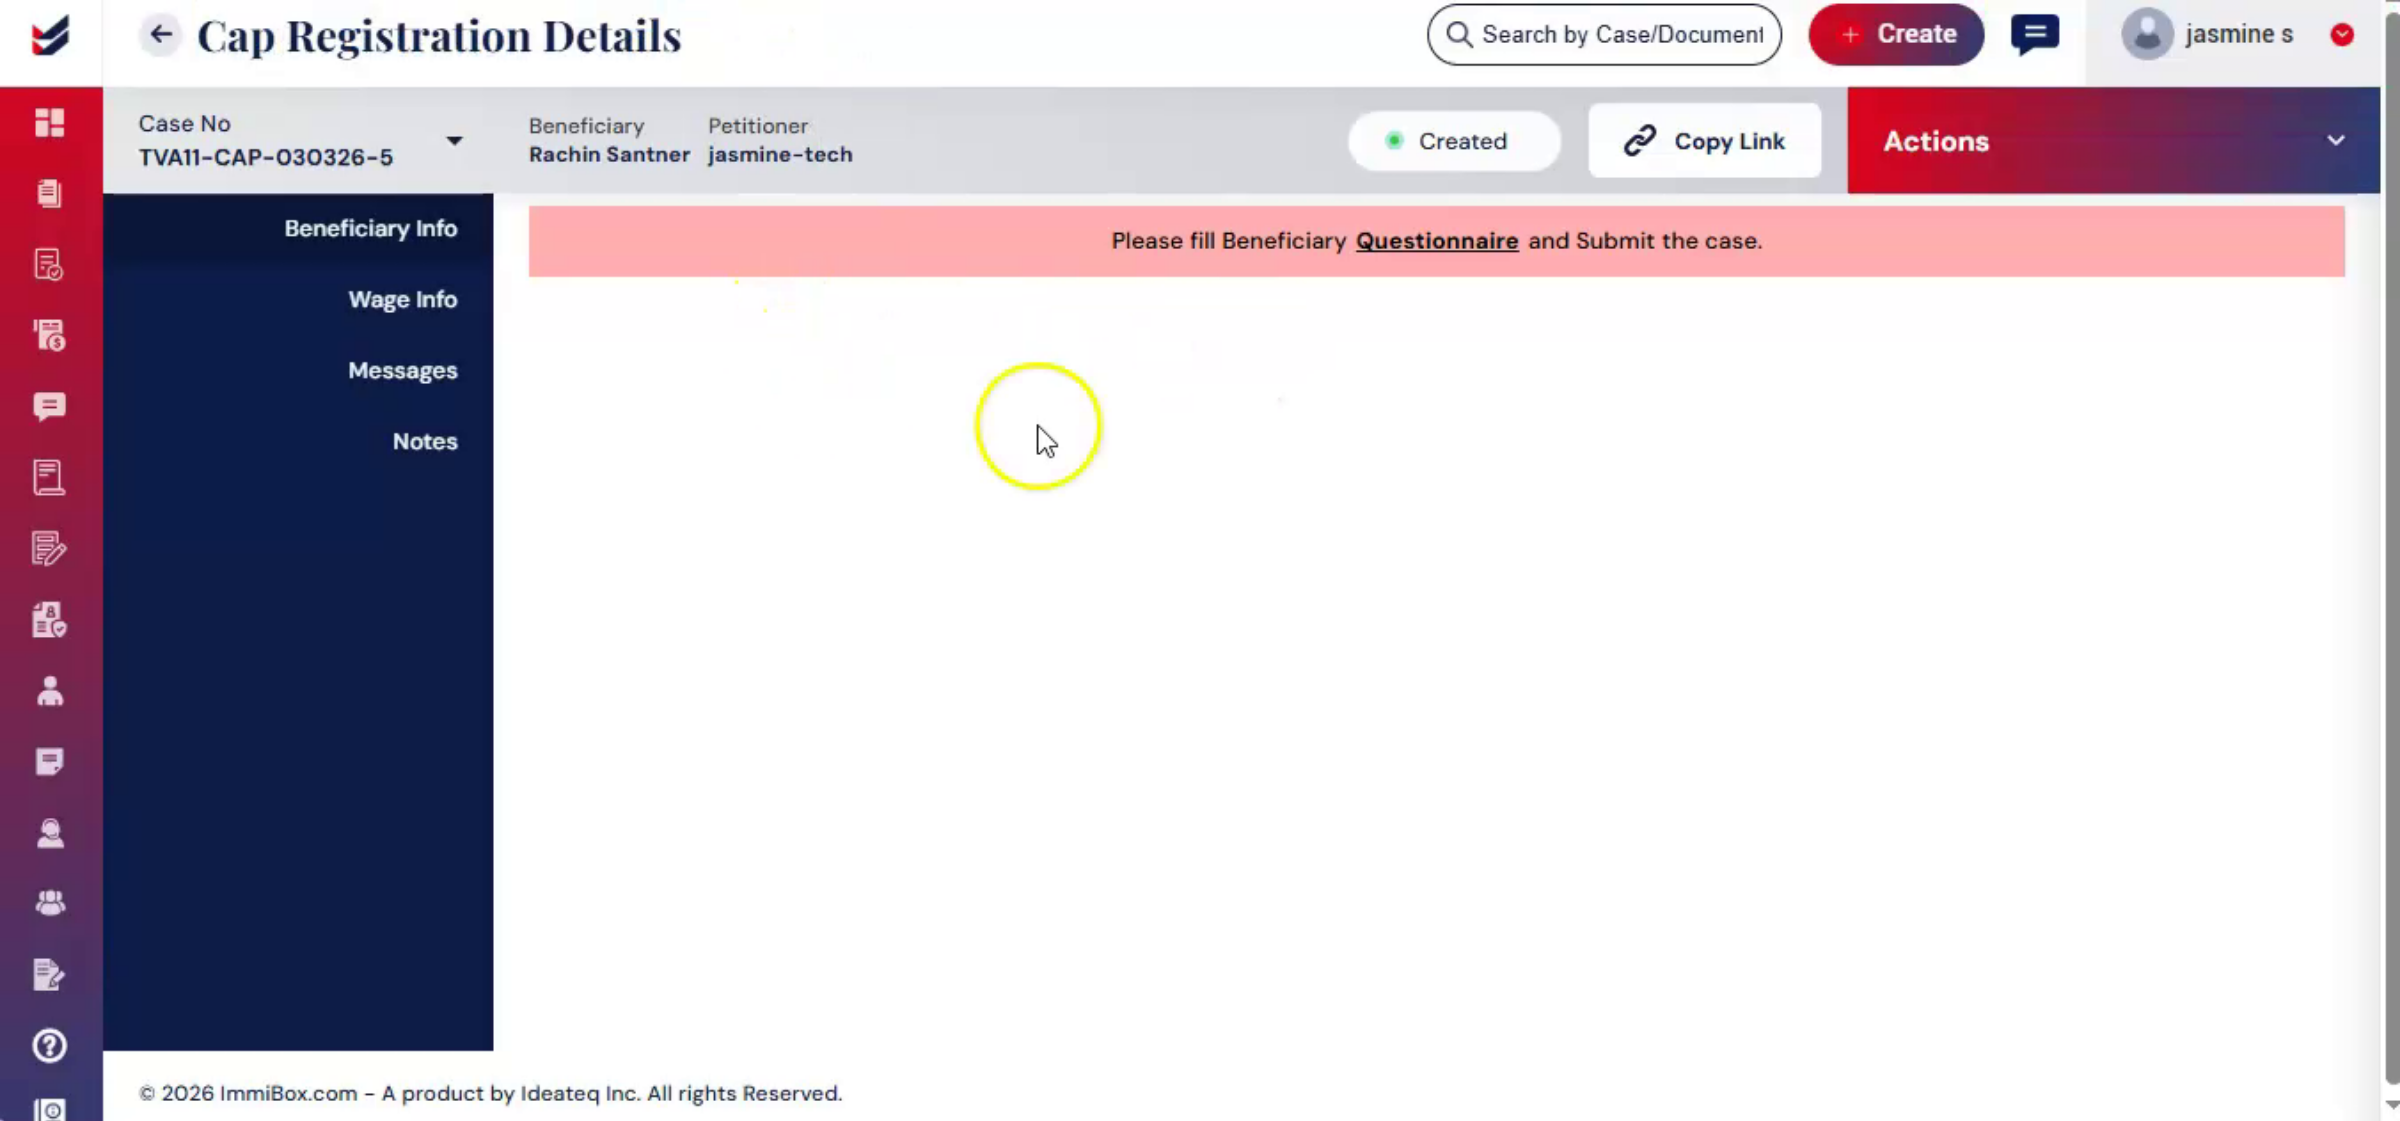
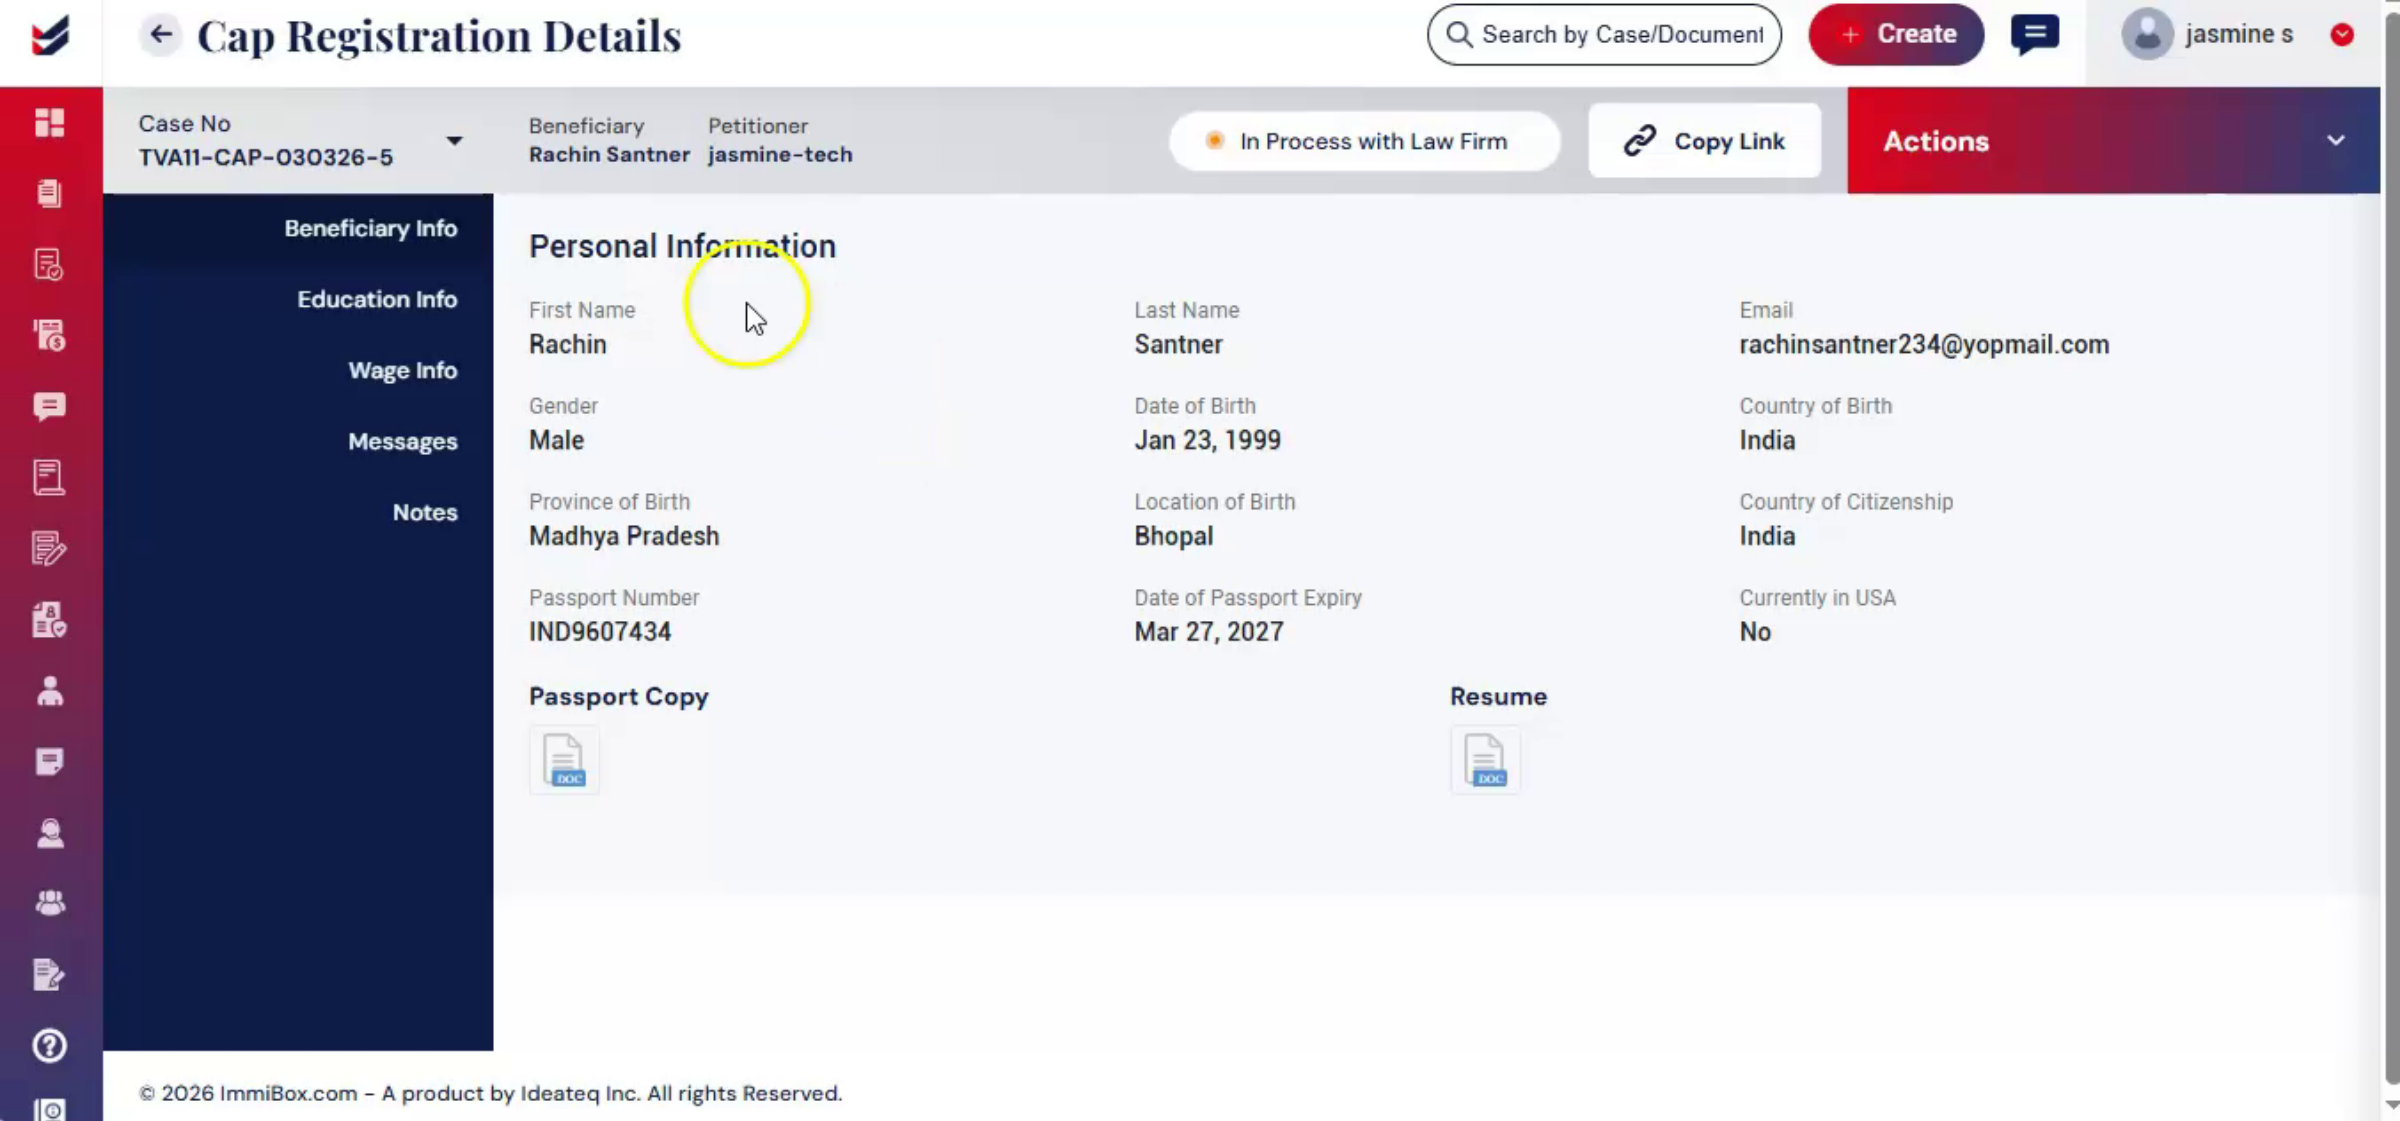
You will be redirected to the CAP registration detail page. Collecting accurate personal and educational data is critical to ensure eligibility for CAP.
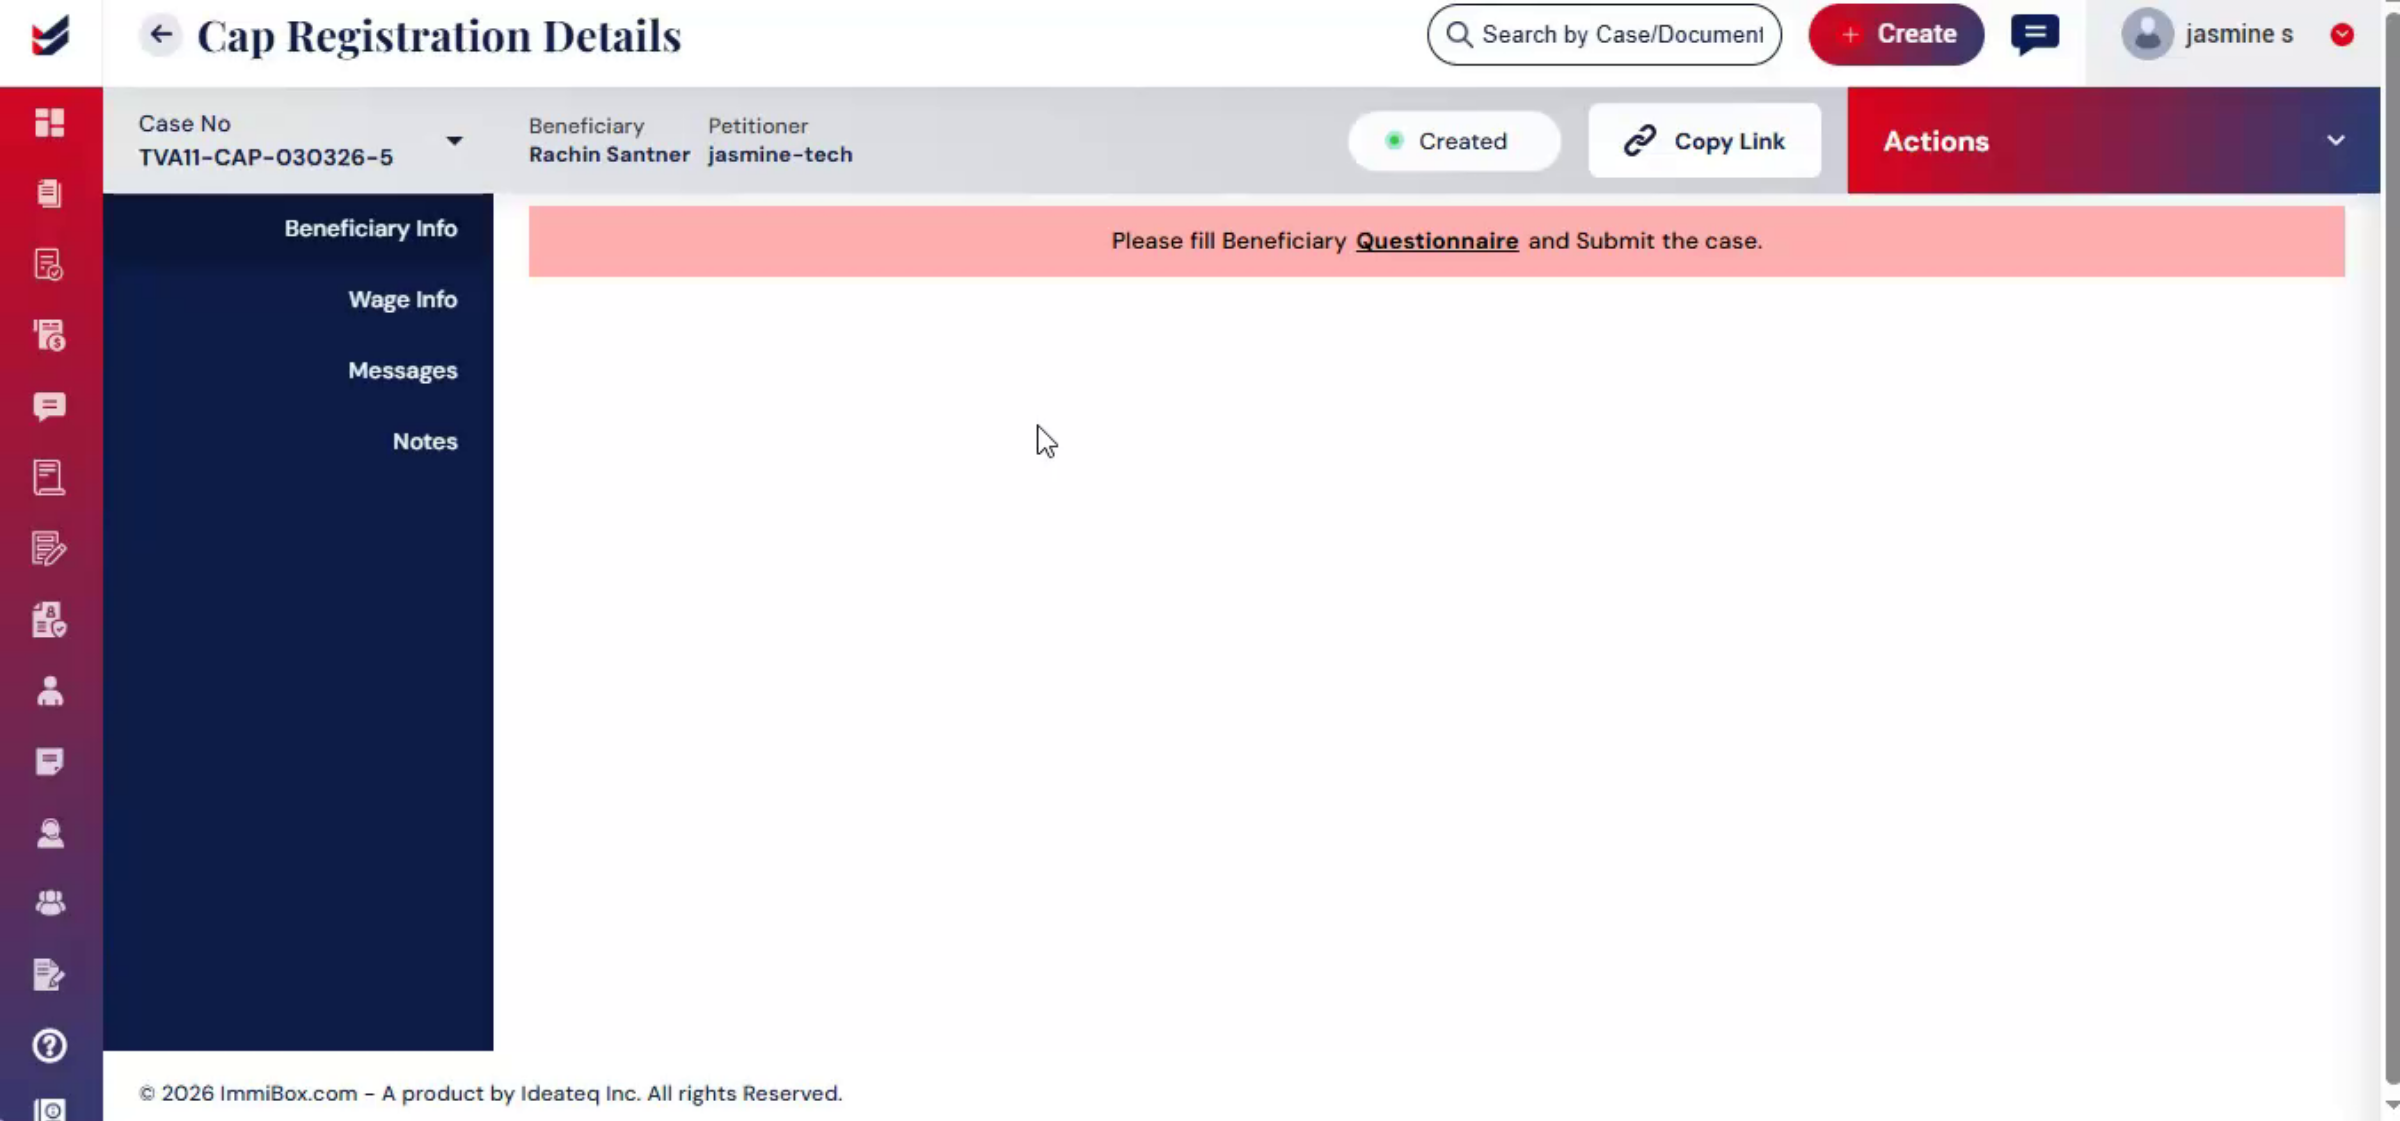
15. Beneficiary Questionnaire Access
 * click the image to view enlarged
The beneficiary questionnaire can be filled out by either the petitioner or the beneficiary.
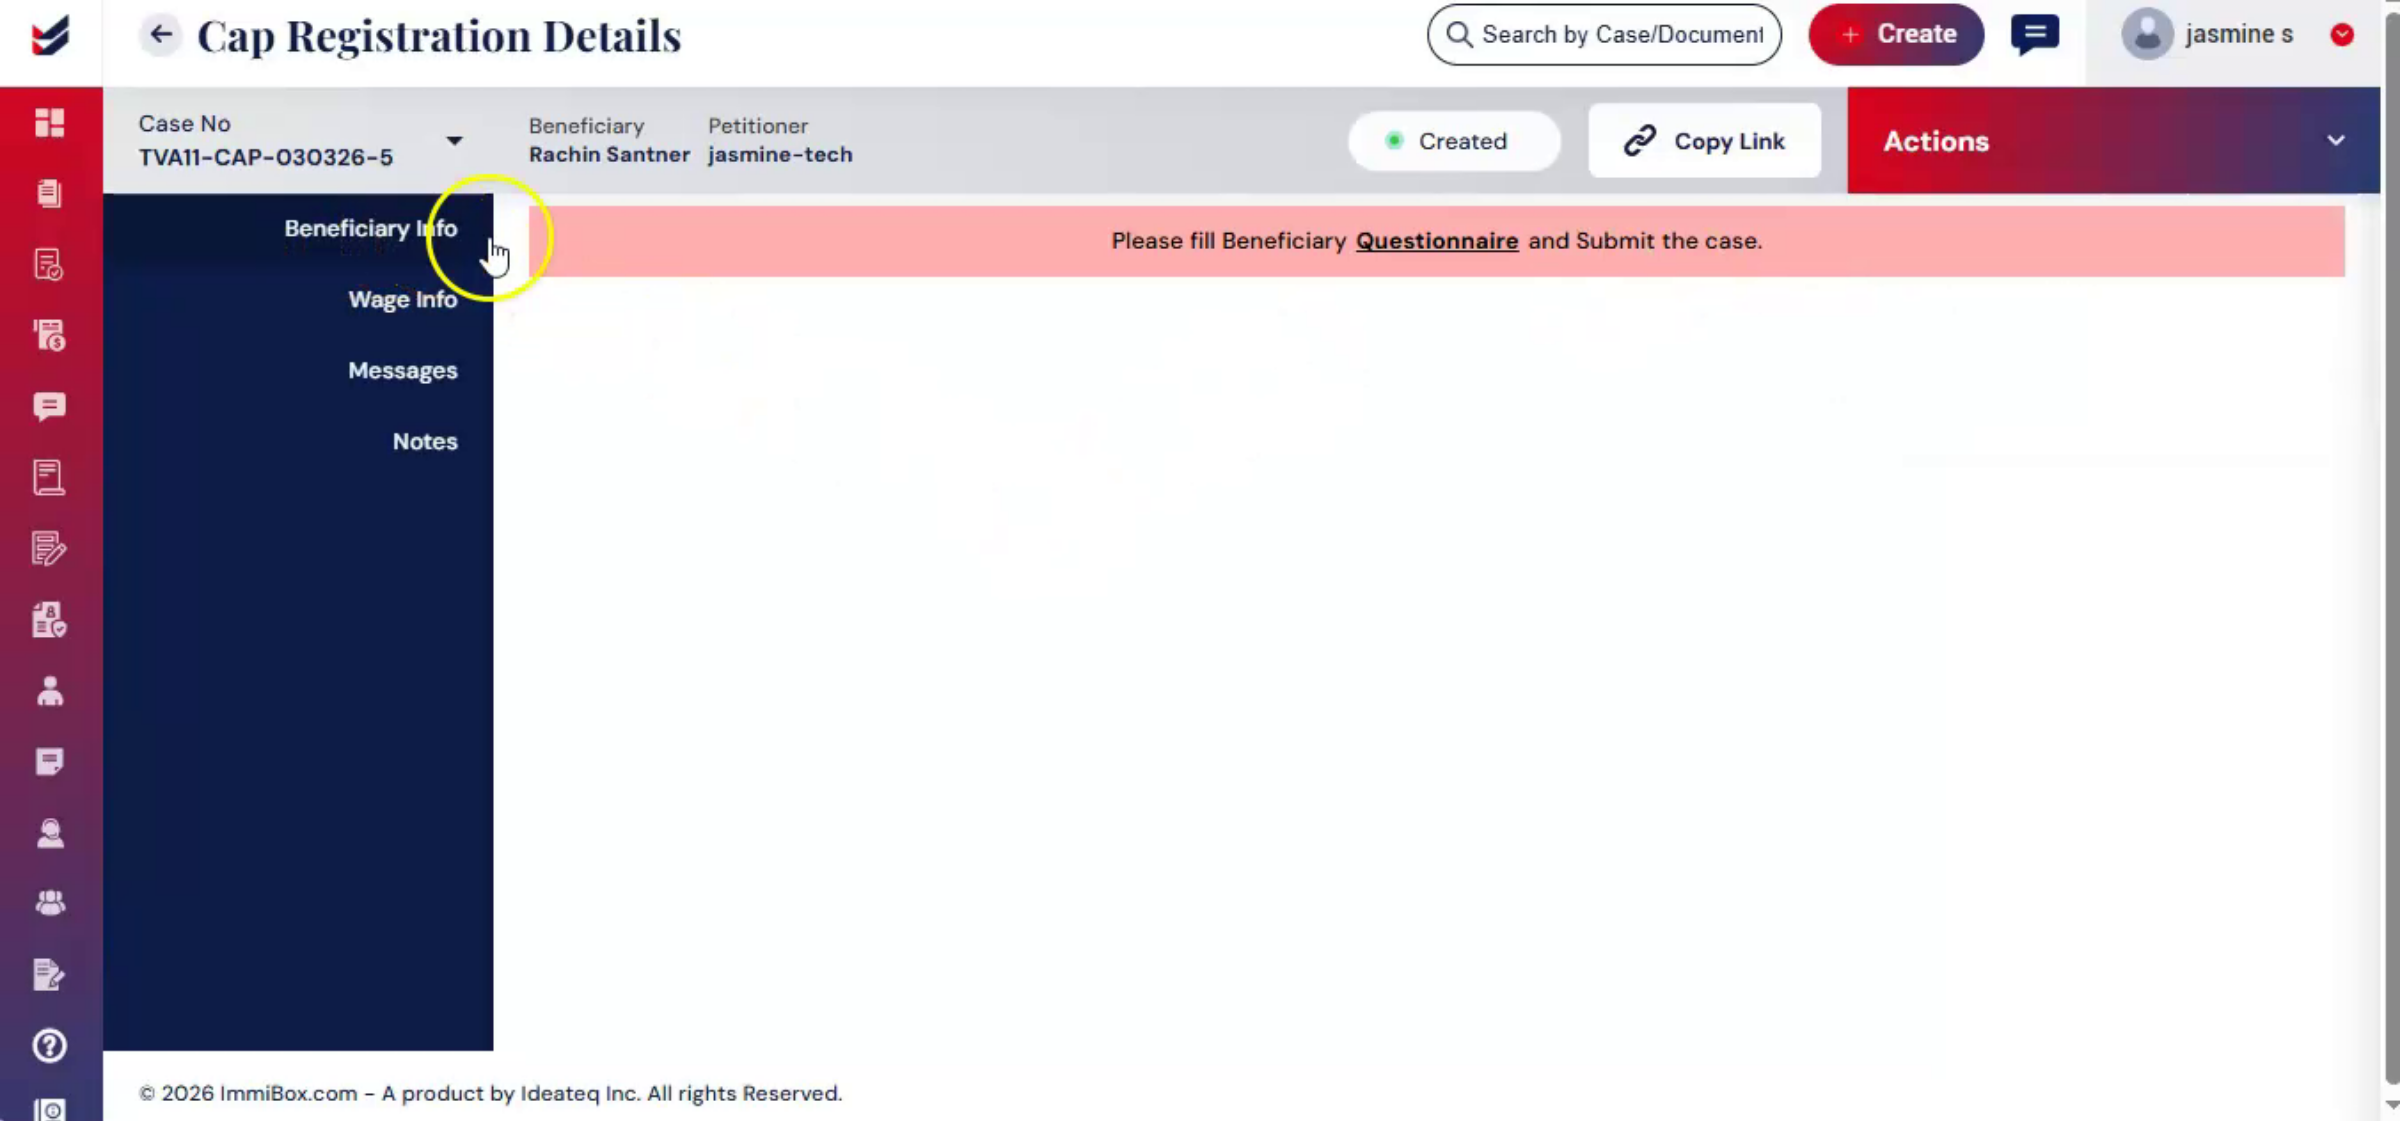
16. Accessing Questionnaire Form
 * click the image to view enlarged
To access the questionnaire, go to Actions, then Edit Questionnaire or under Beneficiary Info.
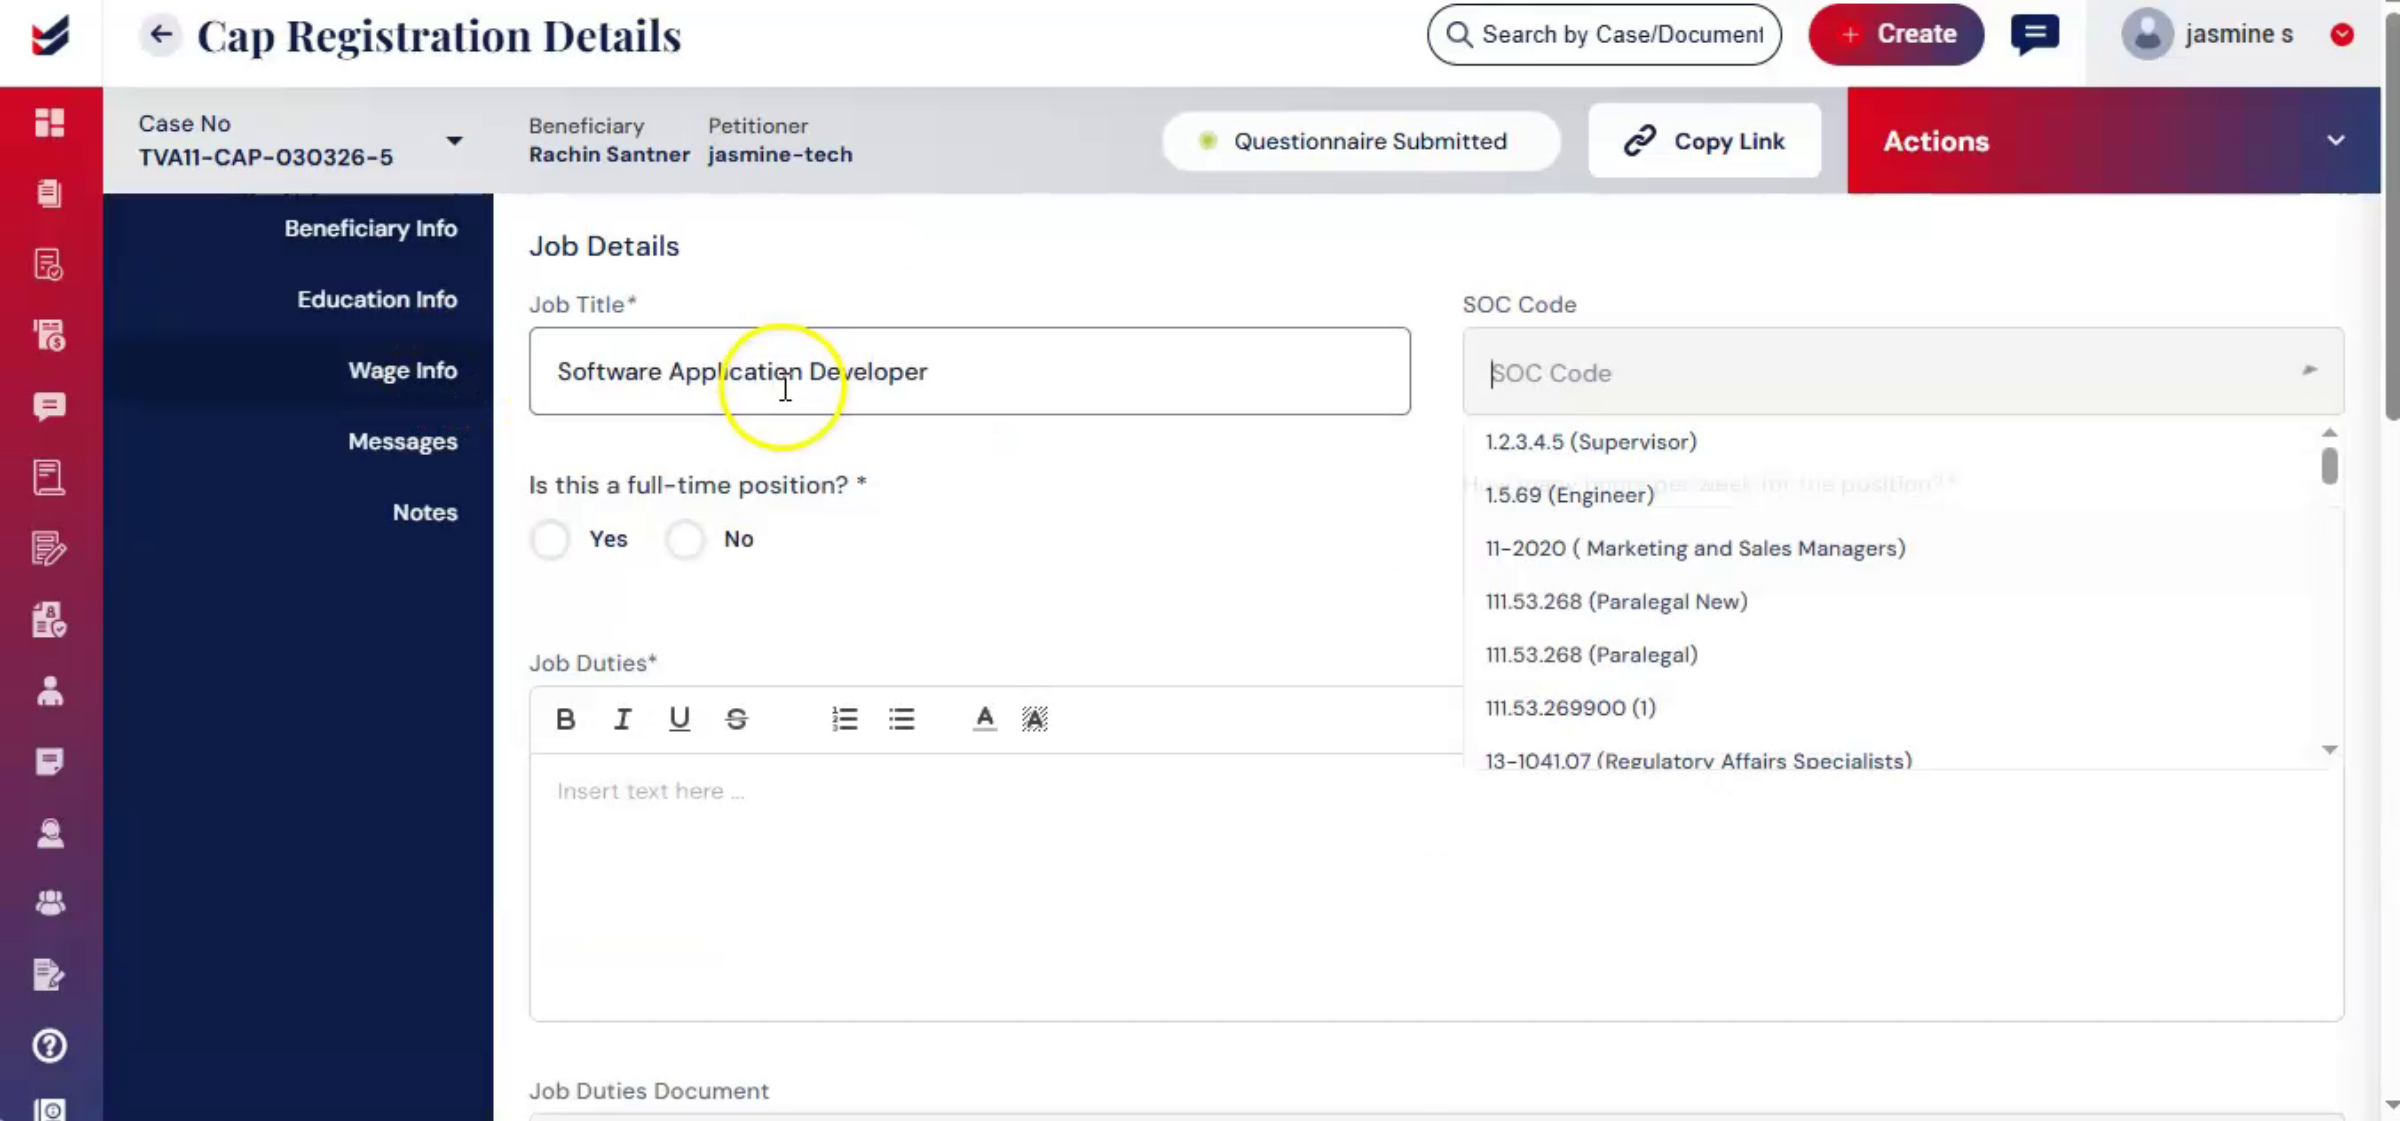
17. Completing Personal Information
 * click the image to view enlarged
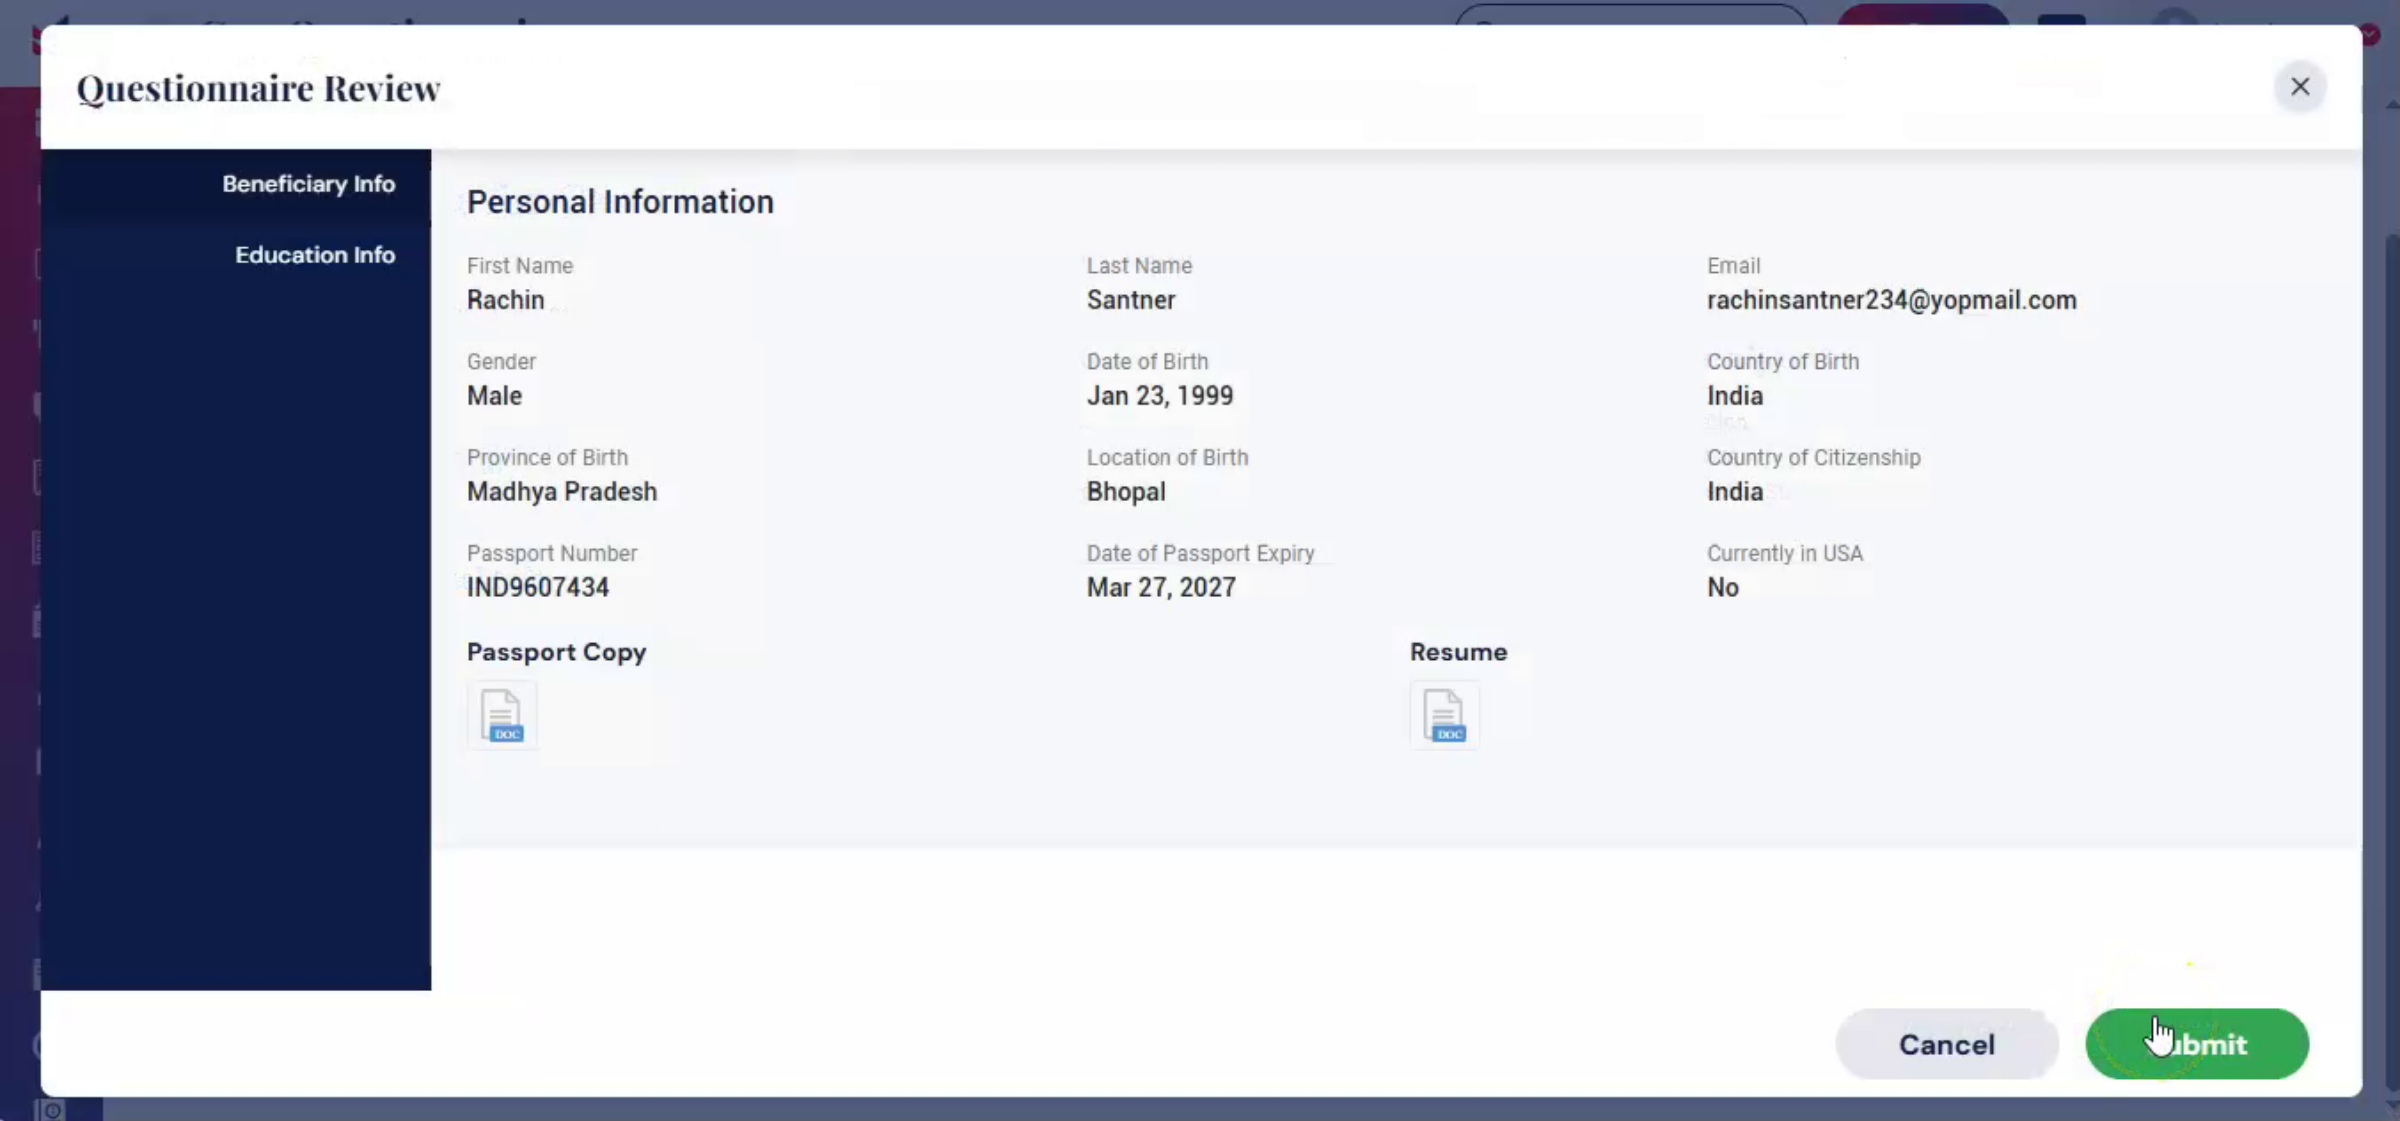
Click the Questionnaire link and carefully complete both the Personal Information and Educational Information sections. In the Personal Information section, fill out all the required details, upload the necessary documents, and click Next to proceed.
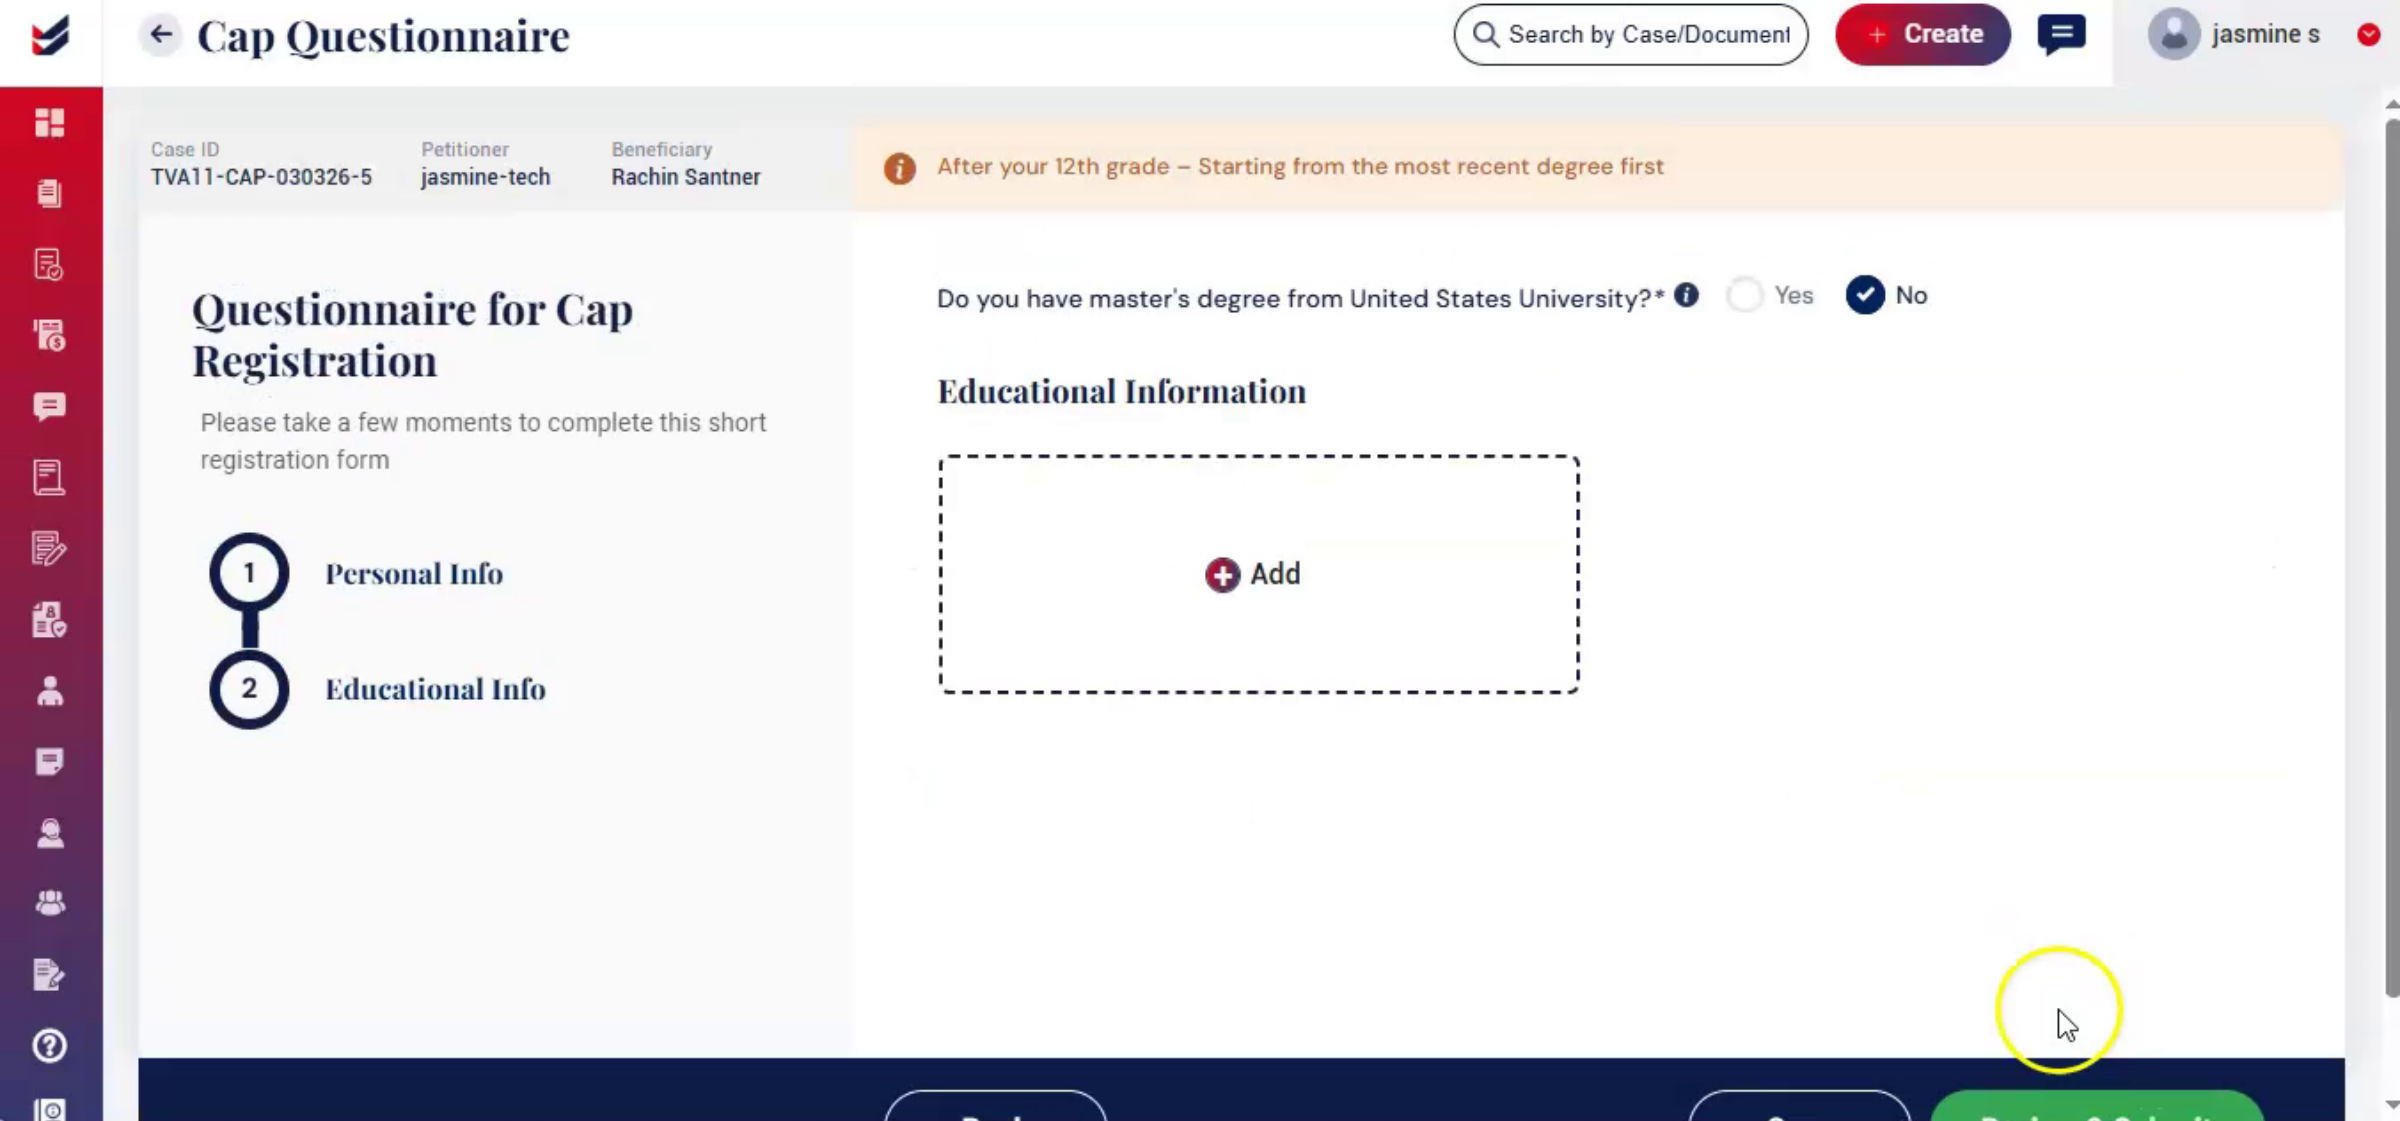
18. Educational Information Section
 * click the image to view enlarged
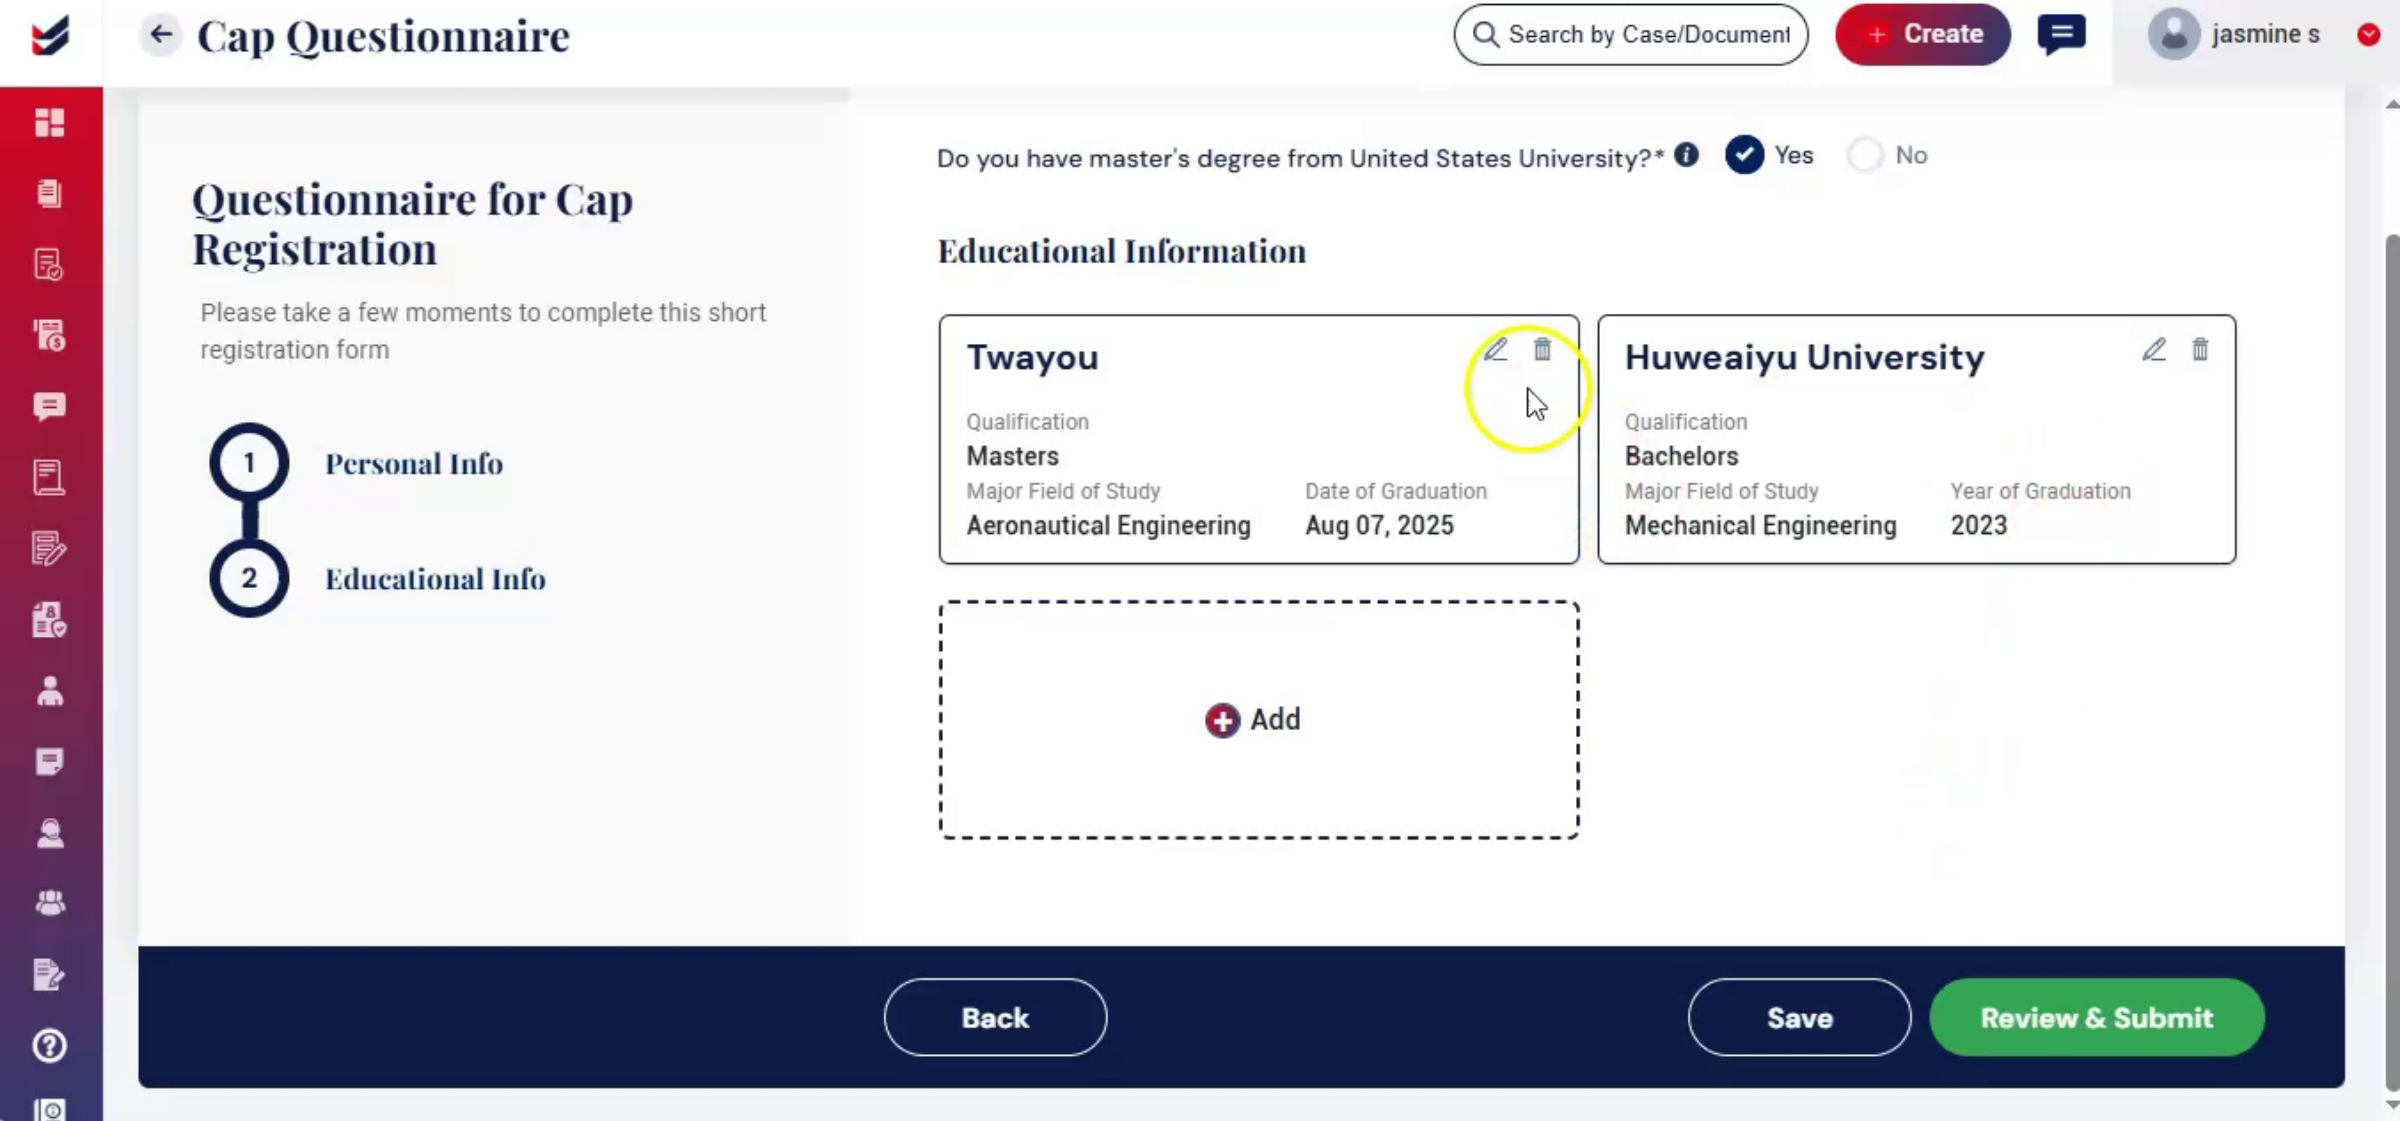
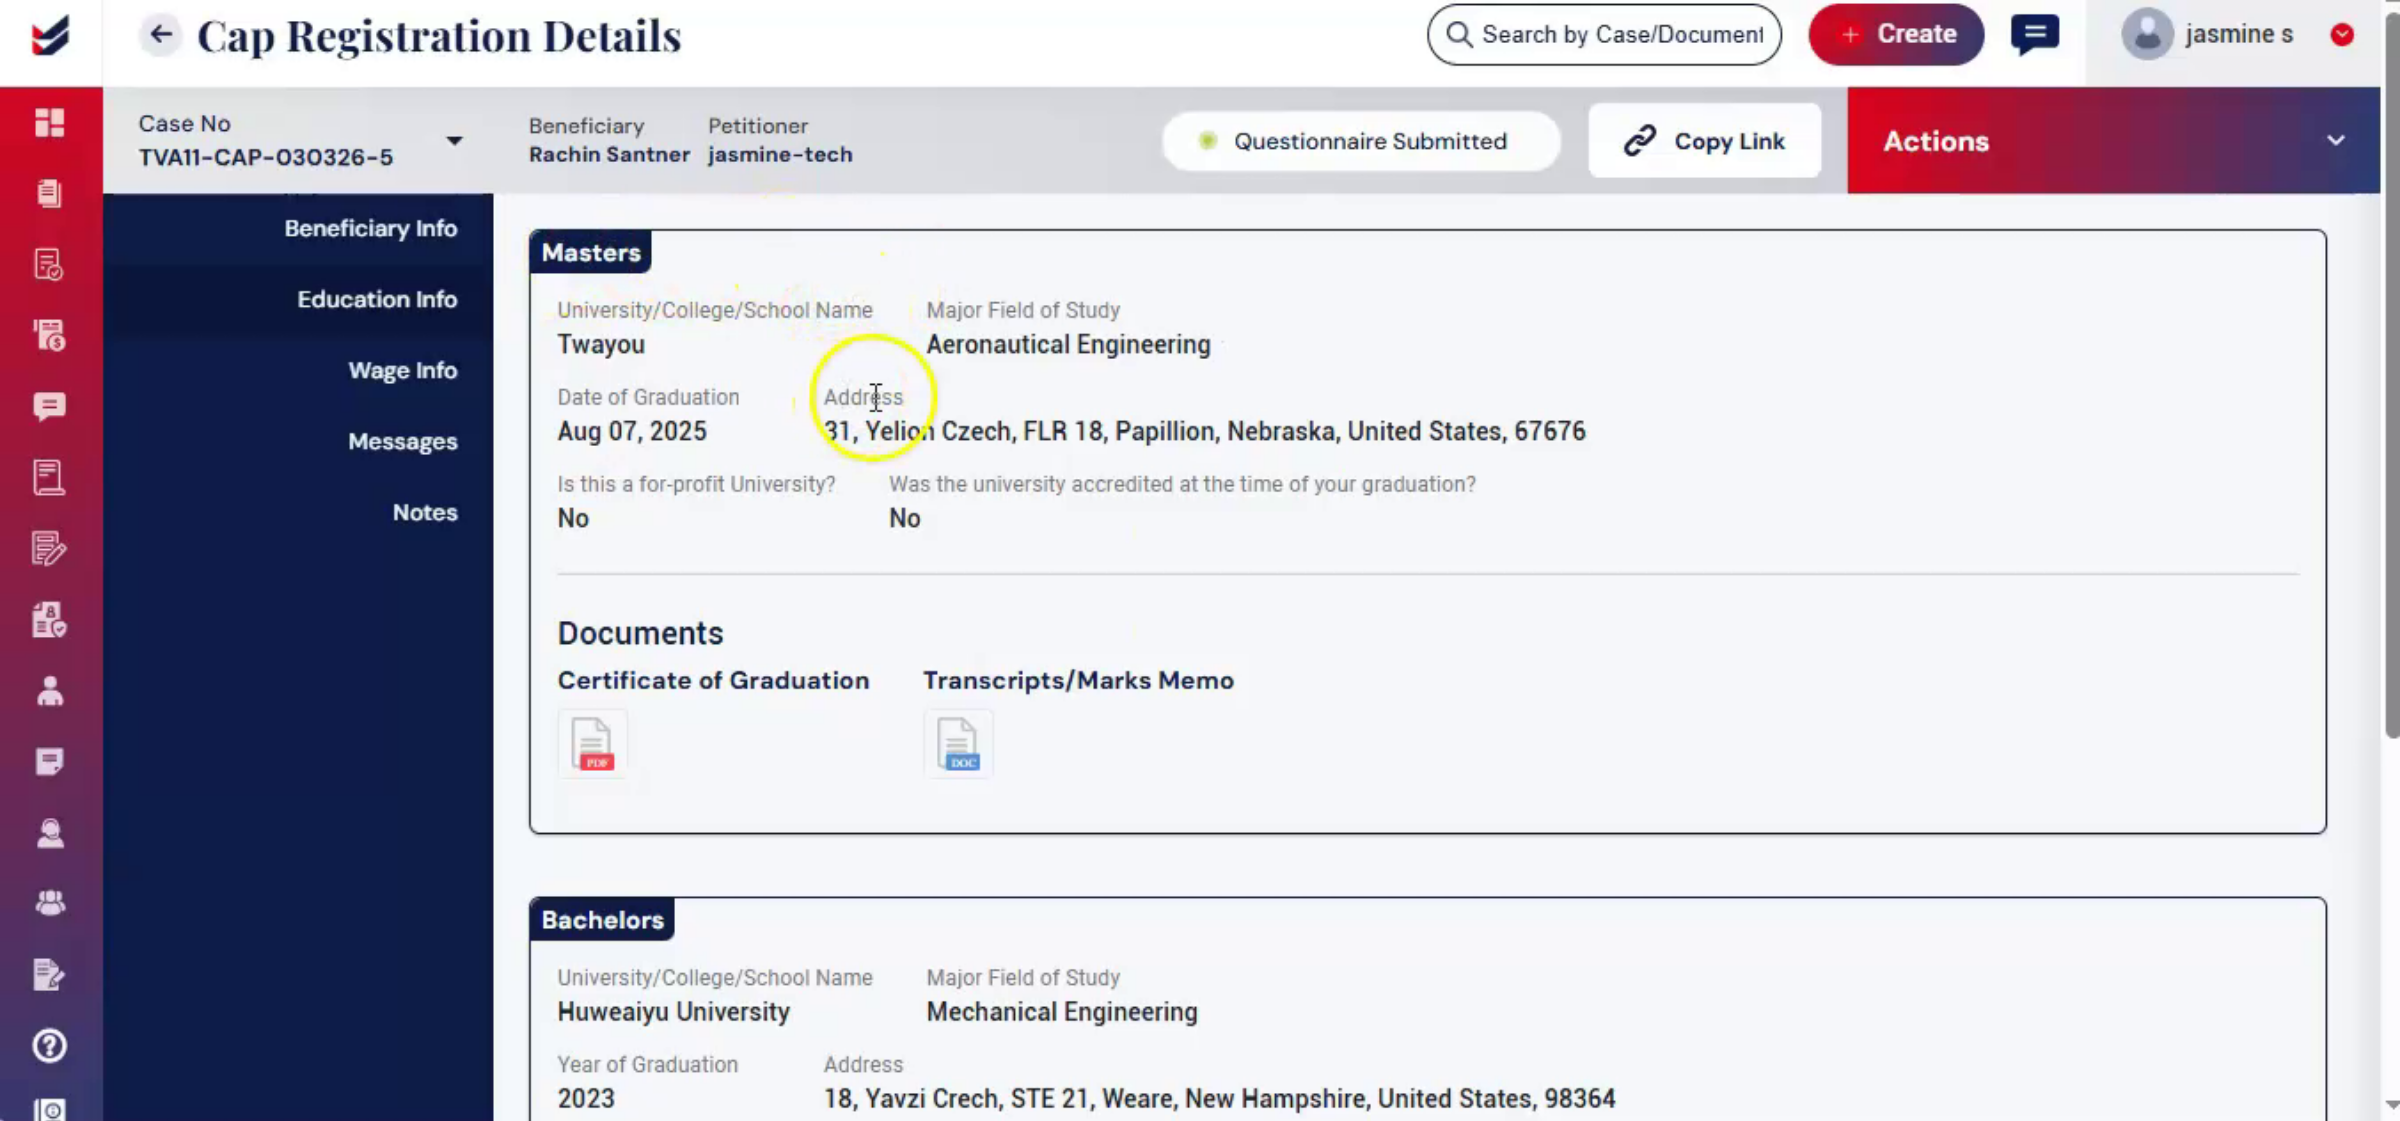
The Educational Information section will then open. If the beneficiary holds a master's degree from a United States university, select Yes. After selecting Yes, click Add and enter the master's degree information along with the graduation details. If the beneficiary does not have a master's degree from a U. S. university, select No.
19. Master's Degree Entry Optional
 * click the image to view enlarged
In that case, entering master's or graduation information is not mandatory and you may proceed with the remaining details.
20. Submitting Questionnaire Data
 * click the image to view enlarged
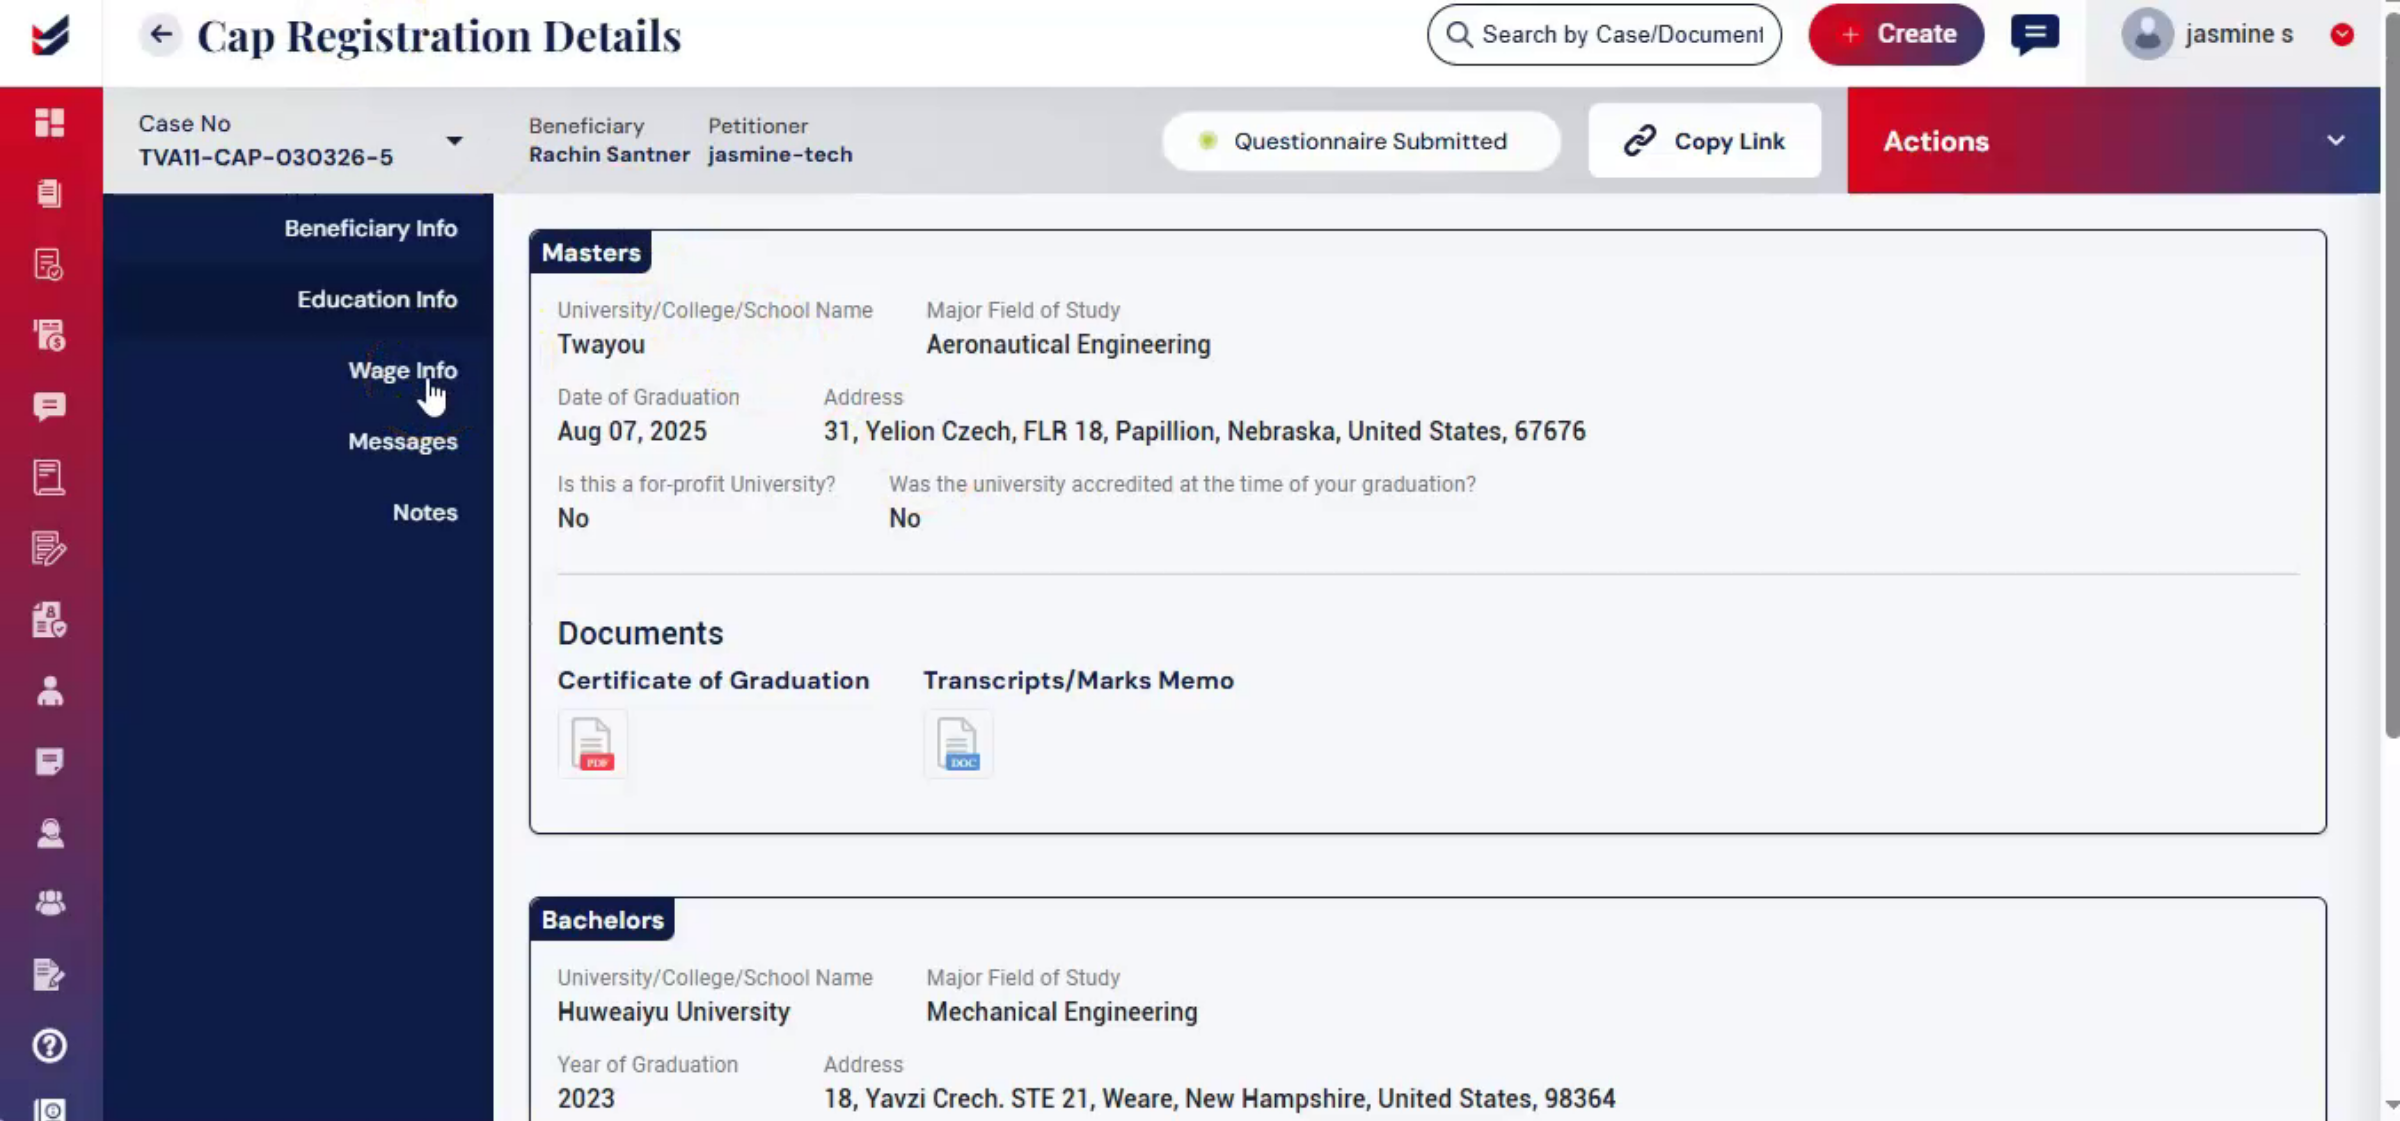
After filling in all the information, review the details and click Submit. Once submitted, the information will be reflected under the Beneficiary Info and Education Info sections.
21. Next Step Wage Information
 * click the image to view enlarged
Now, after completing the Beneficiary Questionnaire, the next step is to fill out the Wage Info section.
22. Wage Info Section Purpose
 * click the image to view enlarged
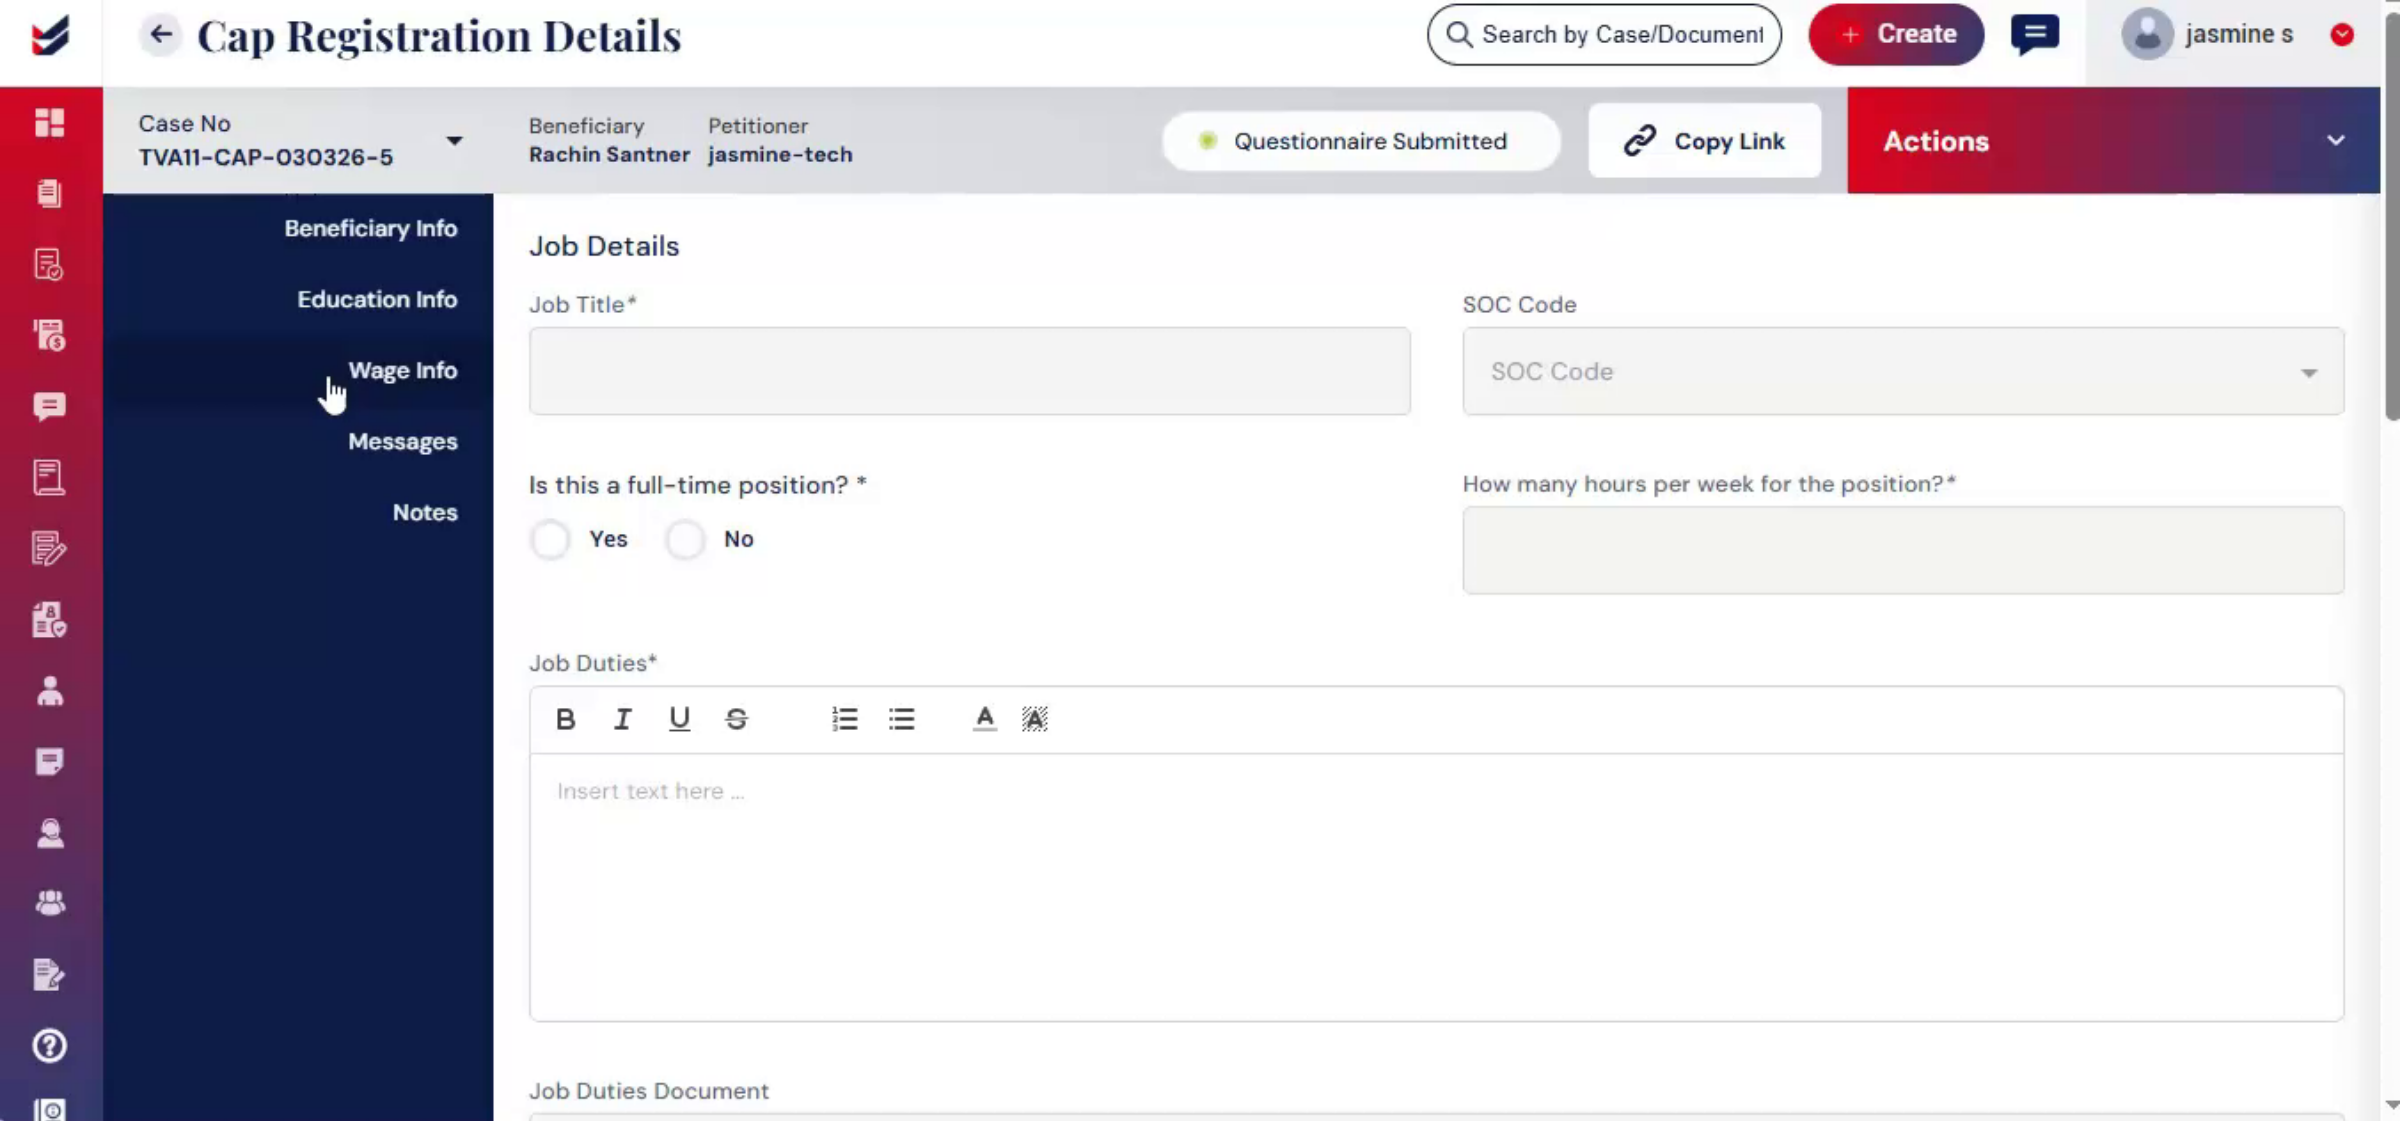
The wage info section captures the beneficiaries work location and offered wage details to ensure the salary meets prevailing wage requirements.
23. Importance Of Accurate Wage Data
 * click the image to view enlarged
Accurate wage information is important for CAP registration, as it helps validate wage compliance before the case is submitted to the law firm for review.
24. Sharing Questionnaire And Wage Info
 * click the image to view enlarged
The beneficiary questionnaire and wage info can also be shared with the beneficiary. Under the Beneficiary Info section, click Copy Link. A dialog box will appear where you can either copy the link directly or send it to the beneficiary through their email ID. The Copy Link option is also available in the Wage Info section.
25. Accessing Wage Info Form
 * click the image to view enlarged
To access the Wage Info form, go to Actions and click Edit Wage or click Wage Info from the left panel. The wage info form will appear on your screen.
26. Entering Work Location Details
 * click the image to view enlarged
Fill out all the required details carefully. Enter the beneficiary work location, including employer location, beneficiary home location, other work locations.
27. Adding Additional Work Locations
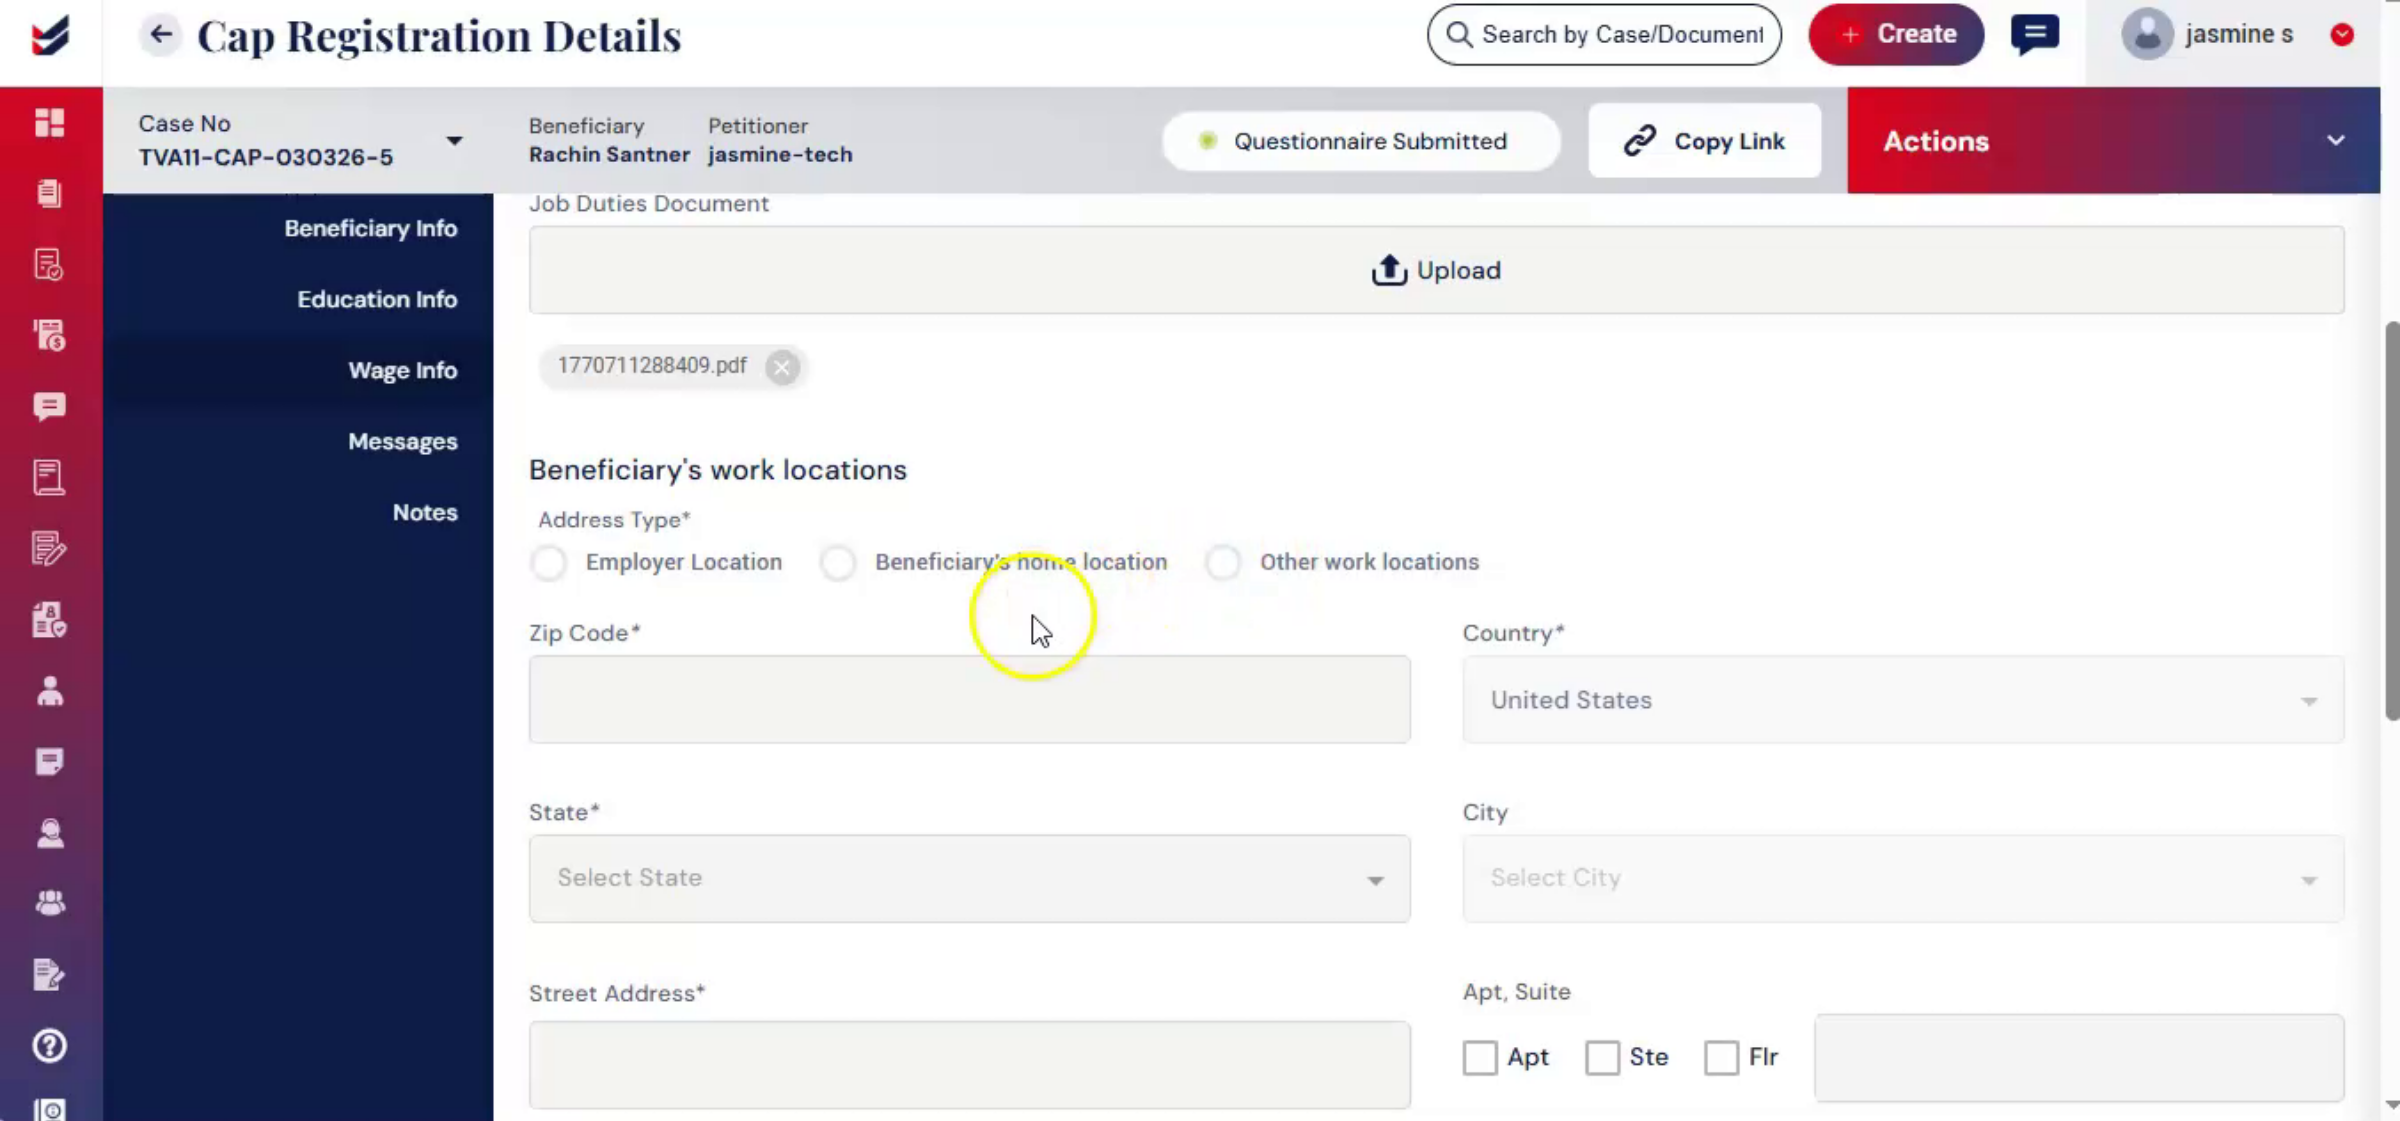 * click the image to view enlarged
The system automatically fetches the office address and the beneficiary's home address from the stored data. To add additional work locations, click Add and enter the required details.
28. Built-In Wage Determination Feature
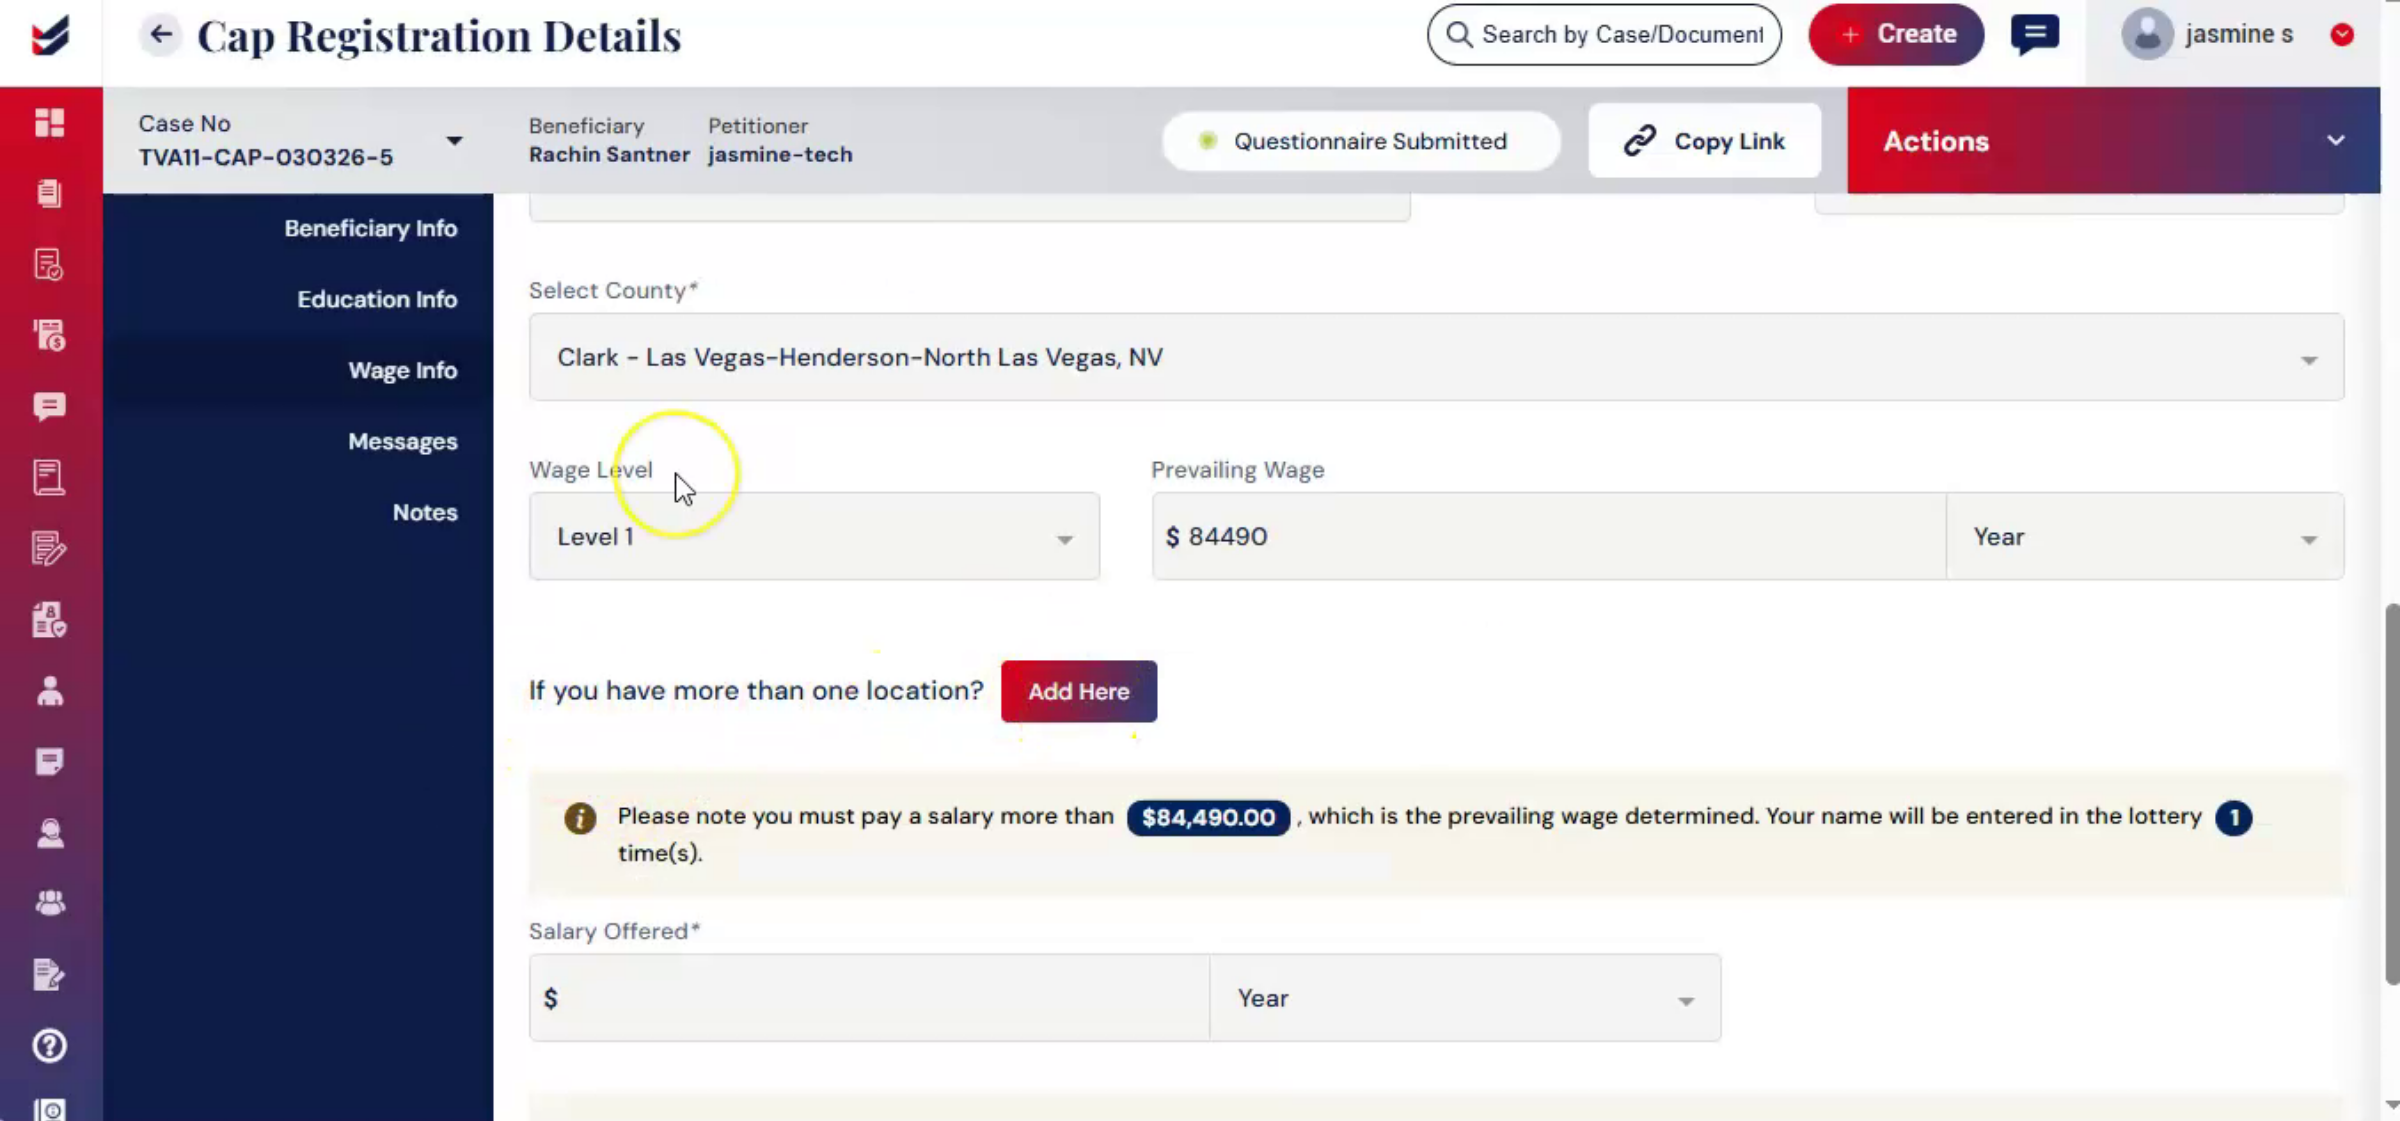 * click the image to view enlarged
IMI box includes a built-in wage determination feature. That ensures the offered salary meets US Department of Labor requirements before registration is submitted. When selecting the wage level, the system displays all four official levels along with their corresponding minimum prevailing wage thresholds. As you enter the offered wage Emmy box, automatically Compares it with the required, minimum for the selected level.
29. Wage Calculation Criteria
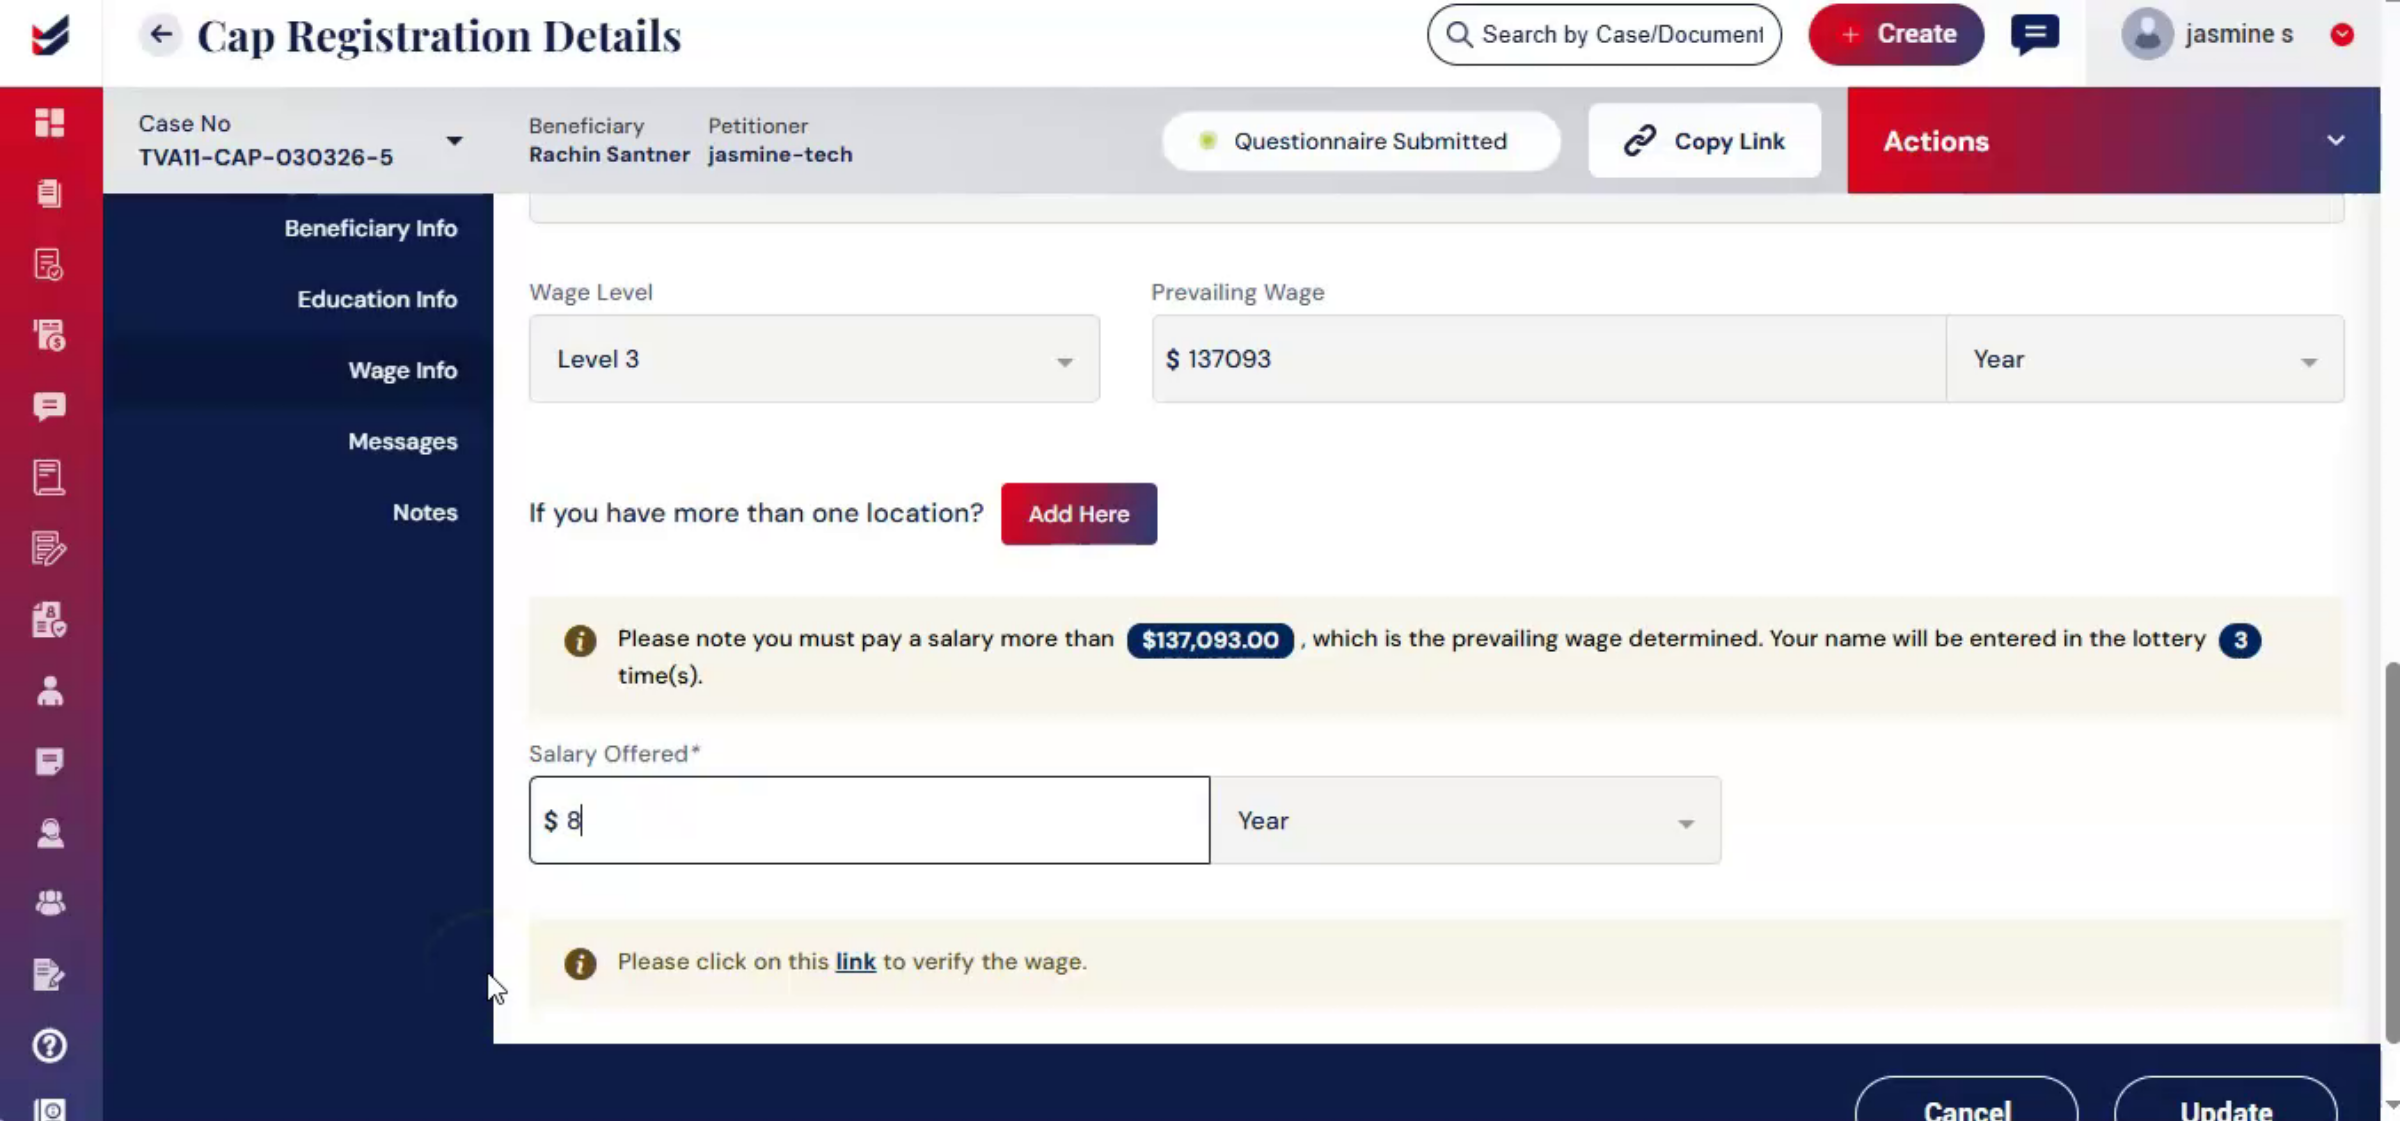 * click the image to view enlarged
Wage determination in ImmiBox requires selecting the state and the corresponding county from the displayed list. The appropriate SOC code must also be selected. The system then calculates the prevailing wage based on both the selected SOC code and the county, ensuring accurate and localized compliance.
30. Wage Validation And Alerts
 * click the image to view enlarged
If the entered wage is below the required threshold, a validation message appears on the screen, clearly showing the minimum required wage. This real-time check helps prevent errors and reduces the risk of non-compliant filings.
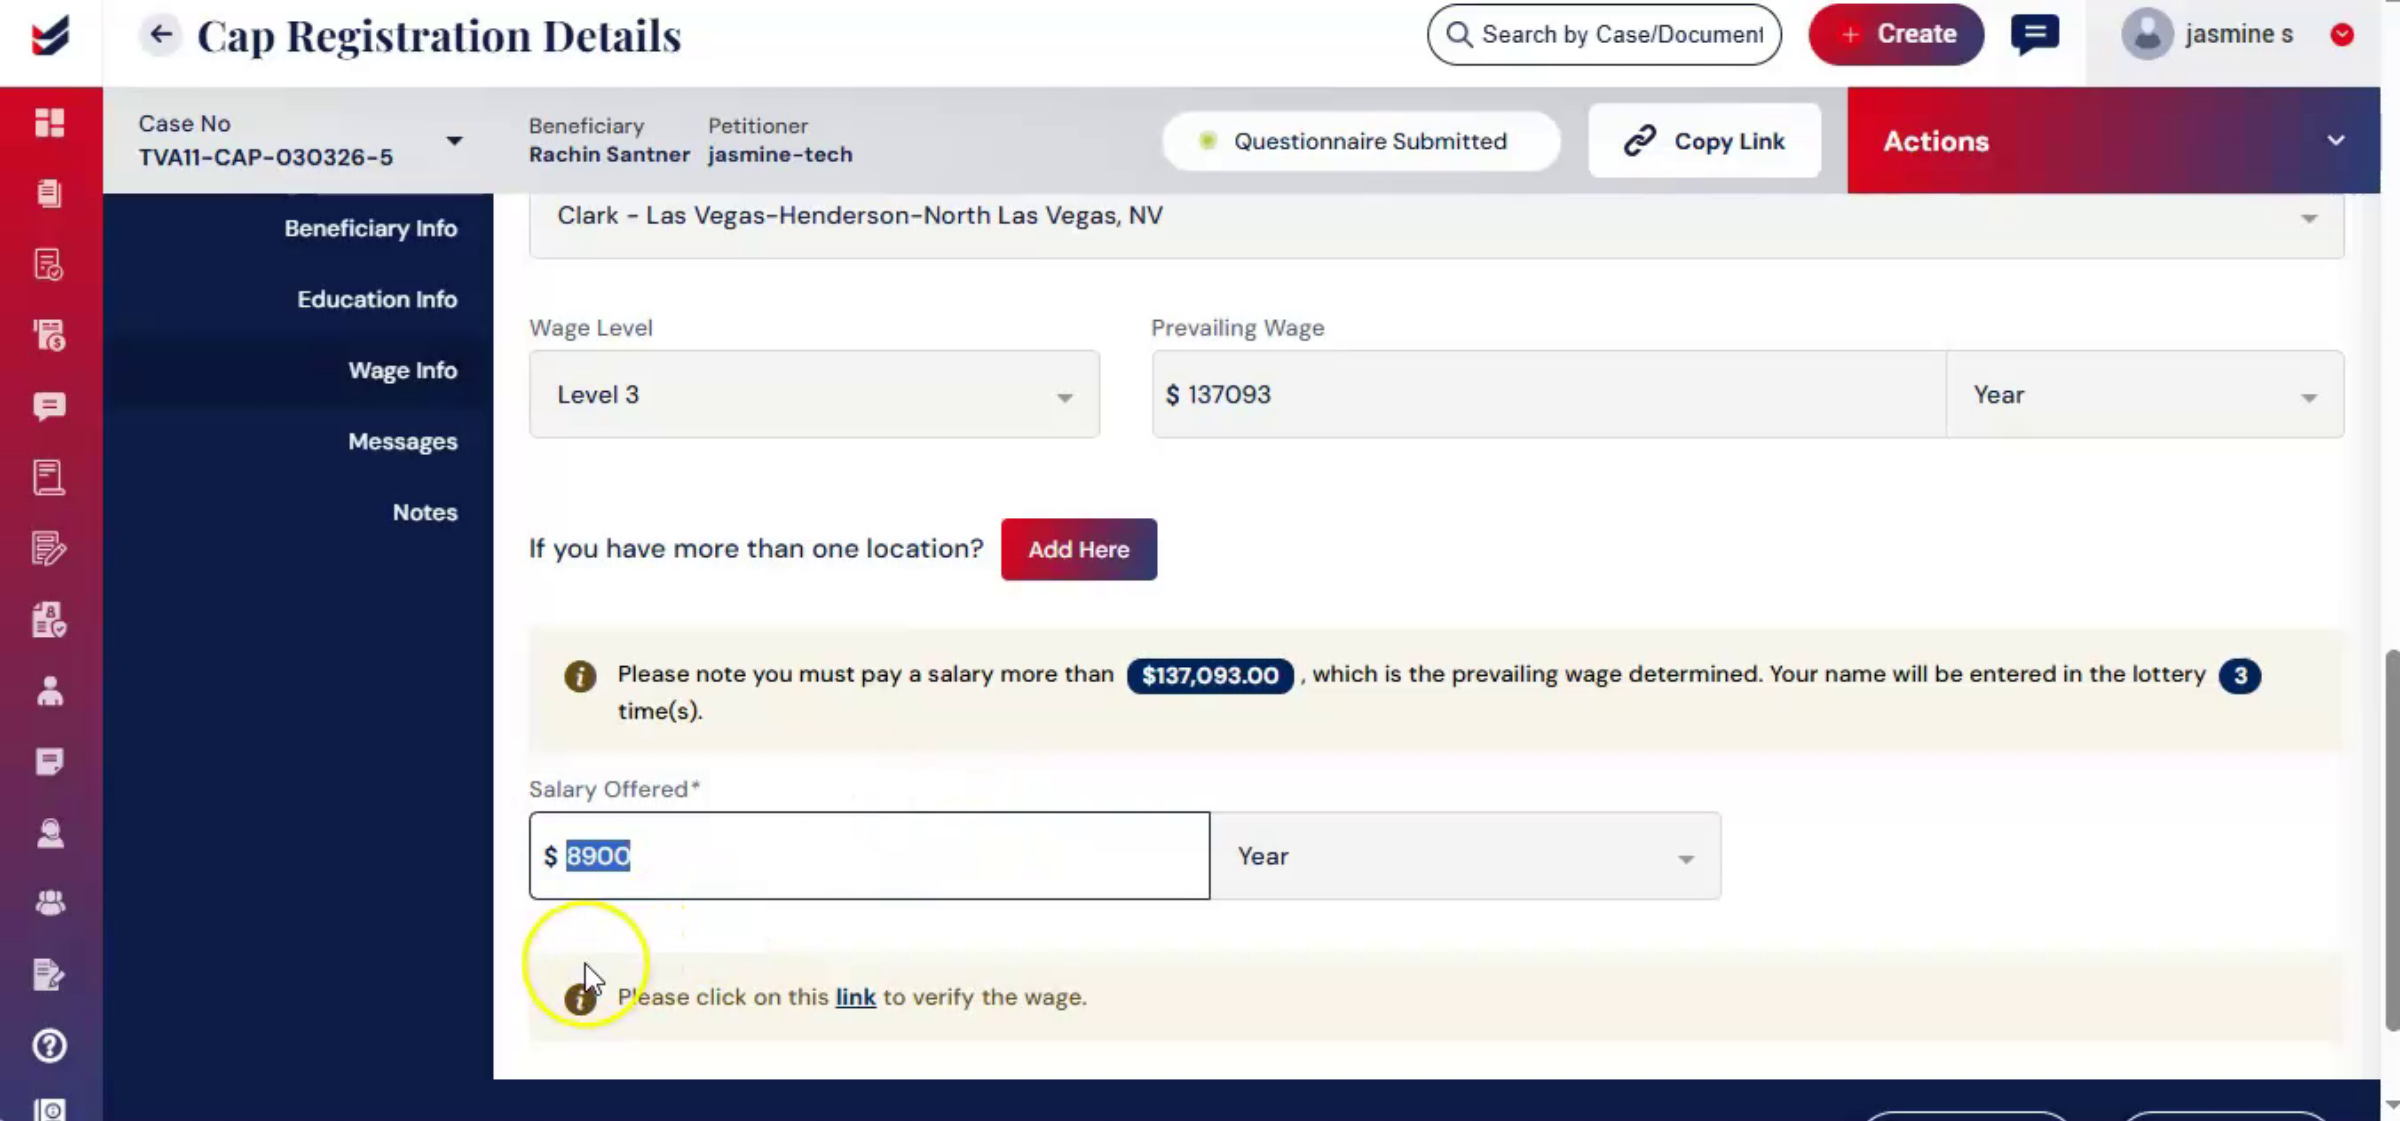
31. Completing Wage Info Form Submission
 * click the image to view enlarged
Complete the Wage Info form by entering the offered salary, selecting the payment basis, and clicking Submit to verify the wage.
32. External Wage Verification Link
 * click the image to view enlarged
Additionally, ImmiBox provides a direct verification link to the official office of foreign labor certification. The OFLC wage search portal offers further validation.
33. Editing And Submitting To Law Firm
 * click the image to view enlarged
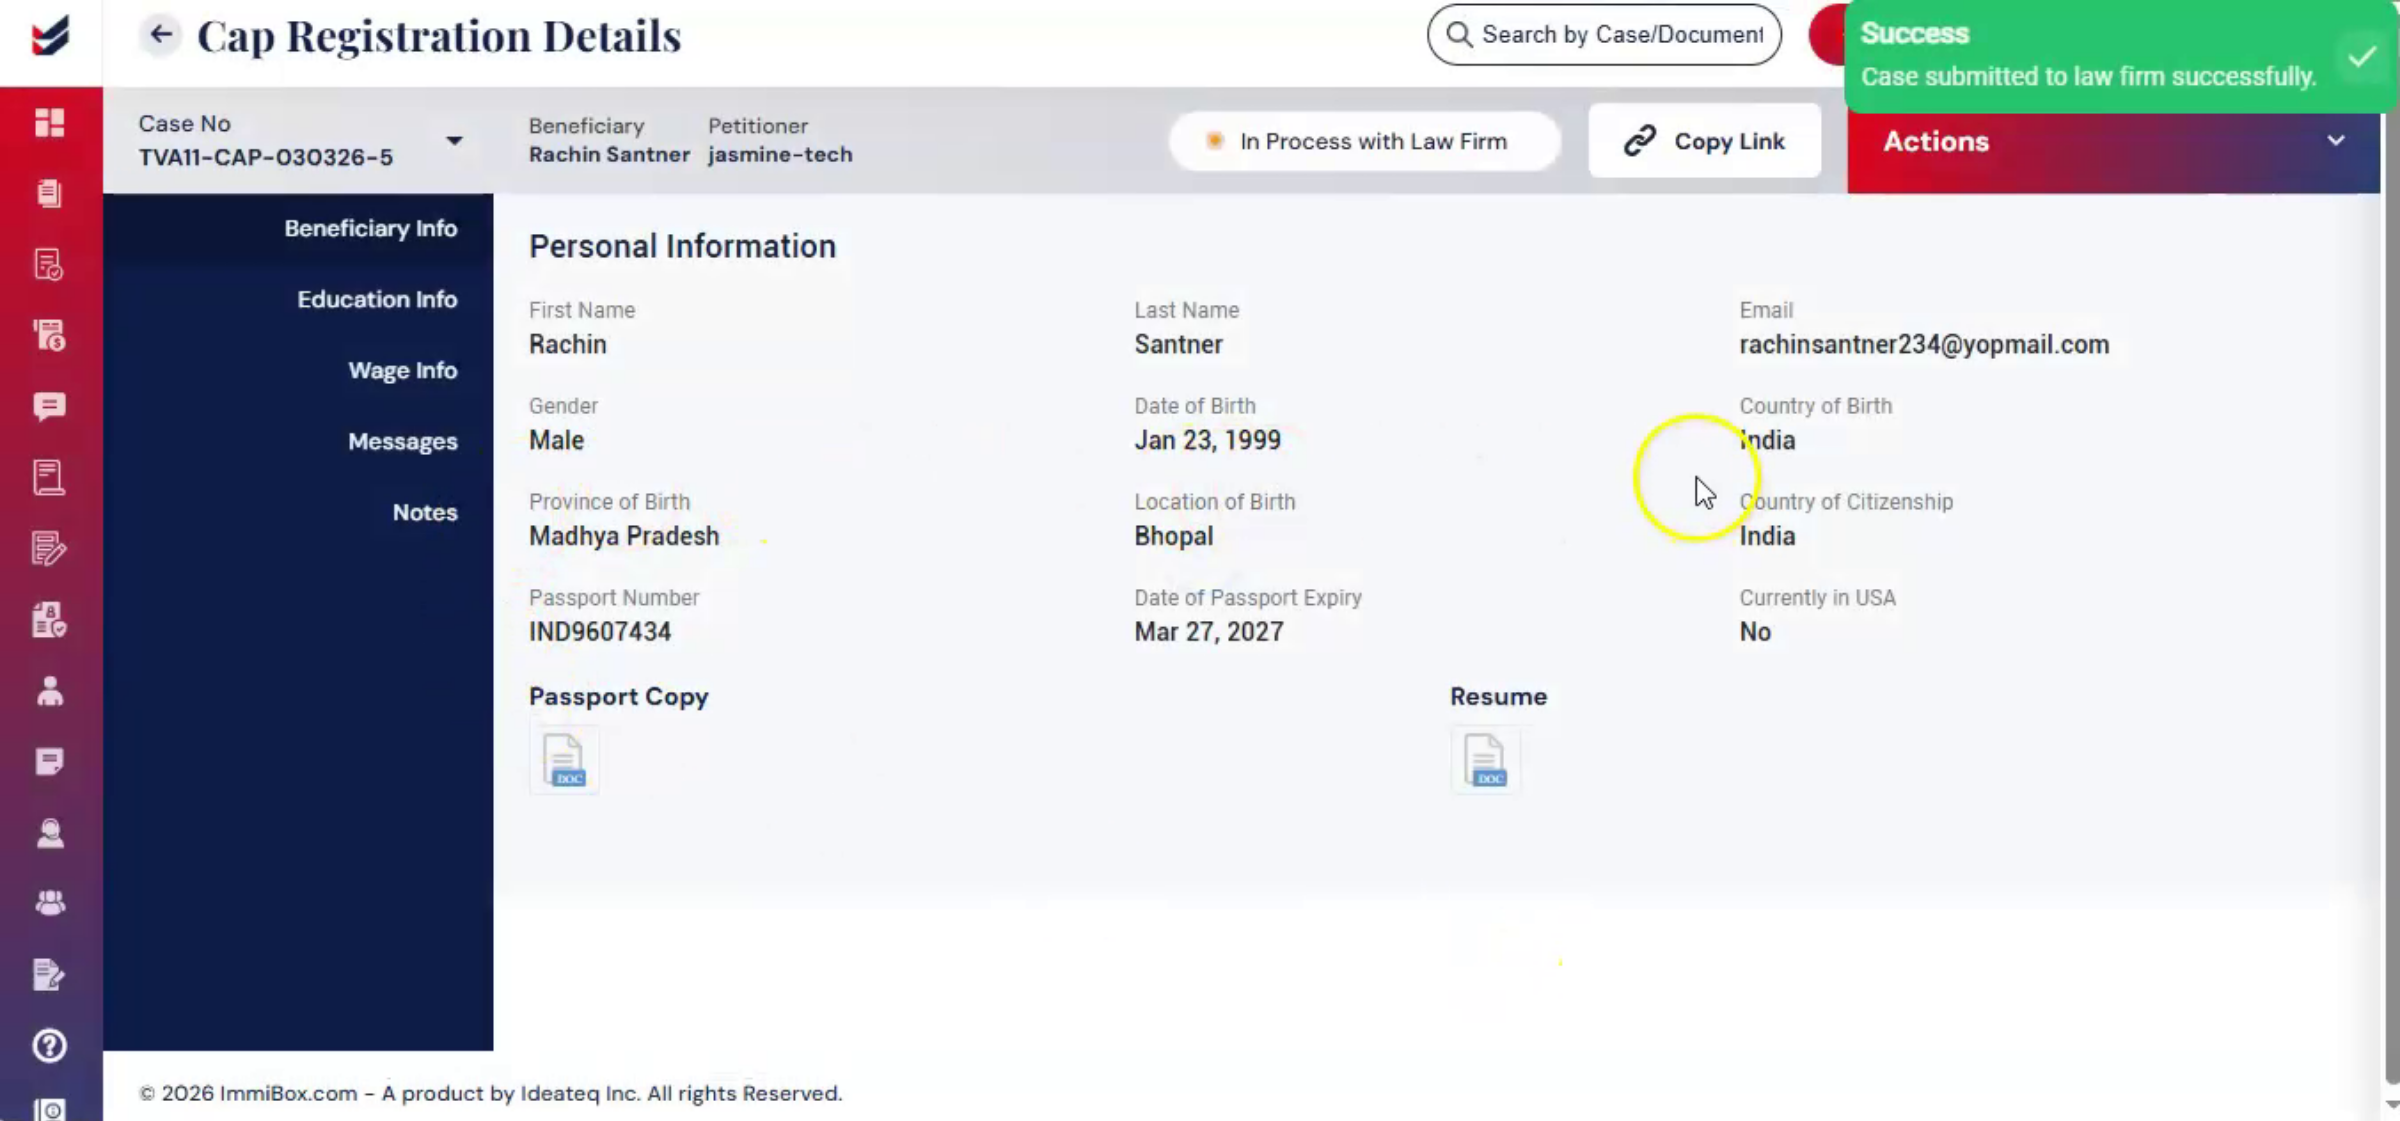
If you need to make edits to the questionnaire or wage info, complete all necessary updates first. Go to Actions, click Submit to Law Firm. Add comments, click Submit. Forwarding the case to the law firm creates a checkpoint for legal review.
34. Legal Review Importance
 * click the image to view enlarged
It ensures that both the questionnaire and wage info are verified by professionals before filing with USCIS.
35. Post Submission Actions Menu
 * click the image to view enlarged
After submitting to Law Firm, you will notice that in the Actions menu, only the Hold or Abandon Case option remains accessible. Below the Wage Info section, you will find the Messages feature. This allows you to send messages to the beneficiary or law firm users.
36. Using Messages Feature
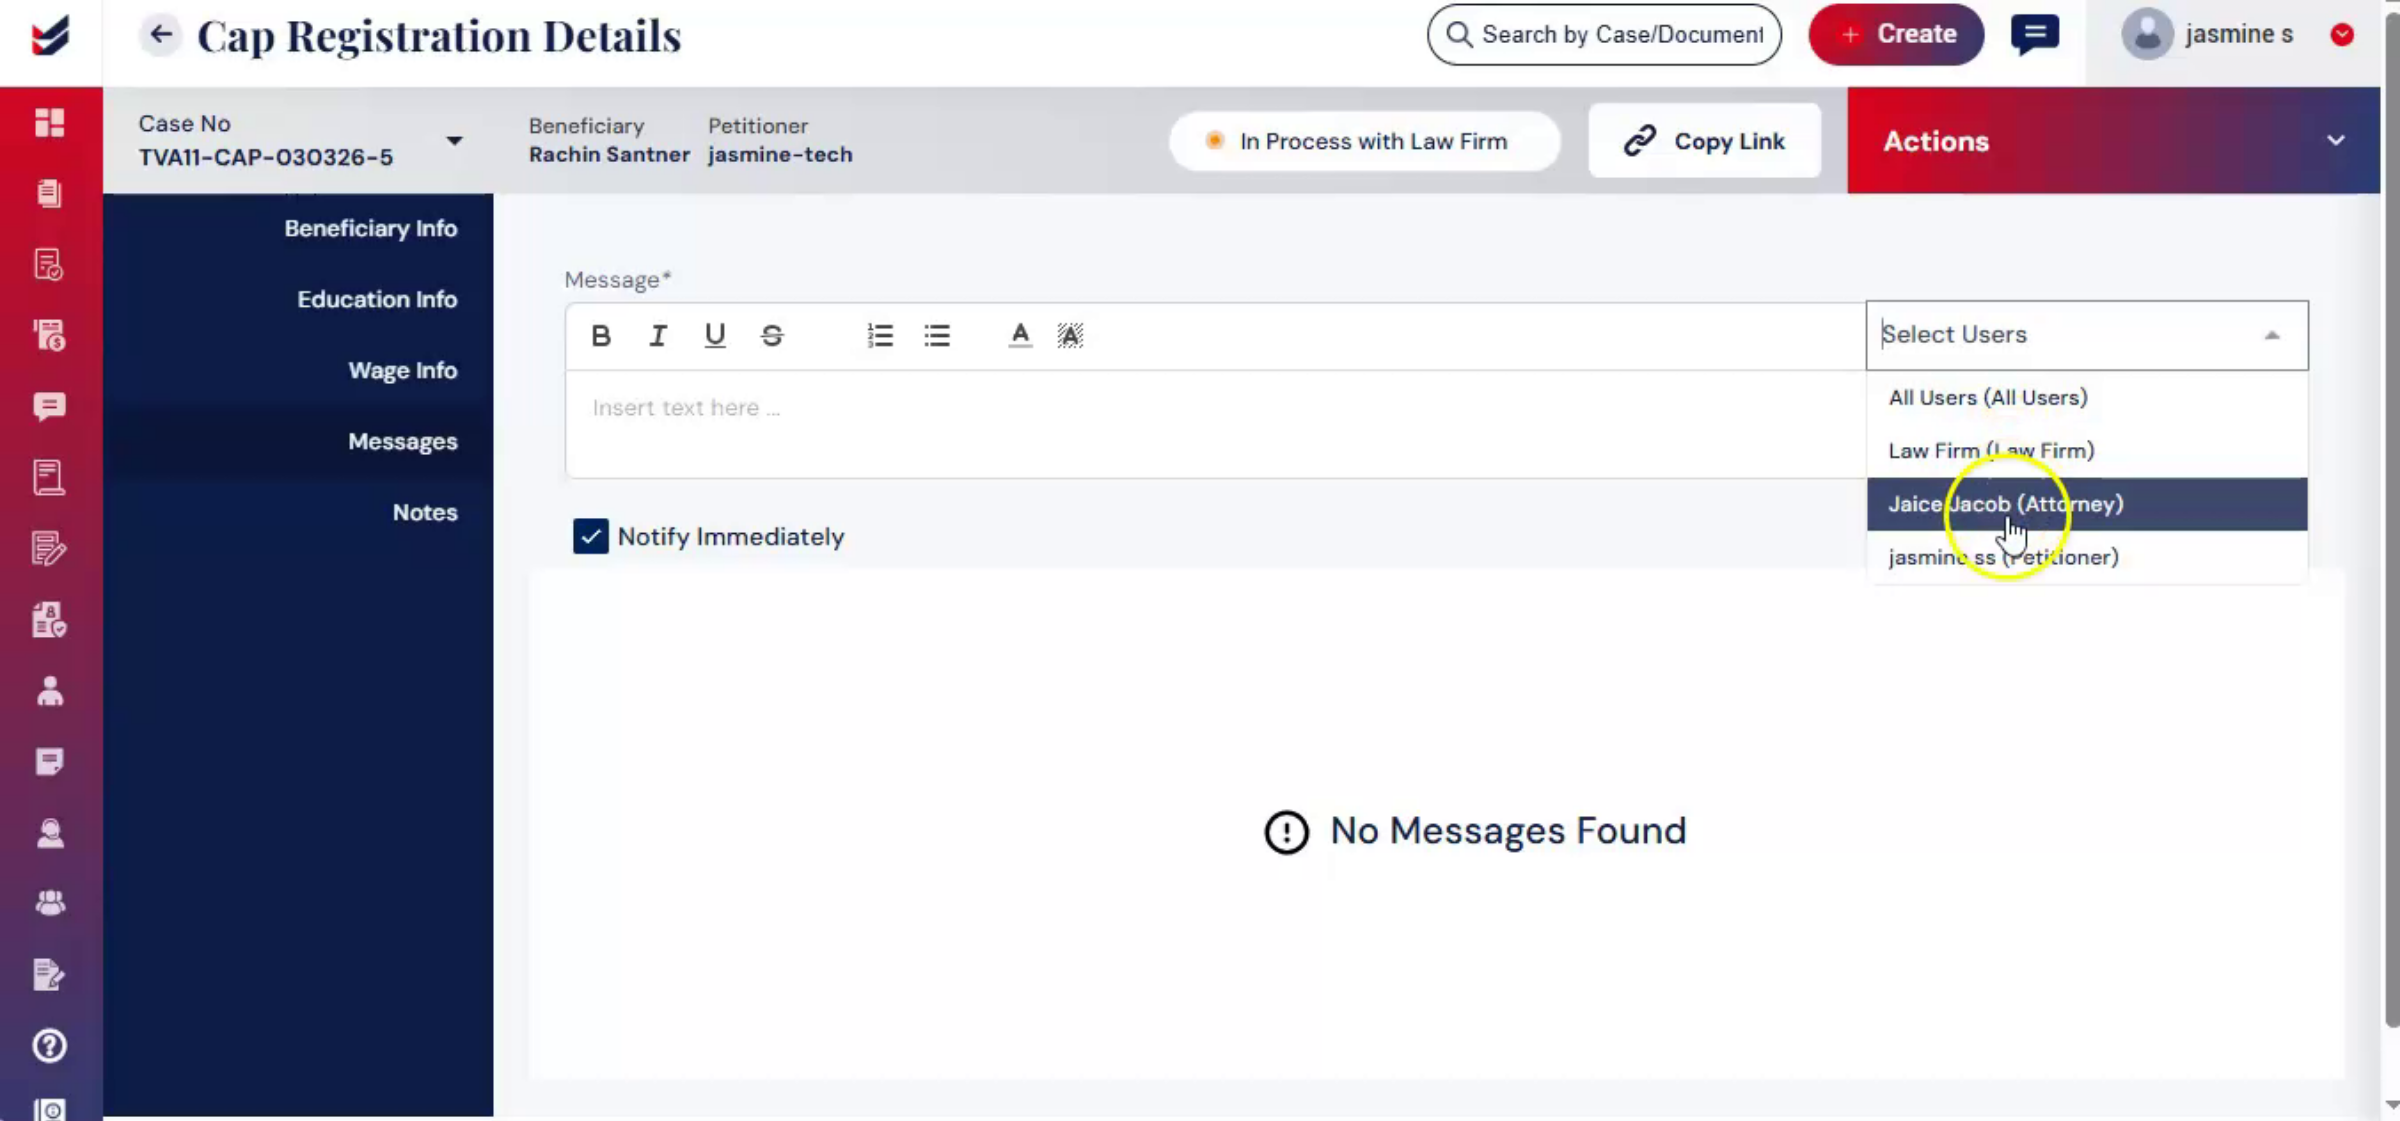 * click the image to view enlarged
Select Users from the list. Draft your message. Click Submit.
37. Case Ownership Transfer
 * click the image to view enlarged
All submitted information remains stored within the case record. From this point onward, the petitioner's role is complete, and the law firm takes ownership of the case to manage the remaining steps.
38. Video Closing Remarks
 * click the image to view enlarged
Thank you for watching.

