

Managing Prevailing Wage Determinations in ImmiBox
Overview
Welcome! This video demonstrates how to manage the Prevailing Wage Determination (PWD) process within ImmiBox using a structured and customizable workflow. It covers creating, filing, linking PWDs to PERM cases, and tracking case progress efficiently.
1. PWD Workflow Overview
 * click the image to view enlarged
Let's learn how the PWD process is managed in ImmiBox through a structured workflow. The workflow can also be customized to align with firm-specific processes through the Workflow Management Documentation. PWDs can be created and filed individually within ImmiBox and later linked to a PERM case when required.
2. PWD Integration With PERM
 * click the image to view enlarged
Additionally, a PWD can be initiated directly during the PERM process, allowing seamless integration between both case types.
3. Linking PWDs To PERM Cases
 * click the image to view enlarged
Individually created PWDs can be linked to PERM at any stage, ensuring continuity within the workflow.
4. Creating PWD From Dashboard
 * click the image to view enlarged
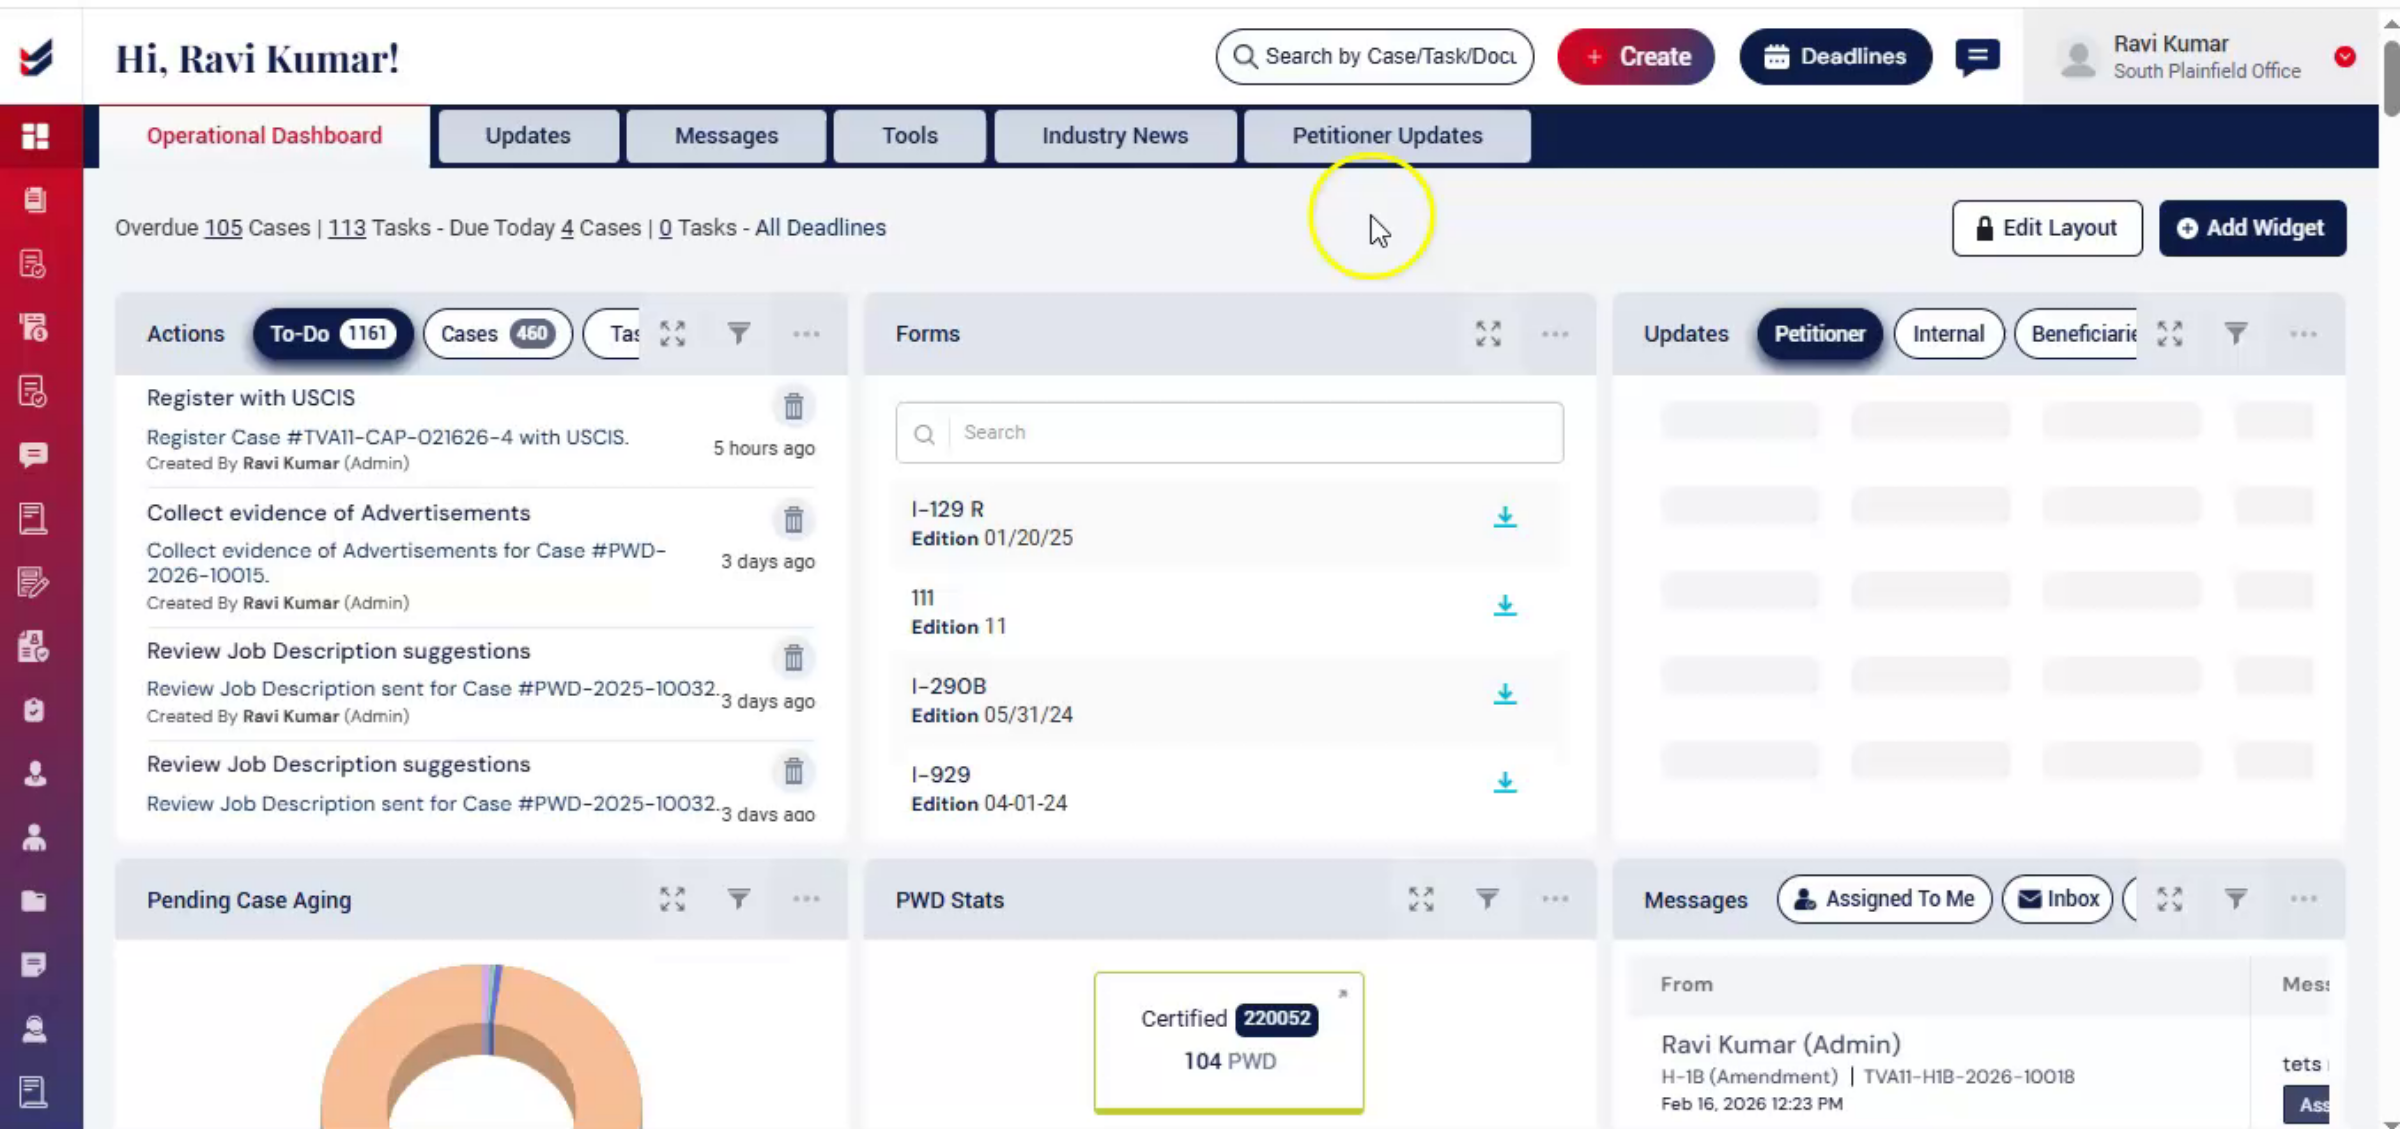
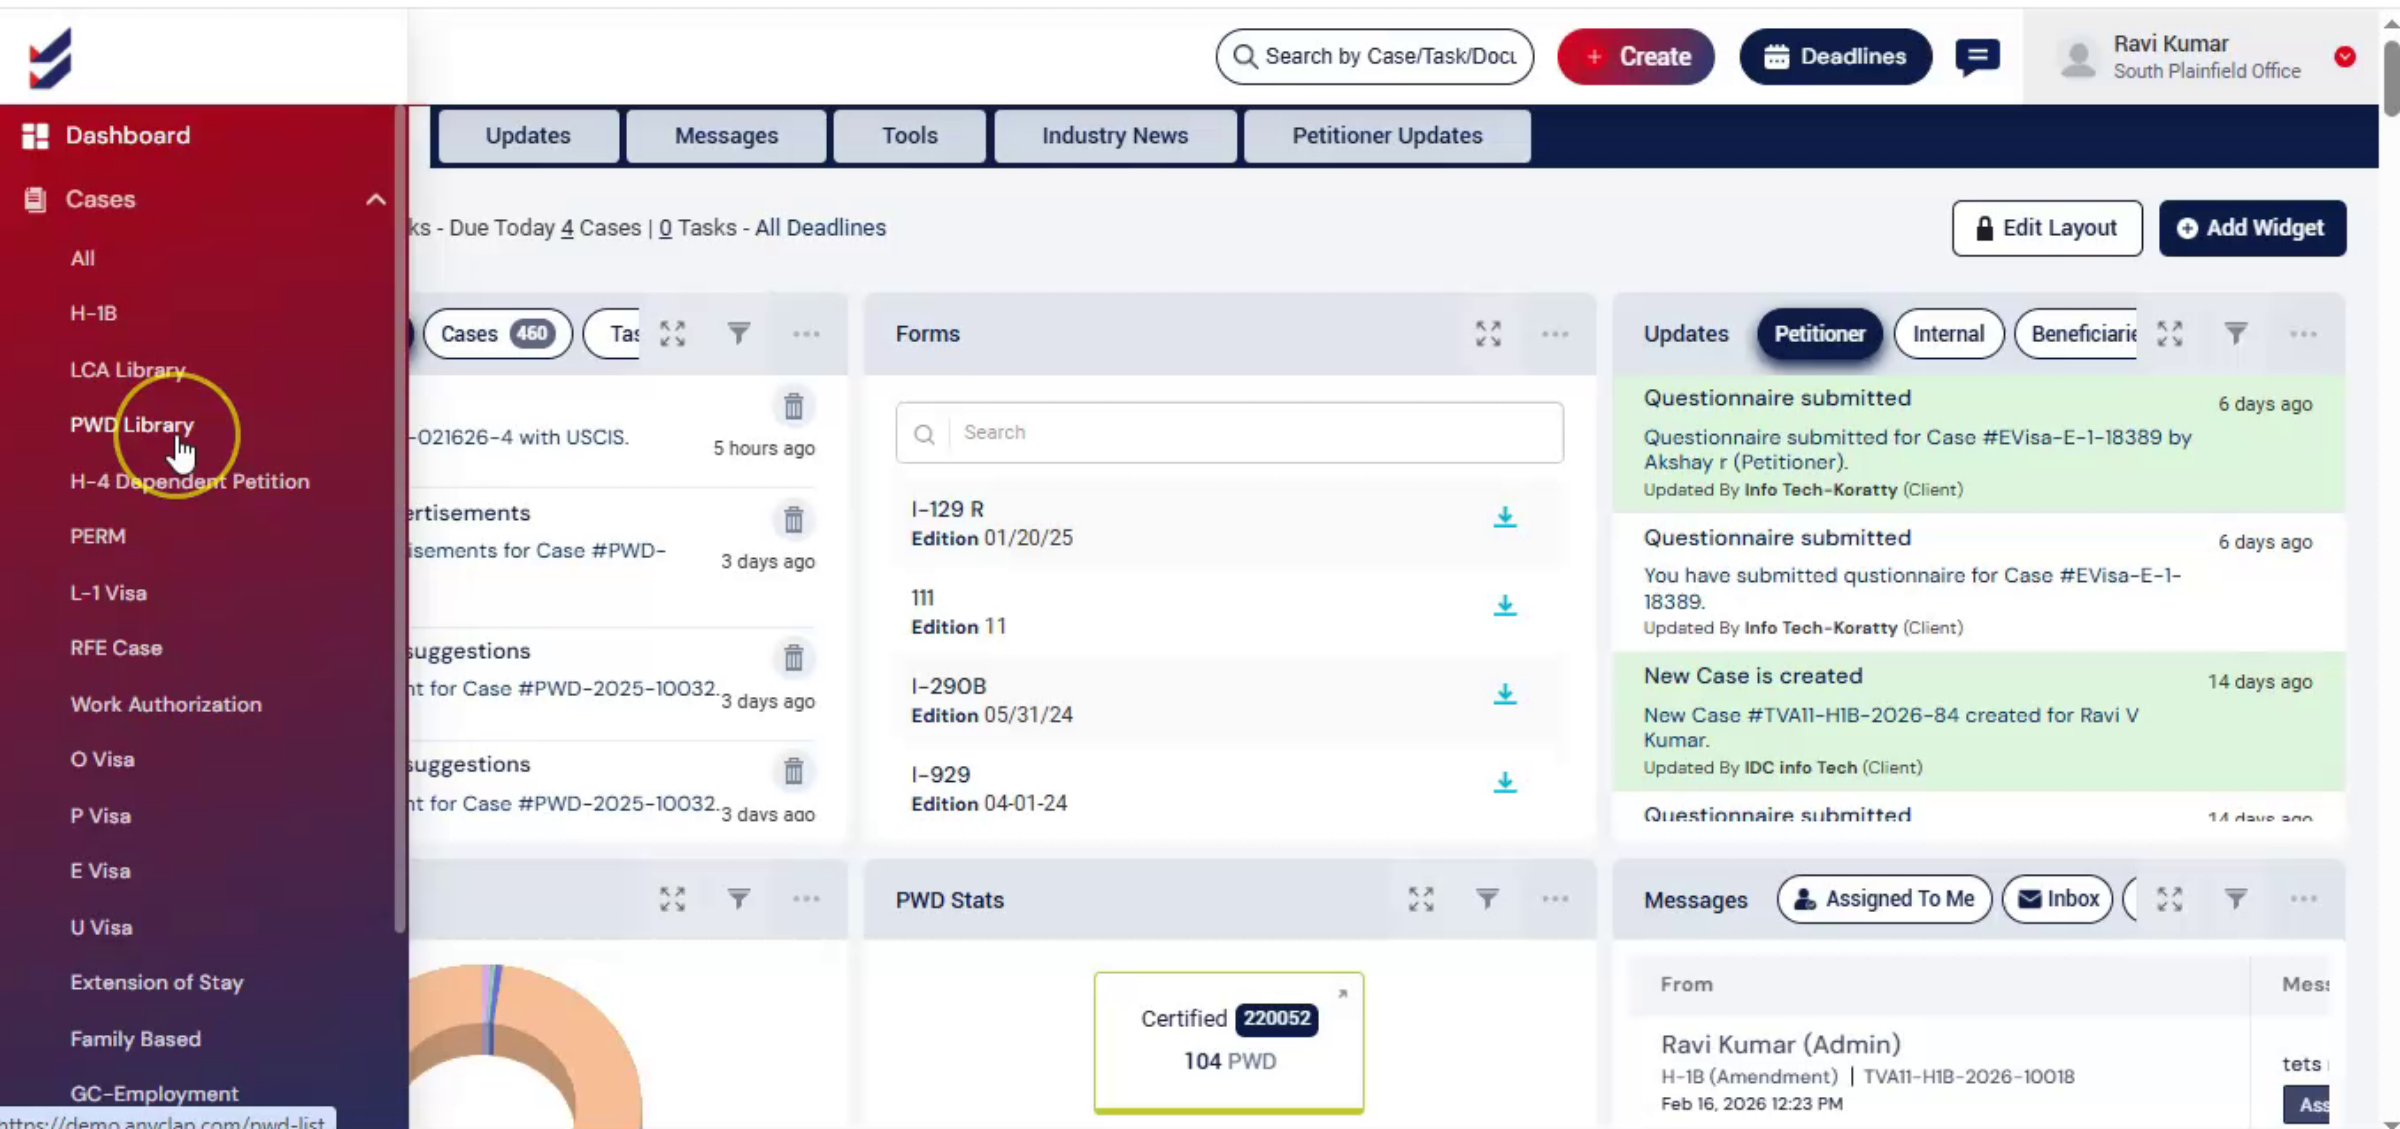
To create PWD, from the dashboard, click Create. Then choose a new PWD, or navigate to the left side and click PWD Library.
5. PWD Library Overview
 * click the image to view enlarged
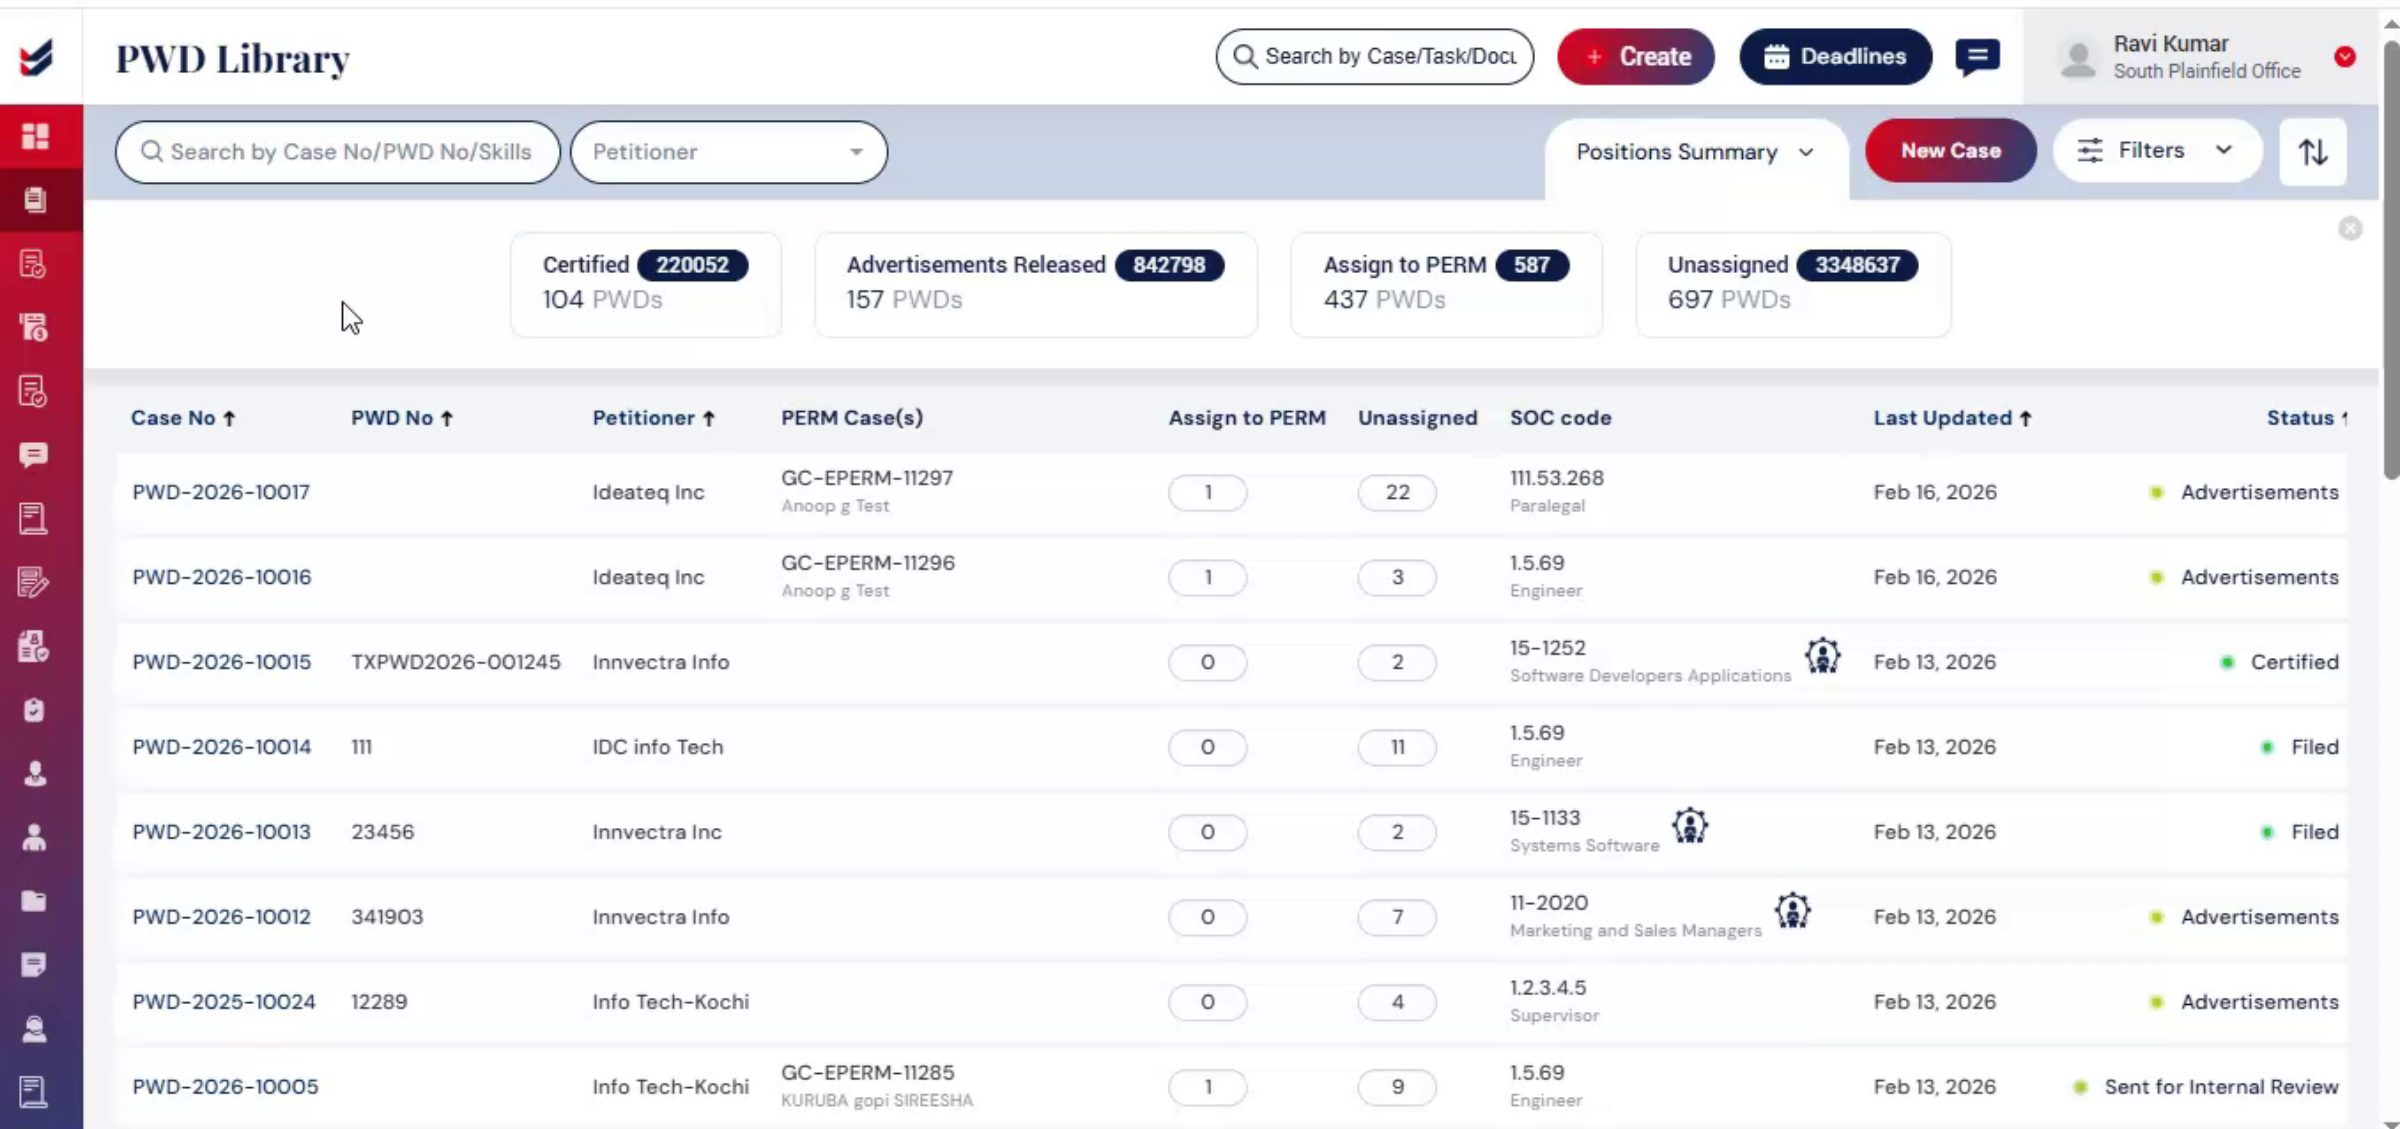
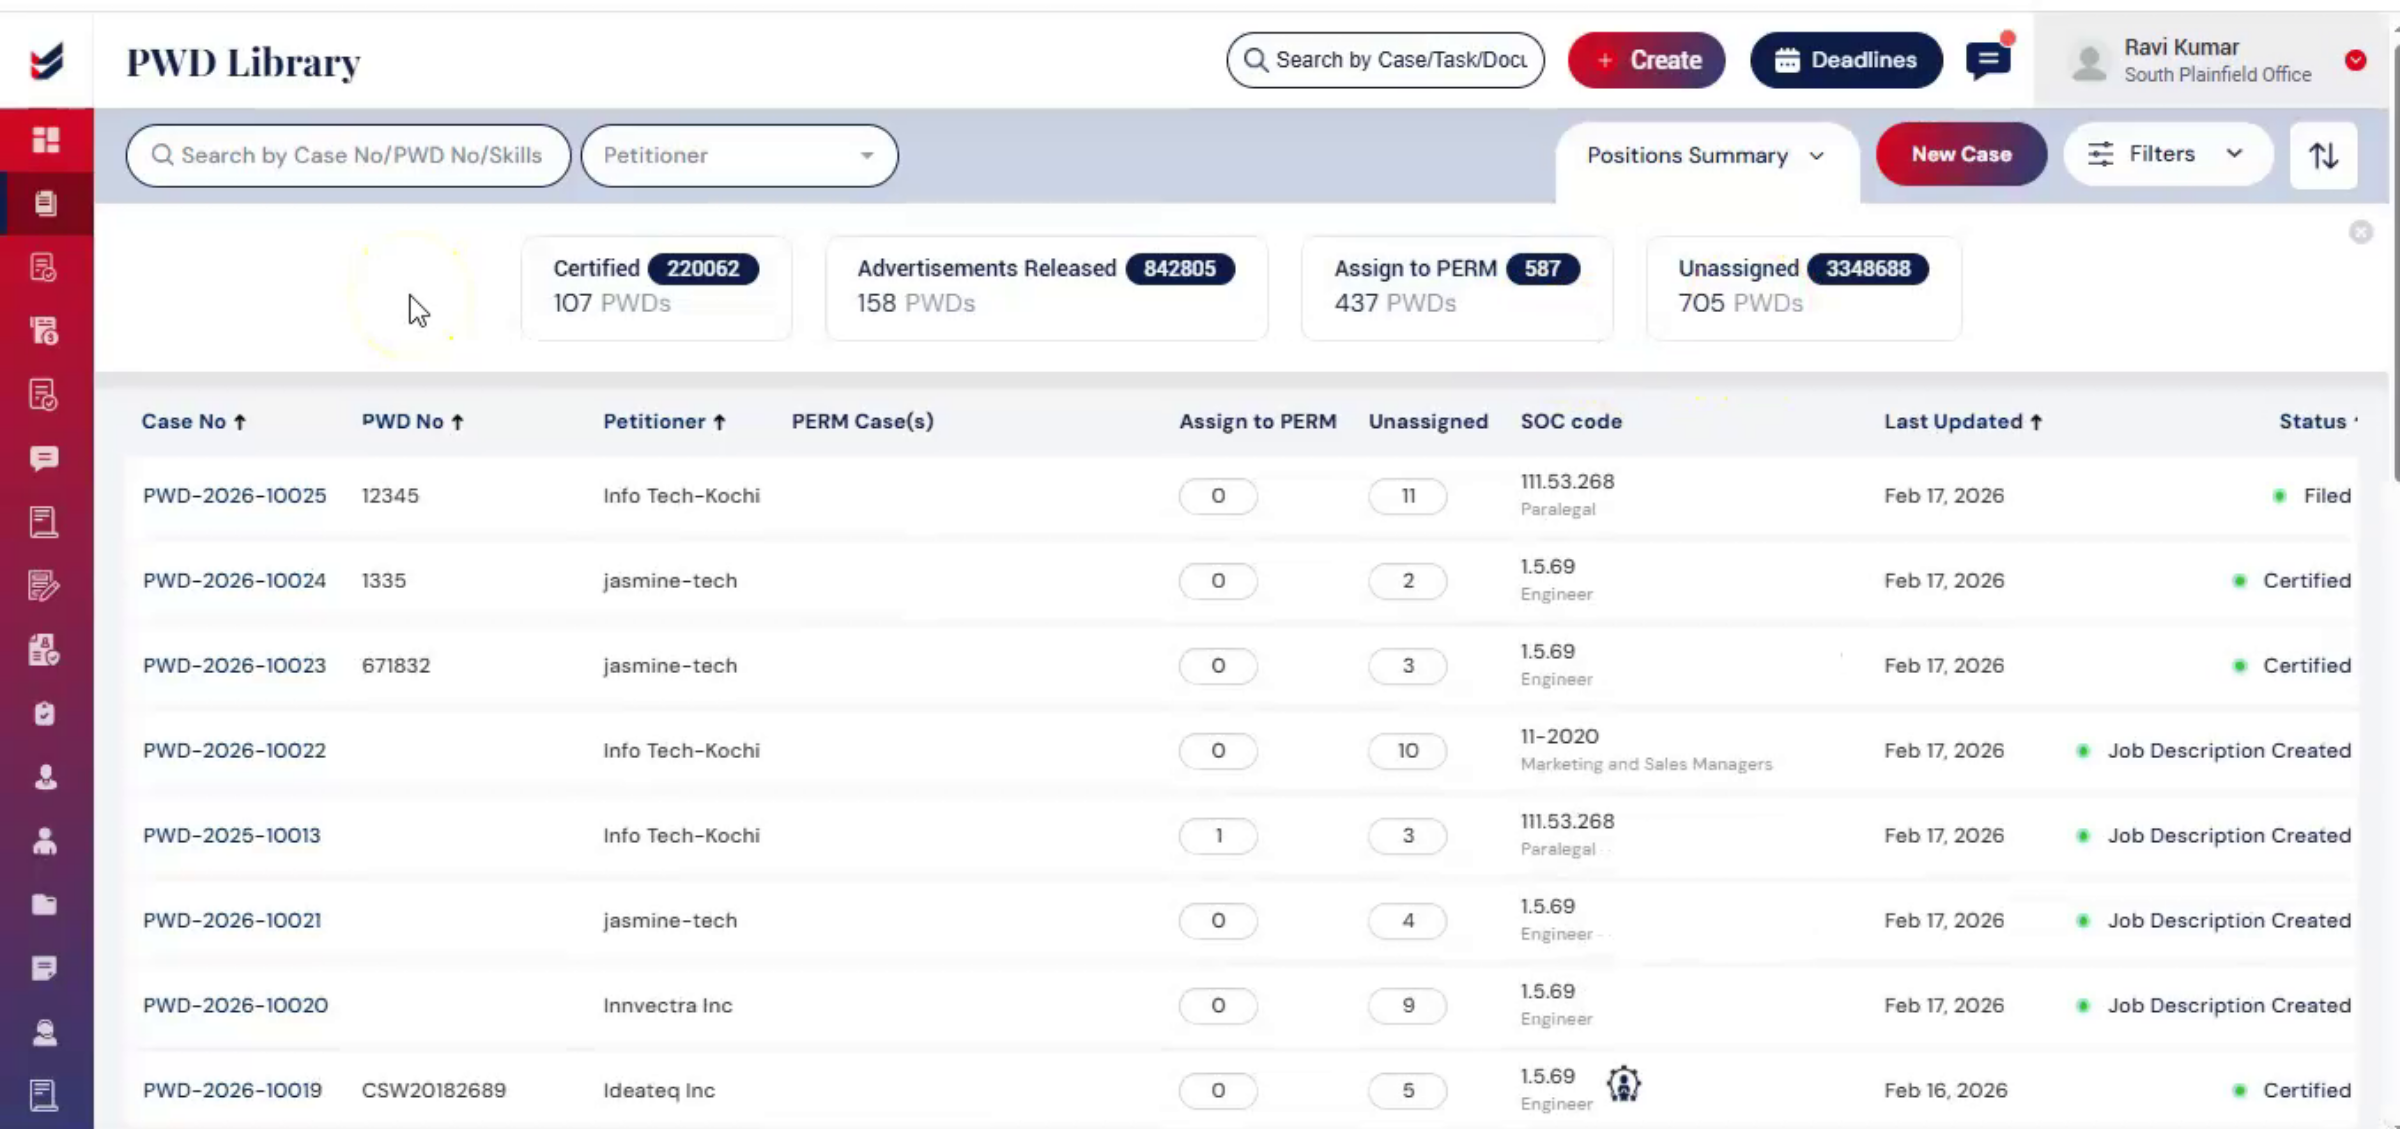
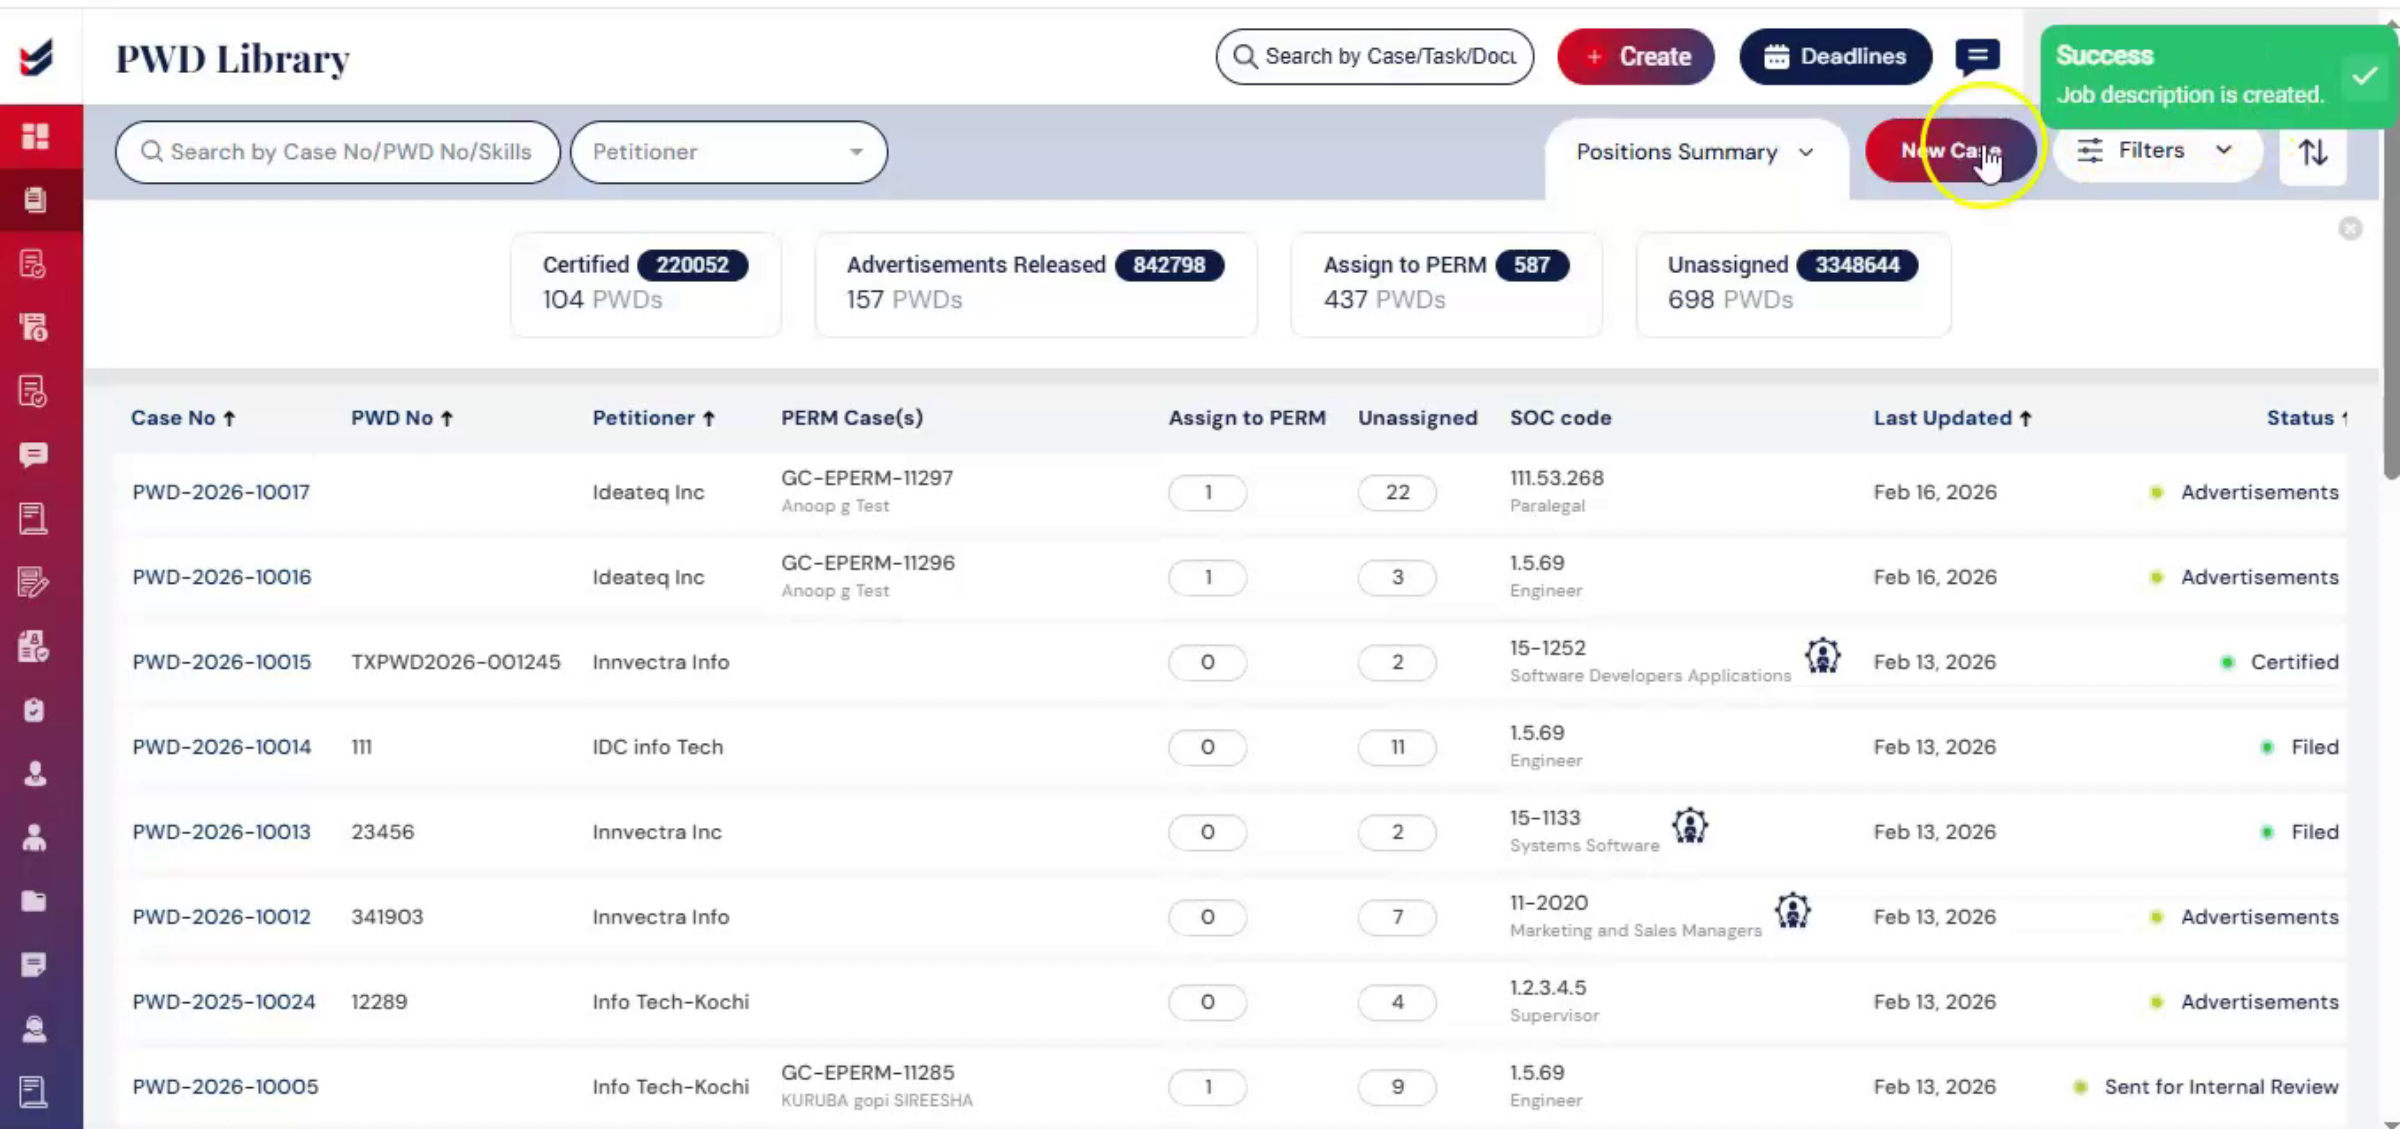
The PWD Library provides a centralized overview of all, prevailing wage, determination cases, offering clear visibility into case progressed and overall position volume.
6. PWD Status Indicators Explained
 * click the image to view enlarged
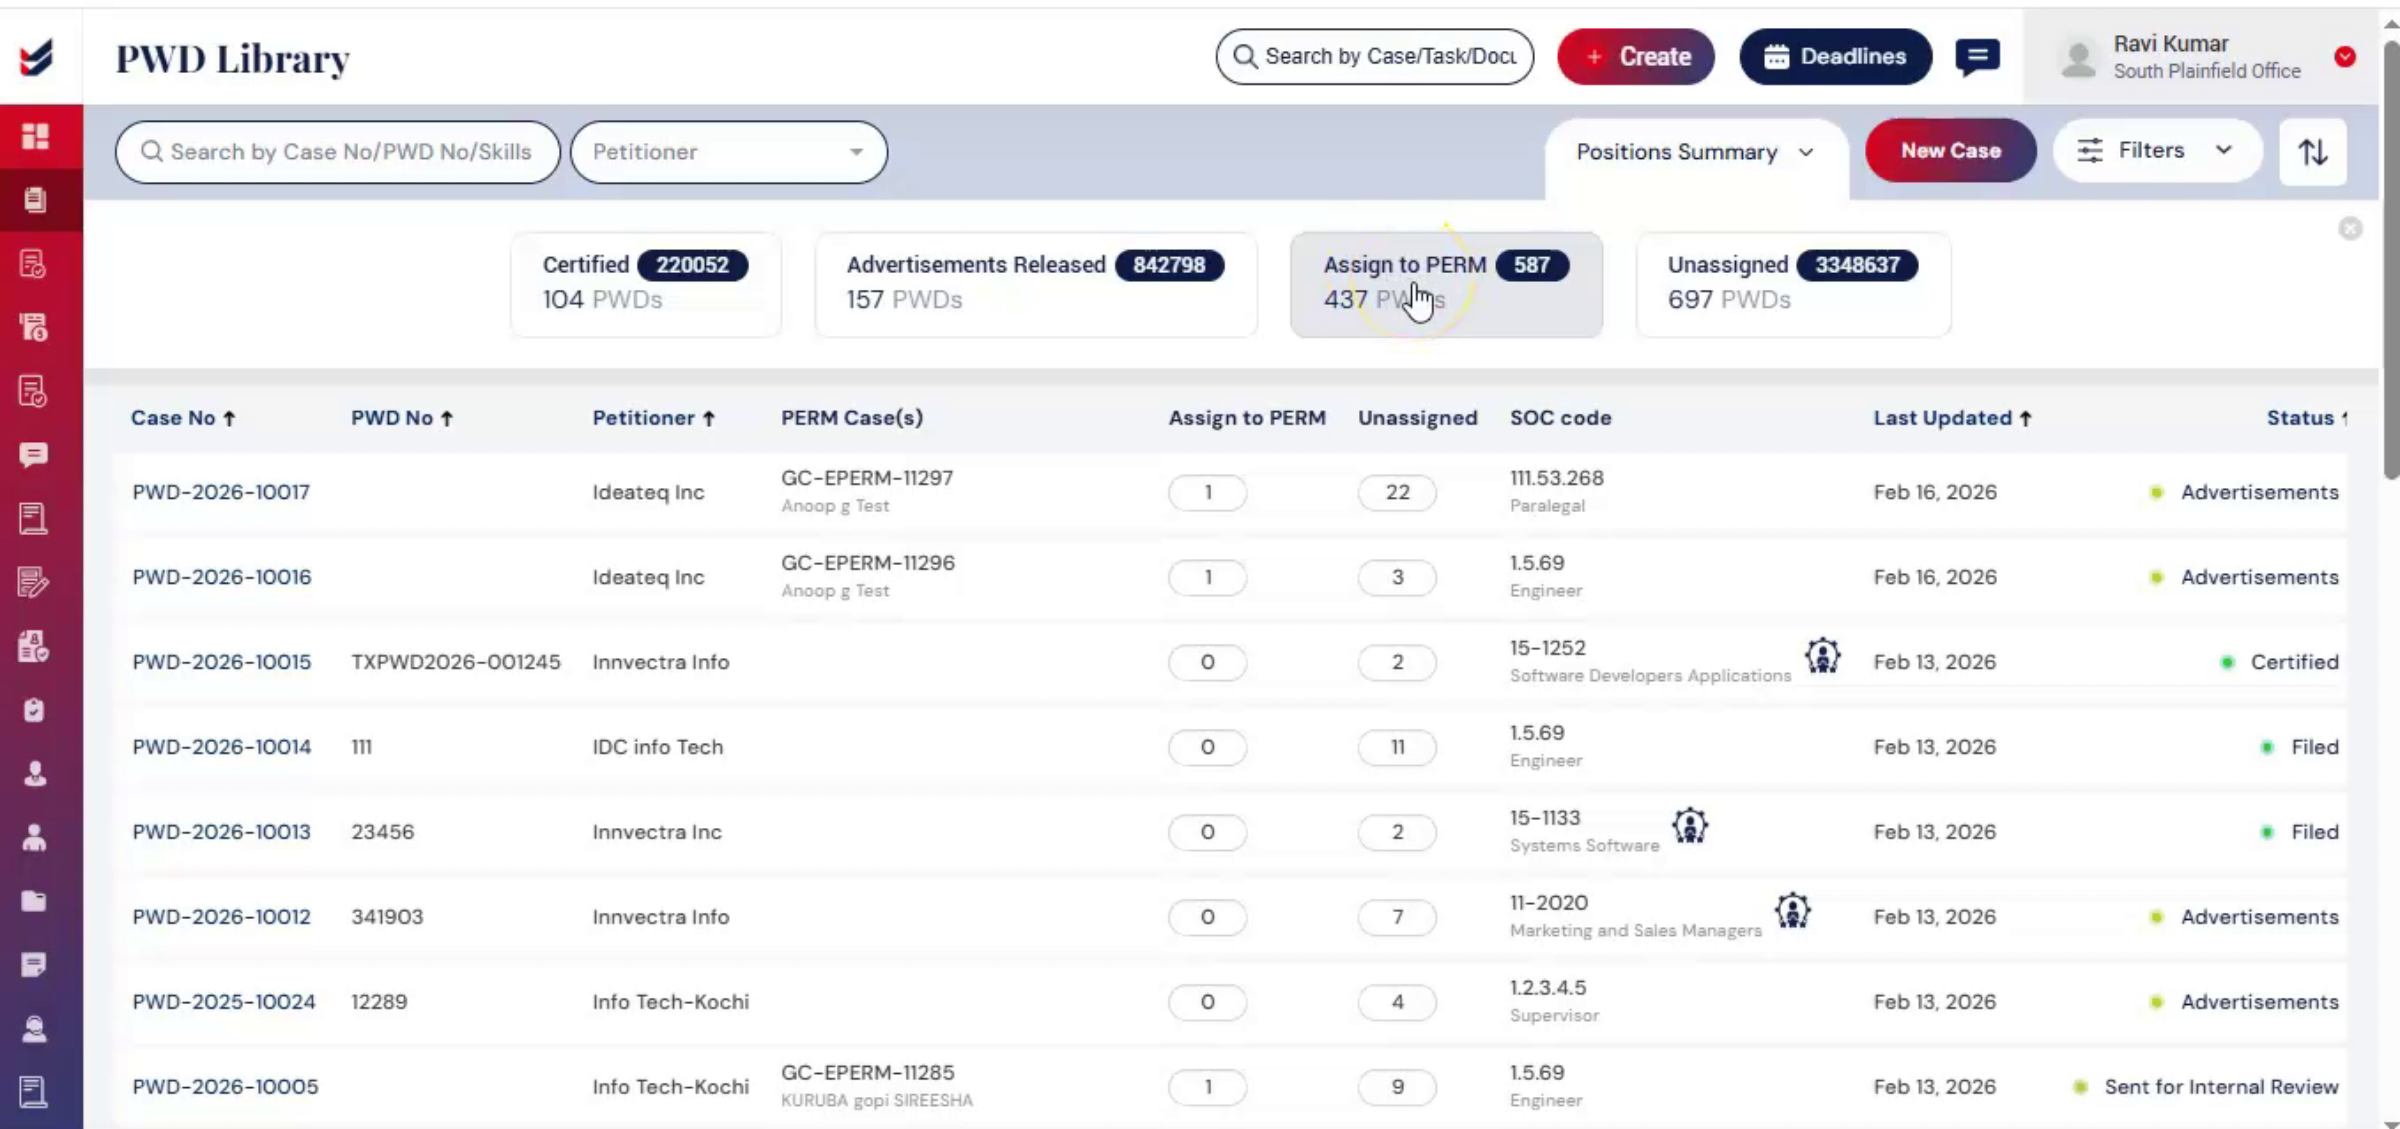
At the top of the page, key status indicators provide an immediate snapshot of case distribution. Certified indicates PWDs that have received certification. Advertisements released shows PWDs where recruitment advertisements have been released. Assigned to indicates PWDs that are linked to a PERM case.
7. Unassigned PWD Cases
 * click the image to view enlarged
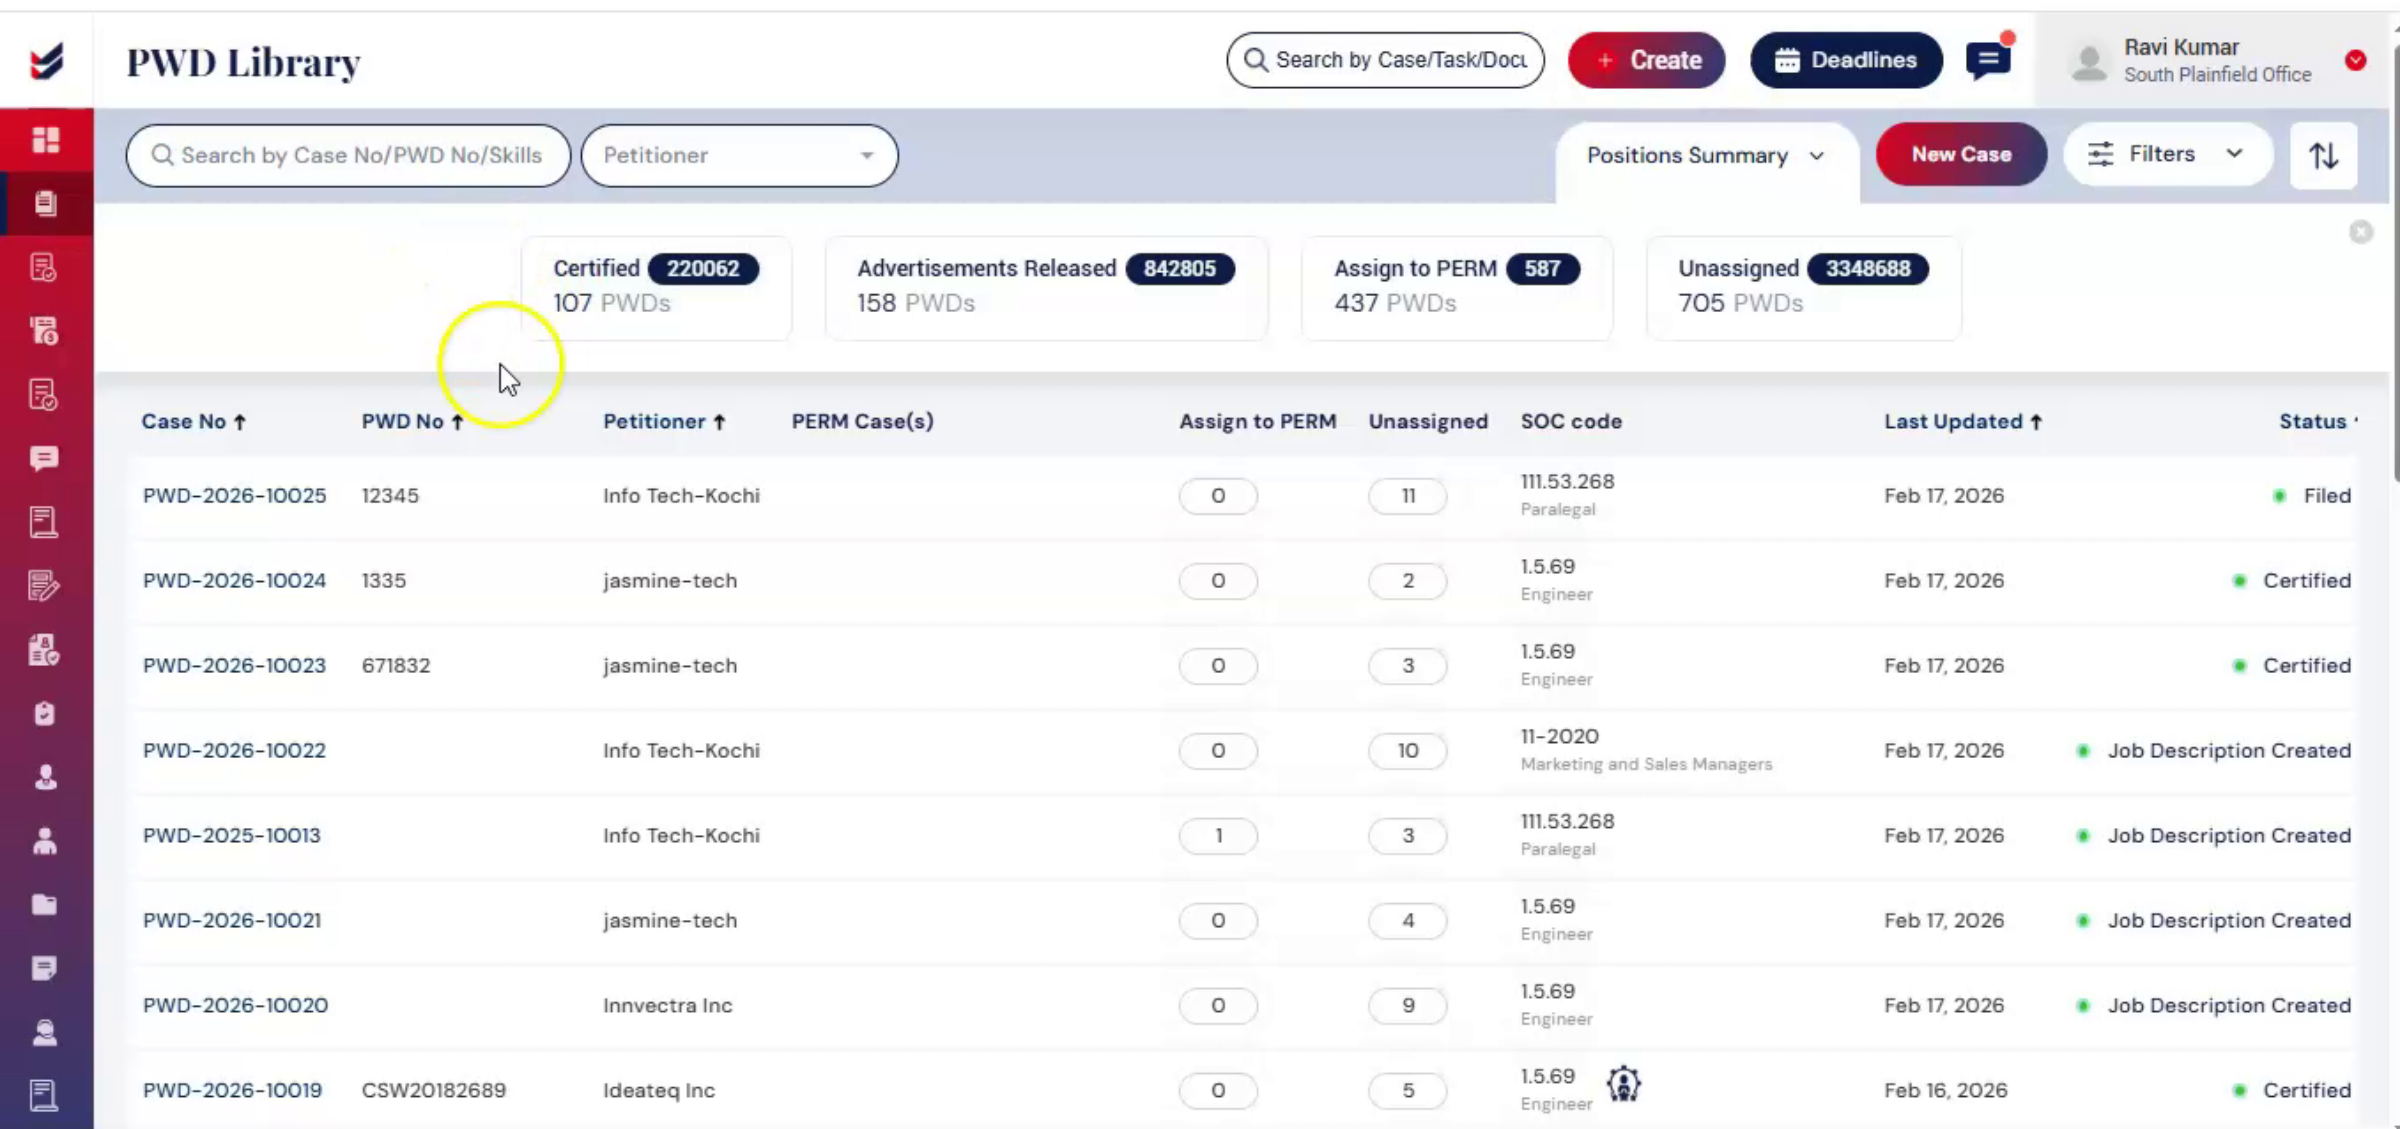
Unassigned shows PWDs that are not yet connected to a PERM matter.
8. PWD Status Metrics
 * click the image to view enlarged
Each status card displays two key metrics, total number of positions, total number of PWD cases.
9. Certified PWD Case Example
 * click the image to view enlarged
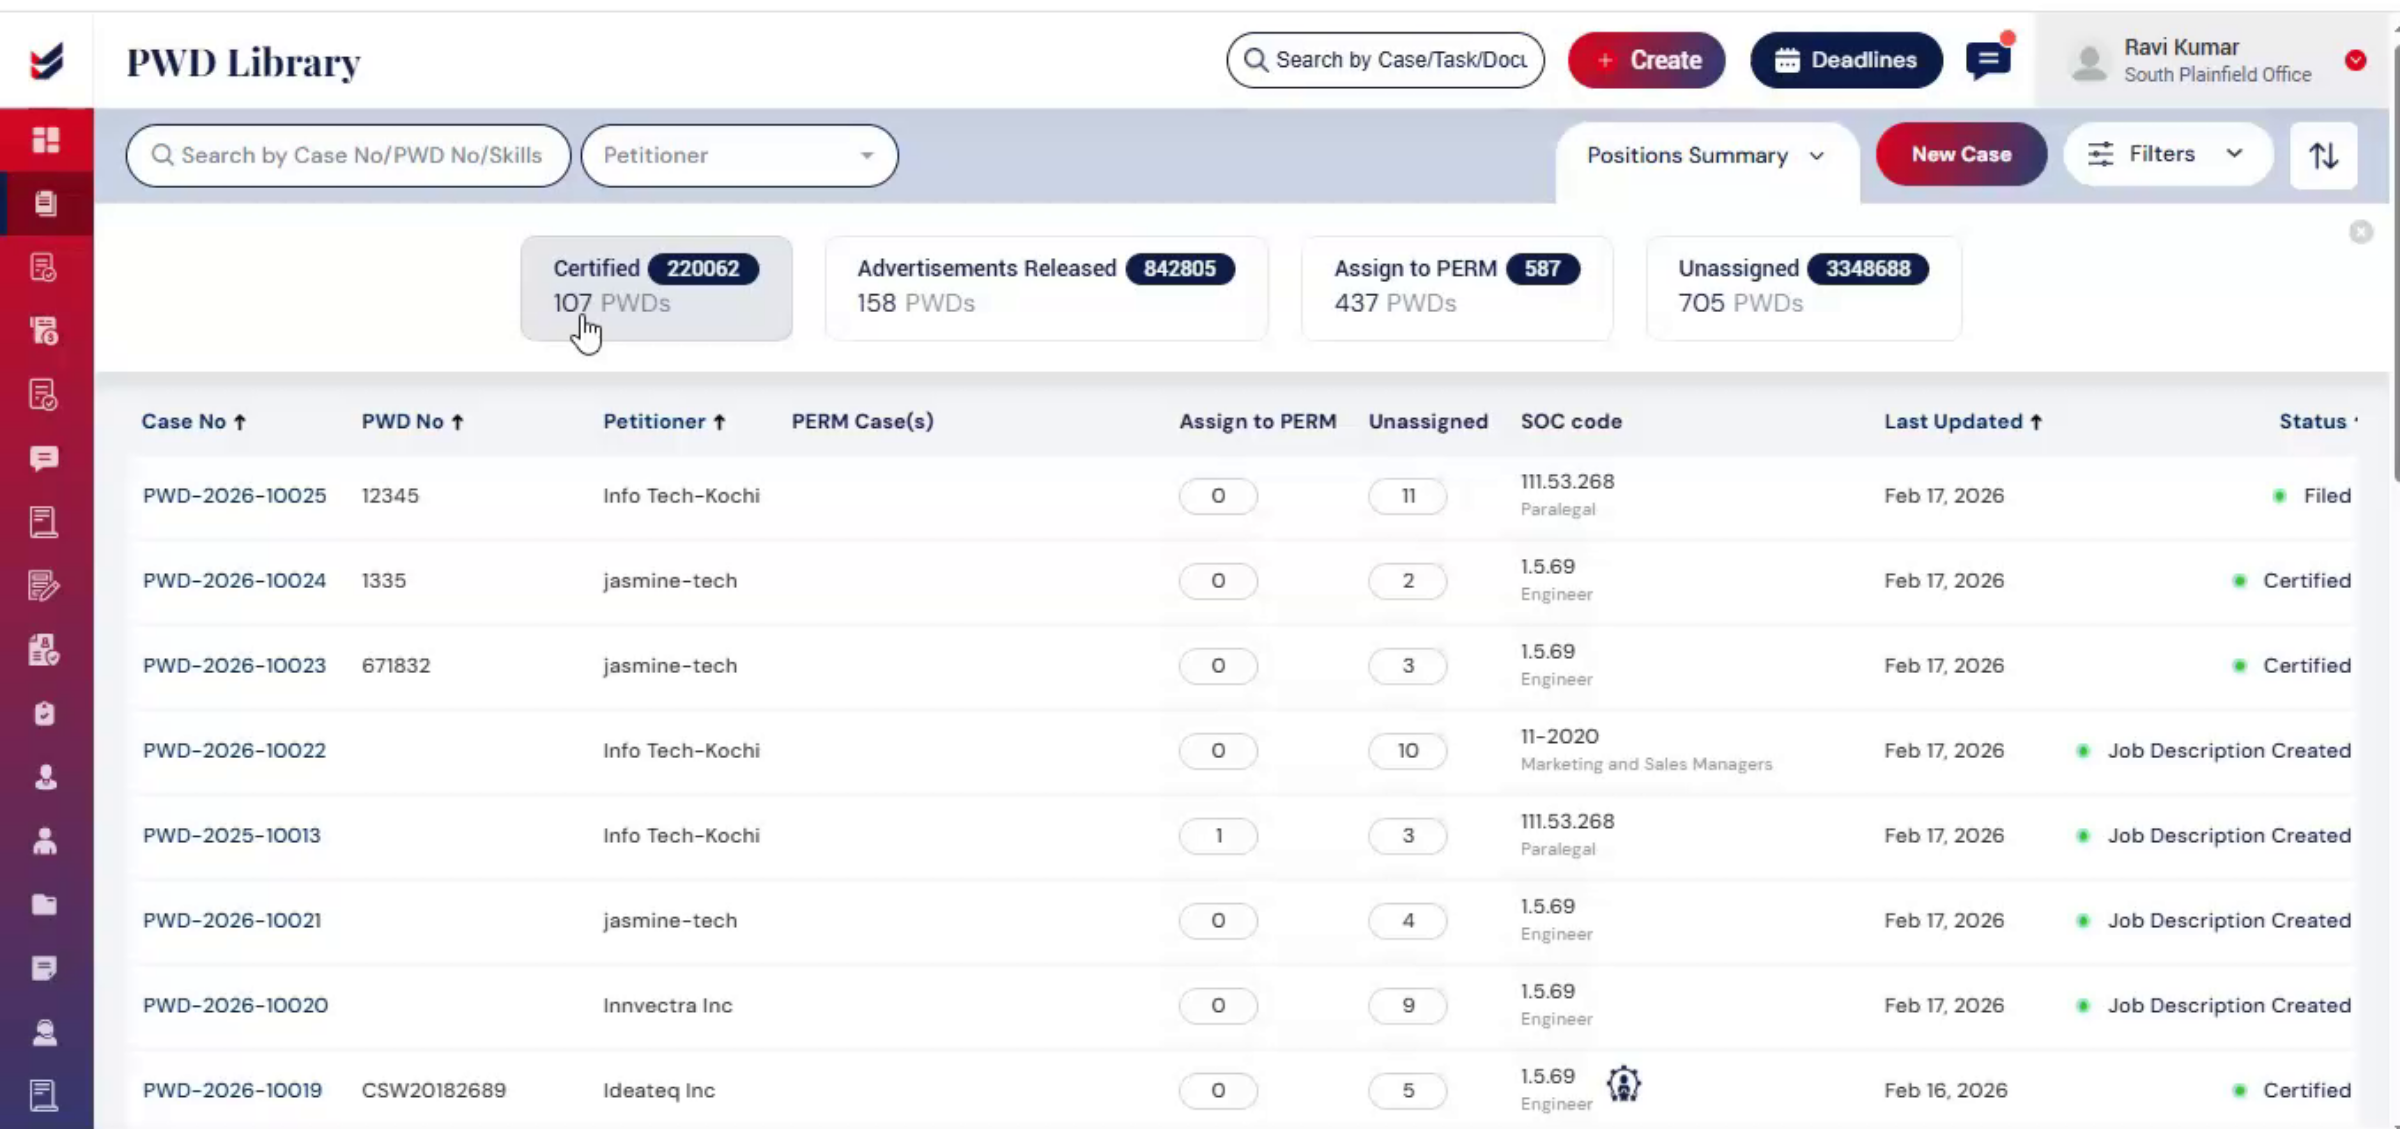
For example, under certified 220,062 to total number of positions covered under all certified PWD cases, 107 PWDs to total number of certified PWD case filings.
10. Petitioner Search Function
 * click the image to view enlarged
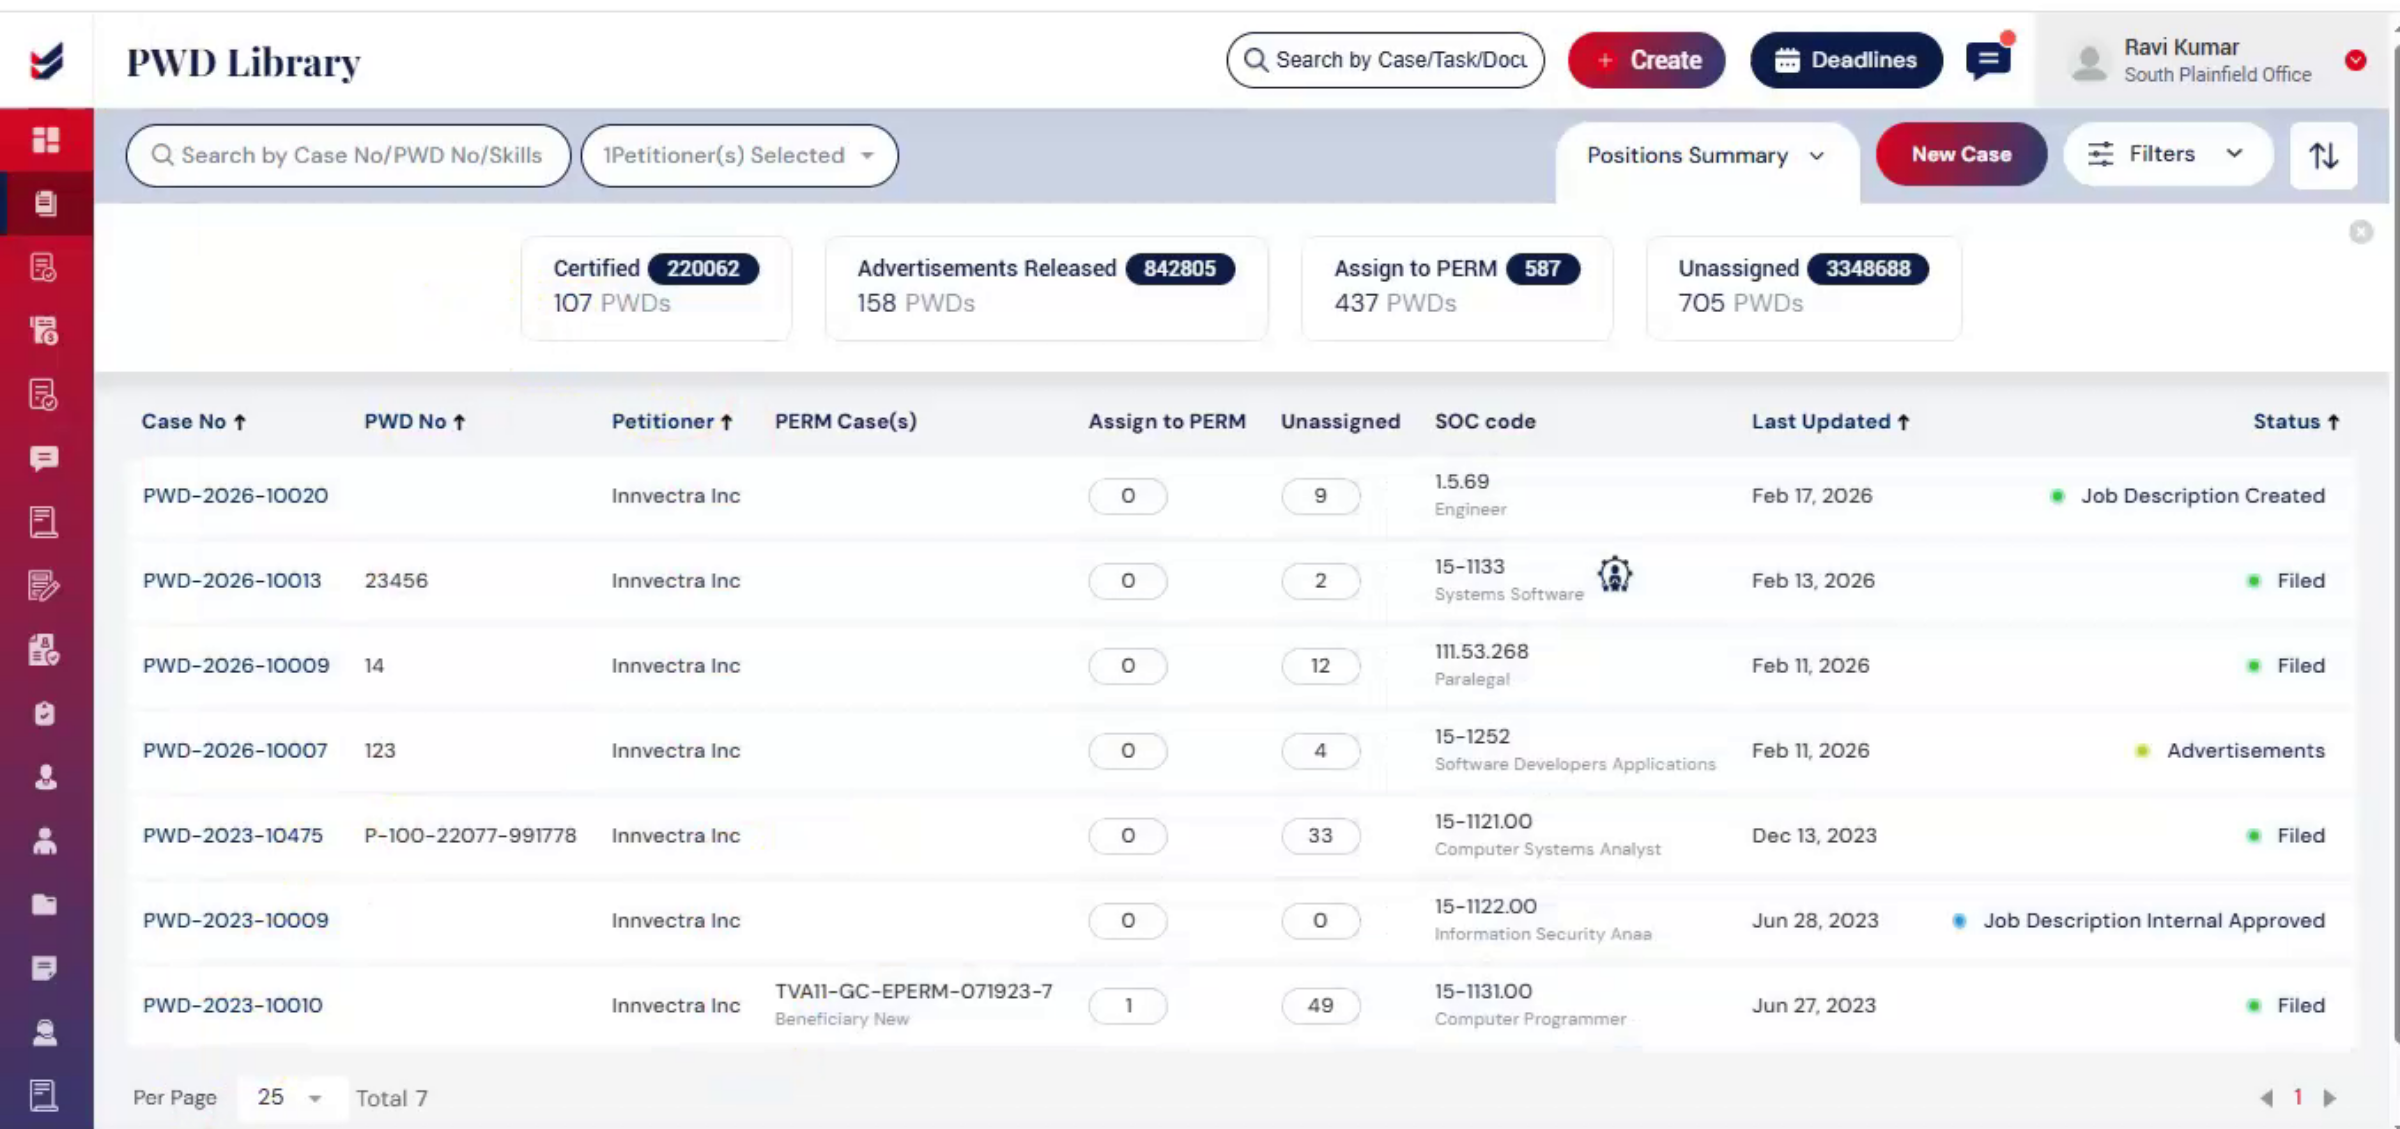
At the top of the Metrics section, a Petitioner Search box is available. This search bar allows users to select a specific petitioner and instantly view all PWD cases filed under that employer, enabling more focused case tracking and review.
11. Starting New PWD Filing
 * click the image to view enlarged
To begin a new filing, click New Case on the right side.
12. PWD Creation Options
 * click the image to view enlarged
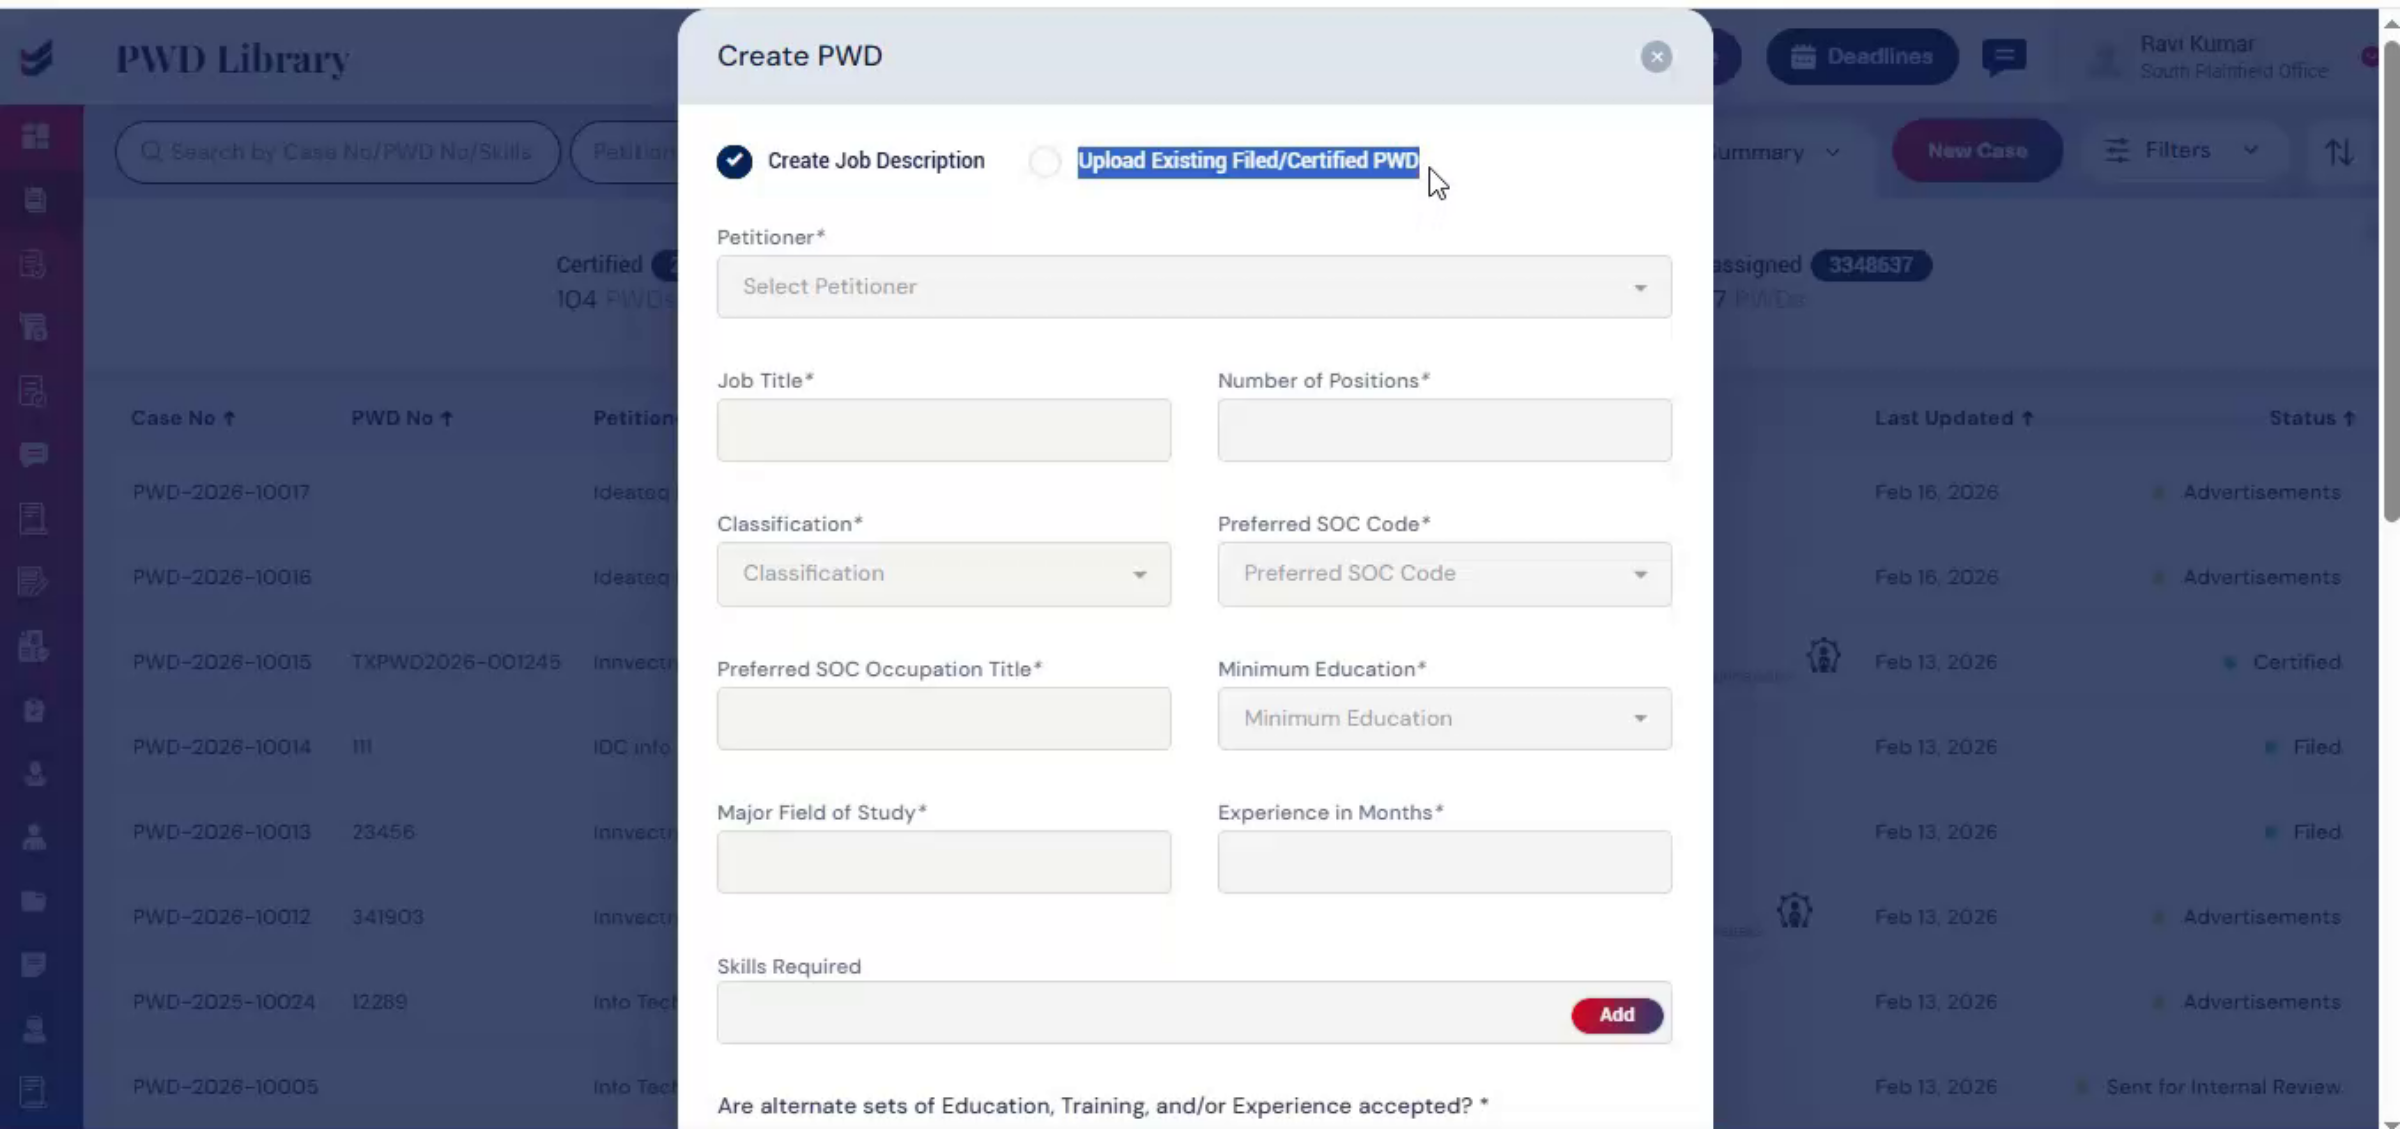
When creating a PWD, there are two options. Create job description or upload an existing filed or certified PWD. This means uploading a previously filed or certified PWD.
13. Creating New Job Description
 * click the image to view enlarged
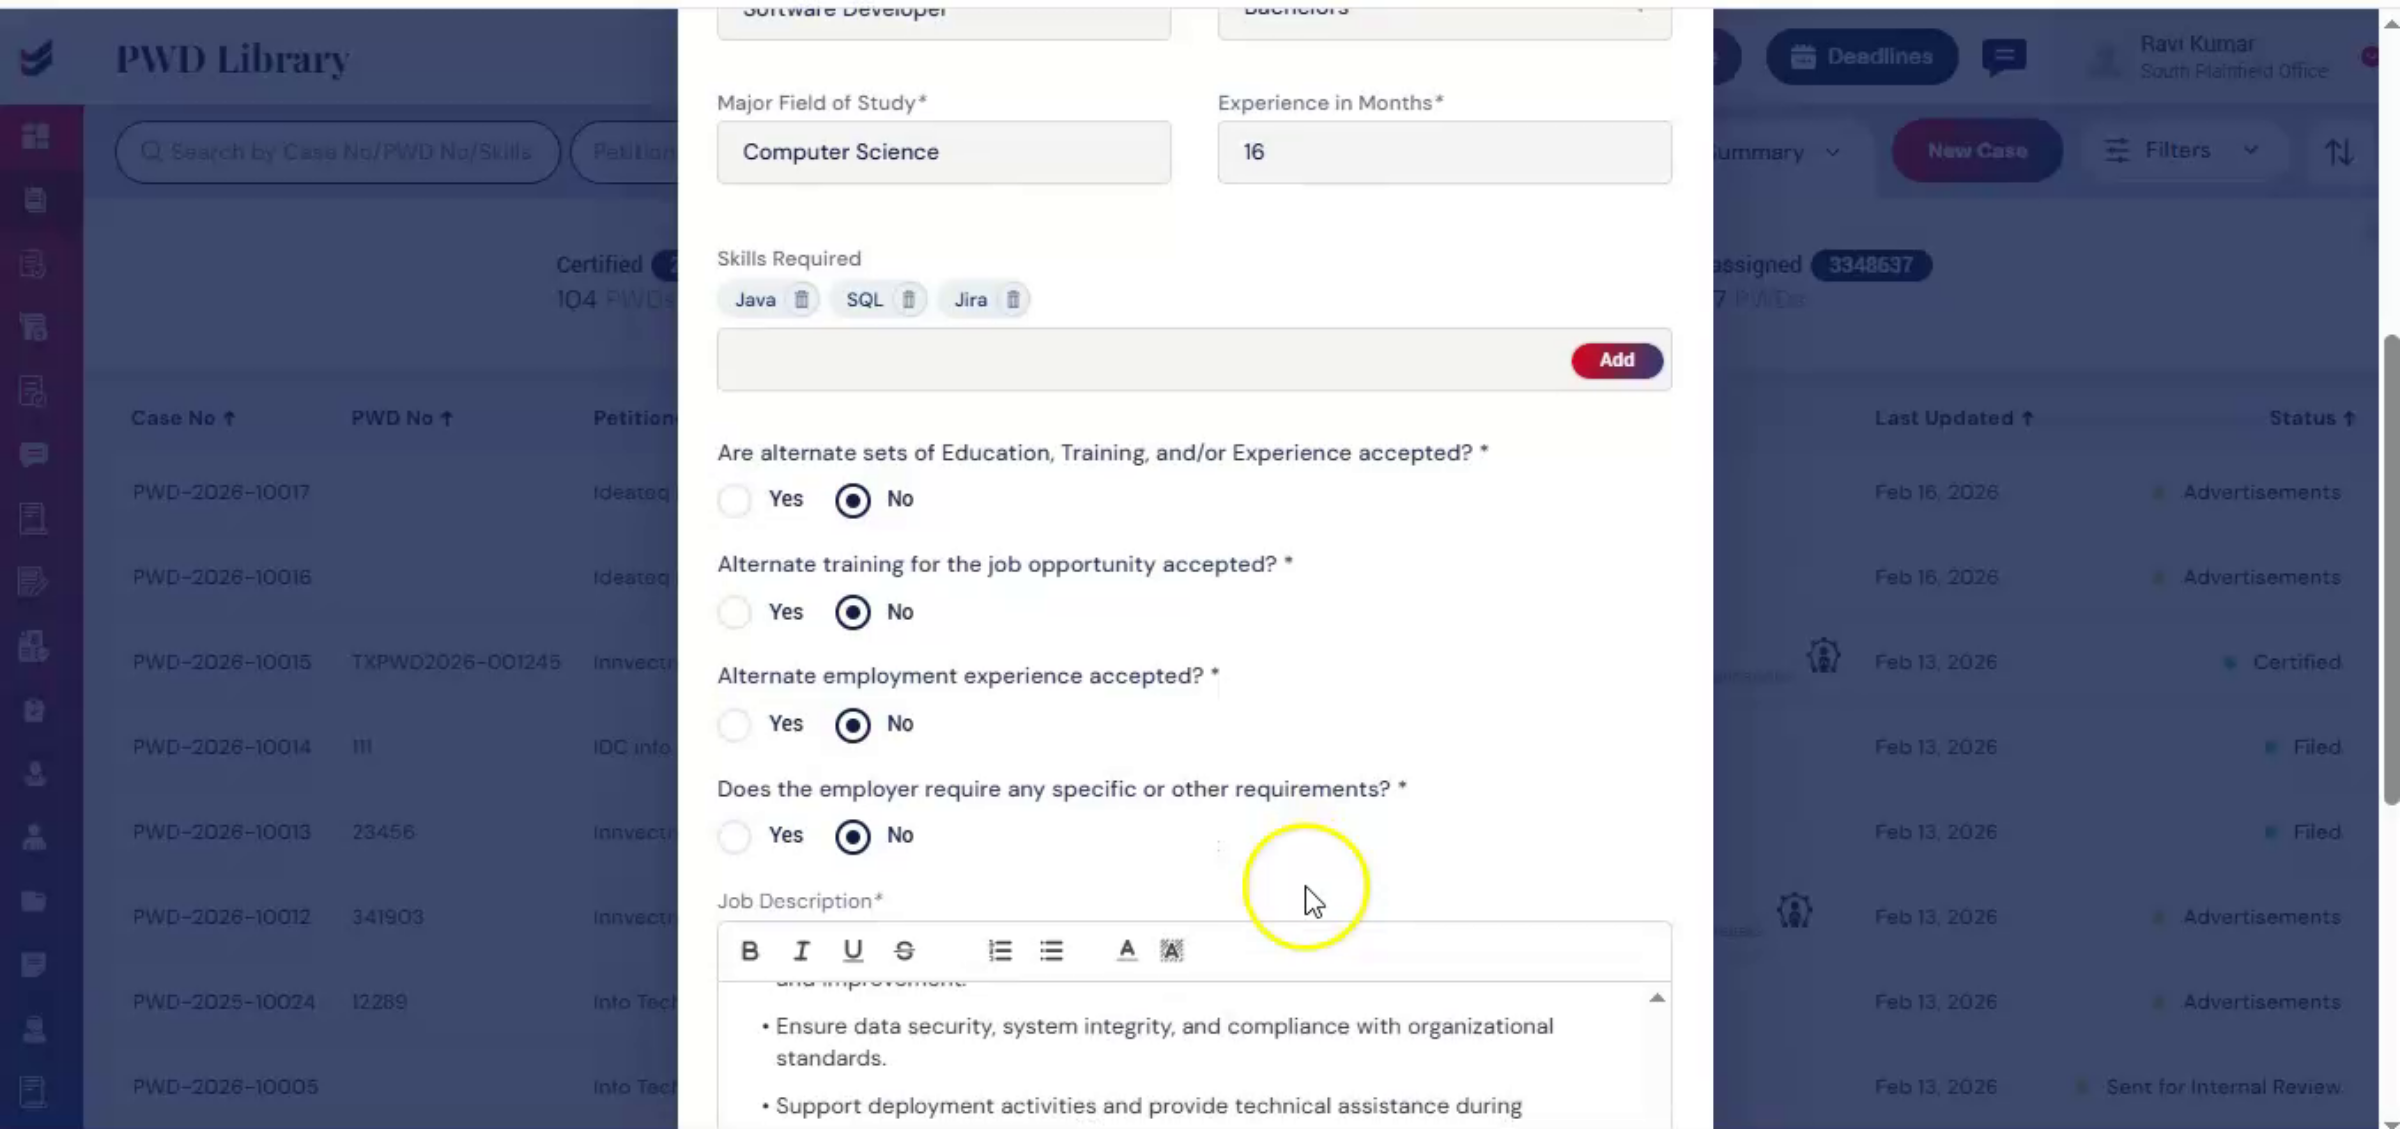
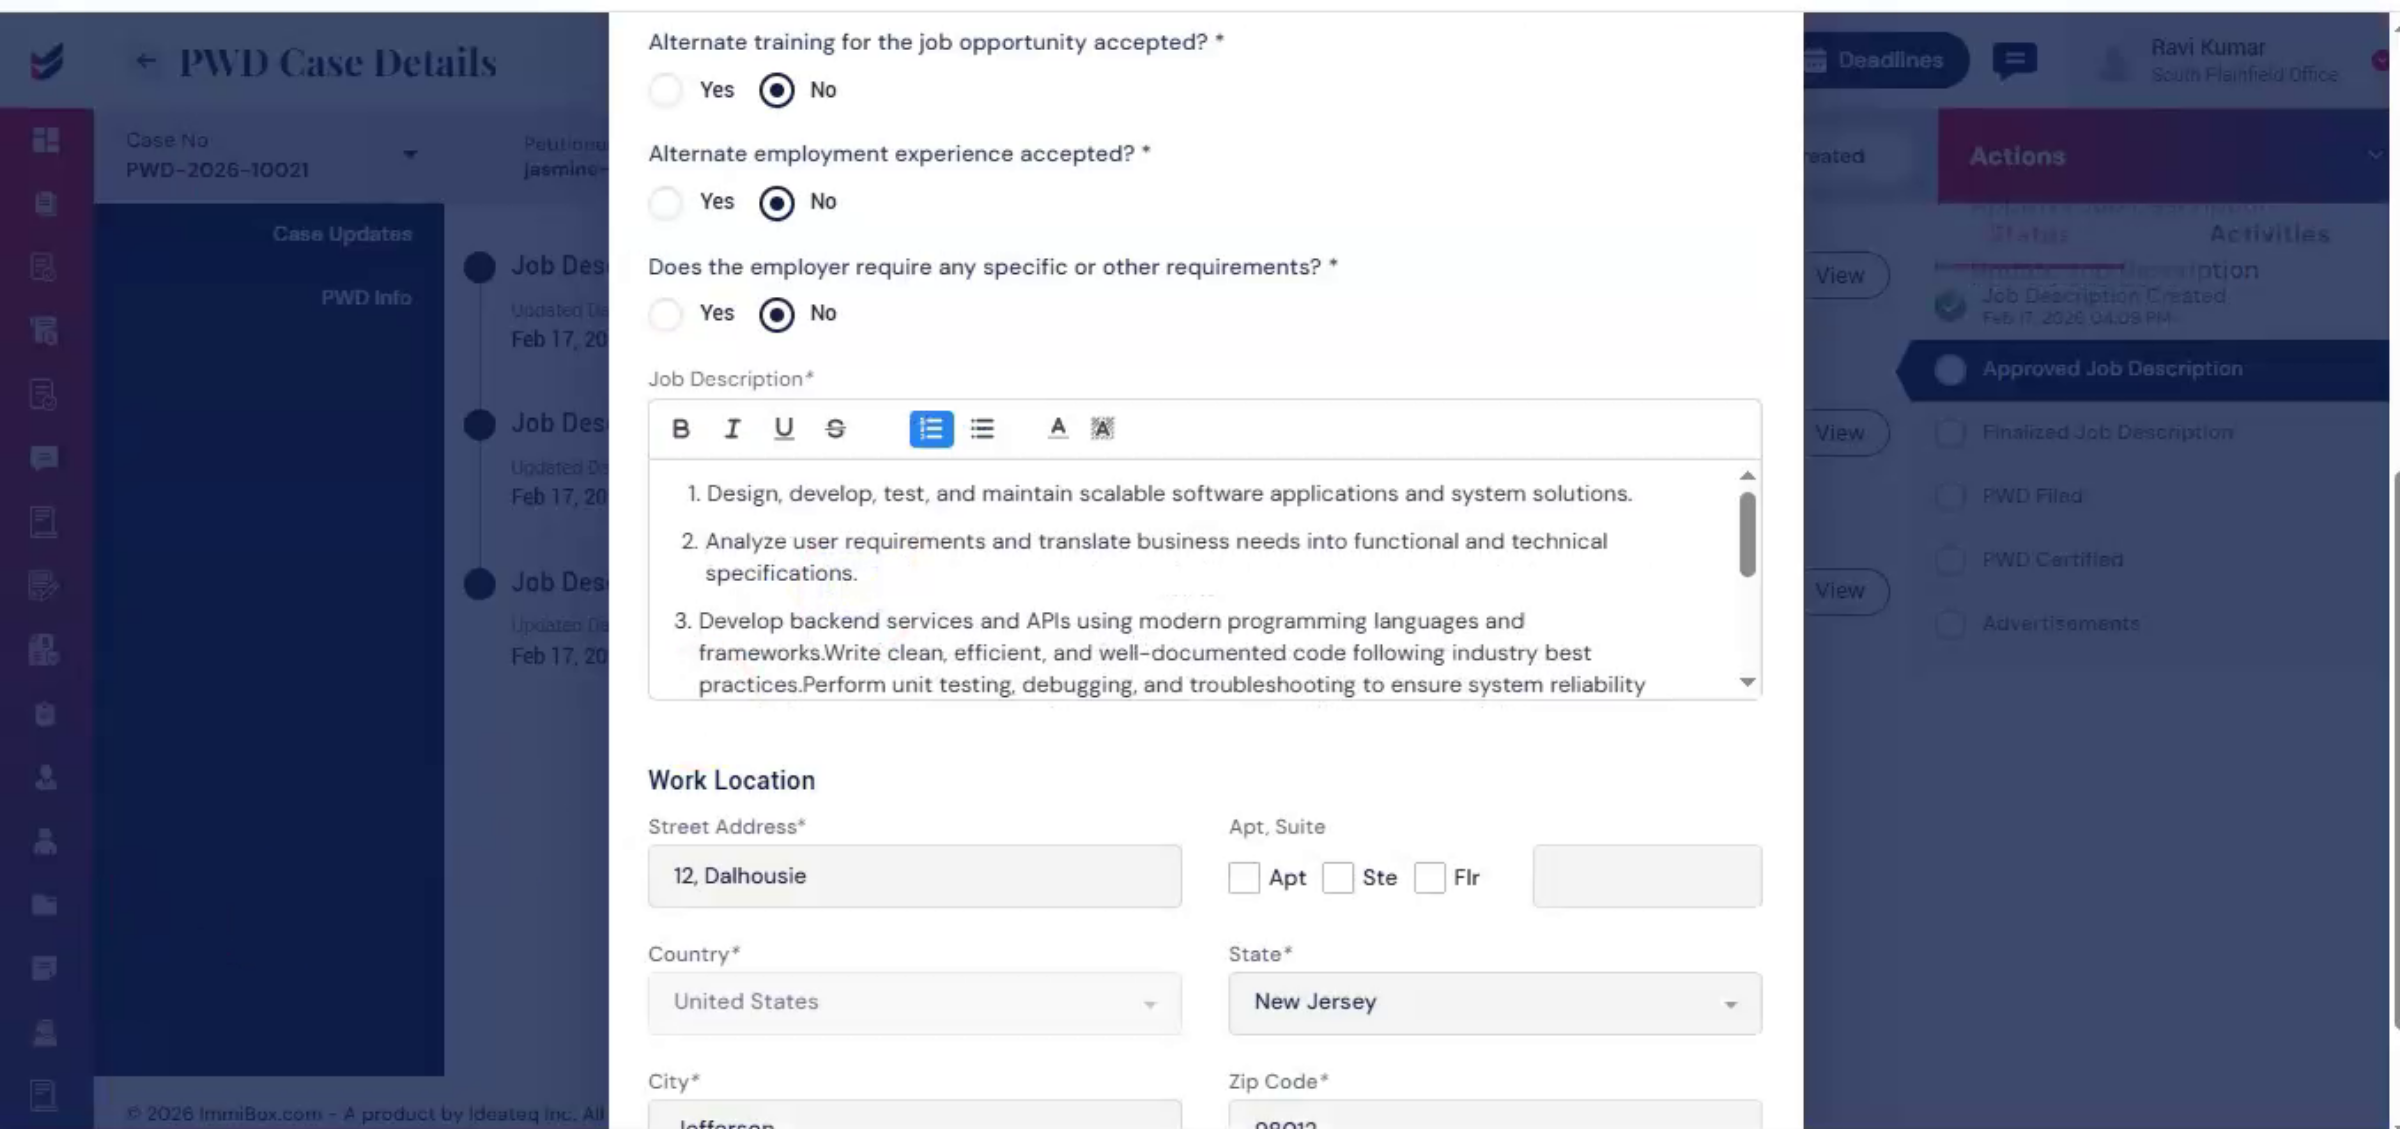
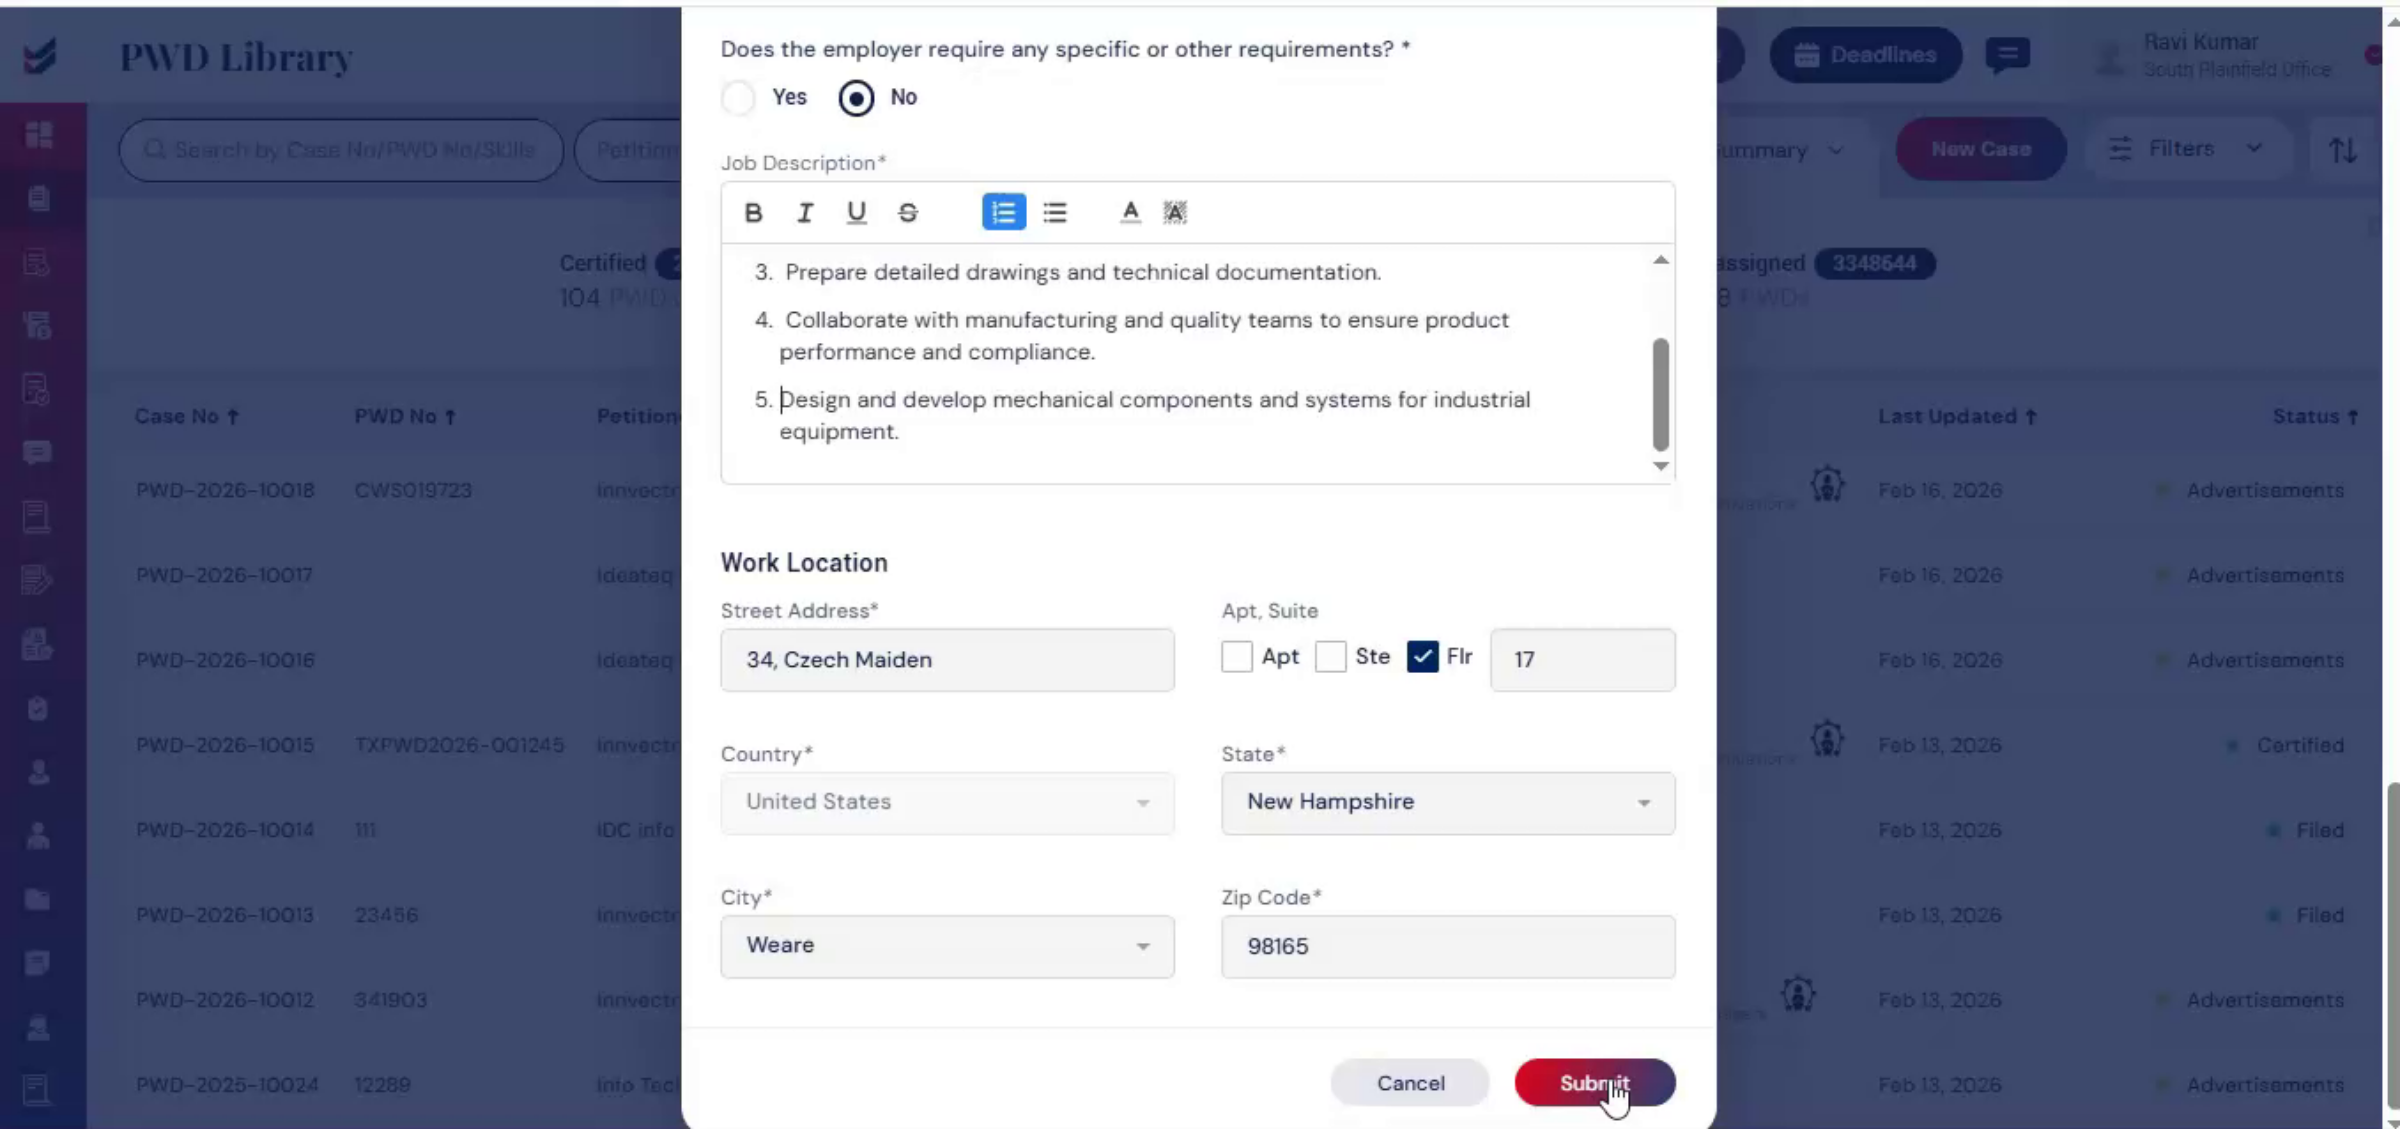
Case 1, creating a new job description. All required information can be entered directly into structured fields, including the detailed job description. The job description should describe the position's main duties and responsibilities and any other relevant requirements. This information forms the basis of the PWD request.
14. Submitting Job Description
 * click the image to view enlarged
After entering the required details, click Submit.
15. Requesting Petitioner Review
 * click the image to view enlarged
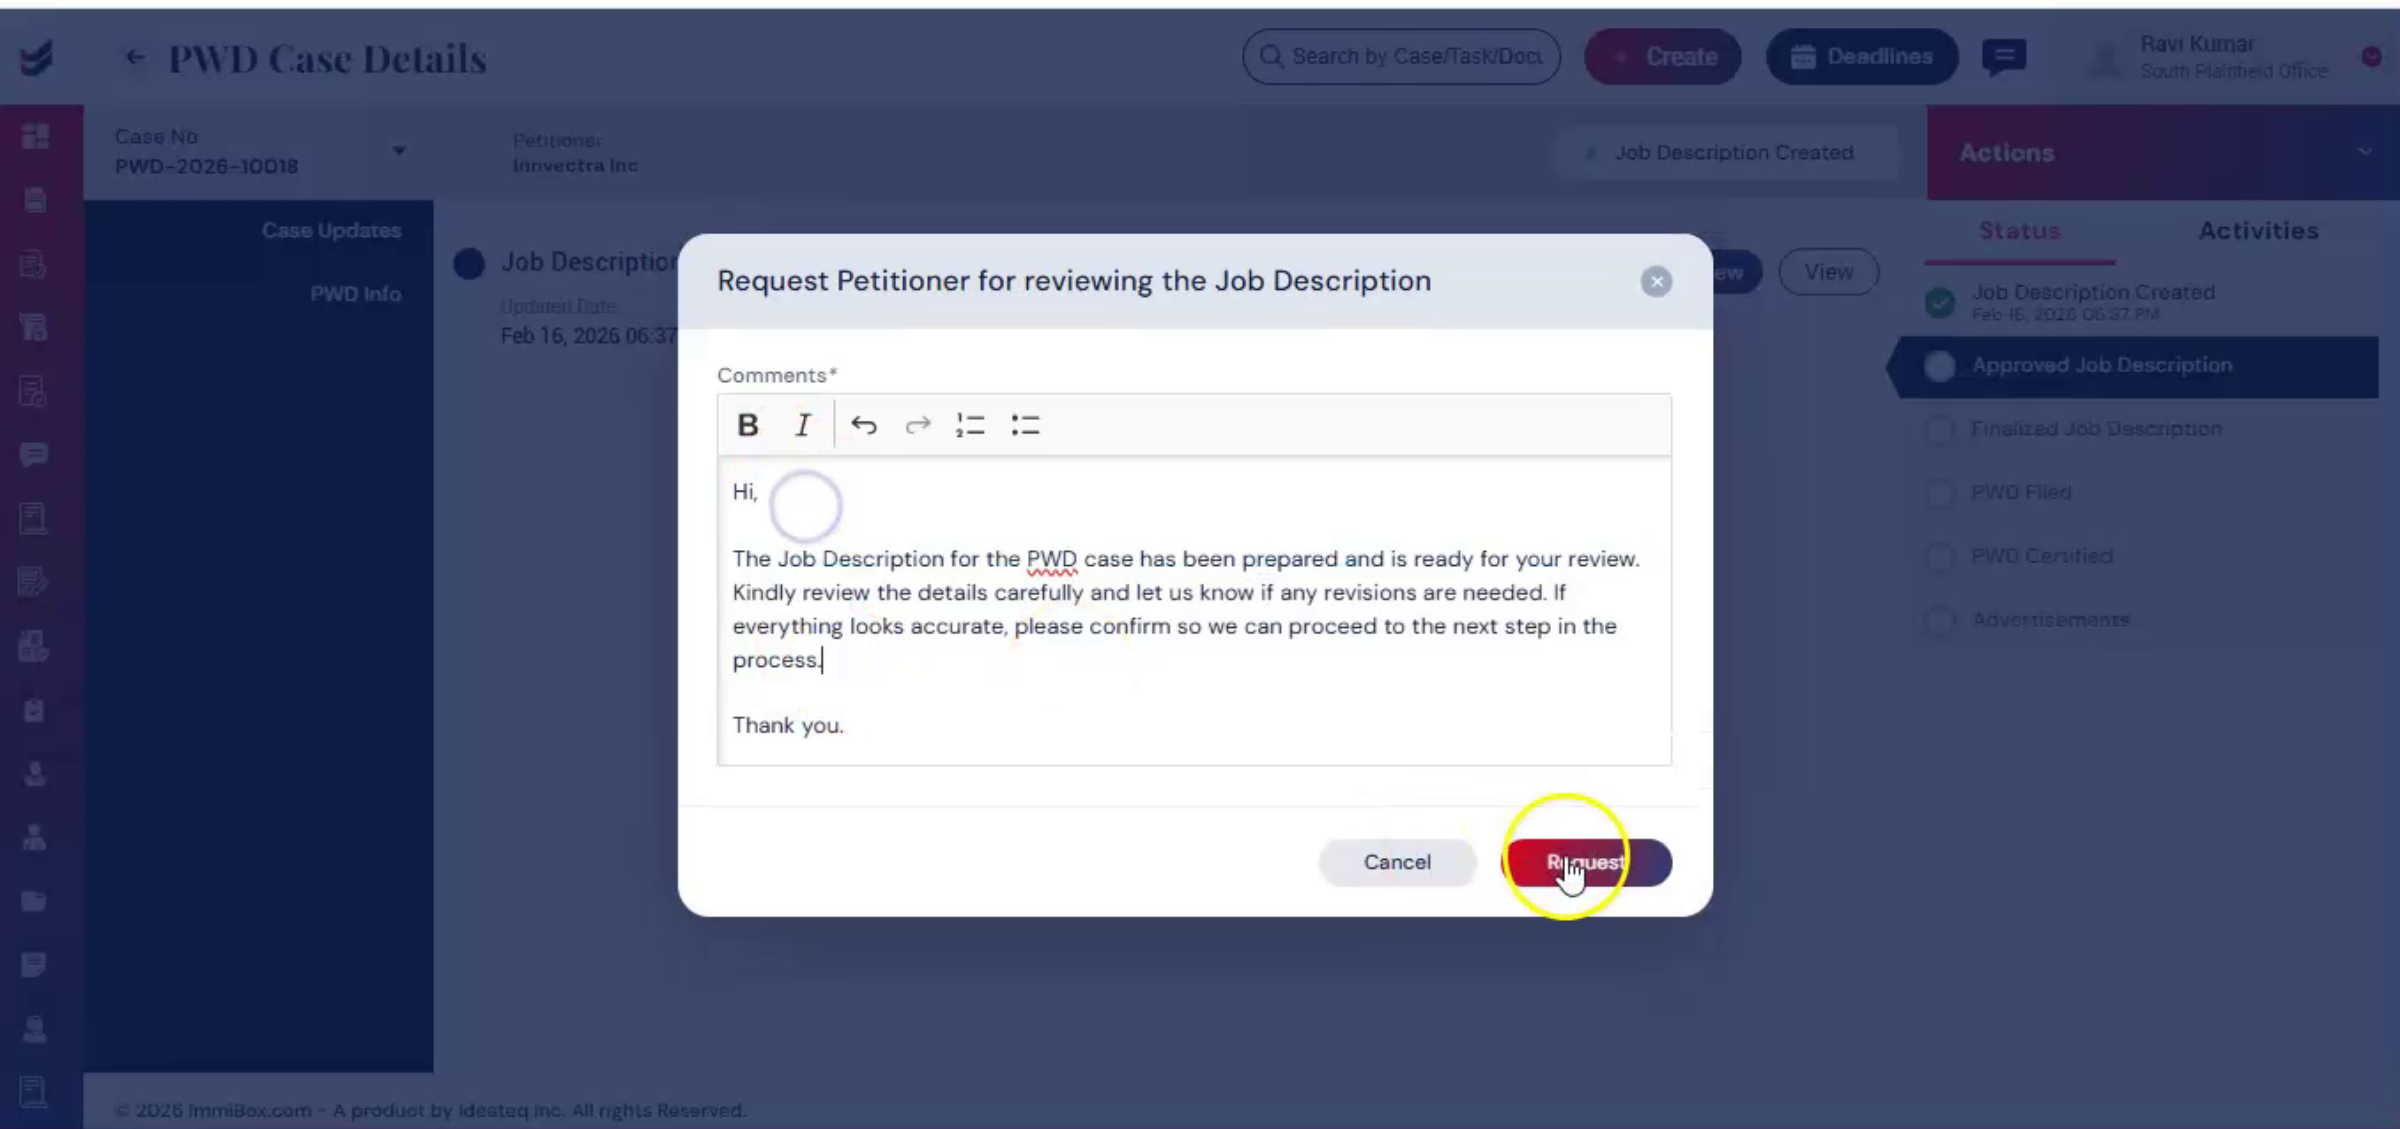
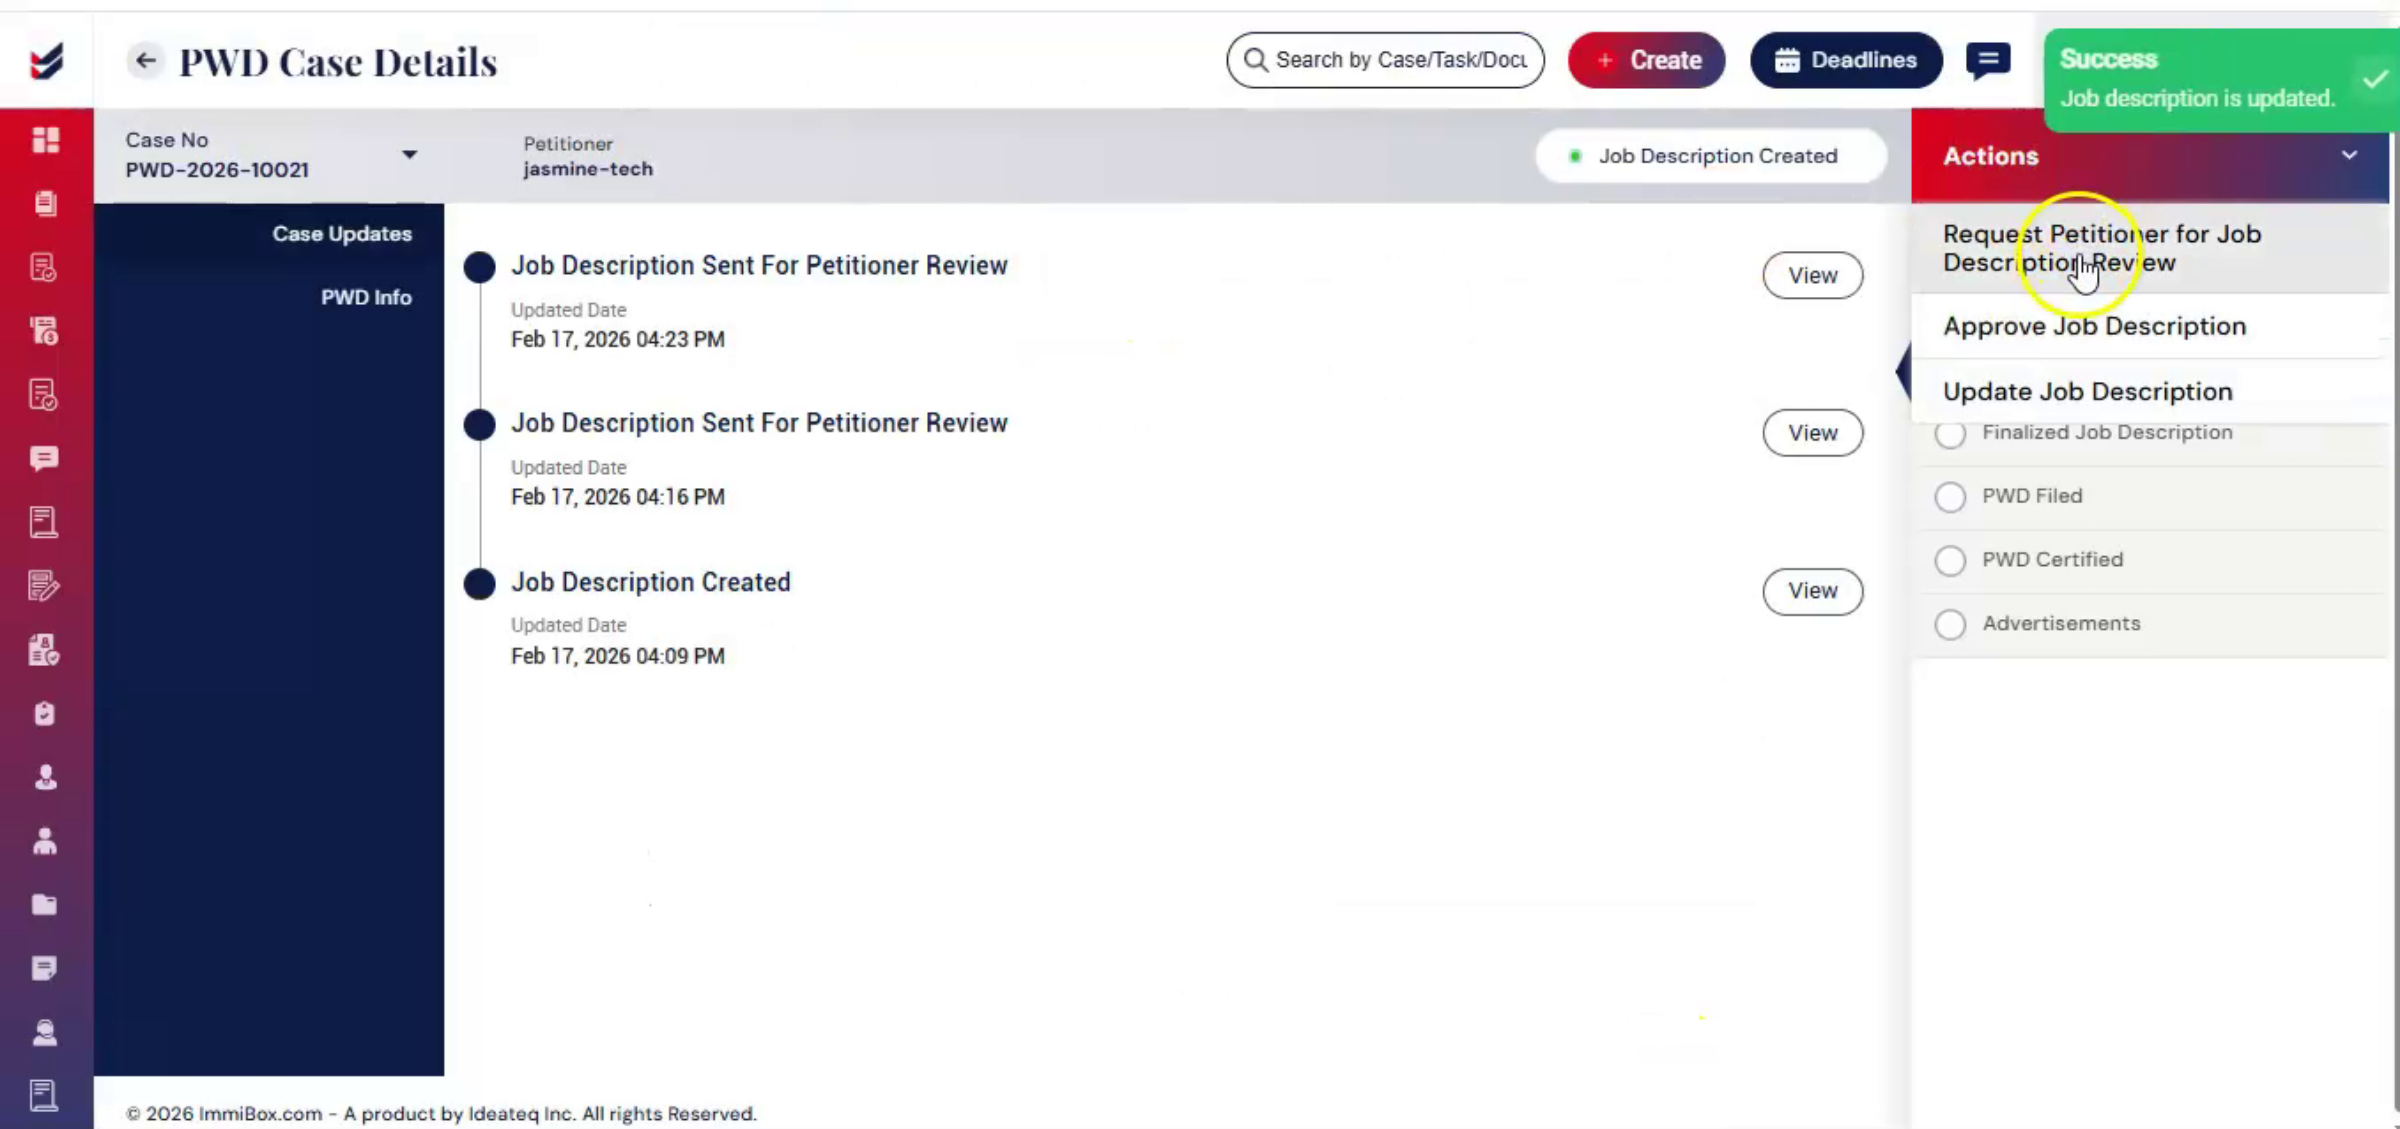
In the Case Updates section, you can send the job description to the petitioner by selecting Request for Petitioner Job Description Review. Before submitting the request, you can include a message in the dialog box to provide context or specific instructions. The petitioner will receive a notification to review the job description.
16. Reviewing Petitioner Feedback
 * click the image to view enlarged
If the petitioner suggests changes, the law firm can review them in the ImmiBox Law Firm portal. Under the Actions tab, three options will be available. Select Update to revise the job description based on the petitioner's feedback.
17. Resubmitting Updated Description
 * click the image to view enlarged
After making the necessary changes, resend the request to the petitioner for review.
18. Approving Job Description
 * click the image to view enlarged
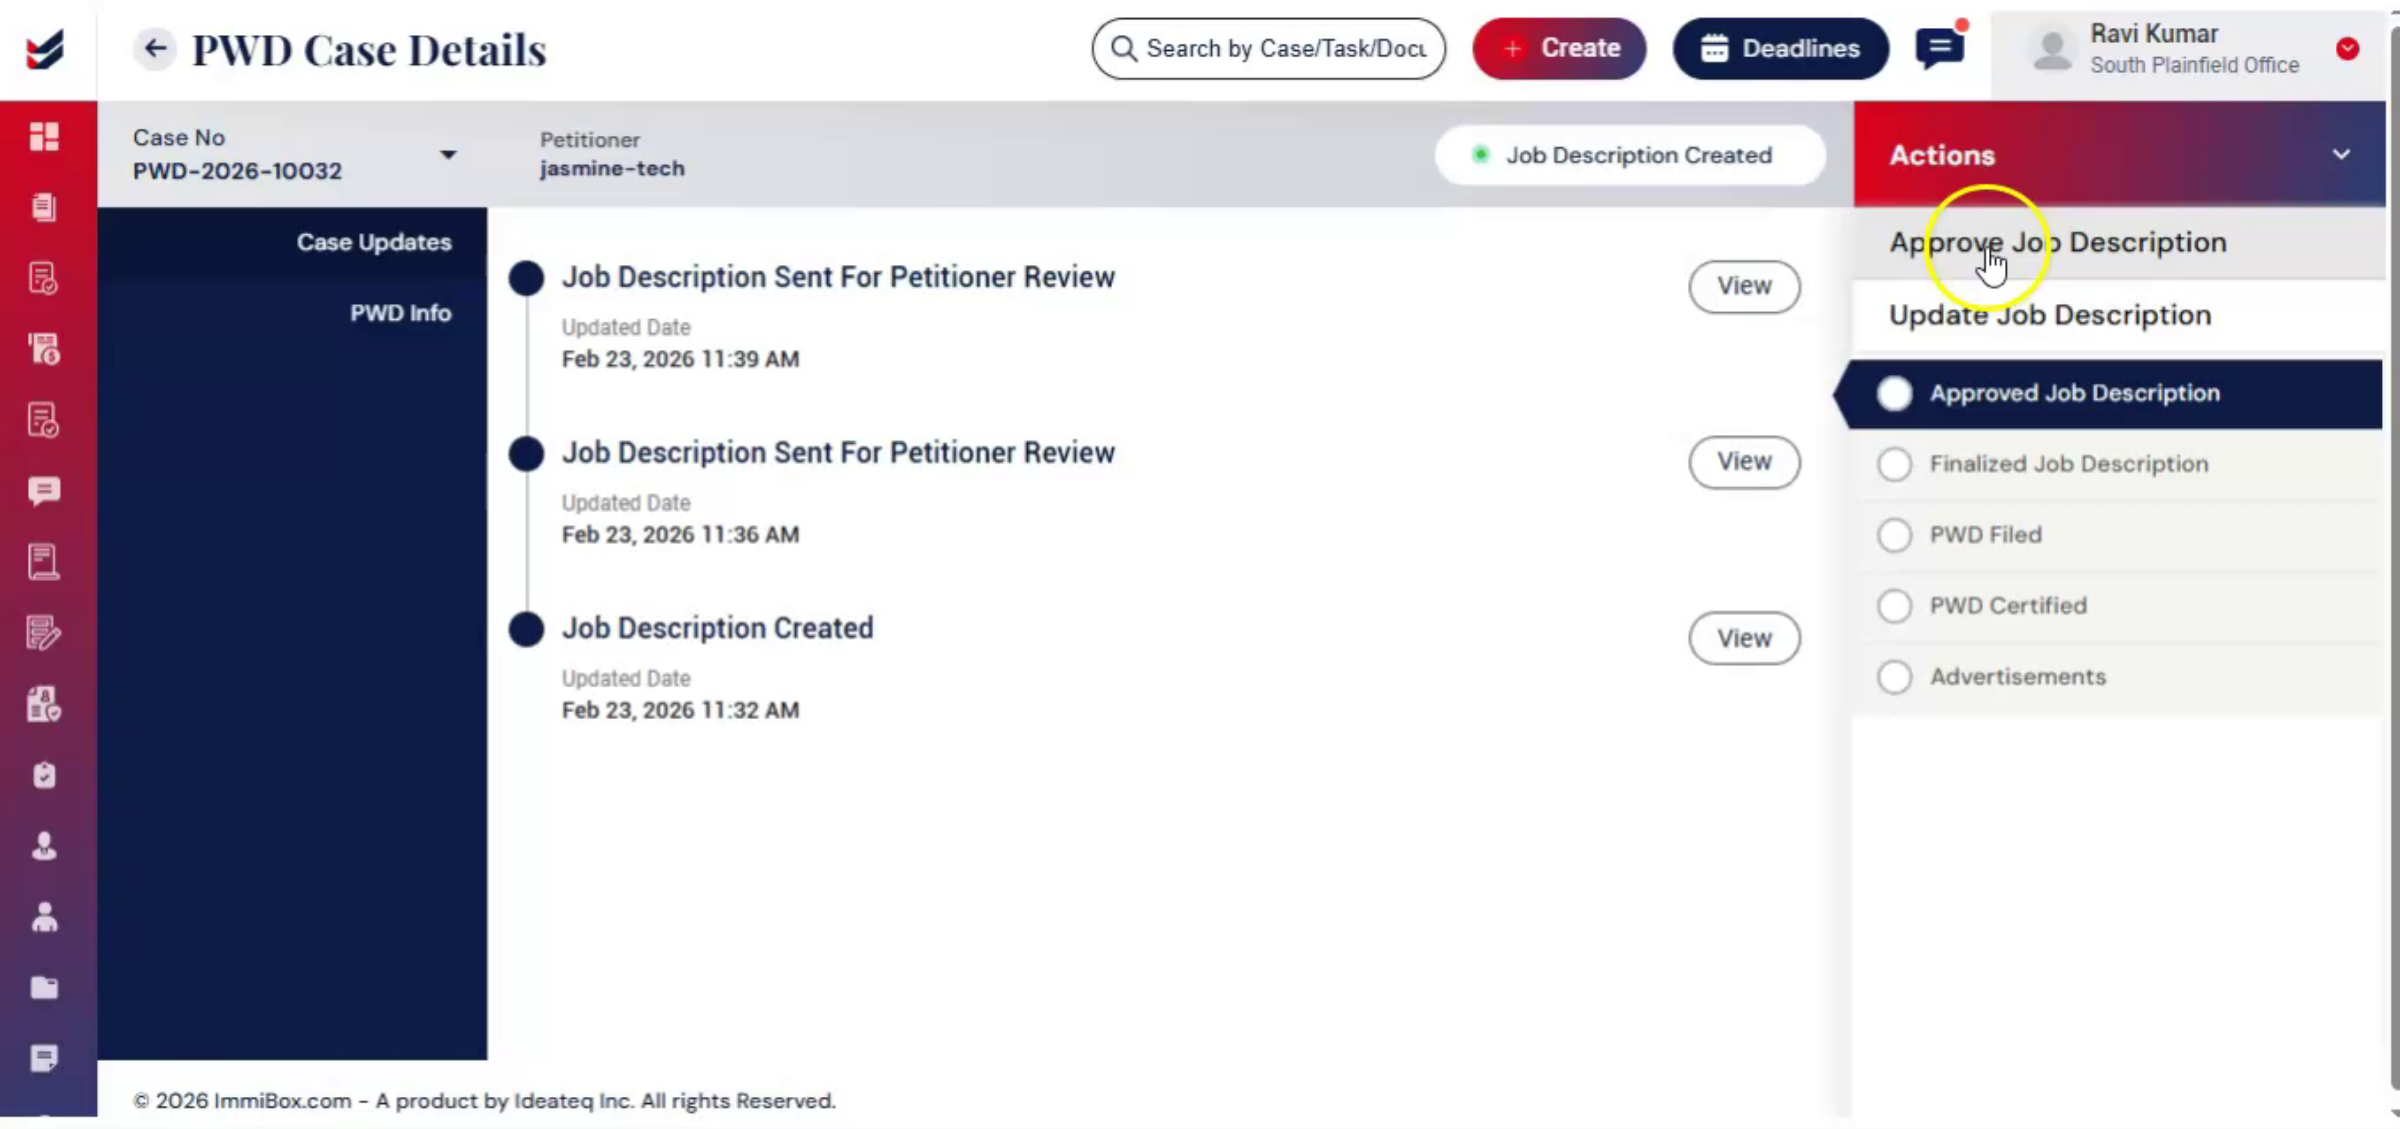
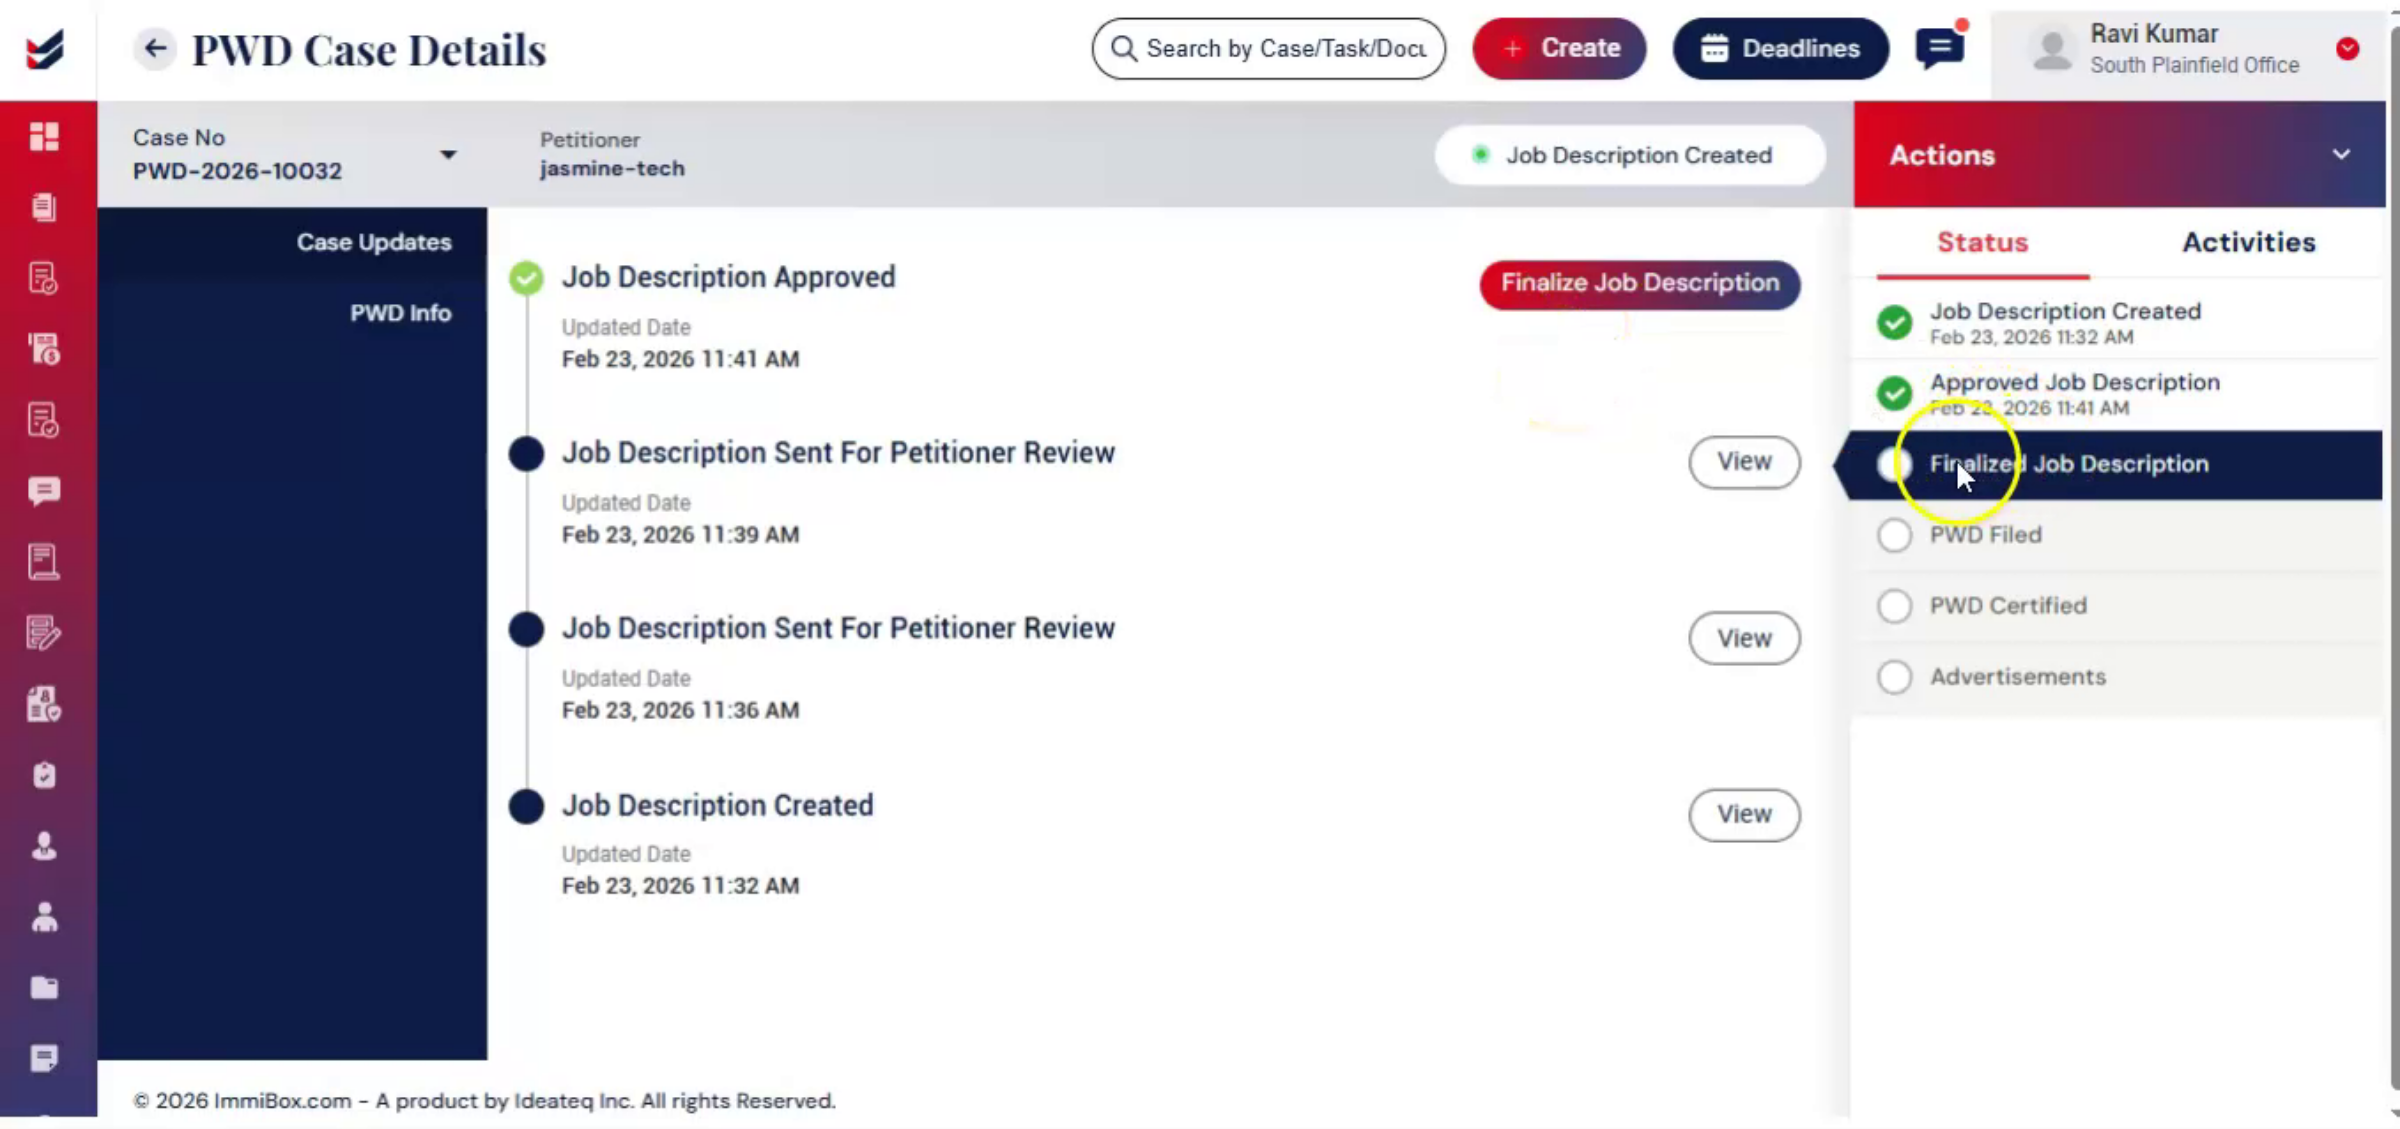
The petitioner can then review the updated version and once they agree with the changes, from the Actions tab, select Approve Job Description to finalize the review.
19. Multiple Review Cycles
 * click the image to view enlarged
This review cycle can occur multiple times. The petitioner may suggest changes multiple times. The law firm can update the job description as many times as needed until it is finalized.
20. Finalizing Job Description
 * click the image to view enlarged
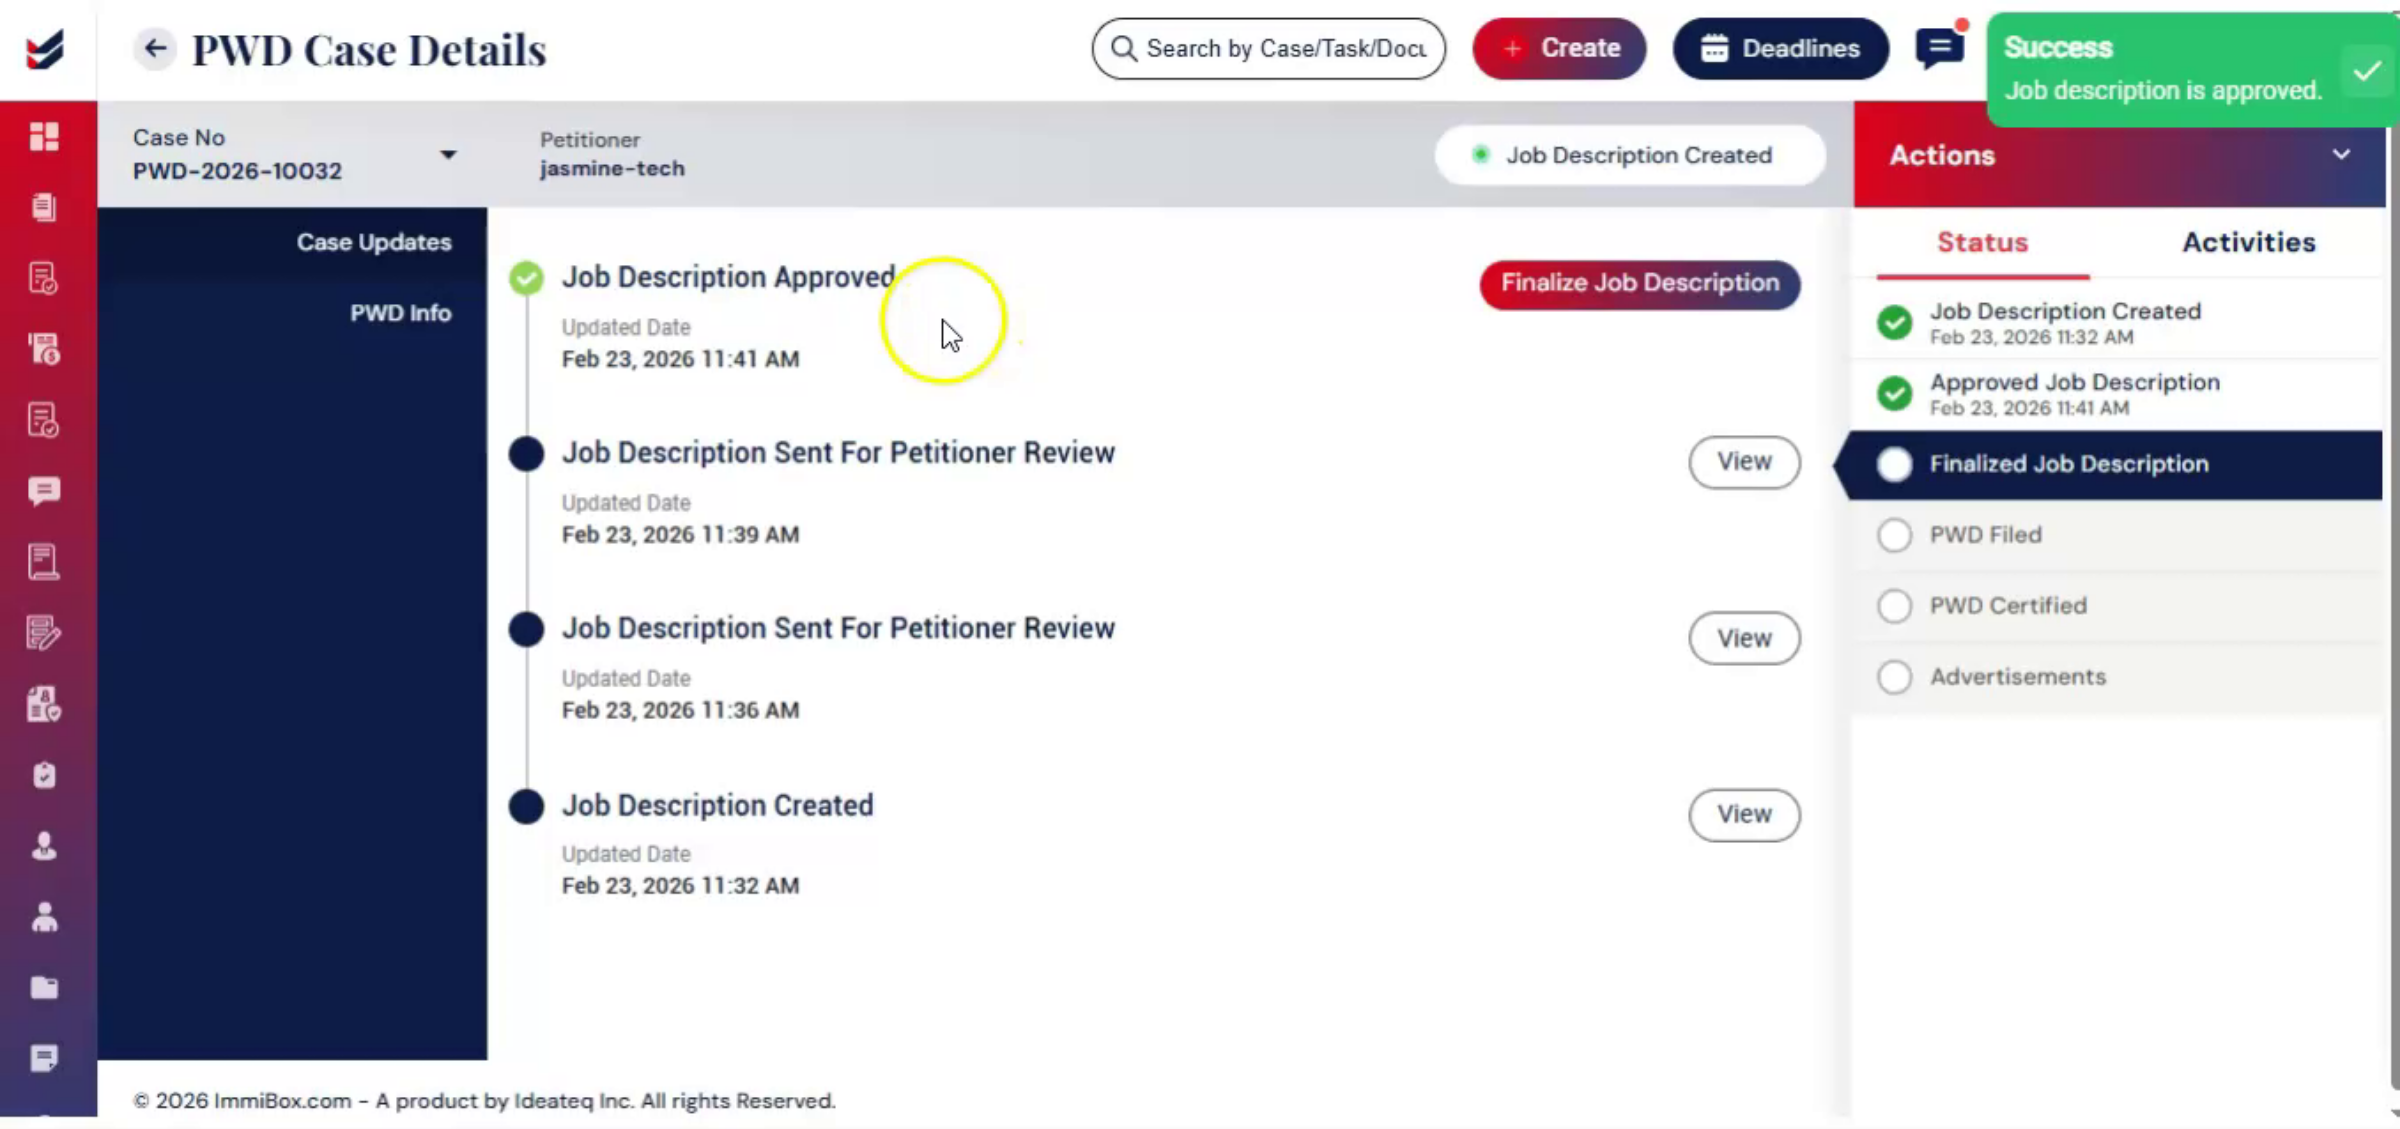
After approval, the job description must be finalized. This is an important step before filing.
21. Finalization Process Steps
 * click the image to view enlarged
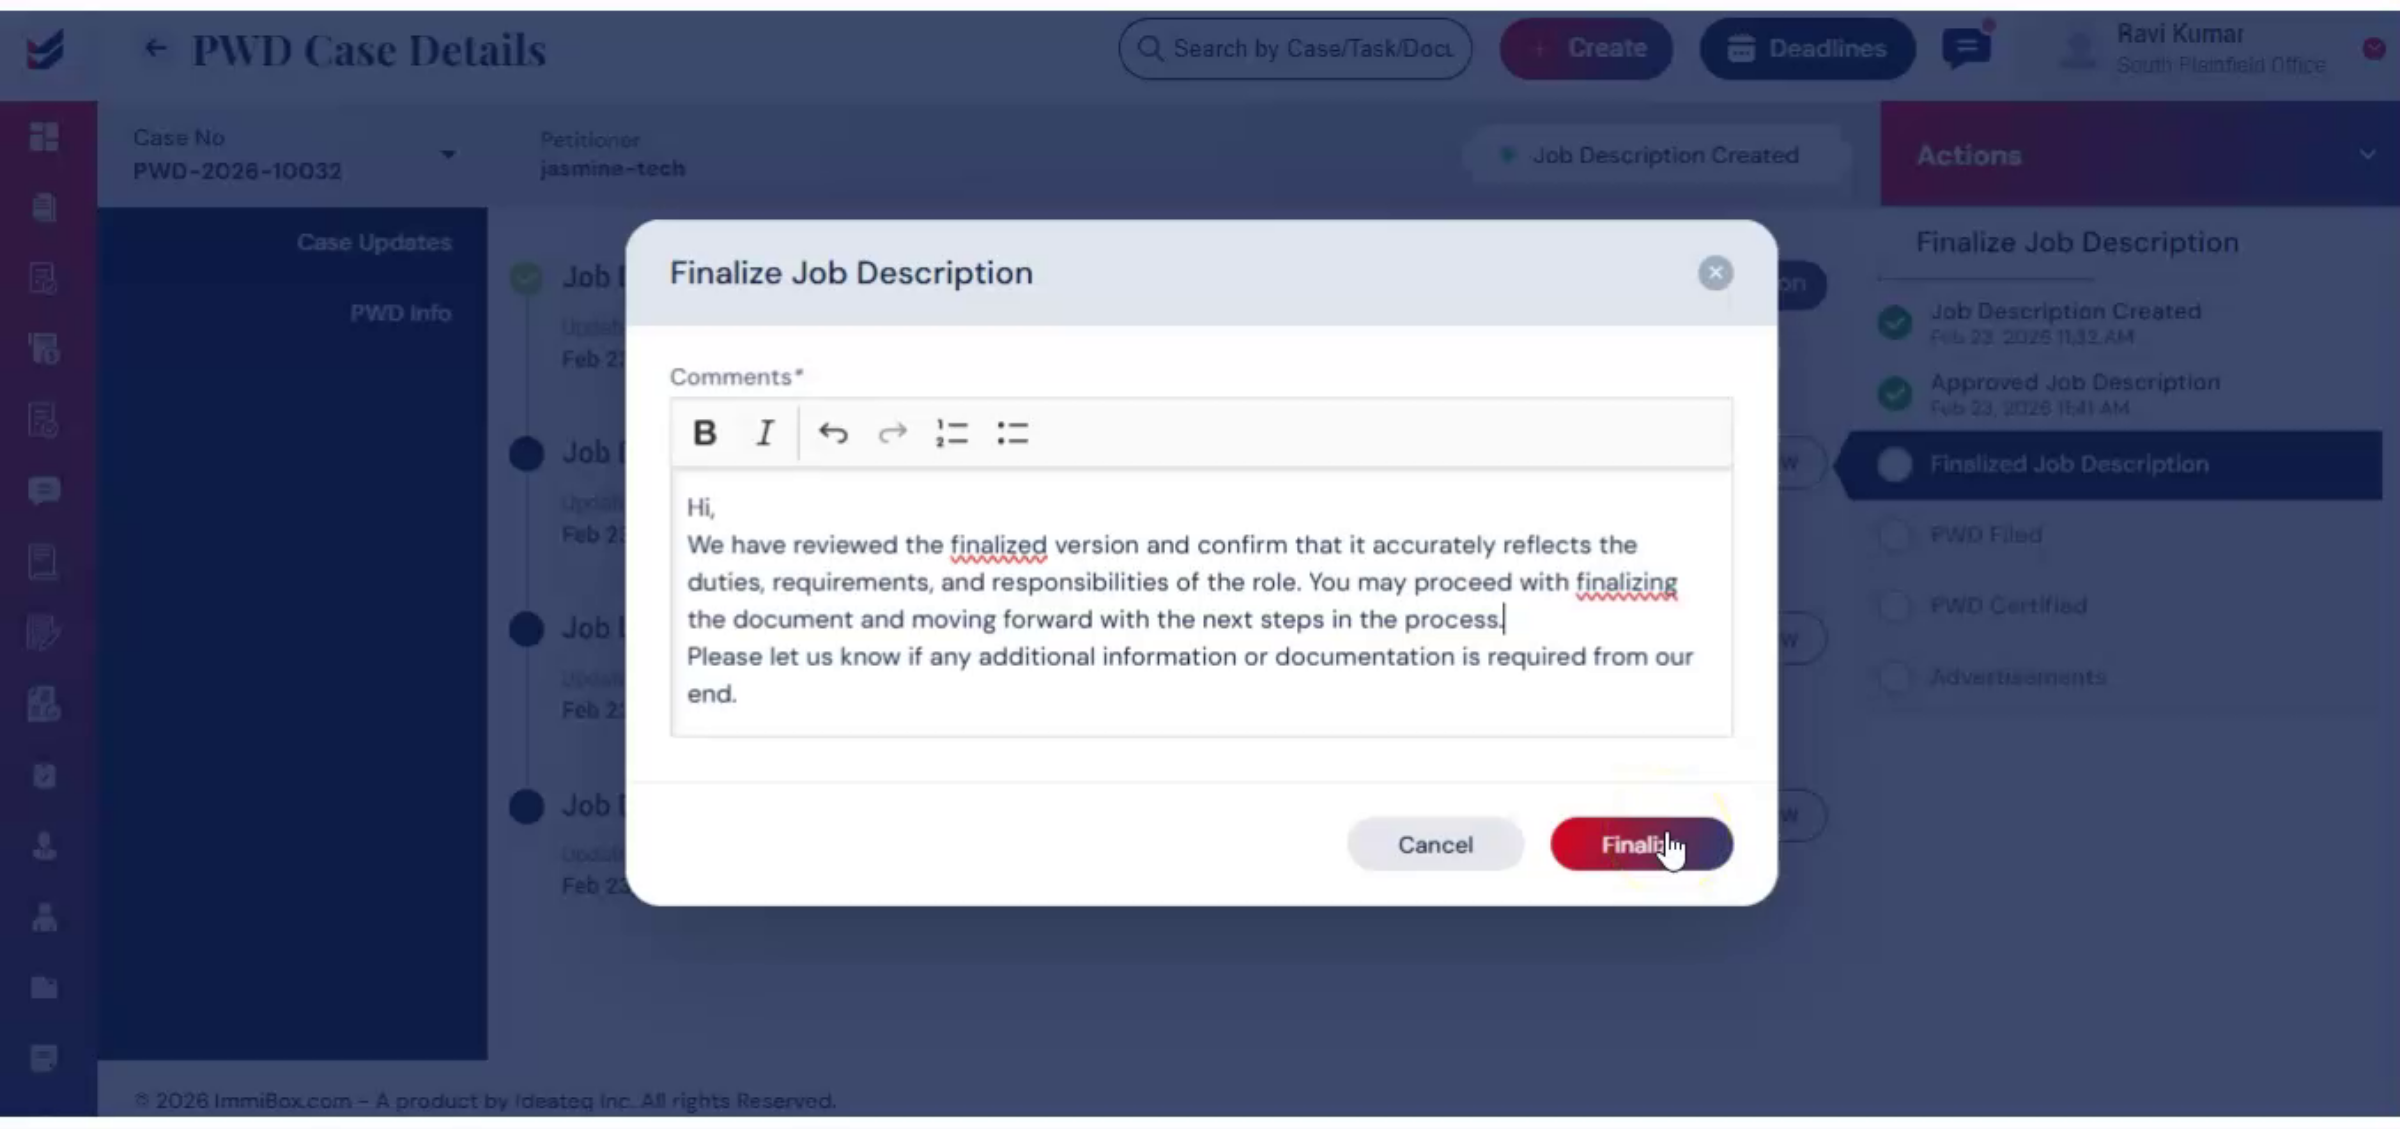
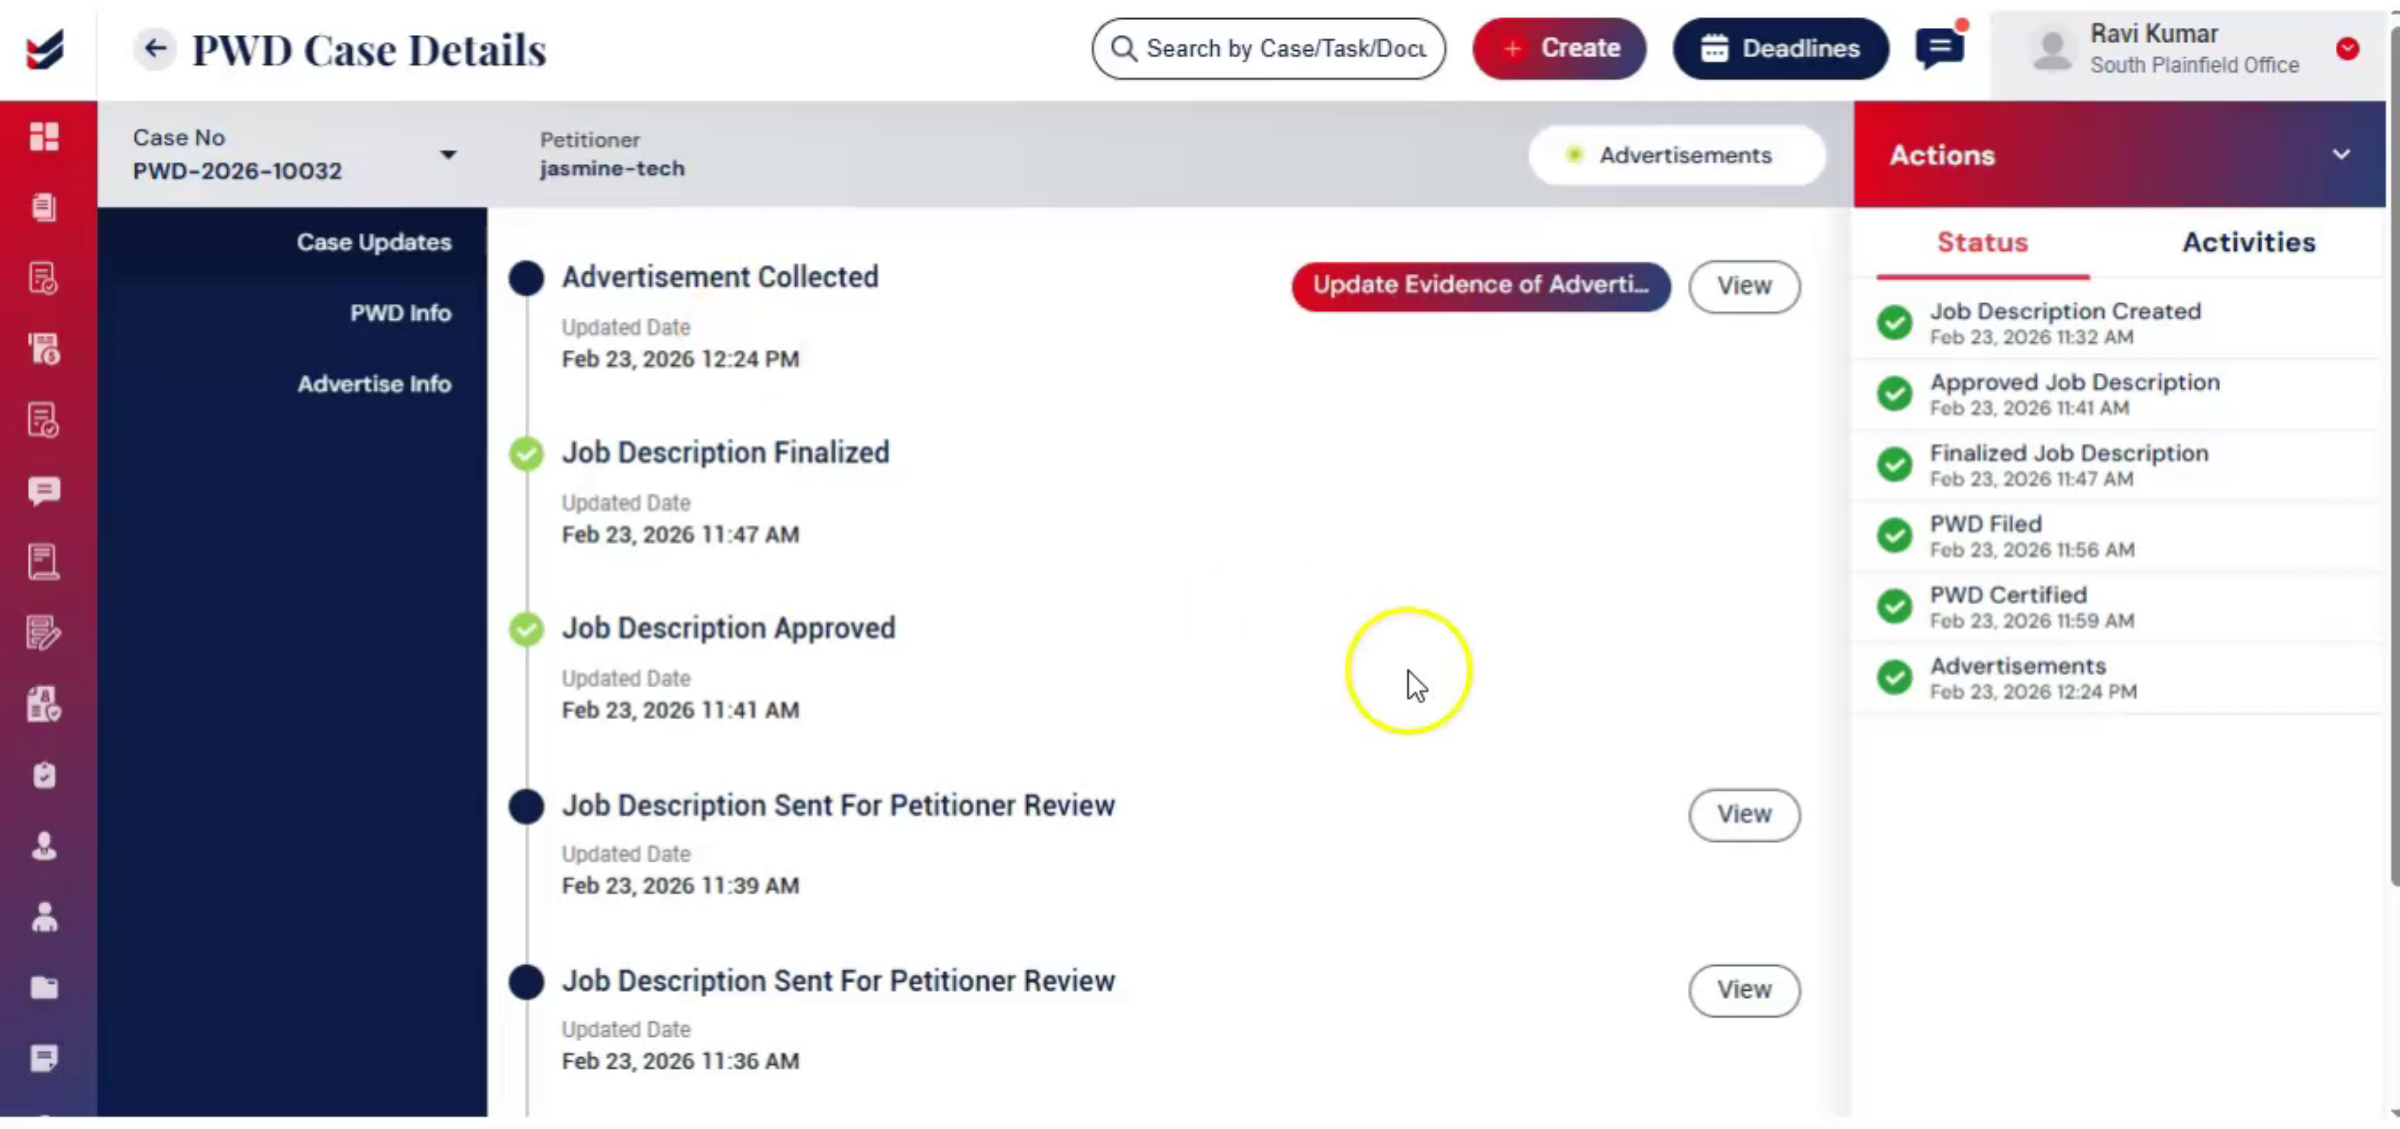
To complete this step, select Finalize Job Description from the Actions tab, or within Case Updates, add comments, and confirm. Once the job description is finalized, it can no longer be edited.
22. Documentation Of Activities
 * click the image to view enlarged
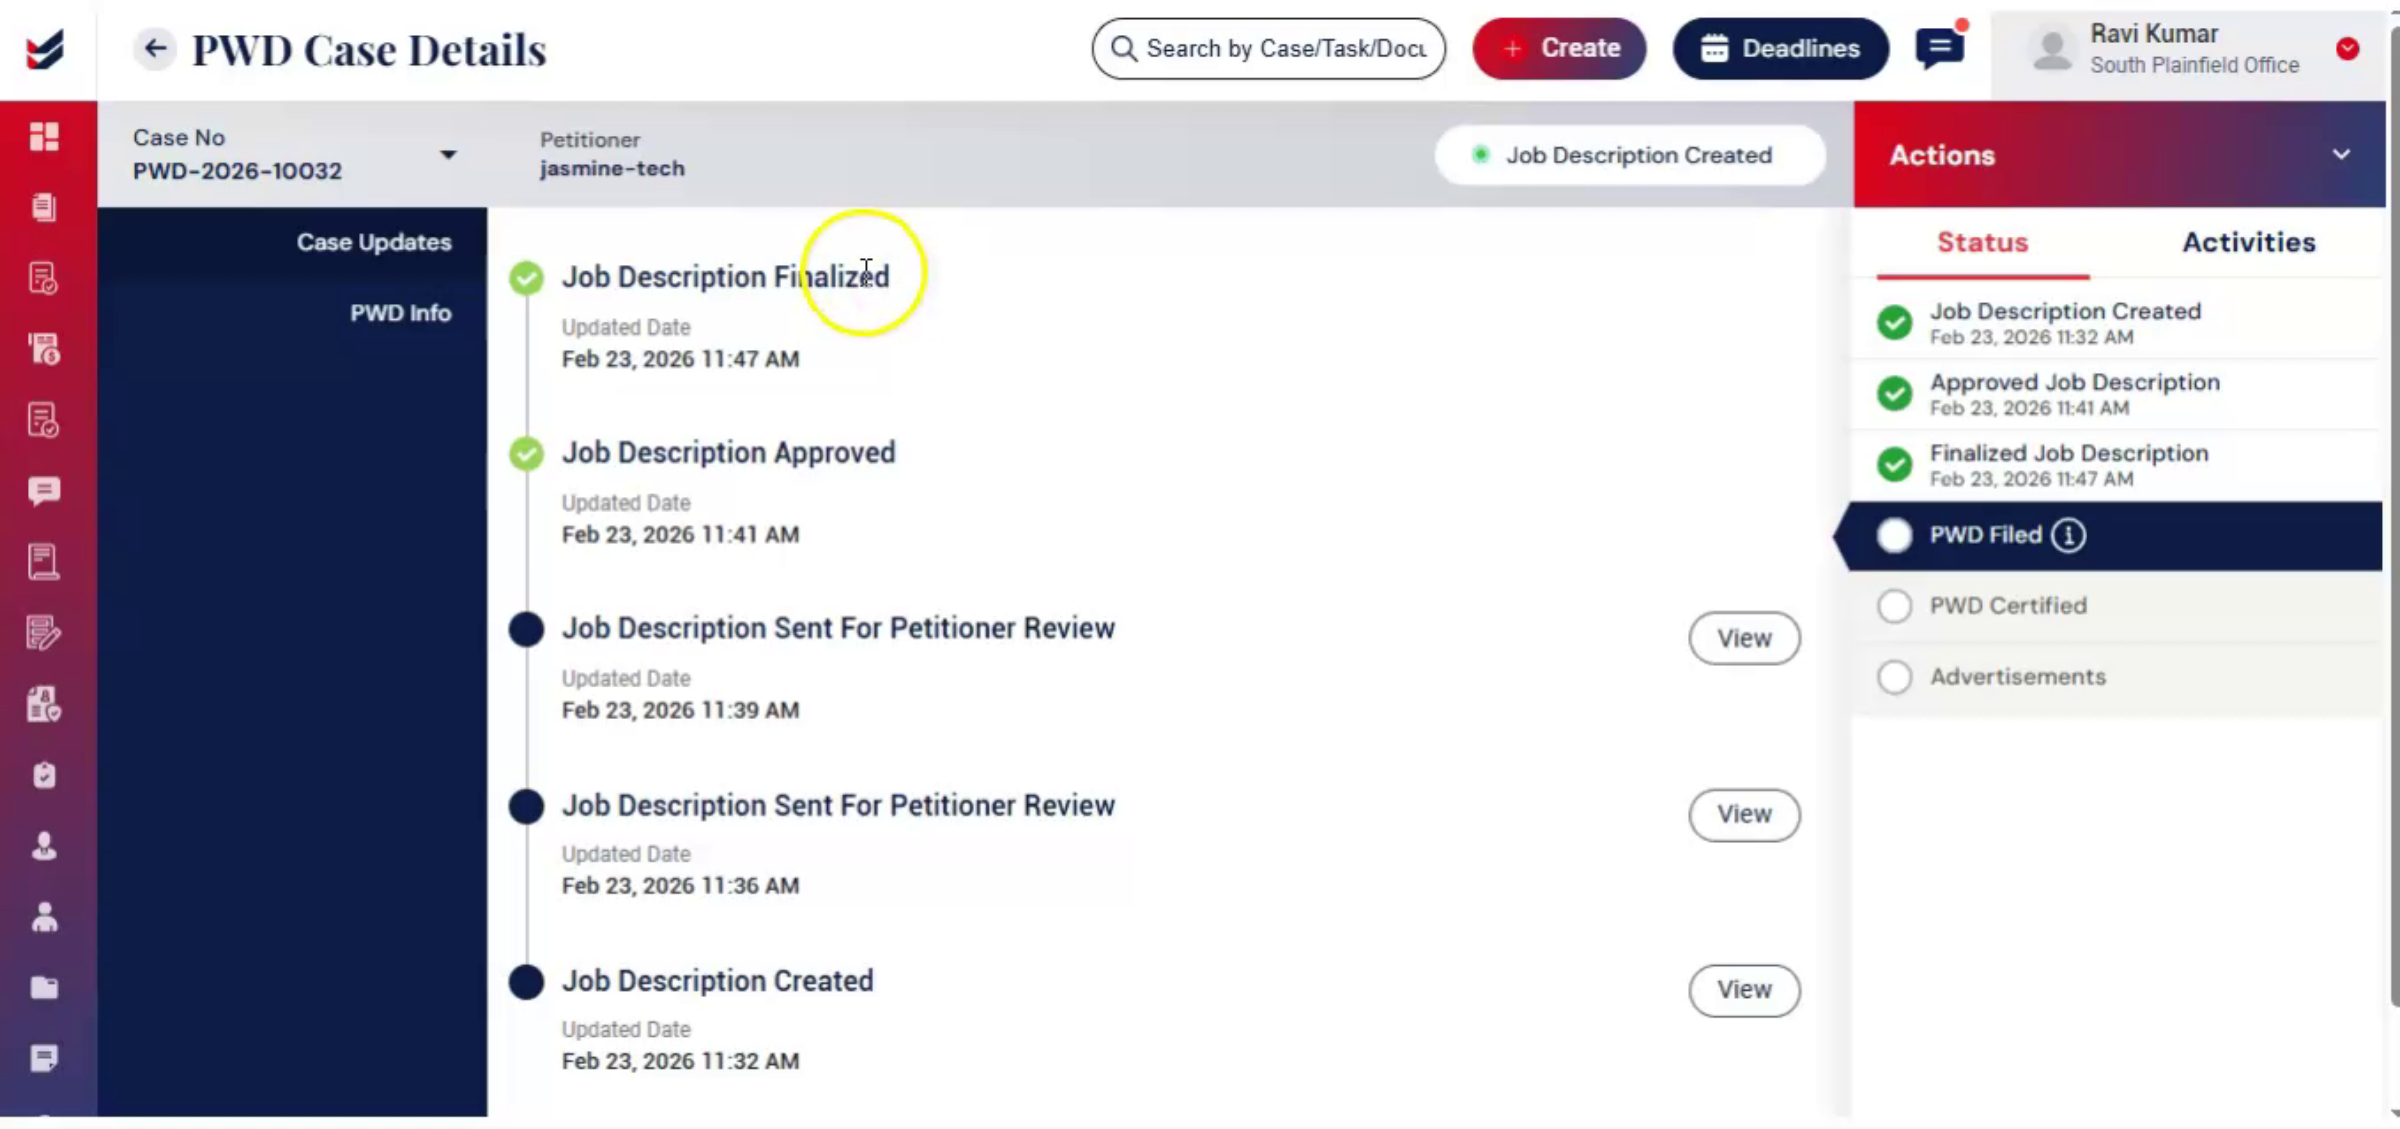
All these activities remain documented within the case, maintaining a clear and traceable record.
23. Case Ready For Filing
 * click the image to view enlarged
Once finalized, the case is ready for filing. ImmiBox offers two filing options.
24. ImmiBox Filing Options
 * click the image to view enlarged
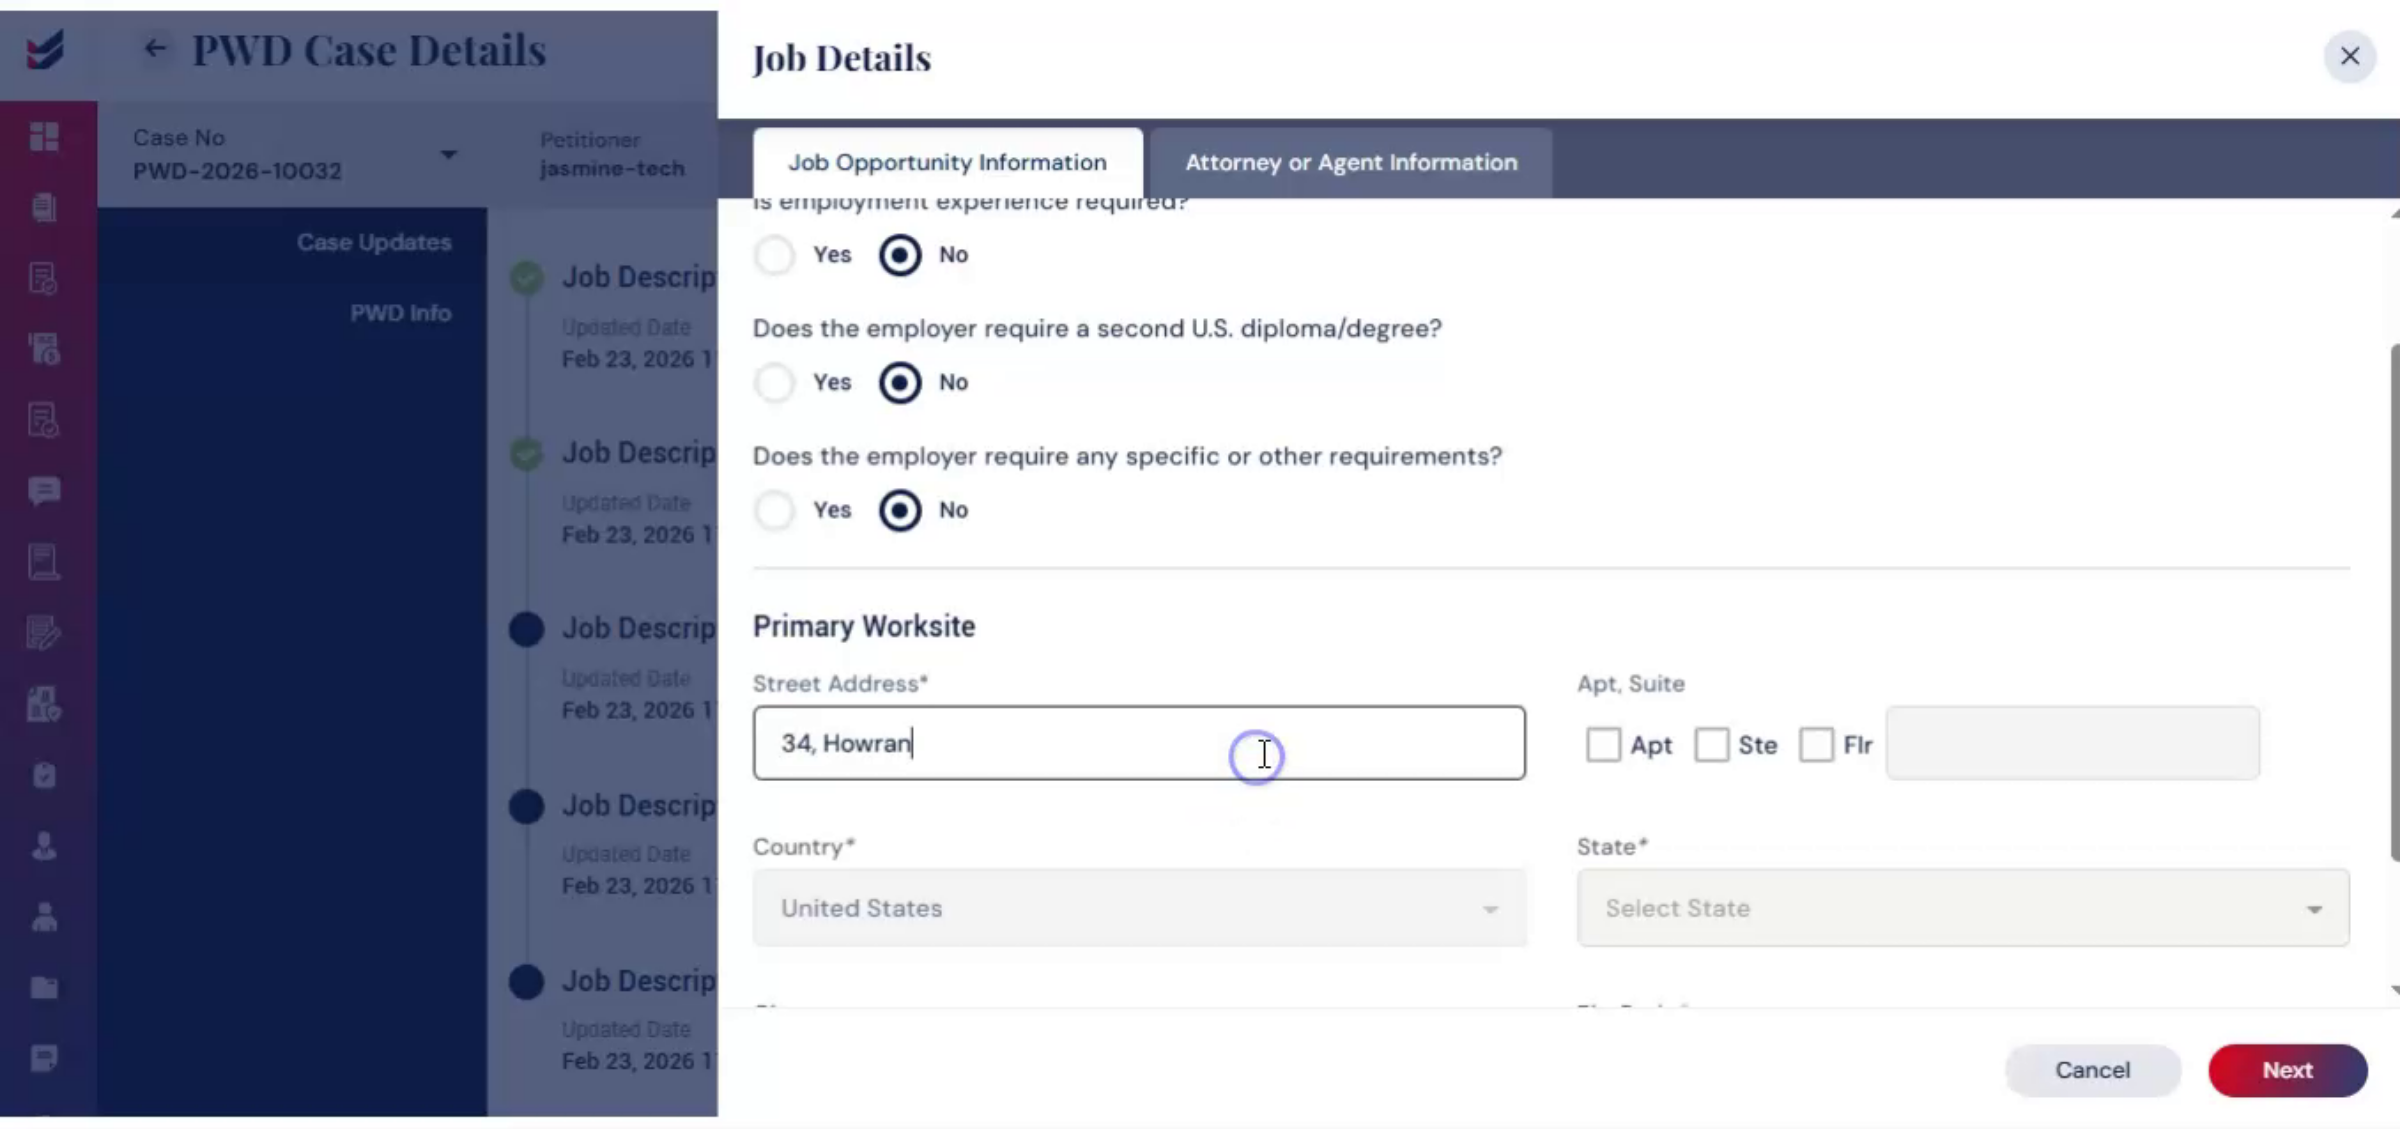
E-file through ImmiBox File Offline. If you choose to e-file, go to the Actions tab and select E-file. You will be guided through two forms. First, the Job Opportunity Information Form.
25. E-Filing Forms Process
 * click the image to view enlarged
Review the pre-filled details, complete any missing information, and click Next. Second, the Agent Information Form. Enter the required details and click Submit.
26. ImmiBox Desktop Application
 * click the image to view enlarged
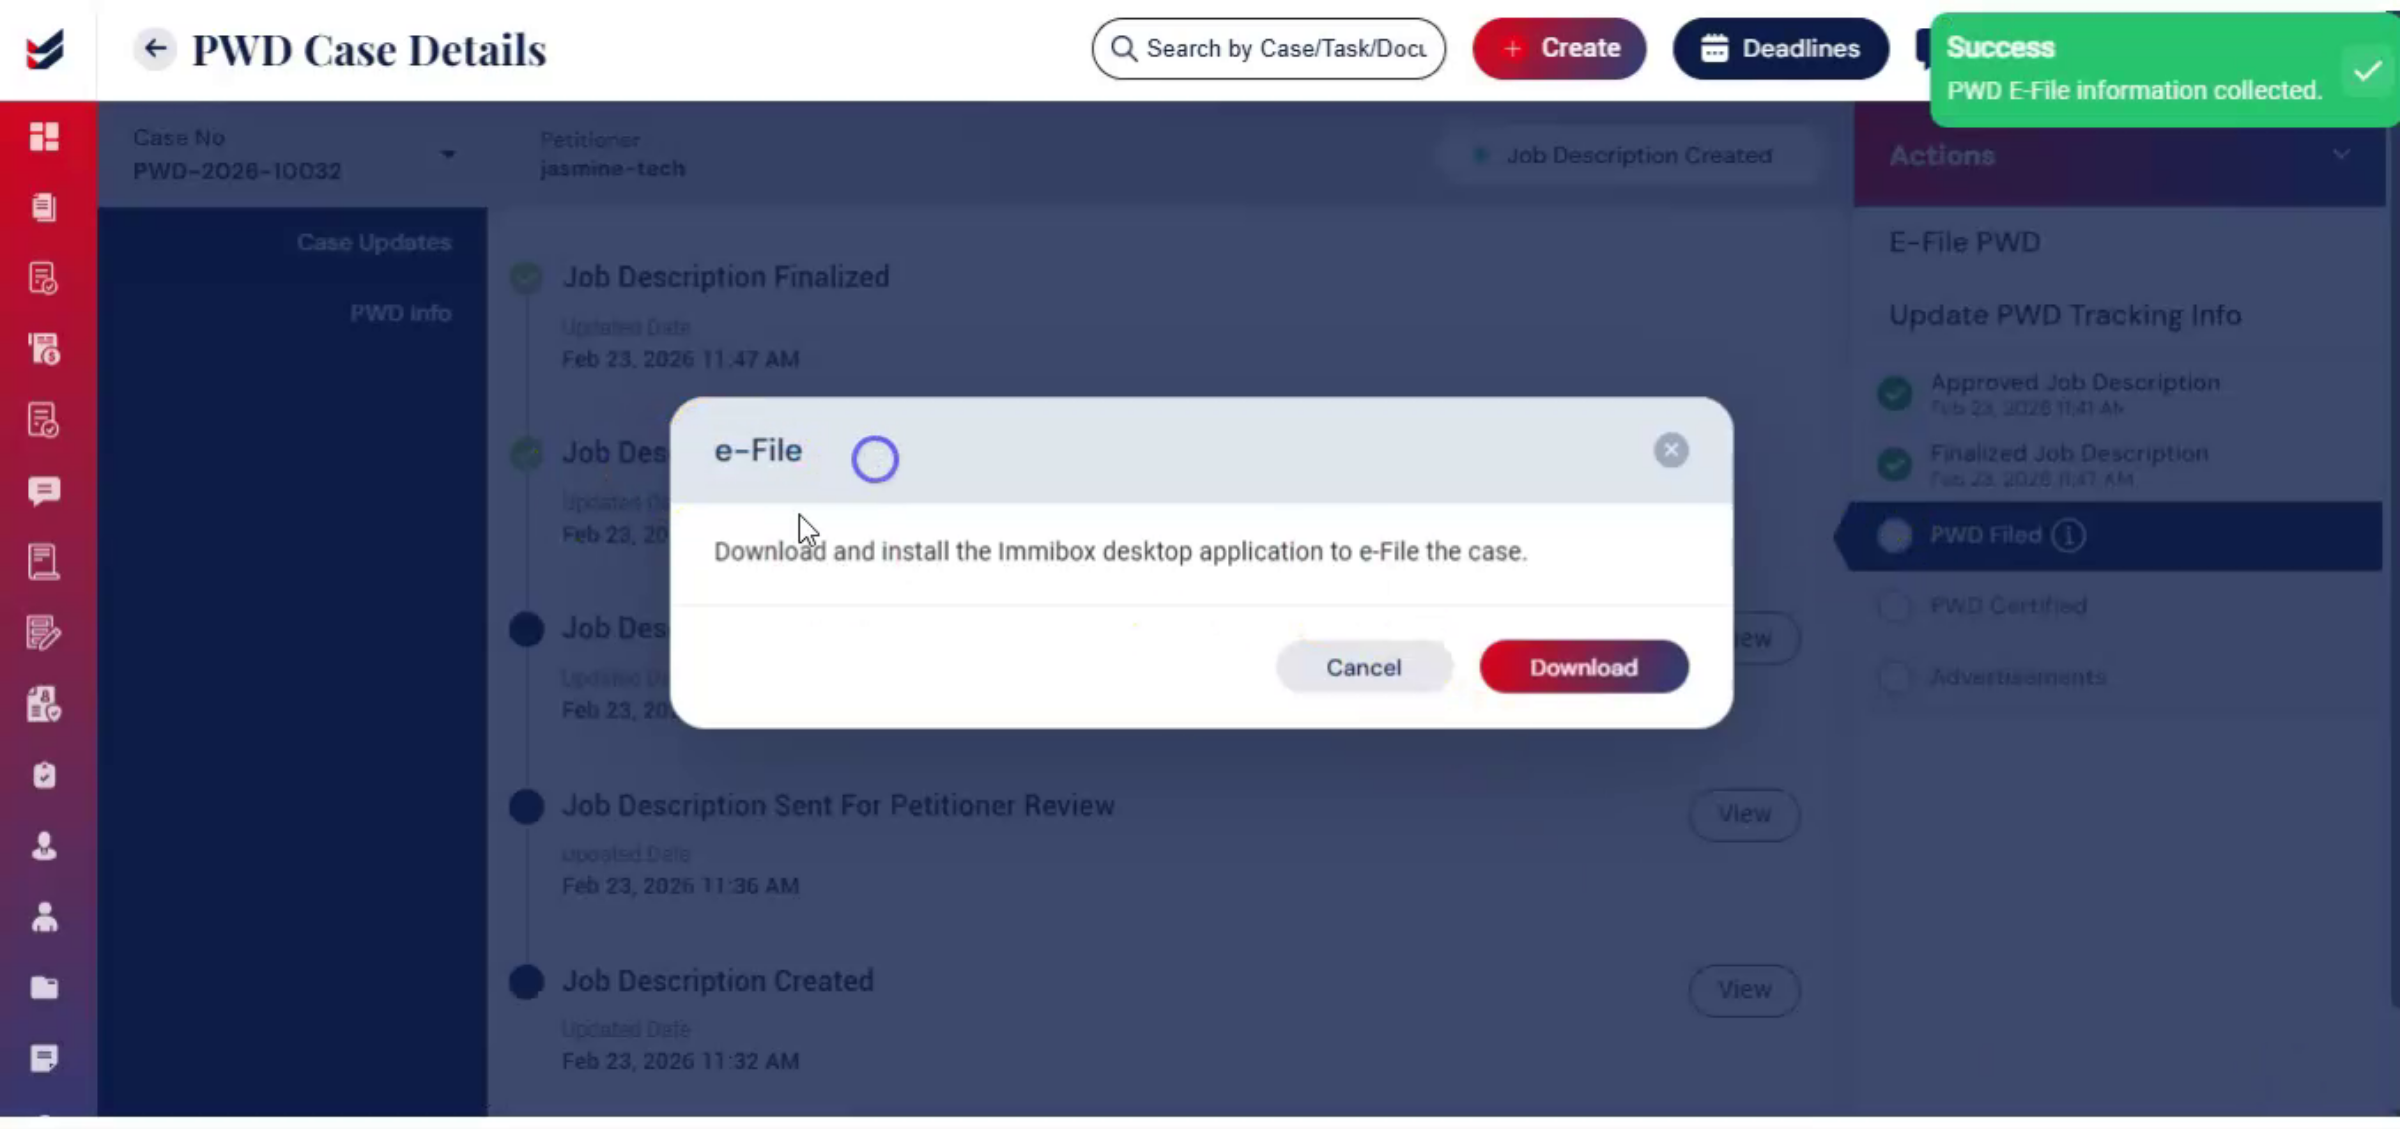
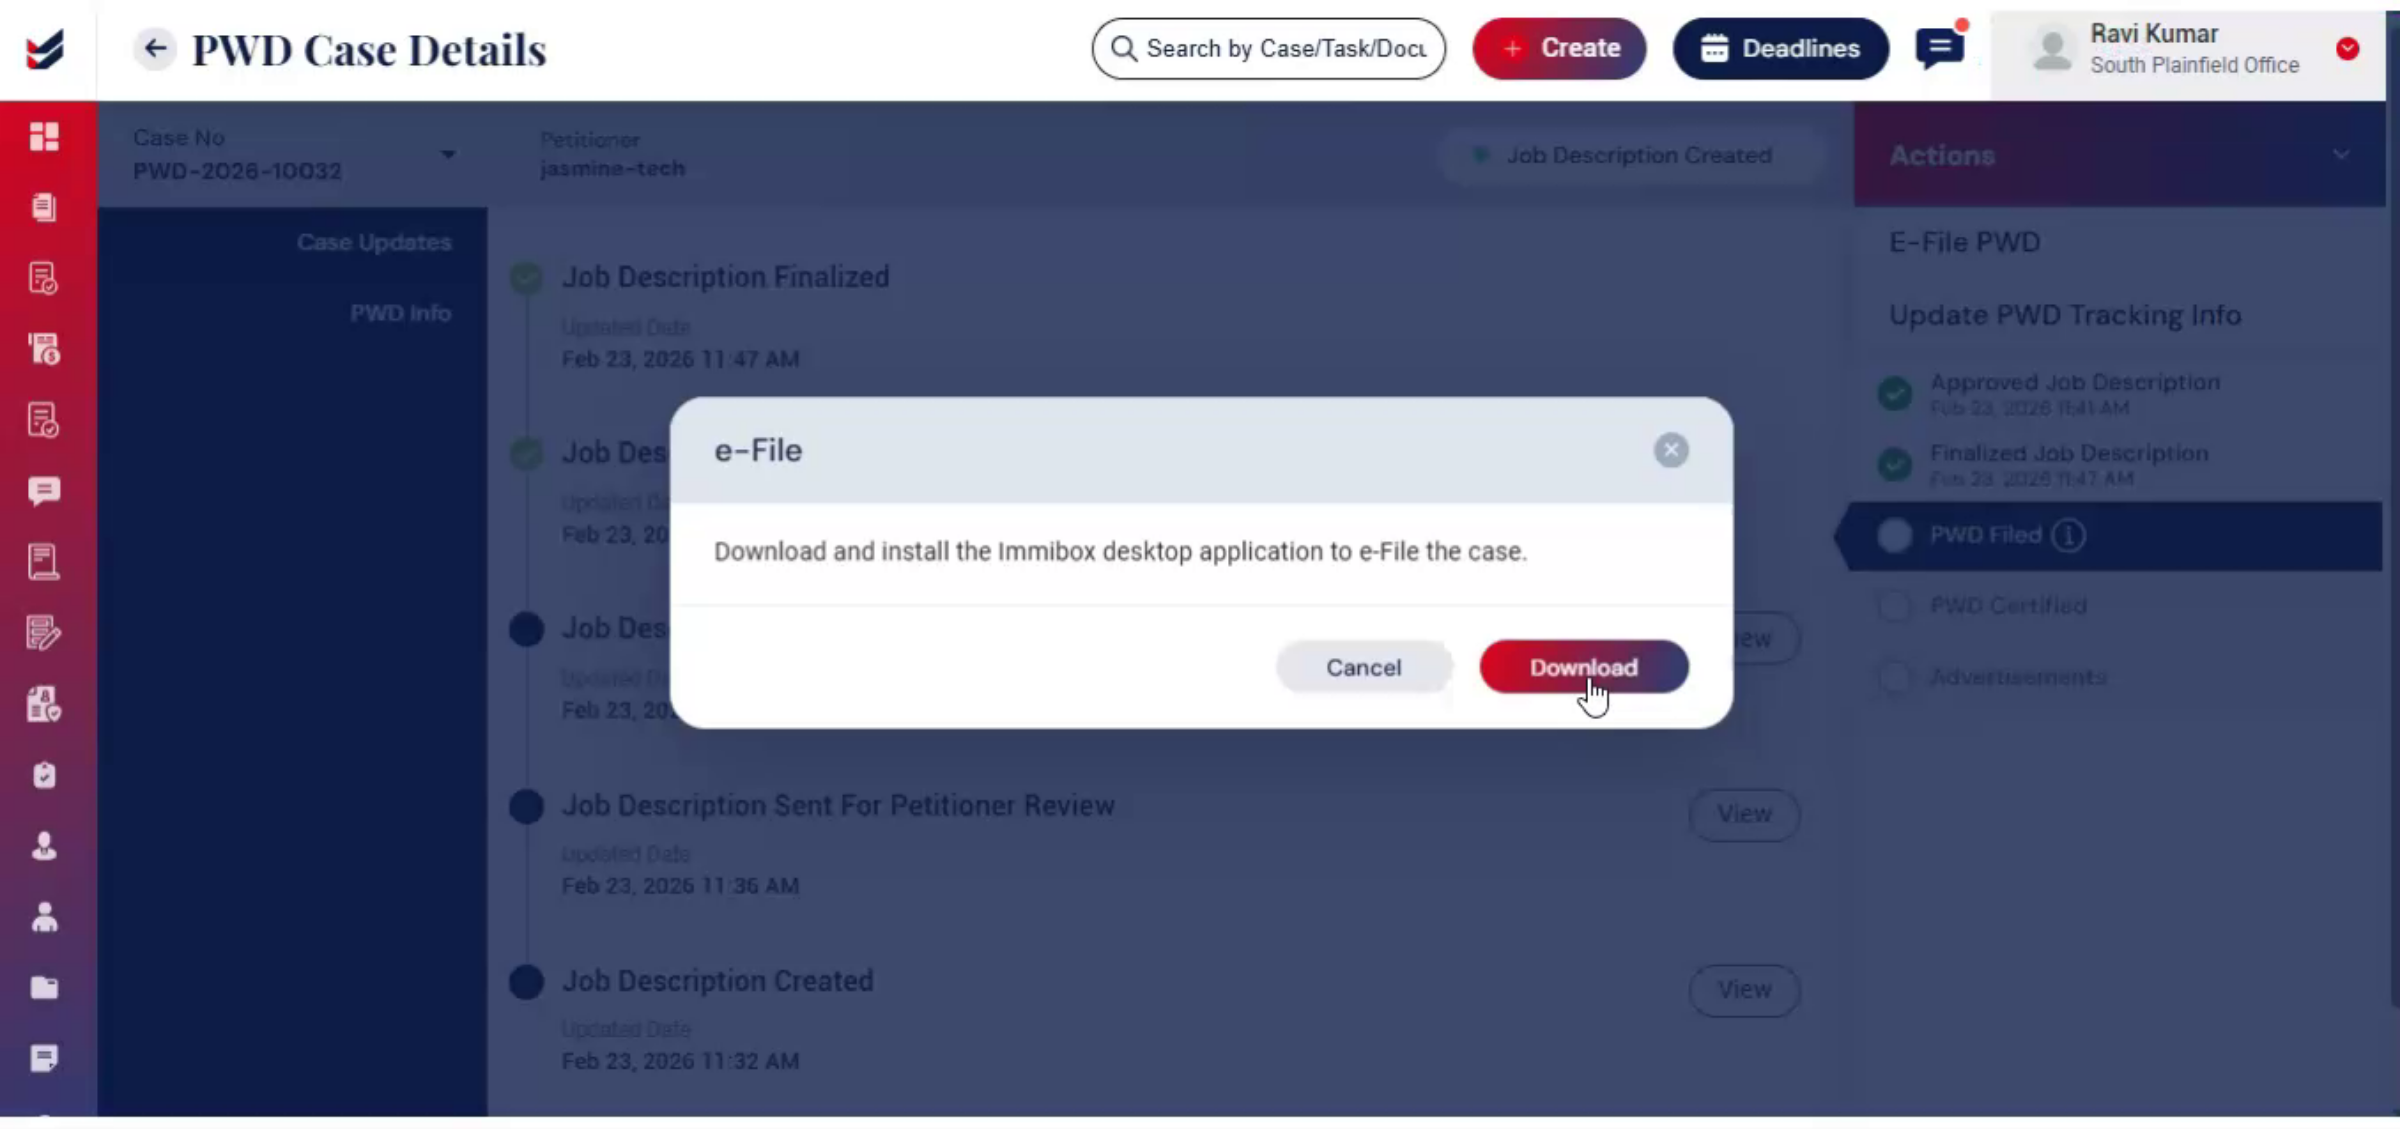
After submission, a pop-up will appear prompting you to download the ImmiBox desktop application. Once installed, you can file the PWD directly through the application.
27. E-Filing Guide Reference
 * click the image to view enlarged
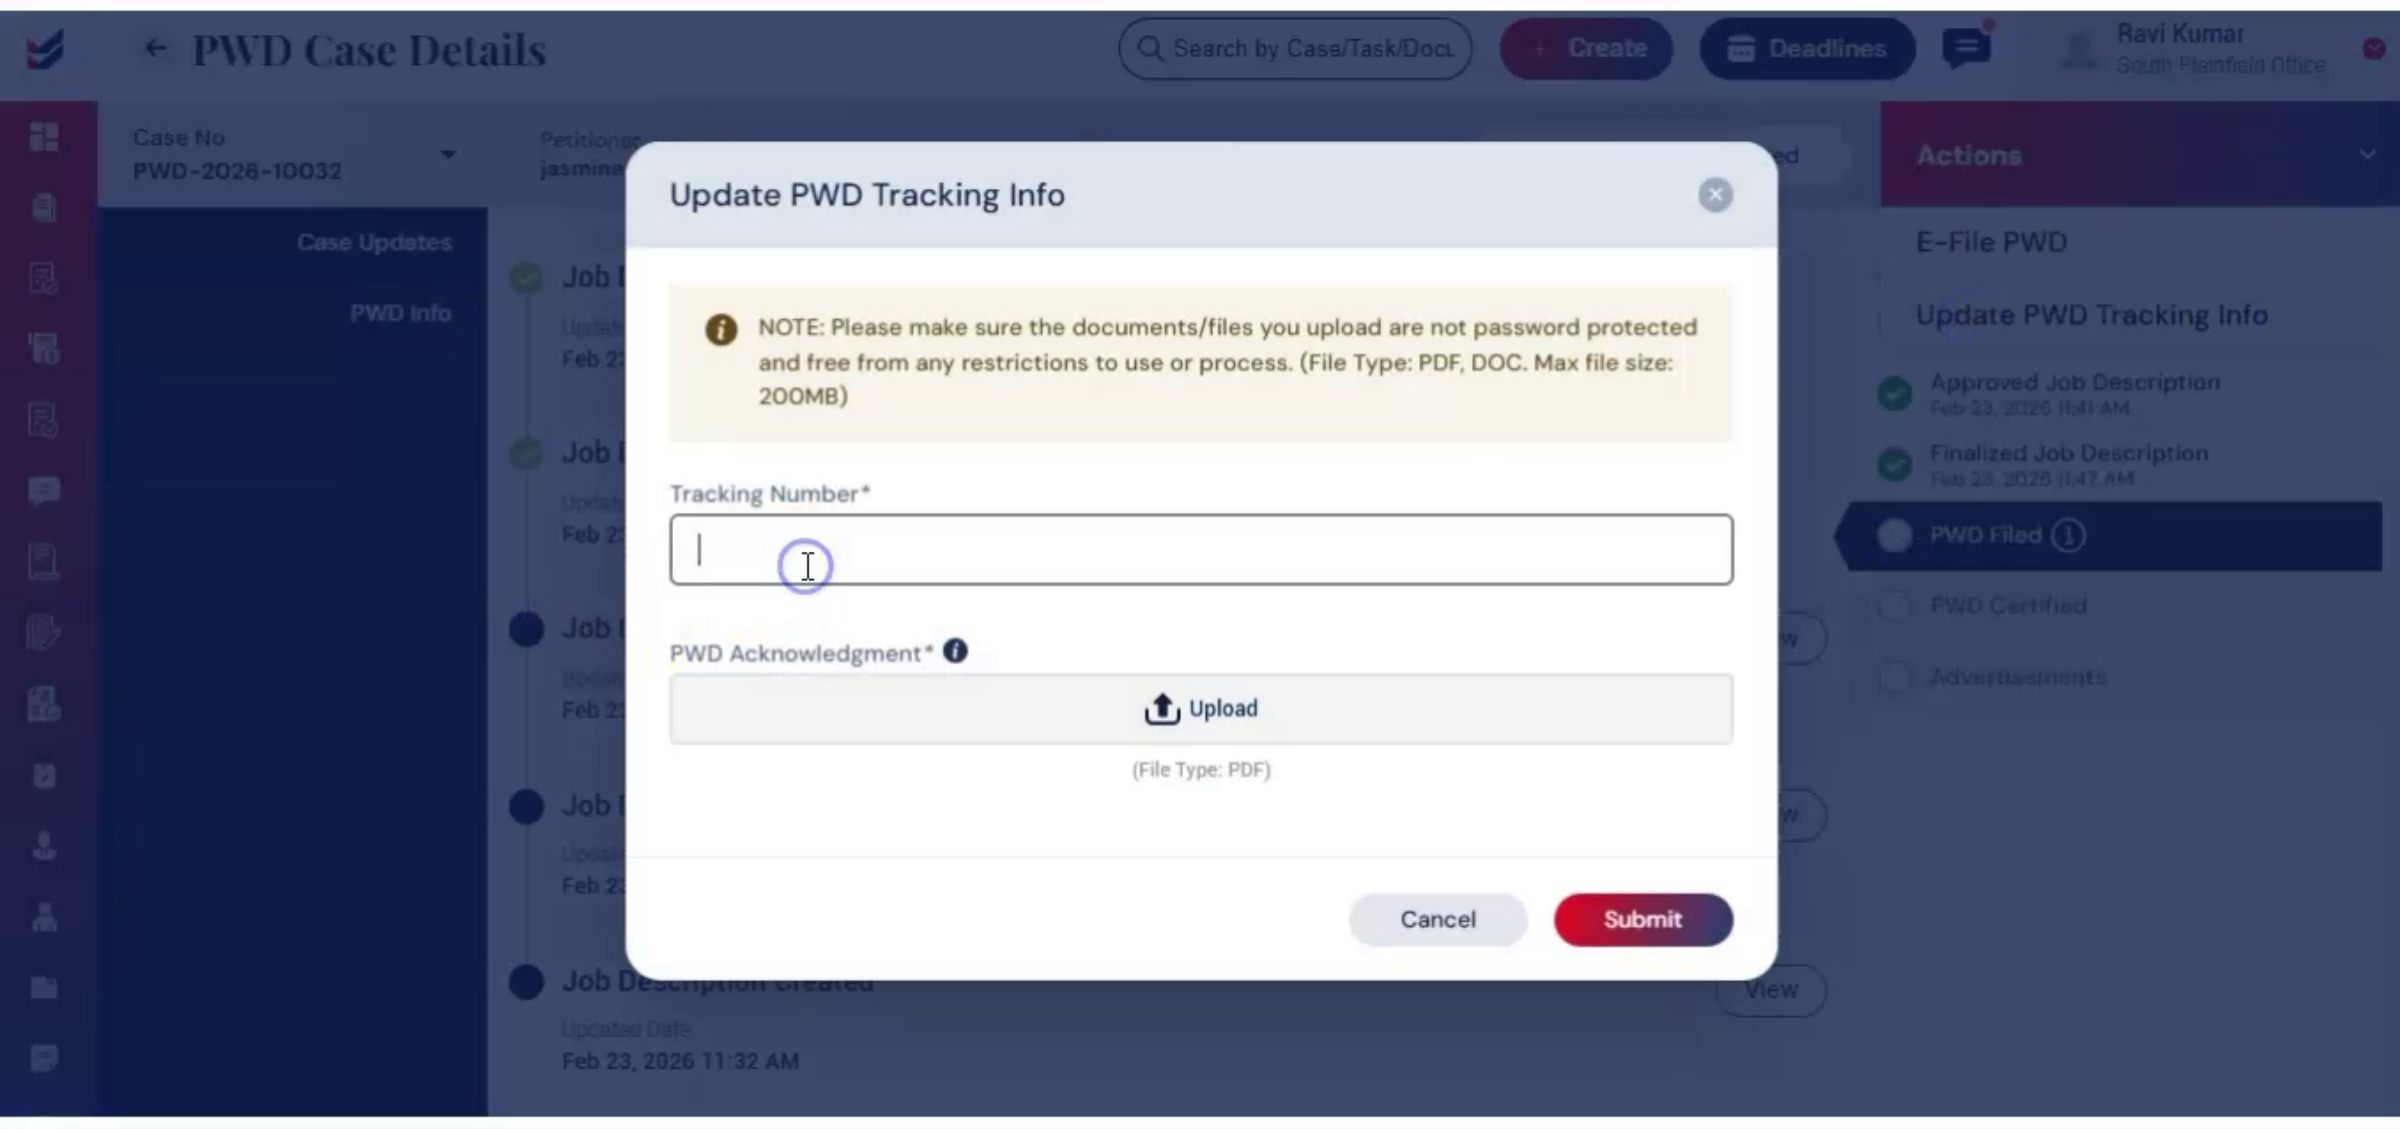
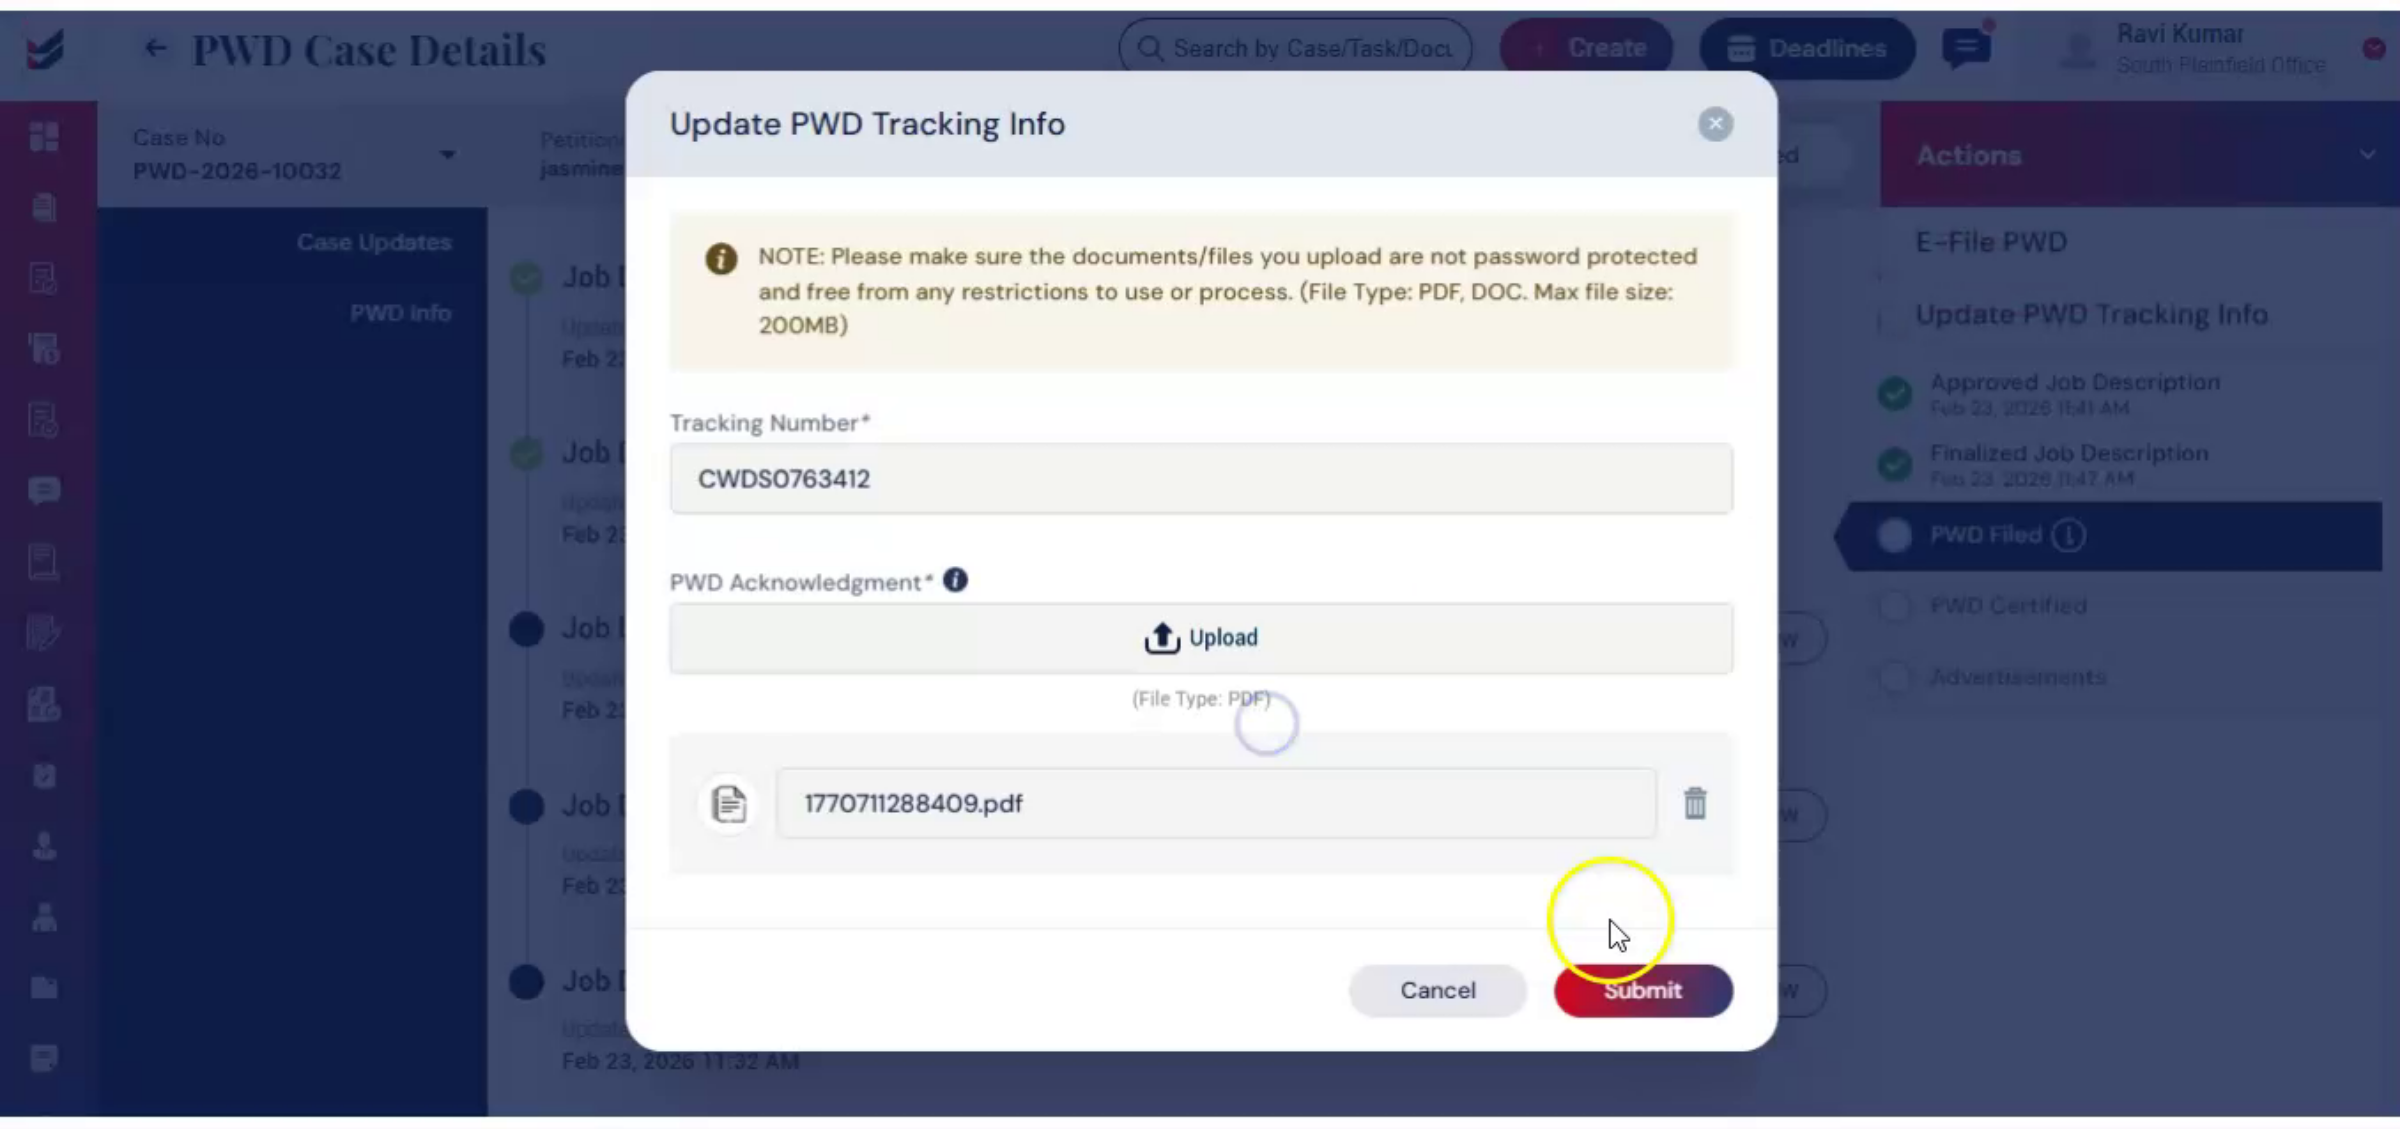
For detailed step-by-step instructions on the e-filing process, please refer to the corresponding e-filing guide. If filing offline, then receipt notice can be uploaded by selecting Update PWD Tracking Info from the Actions tab.
28. Offline Filing Tracking
 * click the image to view enlarged
Once tracking details are submitted, the system begins monitoring the case automatically.
29. Case Status Updates
 * click the image to view enlarged
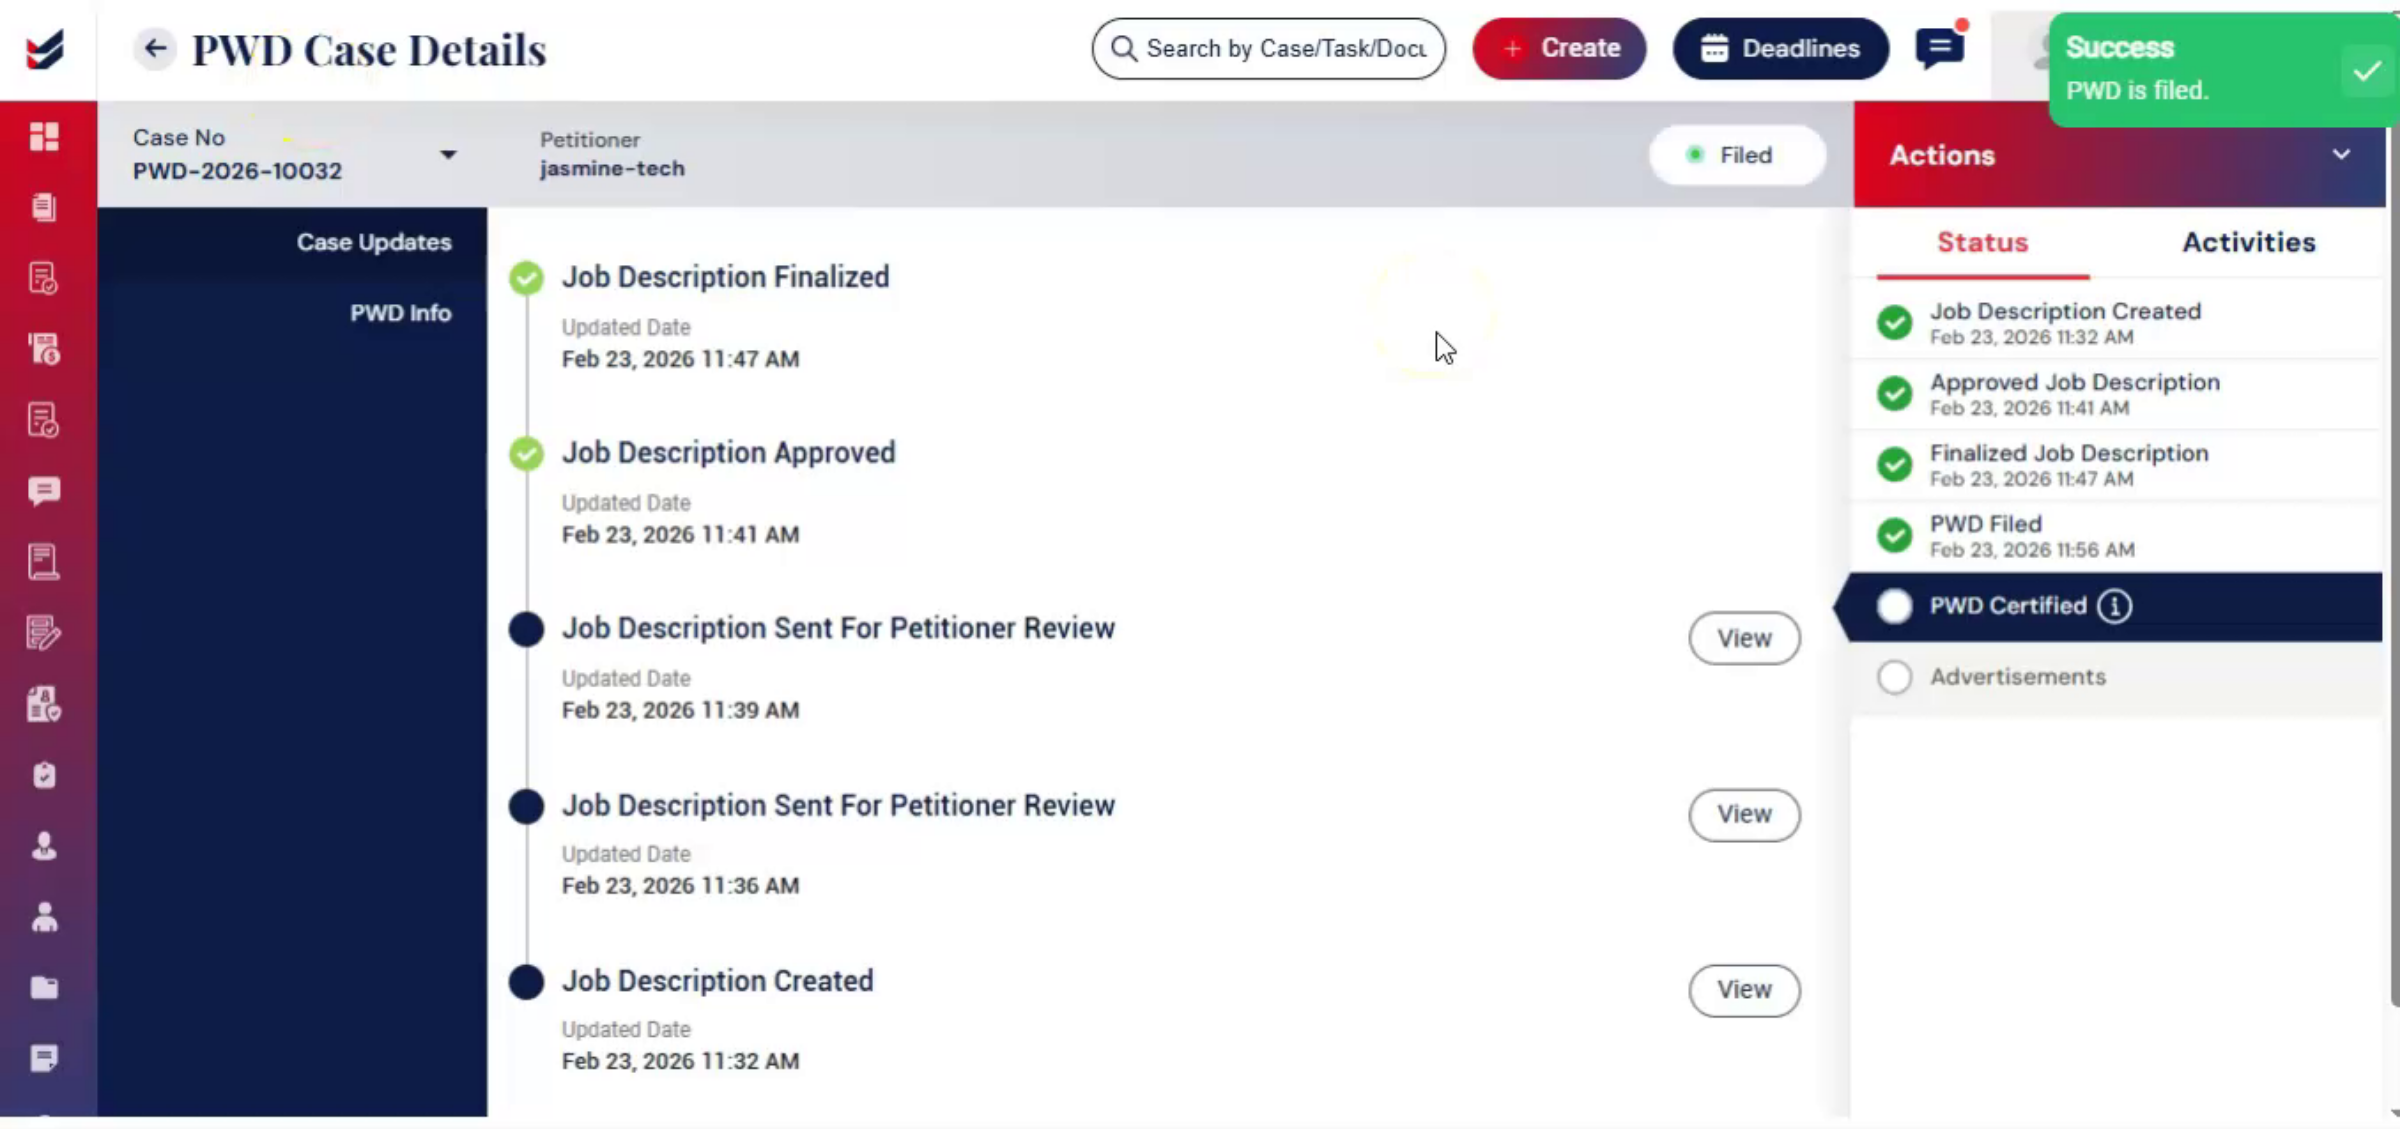
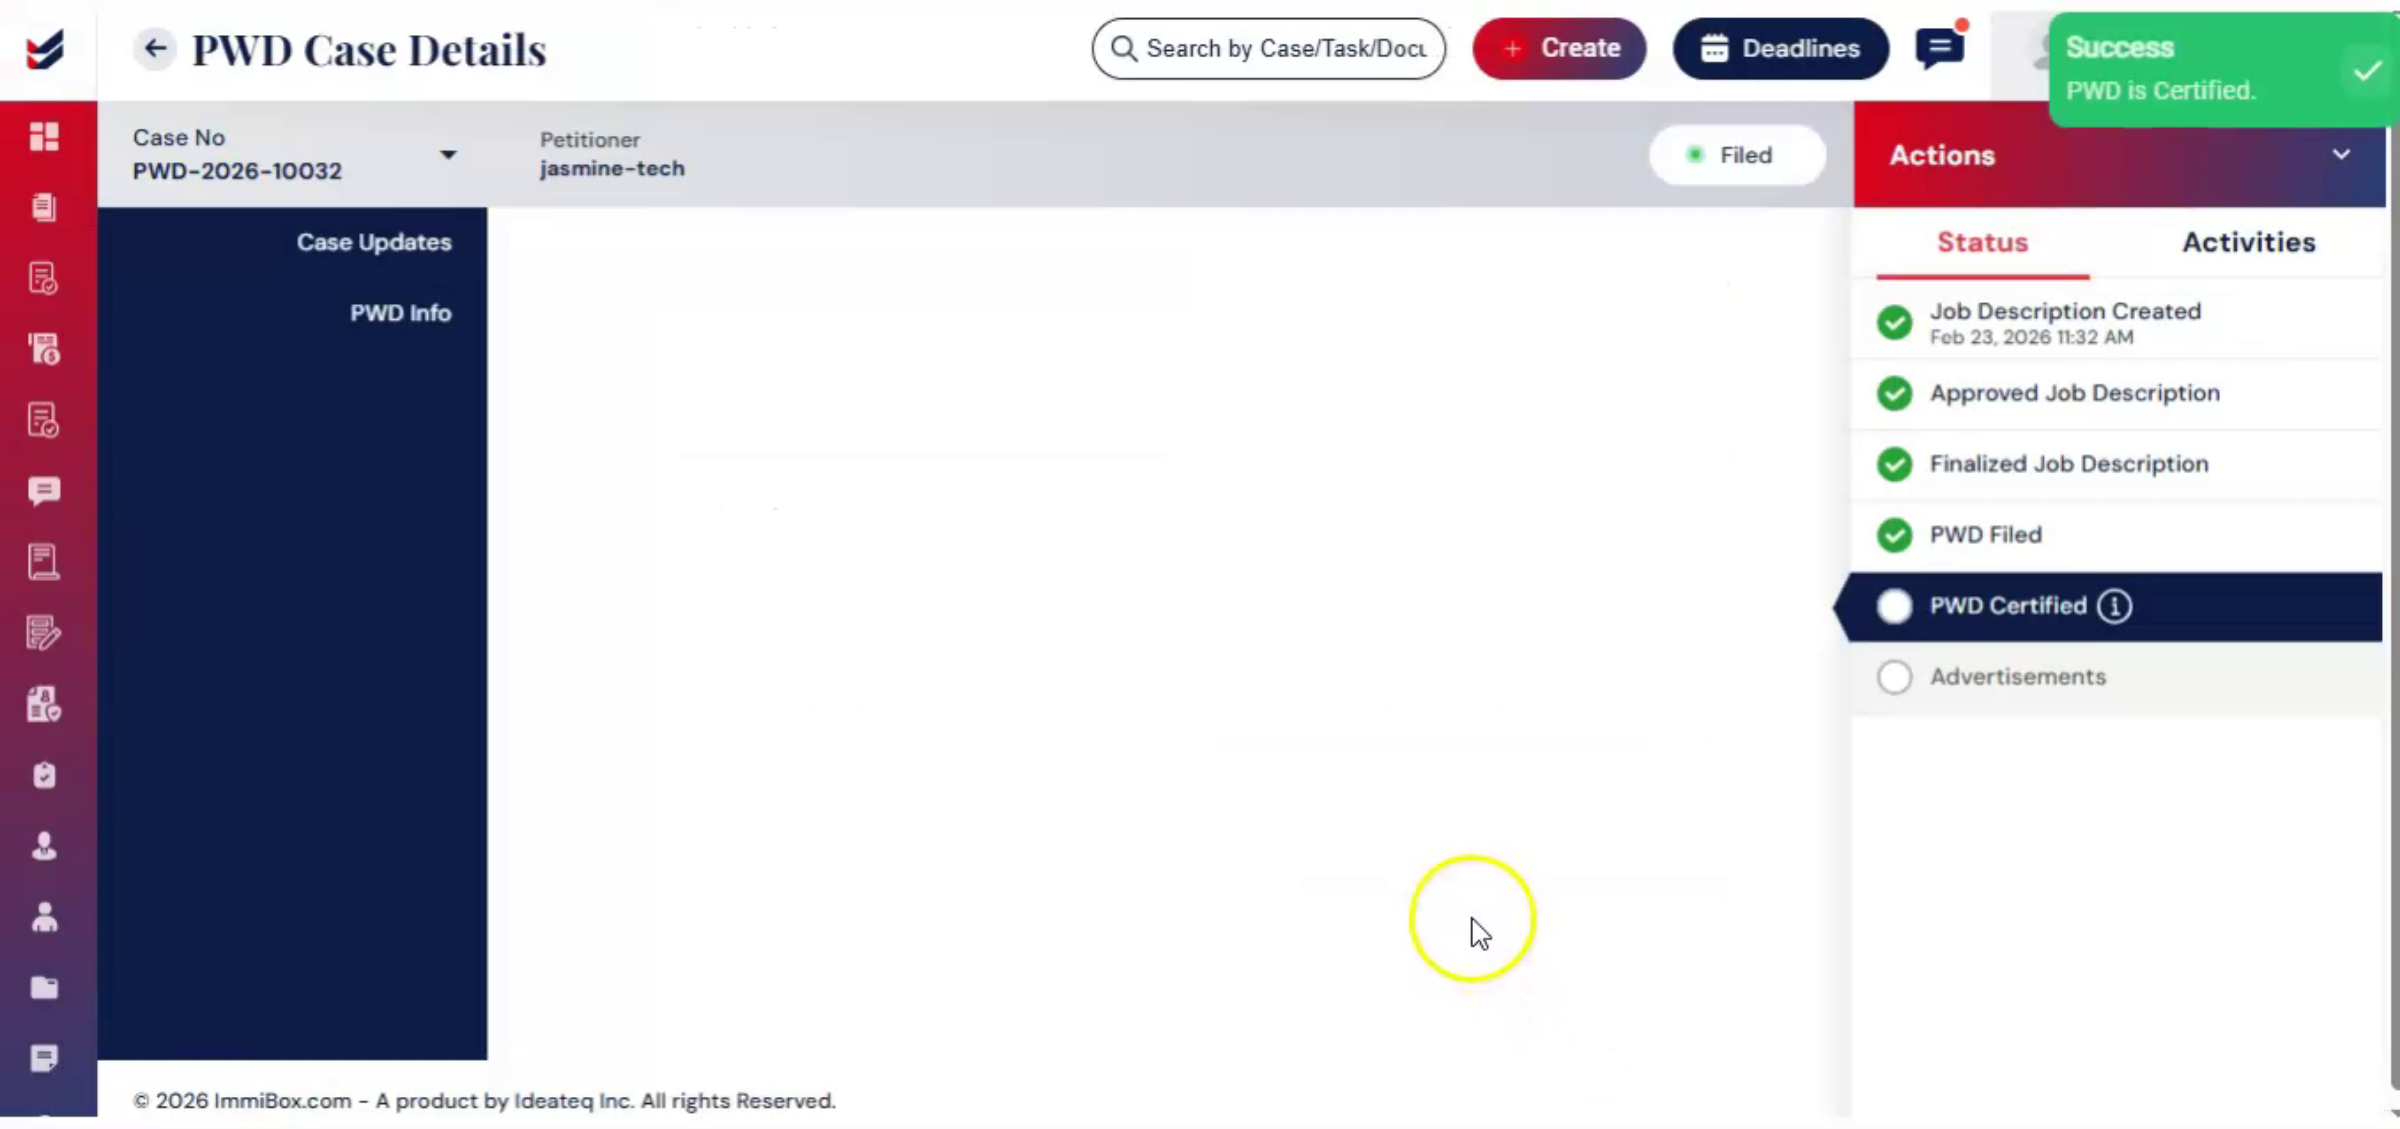
Status updates appear in the Case Update section, providing centralized tracking. When the PWD is certified, the system updates the status automatically.
30. Uploading Certification Documents
 * click the image to view enlarged
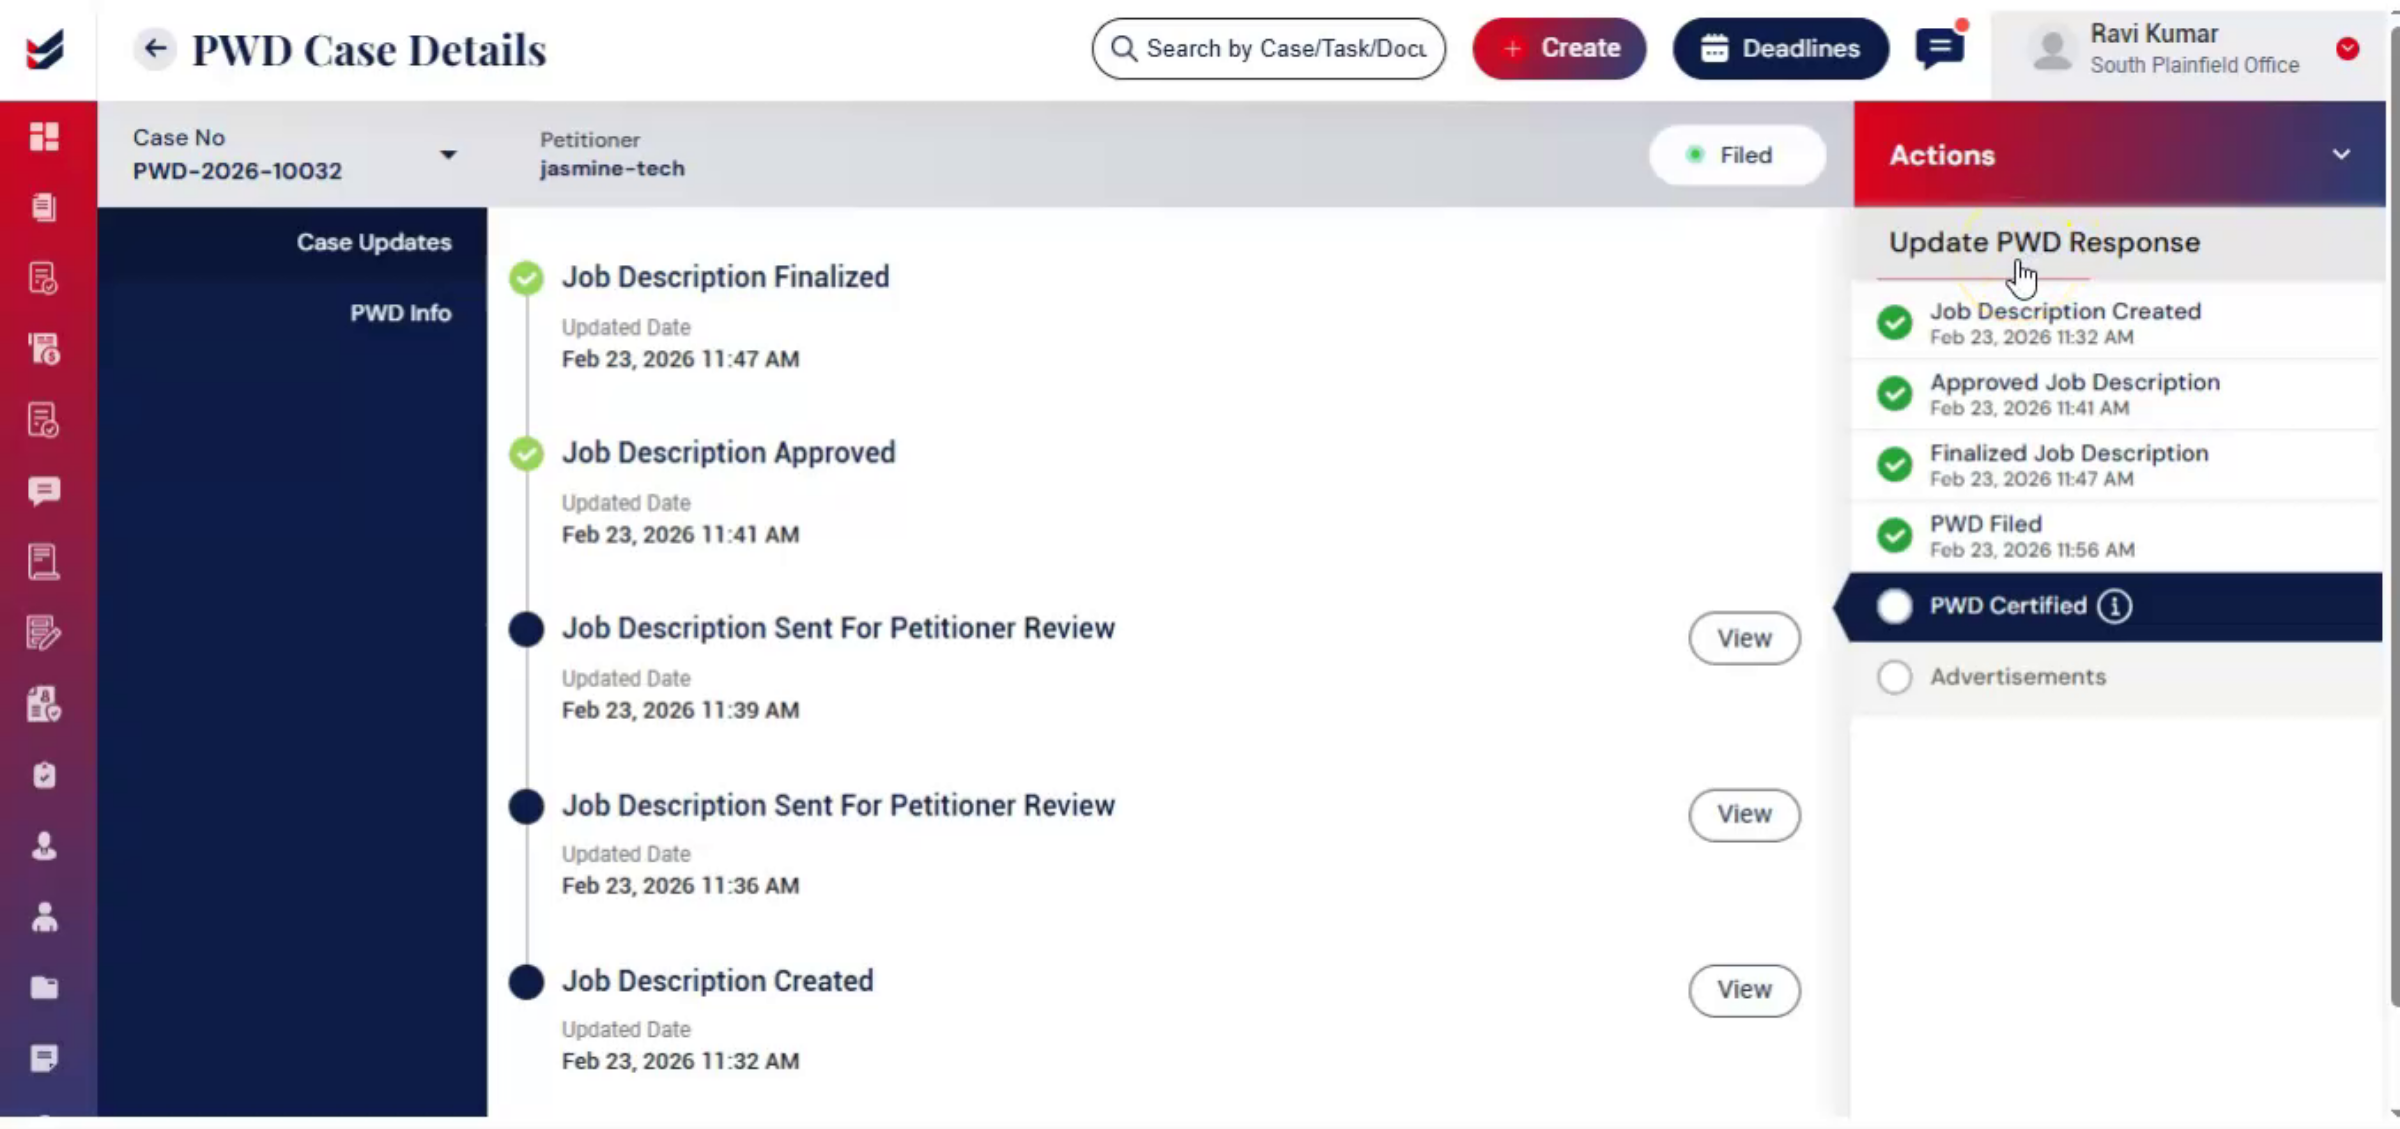
Certification documents may also be uploaded manually using Update PWD Response under the Actions tab.
31. Receipt Notice Upload Process
 * click the image to view enlarged
In the dialog box, upload the receipt notice in the Upload section. Then ImmiBox automatically extracts available data from the uploaded receipt and populates relevant fields. Any missing information can be entered manually before submitting.
32. Recording Advertisement Evidence
 * click the image to view enlarged
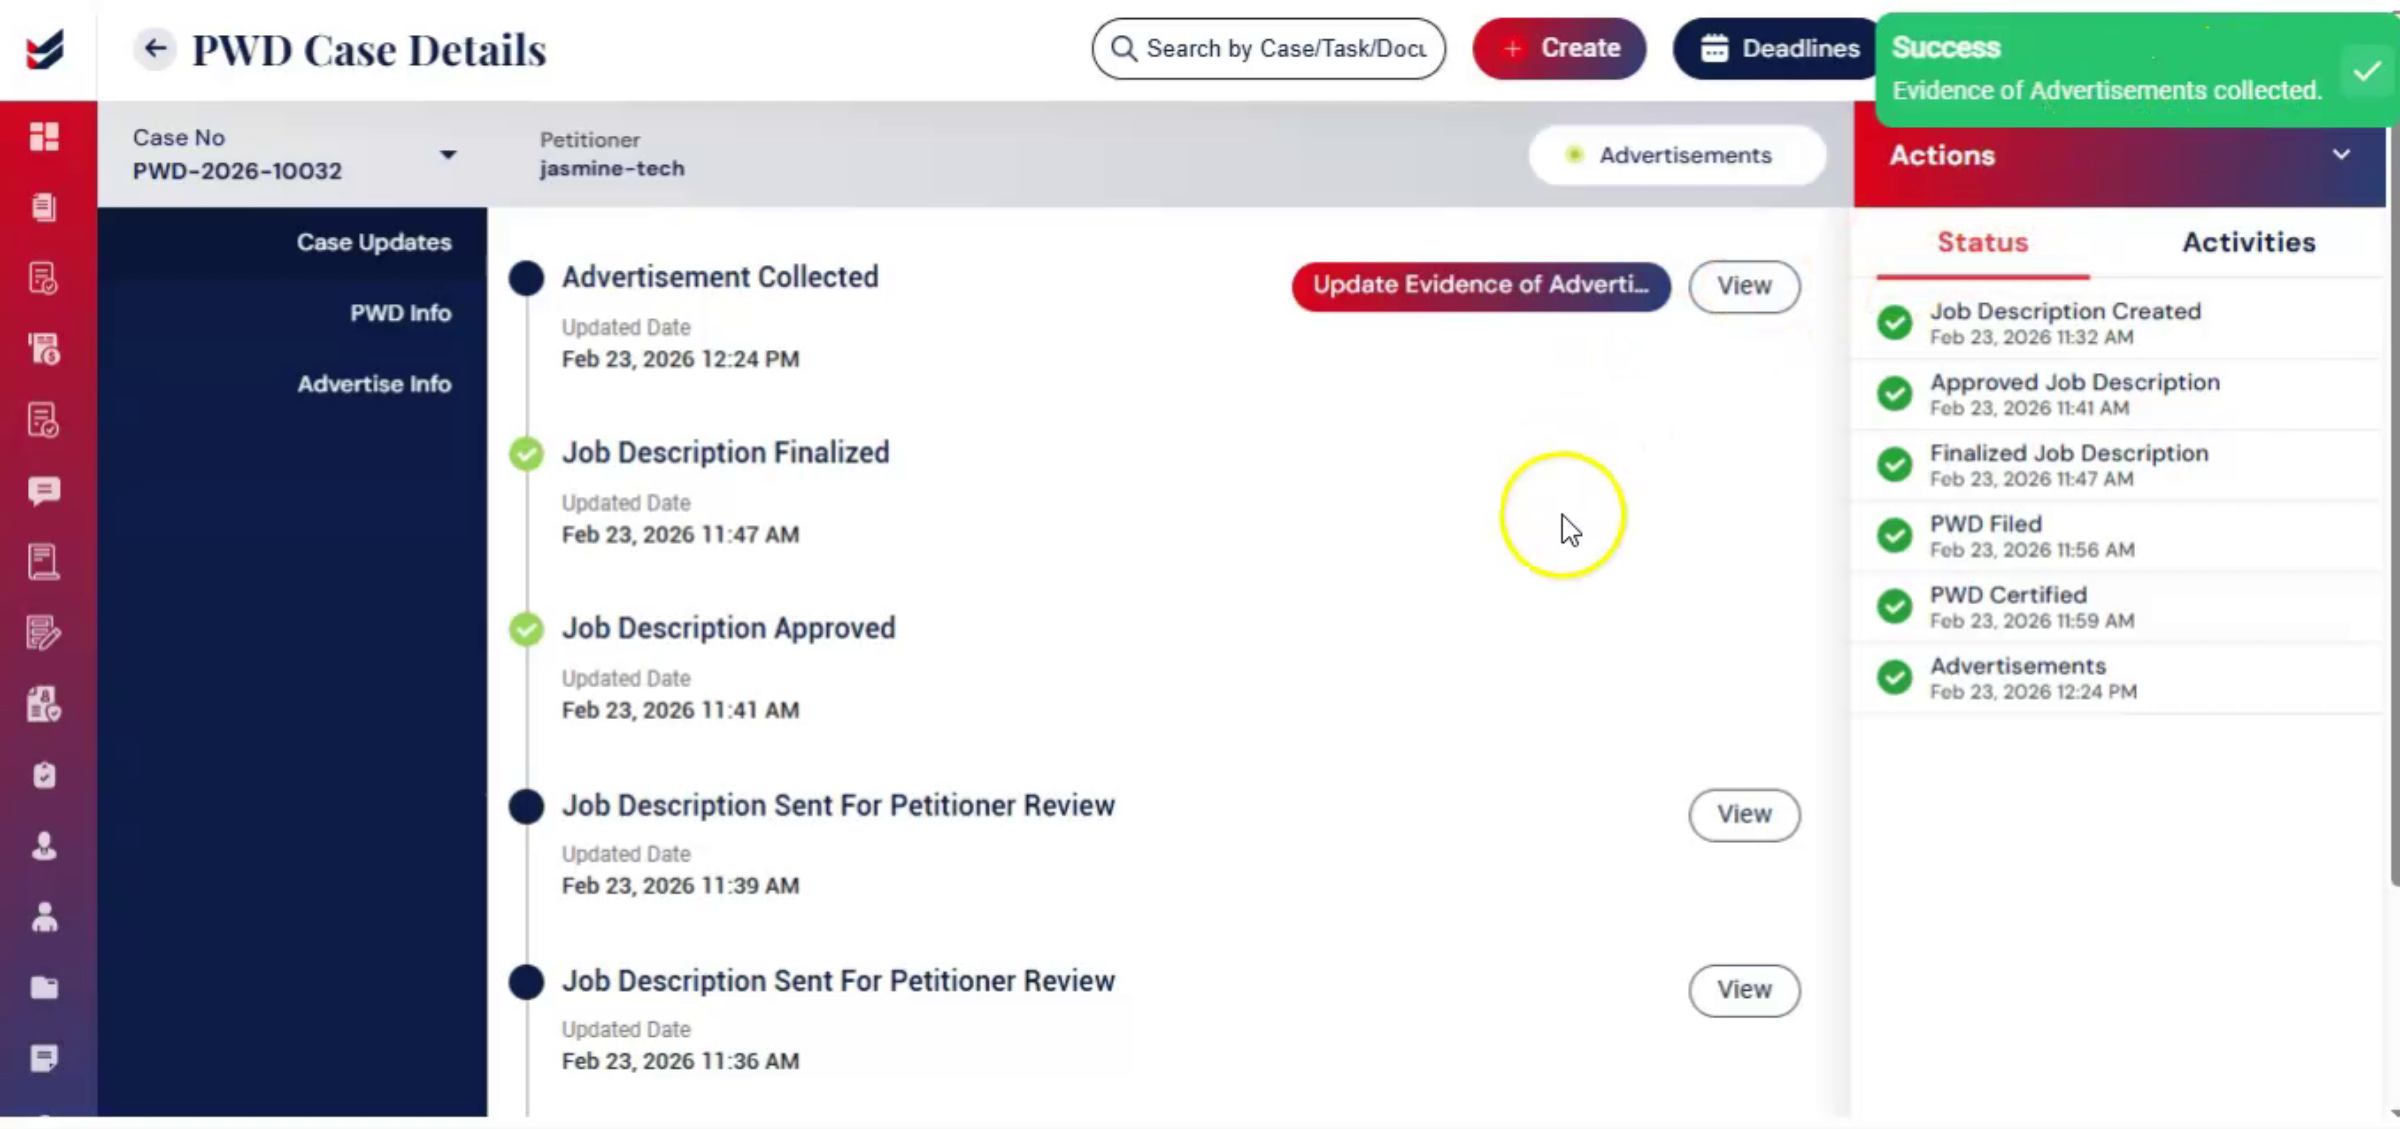
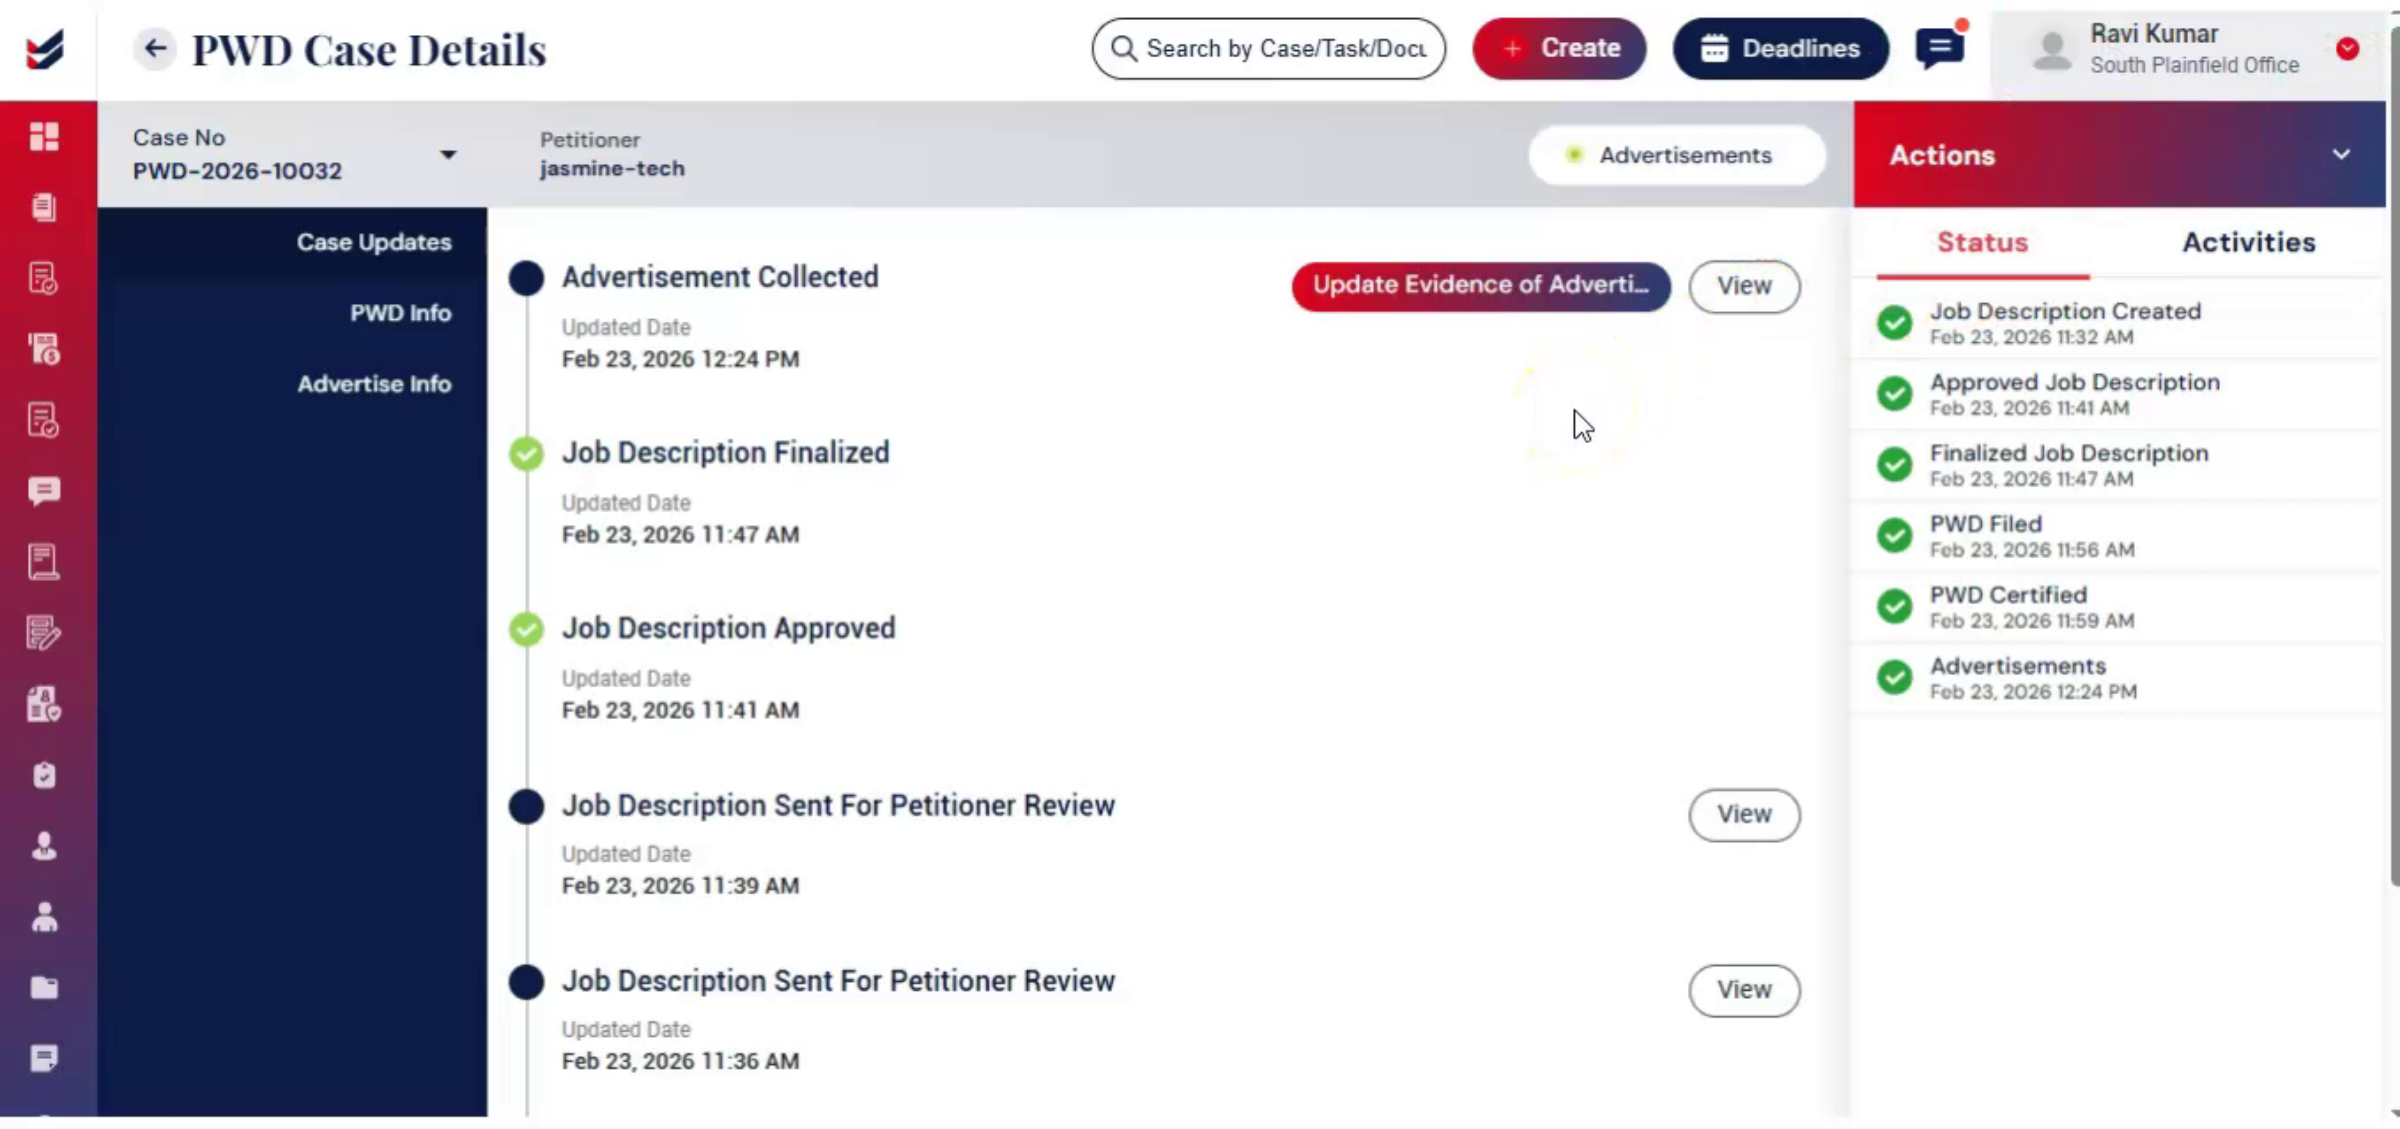
After certification, advertisement documentation can be recorded directly within the same case. From the Actions tab, select Update Evidence of Advertisement and enter the required details, including occupation classification and Advertisement Timelines.
33. Updating Advertisement Records
 * click the image to view enlarged
If updates are required in the Evidence of Advertisement, you can make changes by clicking the Update Evidence of Advertisements link. This allows you to revise and update the advertisement records as needed.
34. Uploading Existing PWD
 * click the image to view enlarged
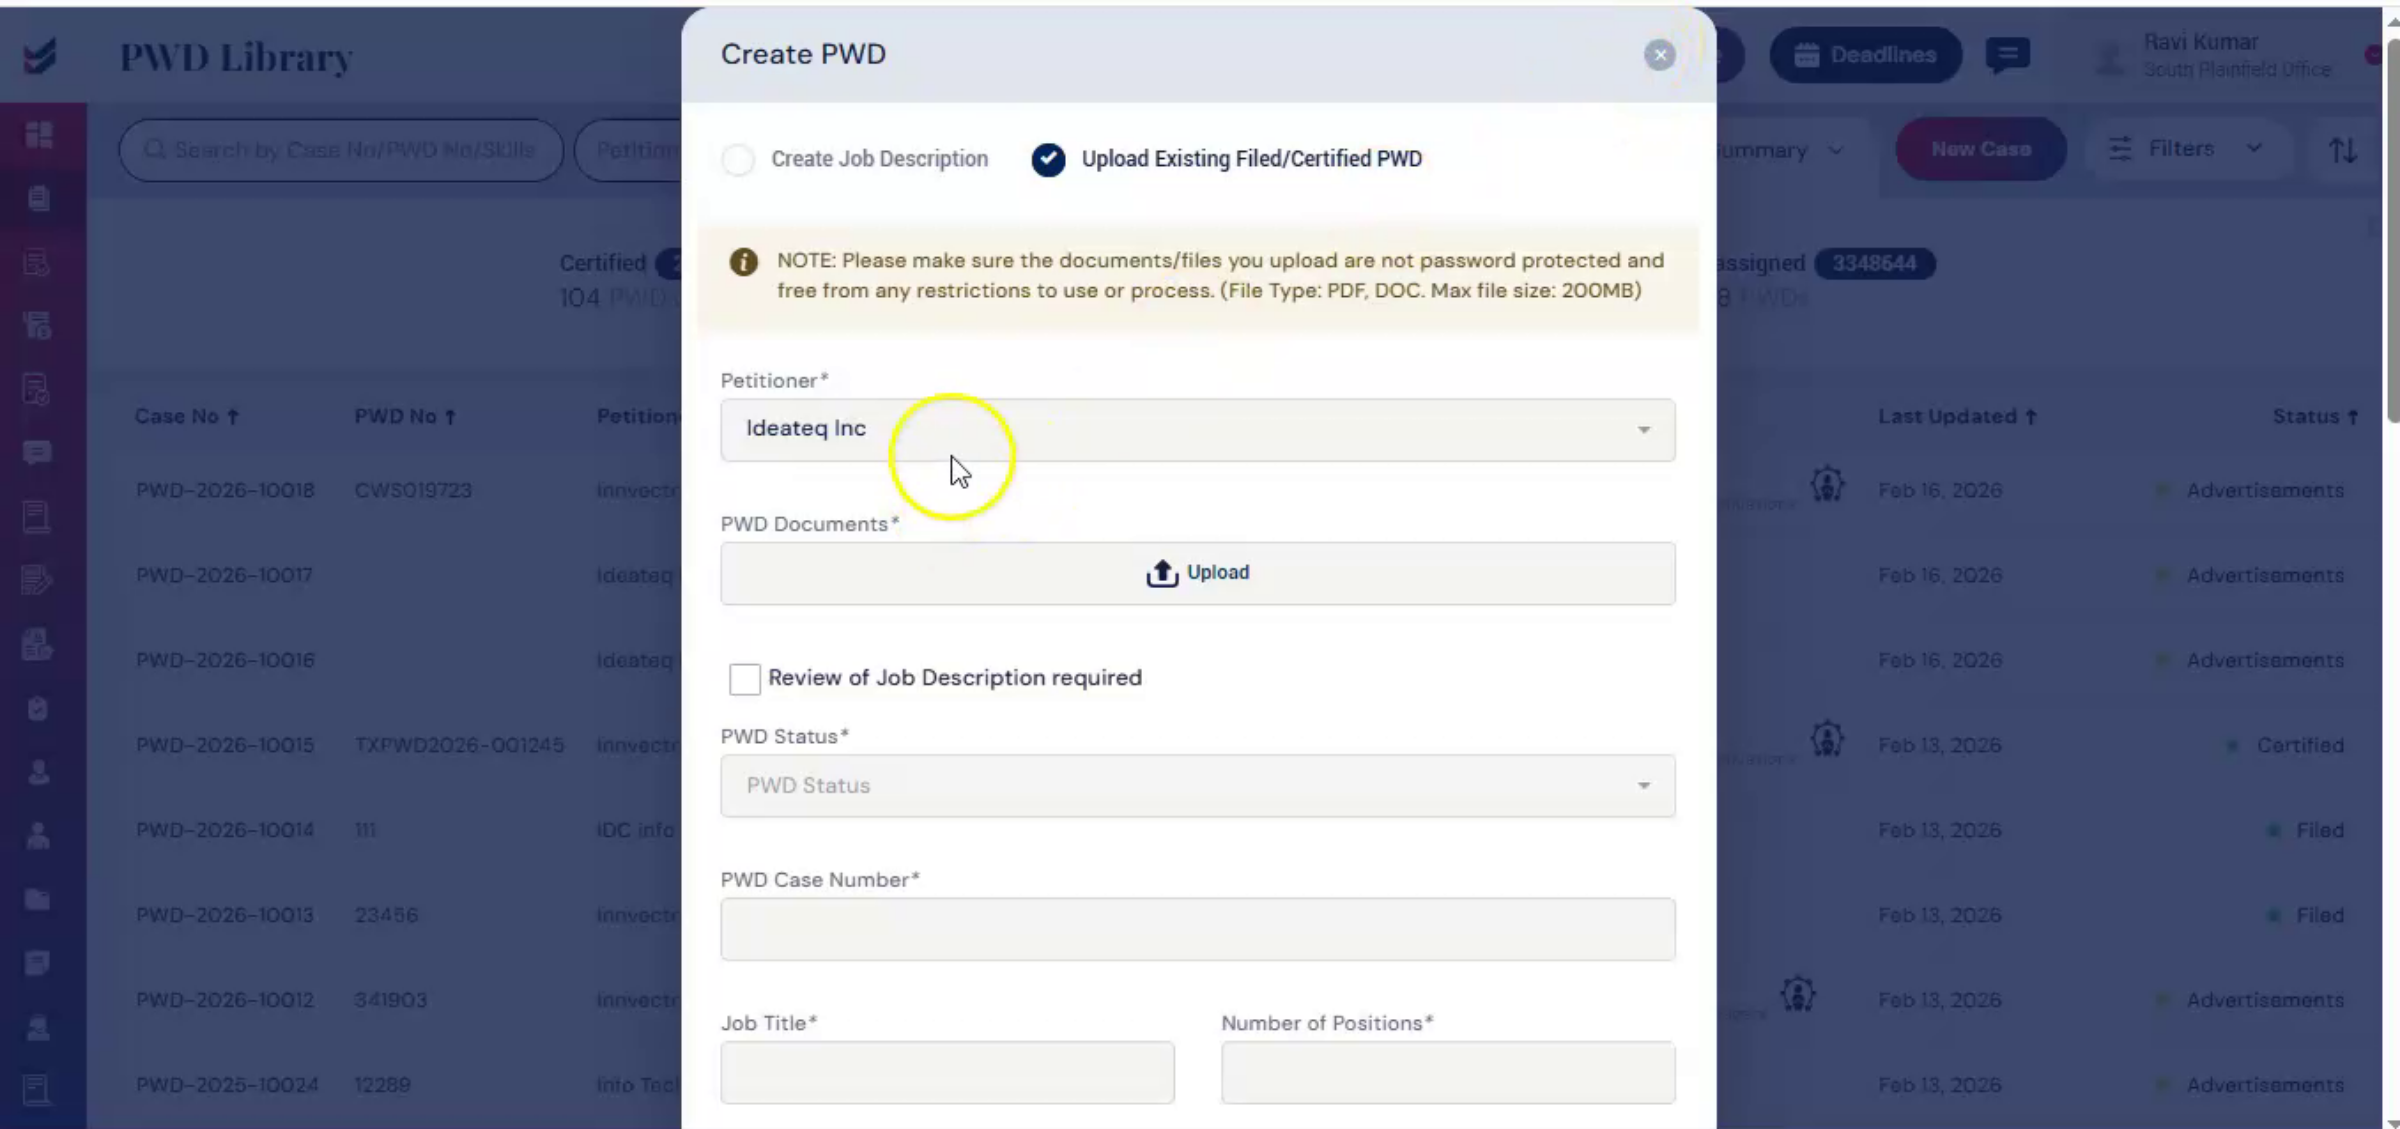
Case 2. Uploading an Existing PWD. If a PWD has already been filed and certified outside the system, you can select Upload Existing Filed Slash Certified PWD during Case Creation.
35. Automatic Data Extraction
 * click the image to view enlarged
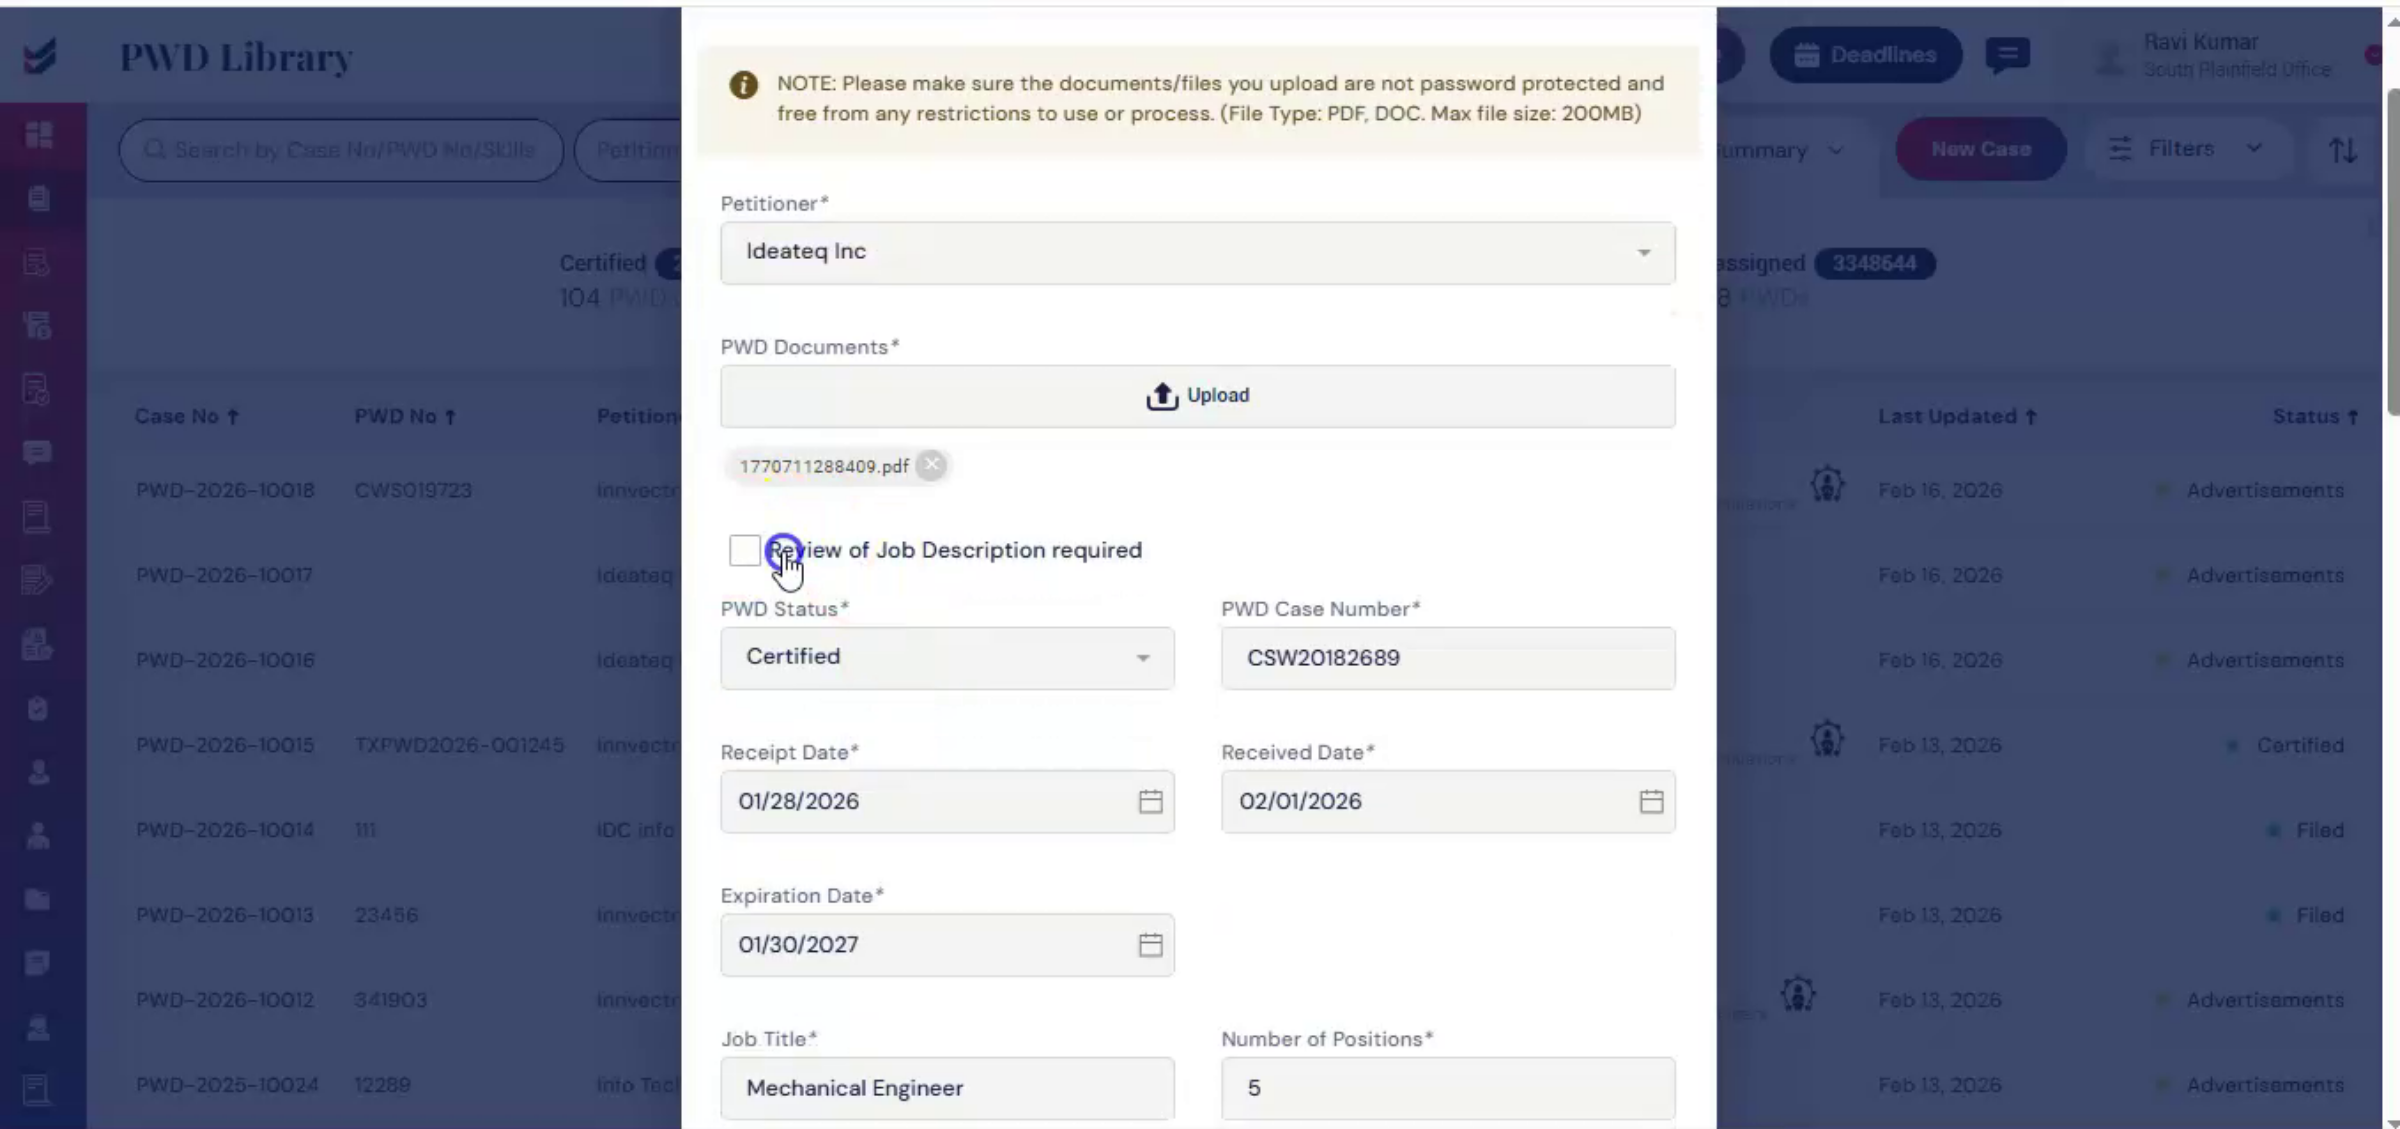
Upload the certified PWD document in the Upload section. ImmiBox will automatically extract the relevant data and populate the form fields, helping to reduce manual data entry and improve accuracy. Below the Upload section, you will see a checkbox labeled Review of Job Description Required.
36. Job Description Review Checkbox
 * click the image to view enlarged
Selecting this checkbox sends the job description to the petitioner for review. This step ensures that the job description details are reviewed and acknowledged.
37. Manual Data Entry And Submission
 * click the image to view enlarged
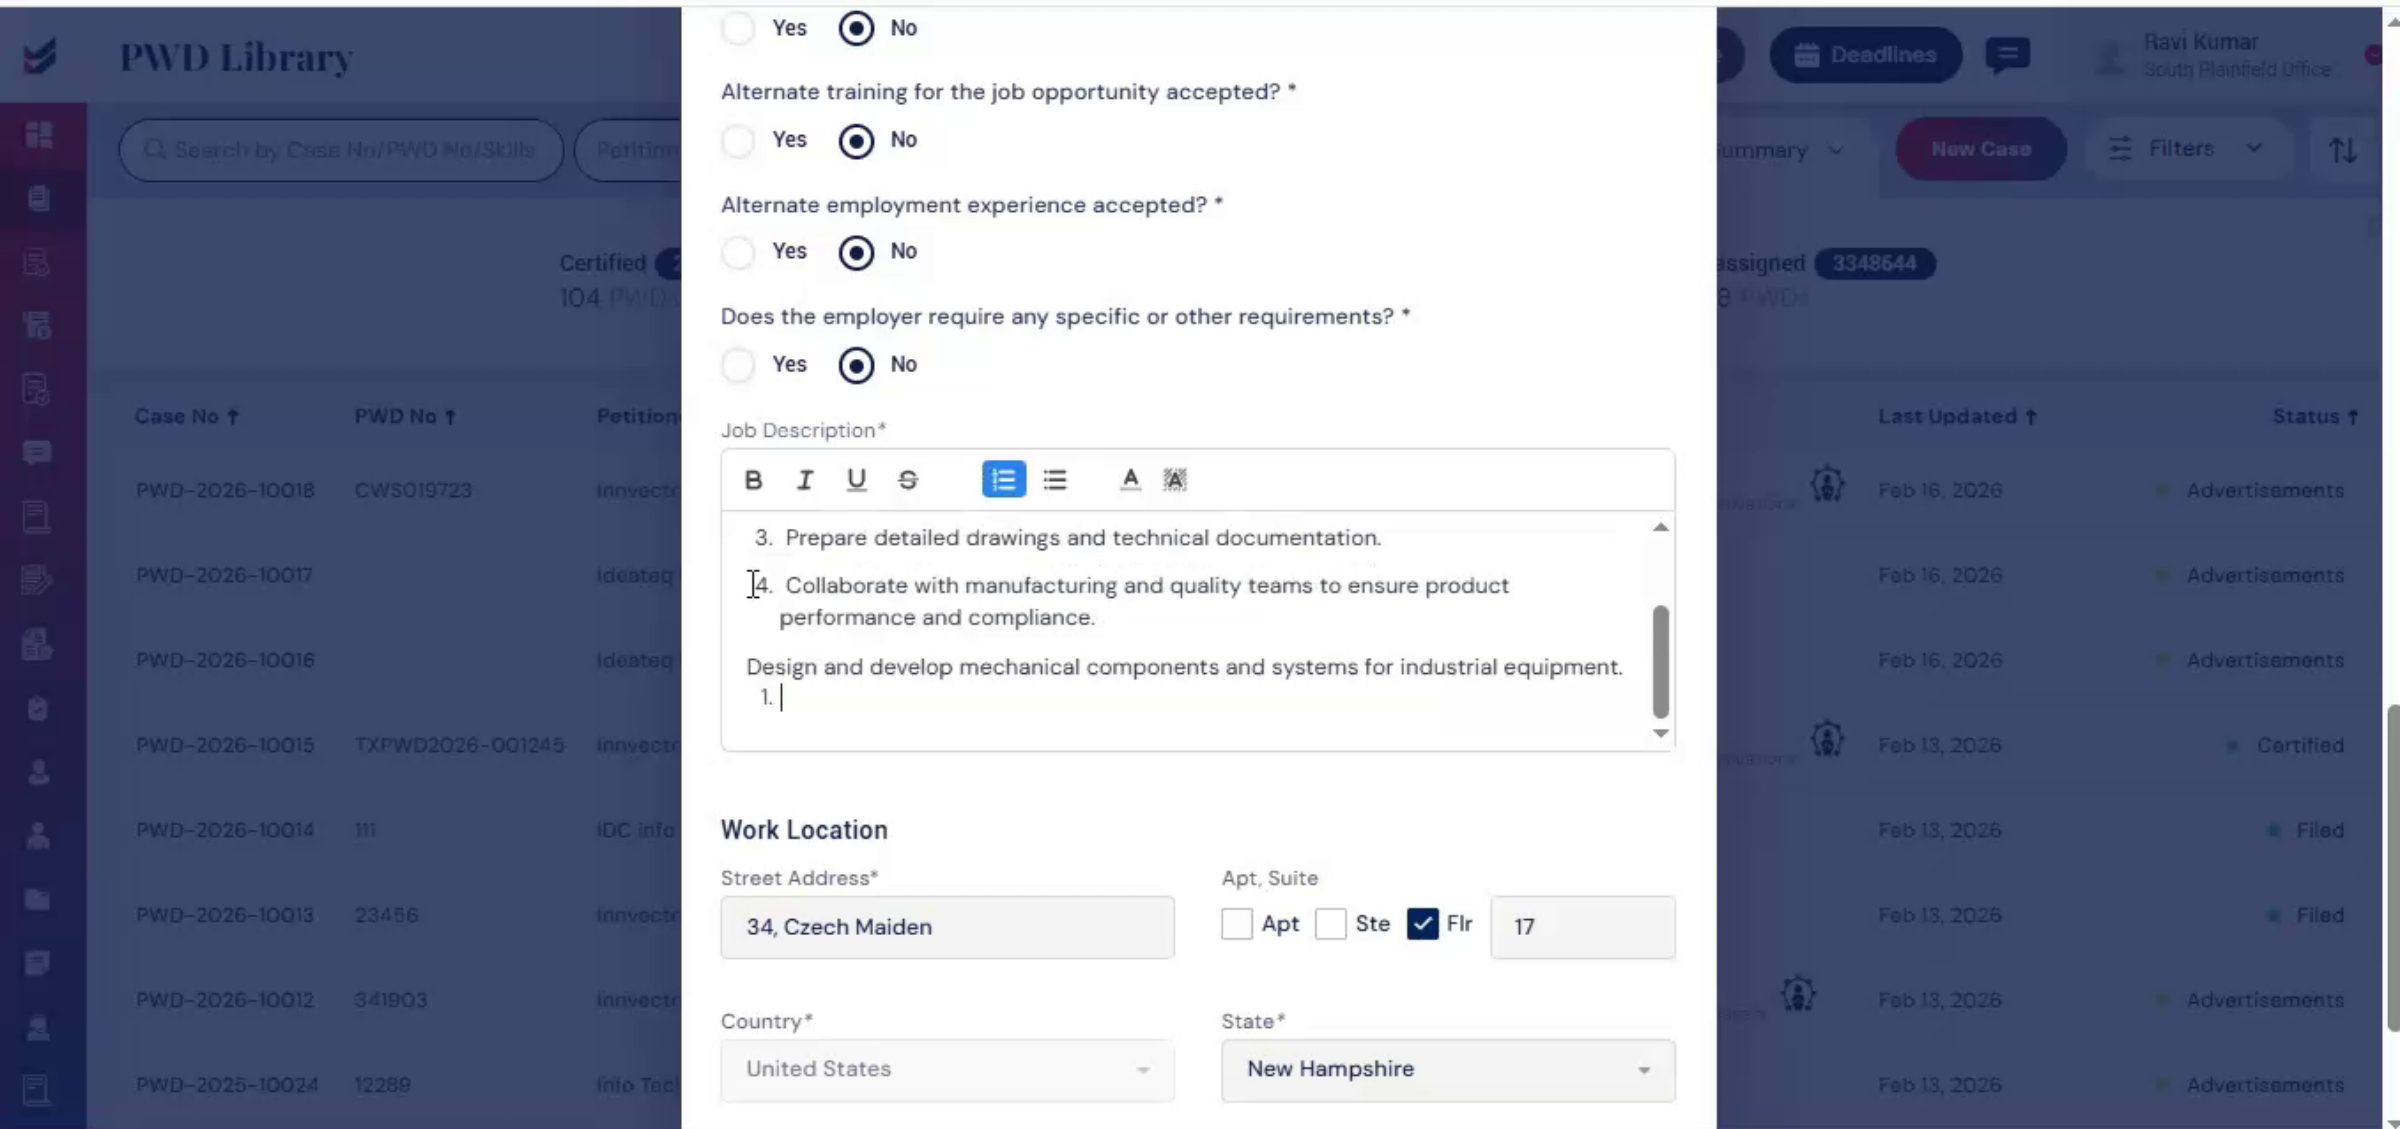
If any information is not populated automatically due to formatting limitations in the uploaded document, you can manually enter the missing details. After reviewing all information for accuracy, click Submit.
38. Case Stage Automation Benefits
 * click the image to view enlarged
Once added, the case will automatically reflect completed stages such as job description, PWD filed, or certified, based on the uploaded document. This eliminates duplicate data entry, reduces errors, and saves valuable time.
39. ImmiBox Centralized System Features
 * click the image to view enlarged
In this way, ImmiBox centralizes drafting, review, filing, tracking, certification updates, advertisement documentation, and PERM linkage into one structured system.
40. System Accuracy And Audit Trail
 * click the image to view enlarged
This streamlined approach improves visibility, enhances accuracy, maintains a complete audit trail.
41. PWD Case Completion And Thanks
 * click the image to view enlarged
and ensures every PWD case remains organized from initiation through completion.

