

Managing H-1B Amendment Cases in ImmiBox
Overview
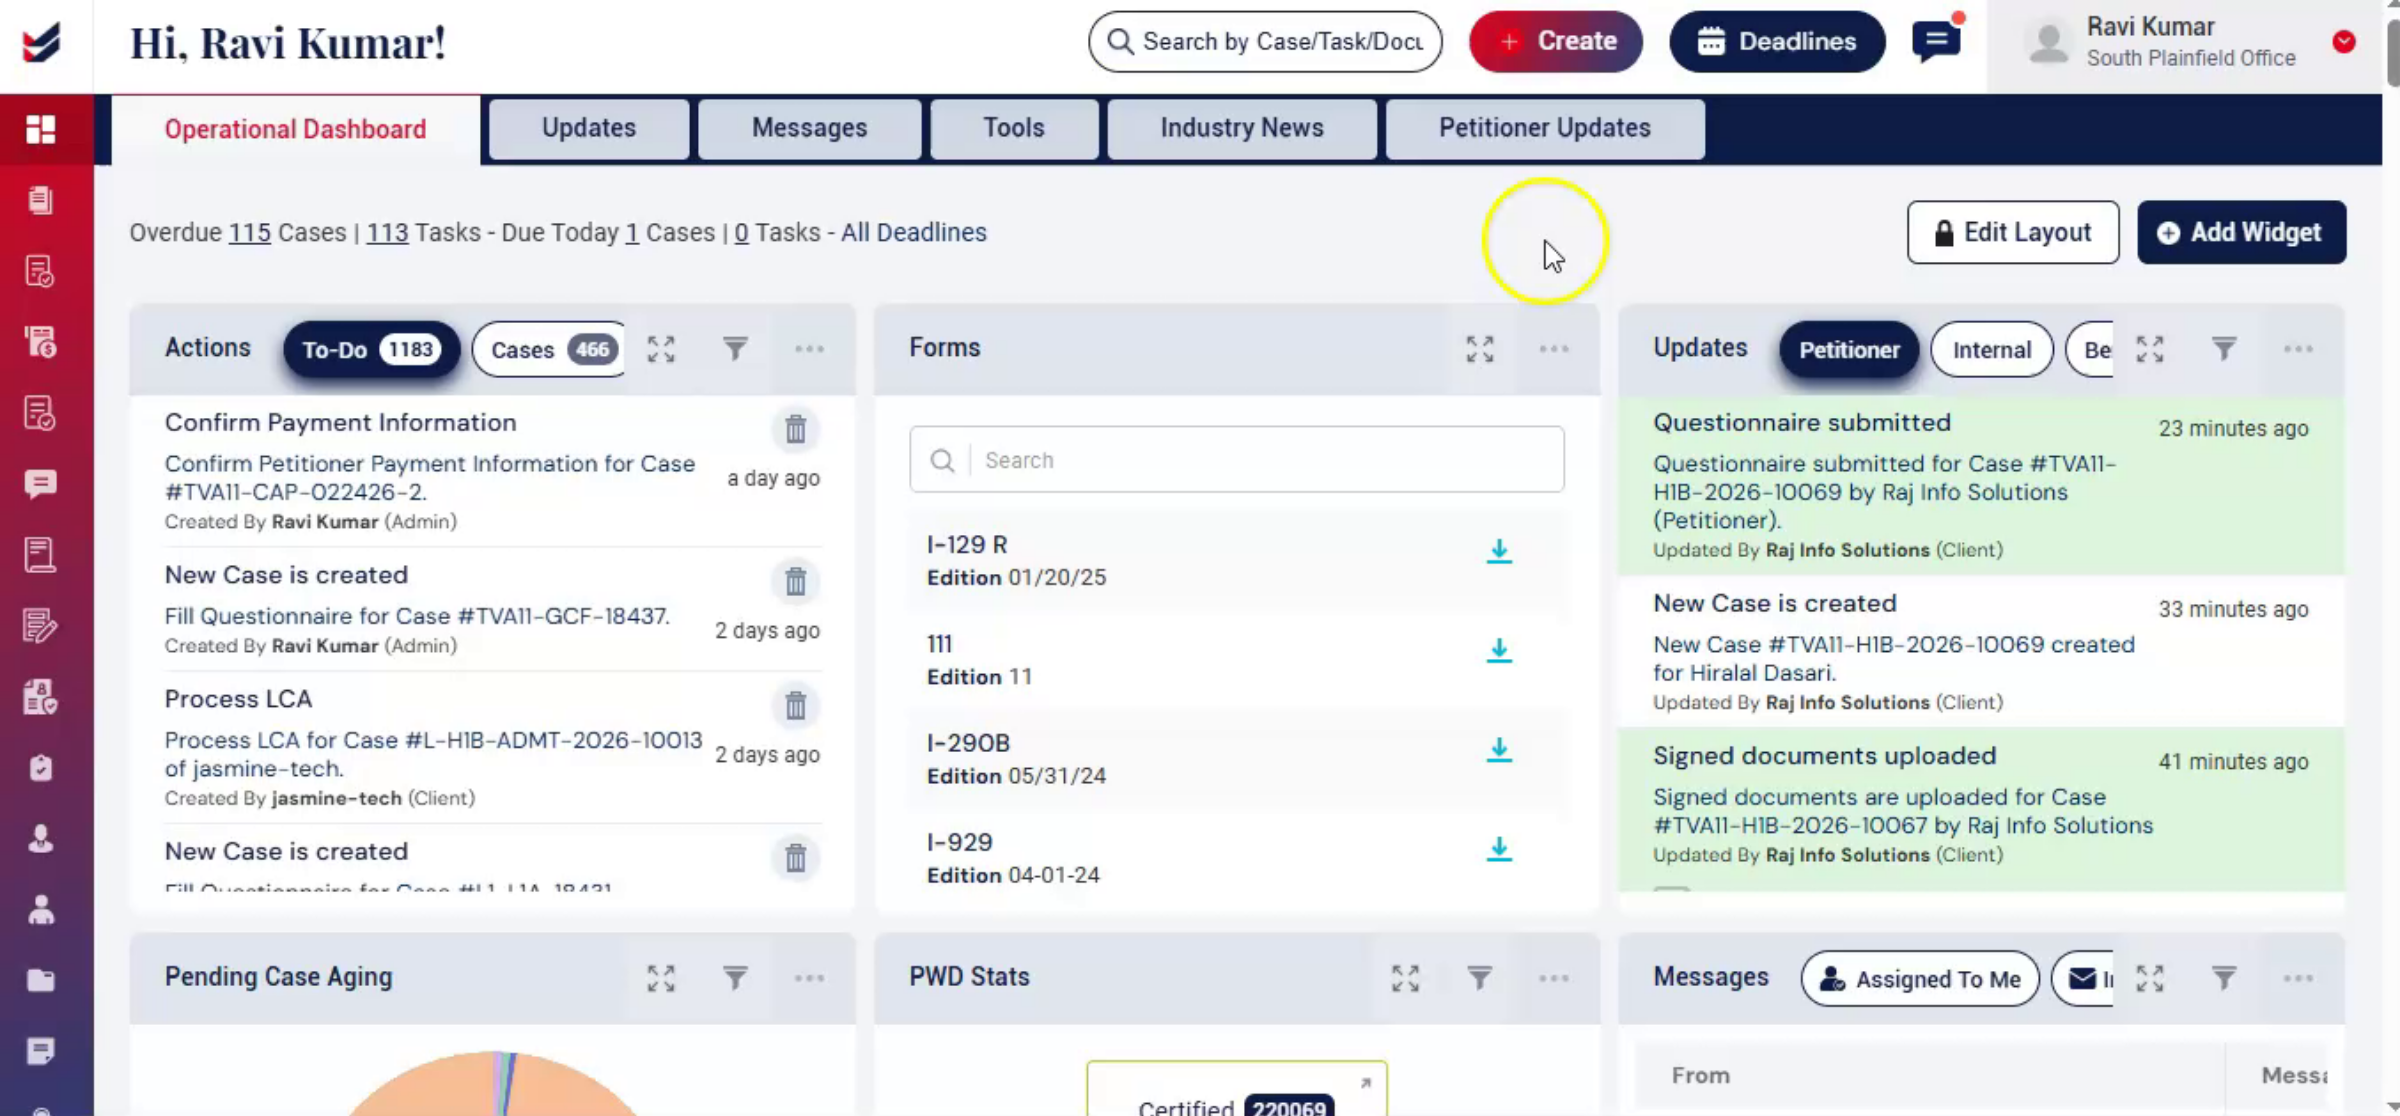
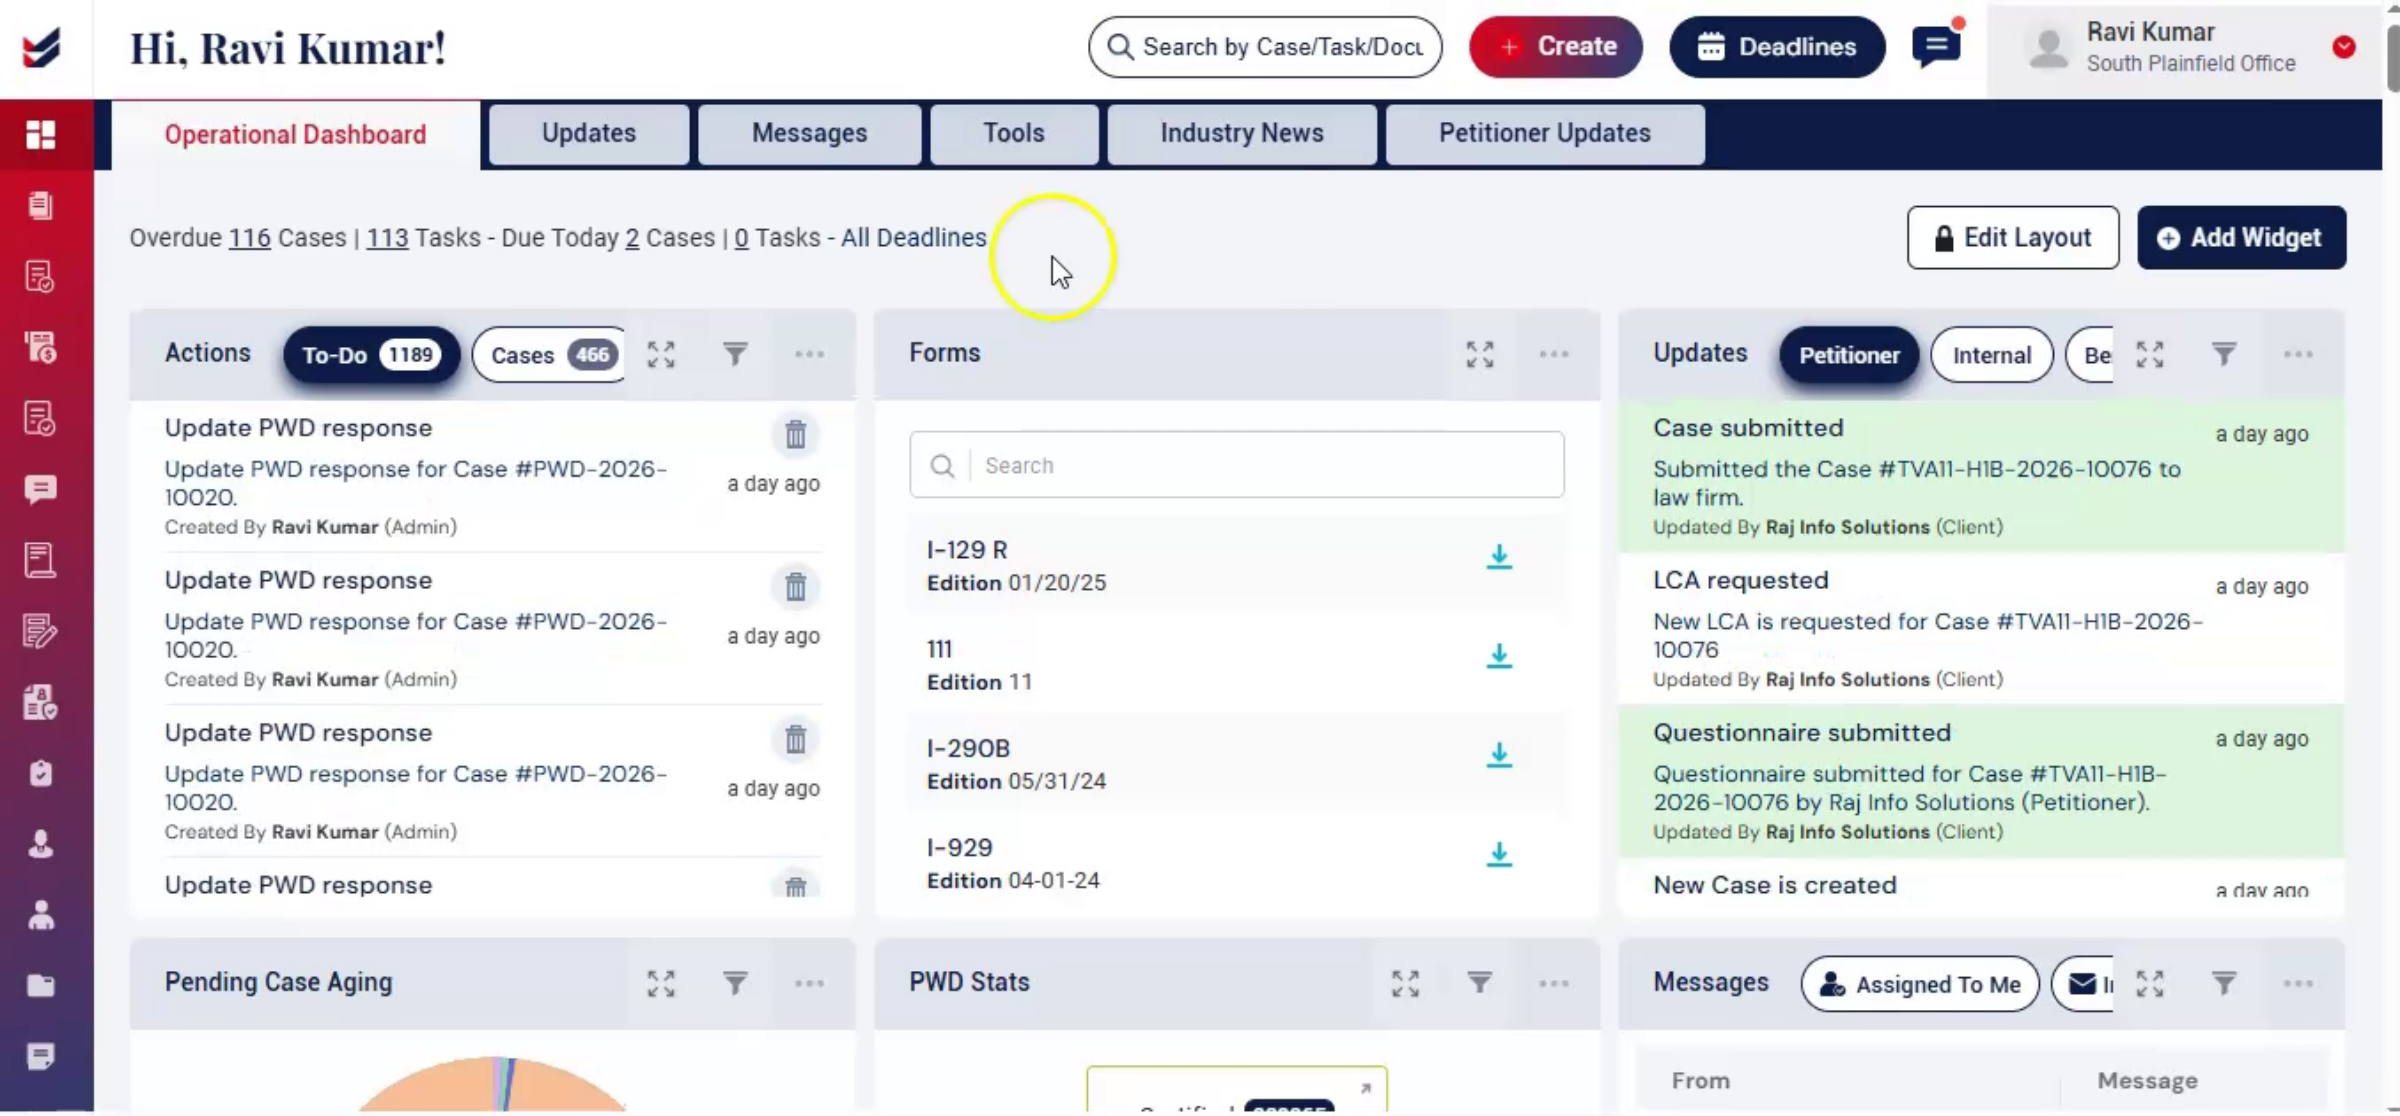
Welcome! This video demonstrates the complete workflow for managing H-1B amendment cases in ImmiBox, from case creation to final USCIS response. It highlights how the system supports collaboration, compliance, and efficiency throughout the process.
1. H-1B Amendment Workflow Overview
 * click the image to view enlarged
This structured workflow guides each stage while allowing collaboration between law firms, petitioners, and beneficiaries.
2. H-1B Case Types Explained
 * click the image to view enlarged
Before going through the procedure, it's important to note that H-1B visa cases can take different forms, such as a new petition, an amendment, or an extension. Regardless of the type, they all generally follow a similar workflow.
3. Workflow Structure And Flexibility
 * click the image to view enlarged
The workflow is structured but flexible. It can be modified according to your law firm's preferences.
4. Adjusting Workflow Guide
 * click the image to view enlarged
To learn how to adjust the workflow, please refer to the Workflow Management Documentation.
5. Maintaining Efficiency And Compliance
 * click the image to view enlarged
Using this, law firms can maintain efficiency, compliance, and transparency while adapting the process to meet each client's specific needs. To create an H-1B amendment case,
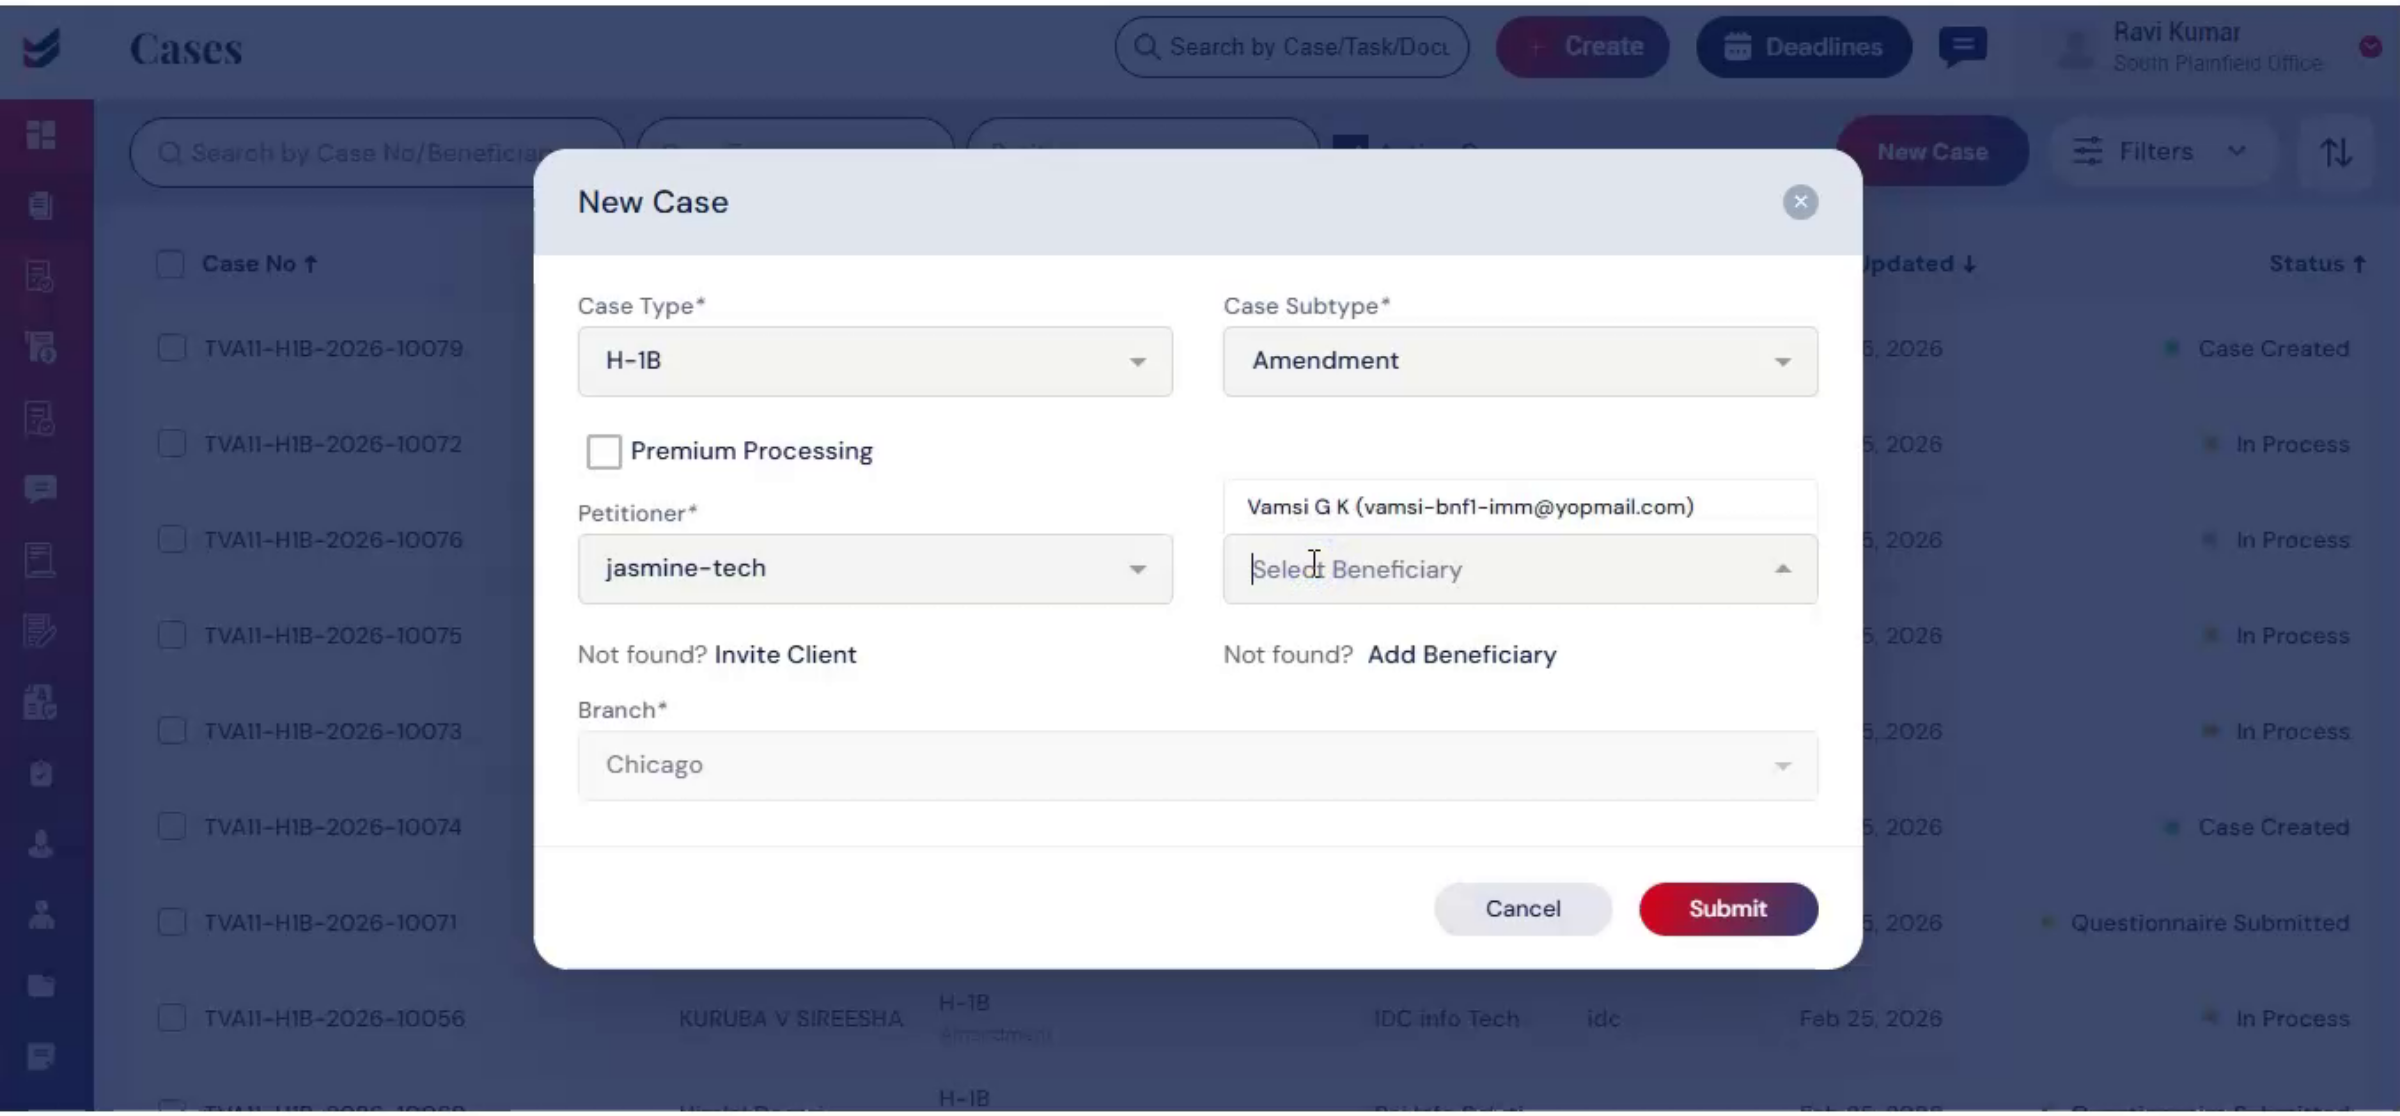
6. Creating New H-1B Amendment Case
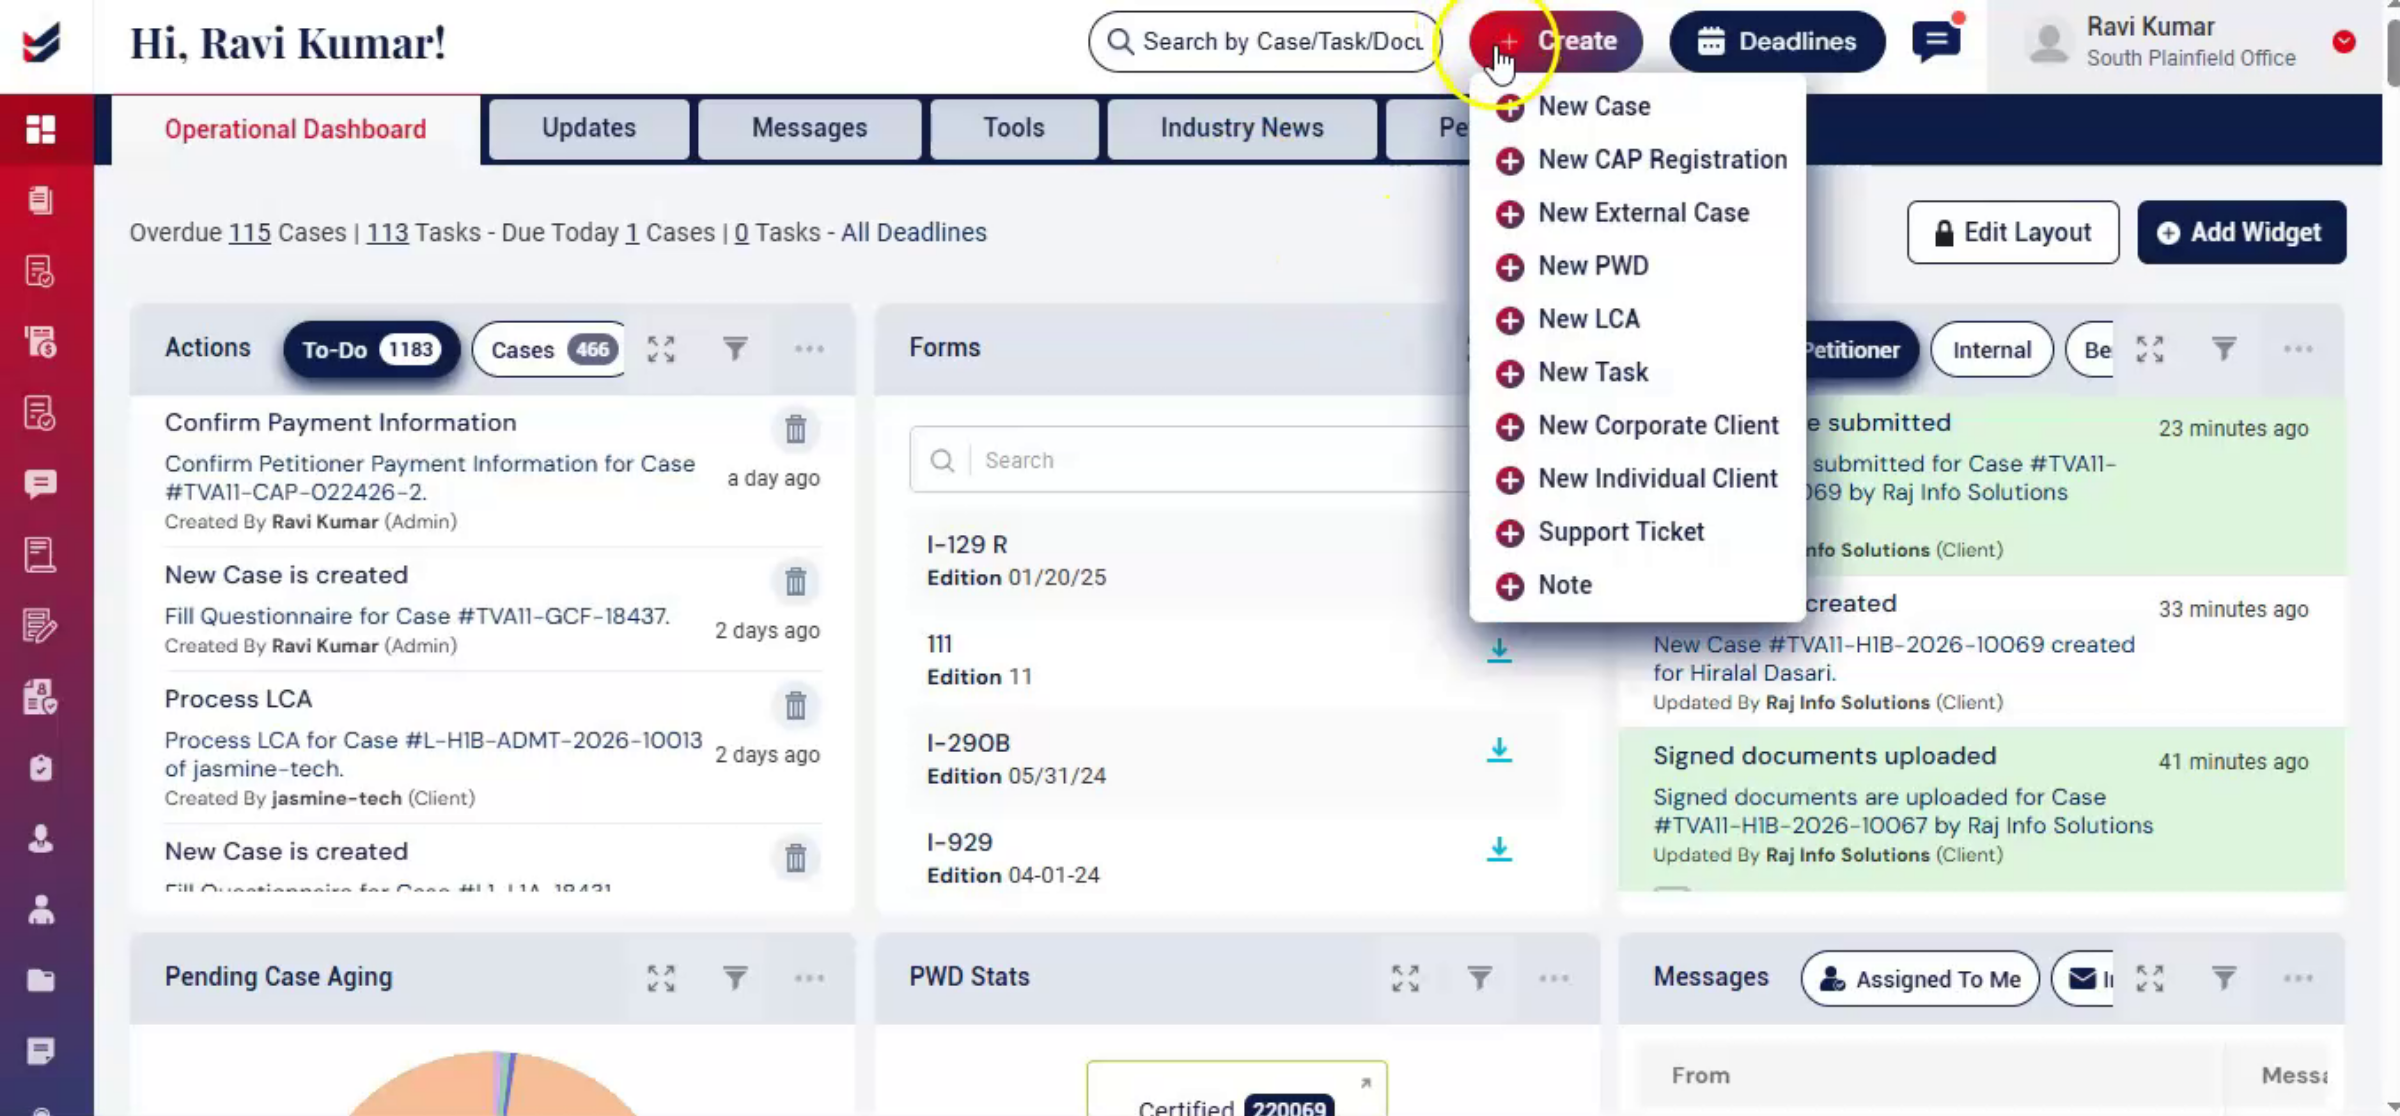 * click the image to view enlarged
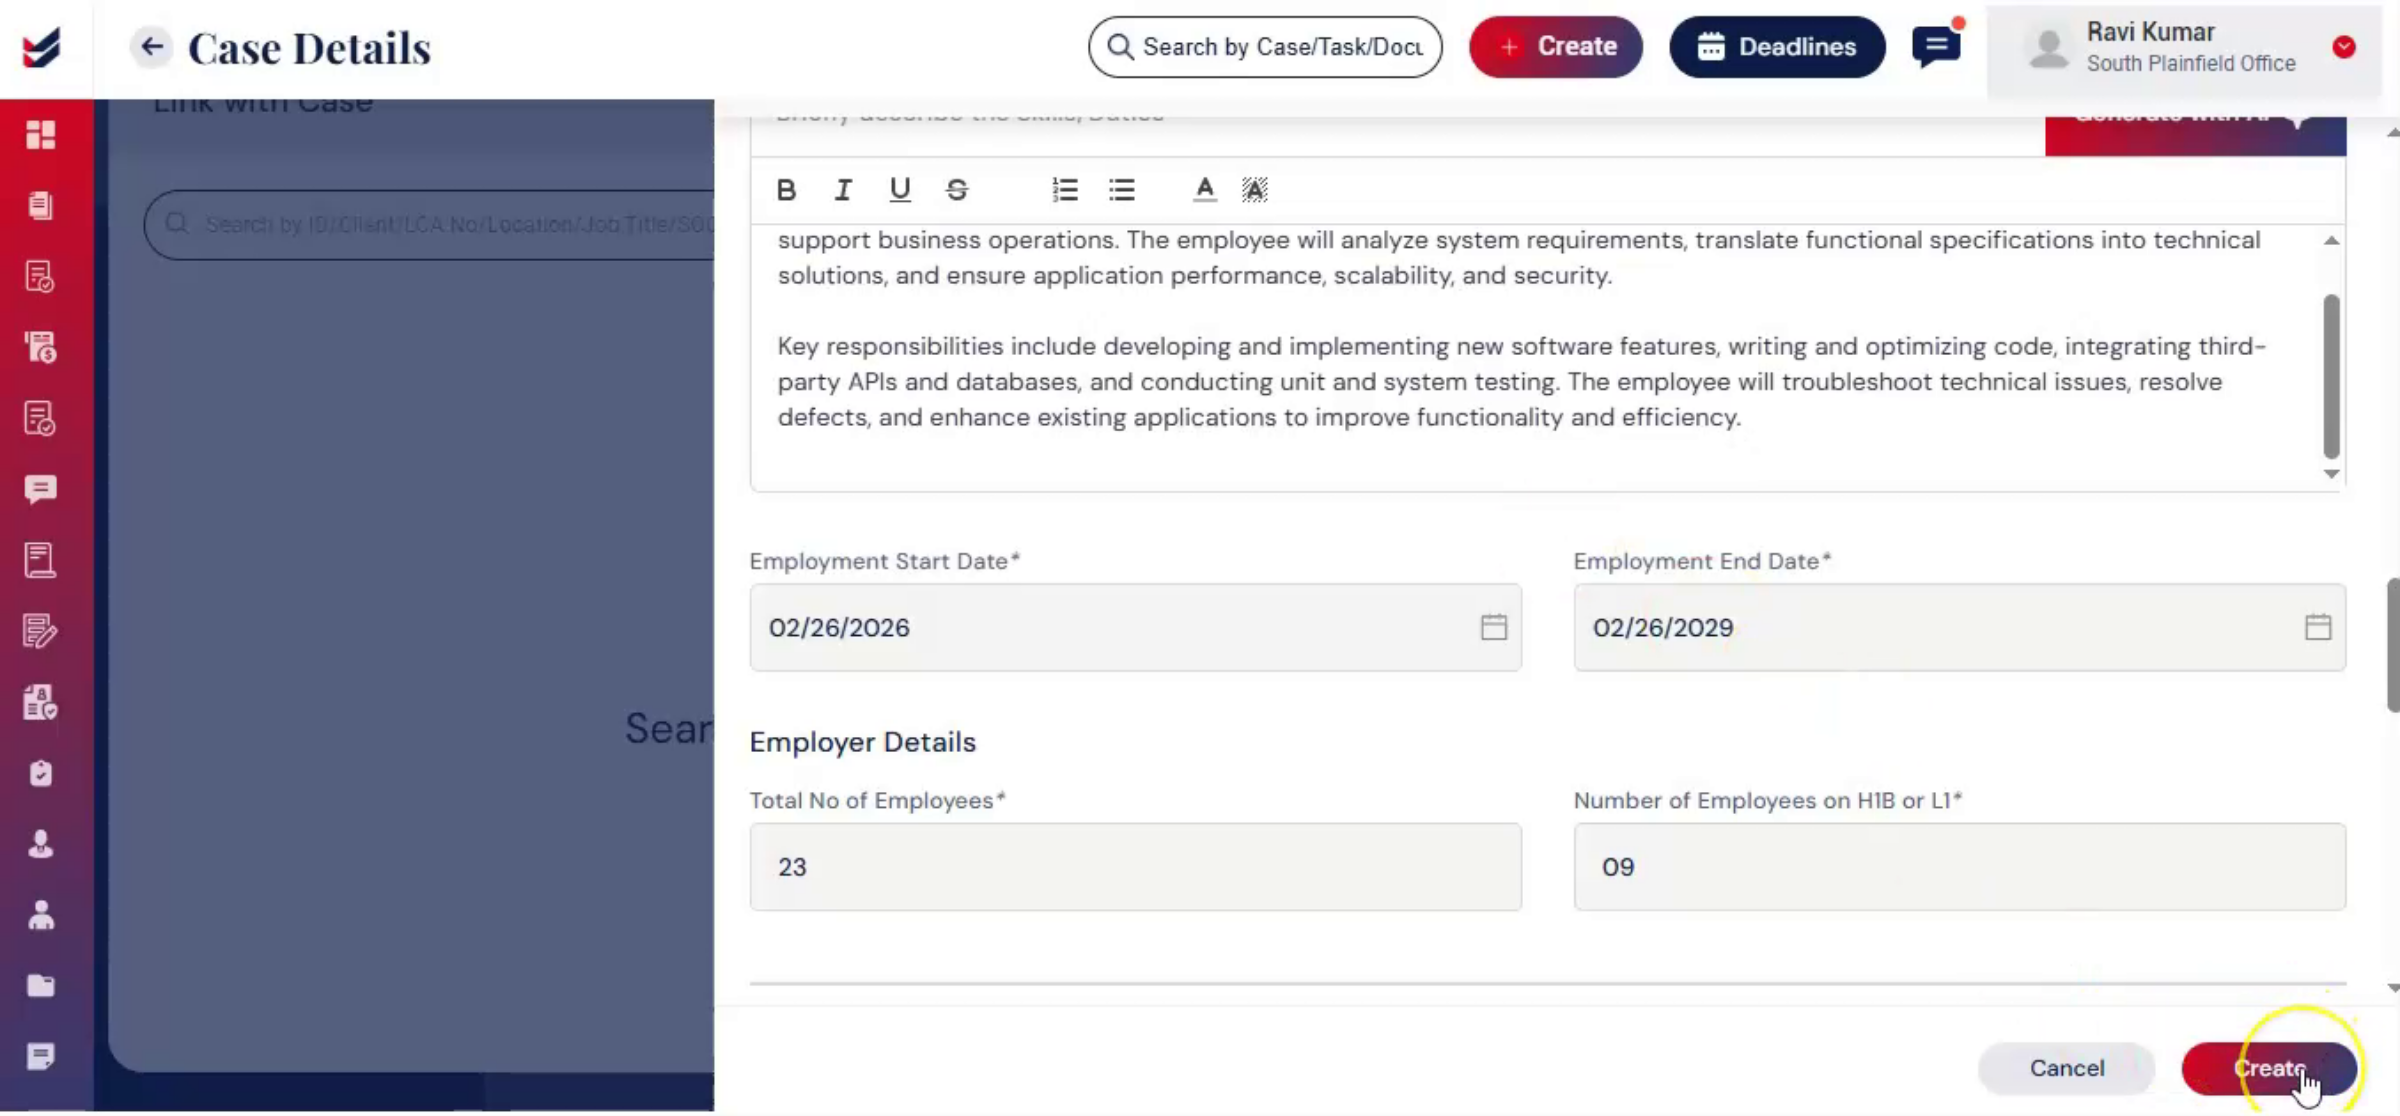
Click on Create, then select New Case. In the New Case dialog box, select Case Type as H-1B and Case Subtype as Amendment. Below, you will see a Premium Processing checkbox. If you want the case to be premium, select the checkbox. Next, add the petitioner and beneficiary. If they are not listed, add them using the Adding Petitioner and Beneficiary Guide. Once completed, click Submit.
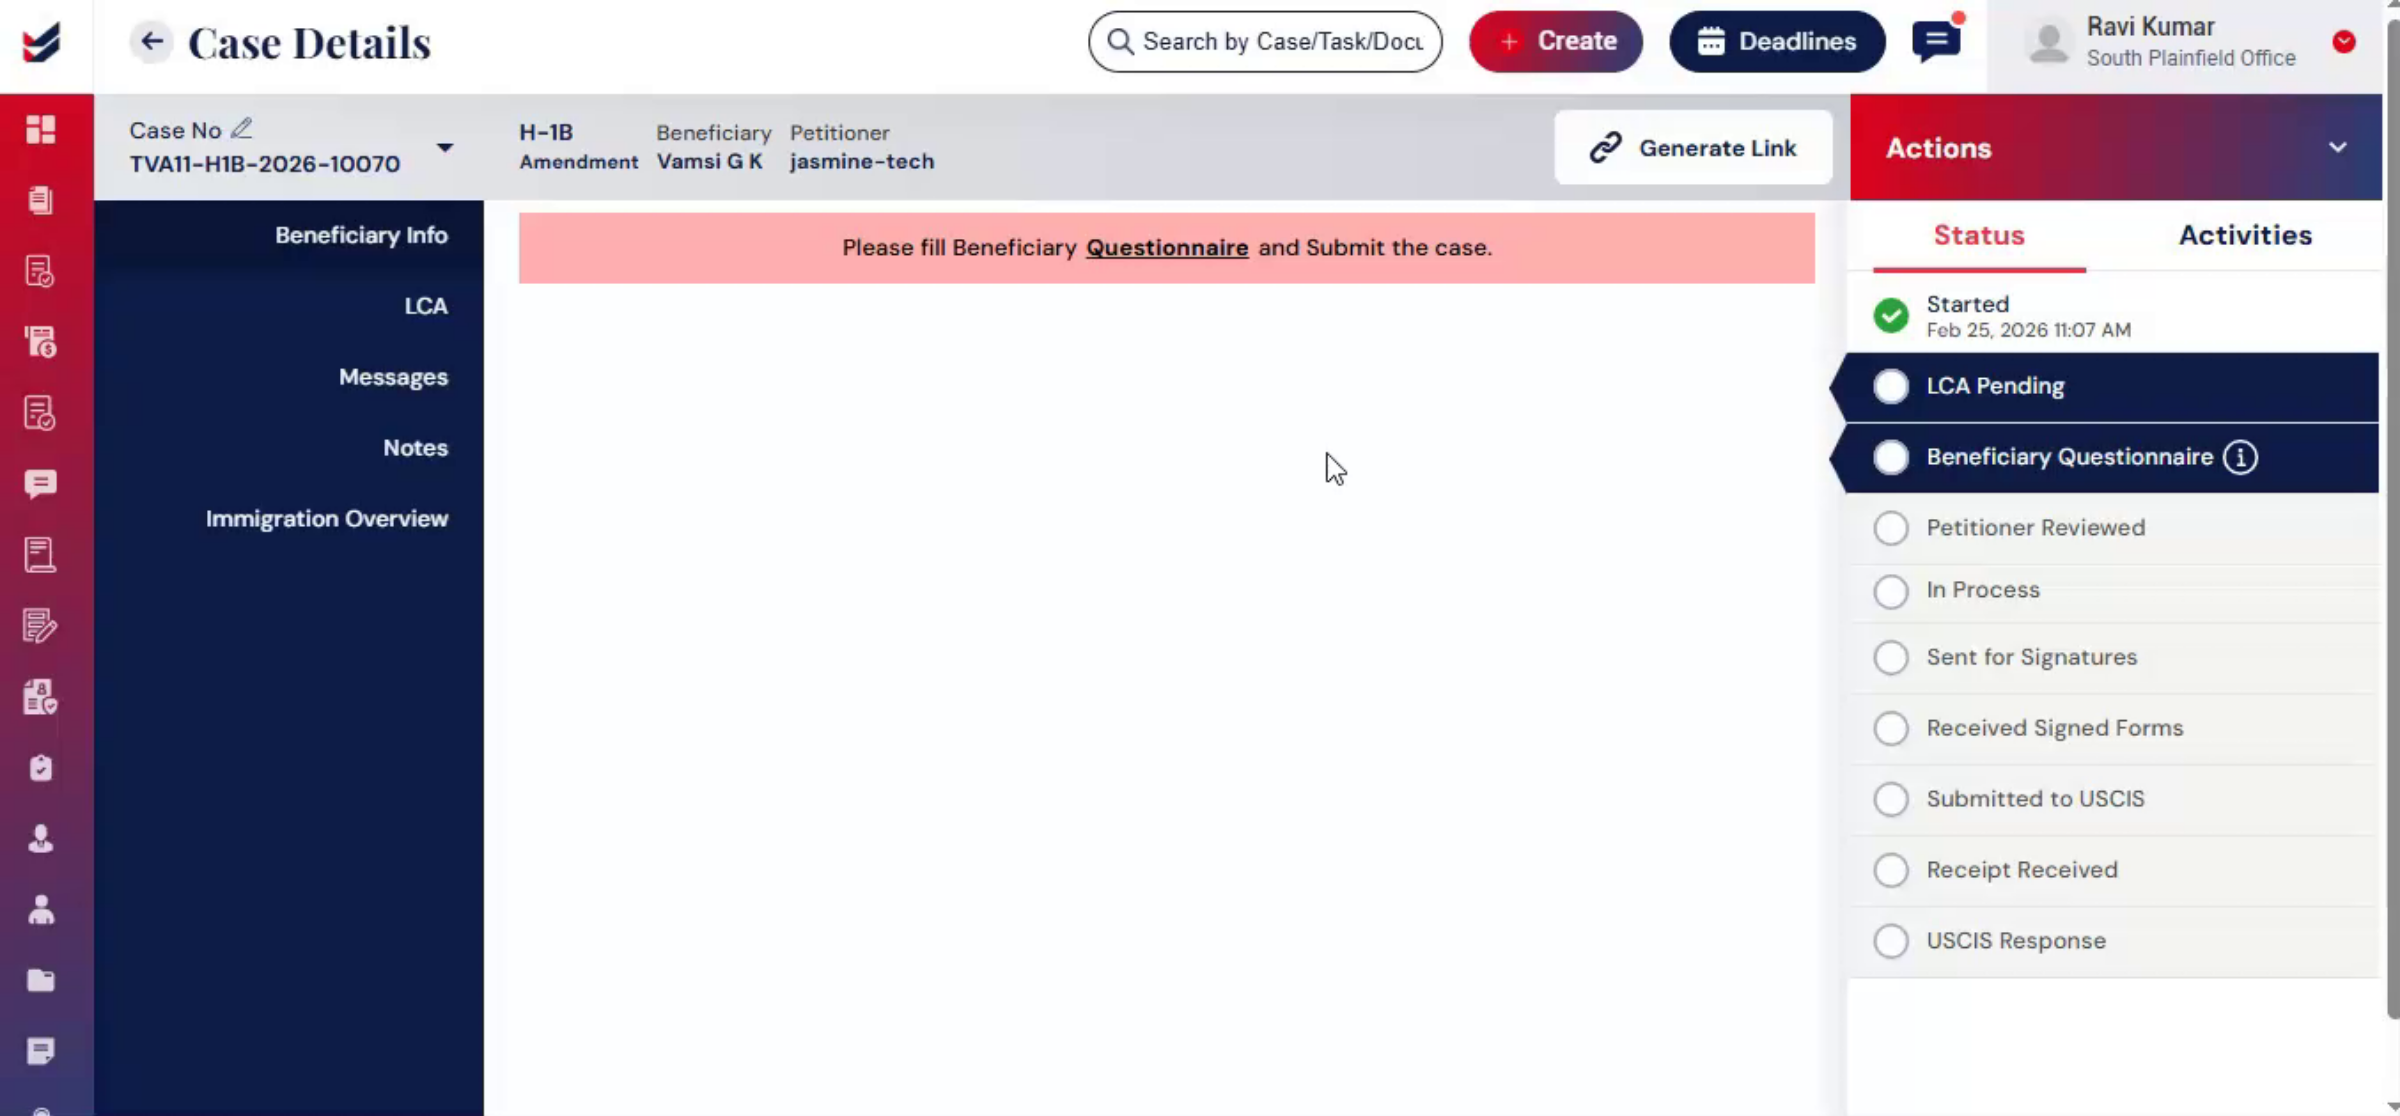
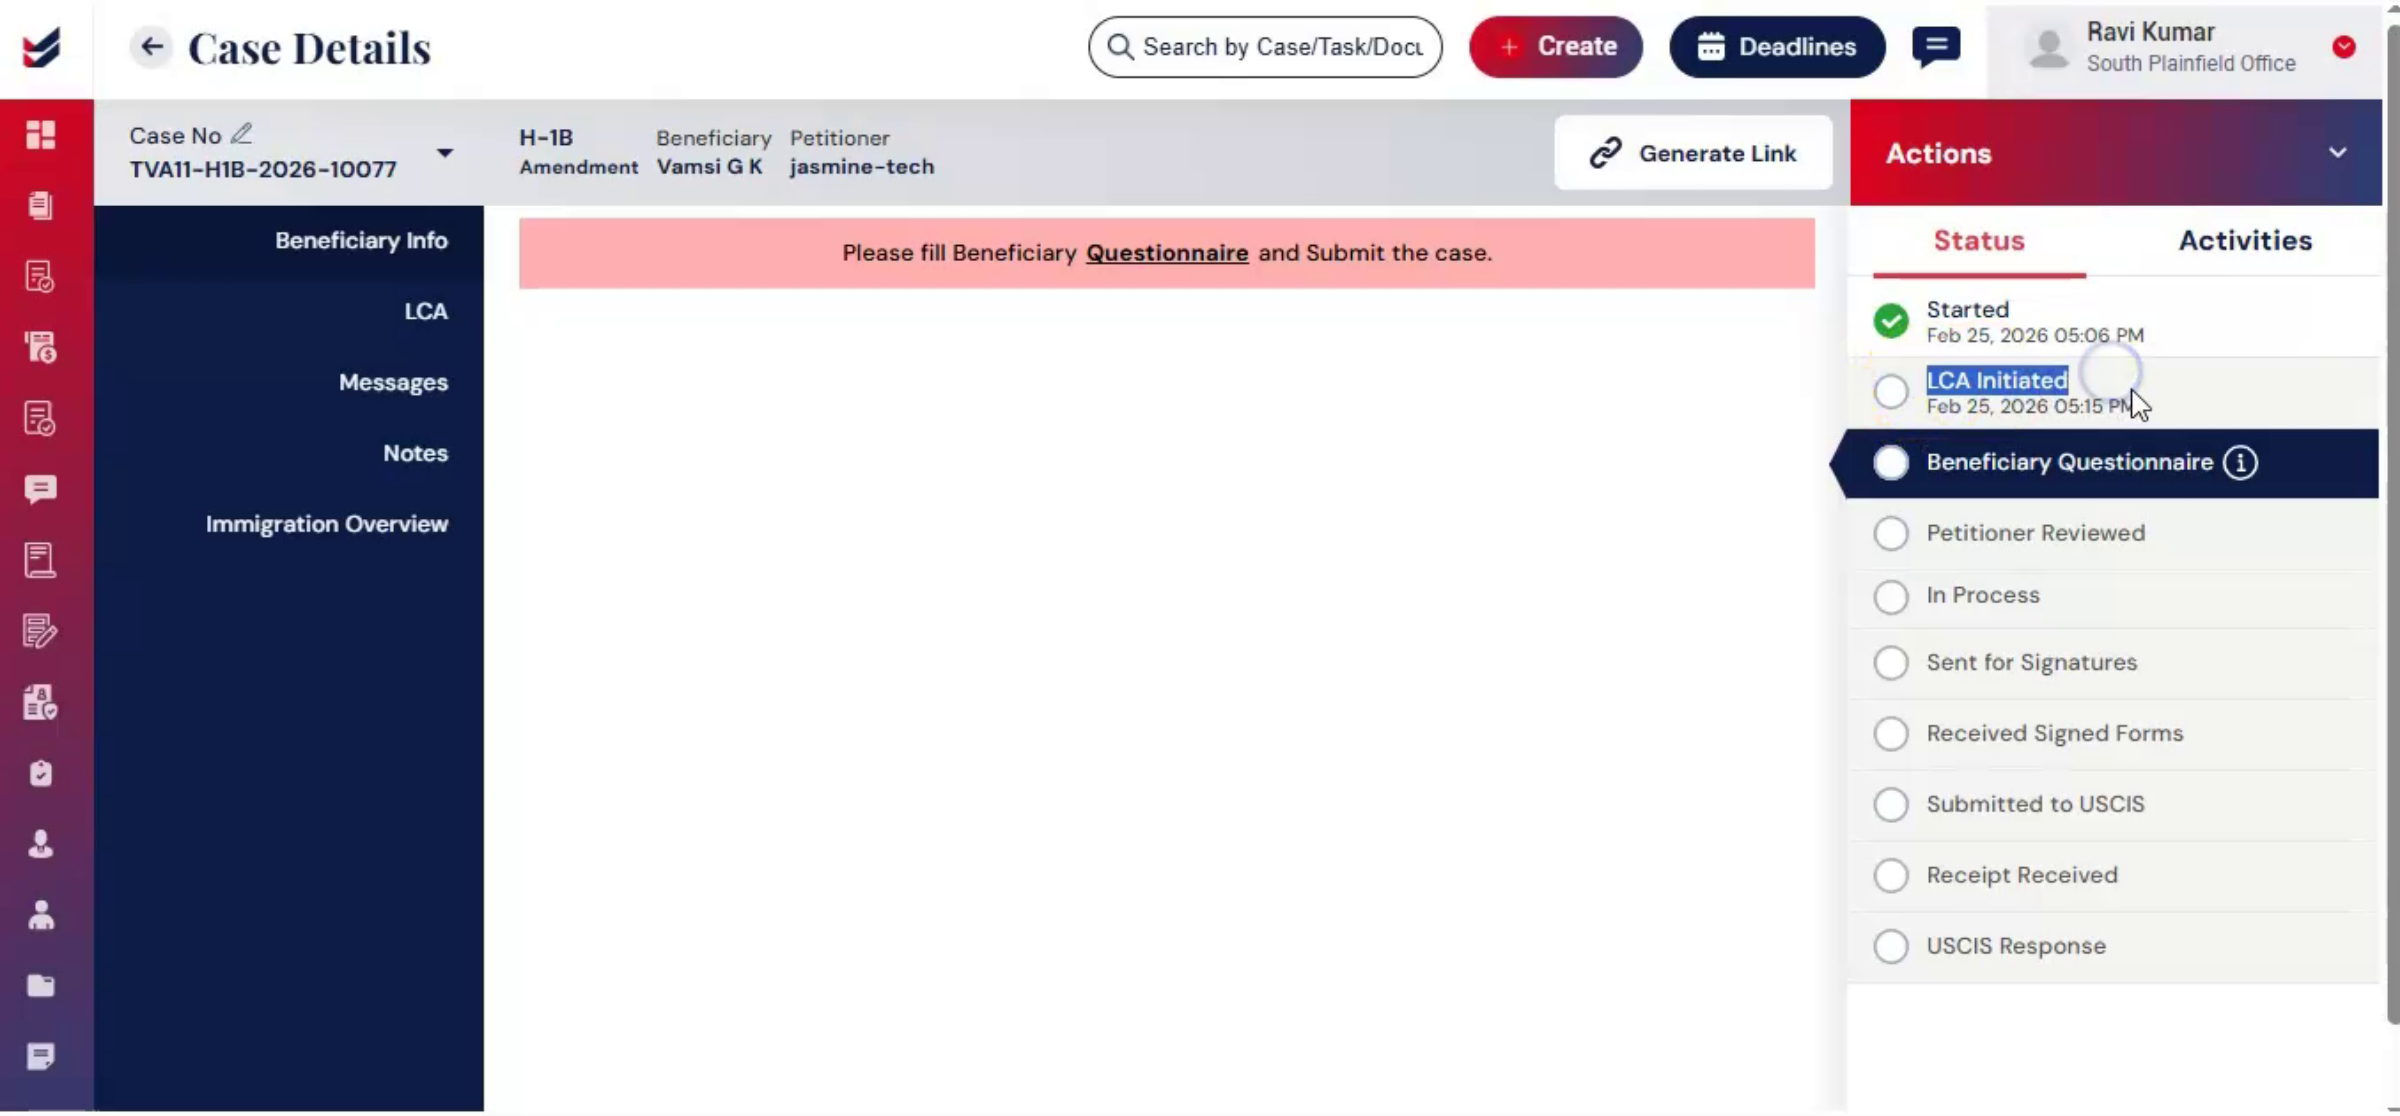
7. LCA Requirement For Amendment Cases
 * click the image to view enlarged
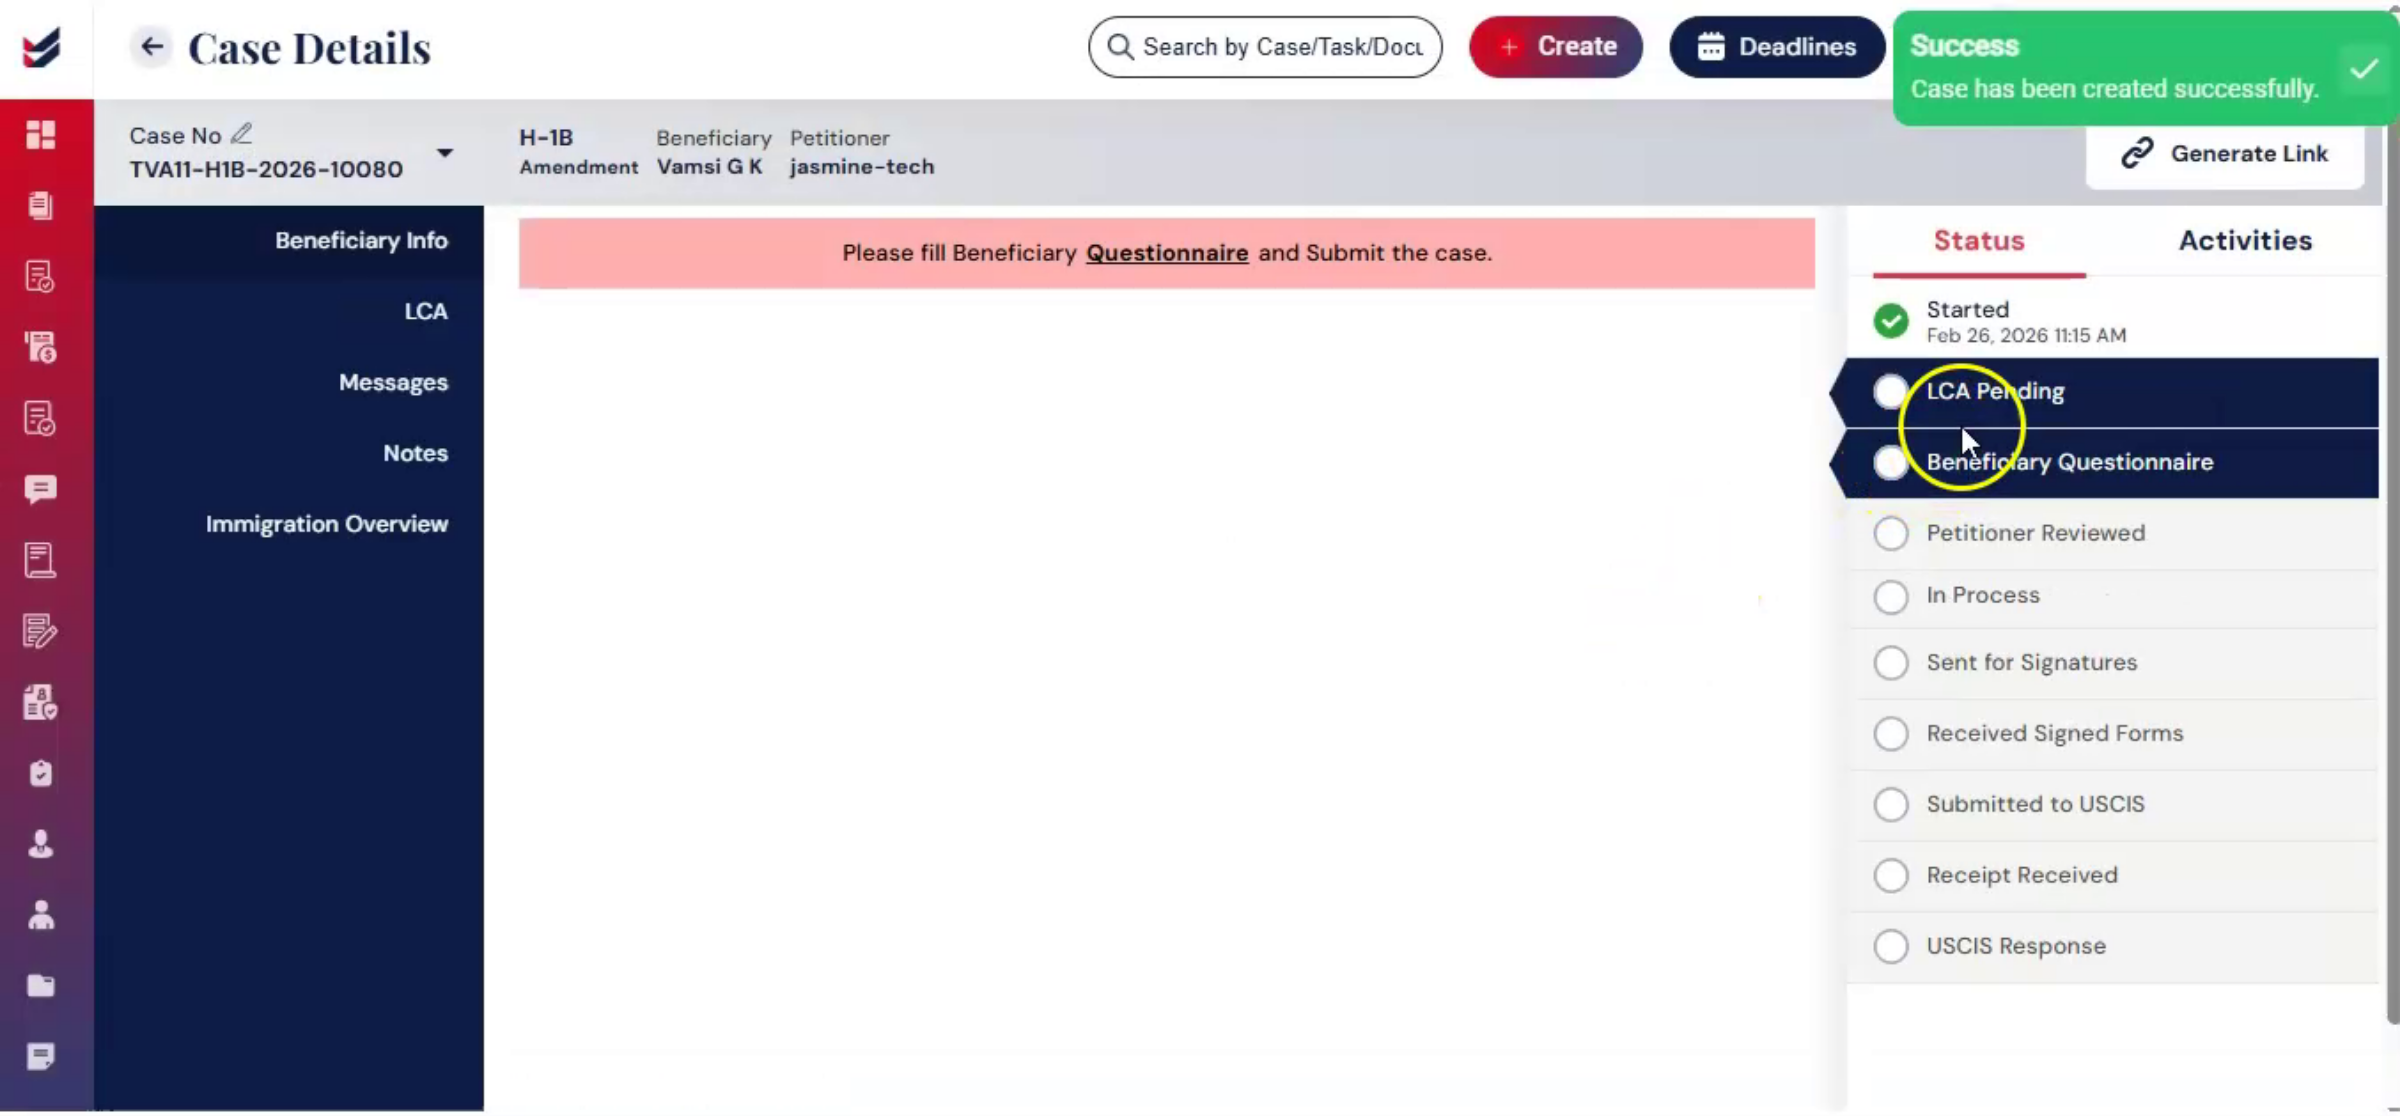
Then you will be redirected to the Case Details page. An H-1B amendment requires a valid LCA, and properly linking or creating the LCA ensures compliance before the petition is filed.
8. Linking Or Creating LCA In ImmiBox
 * click the image to view enlarged
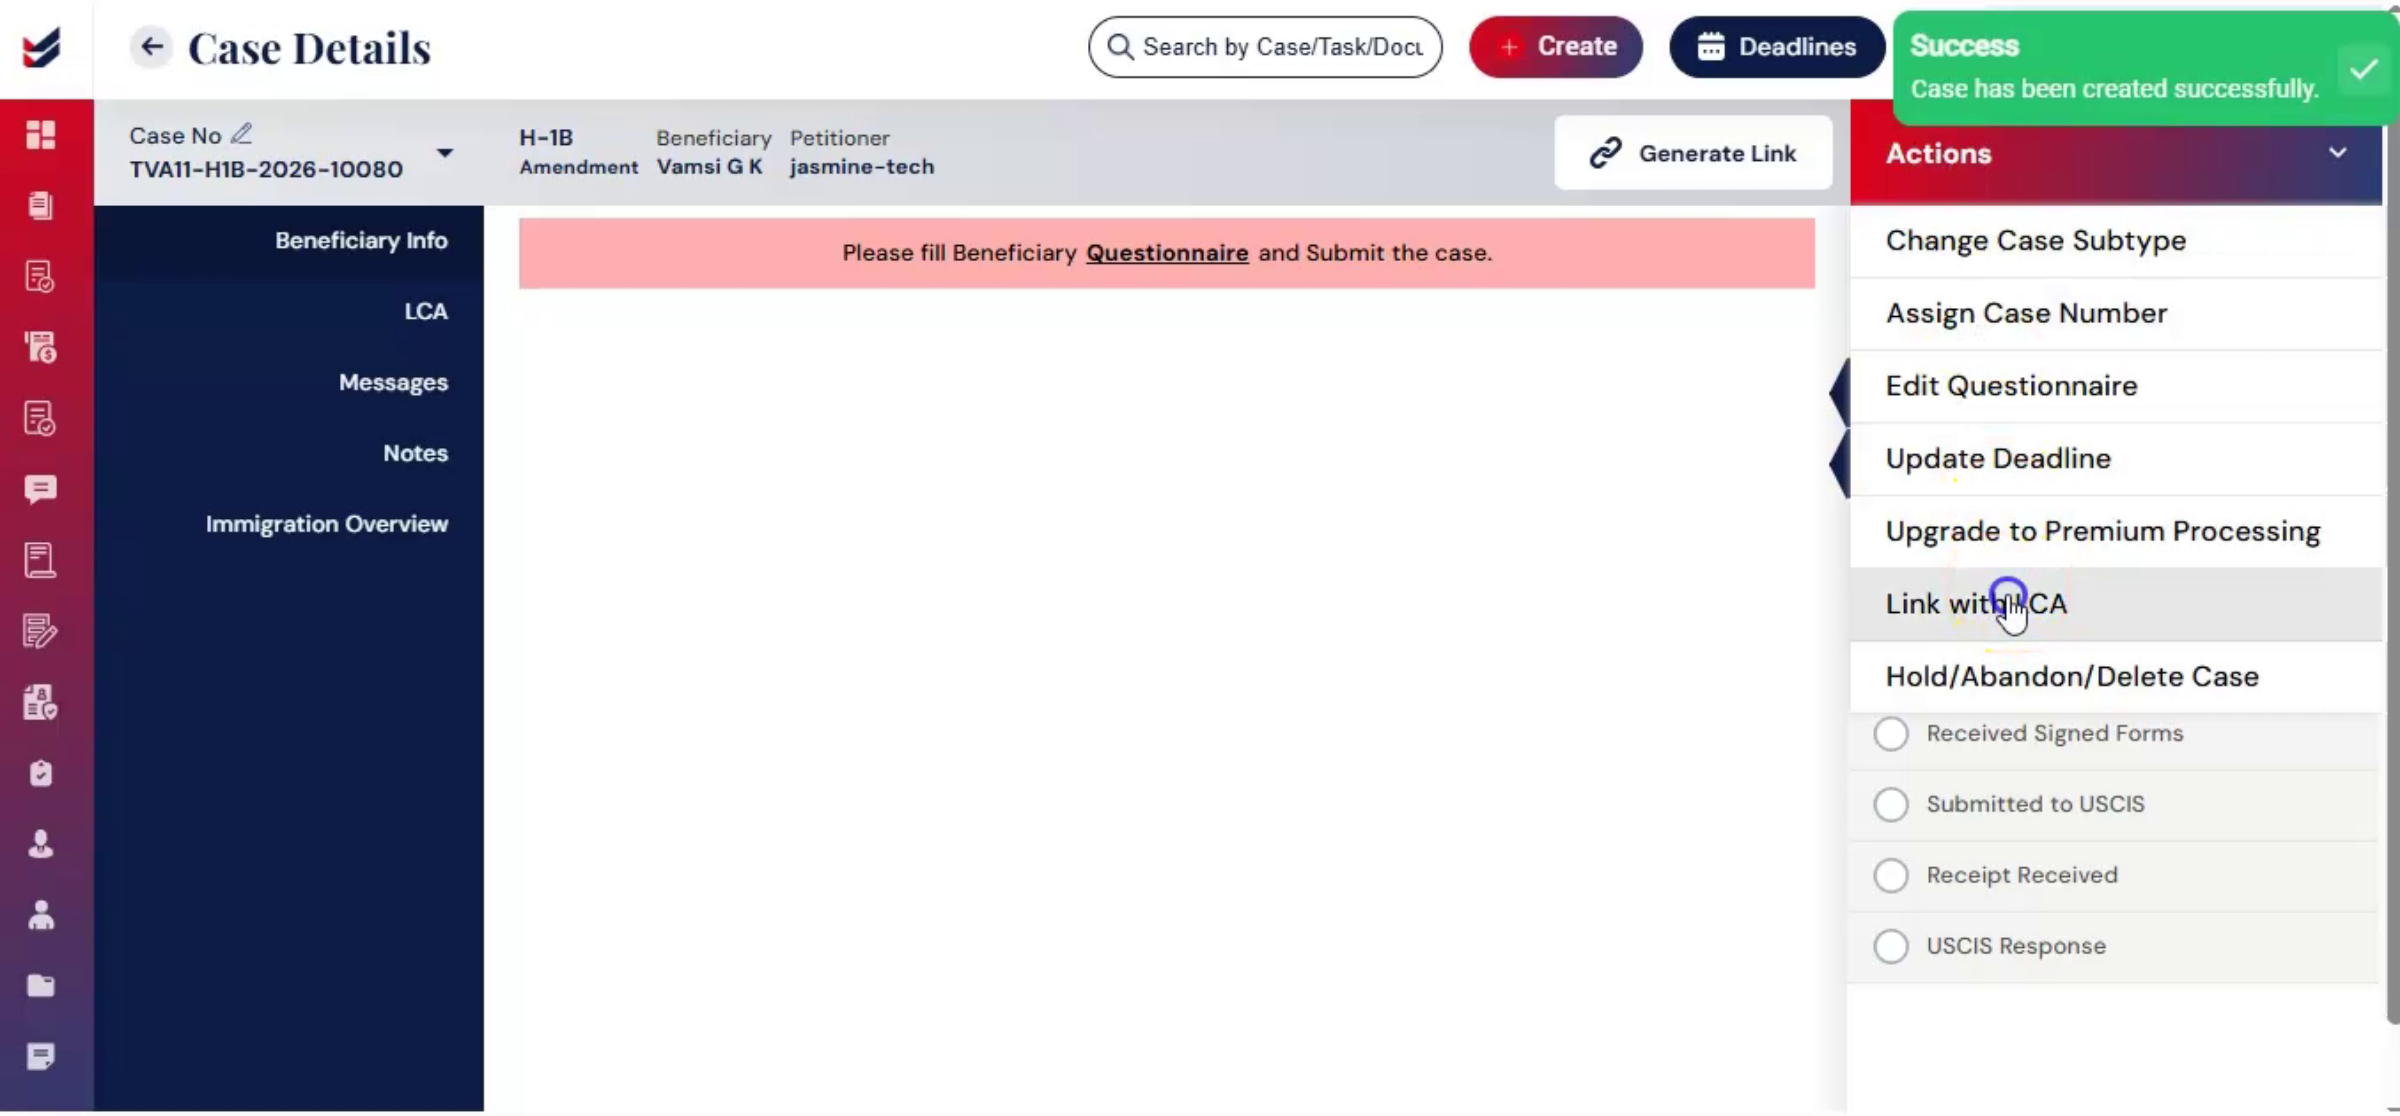
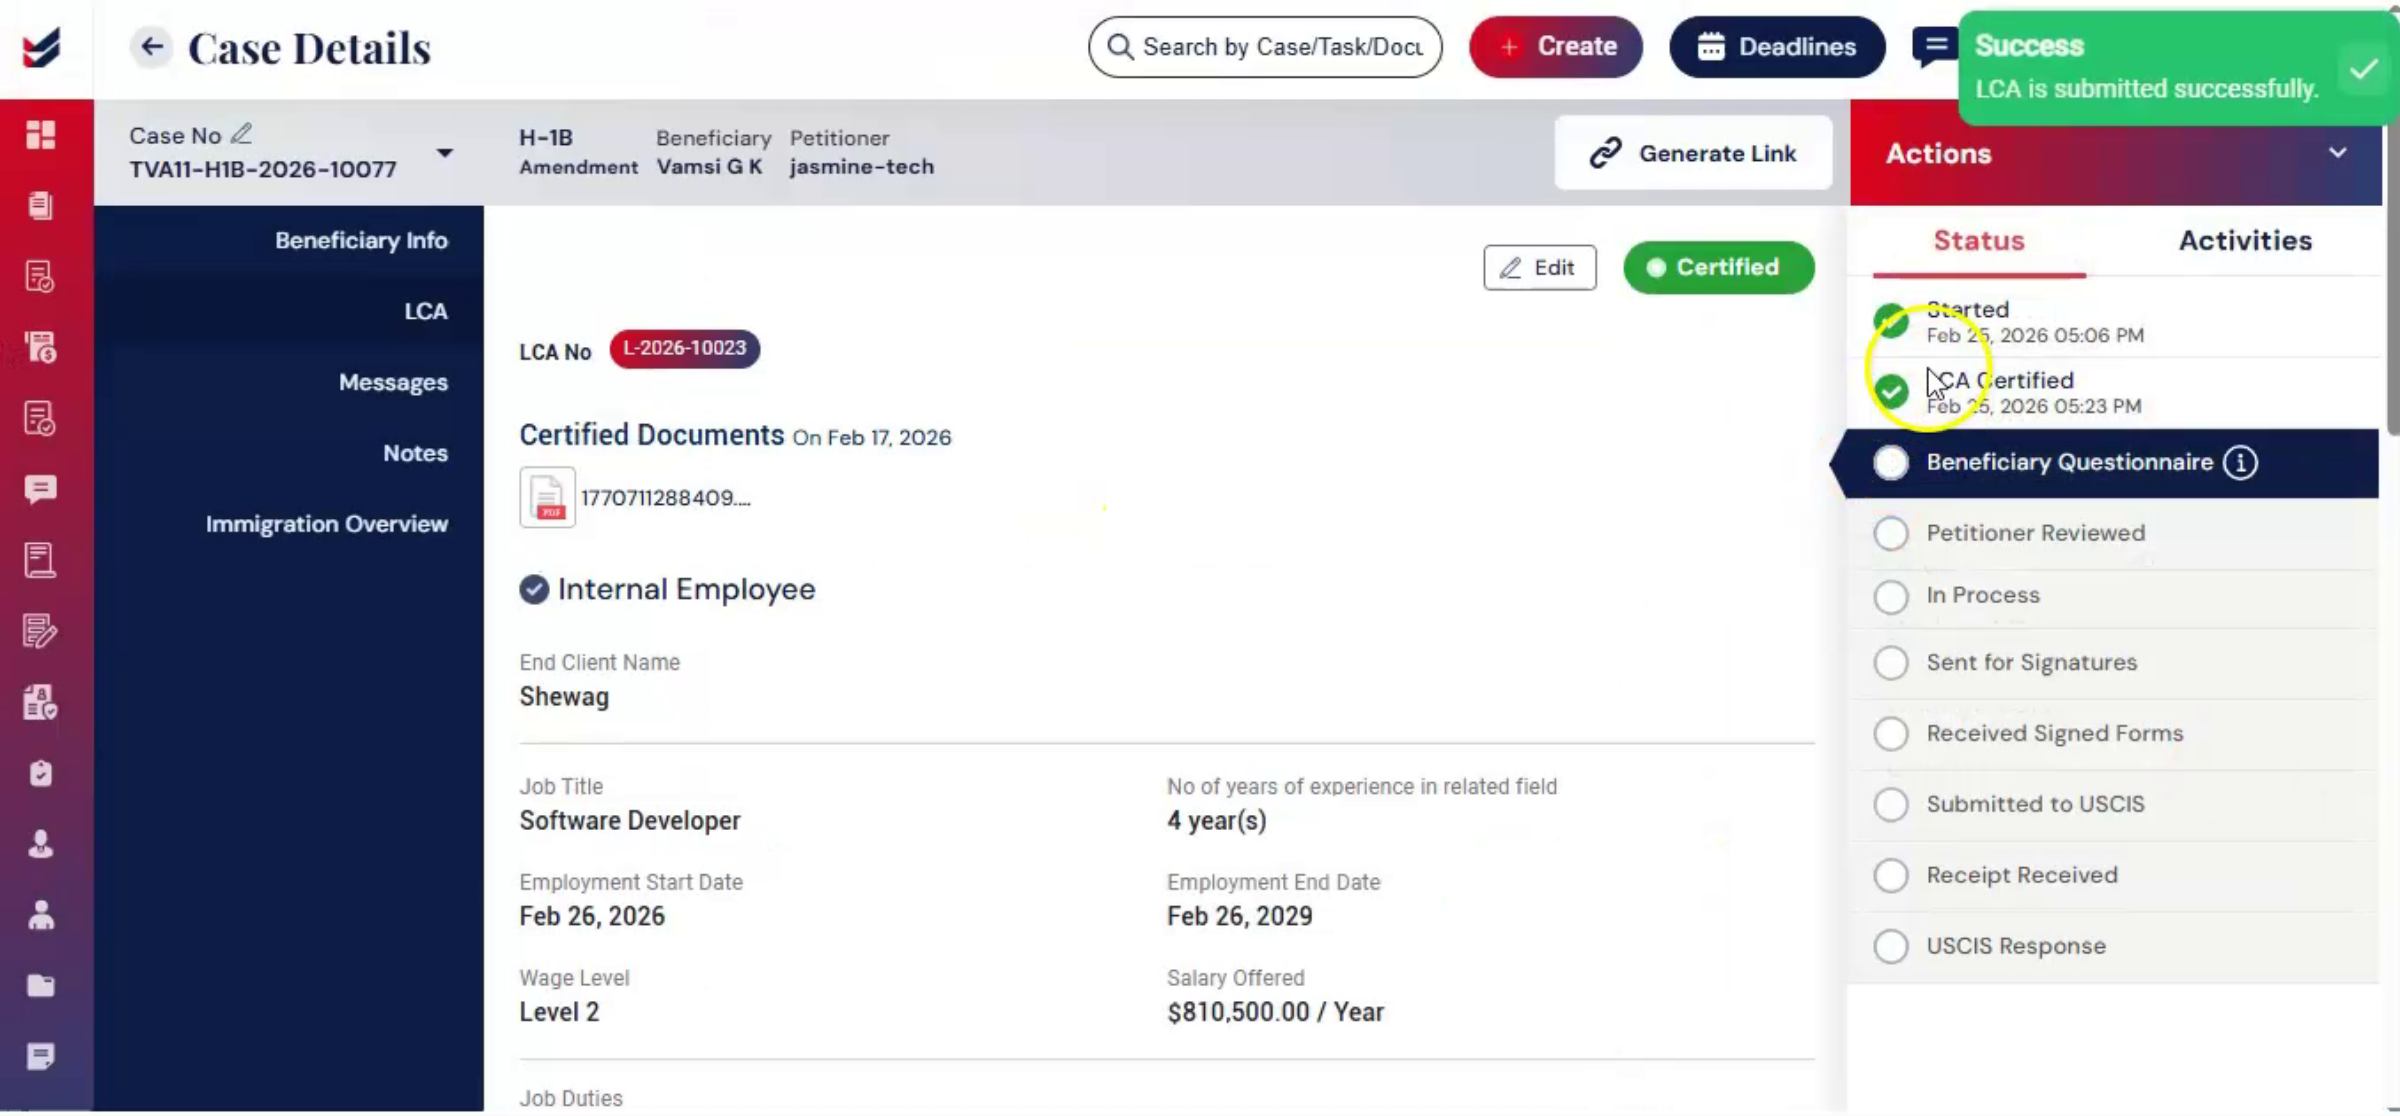
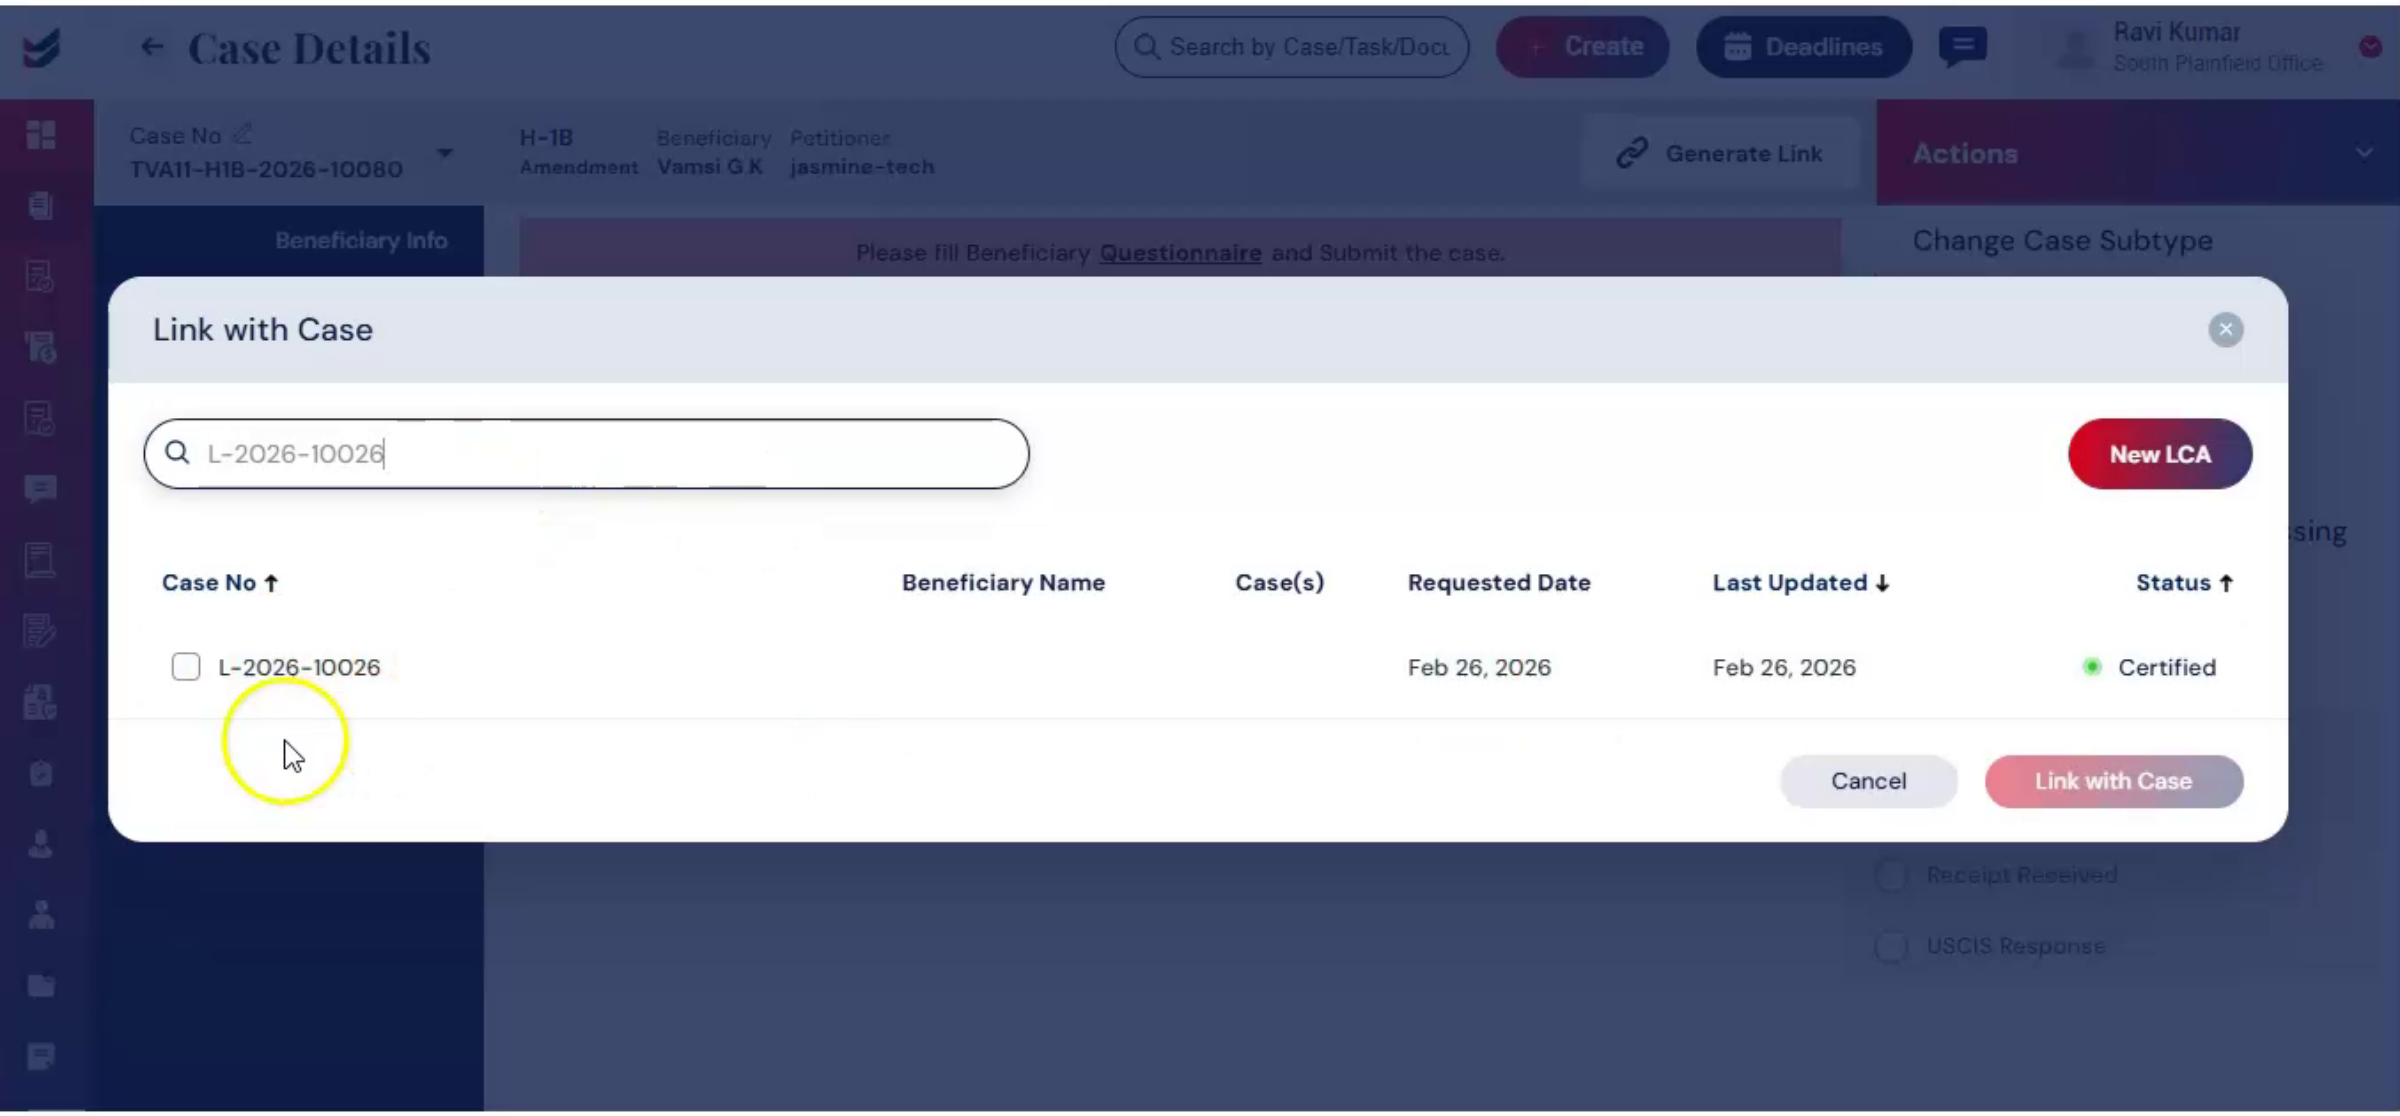
On the Case Details page, ImmiBox provides flexible LCA management. Go to Actions and select Link with LCA. Then in the dialog box, you will see two options. Link Existing LCA means linking an LCA already stored in the system. New LCA means either uploading a certified LCA or creating a new one within the system. This prevents duplicate records and centralizes LCA documentation. It also ensures the amendment petition is directly connected to the correct certified LCA for audit readiness.
9. LCA Completion Responsibility
 * click the image to view enlarged
The LCA step can be completed by the petitioner or the law firm.
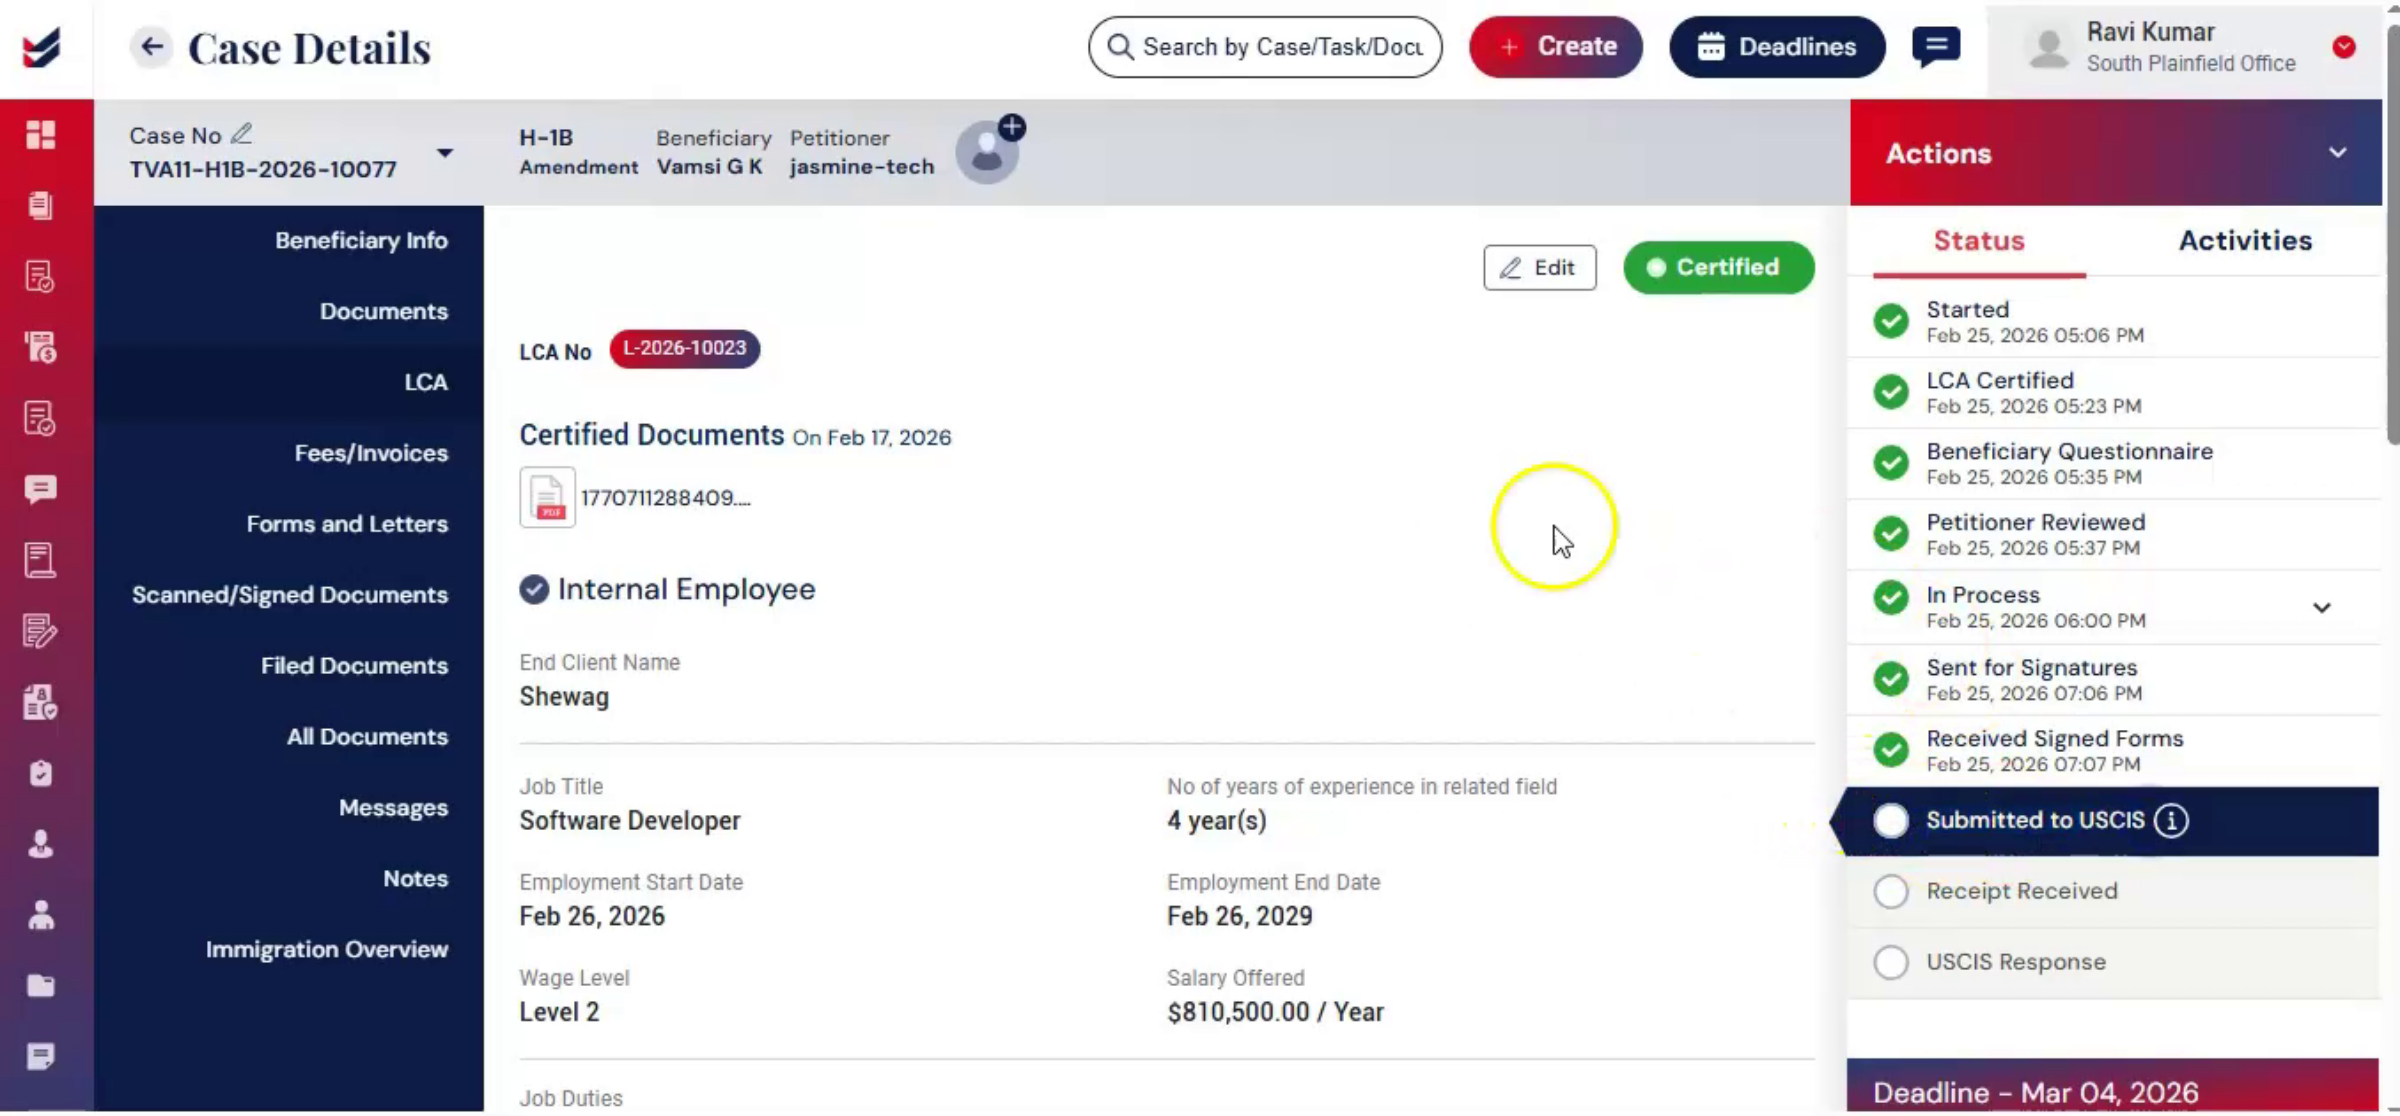
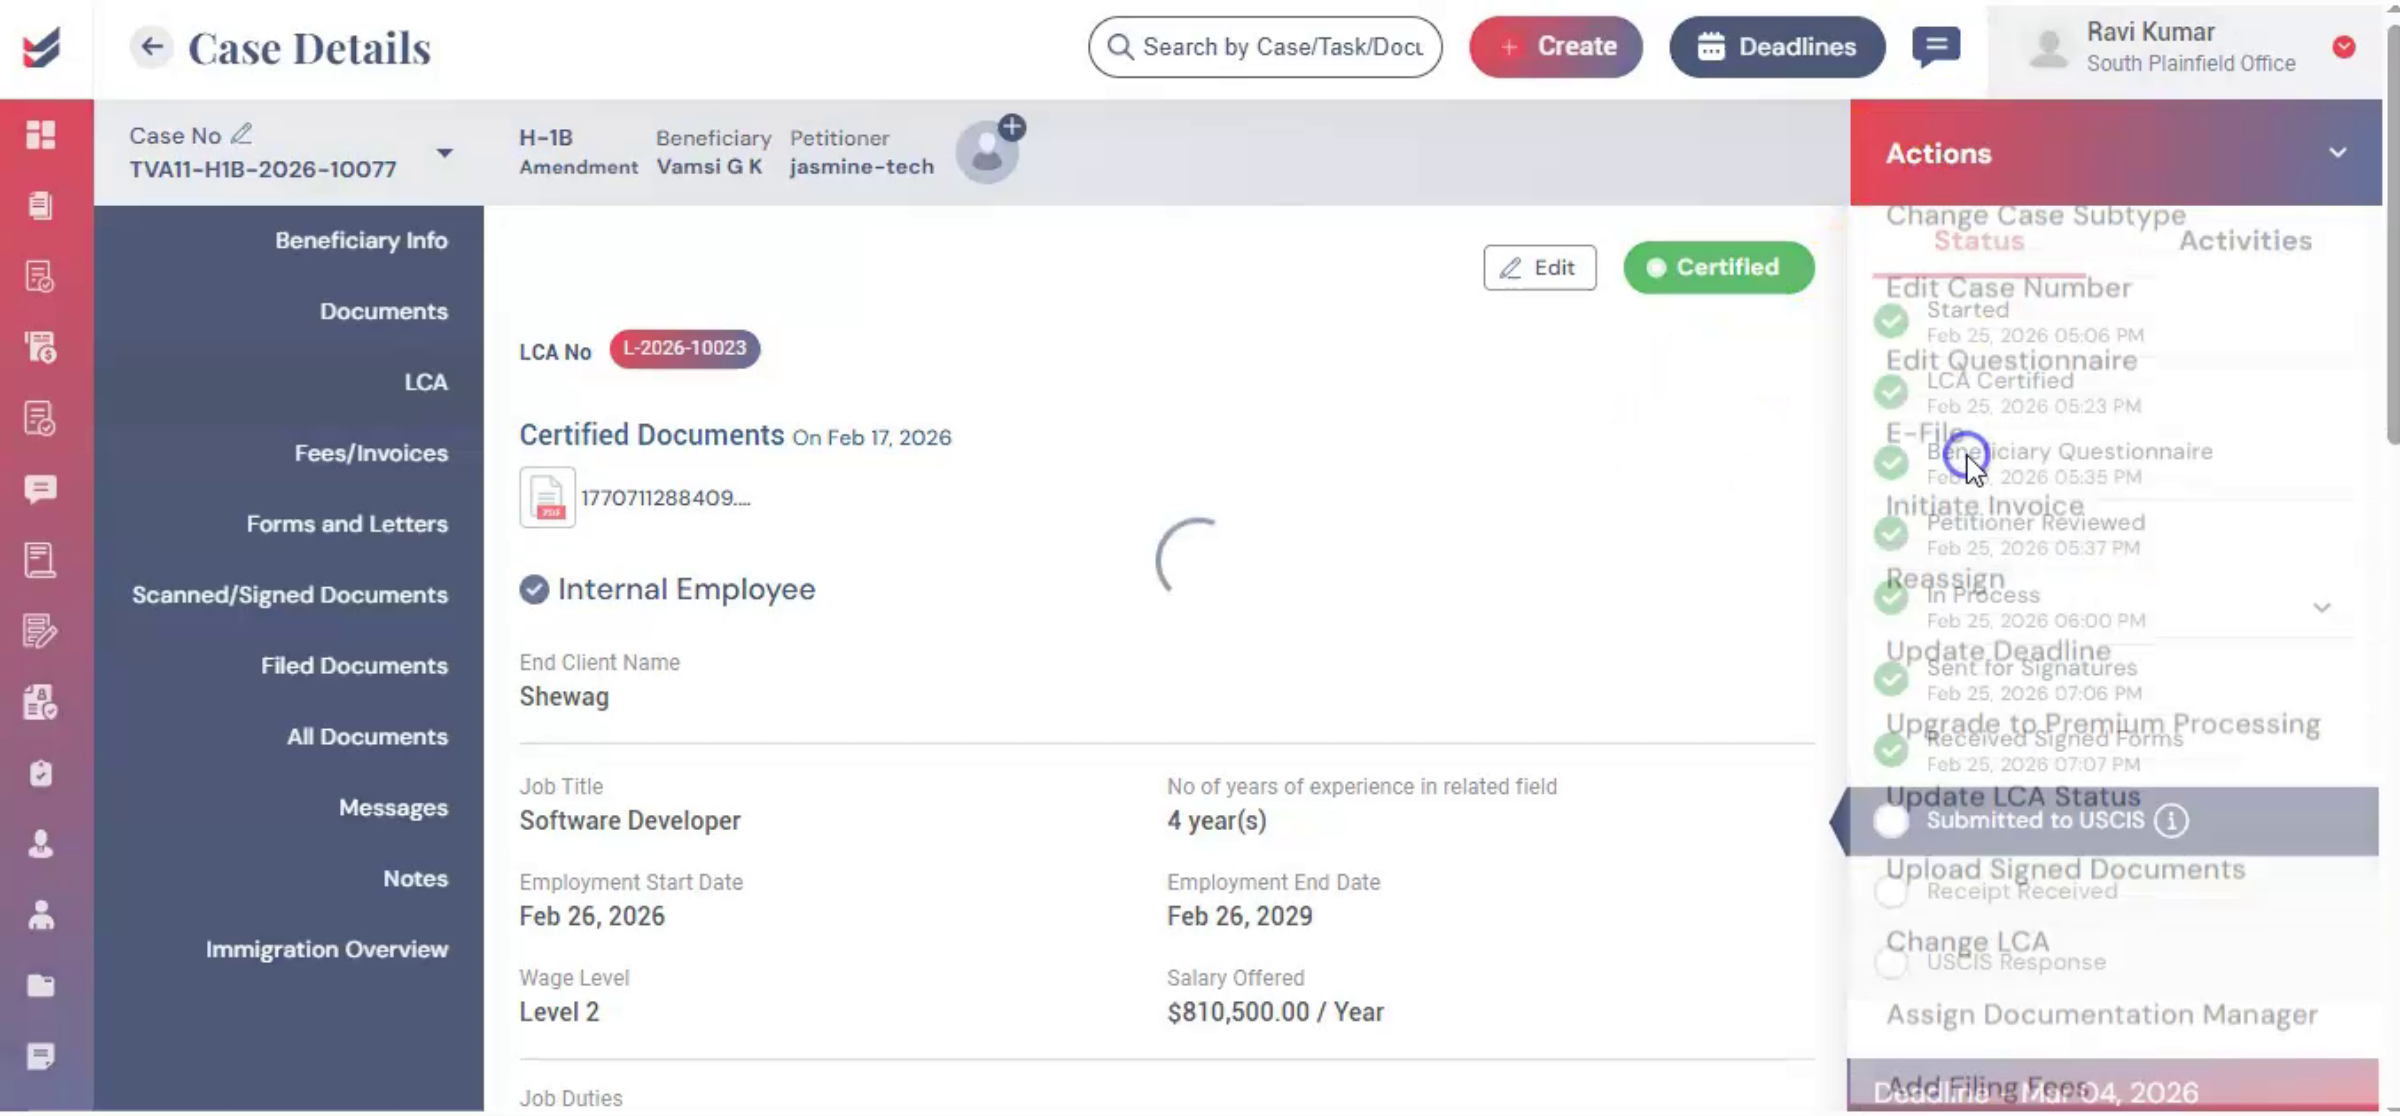
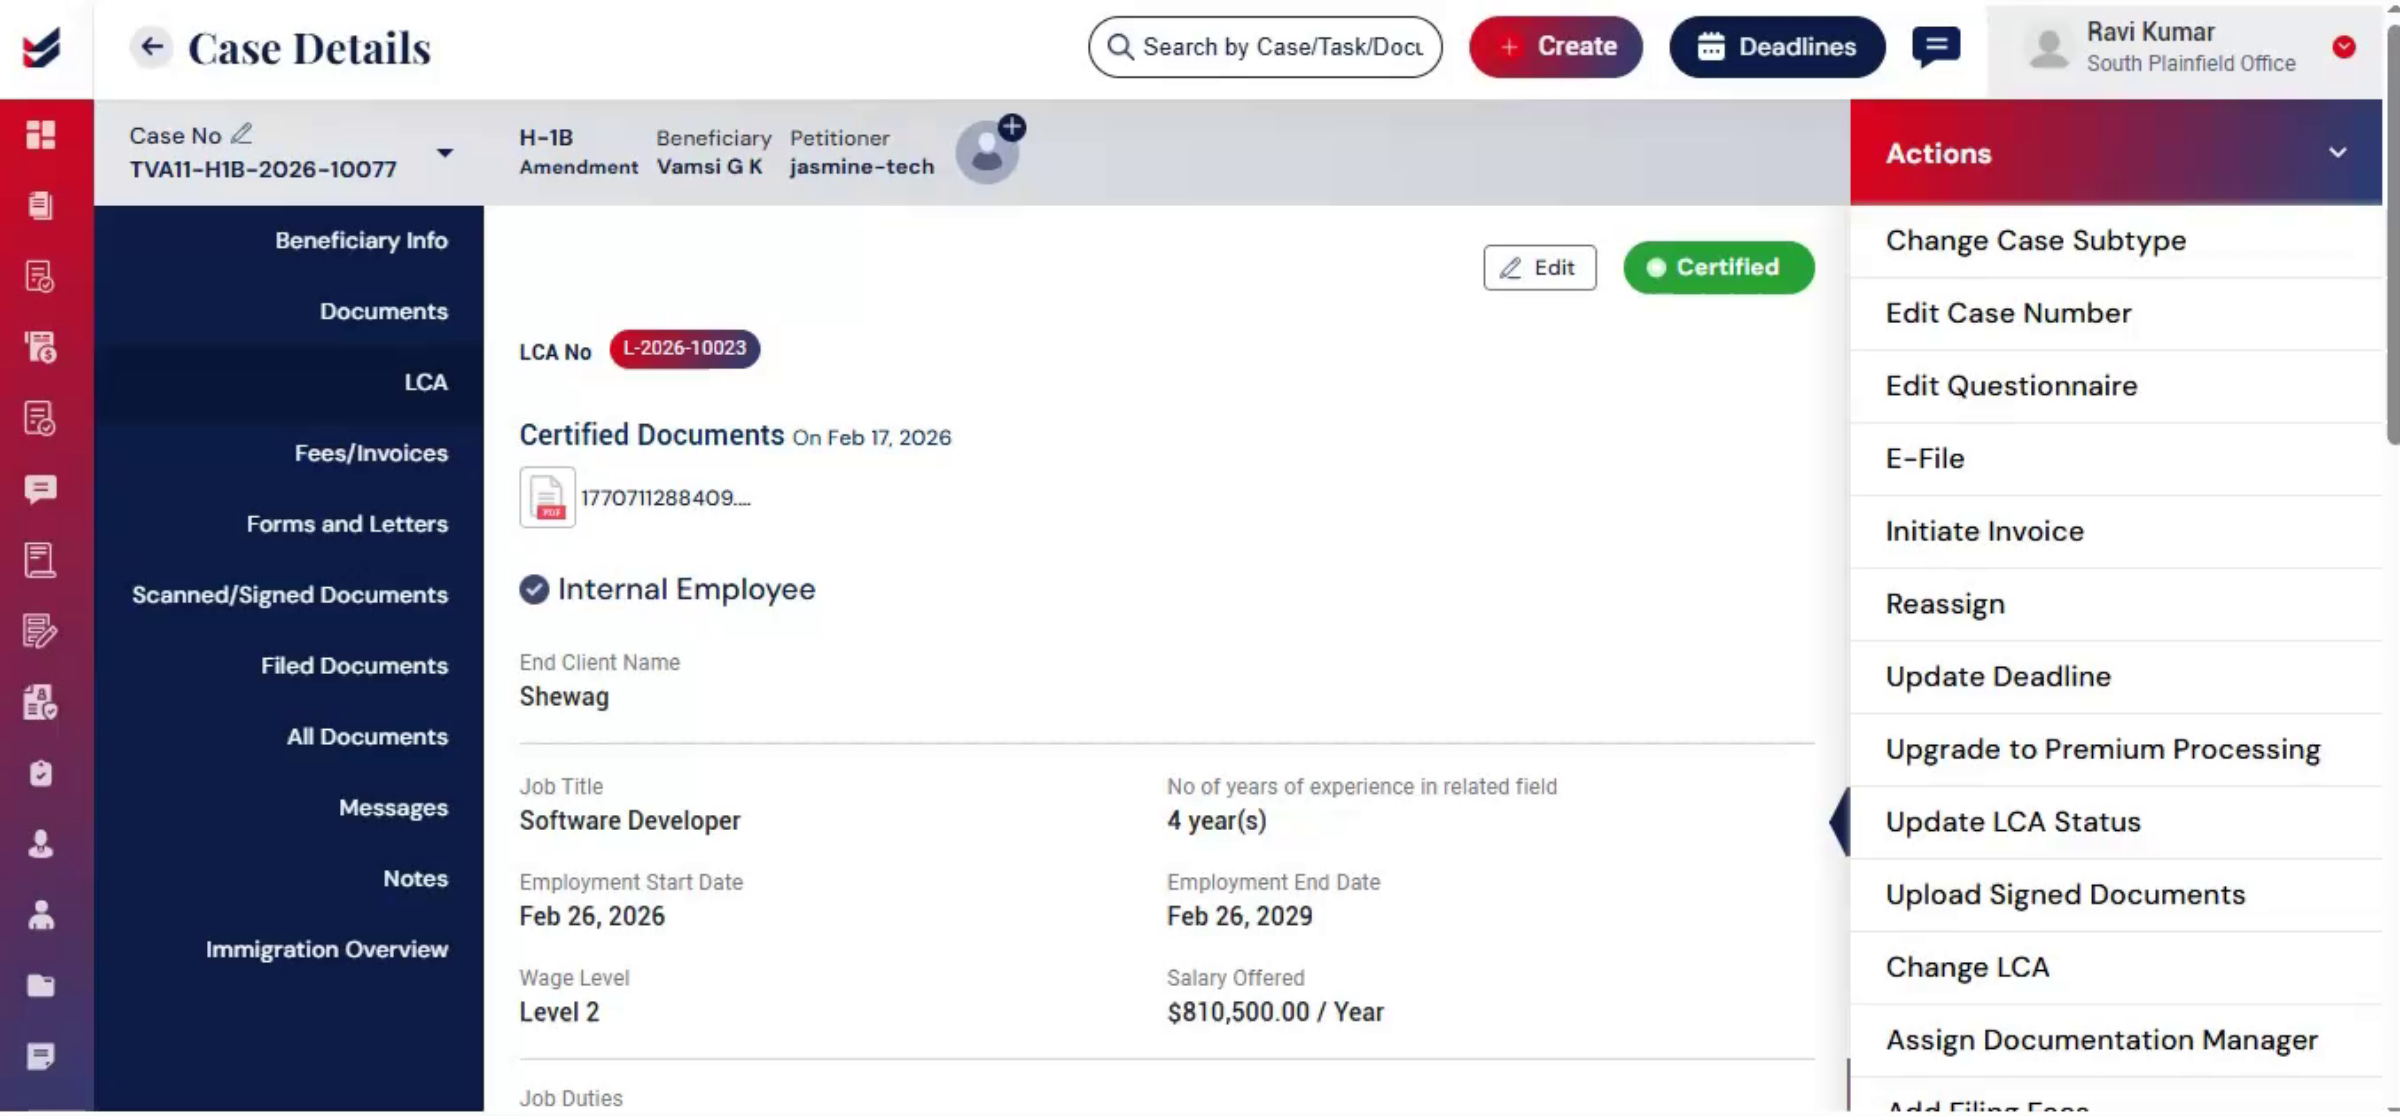
10. Updating LCA Status Process
 * click the image to view enlarged
If you need to update the LCA status, select Update LCA Status, choose the status, add comments, upload documents, and click Submit.
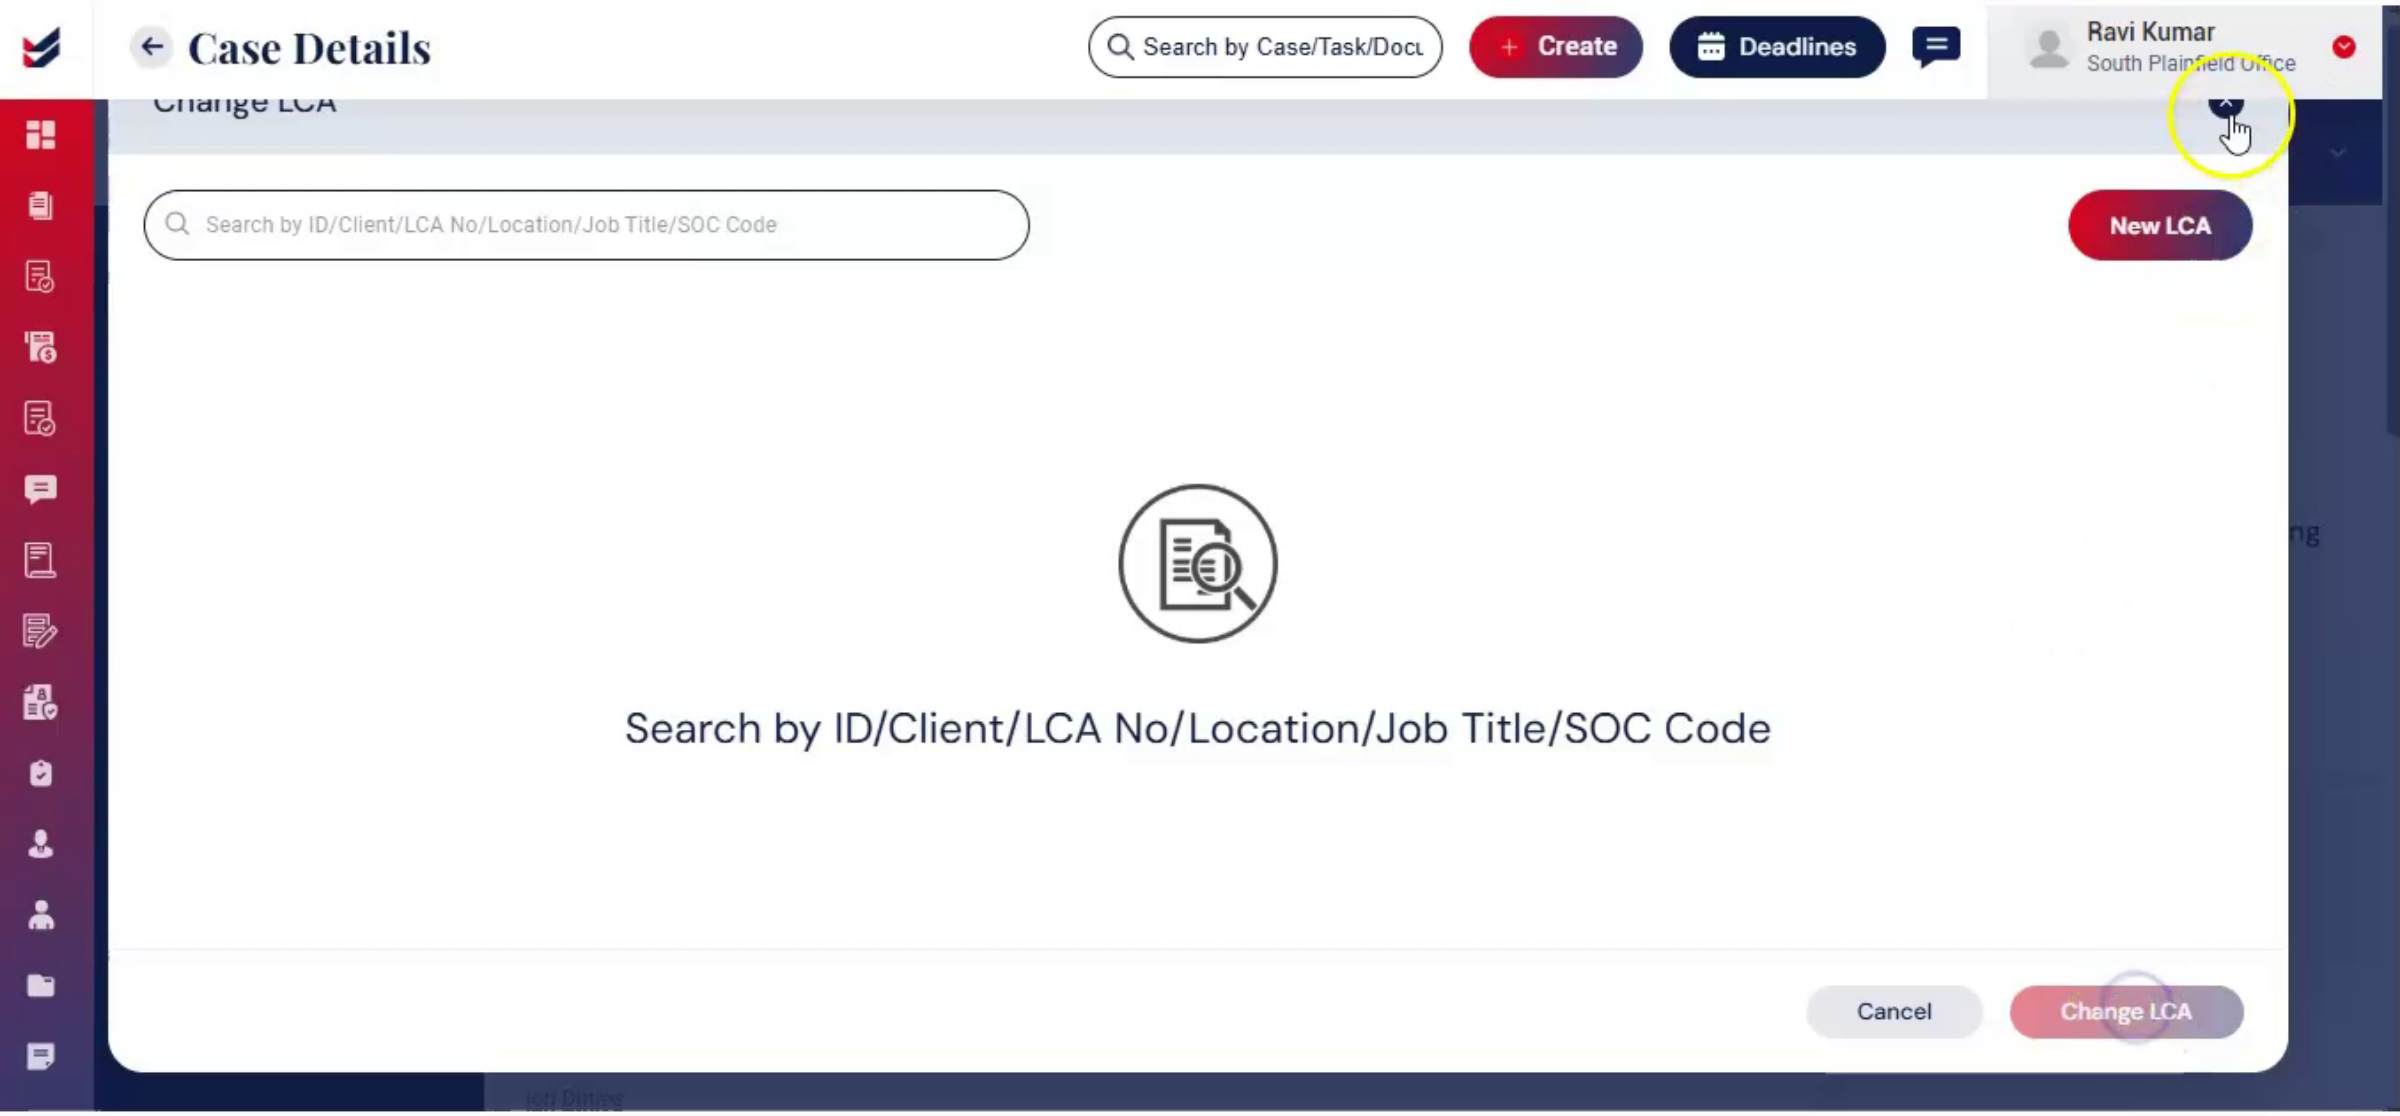
11. Changing LCA Procedure
 * click the image to view enlarged
To change the LCA entirely, go to Actions, select Change LCA, then either link to an existing LCA or create a new one. Fill out the form carefully and click Submit.
12. Beneficiary Information Importance
 * click the image to view enlarged
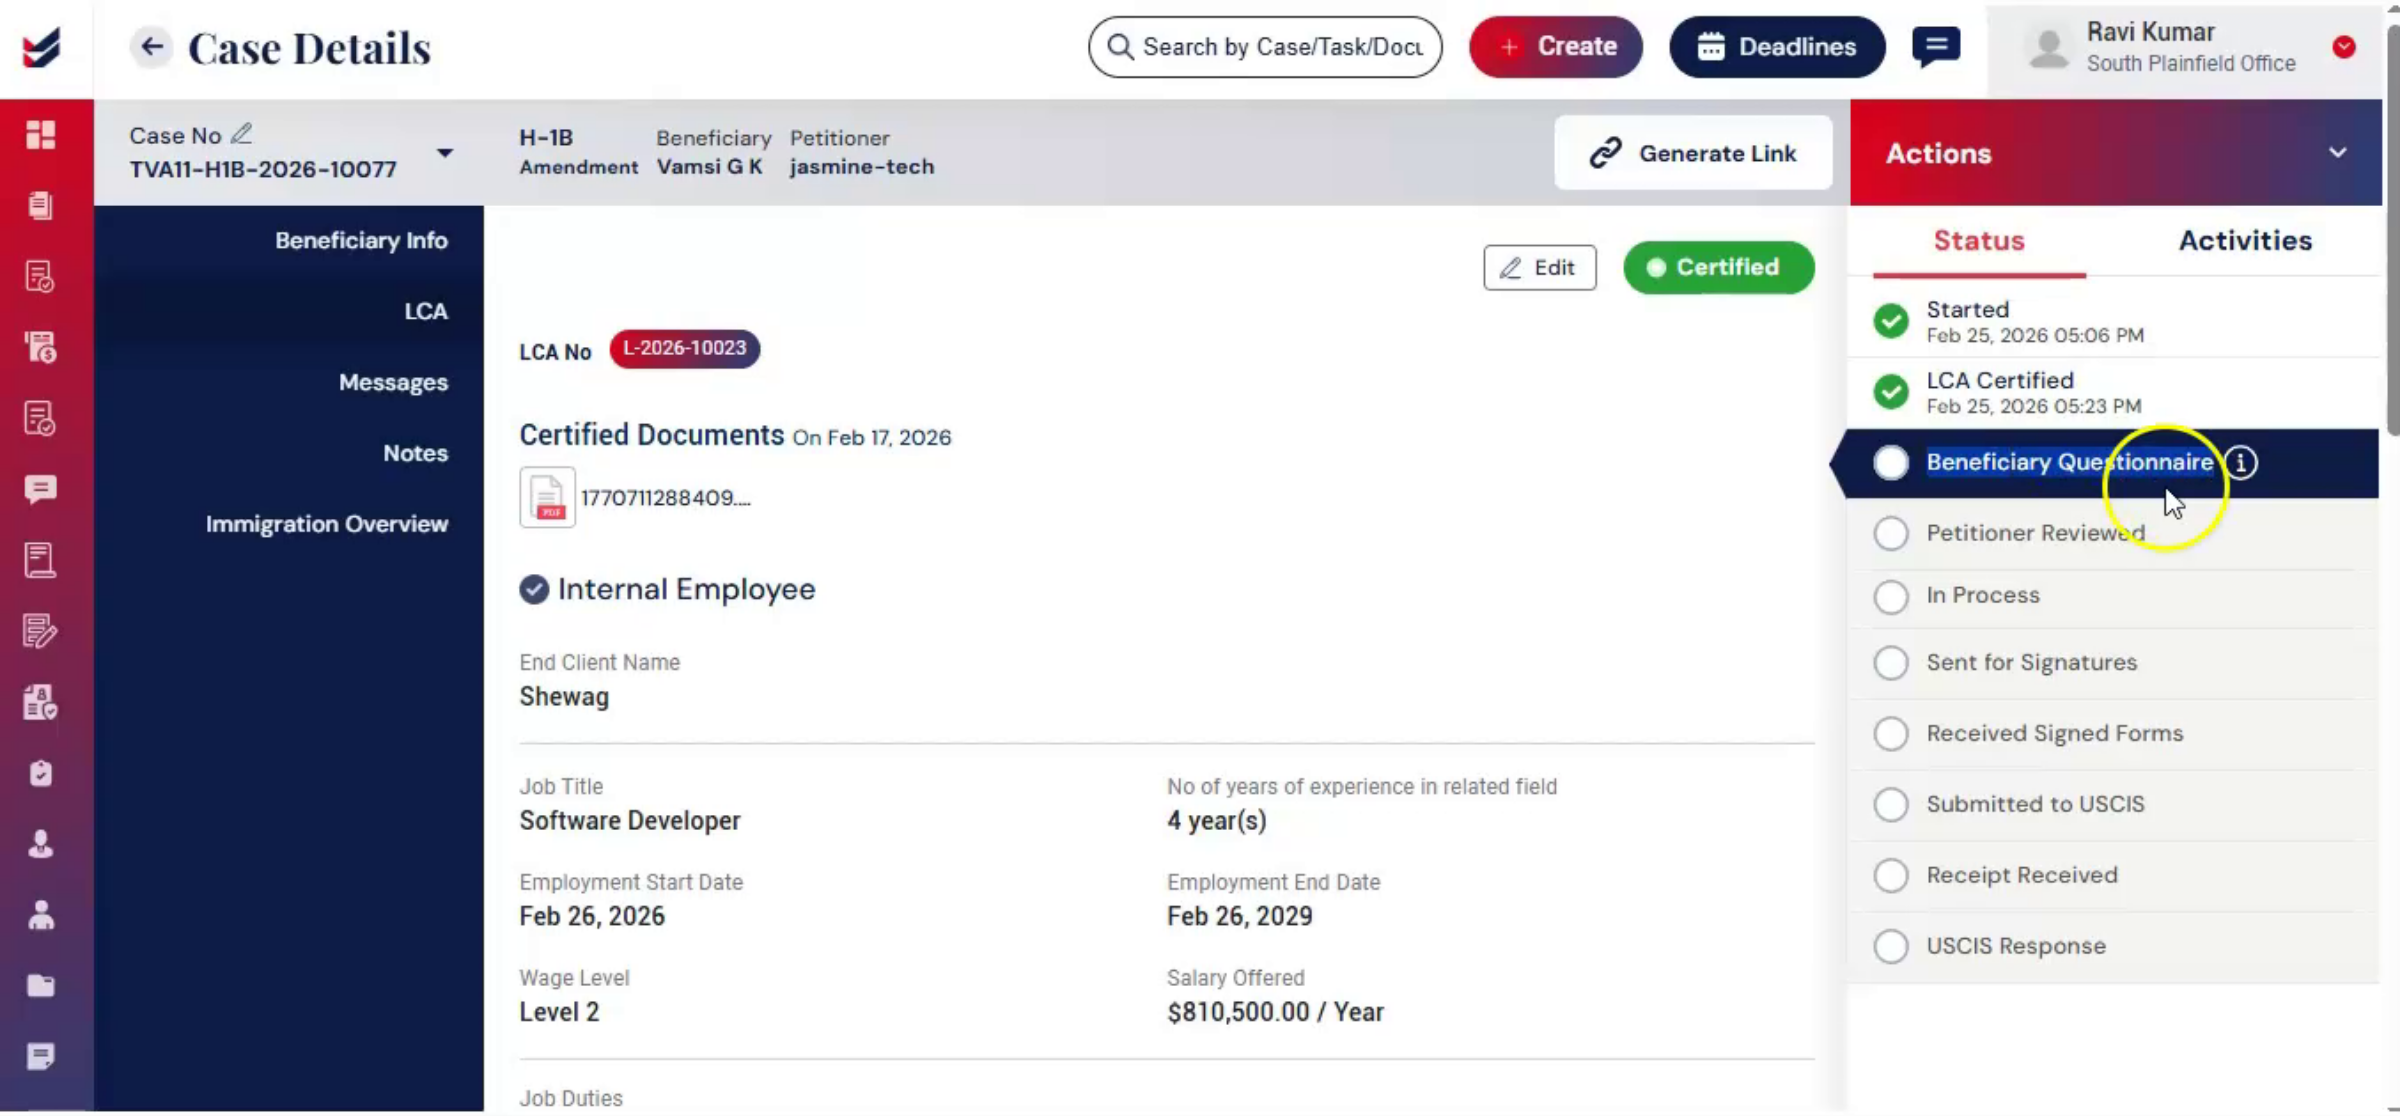
Once the LCA step is completed, the workflow advances automatically. Beneficiary information is critical in amendment cases, especially when changes involve job location, duties, or compensation.
13. Structured Questionnaire Introduction
 * click the image to view enlarged
Emmy box. Initiates a structured questionnaire process to collect updated information in a guided format.
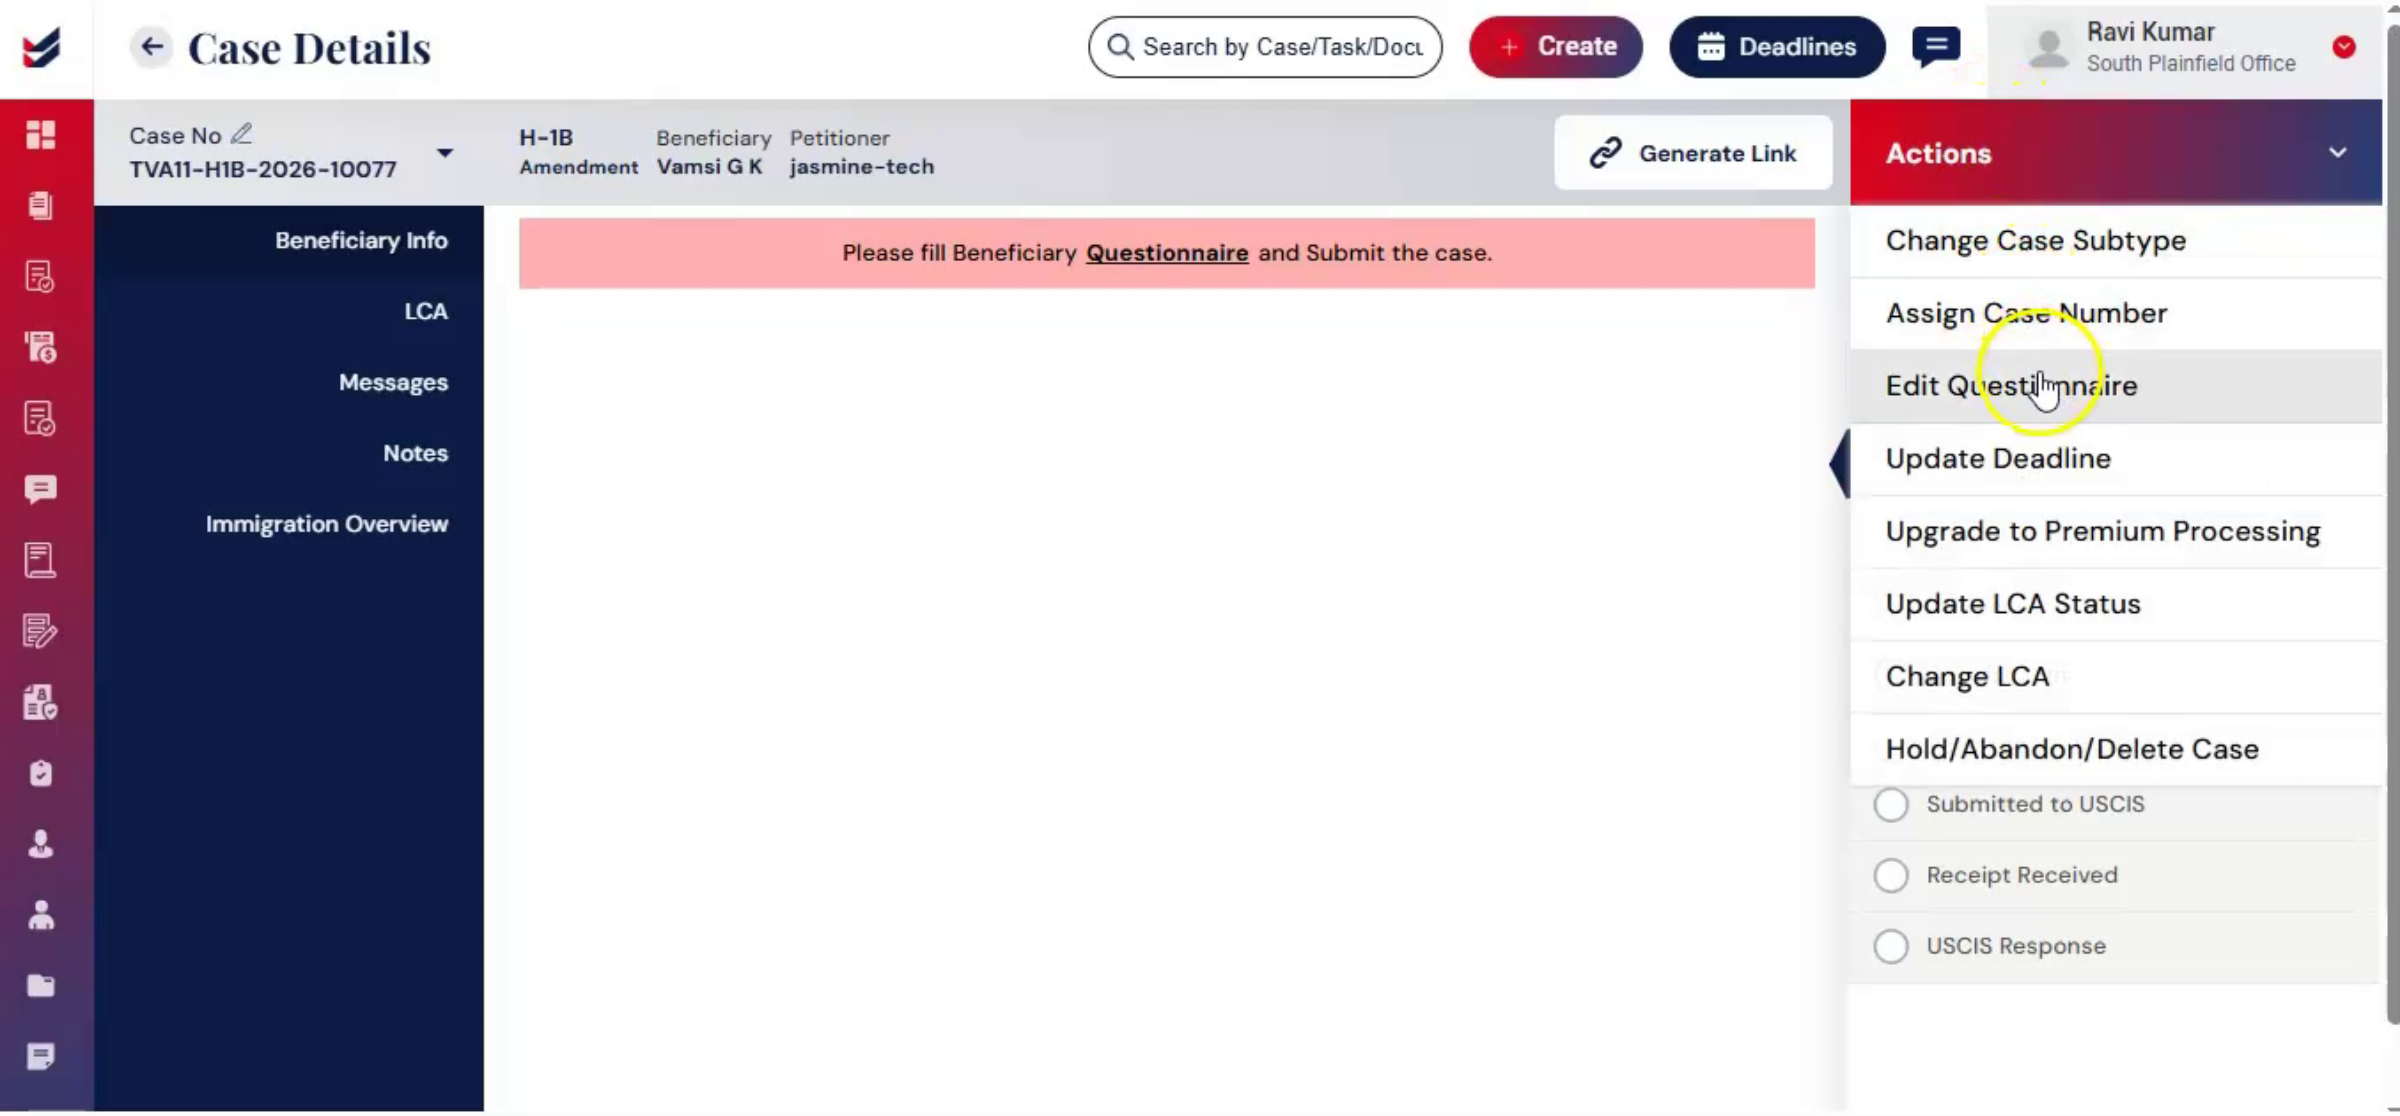
14. Accessing Beneficiary Questionnaire
 * click the image to view enlarged
Under the Beneficiary section, access the Beneficiary Questionnaire, or you can go to Actions, select a questionnaire.
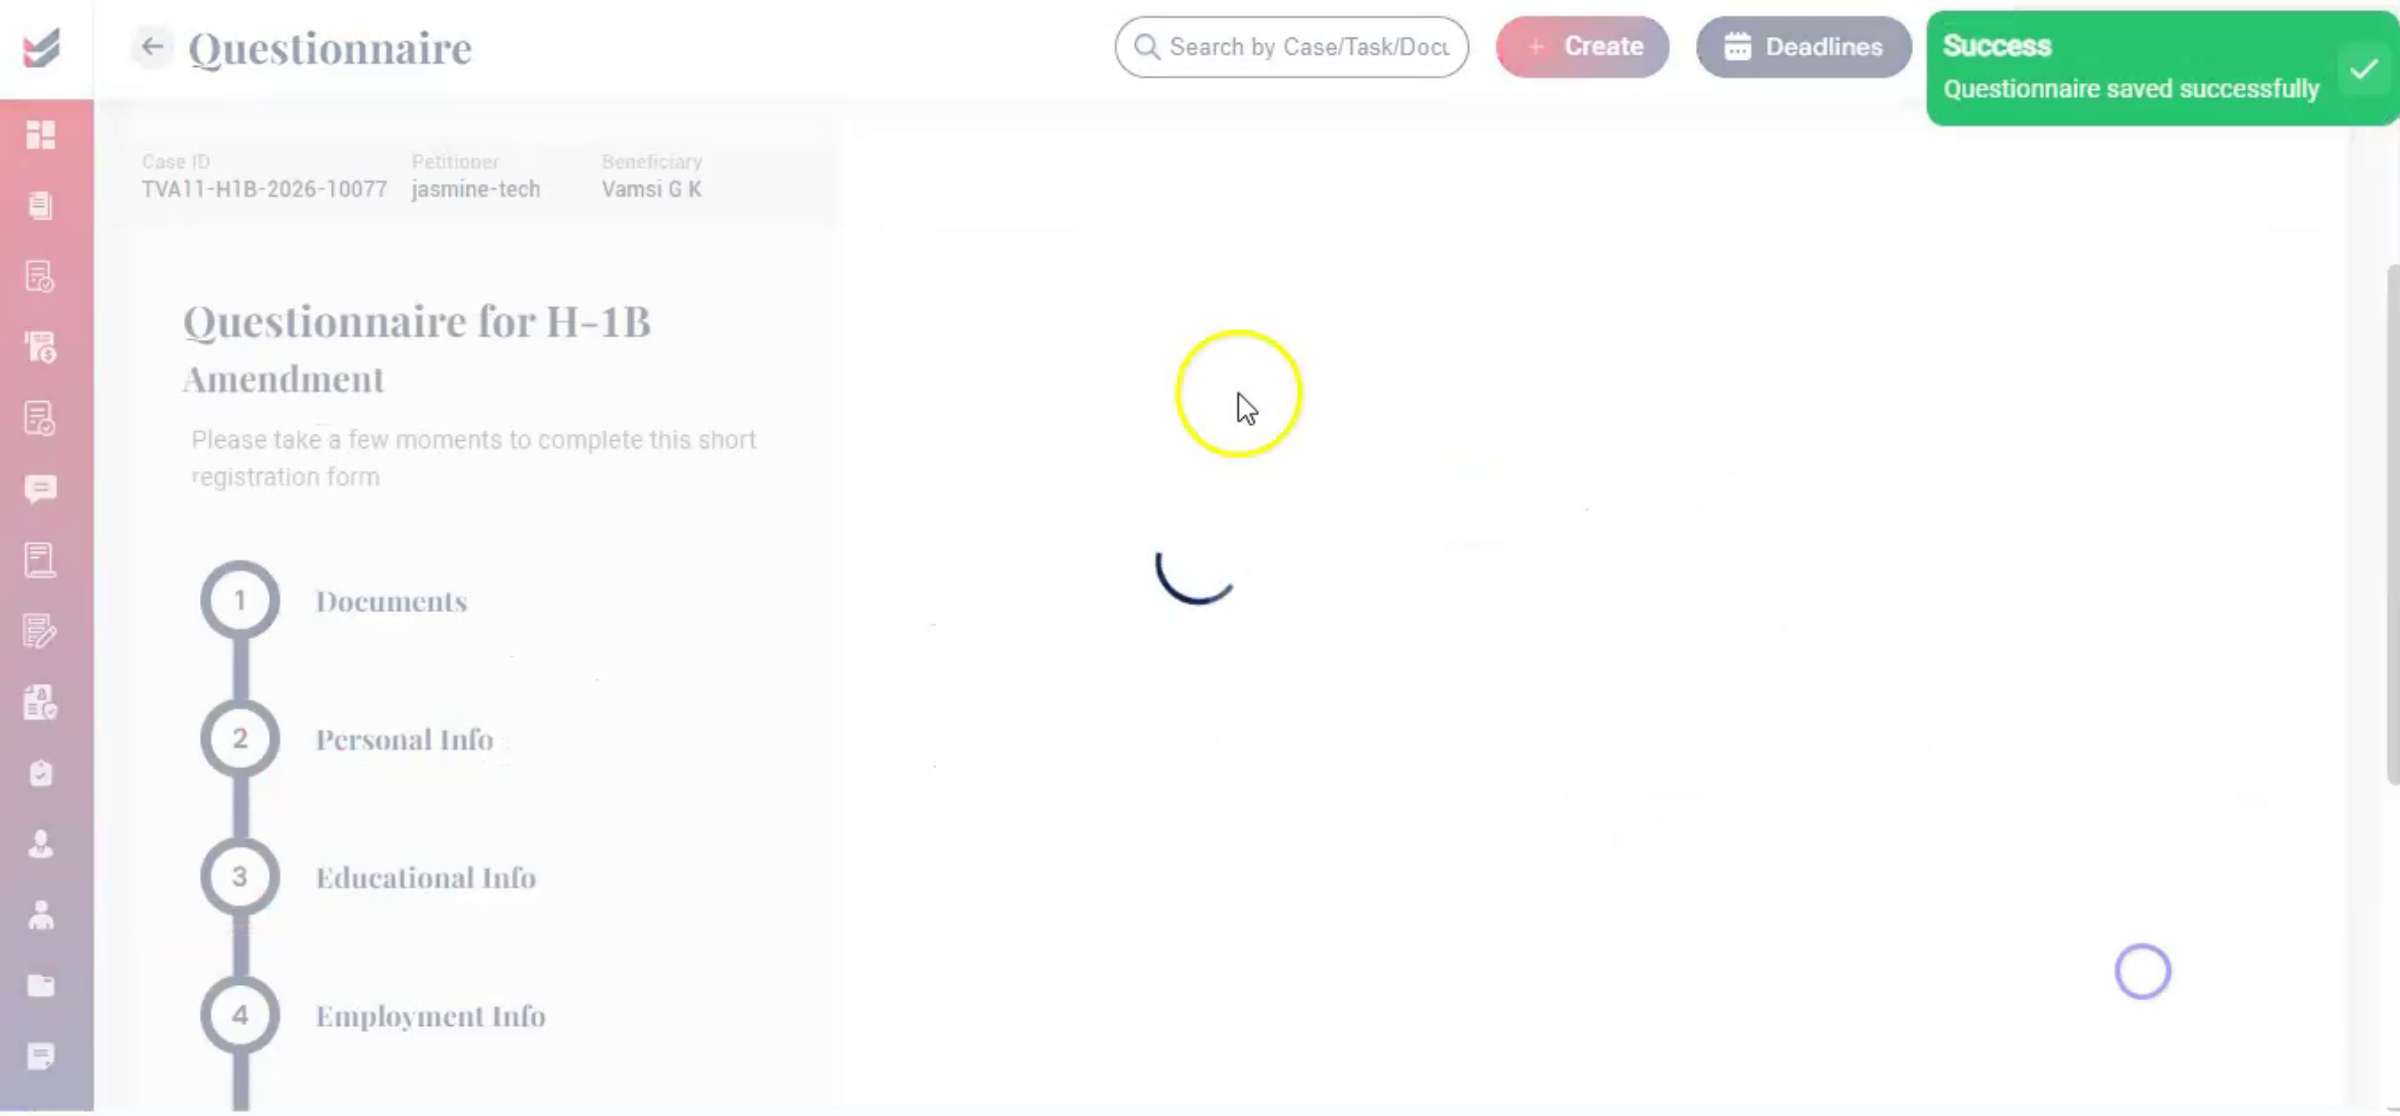
15. Filling And Submitting Questionnaire
 * click the image to view enlarged
Questionnaire Form section will appear on the screen. Fill out the details carefully and click Submit. This questionnaire can be filled out directly by the petitioner or law firm.
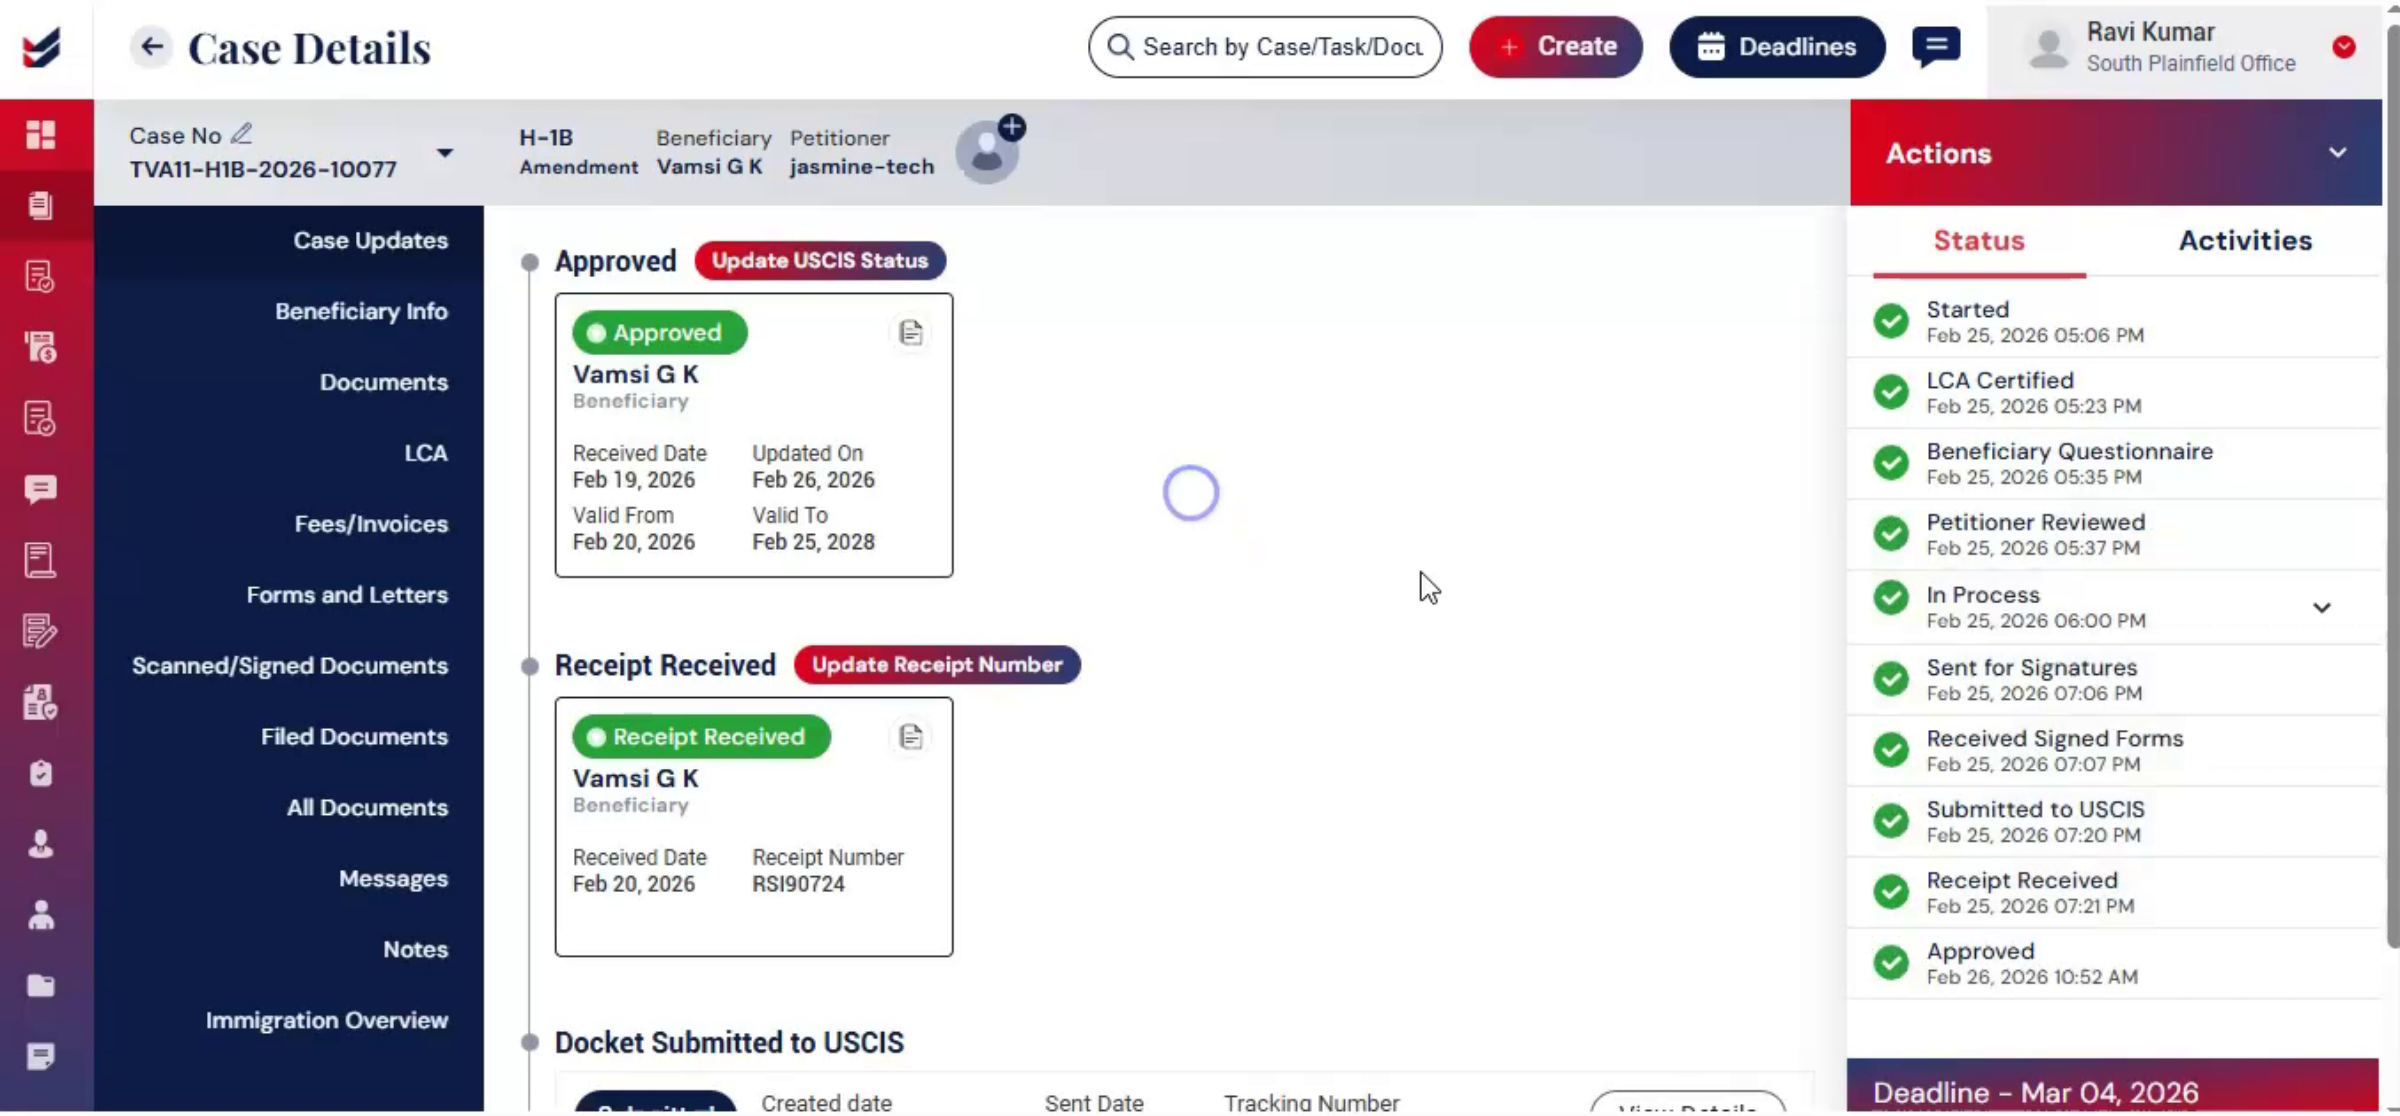
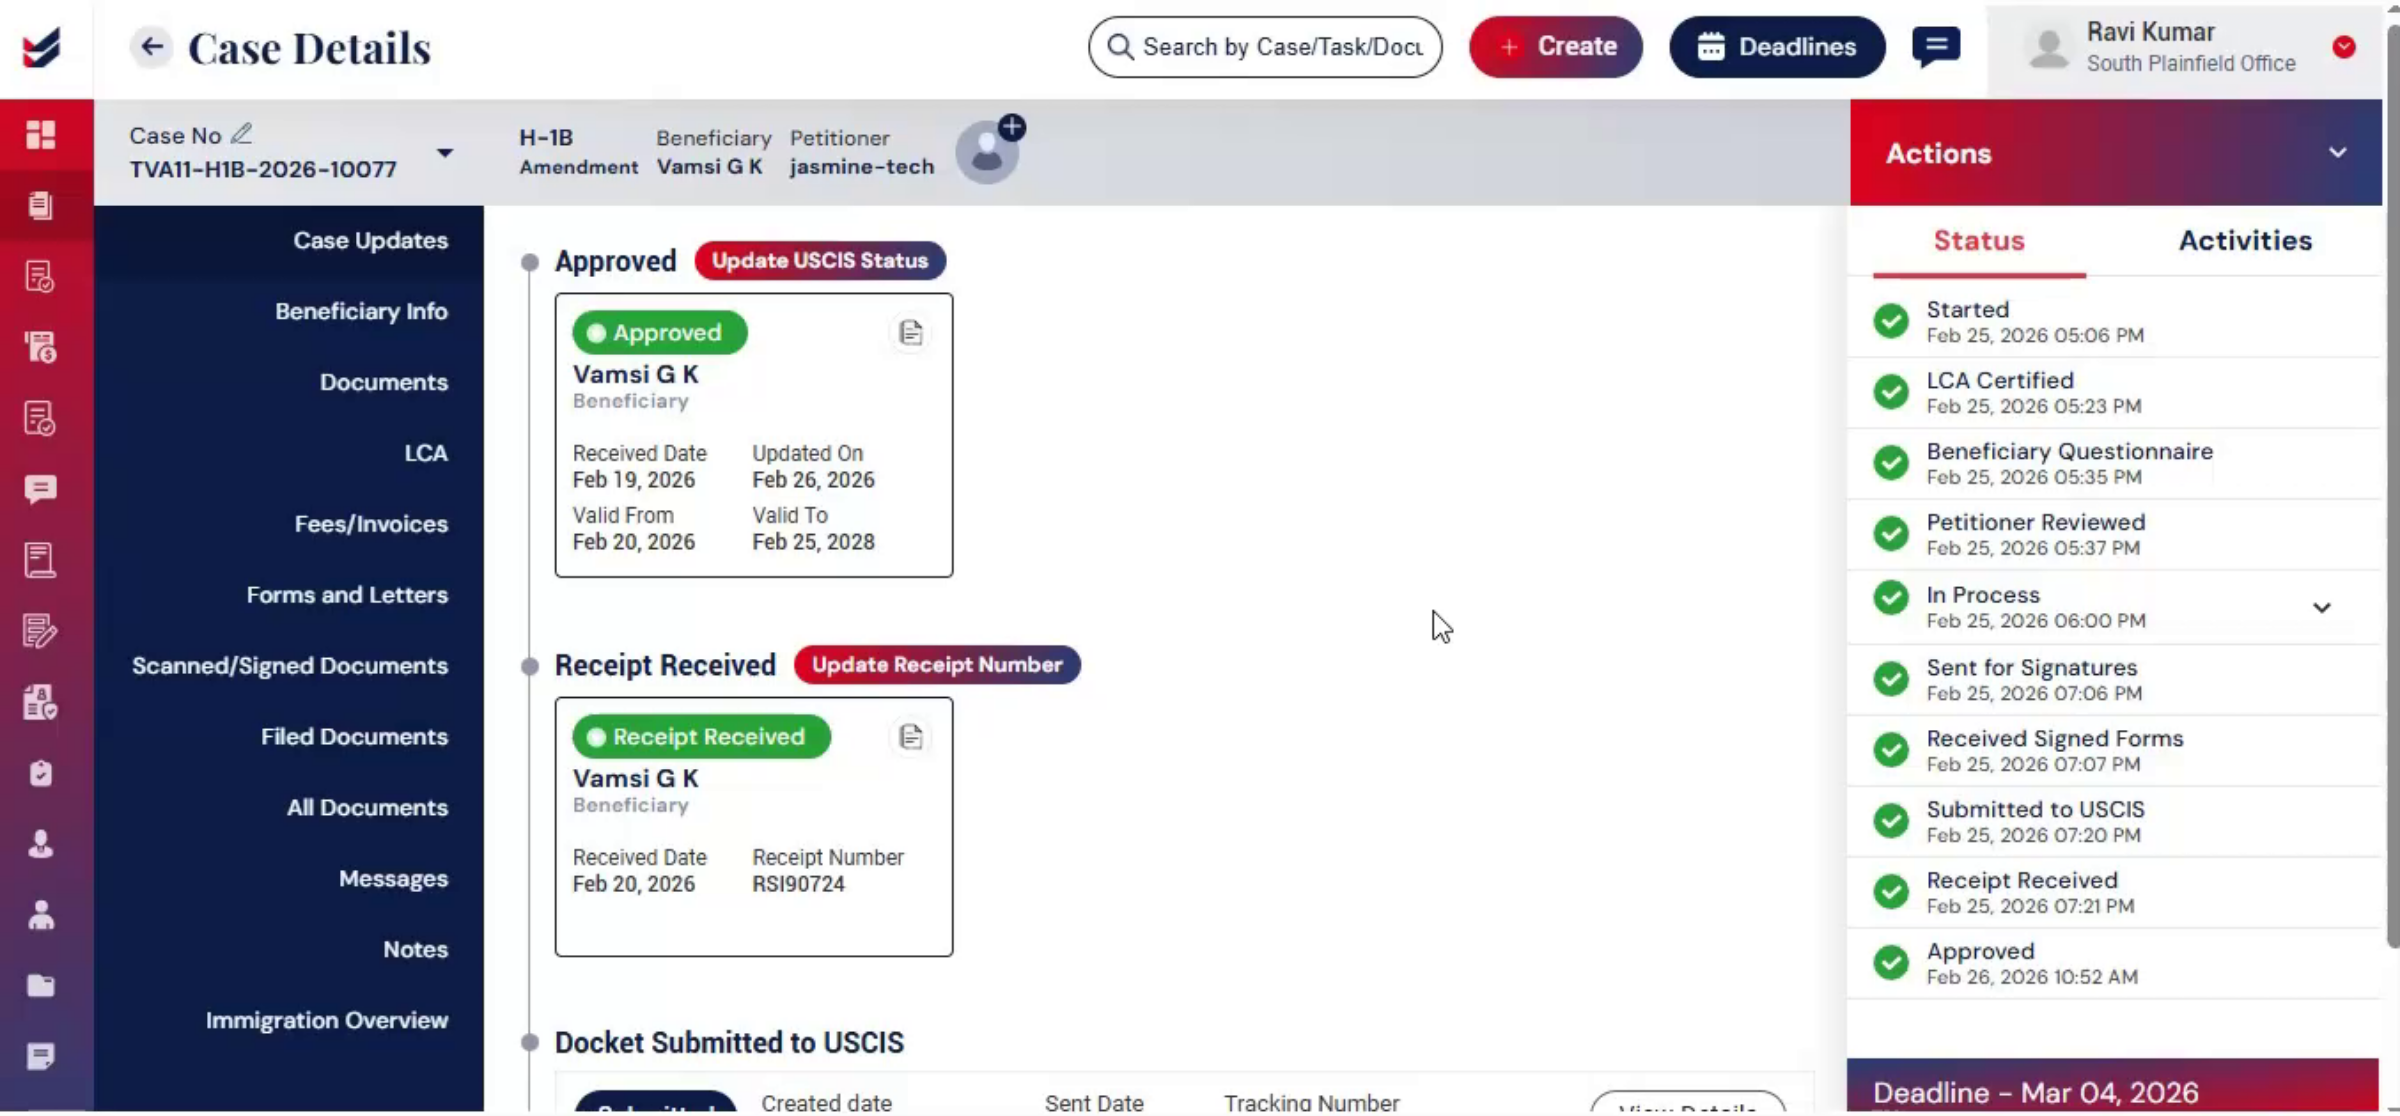
16. Standardizing Questionnaire Responses
 * click the image to view enlarged
The system organizes responses in a standardized format, reducing inconsistencies and minimizing follow-up clarification.
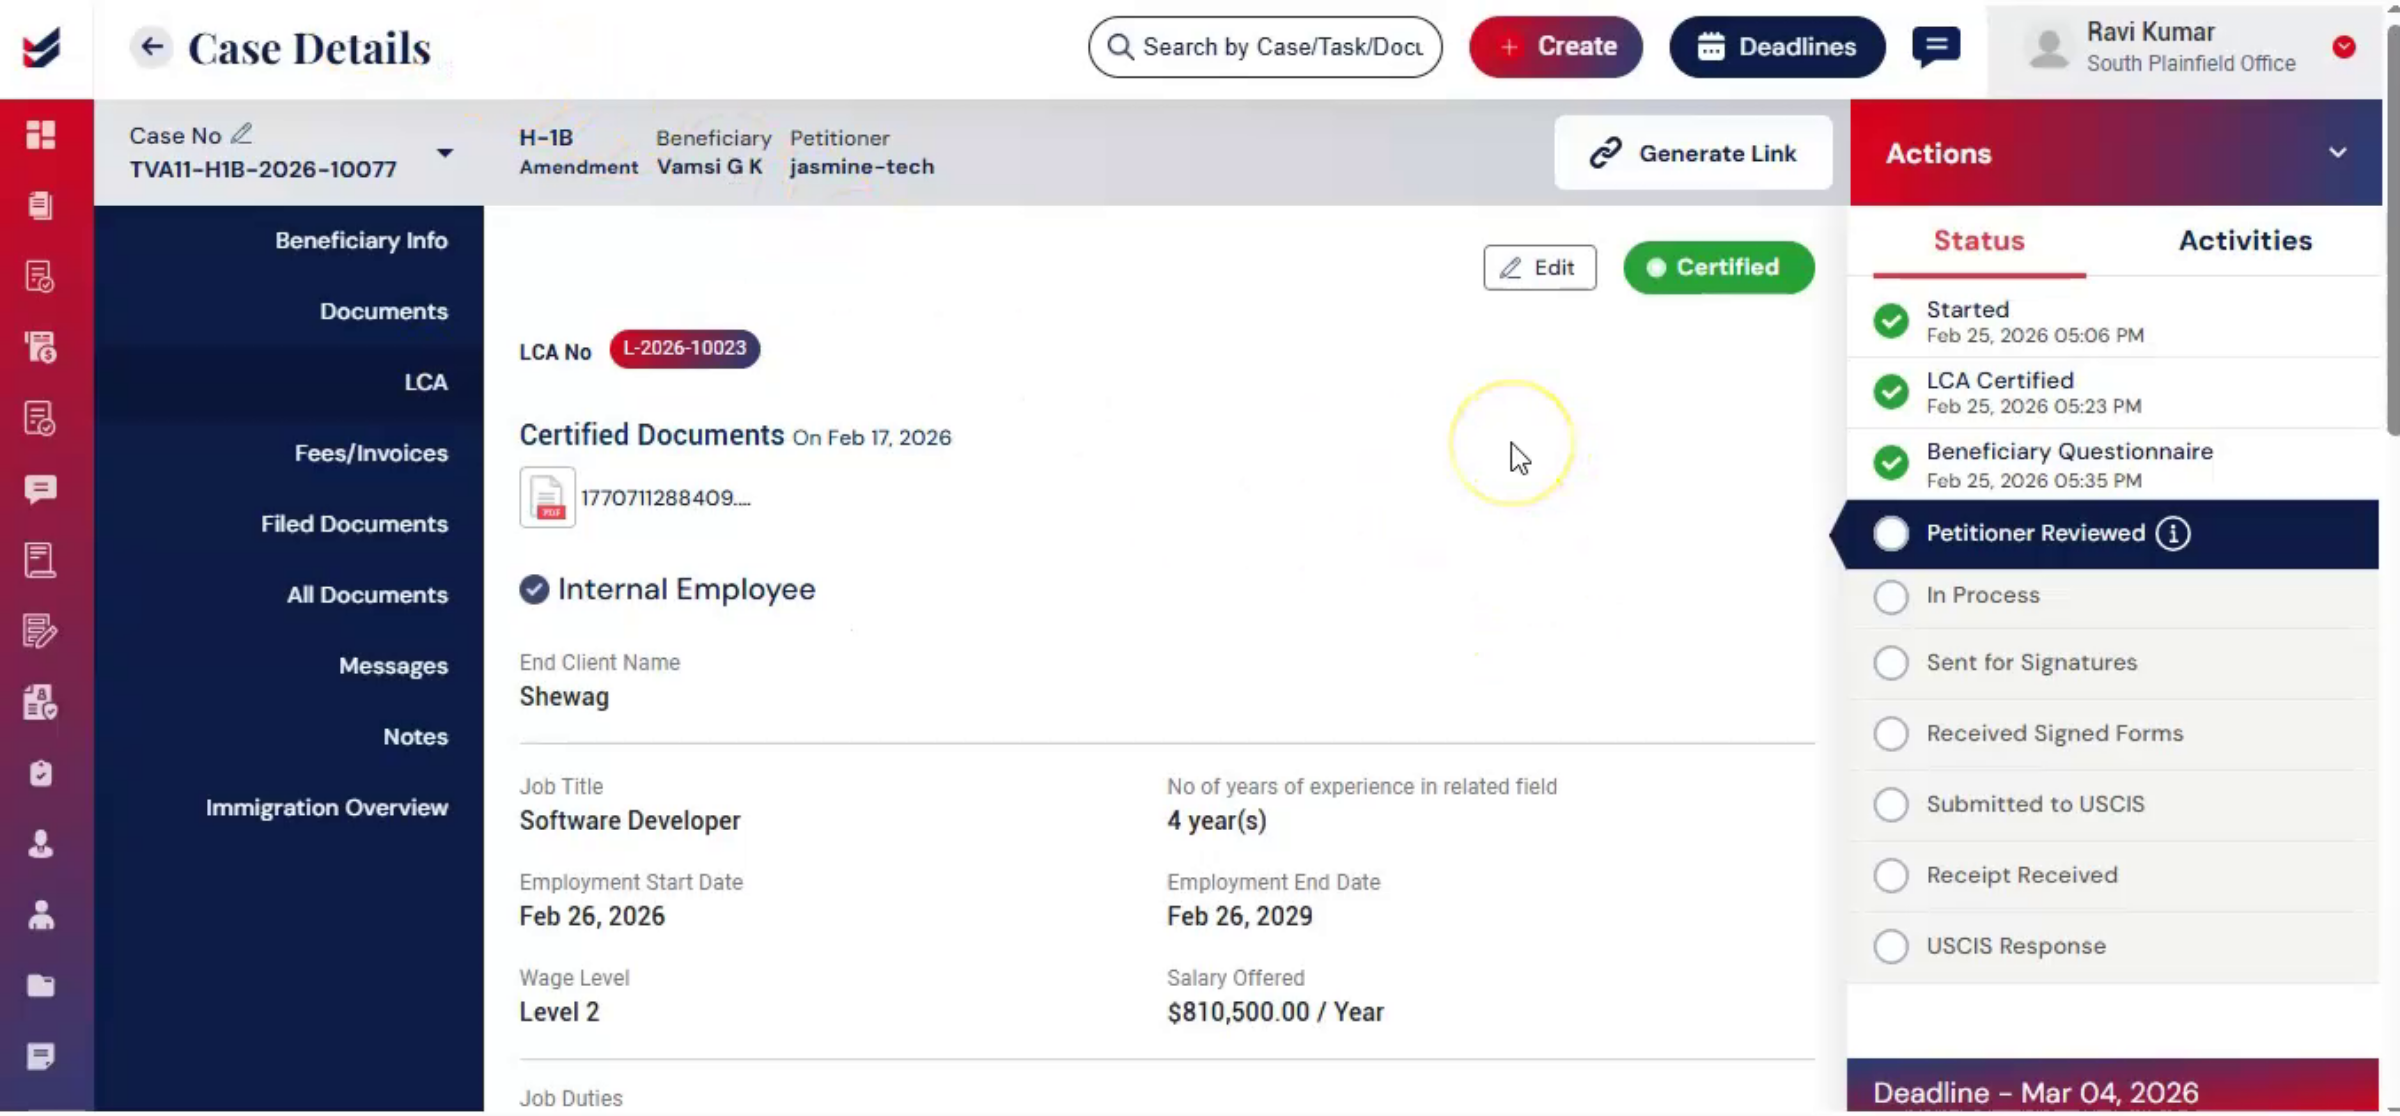
17. Workflow Progression After Submission
 * click the image to view enlarged
Once submitted, the workflow automatically progresses to the next stage.
18. Verifying Information Before Review
 * click the image to view enlarged
Before legal review, Begins the petitioner or Law, Firm should verify. That all information is accurate and complete.
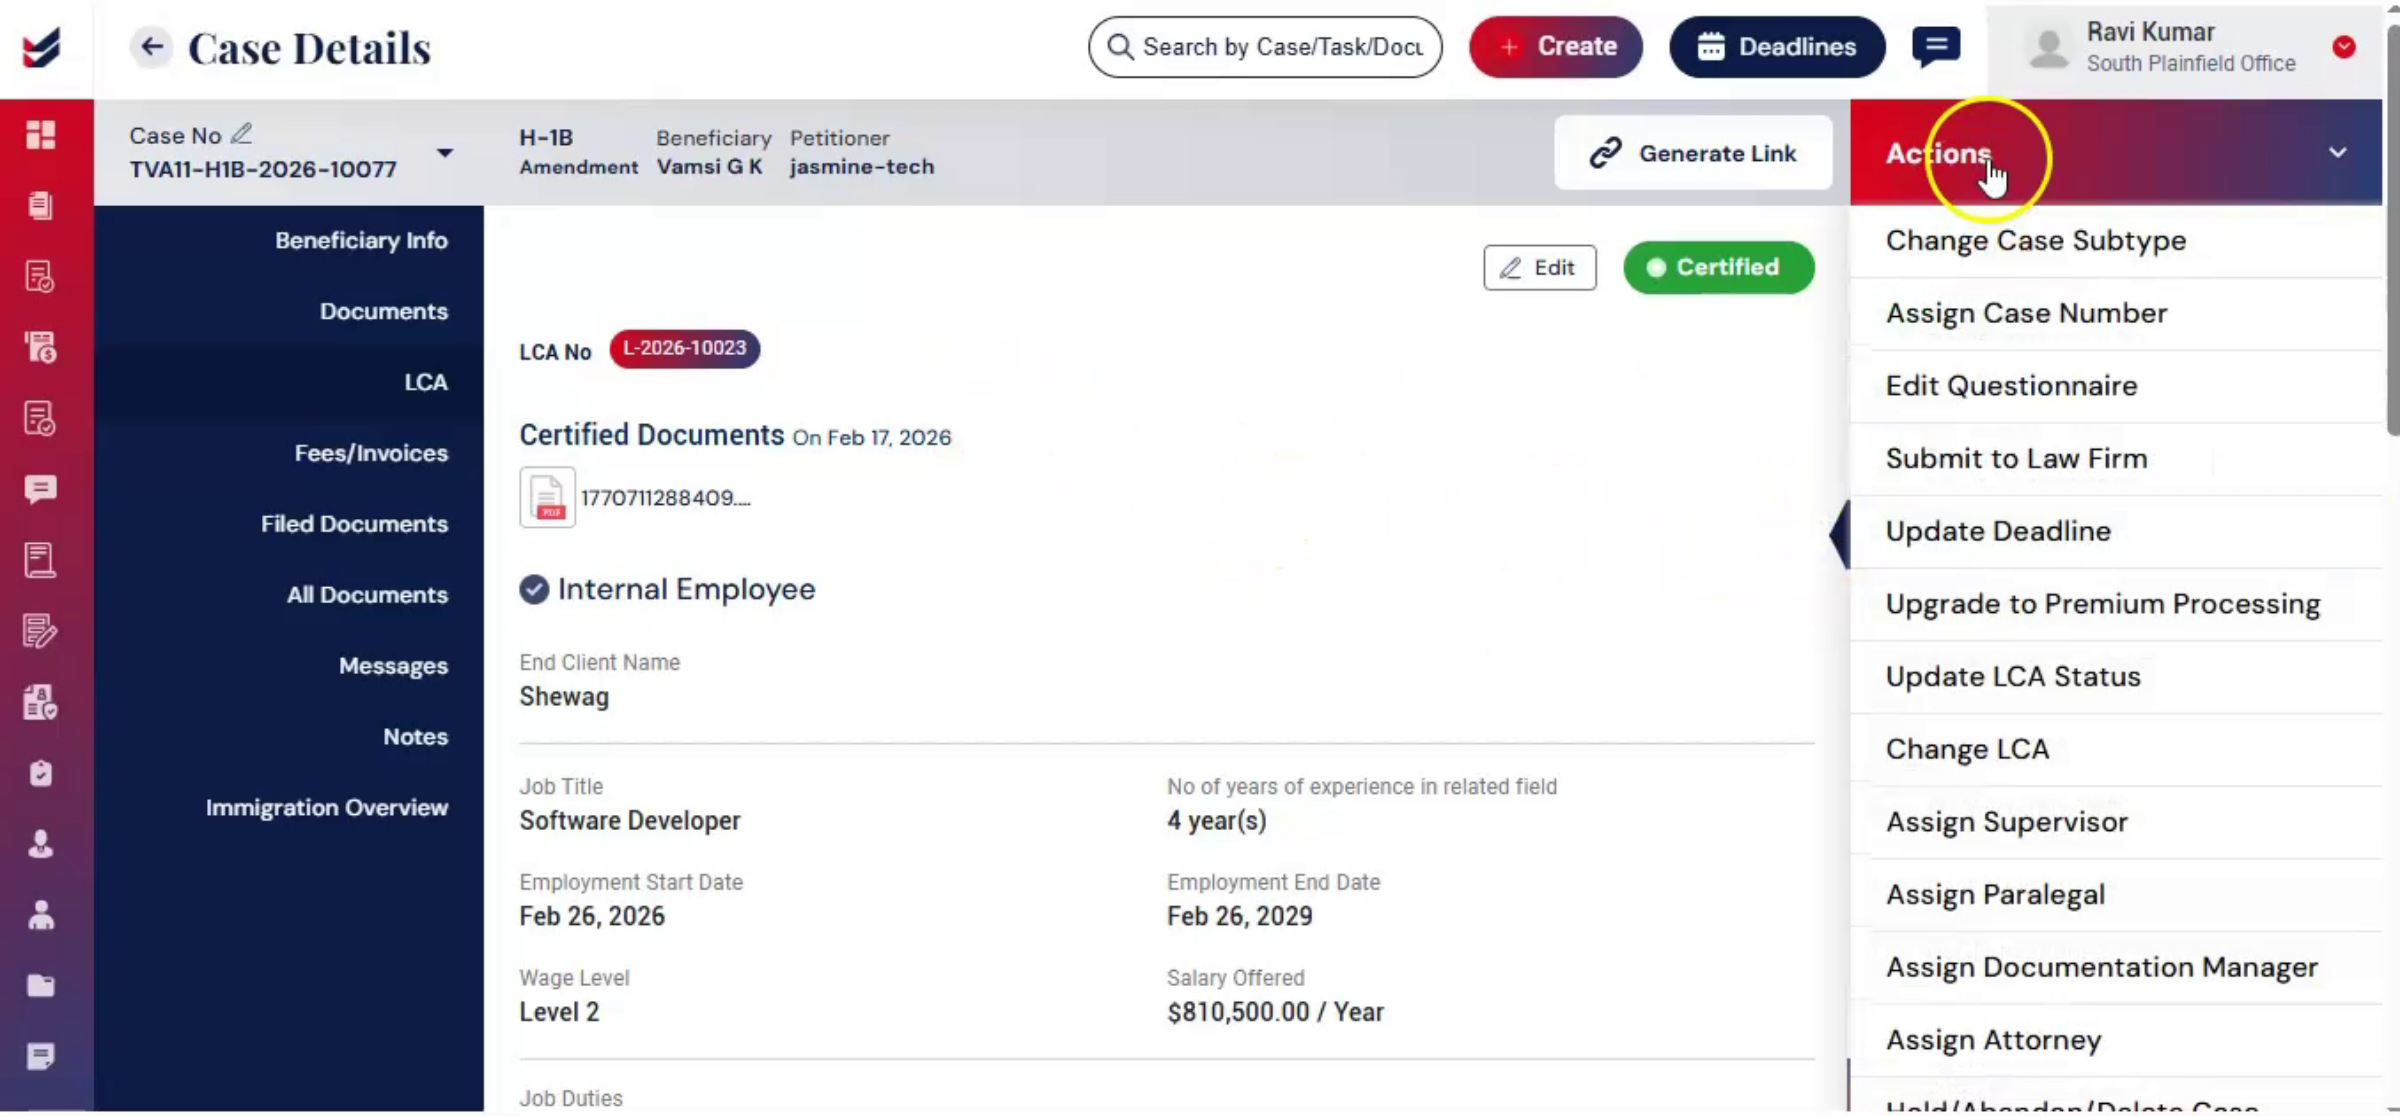
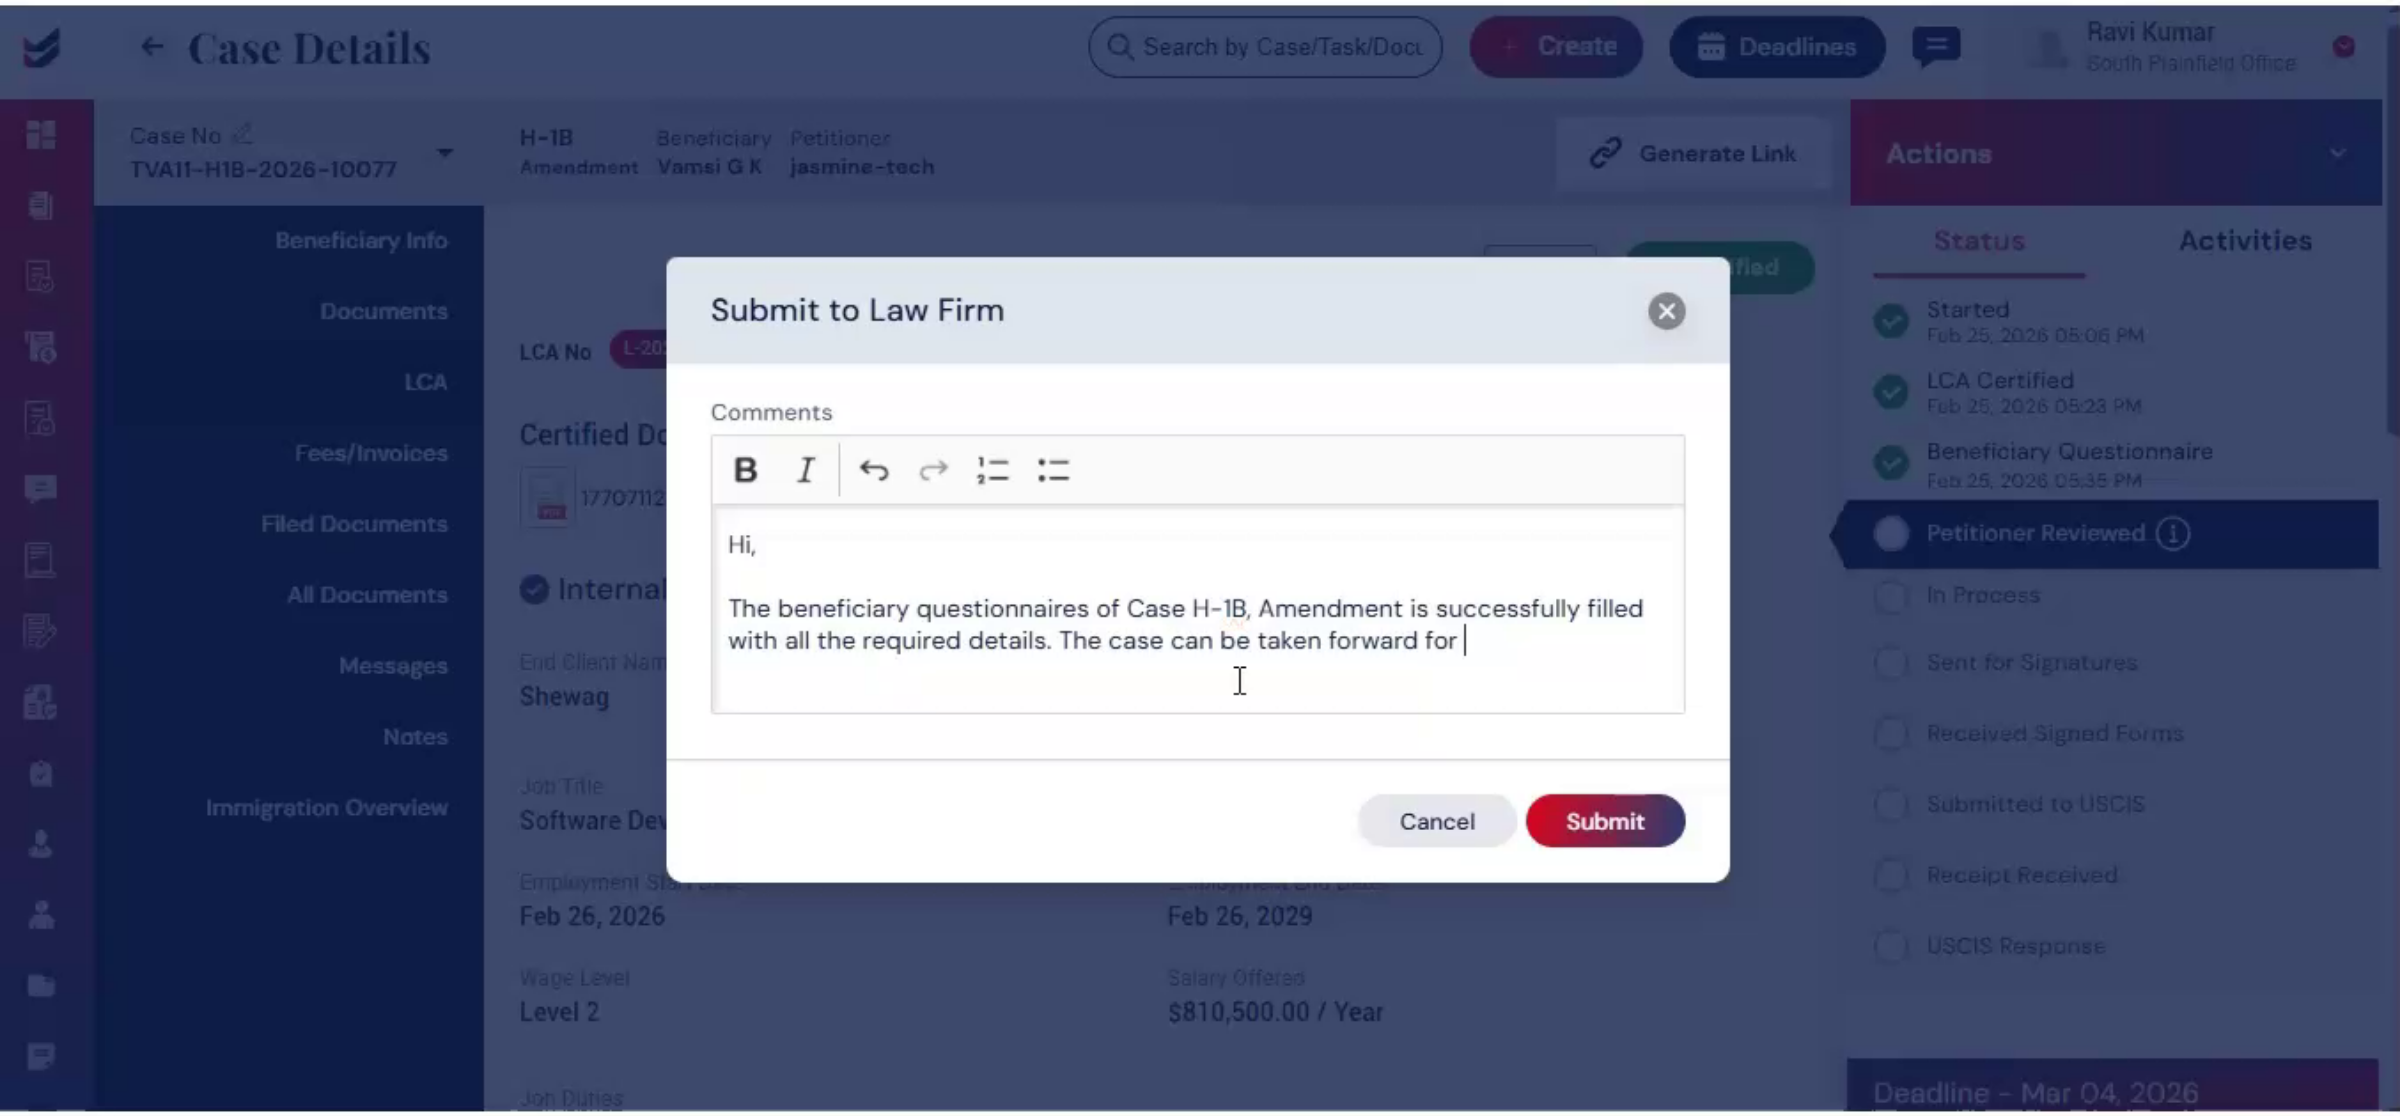
19. Submitting To Law Firm Review
 * click the image to view enlarged
From the Actions menu, select Submit to Law Firm. Add comments and click Submit. ImmiBox logs this review into the case history, creating a documented checkpoint and ensuring transparency and accountability.
20. Legal Oversight Importance
 * click the image to view enlarged
Legal oversight is essential in amendment filings to confirm that the material change qualifies for amendment and that all regulatory requirements are satisfied.
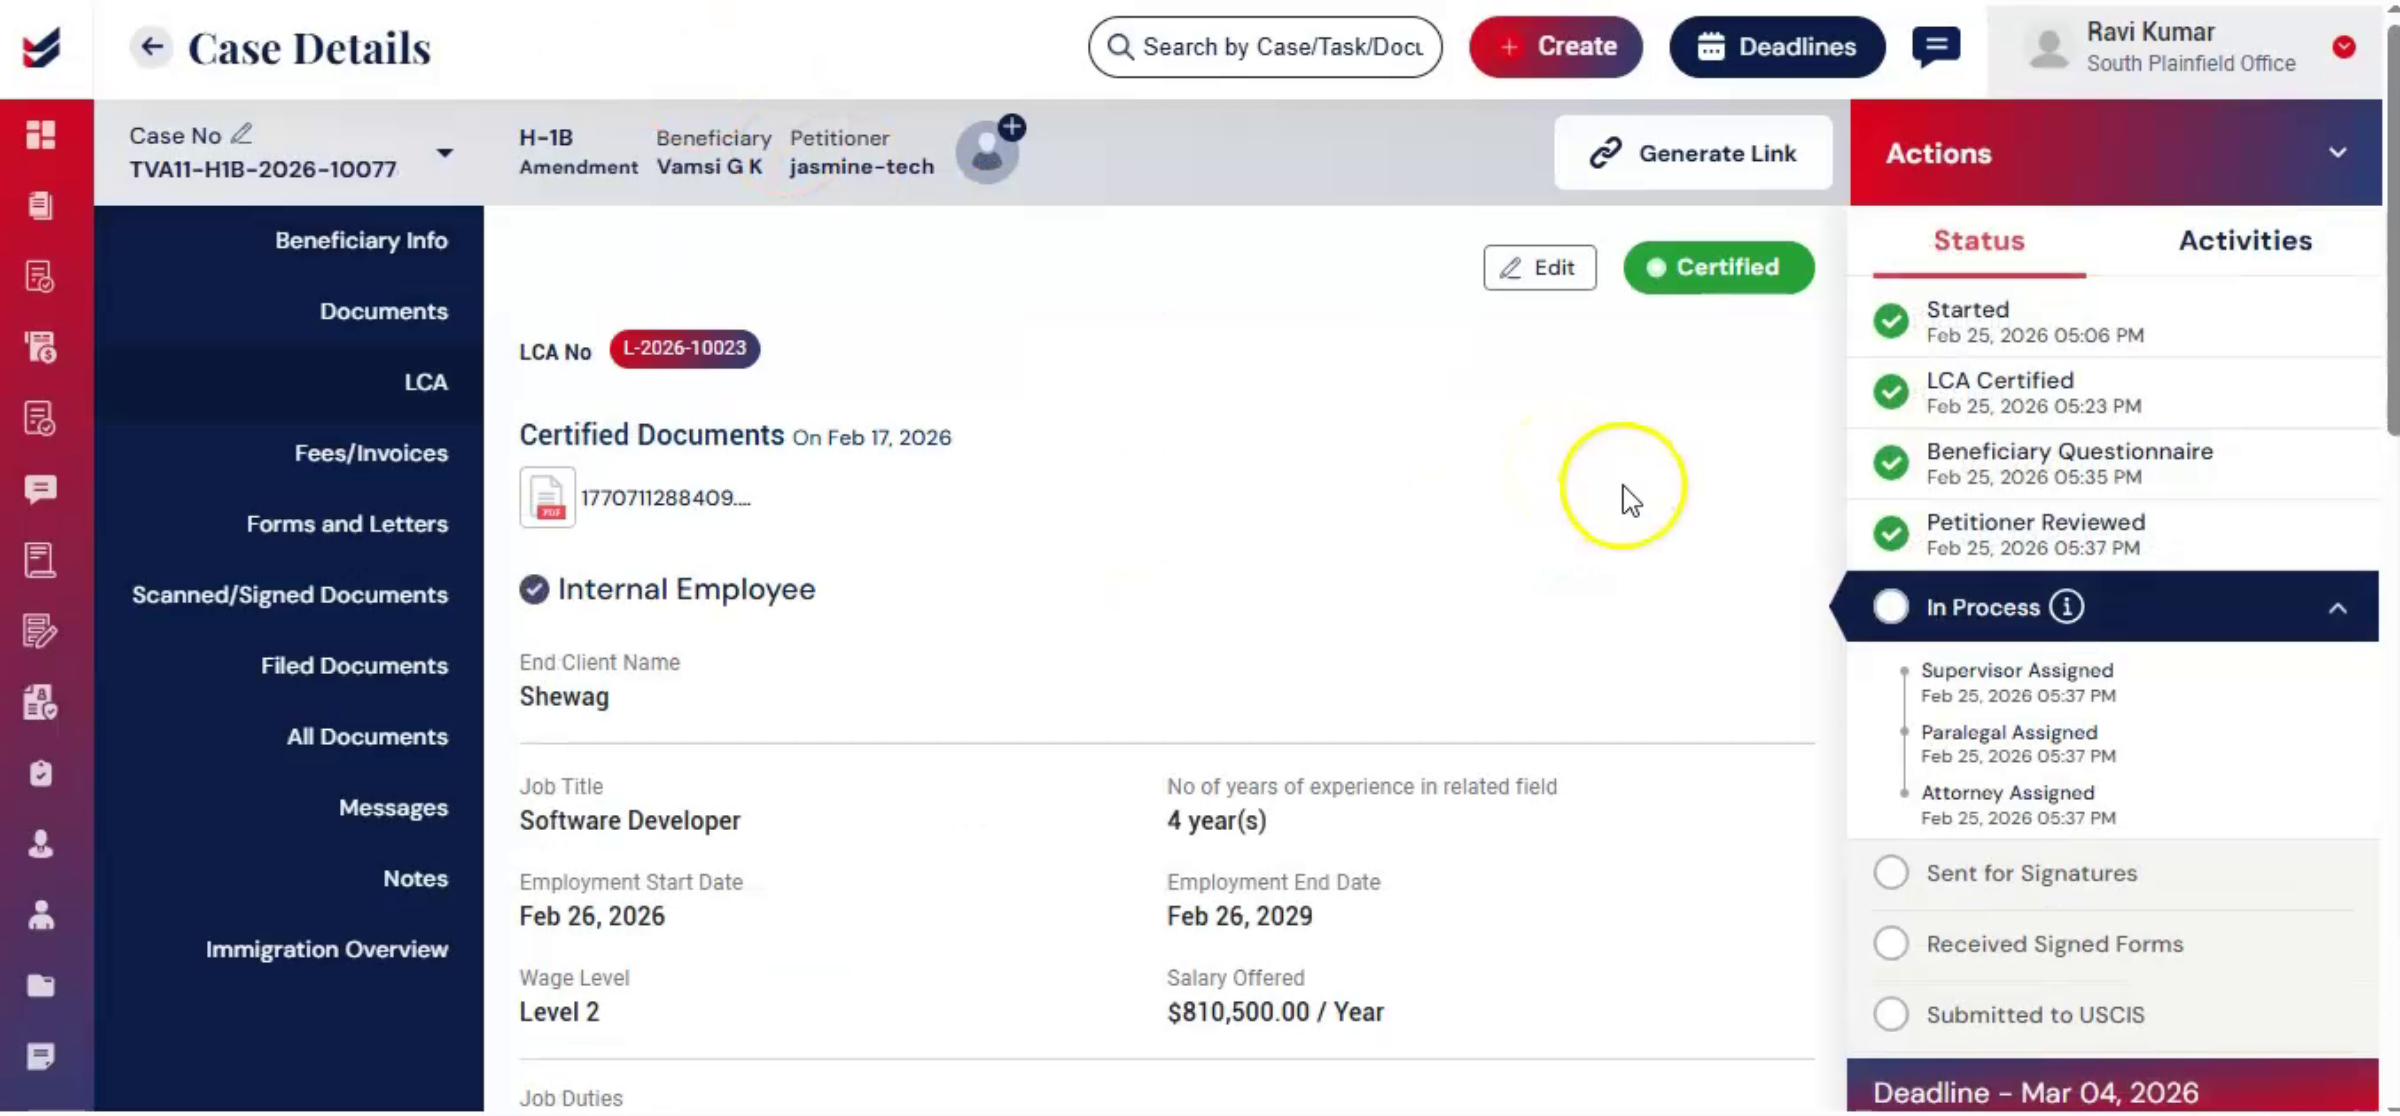
21. Assigning Responsible Attorney
 * click the image to view enlarged
From the Actions menu, select Assign Attorney.
22. Attorney Assignment And Logging
 * click the image to view enlarged
Choose the responsible attorney, add comments, and click Submit. Assigning an attorney establishes responsibility. ImmiBox logs this assignment and ensures workflow ownership.
23. Assigning Other Team Members
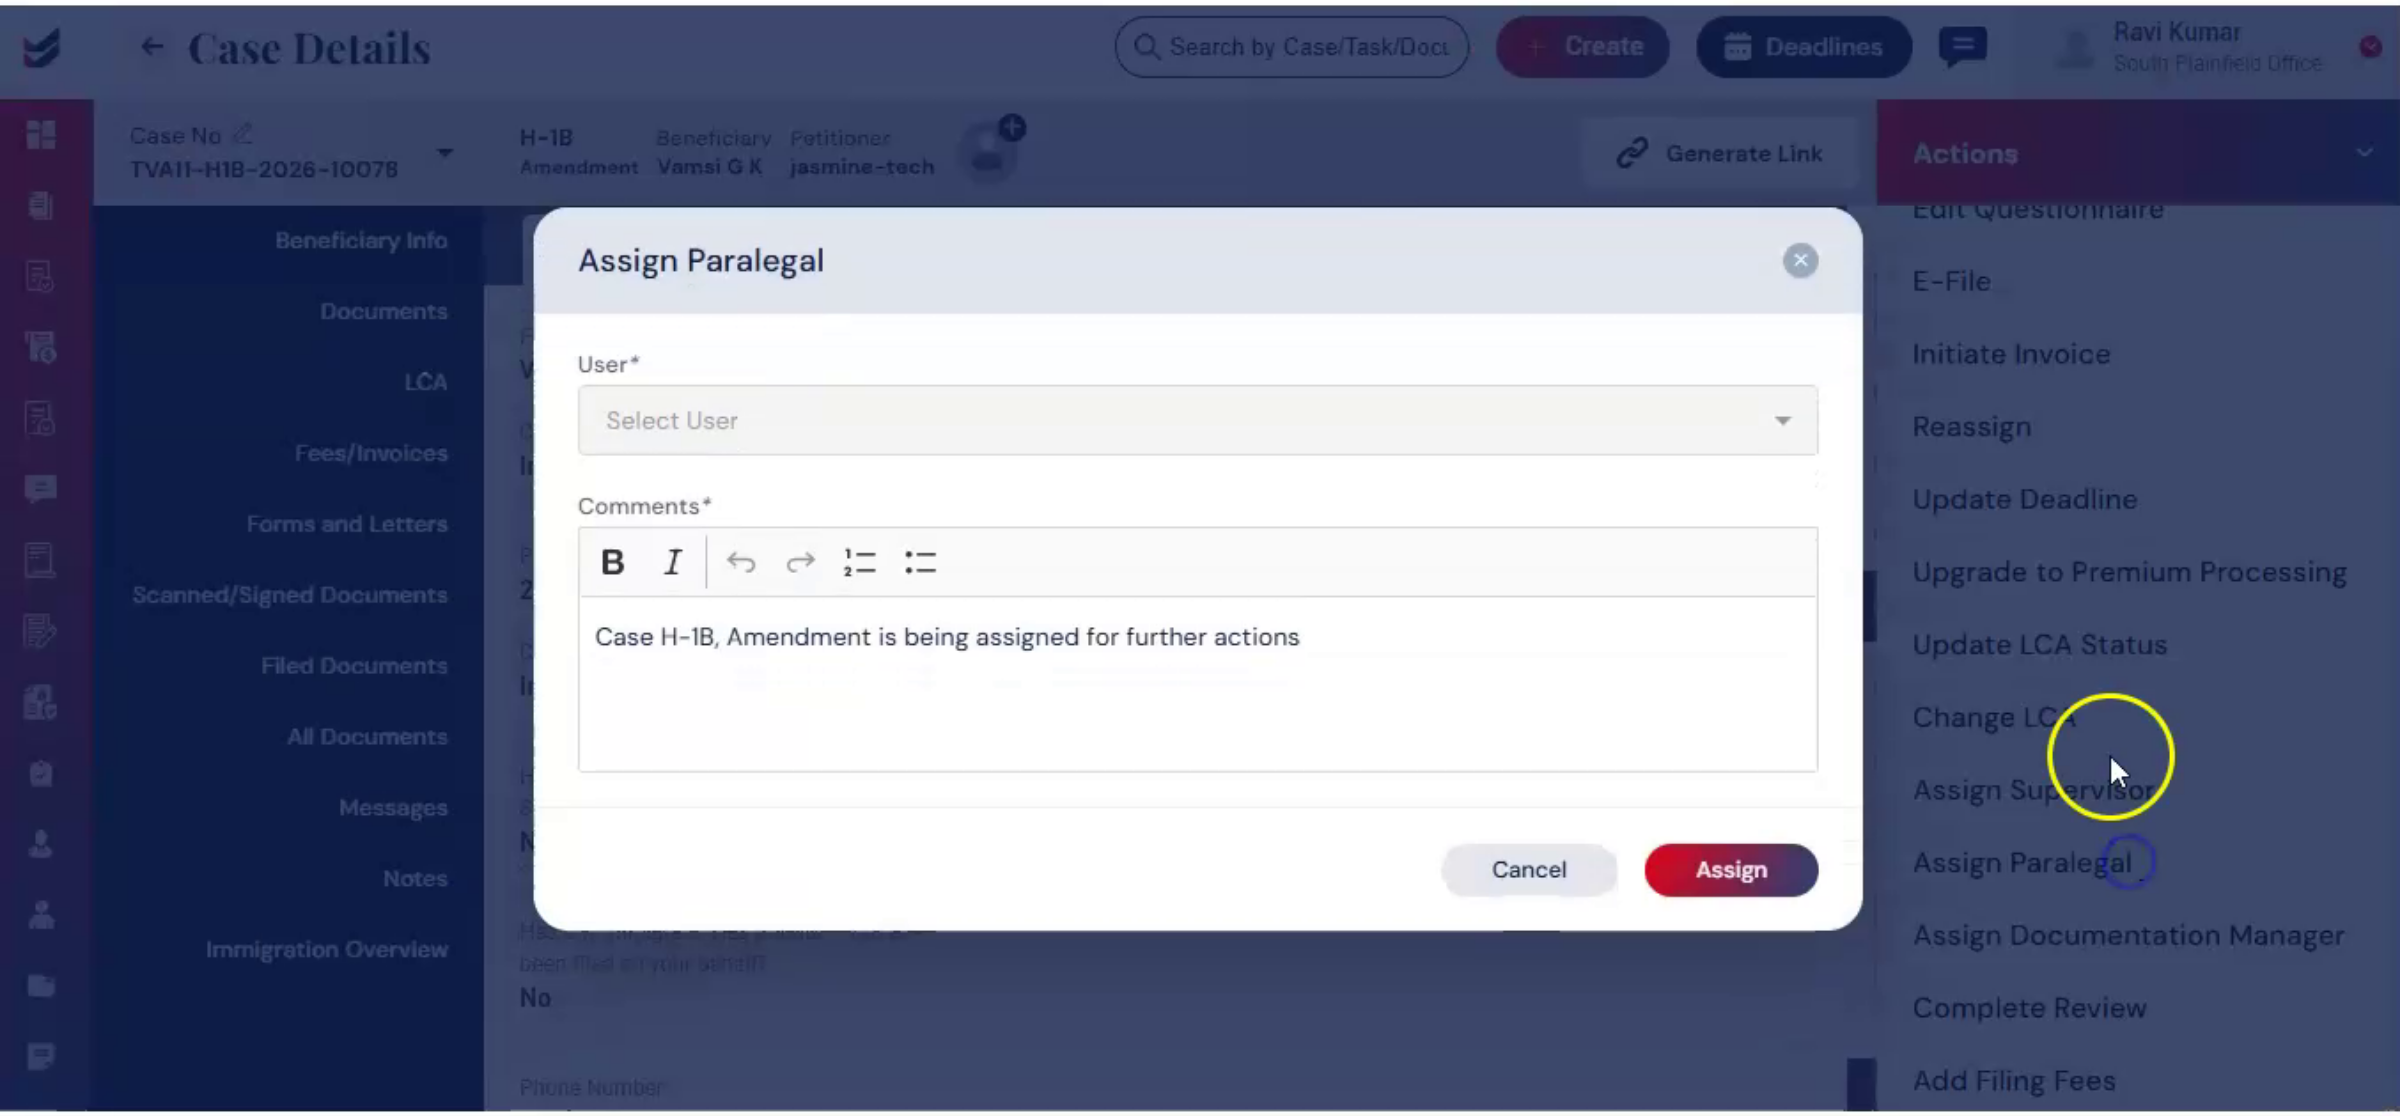 * click the image to view enlarged
You can also assign paralegals, supervisors, or other team members according to the default workflow or your workflow.
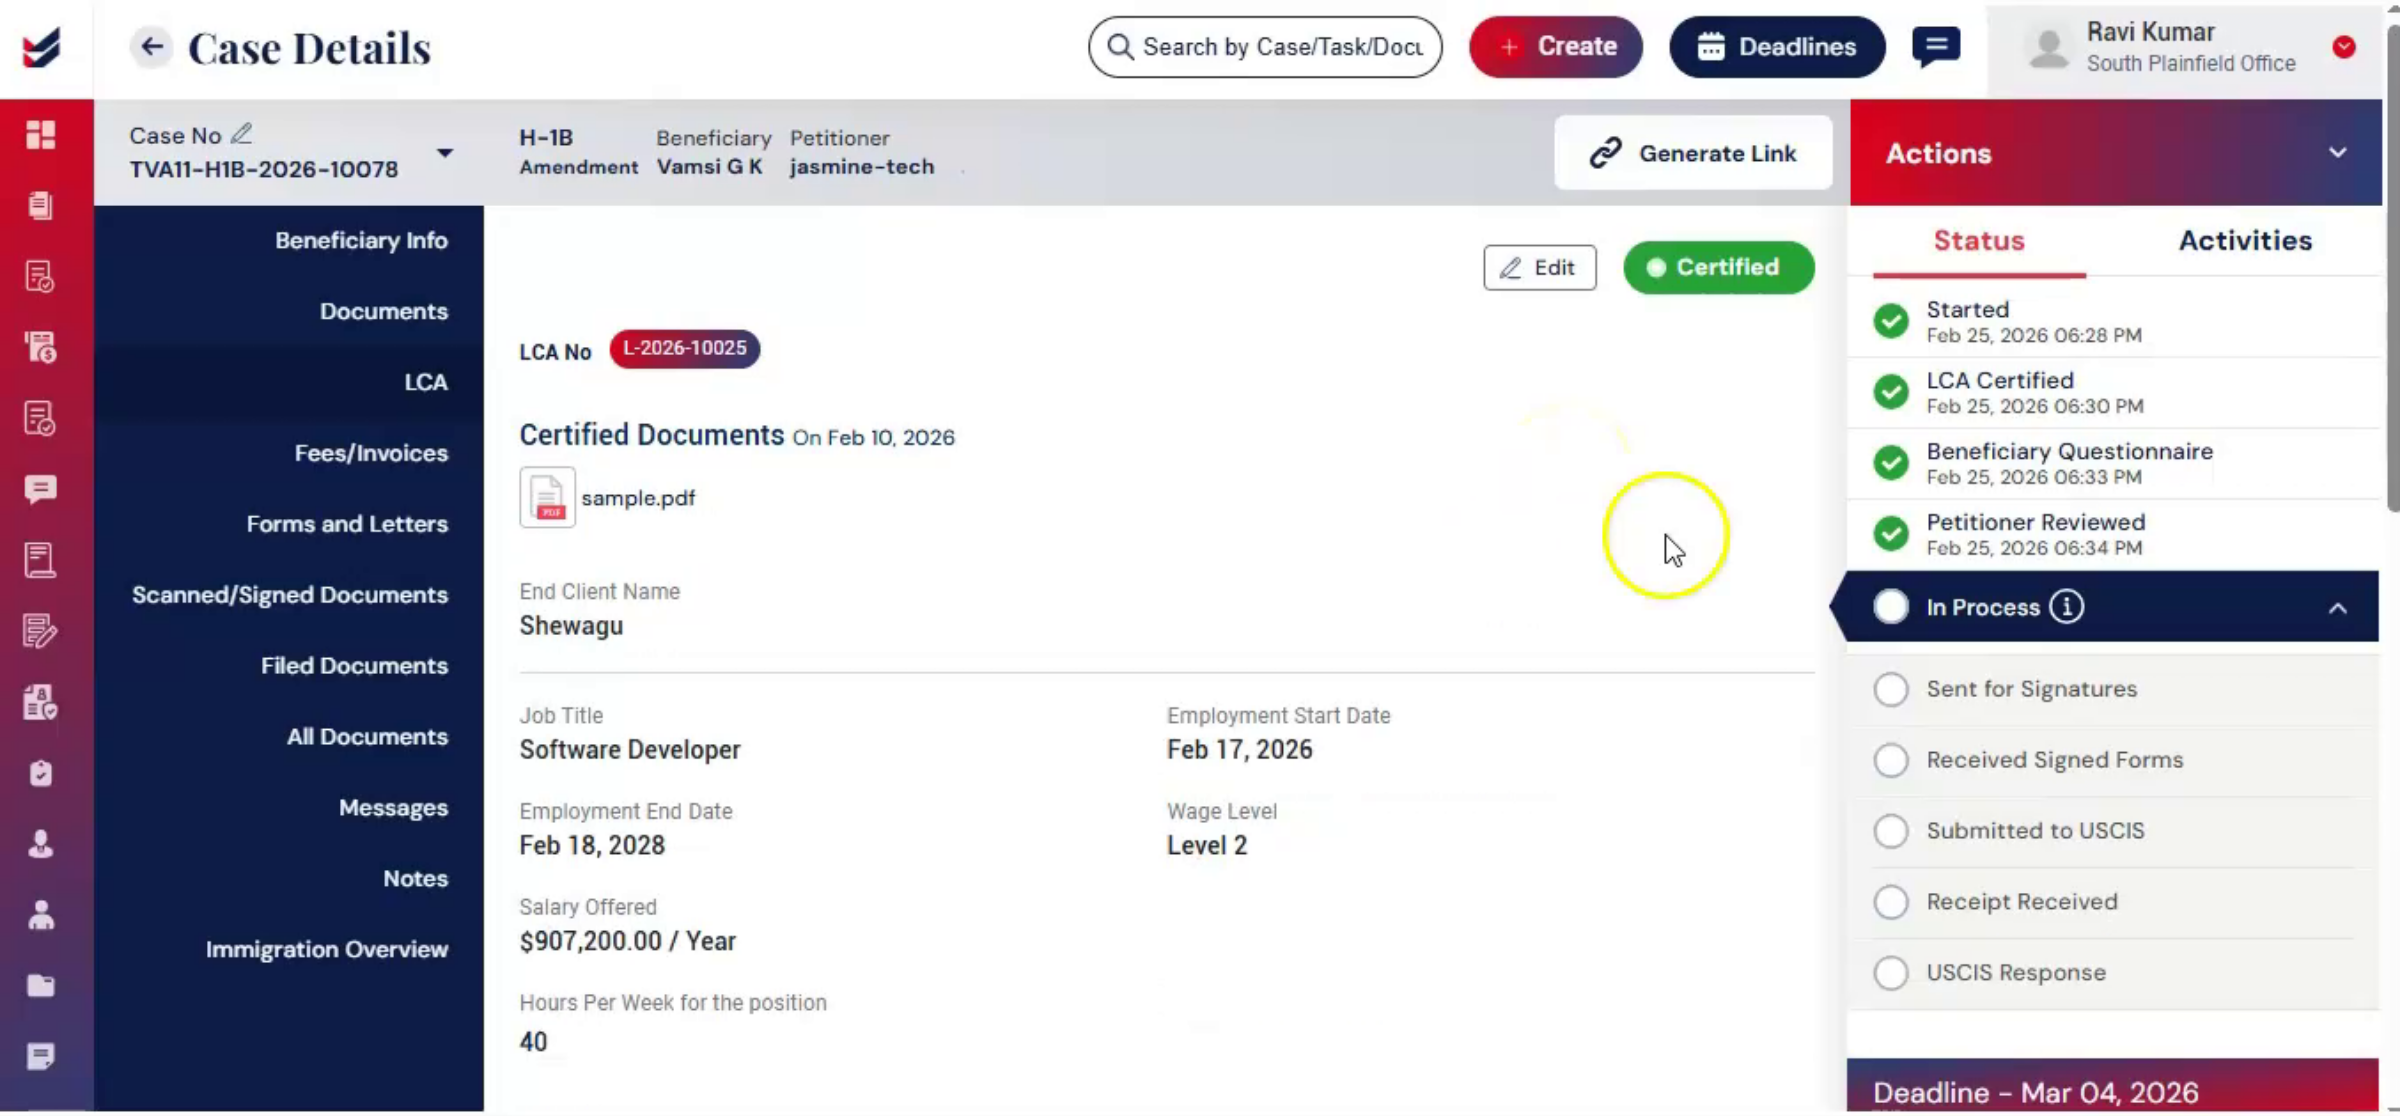
24. Final Internal Verification Step
 * click the image to view enlarged
As per the default workflow, before generating forms, the case undergoes final internal verification. From Actions, select Complete Review.
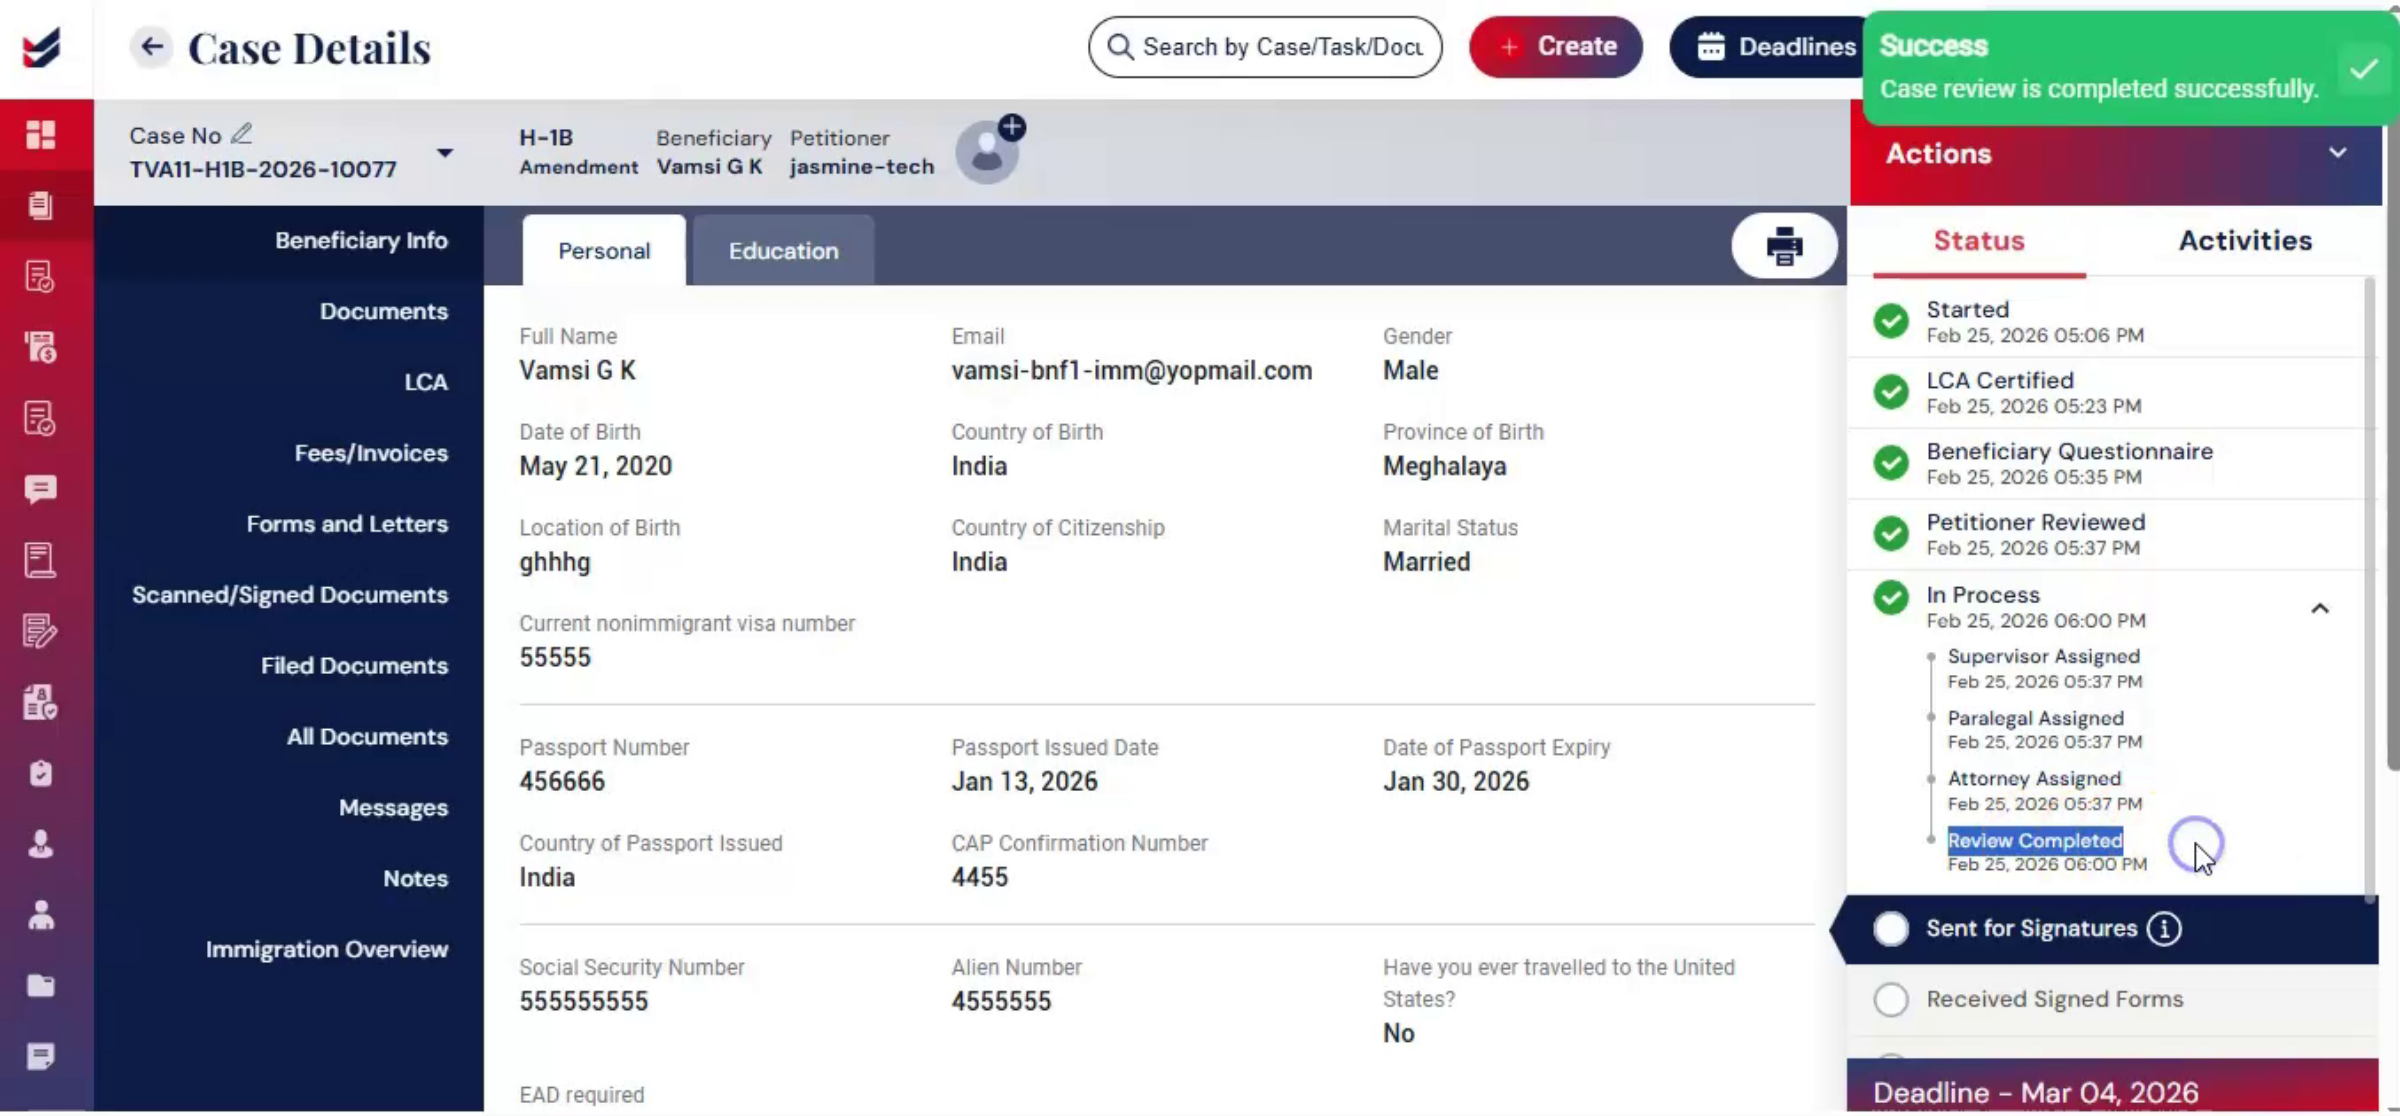
25. Review Notes And Audit Trail
 * click the image to view enlarged
Enter review notes and click Submit. This creates a structured approval checkpoint, ImmiBox, records review activity, creating an internal audit trail to support compliance and quality control.
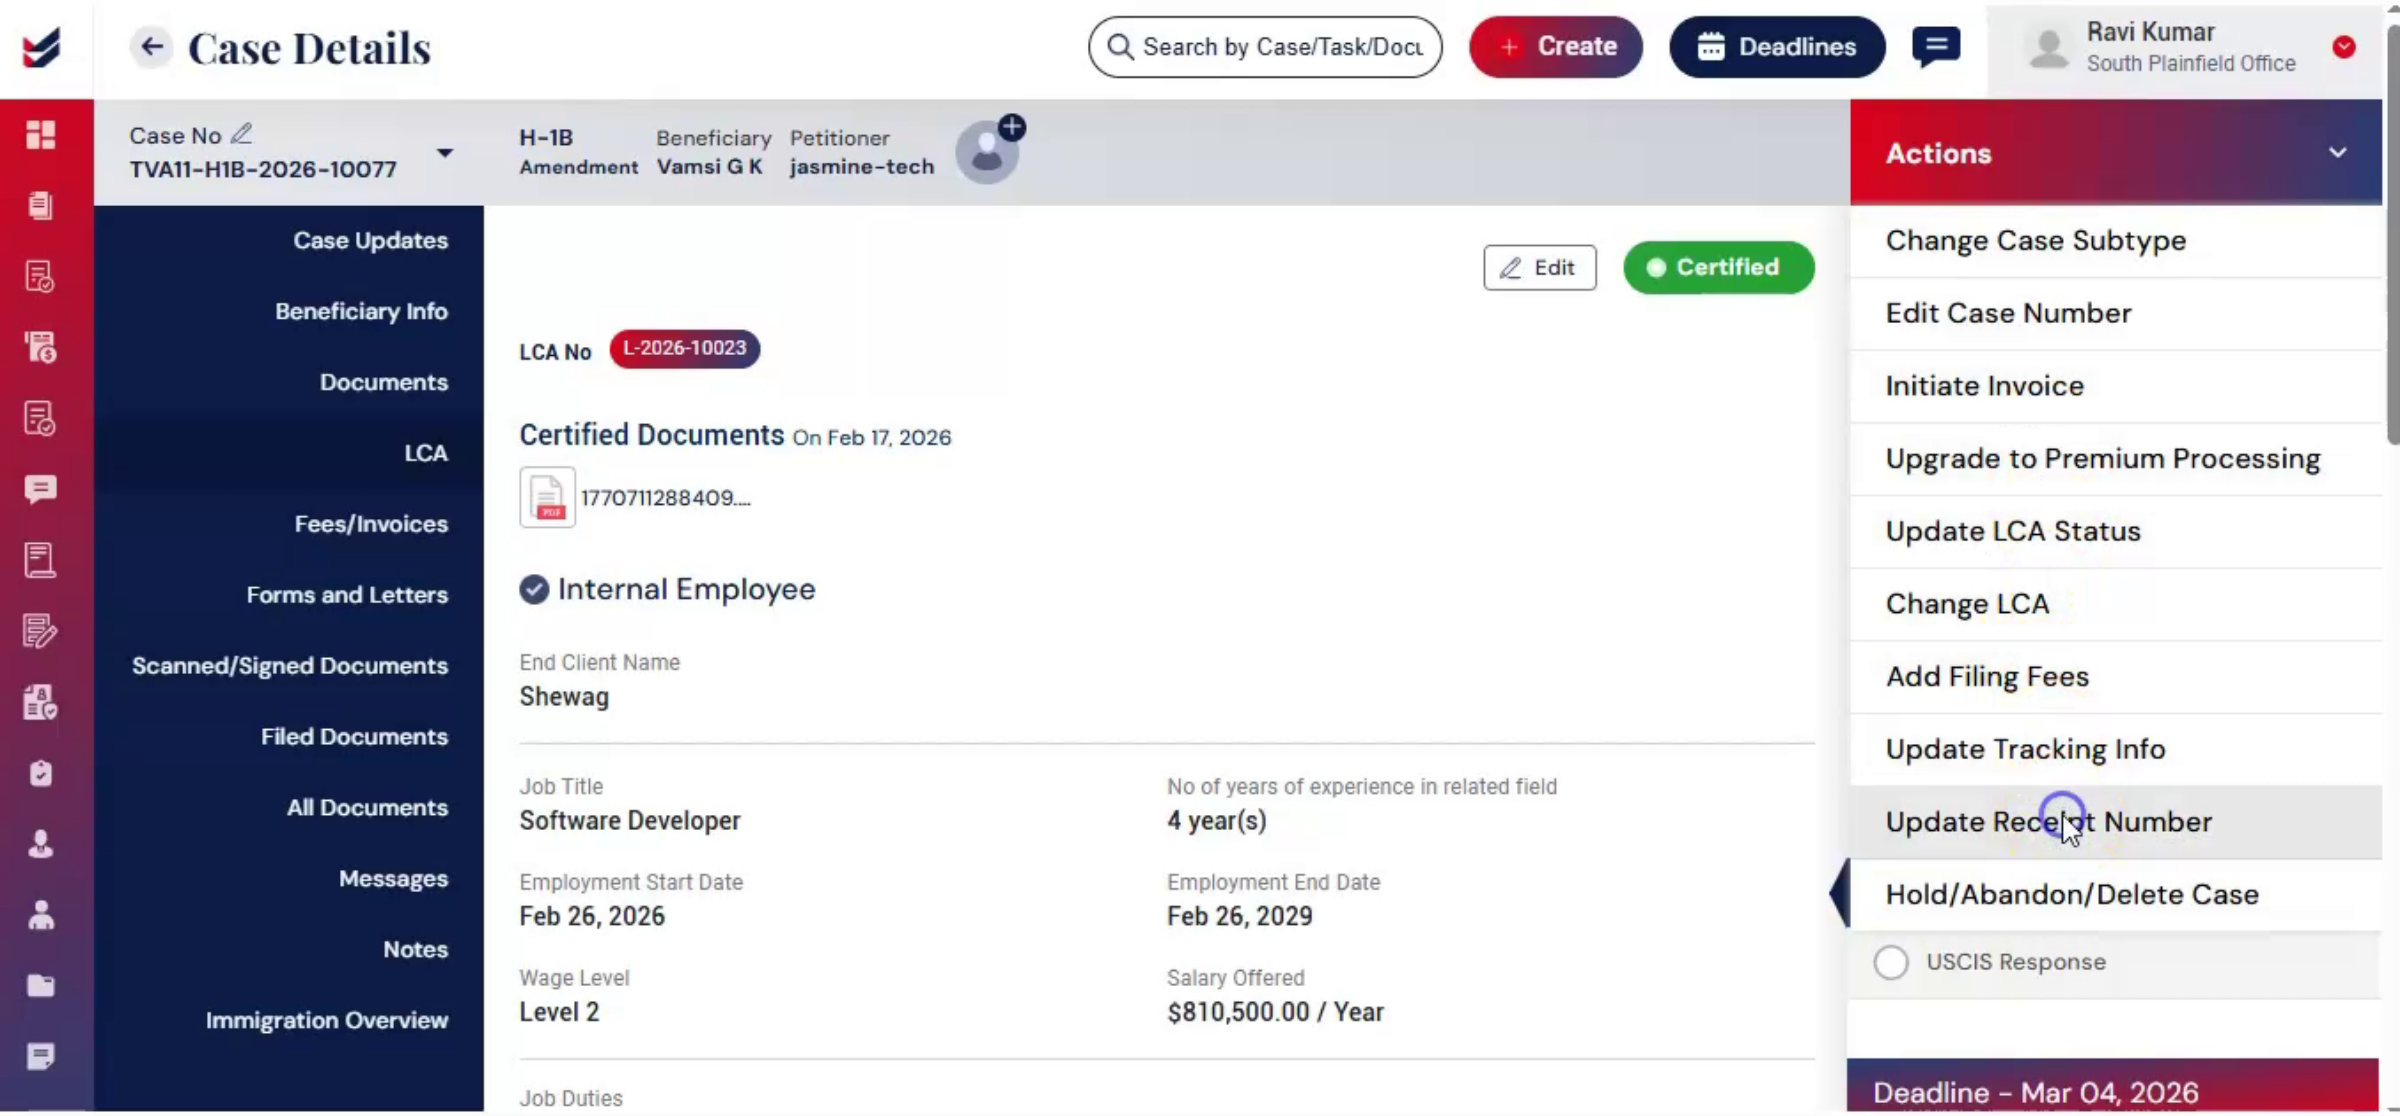
26. Changing Case Subtype Option
 * click the image to view enlarged
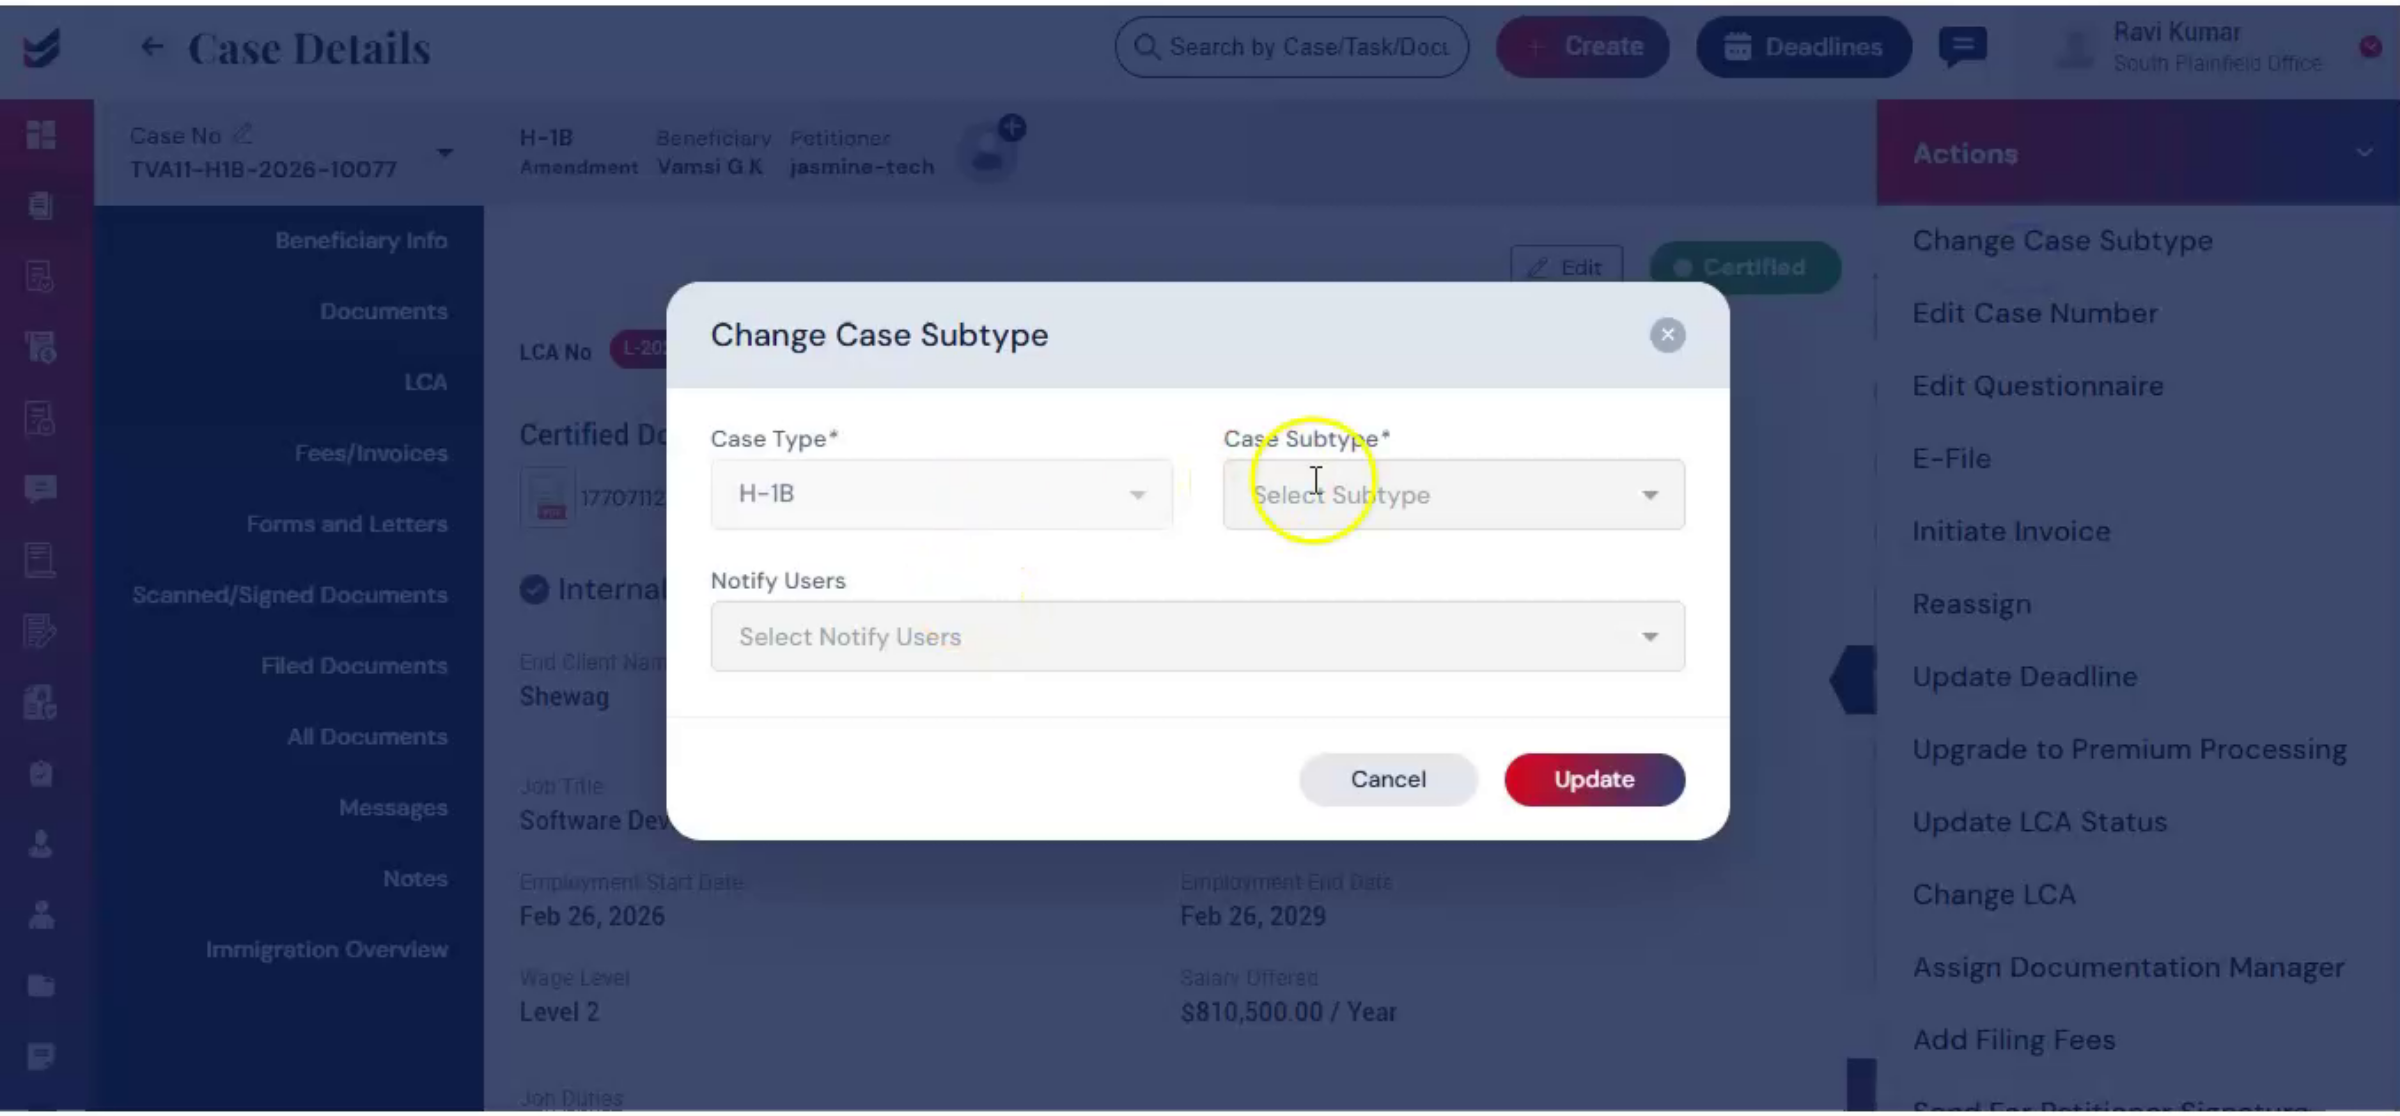
At this stage, you can also change the case subtype if necessary. From Actions, select Change Case Subtype.
27. Updating Case Subtype And Notifications
 * click the image to view enlarged
Choose the new subtype in the dialog box. Select Users to Notify and click Update.
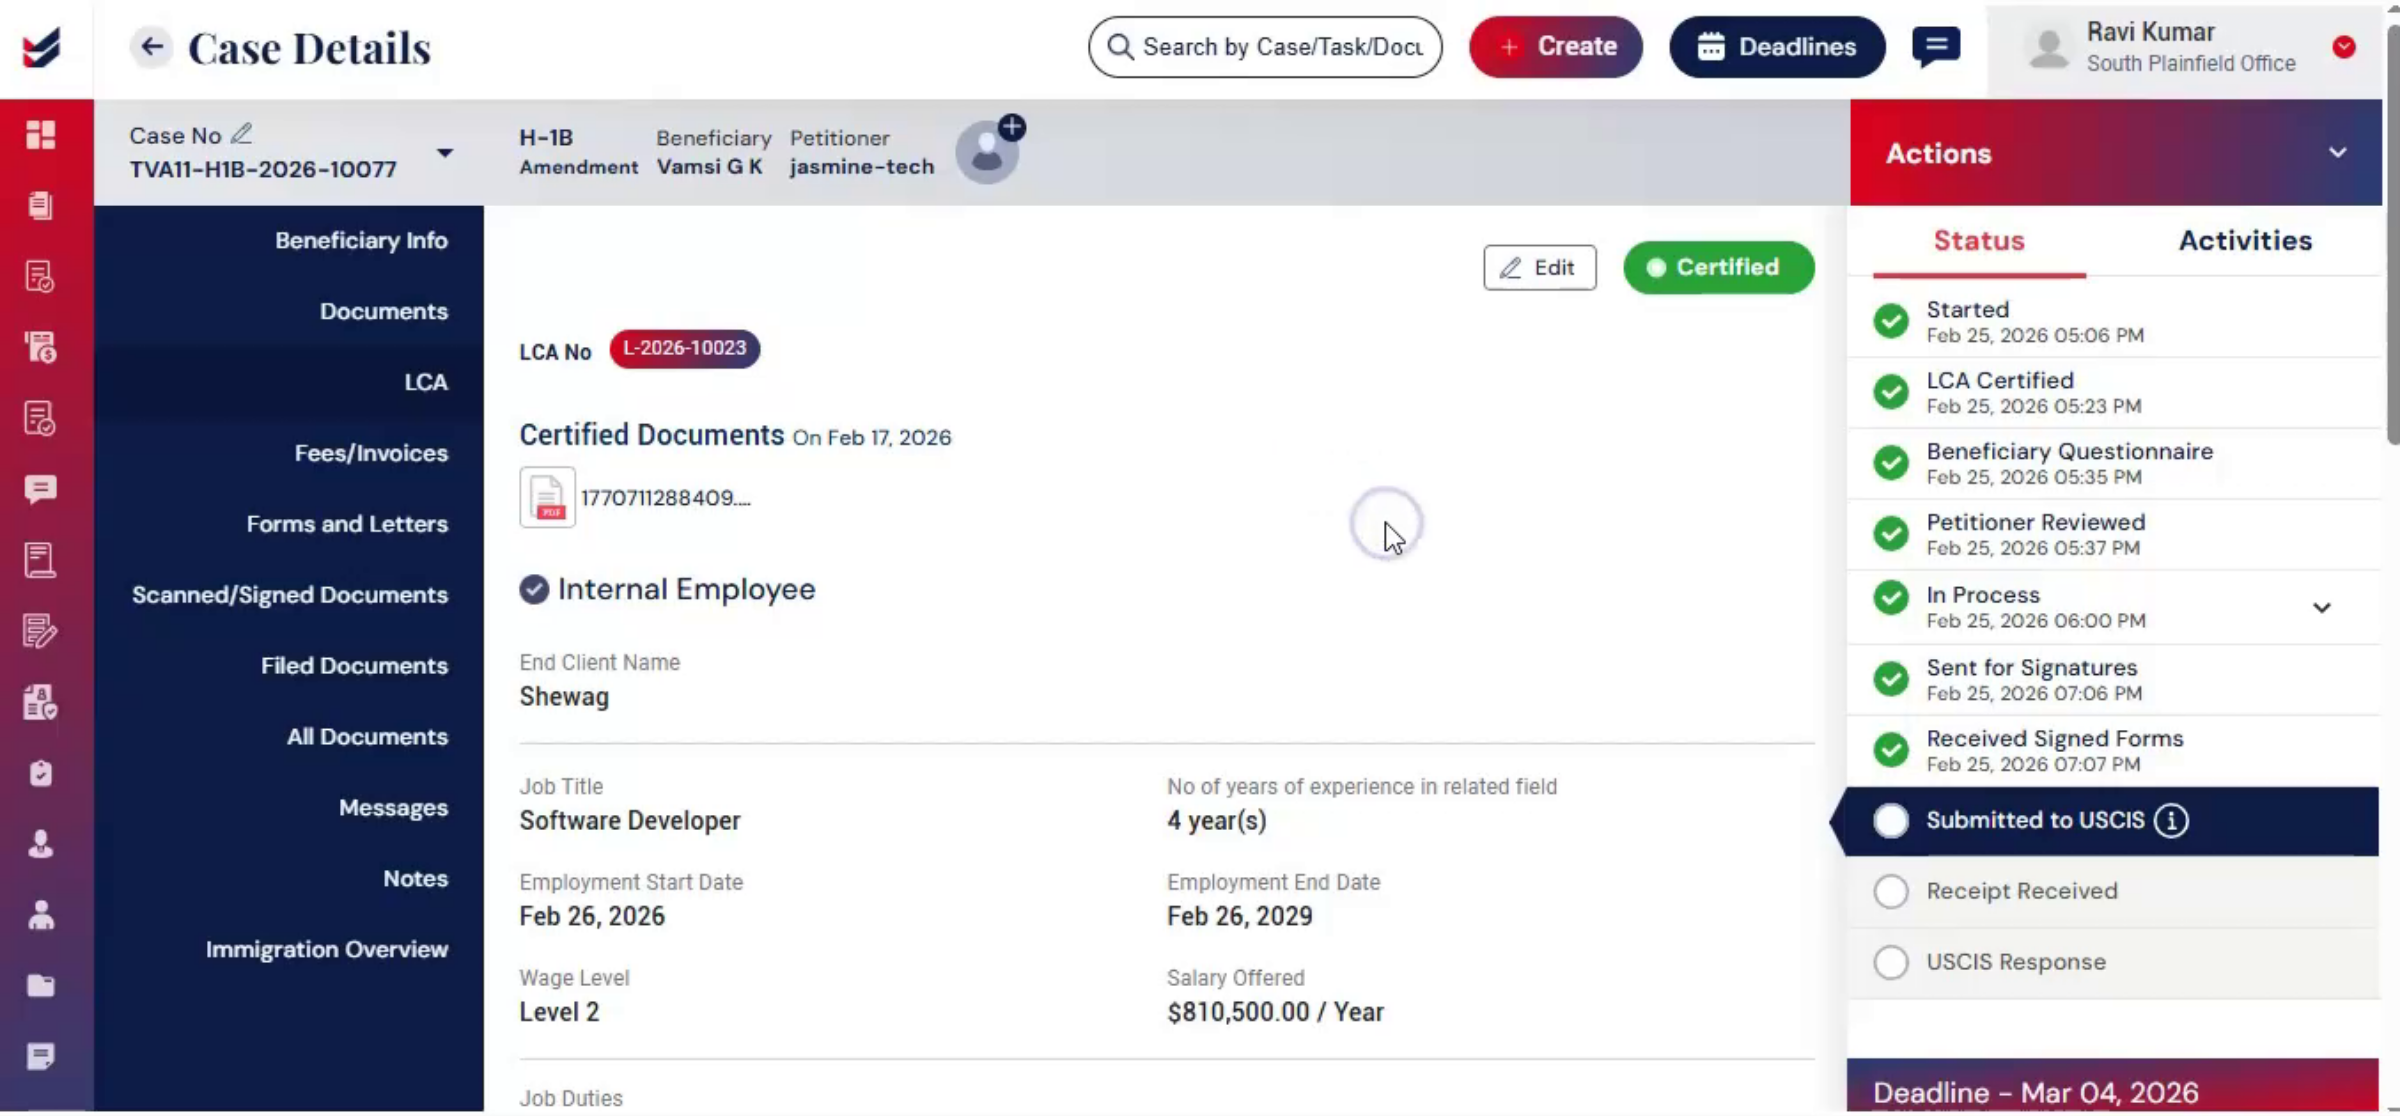
28. Editing LCA Details
 * click the image to view enlarged
You can also access the LCA from the left panel to edit any details. Click Edit, make changes, and click Update.
29. Accessing Forms And Letters
 * click the image to view enlarged
Next, click Forms and Letters on the left-hand side.
30. Generating Forms And Letters
 * click the image to view enlarged
In the Generate Forms and Letters dialog, select Courier Type, select Service Center, or choose Exclude. Select the required forms and letters. Click Generate.
31. Document Generation Benefits
 * click the image to view enlarged
The system prepares documents for review, significantly reducing manual, entry improving, accuracy, and ensuring consistency.
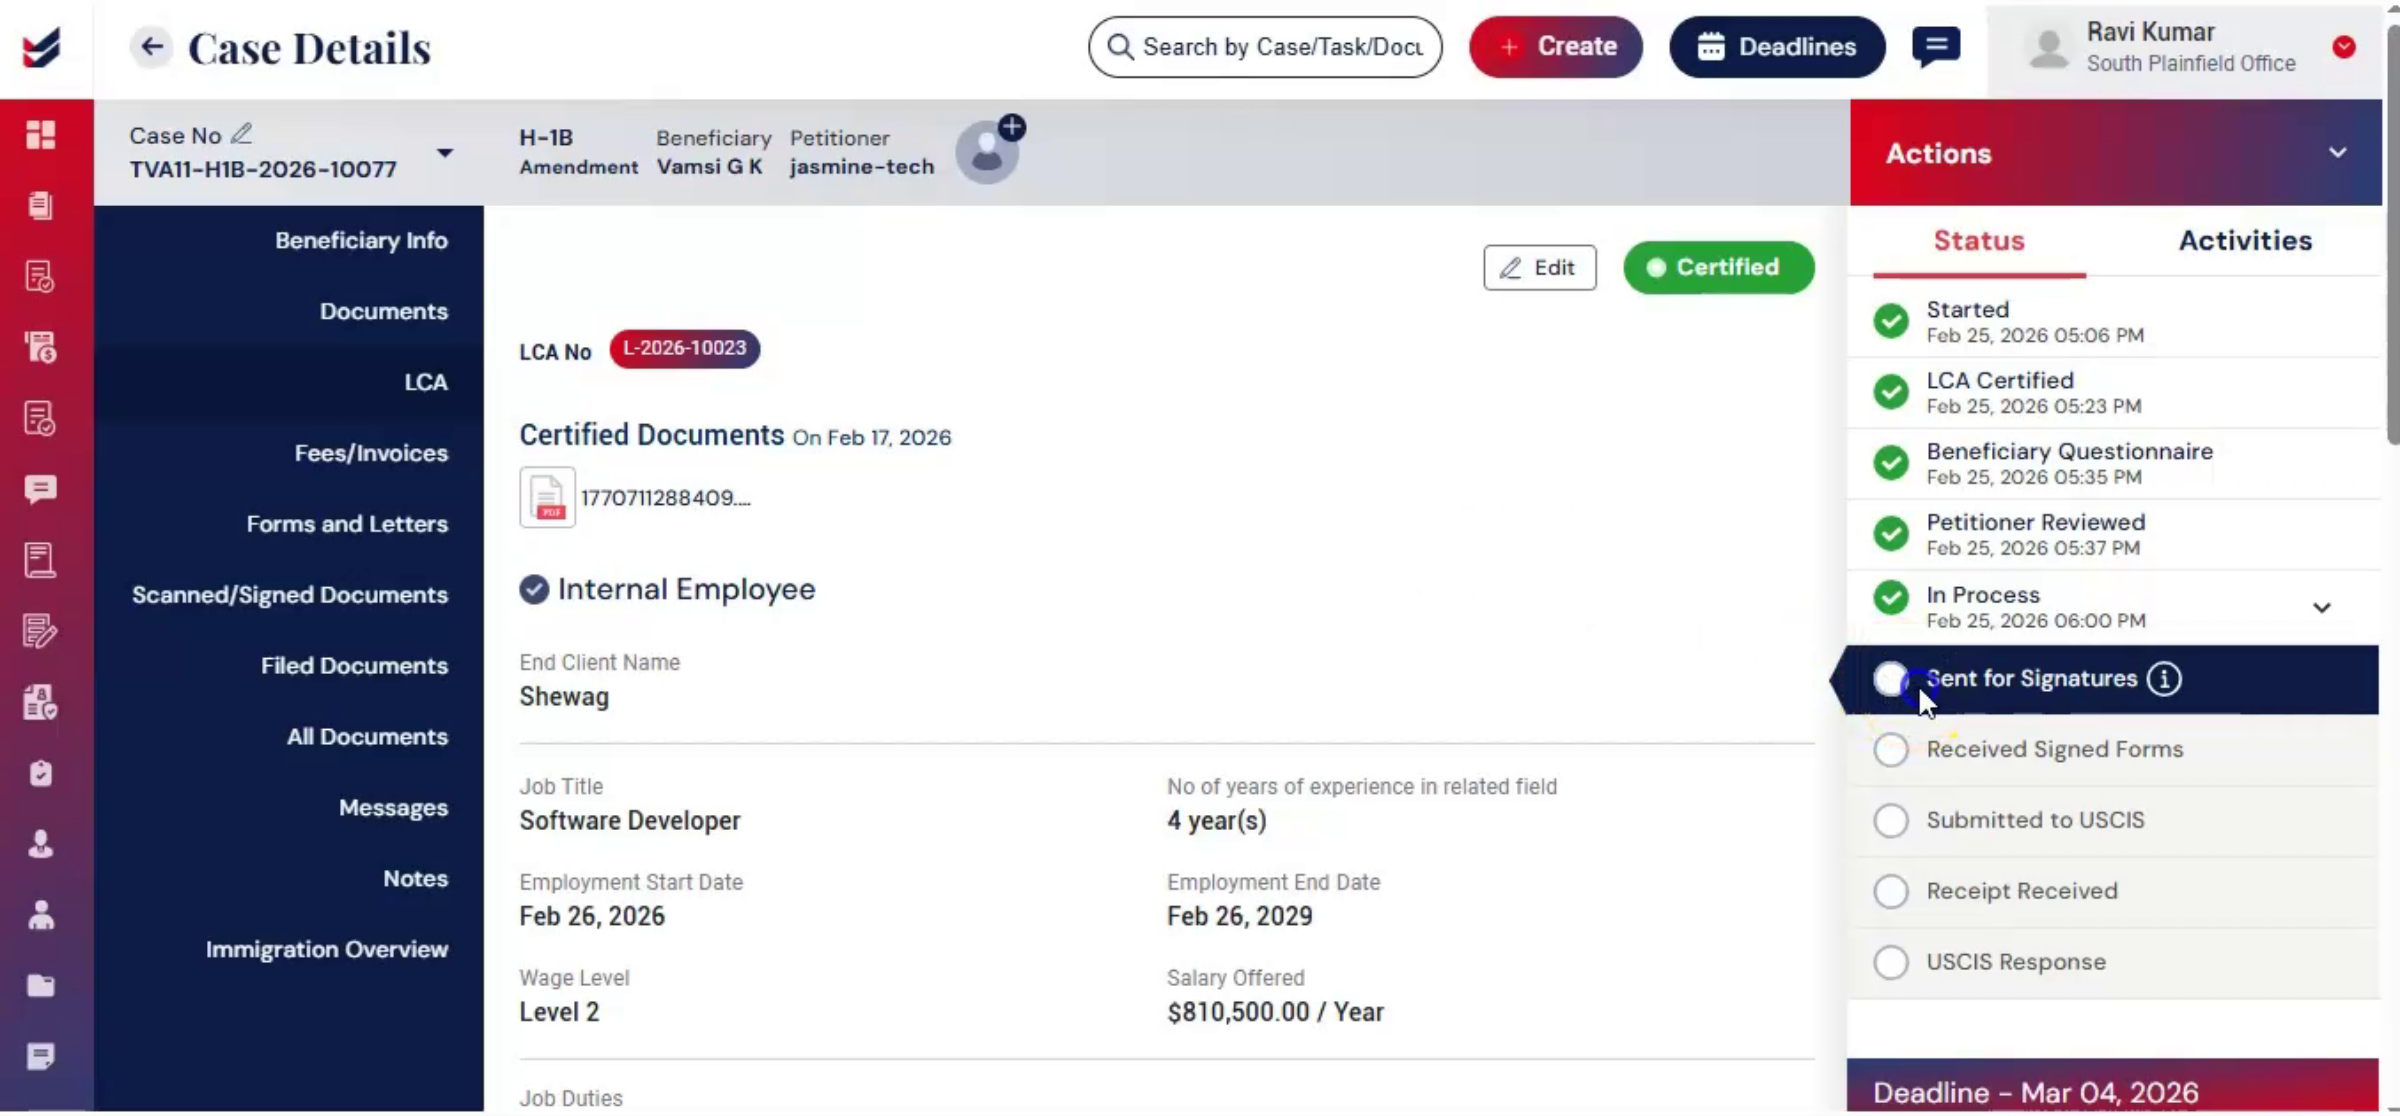
32. Sending Documents For Signature
 * click the image to view enlarged
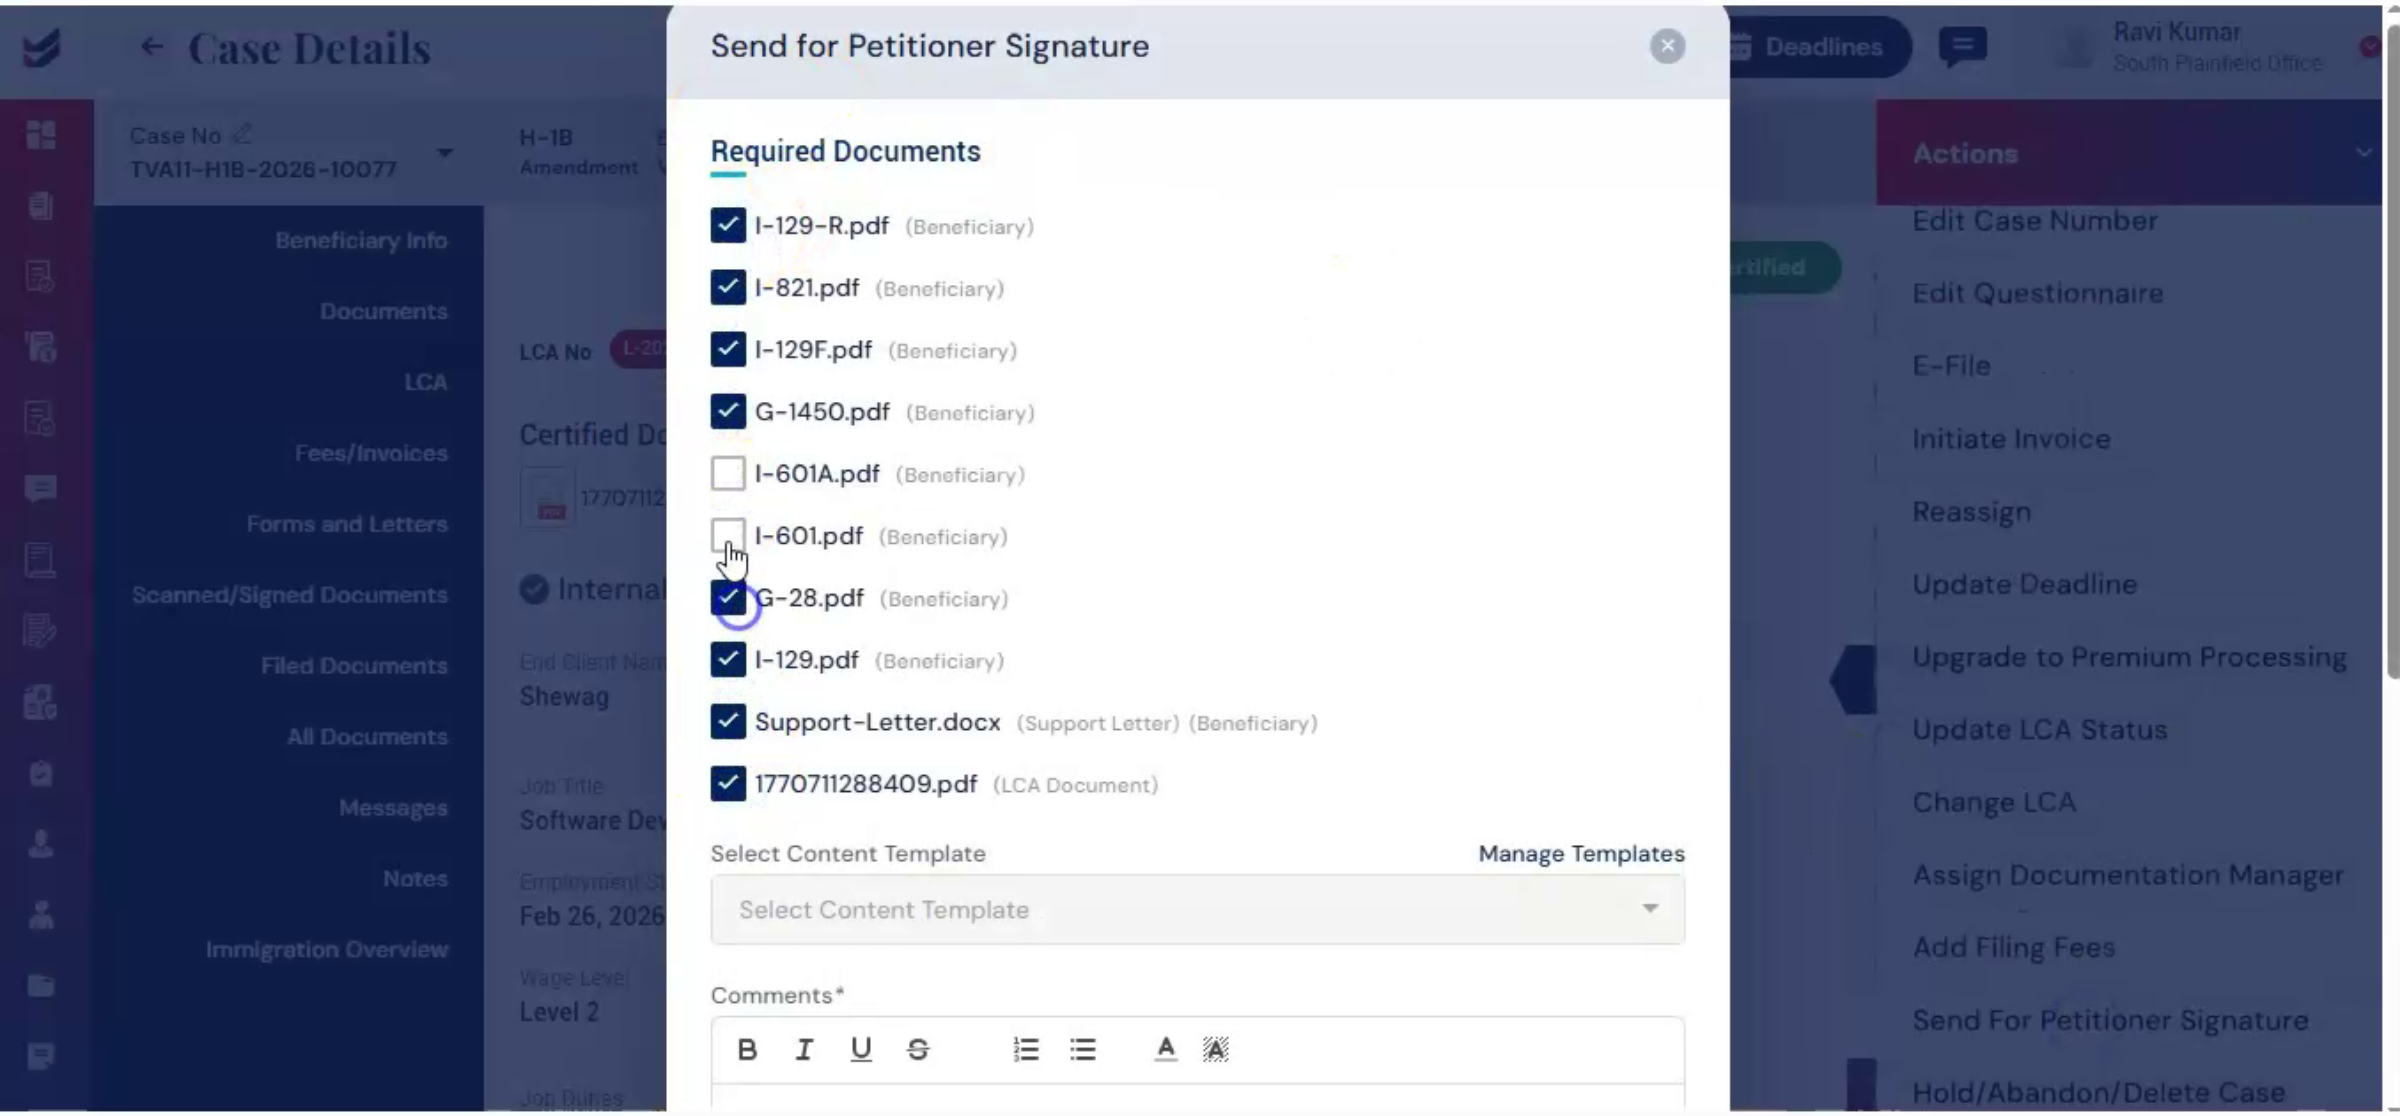
After document generation, the case moves to signature collection. From Actions, select Send for Petitioner Signature. Choose Documents requiring Signature.
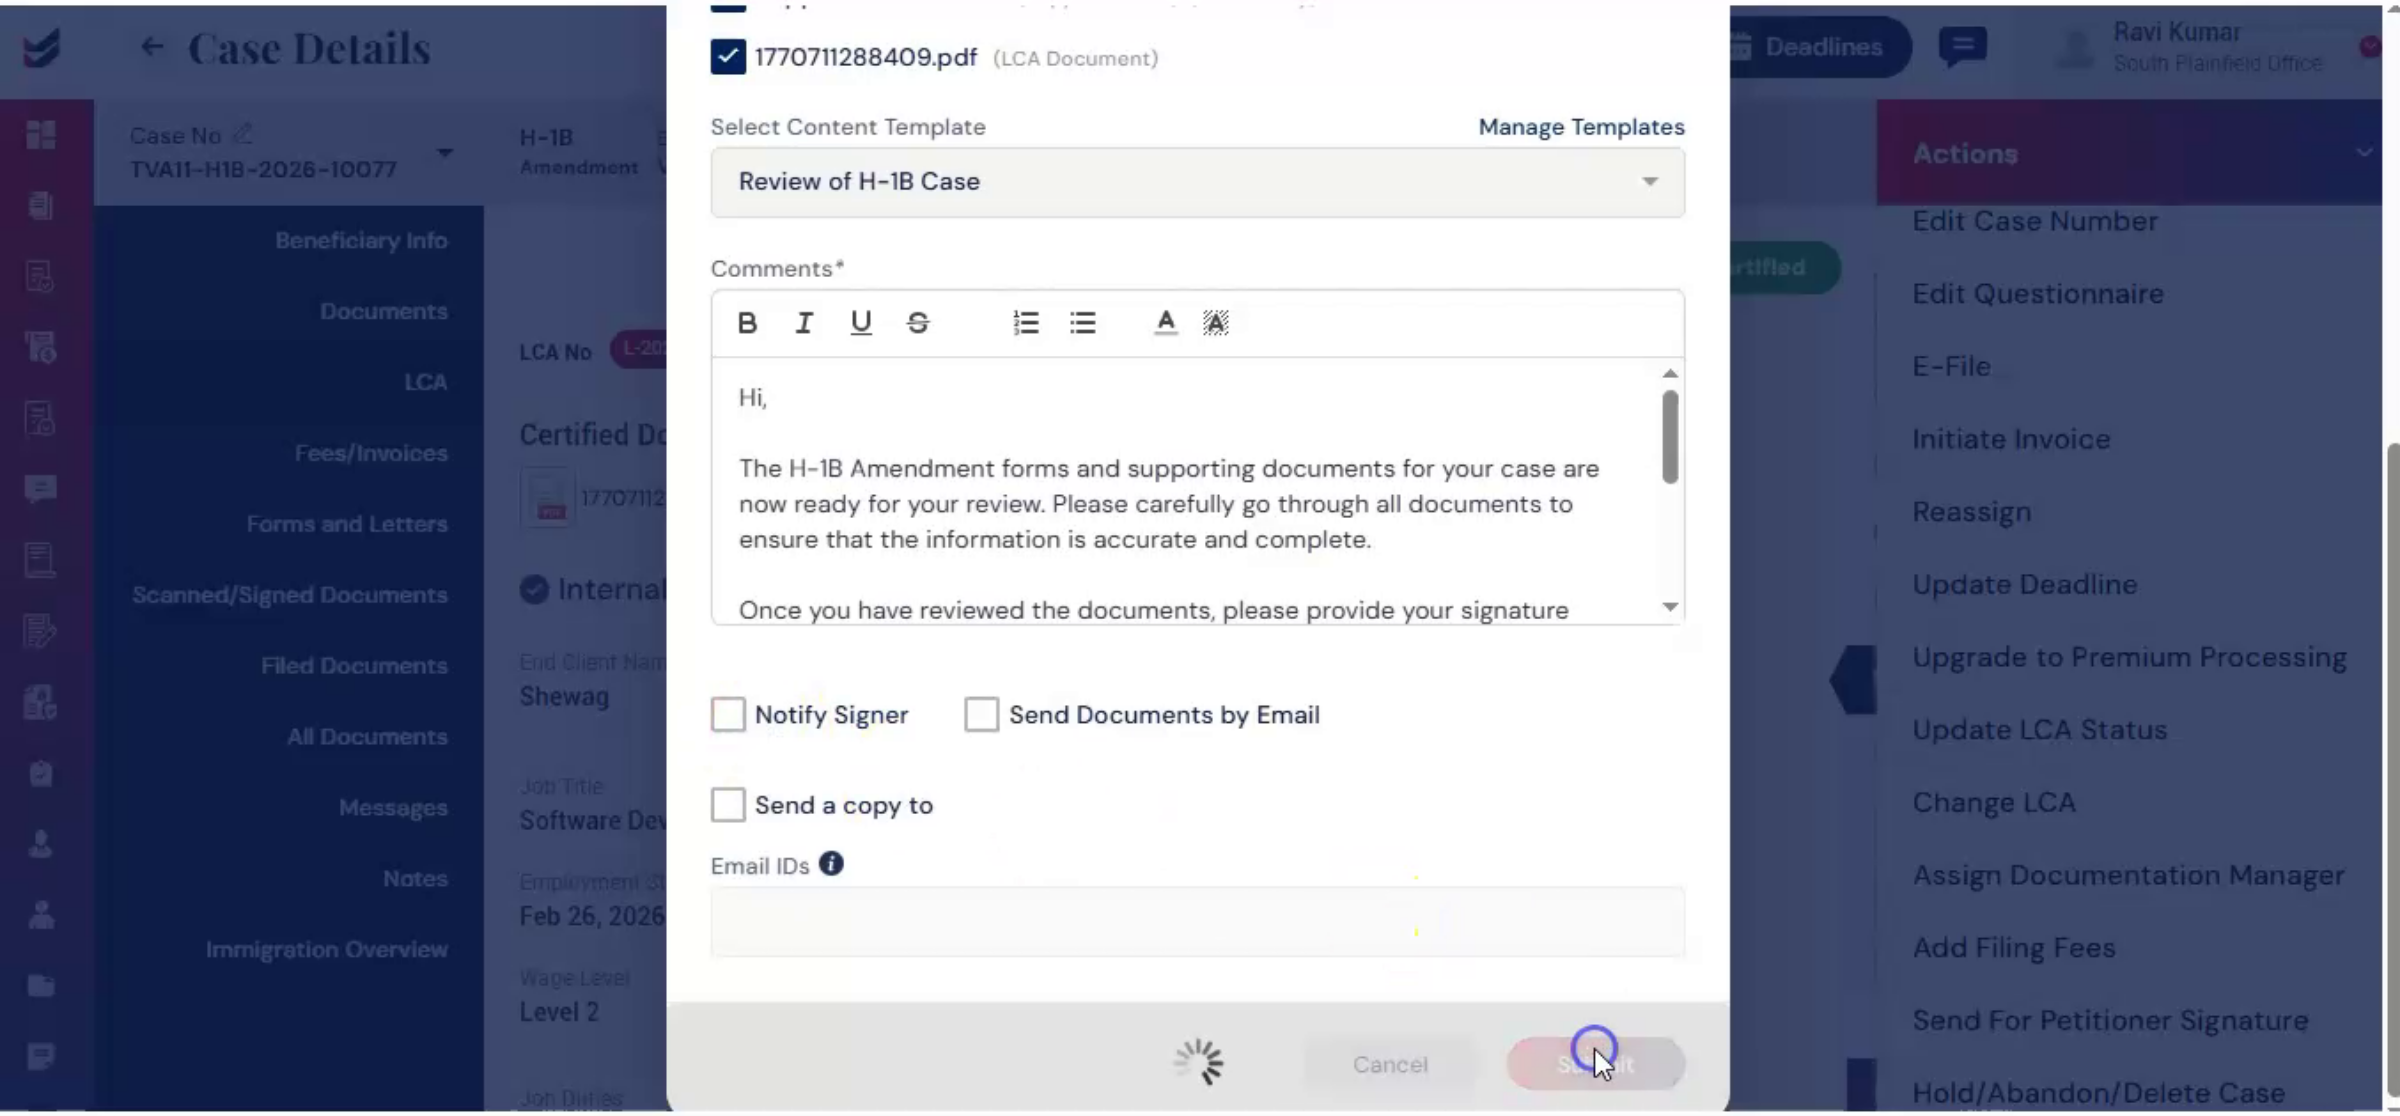
33. Managing Communication Templates
 * click the image to view enlarged
Next, select a content template. ImmiBox allows you to manage customized communication templates for consistent and professional messaging.
34. Enabling Email Notifications
 * click the image to view enlarged
You may enable the notify option to send an email alert to the petitioner.
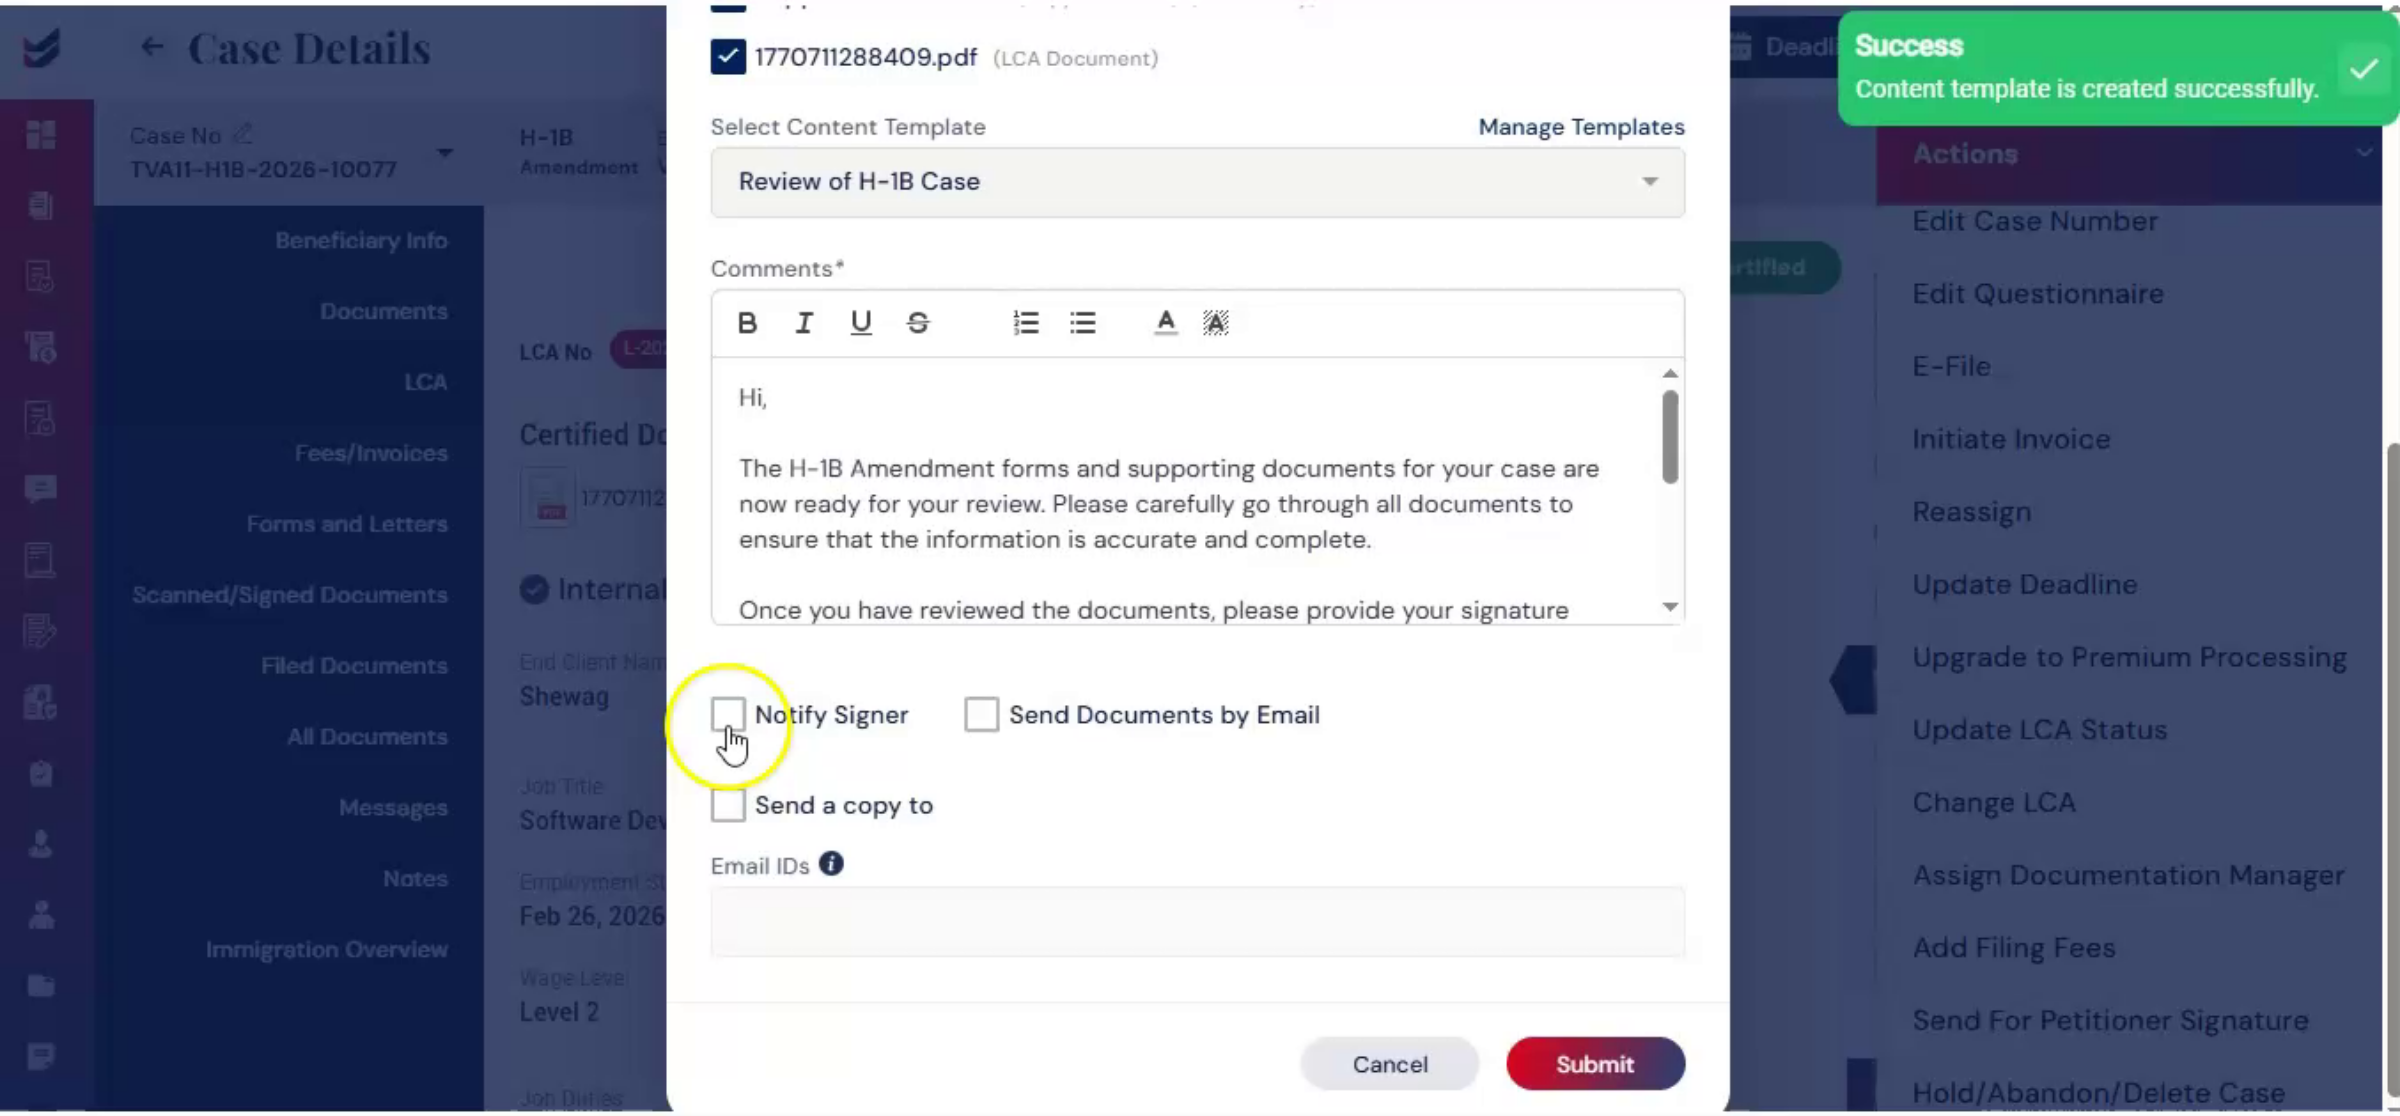
35. Sending Documents By Email Options
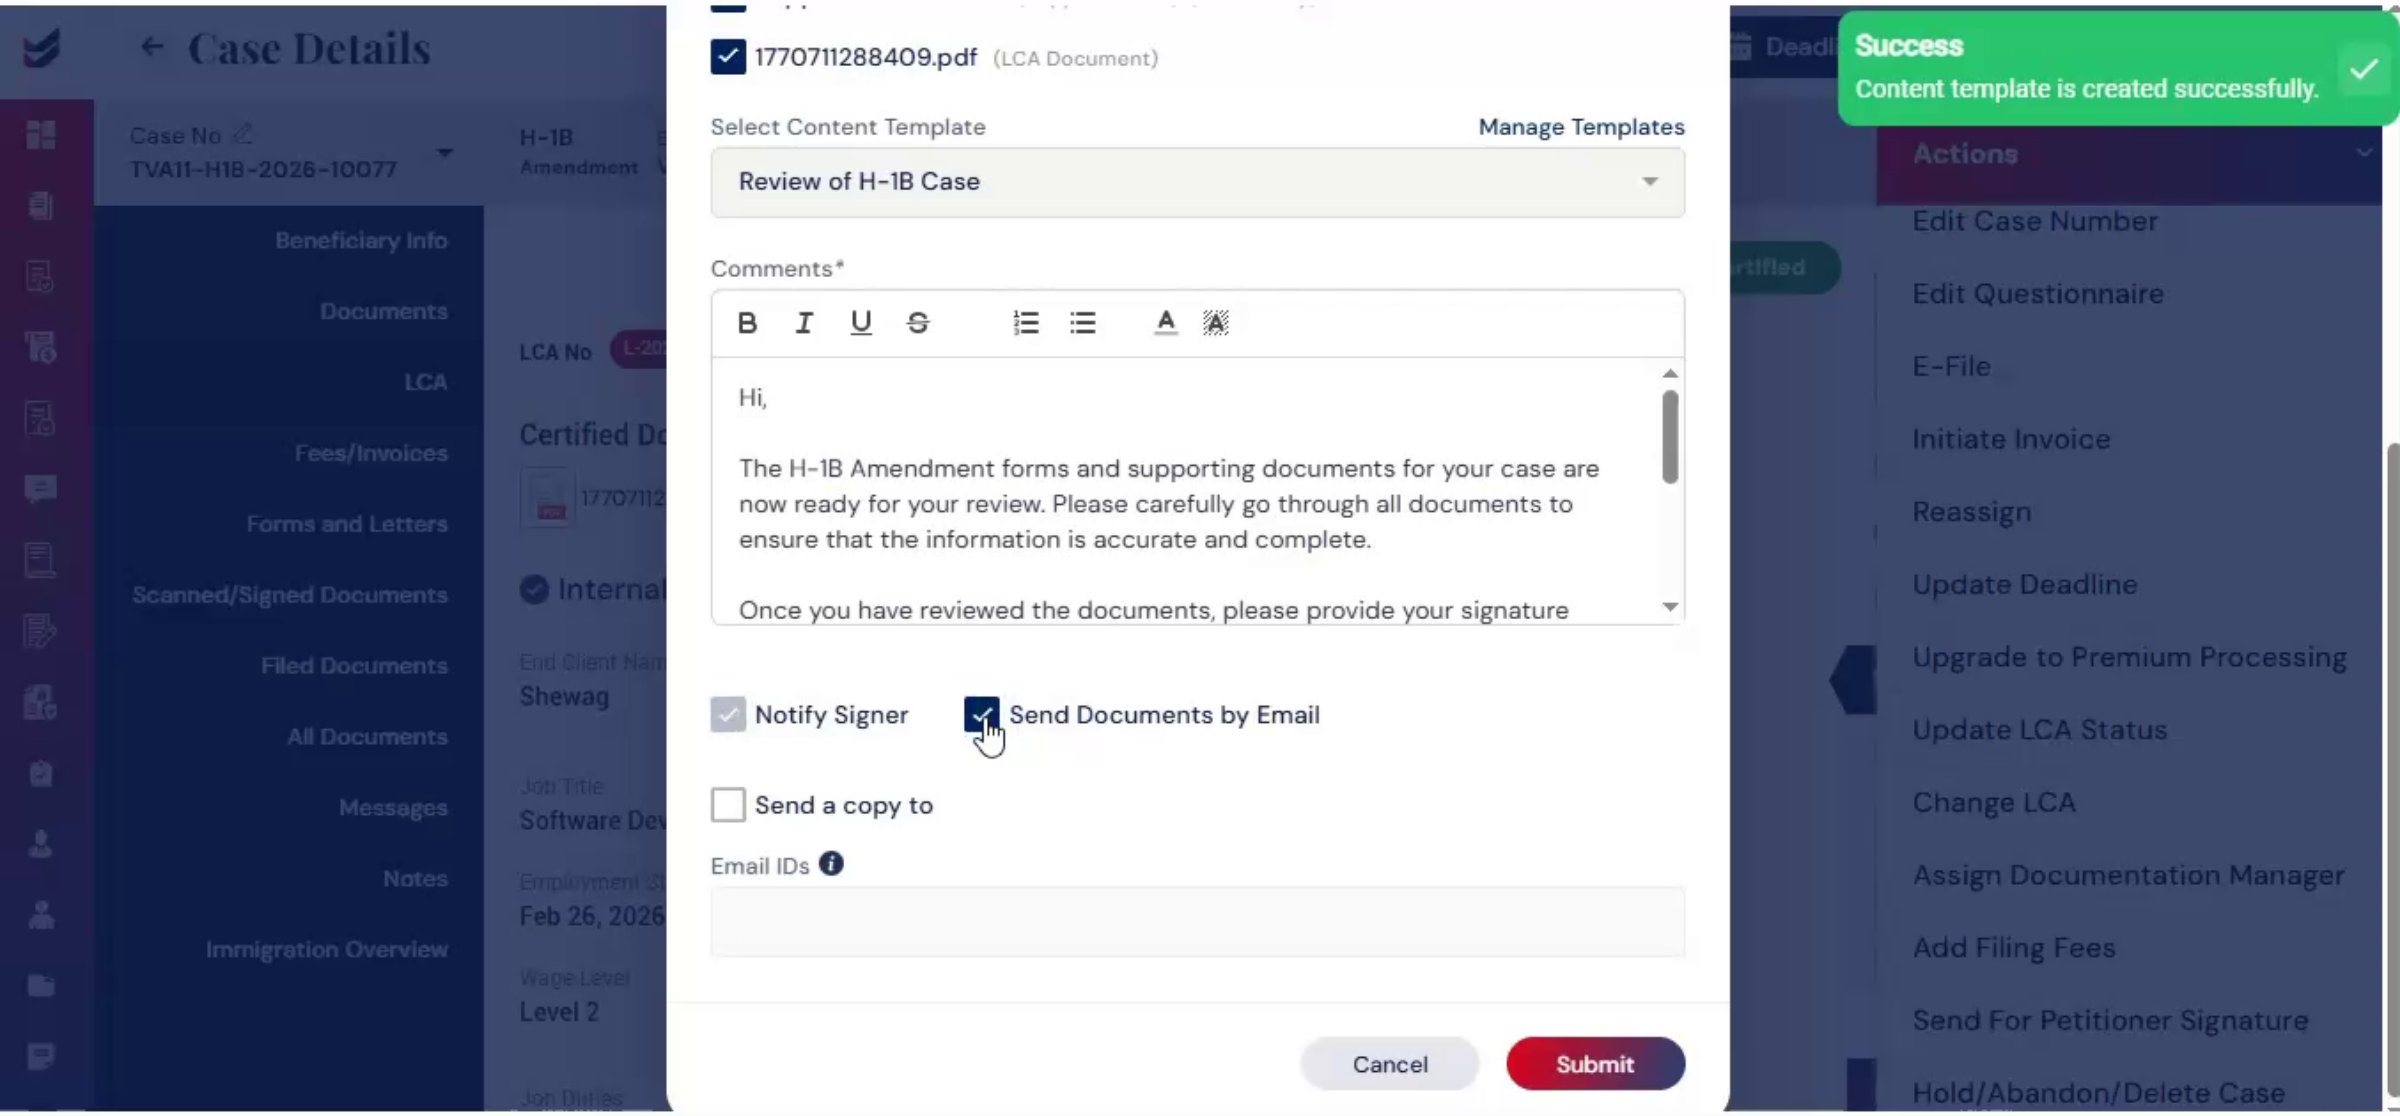 * click the image to view enlarged
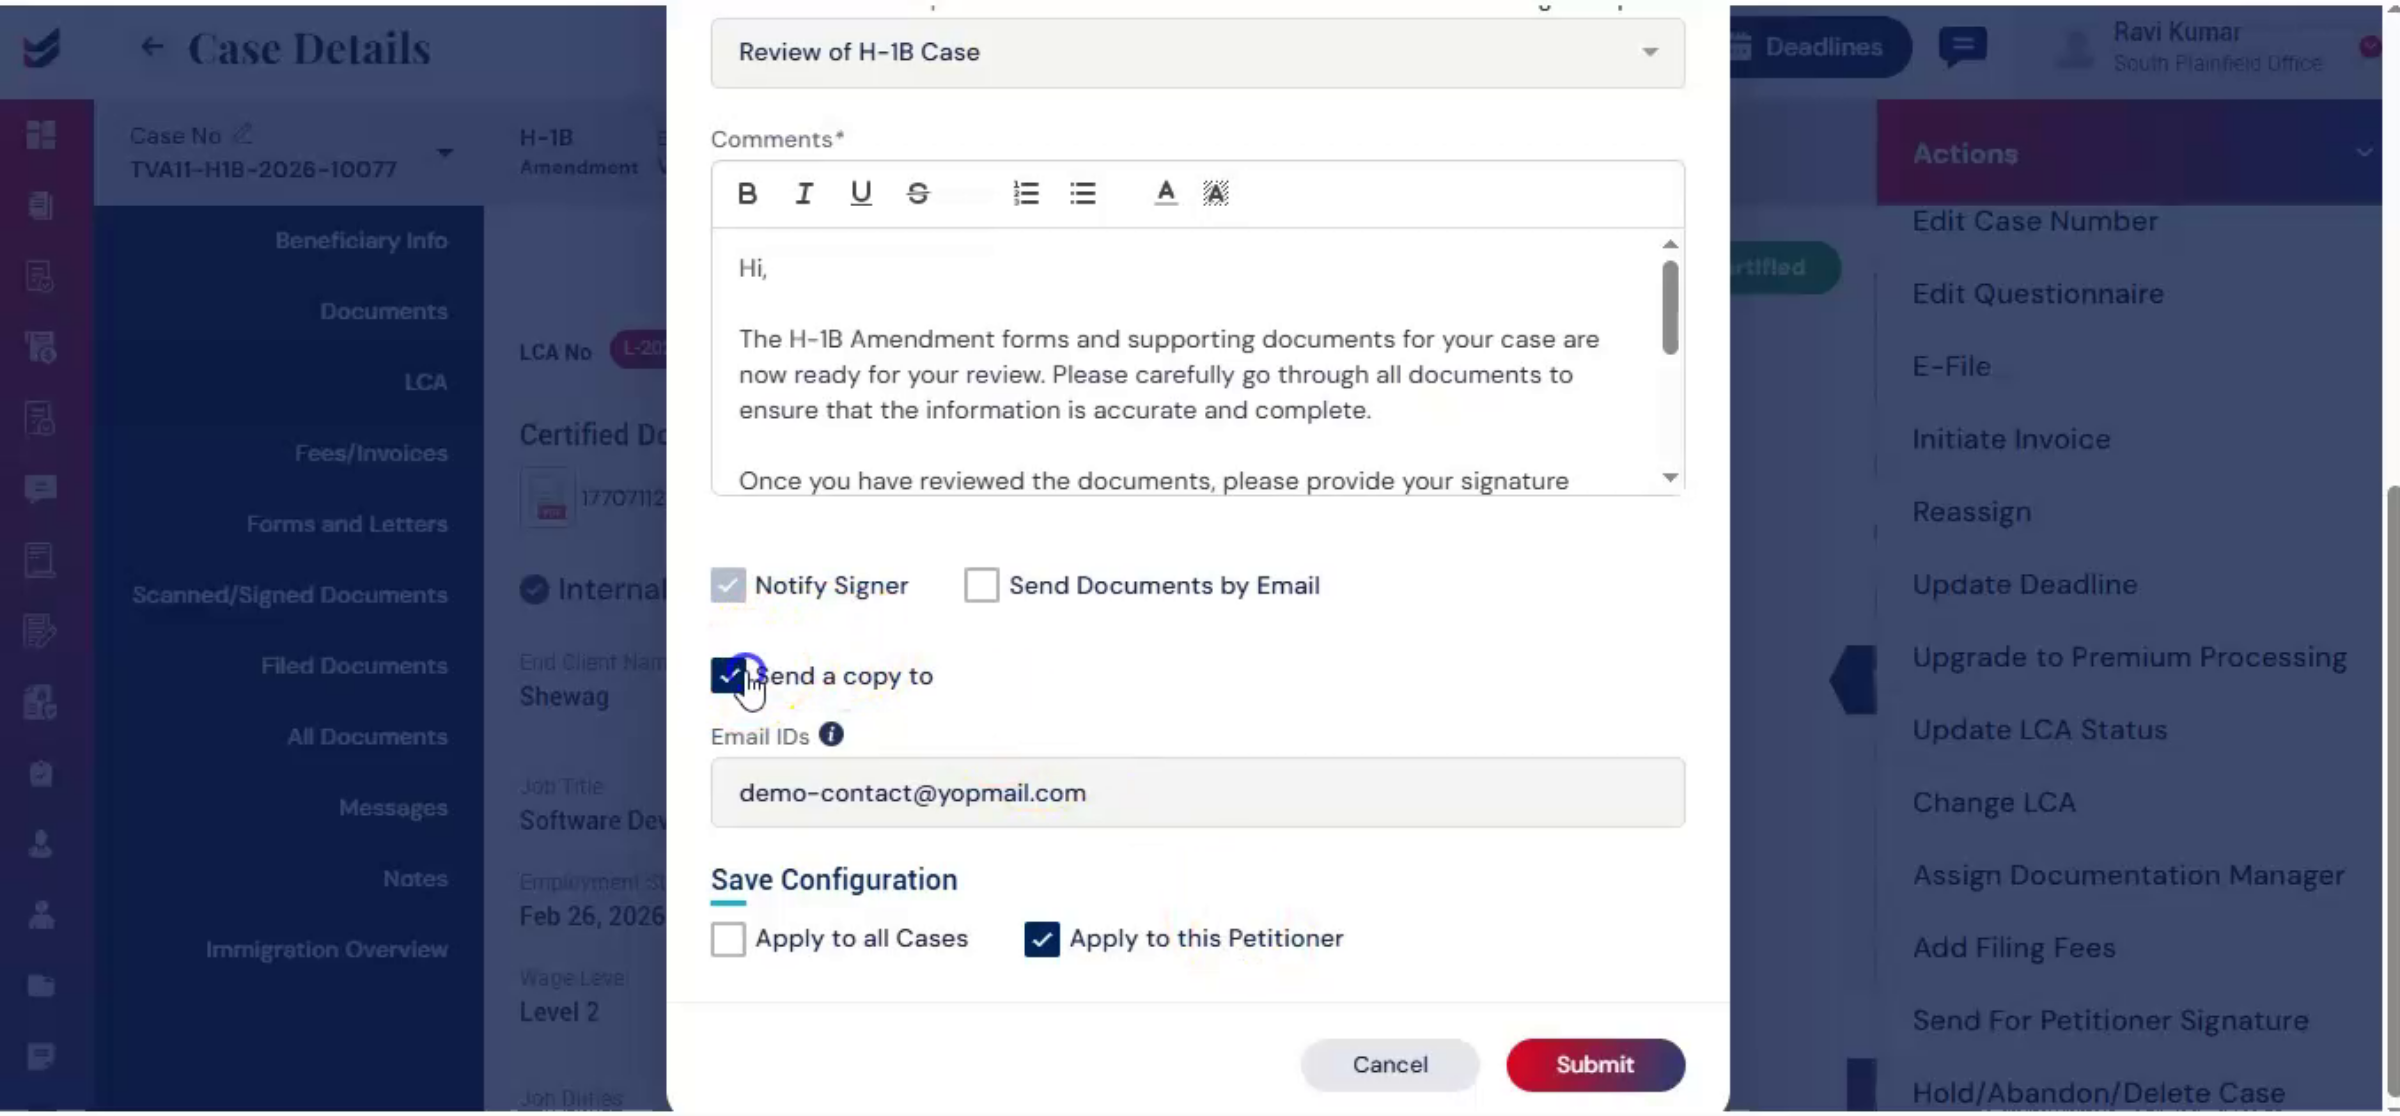
If you want to send the documents directly by email, select send documents by email. There is also a send a copy to option. When enabled, you can choose to apply to all cases, which means the selected recipient will receive signature emails for all future cases.
36. Signature Email Recipient Settings
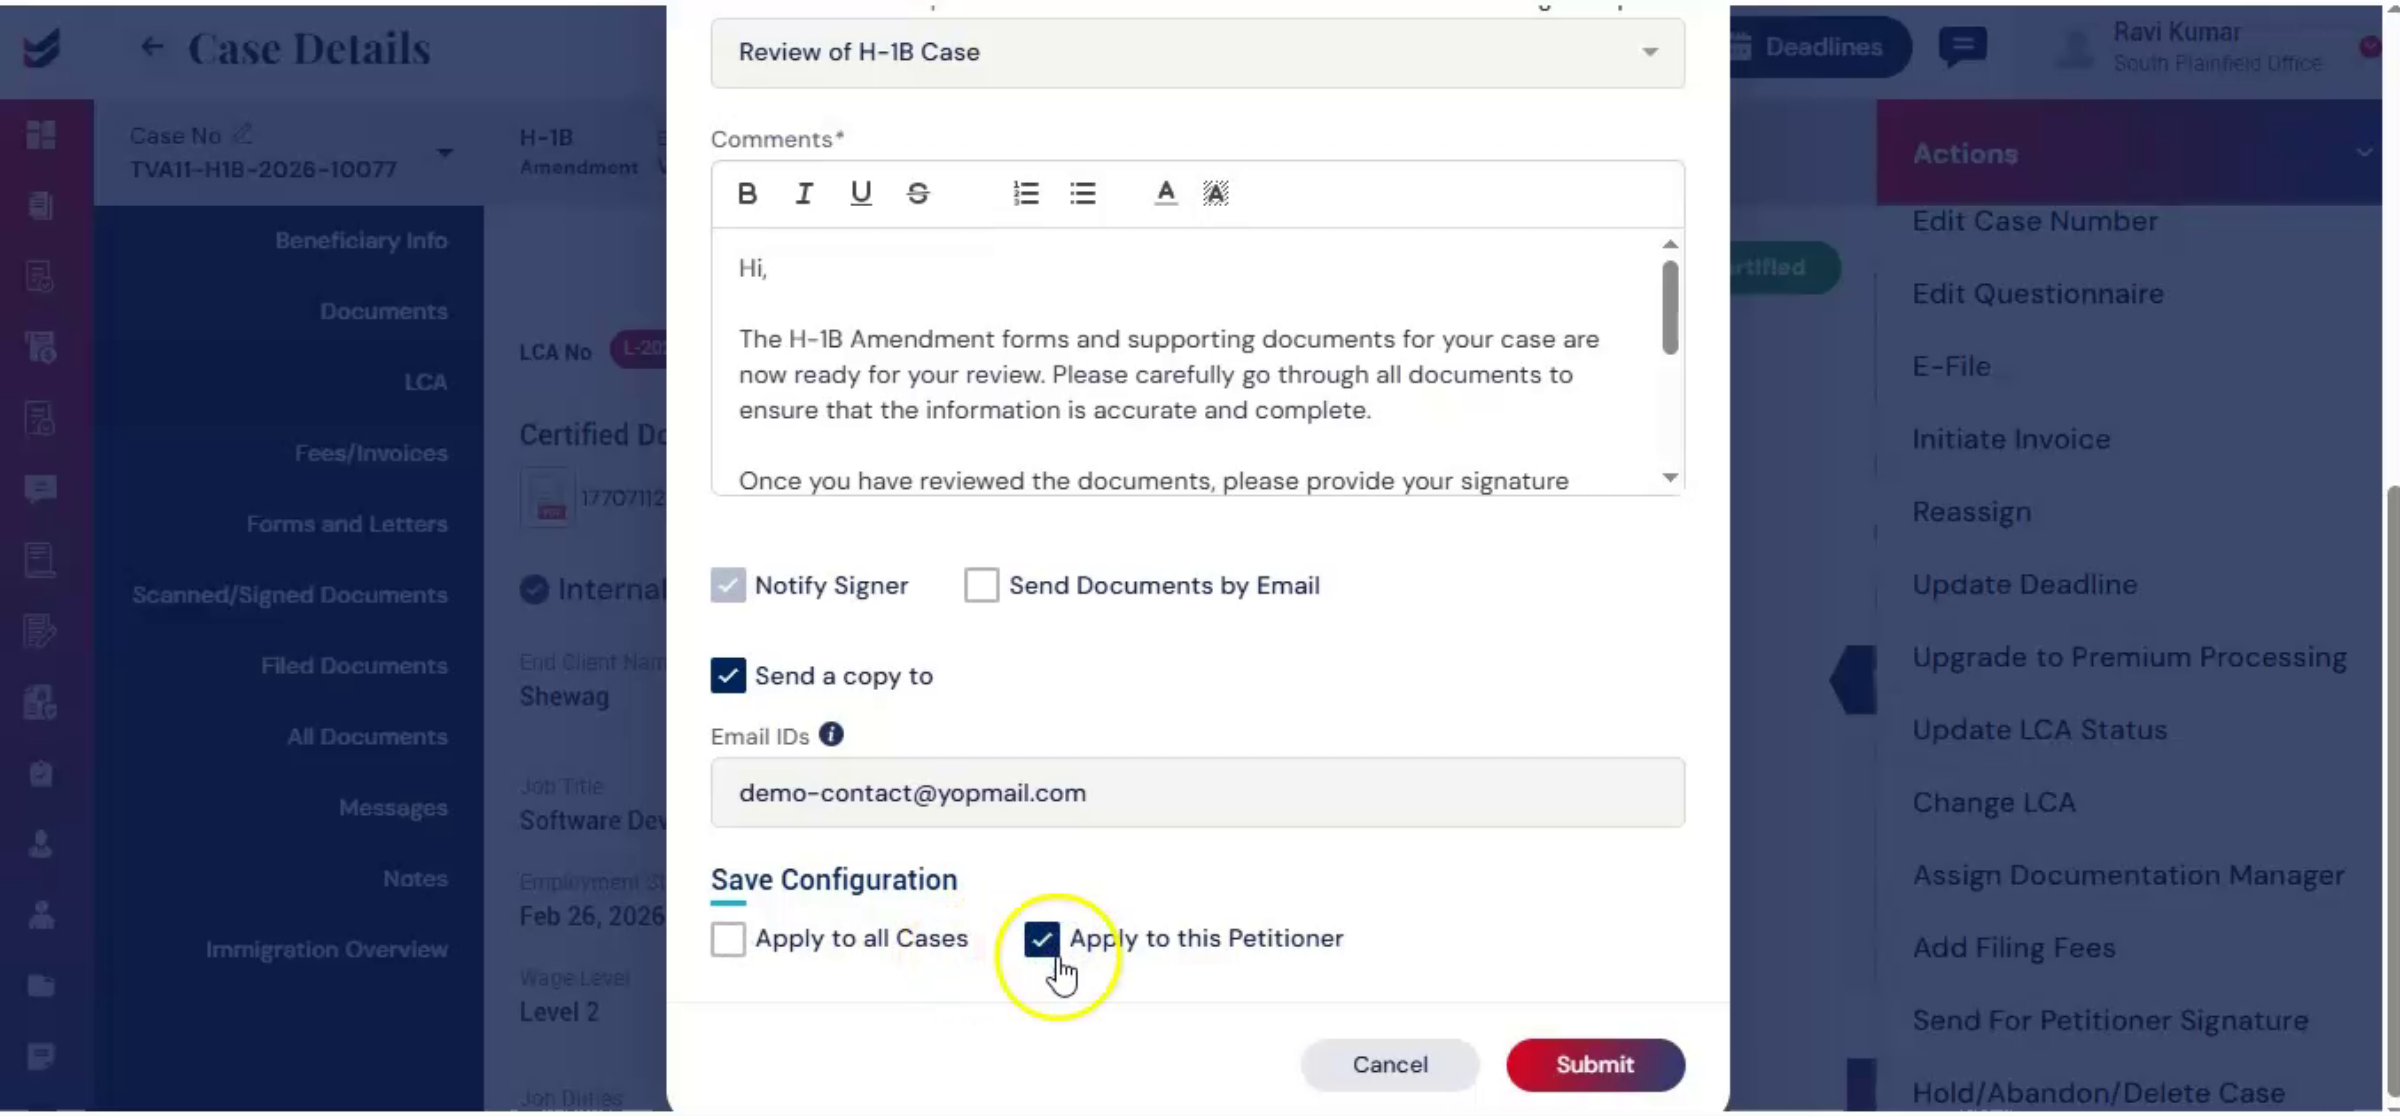 * click the image to view enlarged
Apply to this petitioner. Means the recipient will receive signature emails only for the current case.
37. Submitting Documents To Petitioner
 * click the image to view enlarged
After reviewing your selections, click Submit. The petitioner receives the documents electronically.
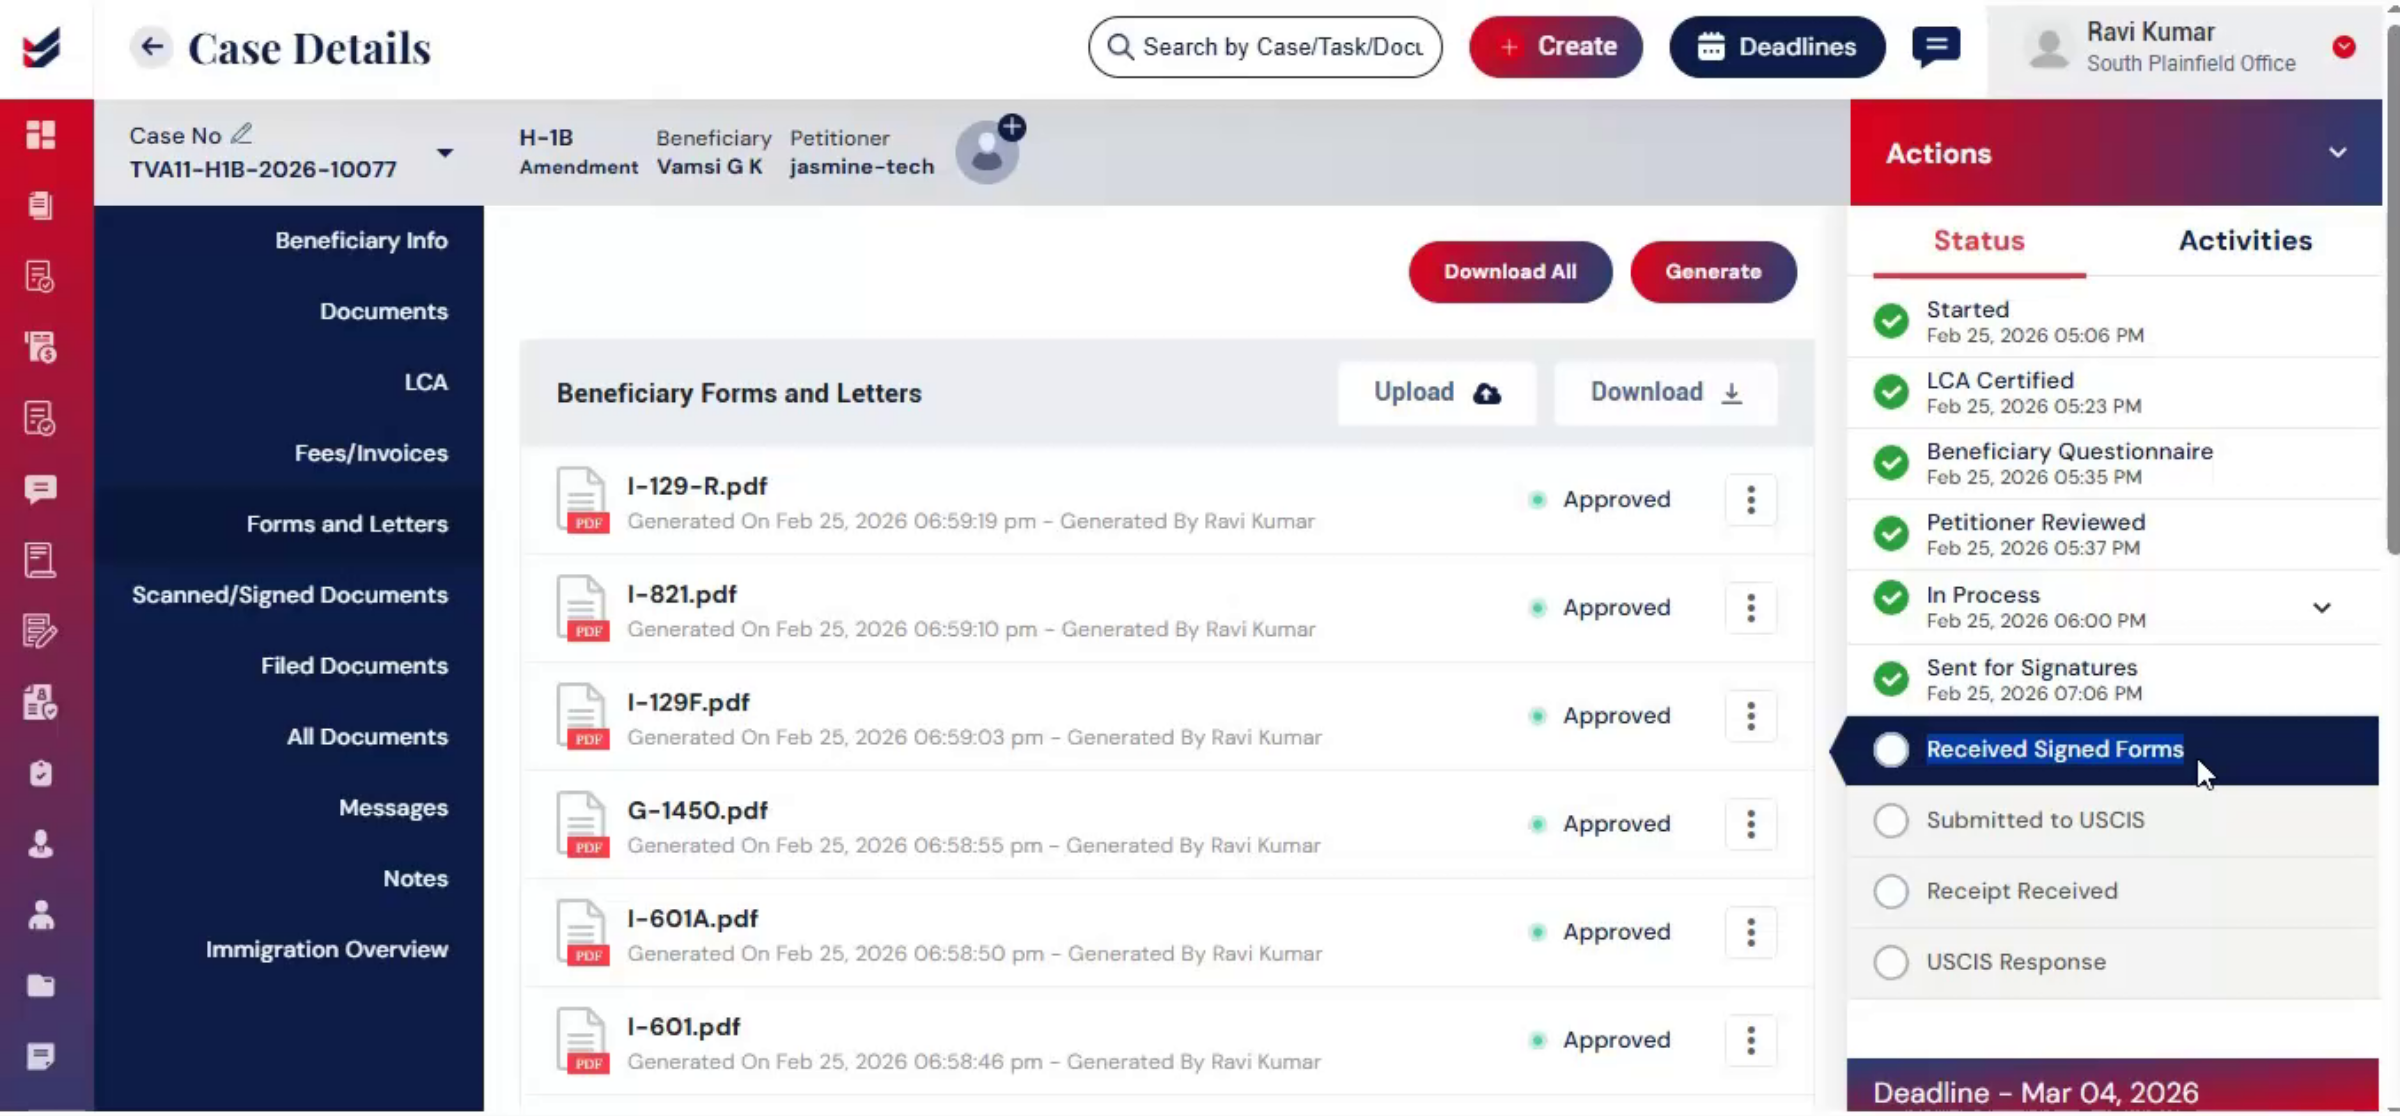
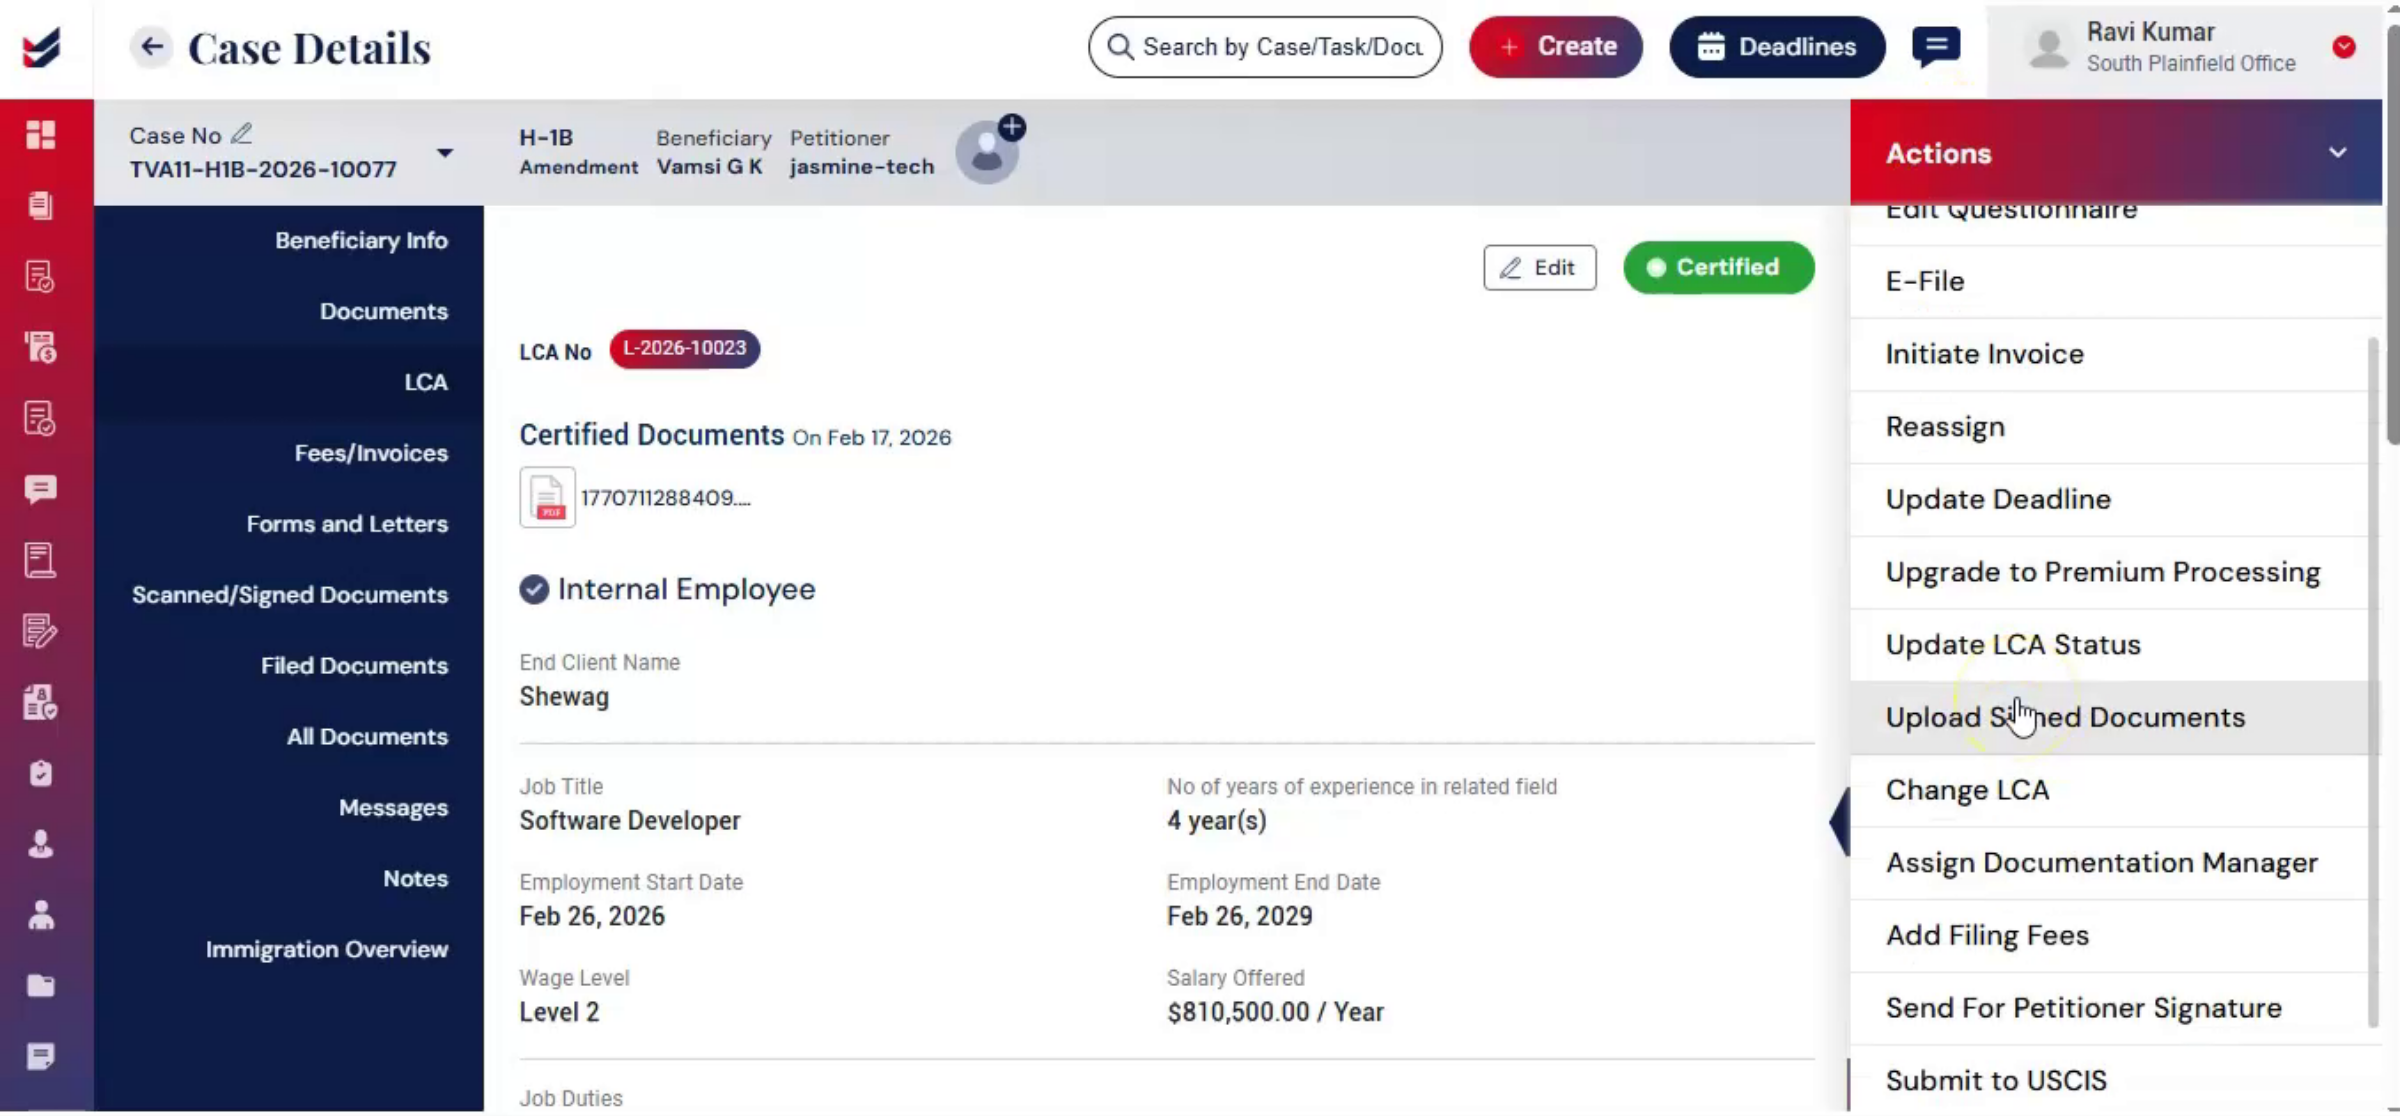
38. Uploading Signed Documents Options
 * click the image to view enlarged
After signing, the petitioner can scan the signed copies and upload them under Scanned and Signed Documents, or use Upload Signed Documents from the Actions menu.
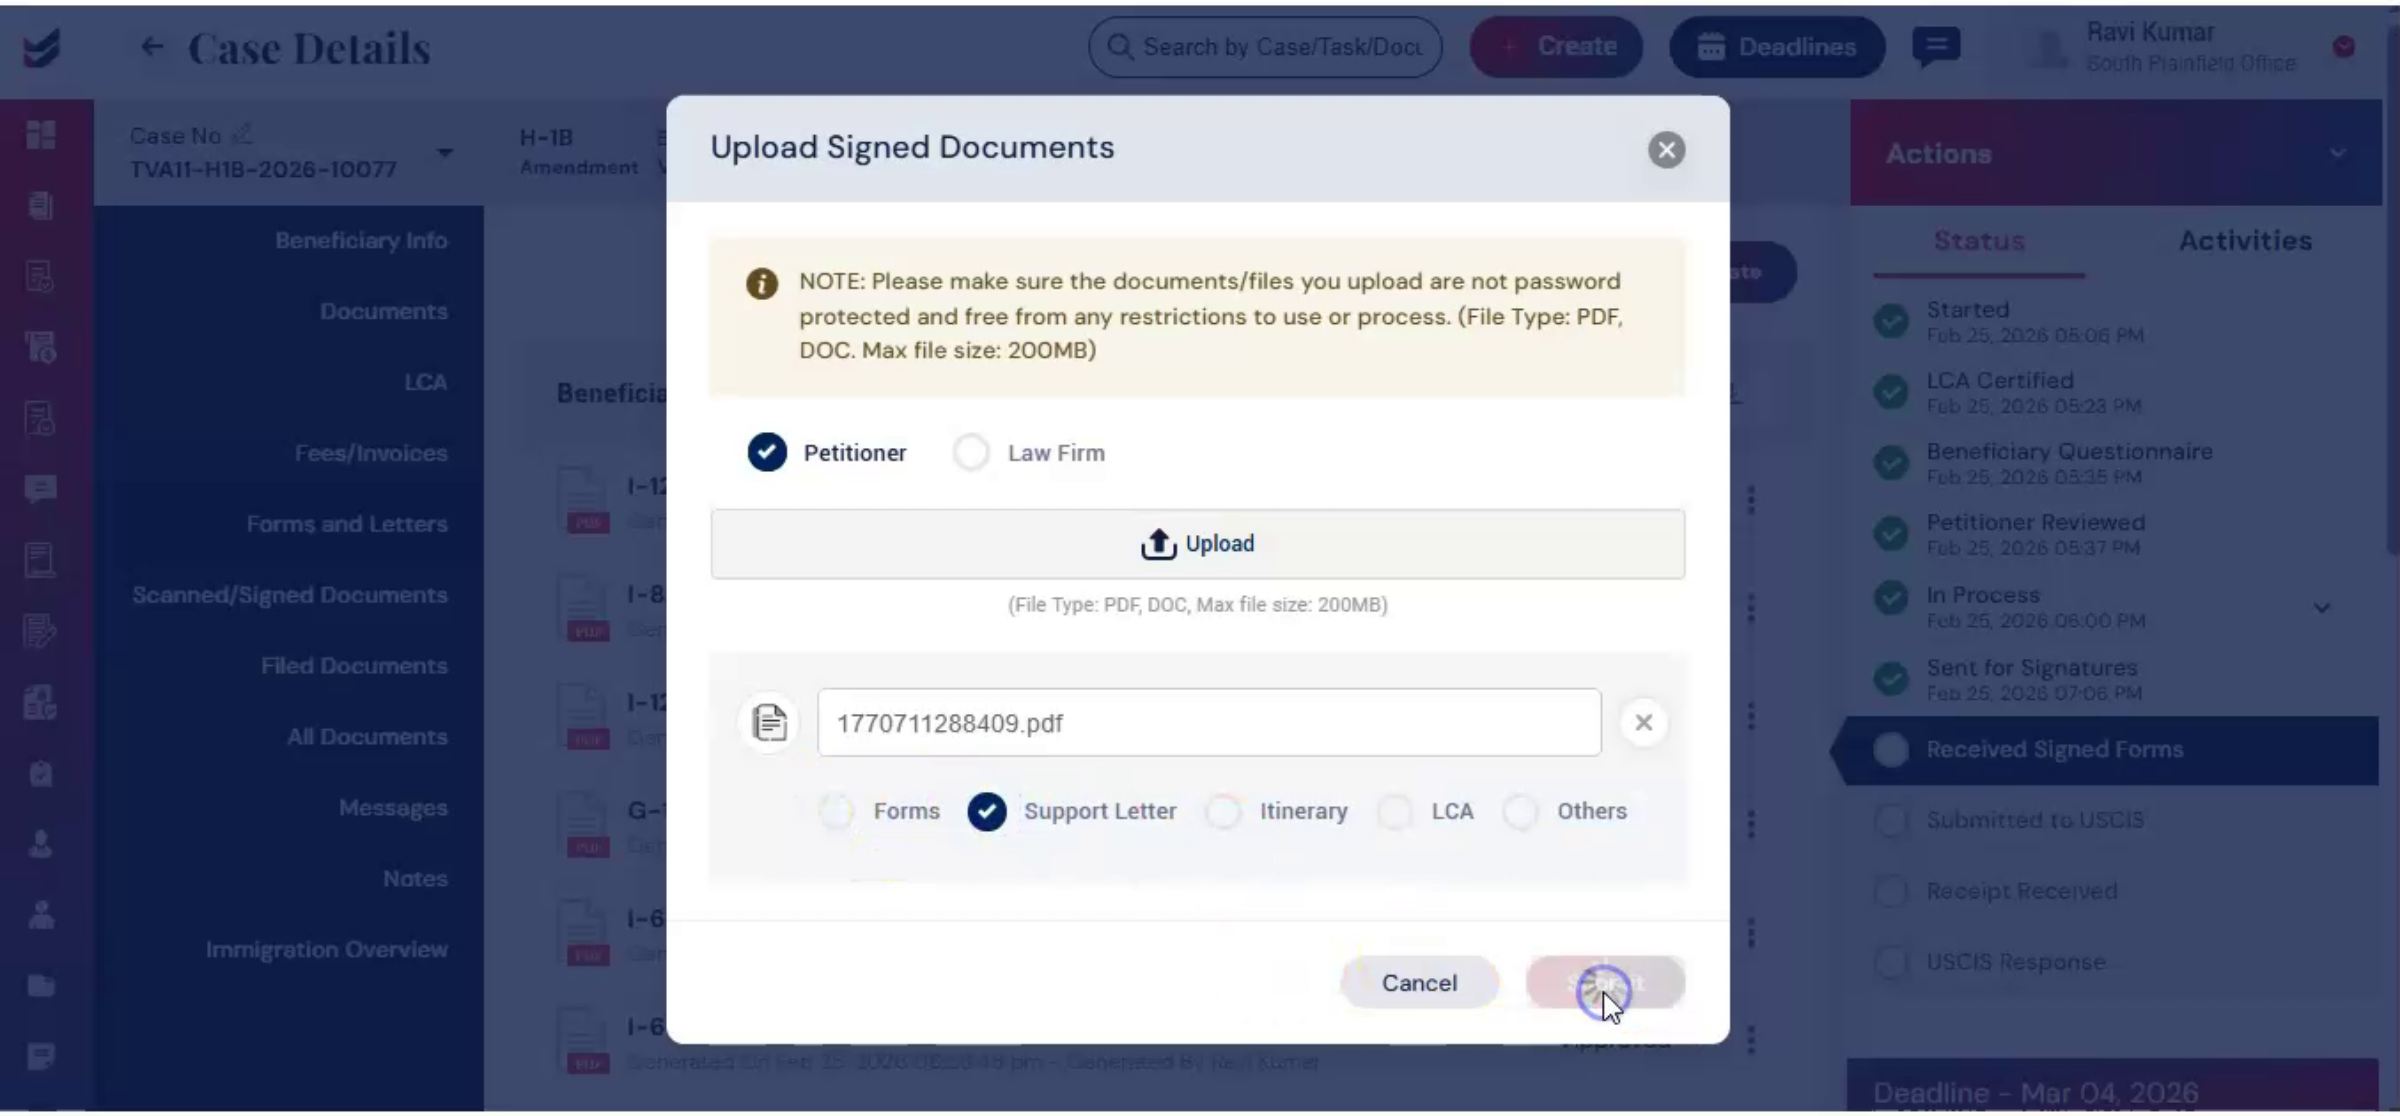
39. Manual Upload Of Physical Copies
 * click the image to view enlarged
If physical copies are received, you can upload them manually. To upload the documents, go to Actions and select Upload Signed Documents. A dialog box will appear.
40. Uploading Documents Dialog Usage
 * click the image to view enlarged
Choose whether the document is from the petitioner or the law firm. In the Upload section, select the document, then choose the appropriate category, such as Forms, Support Letter, Itinerary, LCA, or others, and click Submit.
41. Uploading Scanned Signed Documents
 * click the image to view enlarged
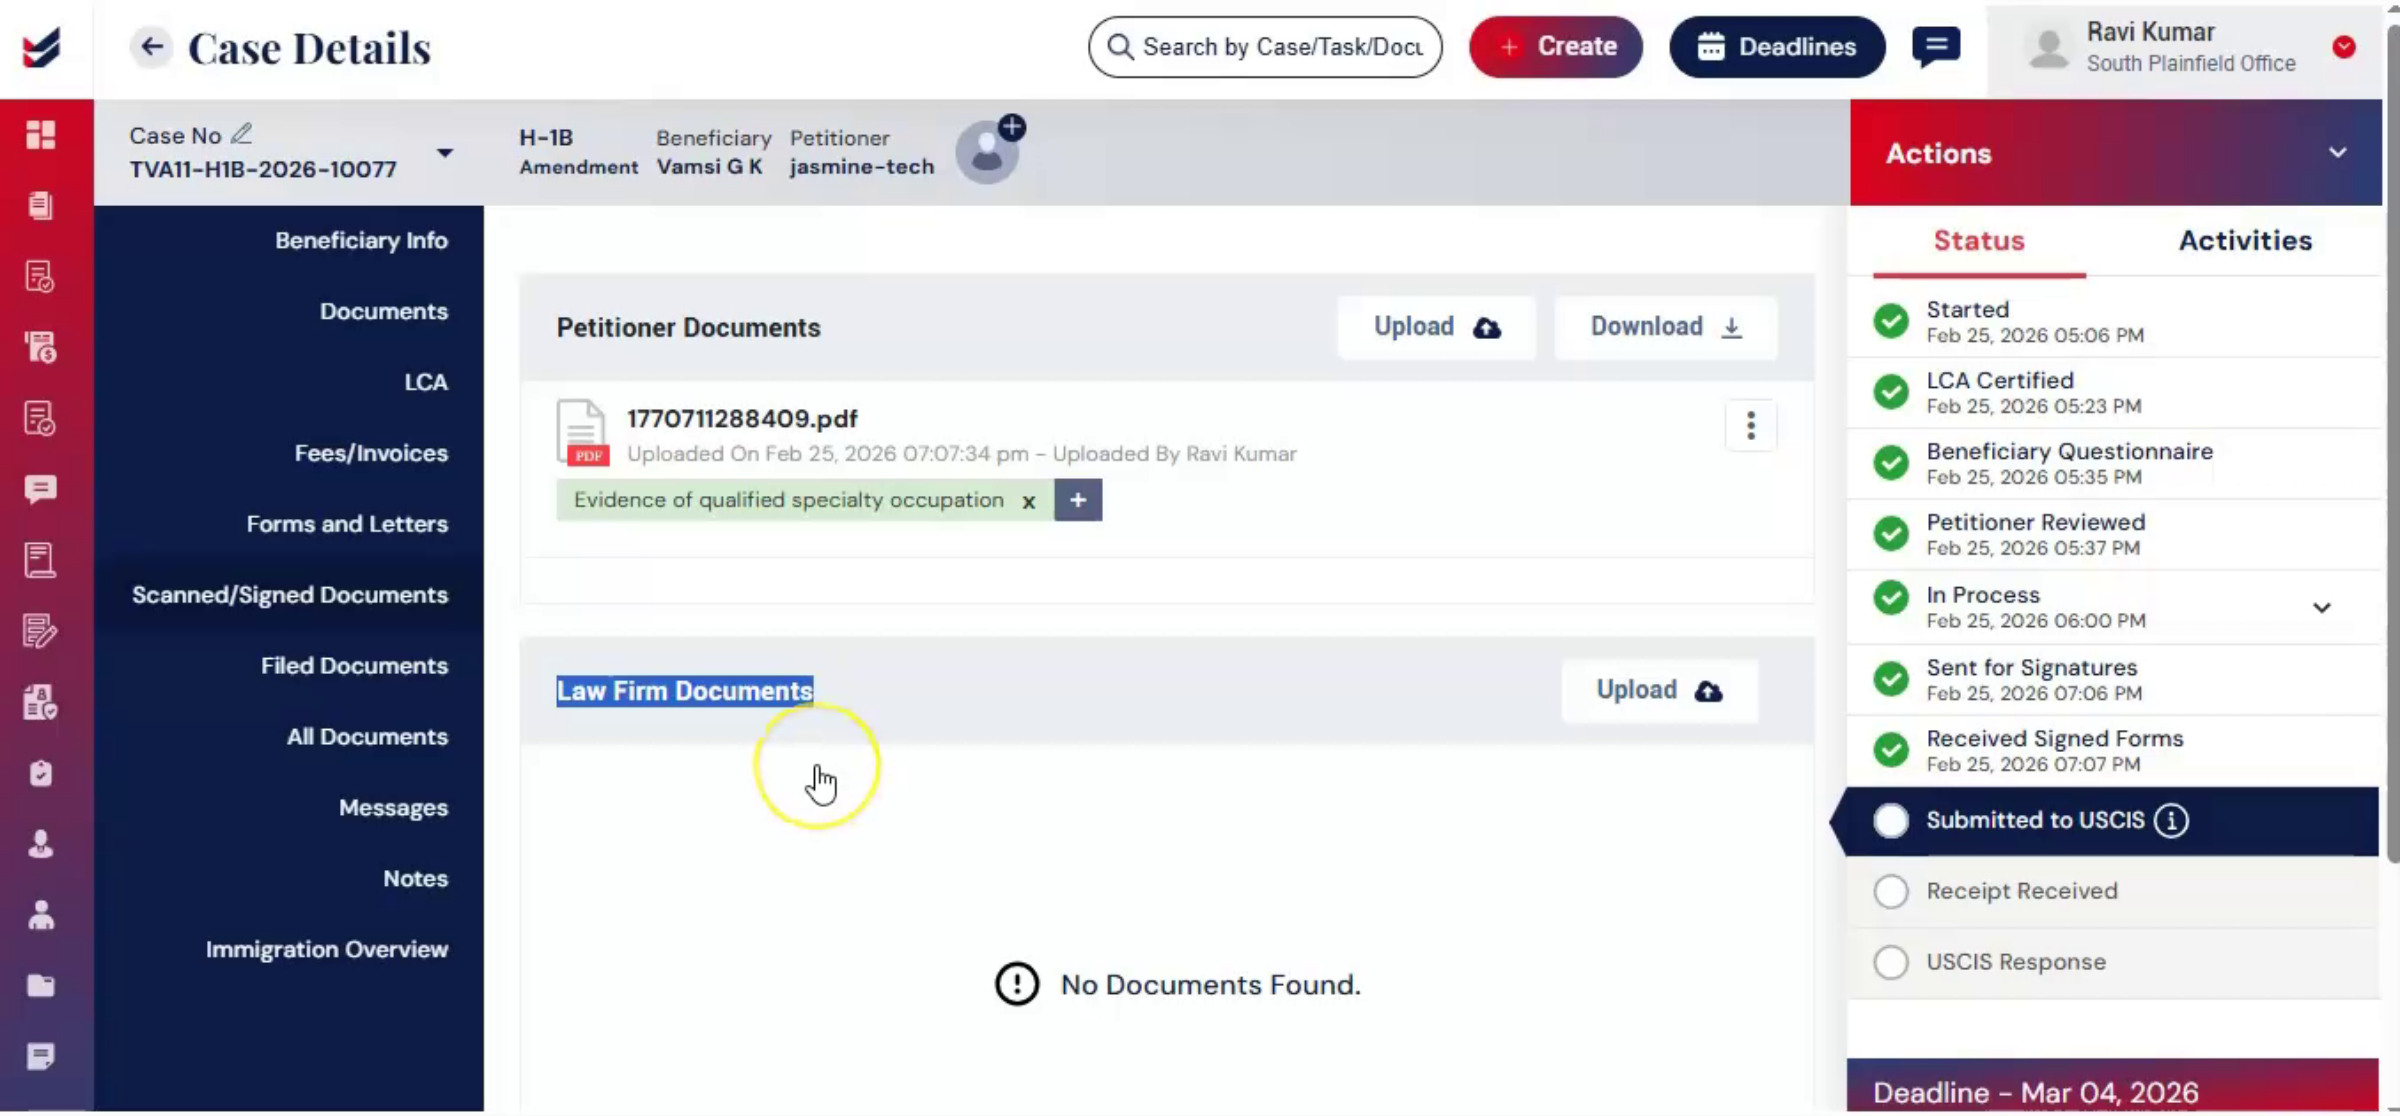
Alternatively, you can navigate to the Scanned and Signed Documents section and click Upload under the Petitioner section to upload the scanned and signed documents.
42. Law Firm Internal Document Upload
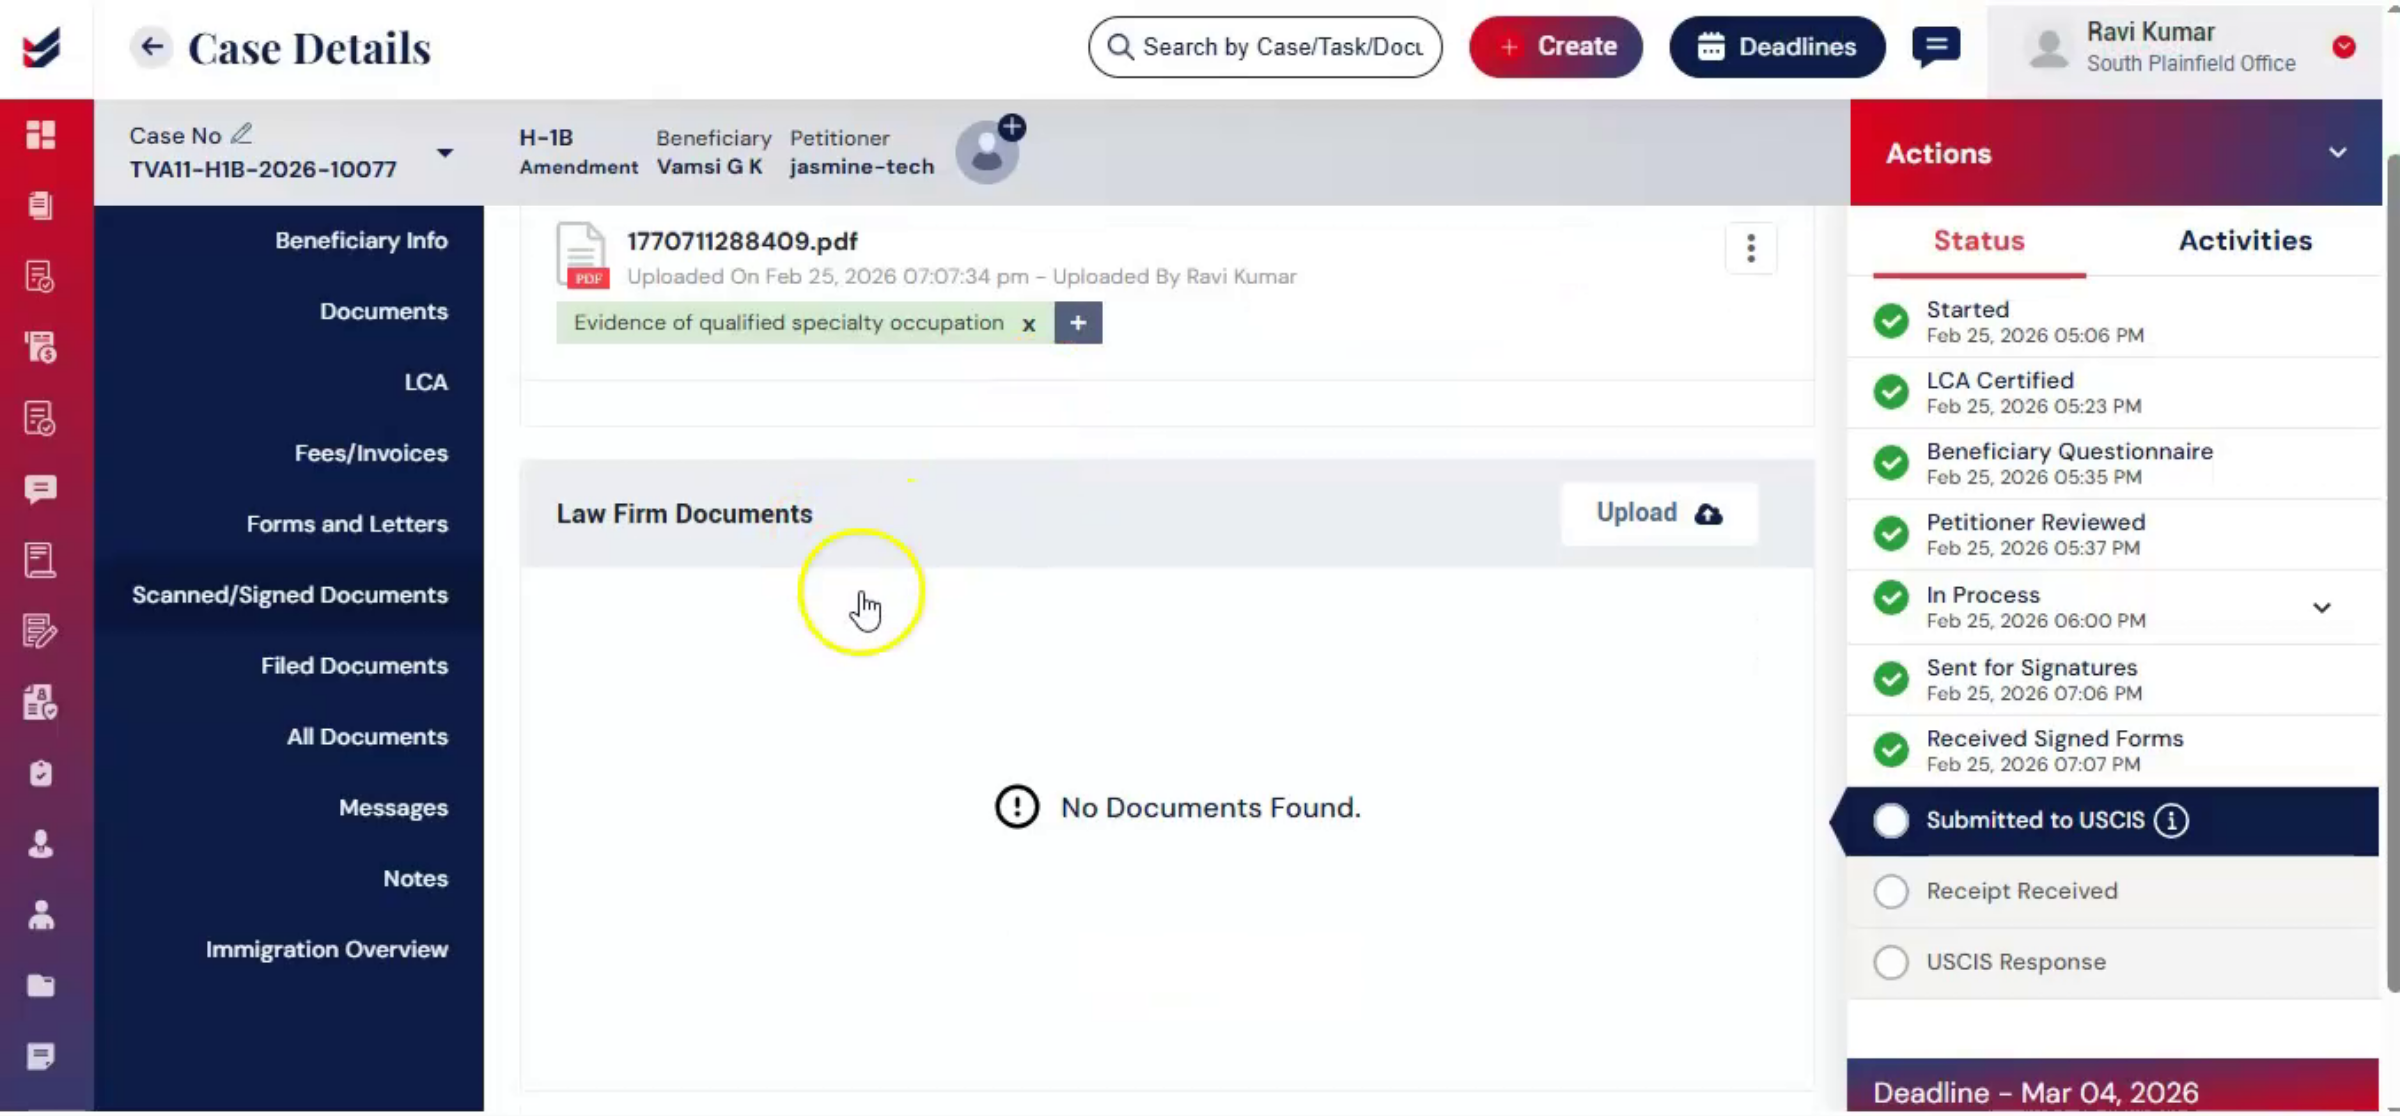 * click the image to view enlarged
ImmiBox also provides a Law Firm Document Feature Upload section for internal documents that remain visible only to firm staff and are not shared with clients. This ensures secure separation between client facing and internal documentation.
43. Case Ready For Final Preparation
 * click the image to view enlarged
After all, signatures are collected and reviews are completed. The case is ready for final preparation.
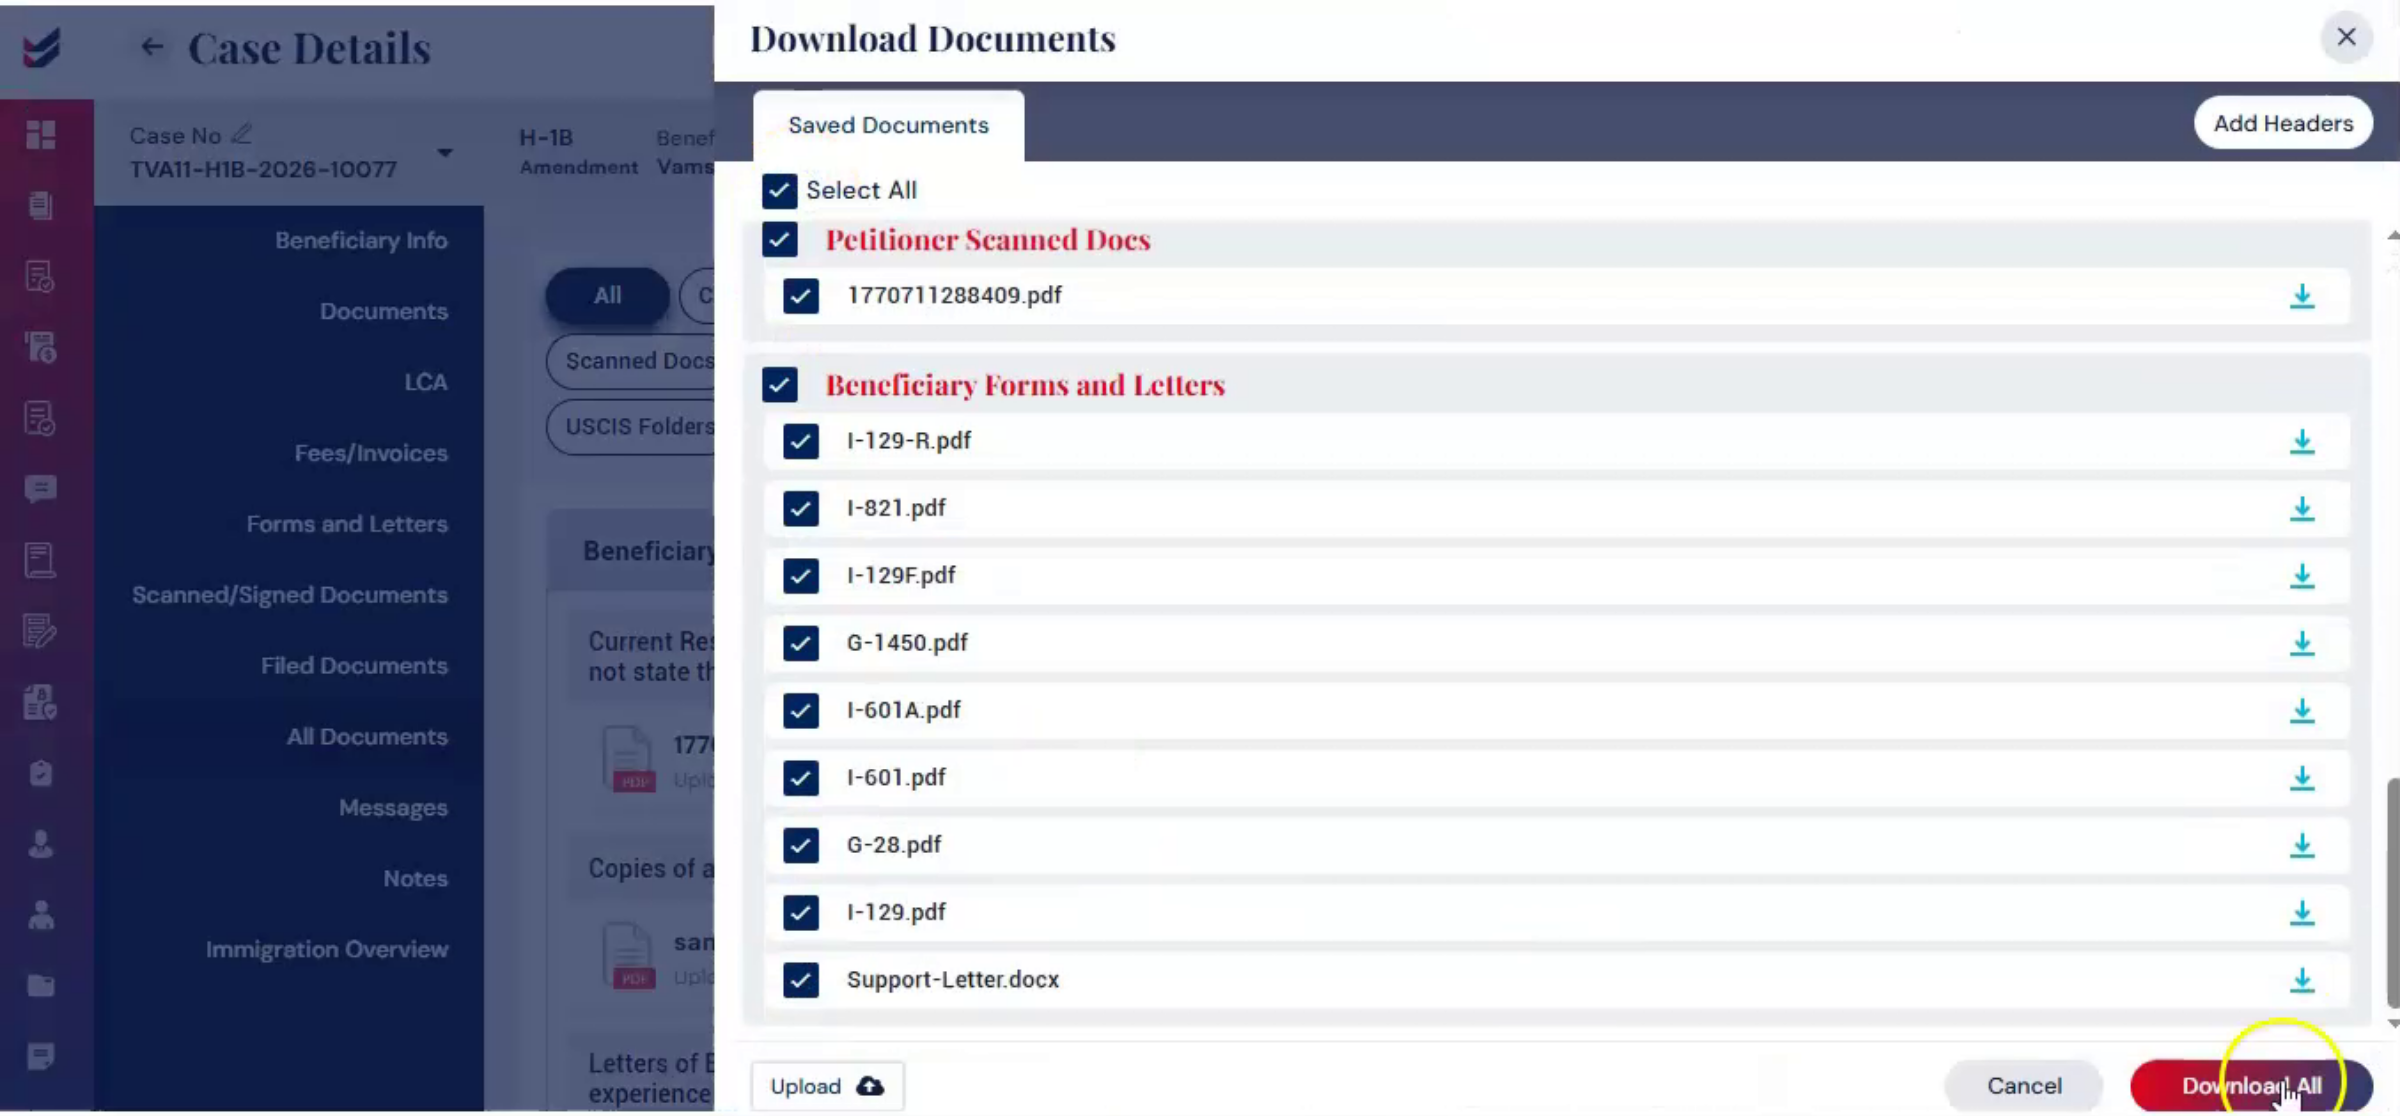
44. Downloading Case Documents
 * click the image to view enlarged
Navigate to All Documents from the left panel and click on the Download option. Select individual documents or use Select All.
45. Accessing Filed Documents Section
 * click the image to view enlarged
Click Download All to generate the organized filing set. When you navigate to the left panel, you will see the Filed Documents tab. Click on it to open the Filed Documents section.
46. Uploading Filed Documents Benefits
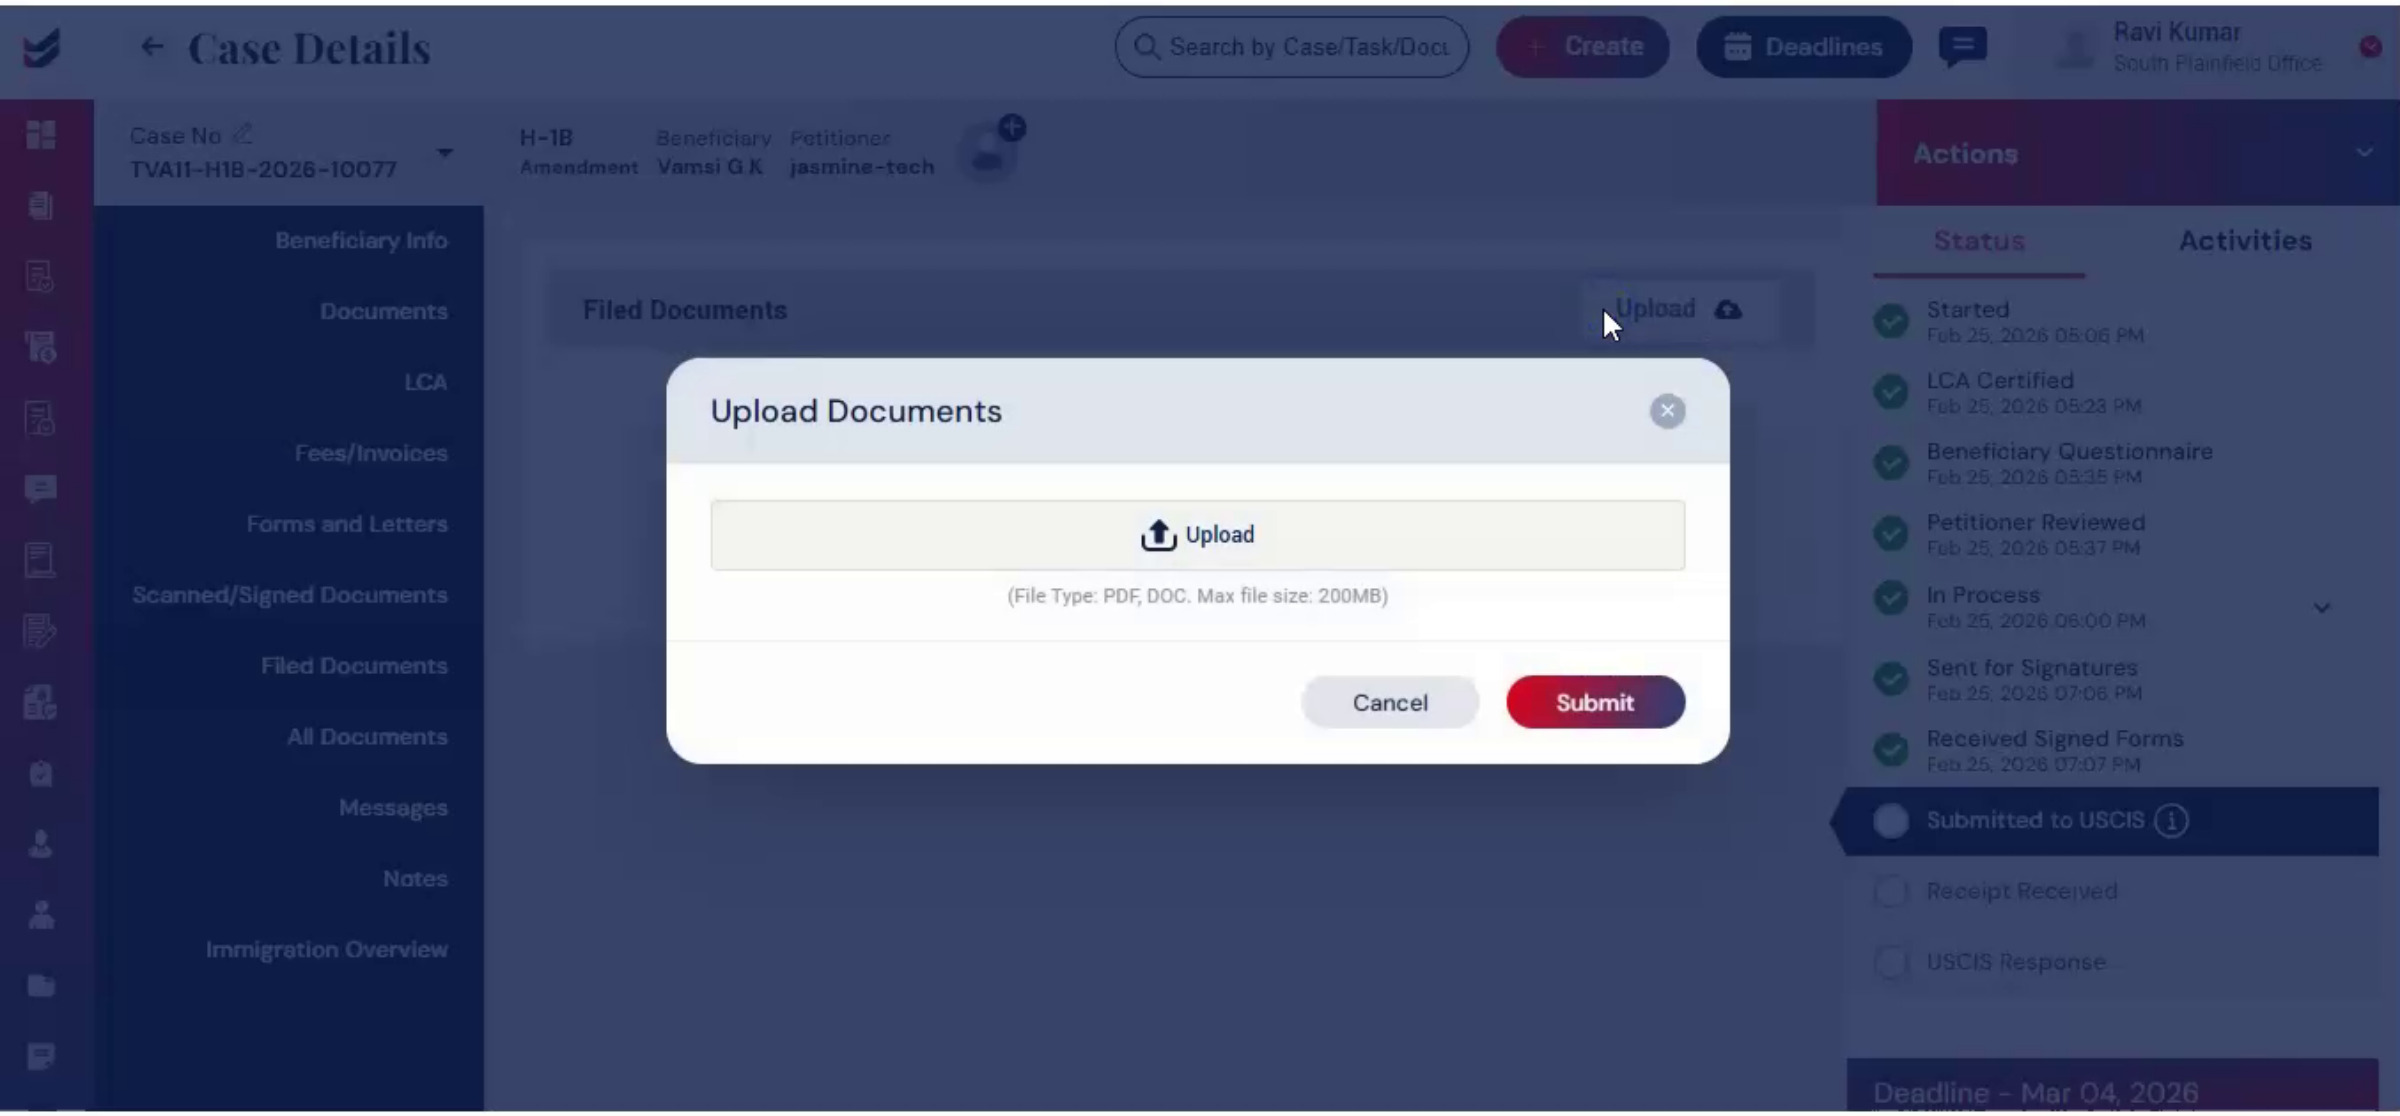 * click the image to view enlarged
Here, you can upload filed documents by selecting the upload option. The file document section serves as a central hub for storing, managing, and sharing all case-related documents in one place, making filing and review much more efficient.
47. Attorney Final Review And Signing
 * click the image to view enlarged
After downloading all the documents, the attorney performs final review and signs the document where required. The case is now ready for submission.
48. Filing Options Overview
 * click the image to view enlarged
ImmiBox supports both electronic and manual filing, depending on the firm's preference.
49. E-Filing Selection Process
 * click the image to view enlarged
For e-file, from Actions, select e-file.
50. ImmiBox Desktop Application For E-Filing
 * click the image to view enlarged
A dialog box will appear and prompt you to download the ImmiBox desktop application. Then complete electronic filing directly through the application.
51. E-Filing Integration Benefits
 * click the image to view enlarged
This integration allows firms to manage preparation and submission within a connected workflow, reducing the need to re-enter information across platforms. For detailed e-filing process, you can refer to the separate ImmiBox e-filing guide.
52. Manual Filing Submission Steps
 * click the image to view enlarged
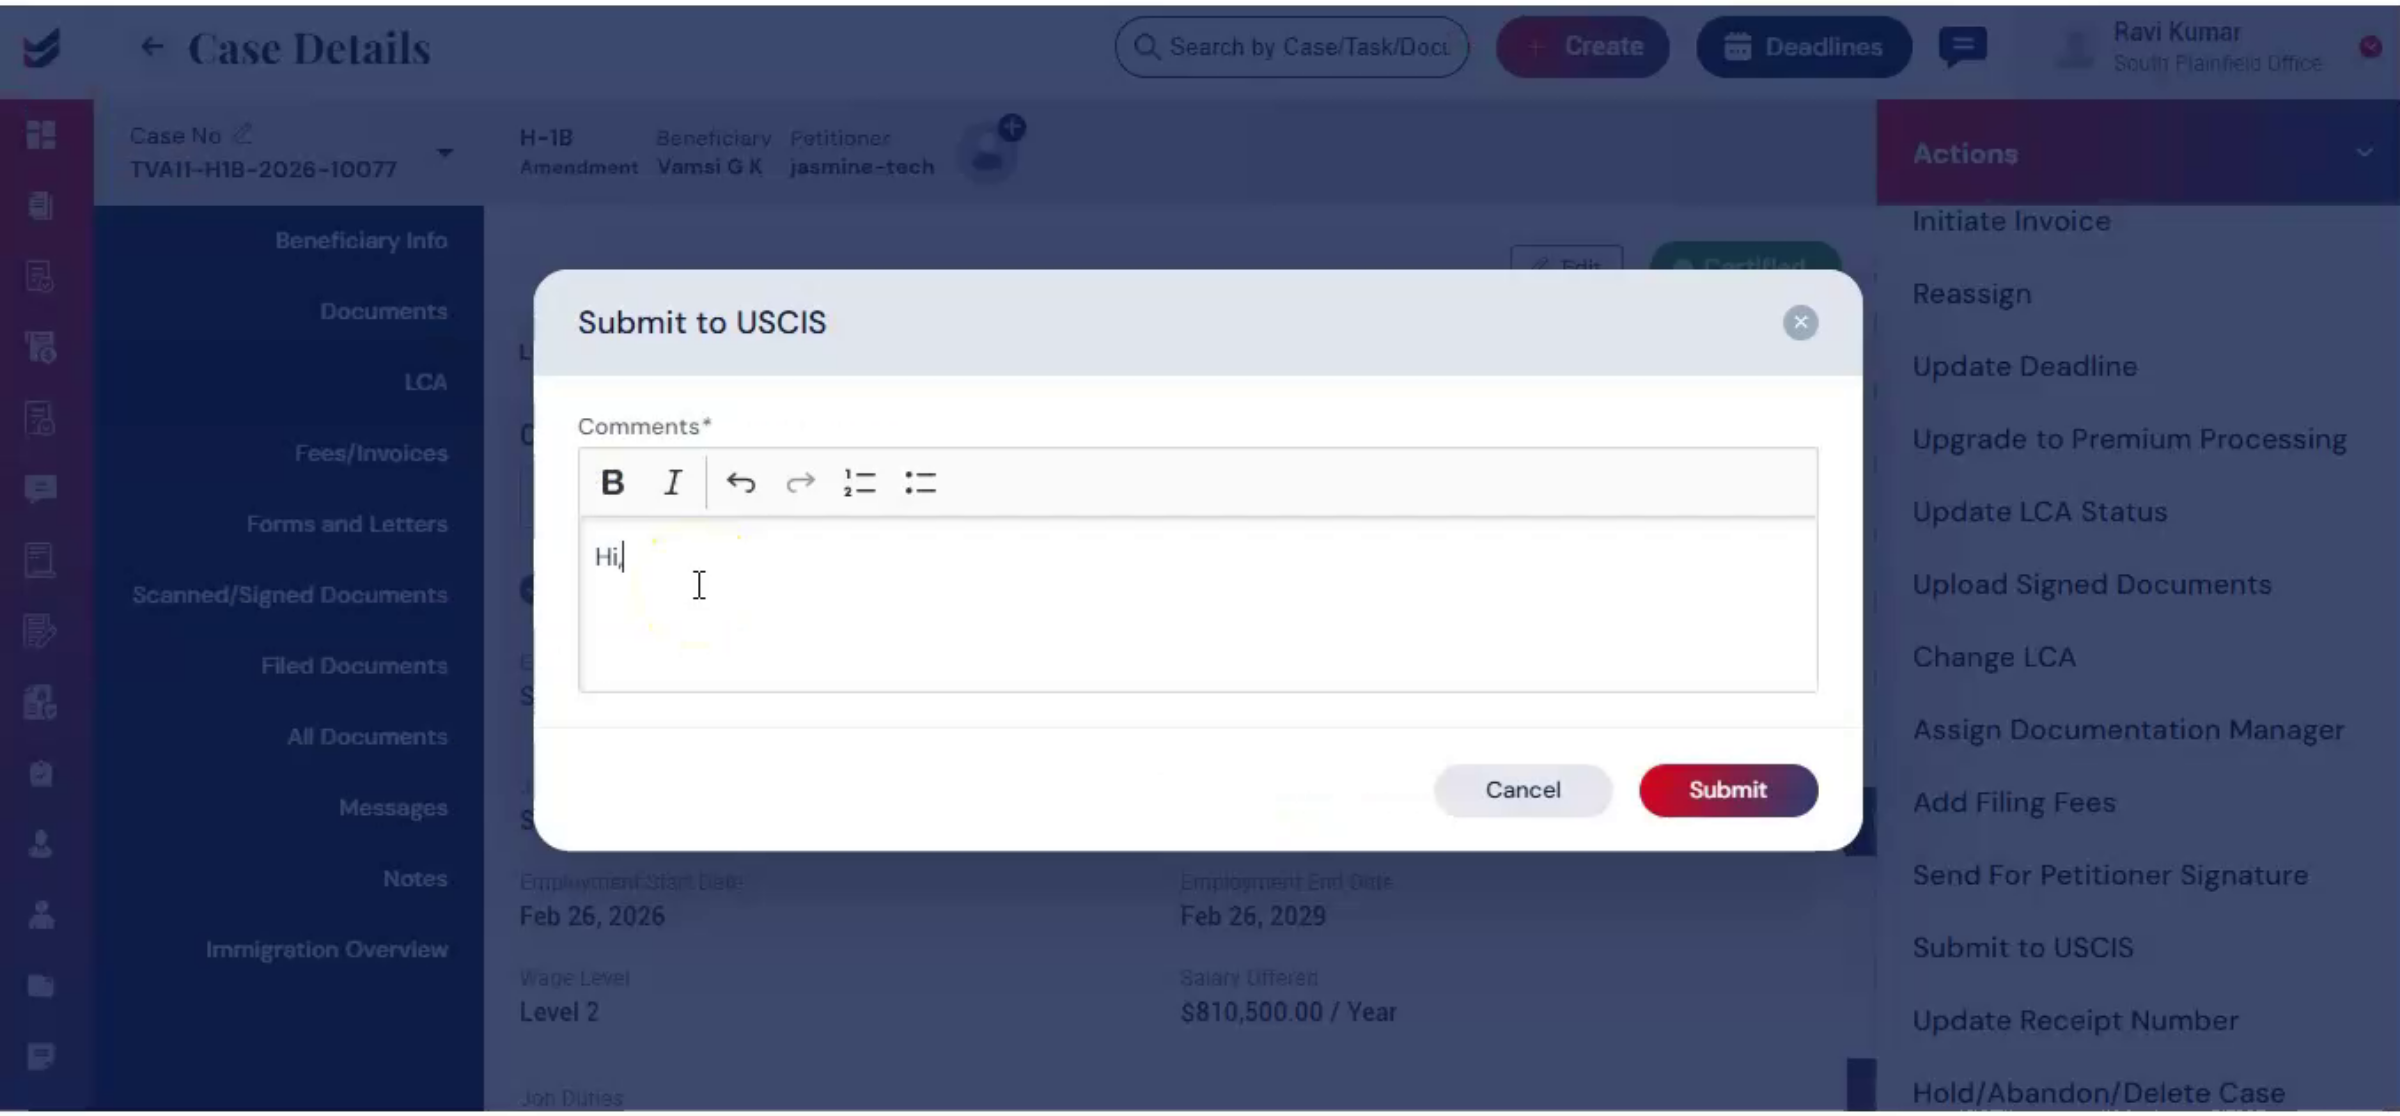
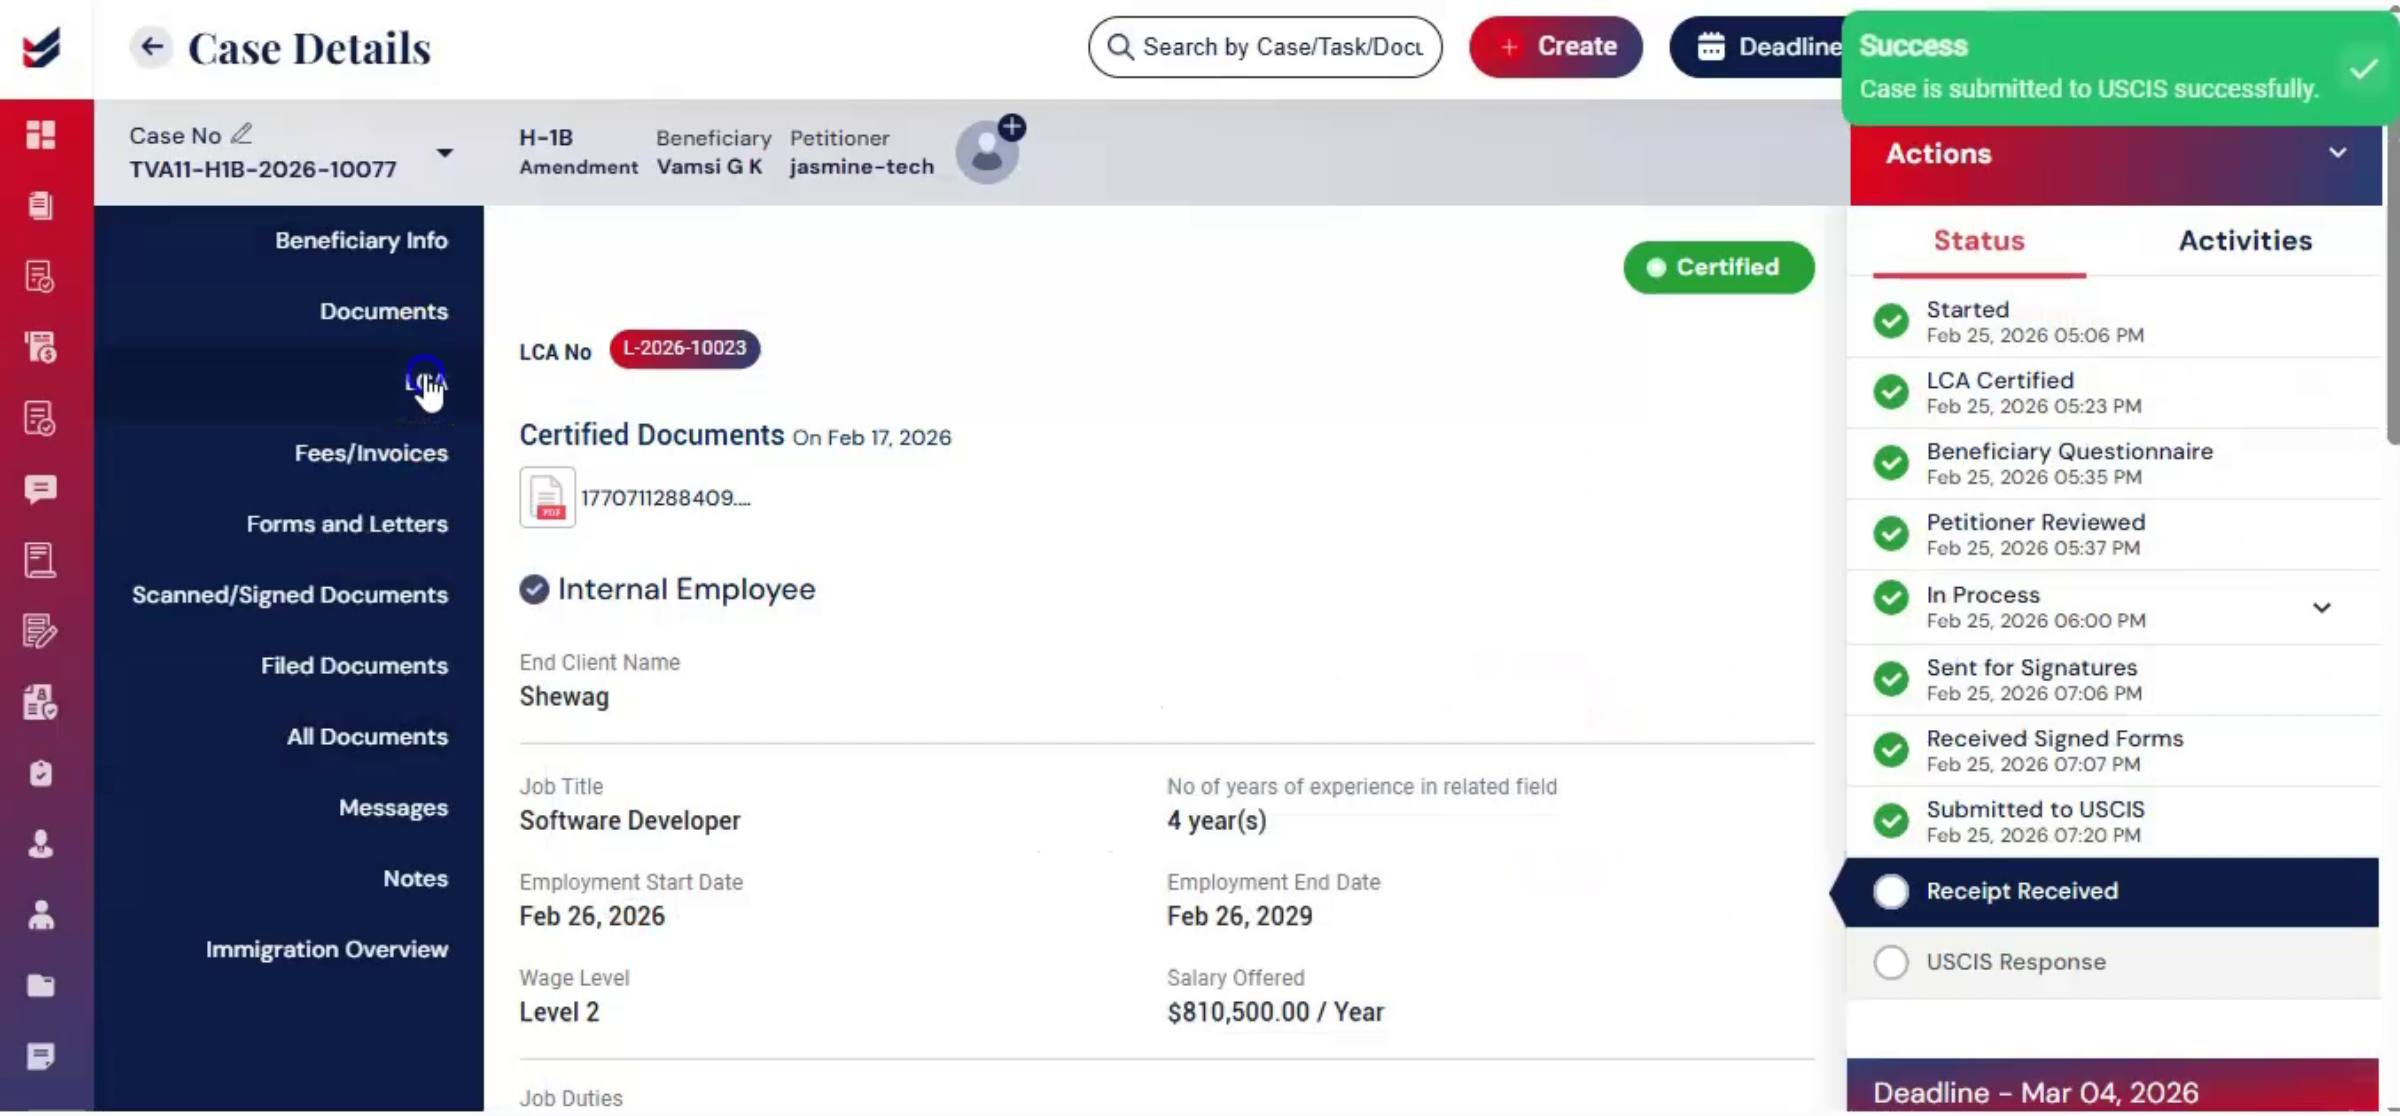
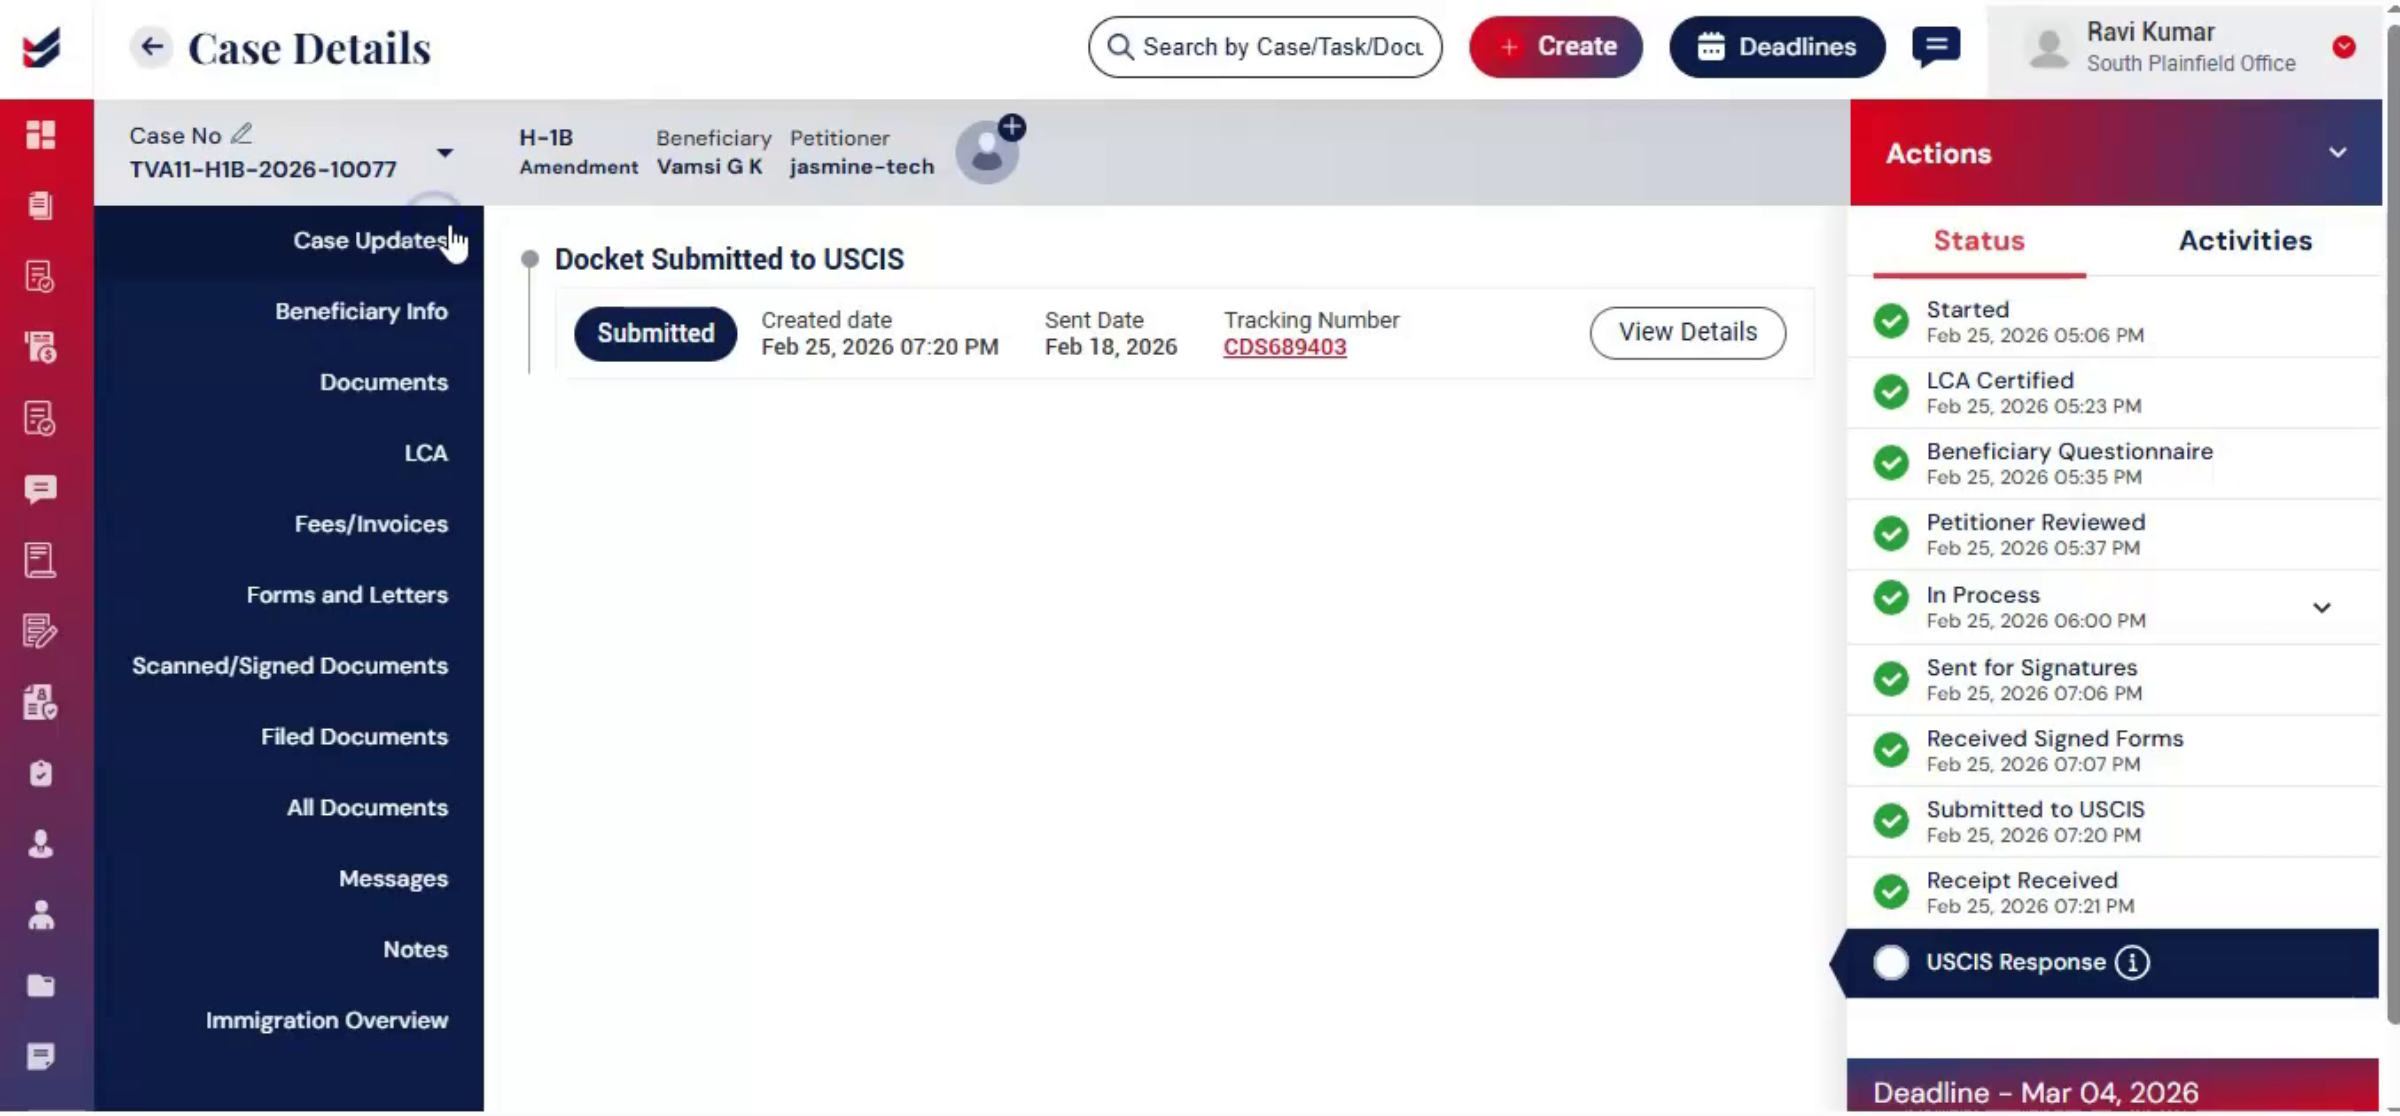
For manual filing, from Actions, select Submit to USCIS.
53. Recording Filing Stage And Accuracy
 * click the image to view enlarged
Add case notes and click Submit. This step records that the case has officially moved to the filing stage, maintaining workflow accuracy within the system.
54. Updating Tracking Information
 * click the image to view enlarged
After mailing the petition, tracking information should be recorded. From the Actions menu, select Update Tracking Details. Enter the Courier Tracking Number and any related details.
55. Tracking Information Notification
 * click the image to view enlarged
You may enable the Notify option if you would like the petitioner to receive an update. After submission, the tracking information is recorded in the Case Update section. The system will track the case and keep it updated.
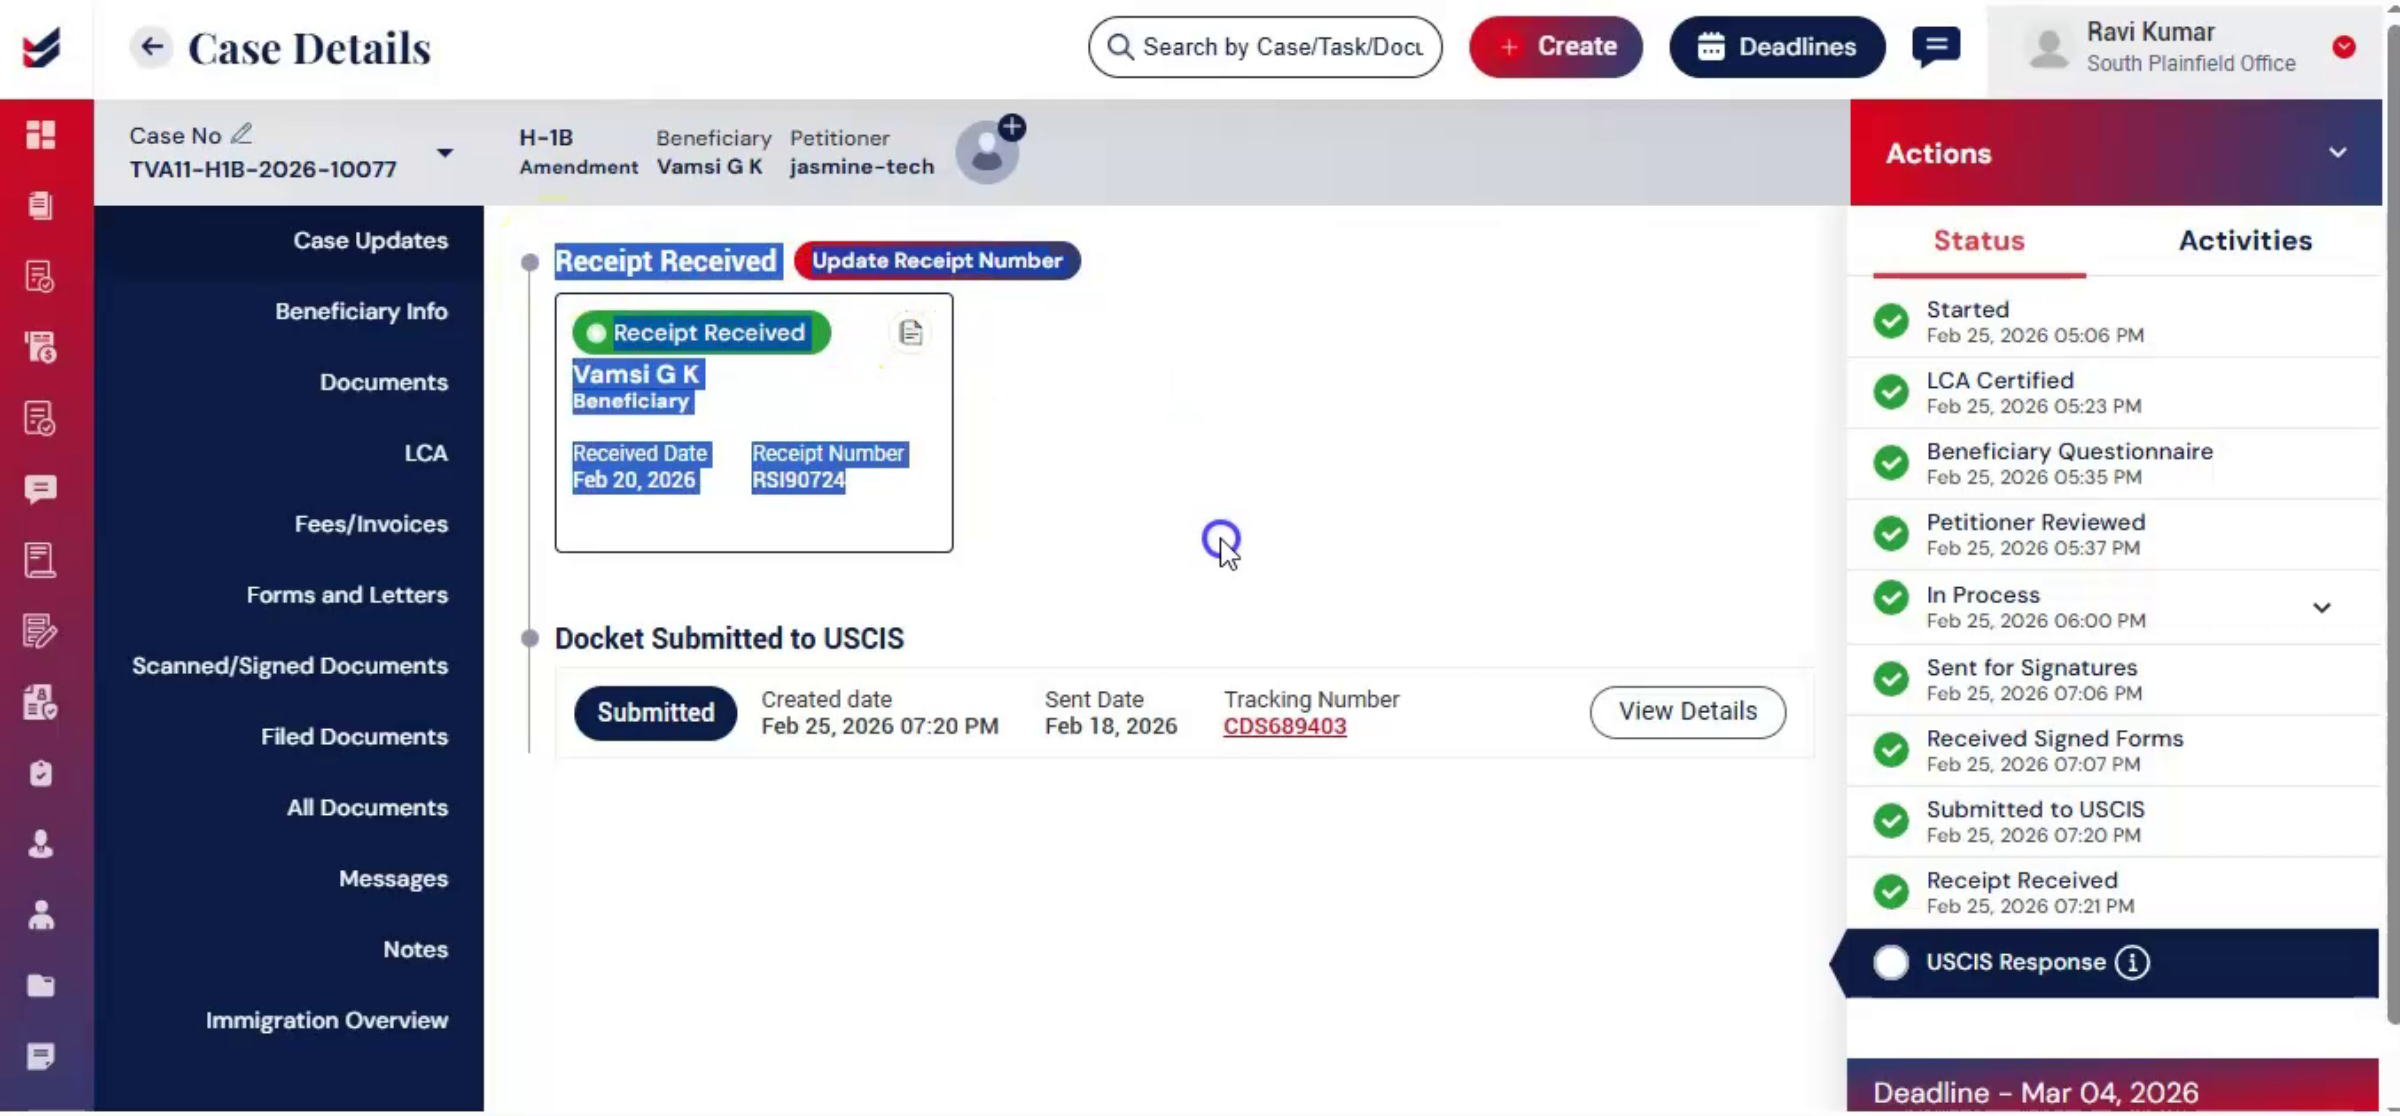
56. Recording Receipt Of Notice
 * click the image to view enlarged
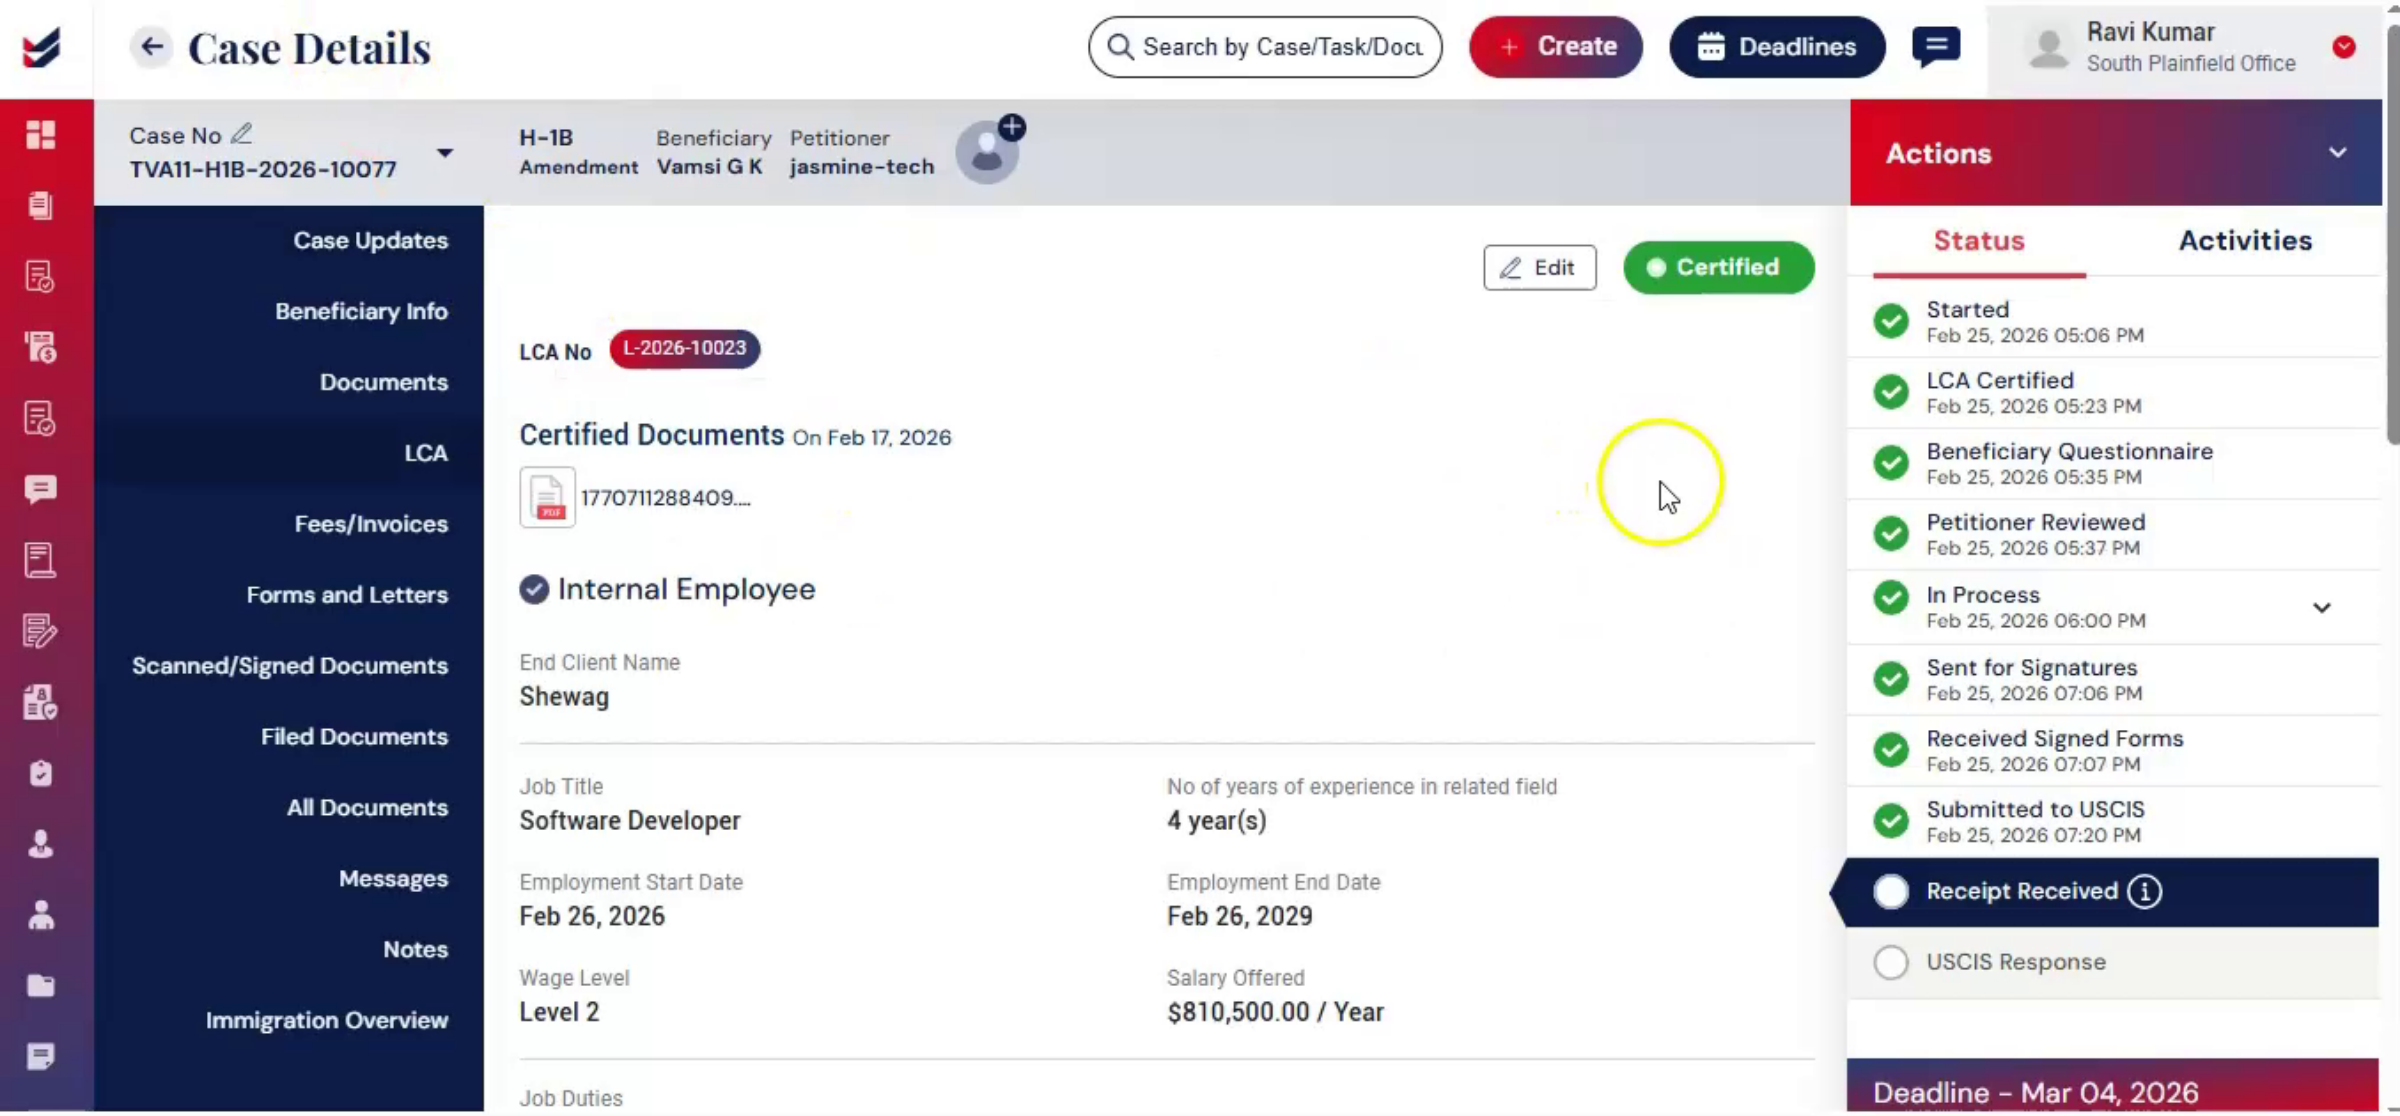
Once USCIS receives the filing and issues a receipt of notice, the receipt details must be recorded. From the Actions menu, select Update Receipt Number.
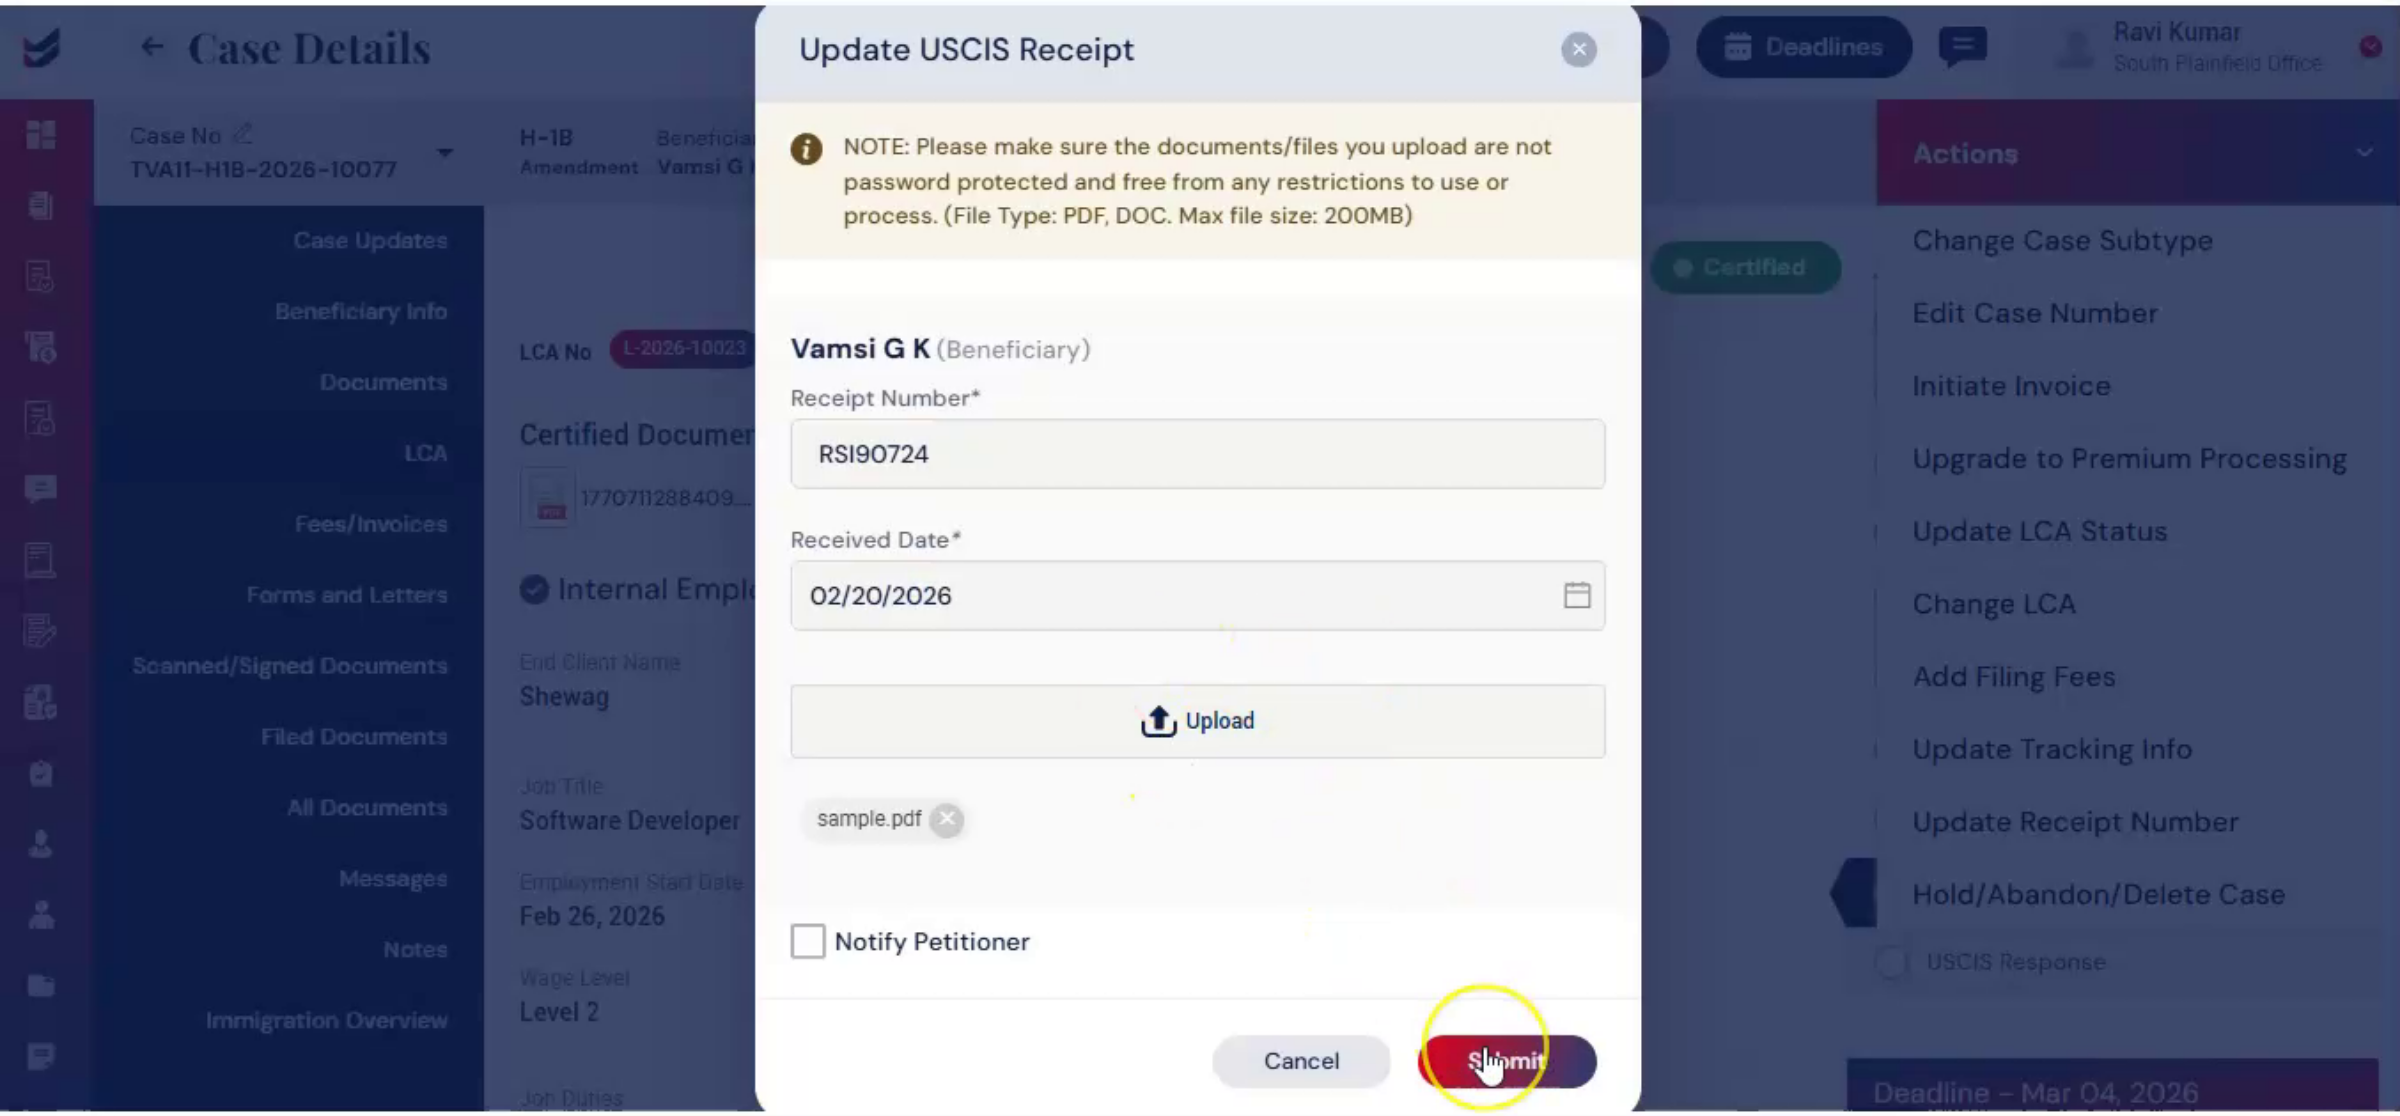
57. Uploading Receipt Notice Details
 * click the image to view enlarged
Now upload the receipt notice, enter the details, and click Submit.
58. Uploading Multiple USCIS Notices
 * click the image to view enlarged
Alternatively, navigate to the dashboard and open the Tools section. Using this feature, you can upload multiple USCIS notices at once.
59. Automatic Notice Information Extraction
 * click the image to view enlarged
The system will automatically extract information from each notice, and assign it to the corresponding case.
60. Tools Functionality Guide Reference
 * click the image to view enlarged
For more details, please refer to the Tools Functionality Help Guide.
61. Receipt Information Visibility
 * click the image to view enlarged
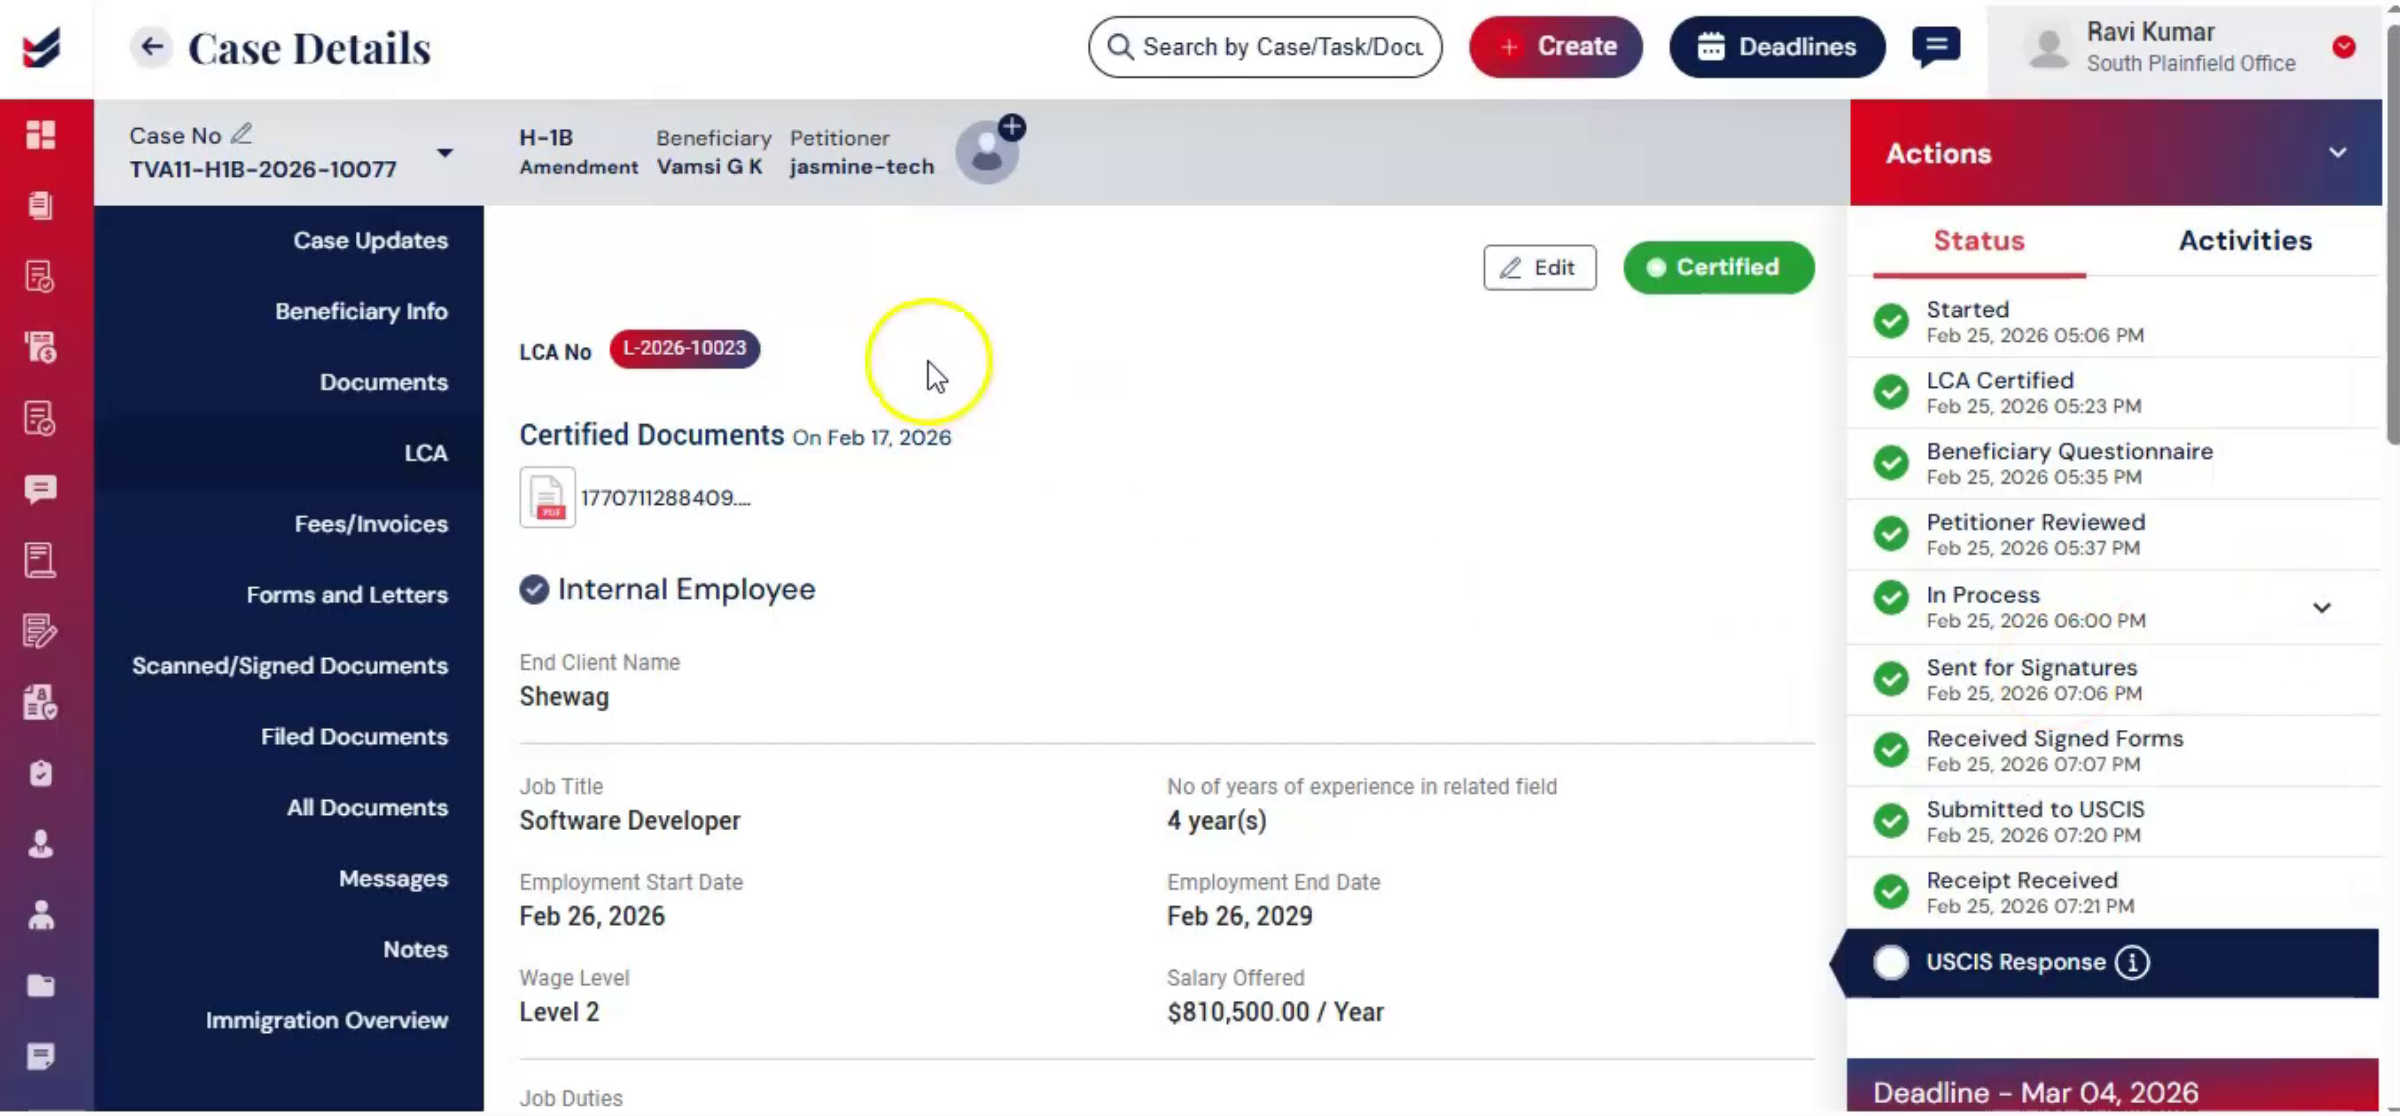
The receipt information is then visible. In the case update section keeping all case, Milestones centralized.
62. ImmiBox Case Tracking
 * click the image to view enlarged
The ImmiBox portal will track the case and keep updating the tracking. As the case progresses,
63. Recording USCIS Updates
 * click the image to view enlarged
Any updates from USCIS are recorded within ImmiBox. You can also do it manually.
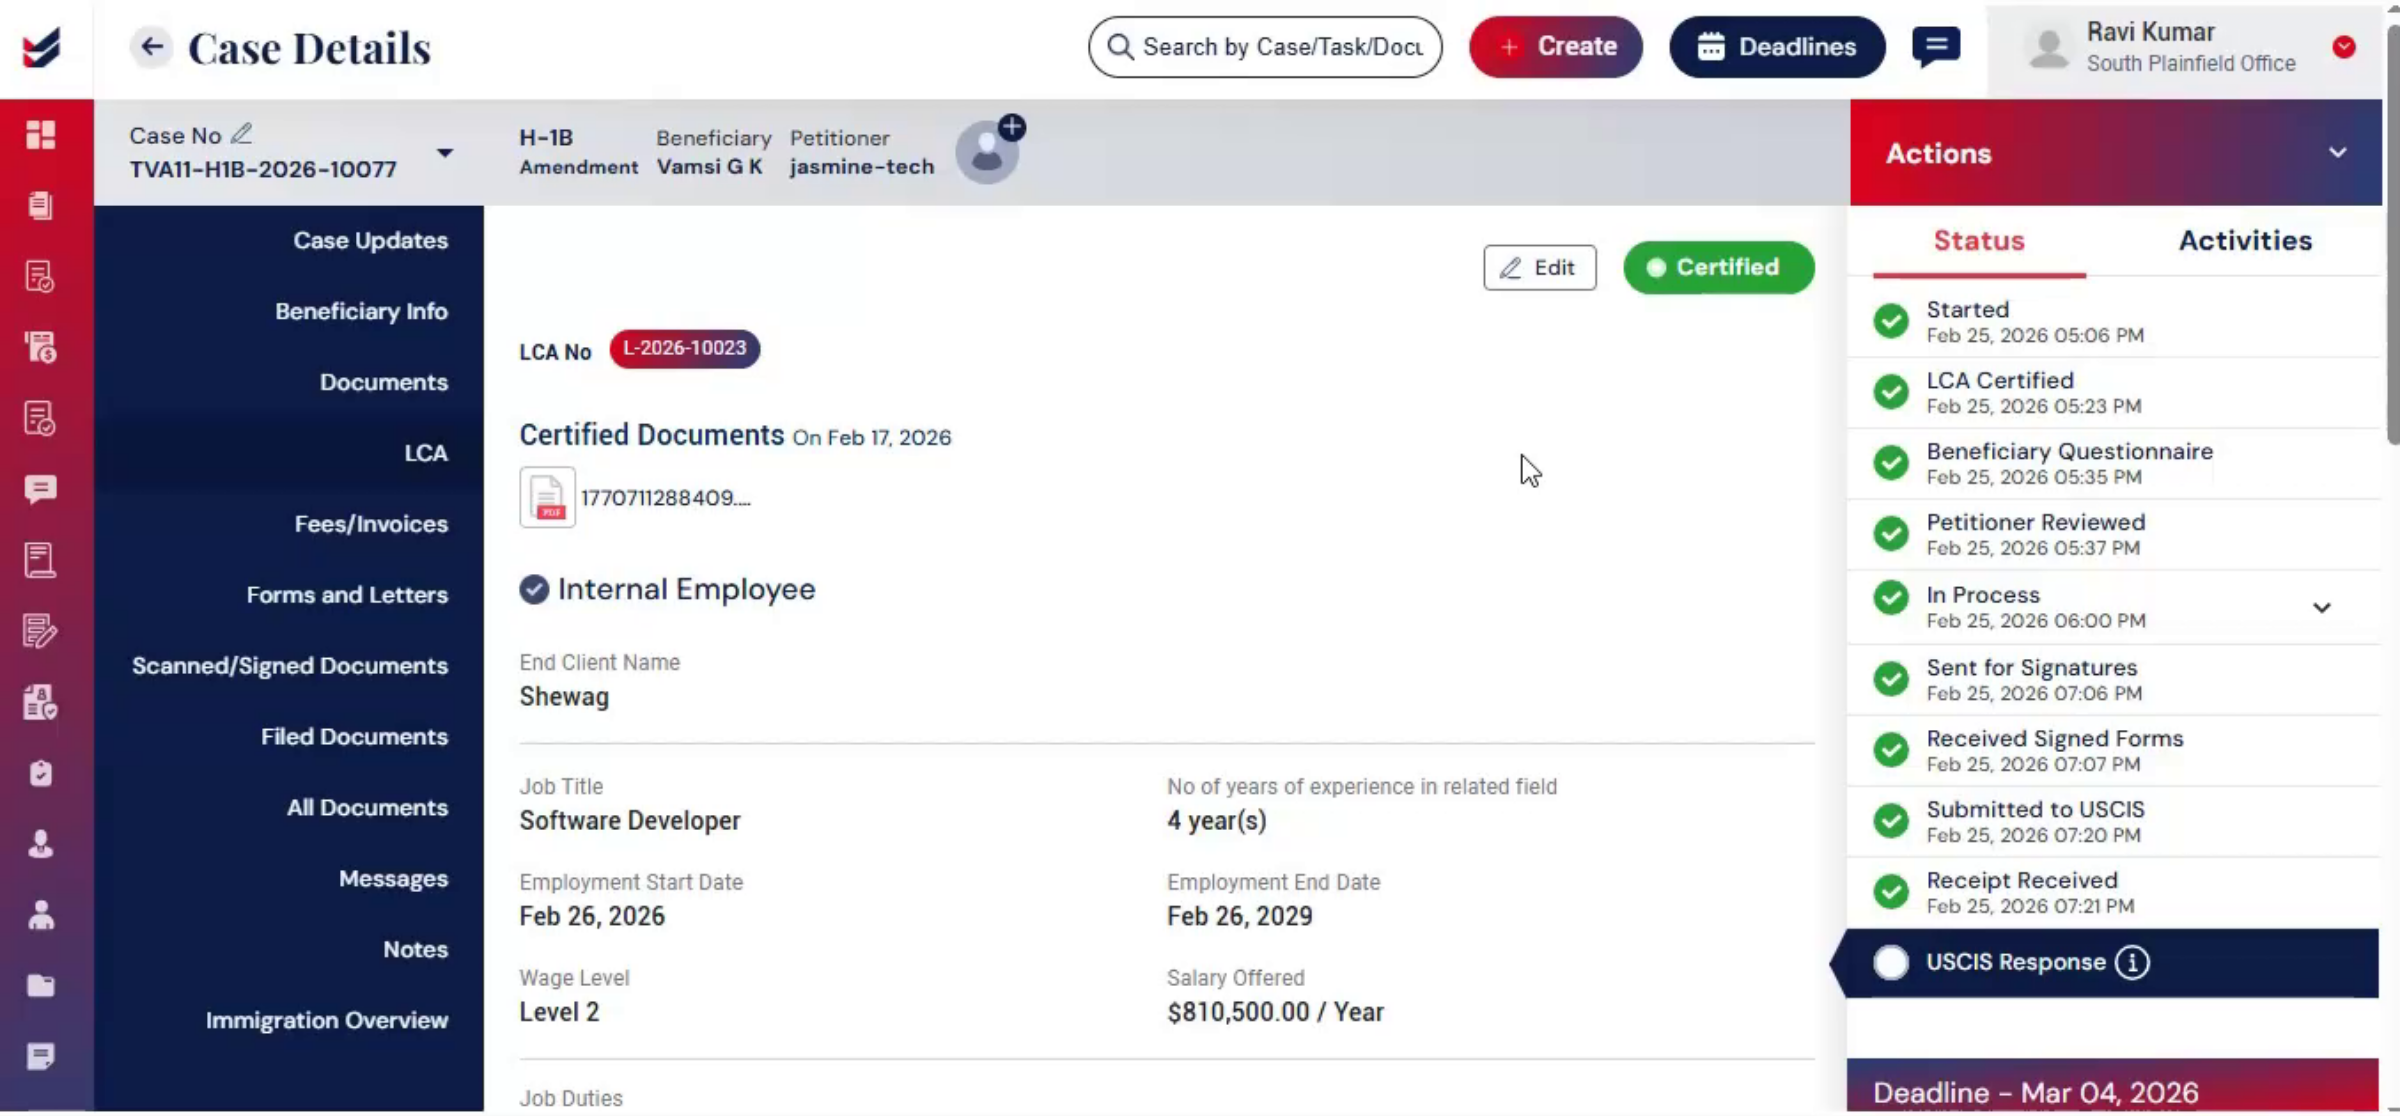
64. Updating USCIS Case Status
 * click the image to view enlarged
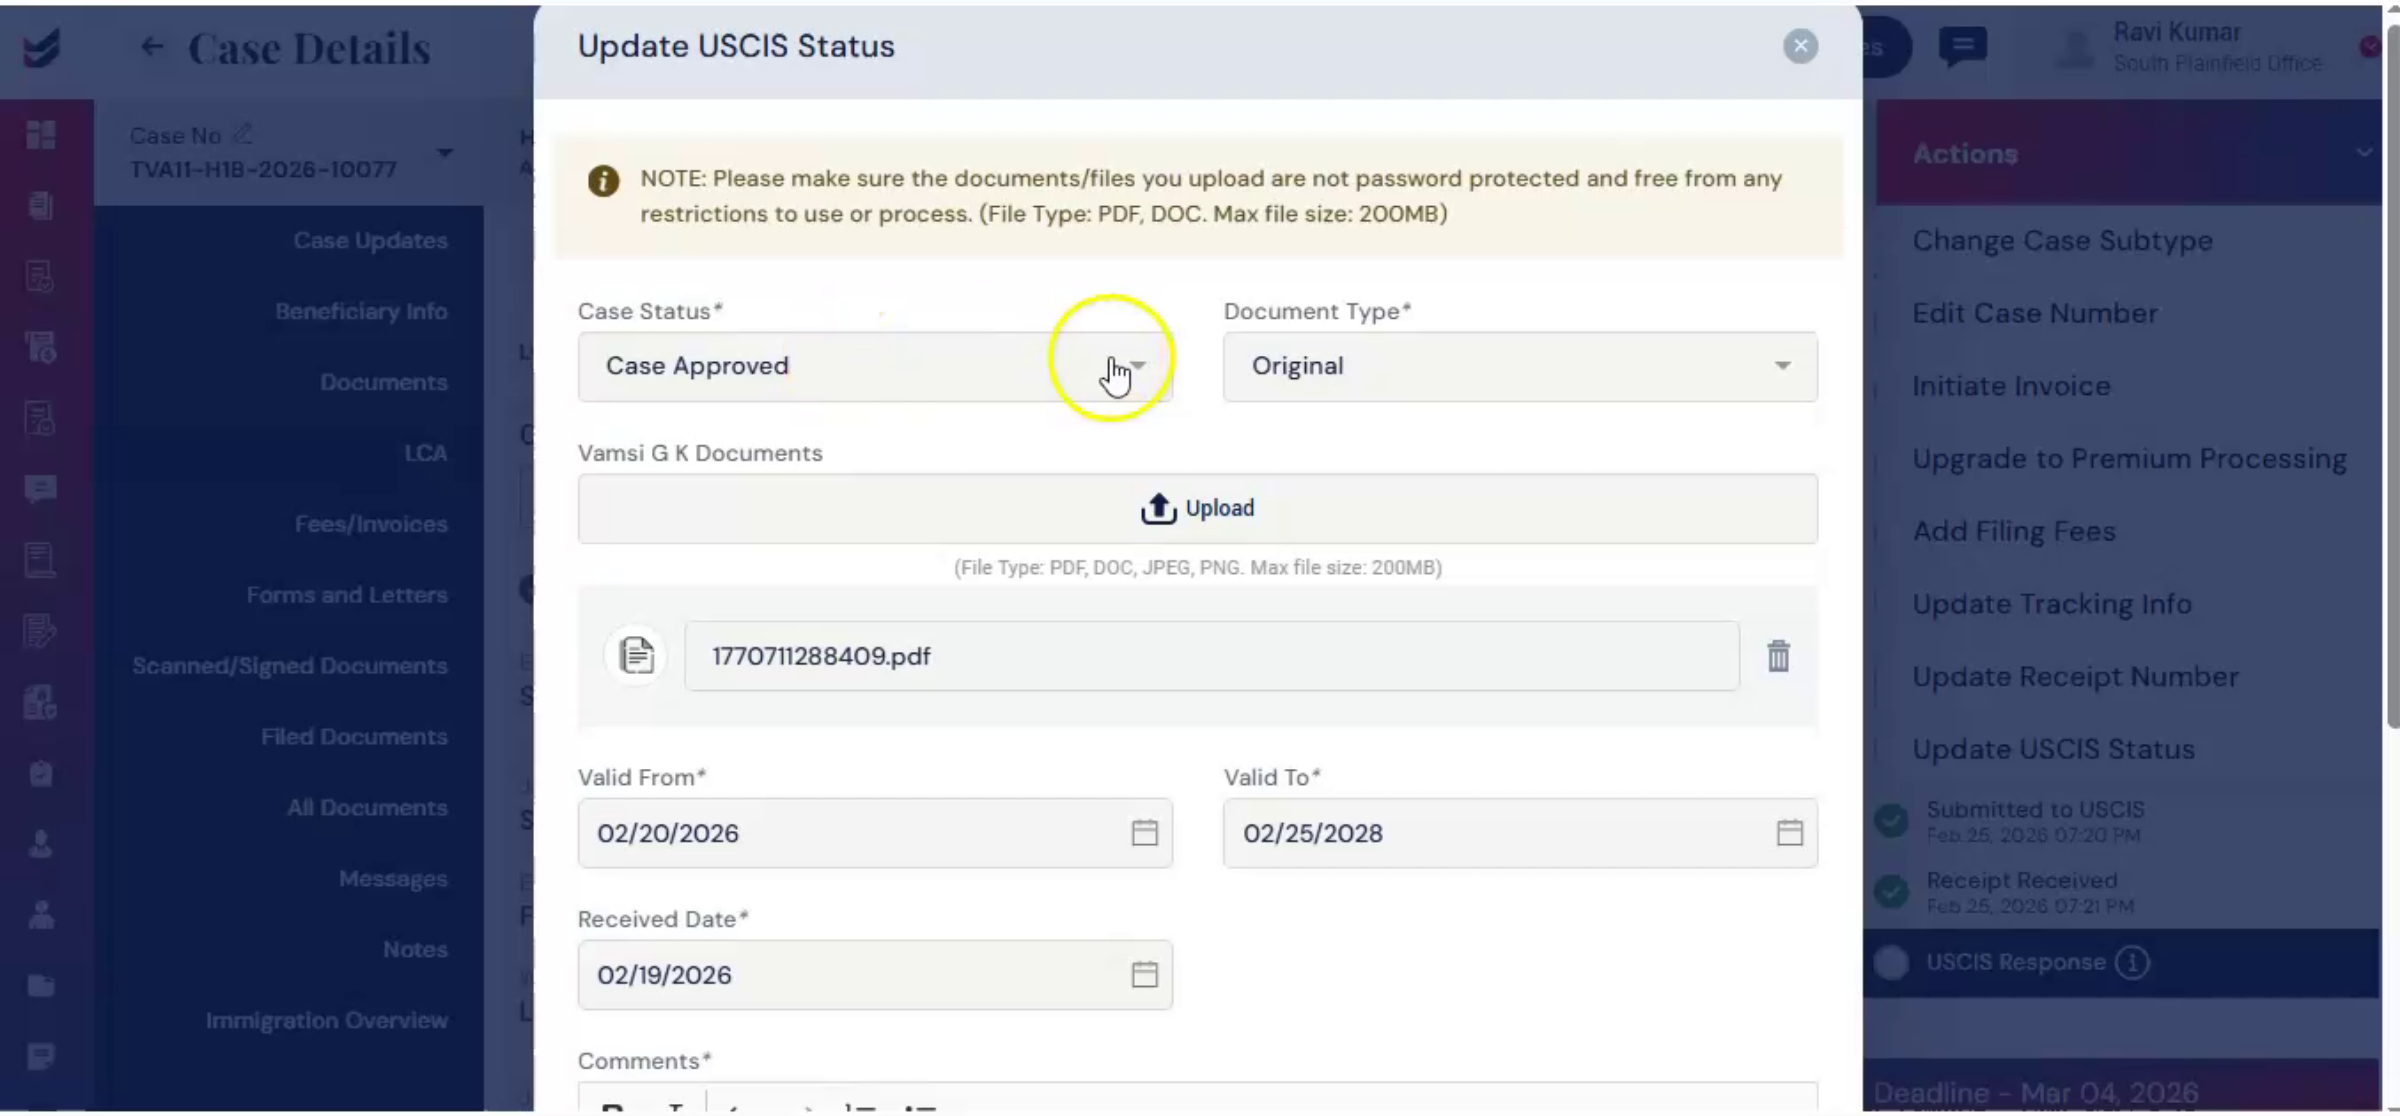
From the Actions menu, select Update USCIS Status. Choose the appropriate case status, such as Case Approved, RFE Received, Case Denied, or Case Withdrawn. Upload supporting documents as the case progresses, and the system will automatically populate the related fields.
65. Manual Data Entry For Status
 * click the image to view enlarged
If the data is not extracted, enter the information manually and click Submit.
66. Case Lifecycle History Maintenance
 * click the image to view enlarged
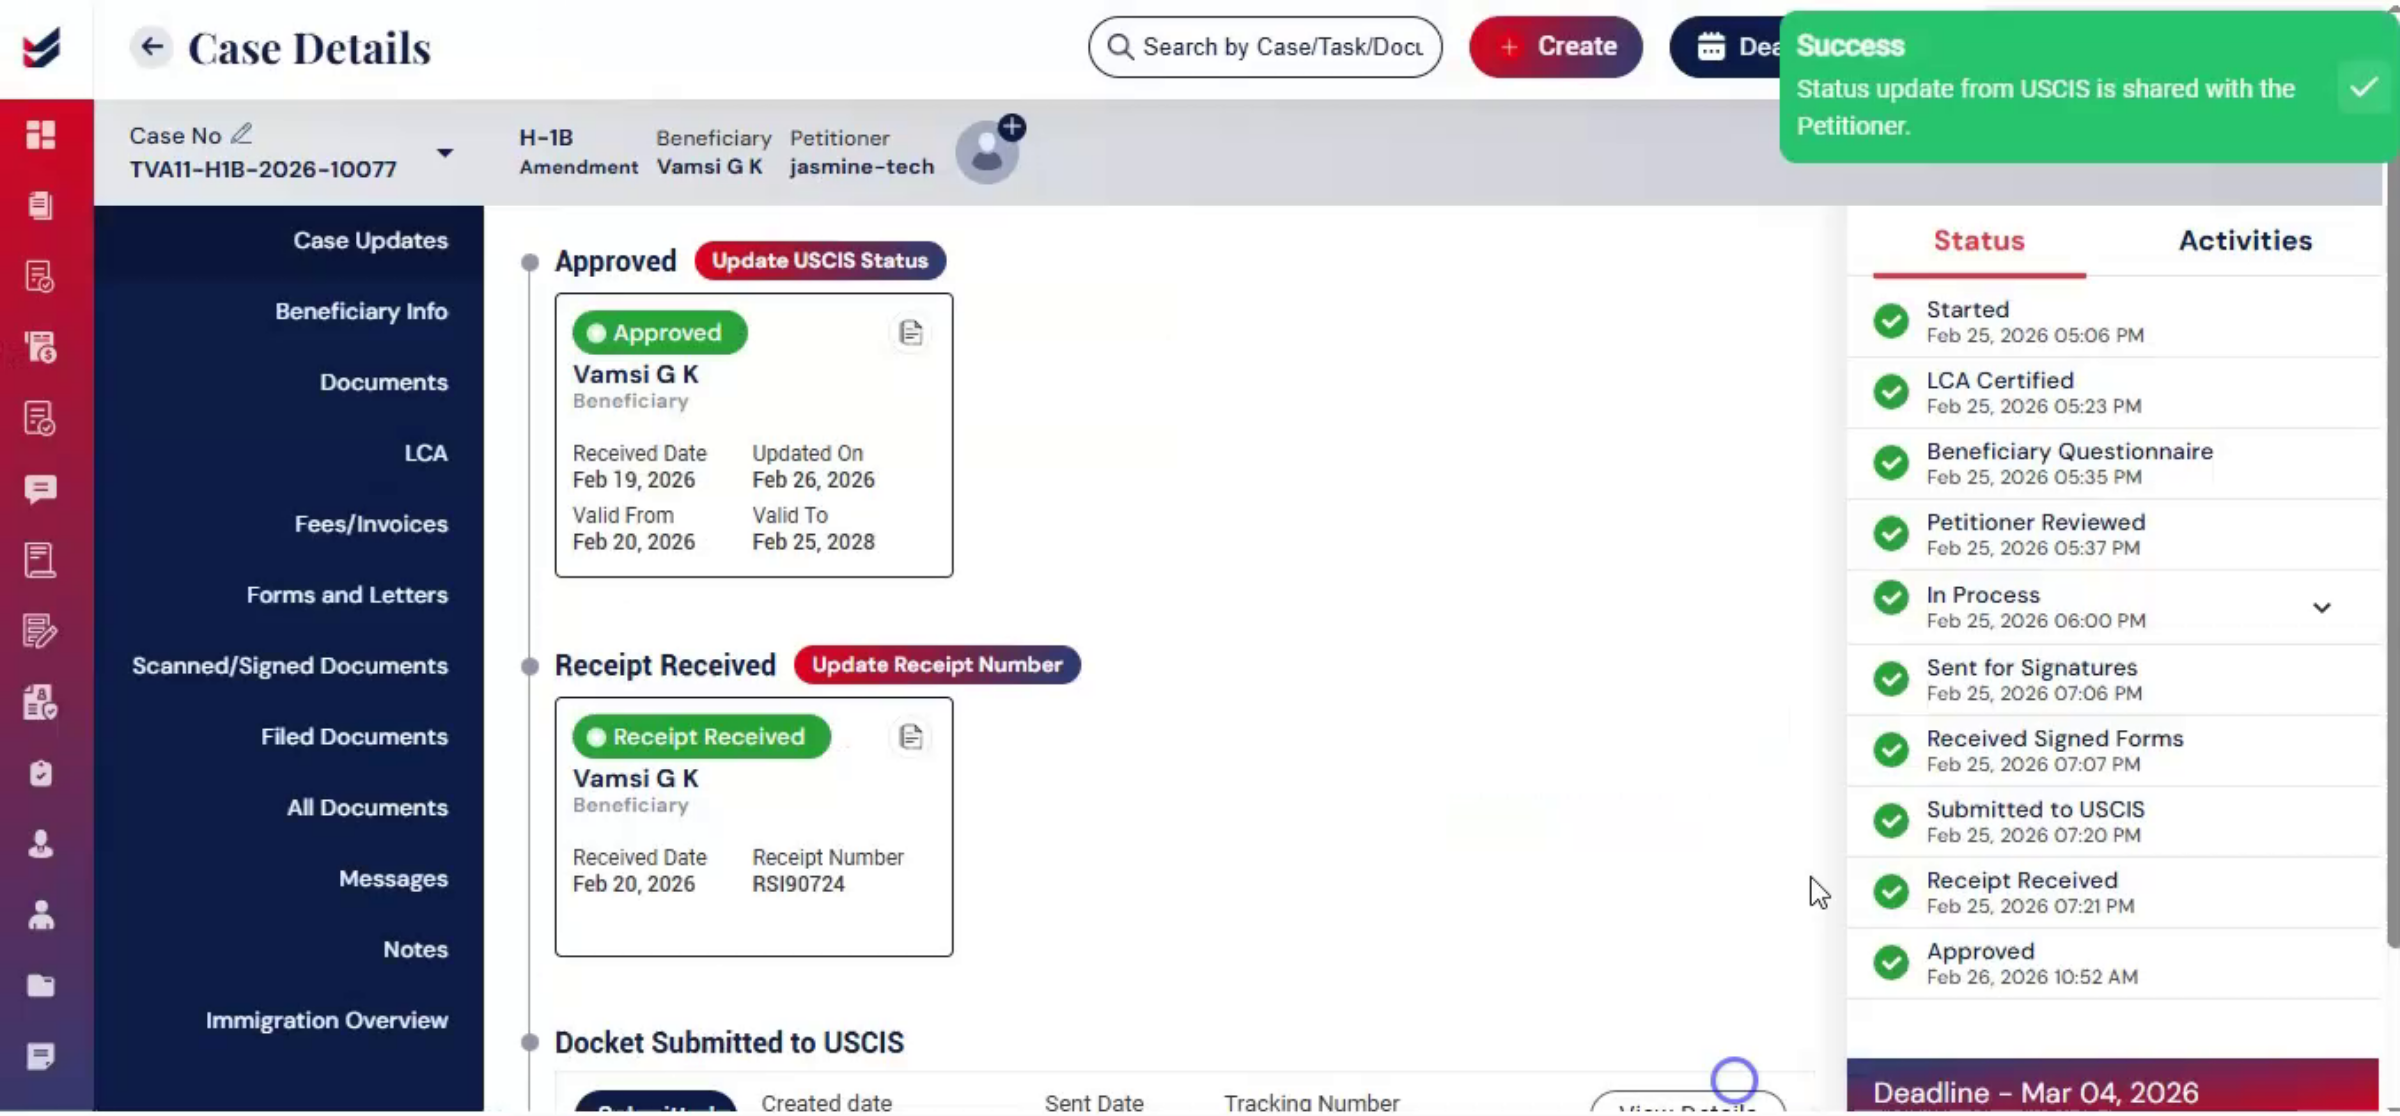
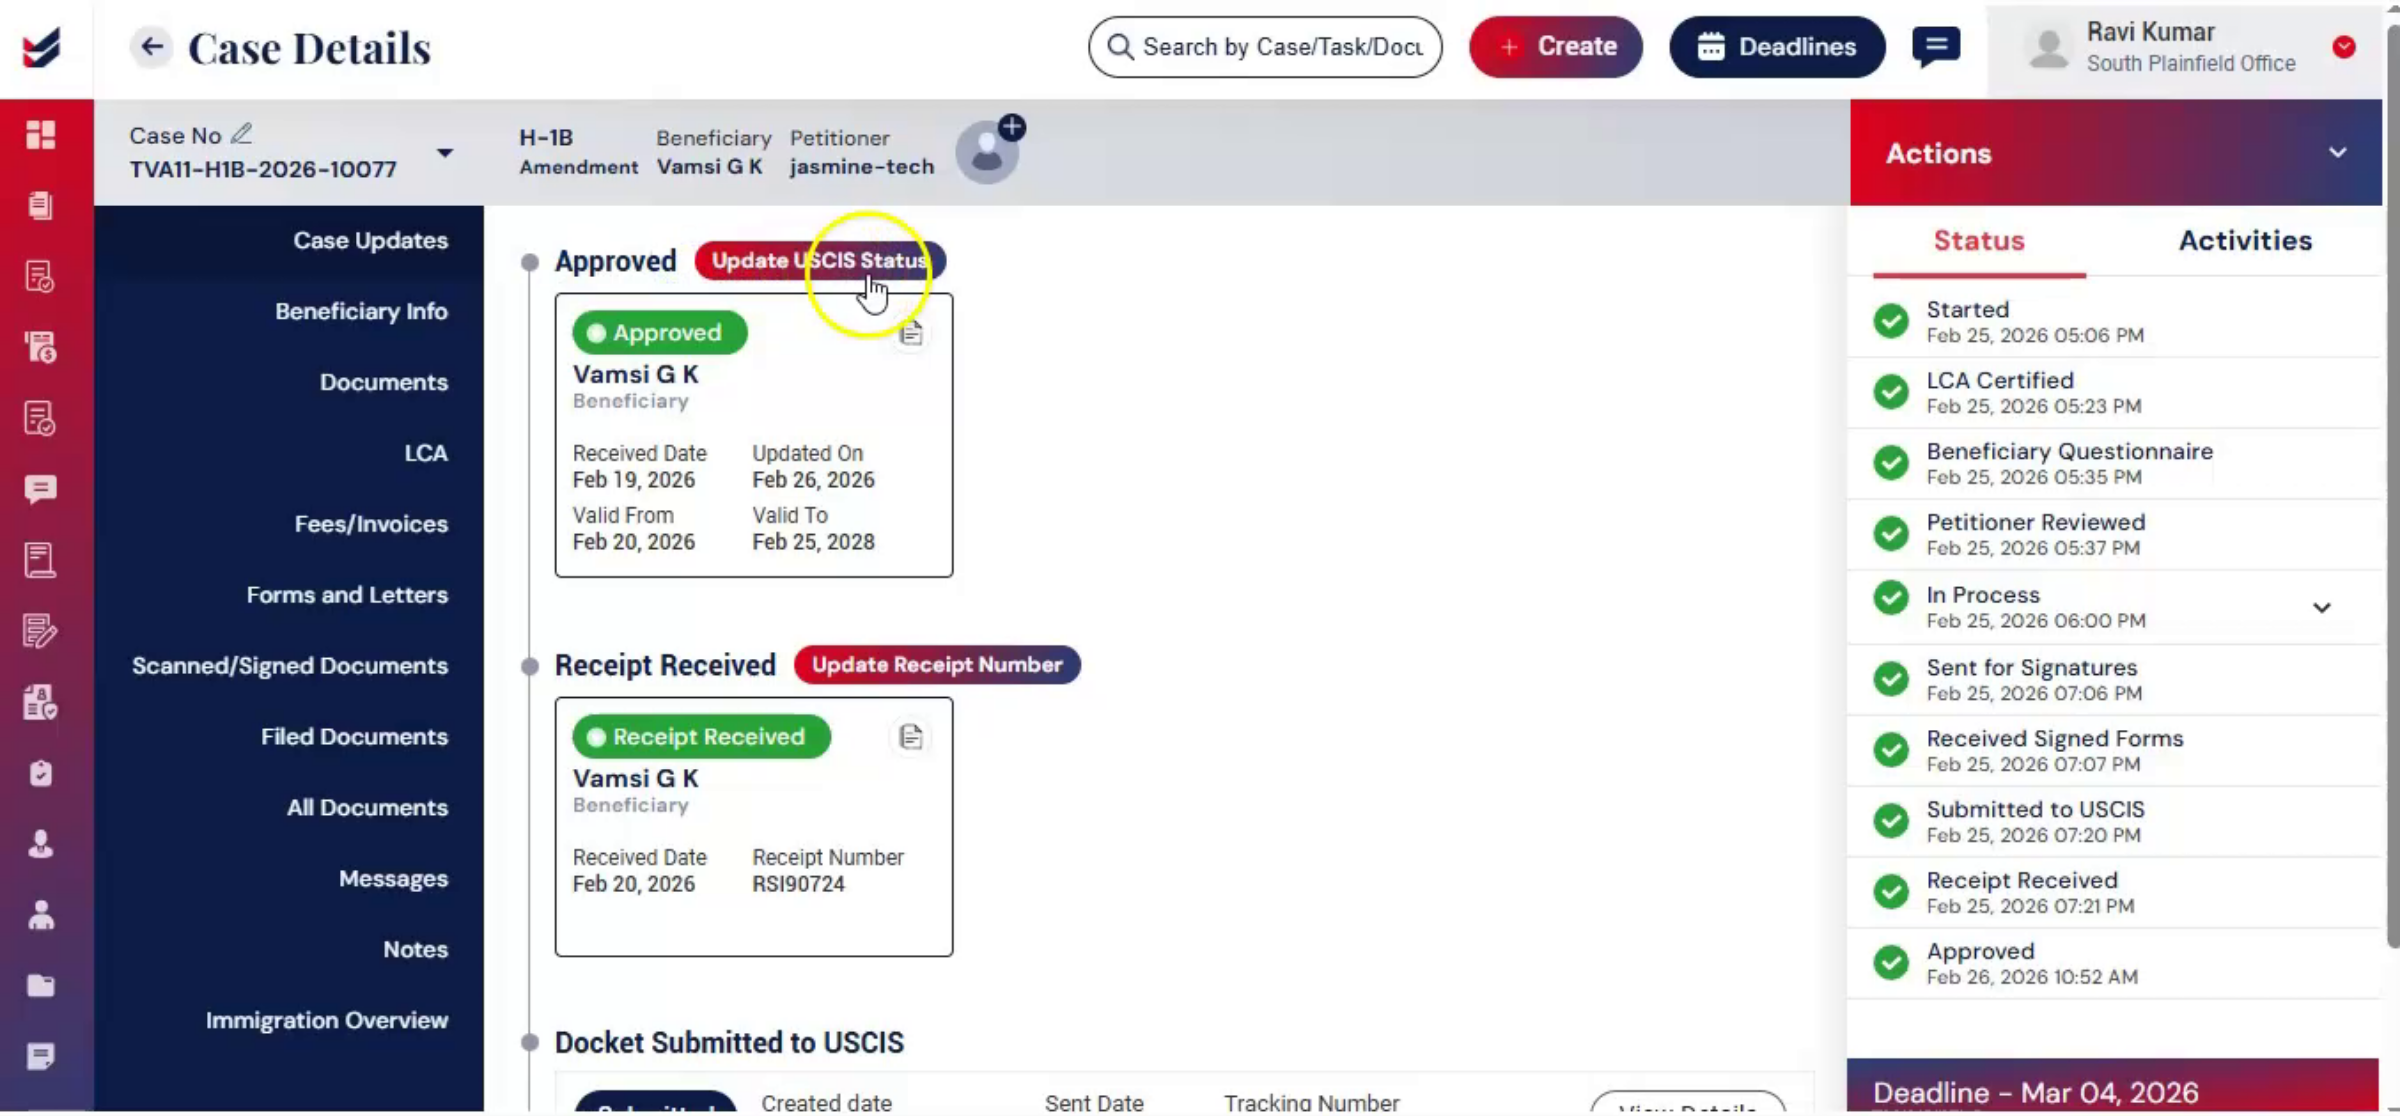
The updated status is reflected in the Case Update section on the left panel. This ensures the firm has a complete history of the case lifecycle, from intake to final decision.
67. Case 2 Linking Existing LCA
 * click the image to view enlarged
Let's see case 2, linking an existing LCA.
68. LCA Linking Feature Overview
 * click the image to view enlarged
If you want to link an existing LCA to an H1B case Emmy box, provides a dedicated feature to connect an LCA to a case that is being created or has already been created.
69. Linking Existing LCA Steps
 * click the image to view enlarged
To link an existing LCA to an H-1B case, go to the case details page. From actions, click Link with LCA.
70. Searching And Linking LCA Records
 * click the image to view enlarged
Then, in the search box, enter the existing LCA ID, client name, number, location, job title, or SOC code. The system will search and display matching LCA records. Select and click Link with Case.
71. Completing Case Details After Linking
 * click the image to view enlarged
After linking to the LCA follow, the same steps shown earlier and complete. All required information, including the beneficiary questionnaire. And other case details.
72. ImmiBox Tracking And Centralization
 * click the image to view enlarged
Throughout the entire process, ImmiBox continues to track each stage, and every action is recorded, organized, and accessible in one centralized system.
73. Workflow Efficiency Compliance Transparency
 * click the image to view enlarged
This structured yet flexible workflow allows firms to maintain efficiency, compliance, and transparency.
74. Video Closing Thanks
 * click the image to view enlarged
Thank you for watching.

