

Manage Invoices
Overview
ImmiBox provides law firms with the capability to oversee the financial aspects of cases through its specialized Invoices module. This module facilitates the creation, viewing, sending, and management of invoices pertinent to individual cases. It guarantees transparency, optimizes billing procedures, and aids teams in collaborating effectively on payments and accounting.
Initiate Invoice
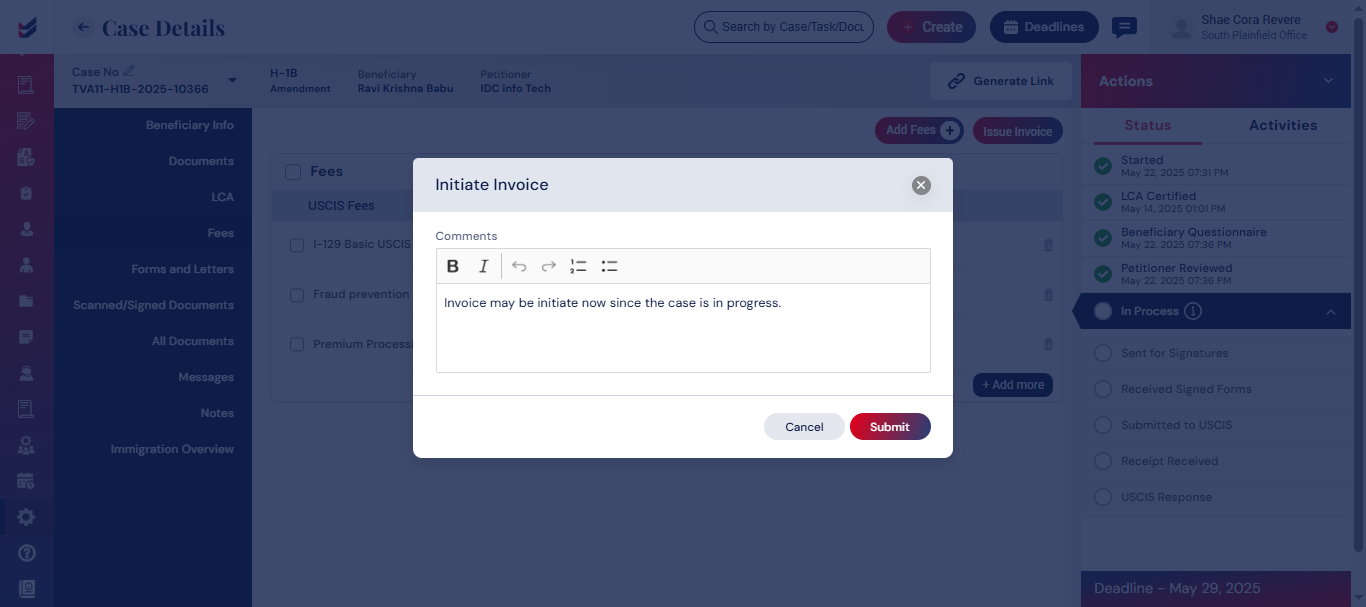
Invoices may be initiated in accordance with the established workflow. Depending on the configuration available in Workflow, the individuals who are working on the Case will have an option ‘Initiate Invoice’ in the Actions menu.
Click here to learn how to Create and Customize a Workflow.
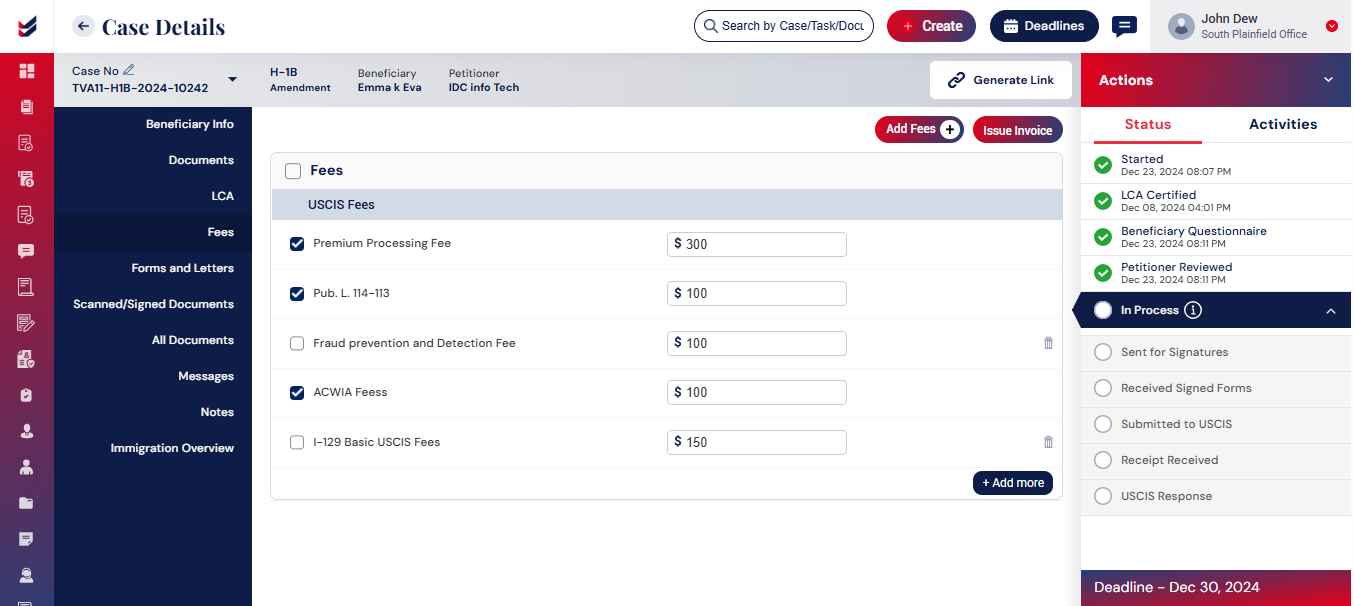
Prior to the initiation, the team working on the Case will have an option to add all applicable Fees to the Case under ‘Fees/Invoices’ section in Case Details. The Fee will be displayed based on the default configuration.
Click here to learn how to Configure Fees for various Case Types
The default is modifiable by the users or Accounts team as needed.
To add various fees, Select the ‘Add Fees’ under ‘Fees/Invoices’ in the Case Details as shown below.

Please note that each Client may have a discount configurable in the client profile. The Professional/Legal Fee will be included in post applying the applicable discount.
To initiate an invoice, choose the 'Initiate Invoice' option from the Actions menu from the Case Details. This action will prompt an email to be sent to the Accountants in that branch, asking for the creation of an invoice for the relevant case.
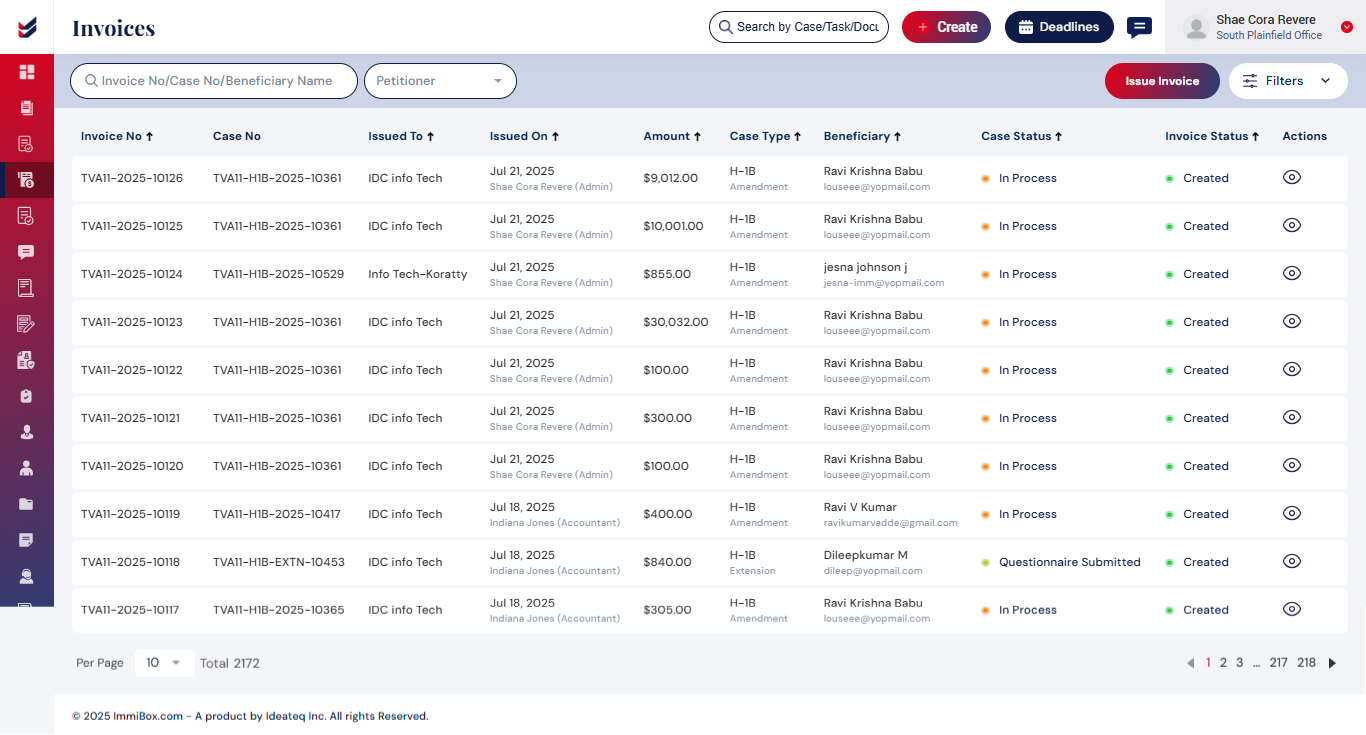
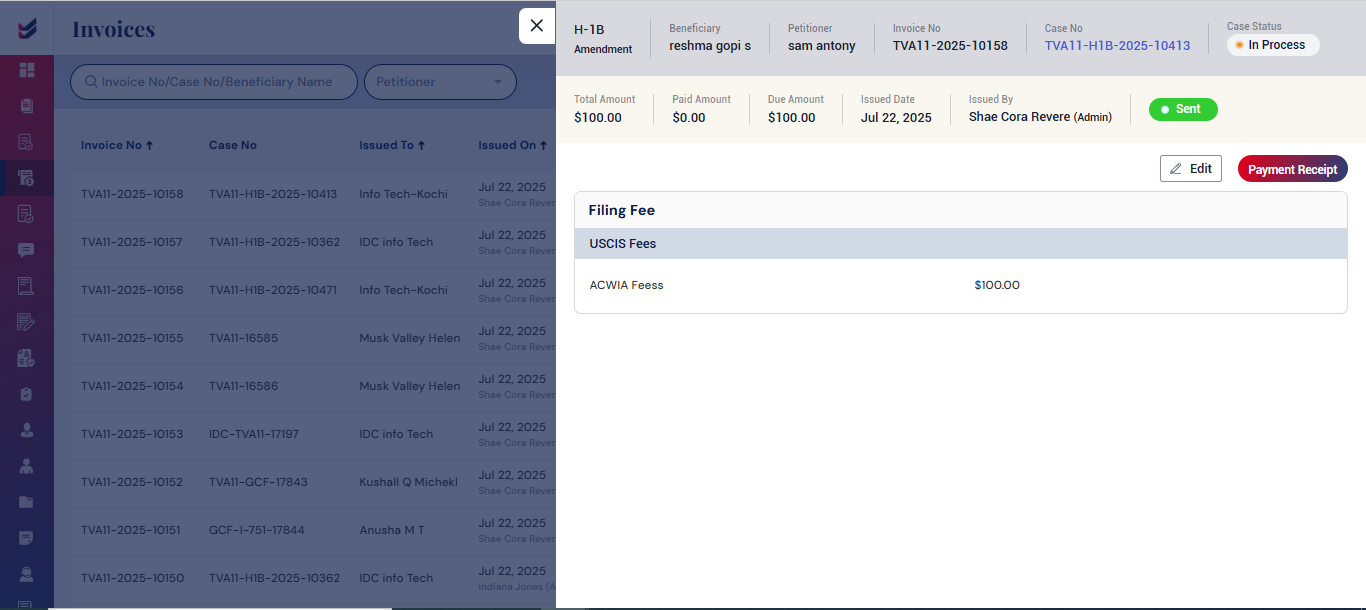
View Invoices
All invoices related to any case that are issued can be accessed through the navigation menu by selecting the “Invoices” option. Depending on your ole, Branch, and the Cases assigned to the internal user of the law firm, the invoices can be edited, viewed, or a new invoice can be issued.
Issue Invoice
Invoices may be Issued by an Accountant, Branch Manager, or Administrator for cases created within the corresponding branch. They will have the ability to access all invoices and execute actions such as Add Fee, Initiate Invoice, and Edit Invoice. Invoices can be issued following the prescribed workflow. By default, the Accountant will be given access to this action.
Only the Accountant, Branch Manager, and Administrator are authorized to issue invoices.
To issue an invoice, it is necessary to include the applicable Fee and select them to issue Invoice.
By clicking on the "Issue Invoice" button, the invoice will be generated, and an email will be sent to the Petitioner or the Beneficiary depending on the Case Type.
The Invoice may also be generated for the cases in the invoices section directly without navigating to Case Details. However, the same invoices will still be visible under Caes Details -> Fees/Invoices section.
Create Invoice
Invoices can be issued for cases by accessing ‘Create Invoice’ from Invoices section from the left navigation. We can search the cases to issue invoices using Case Number, Beneficiary and Petitioner Name and Case Type. Against each case, all applicable fees can be added under ‘Fees’ column.
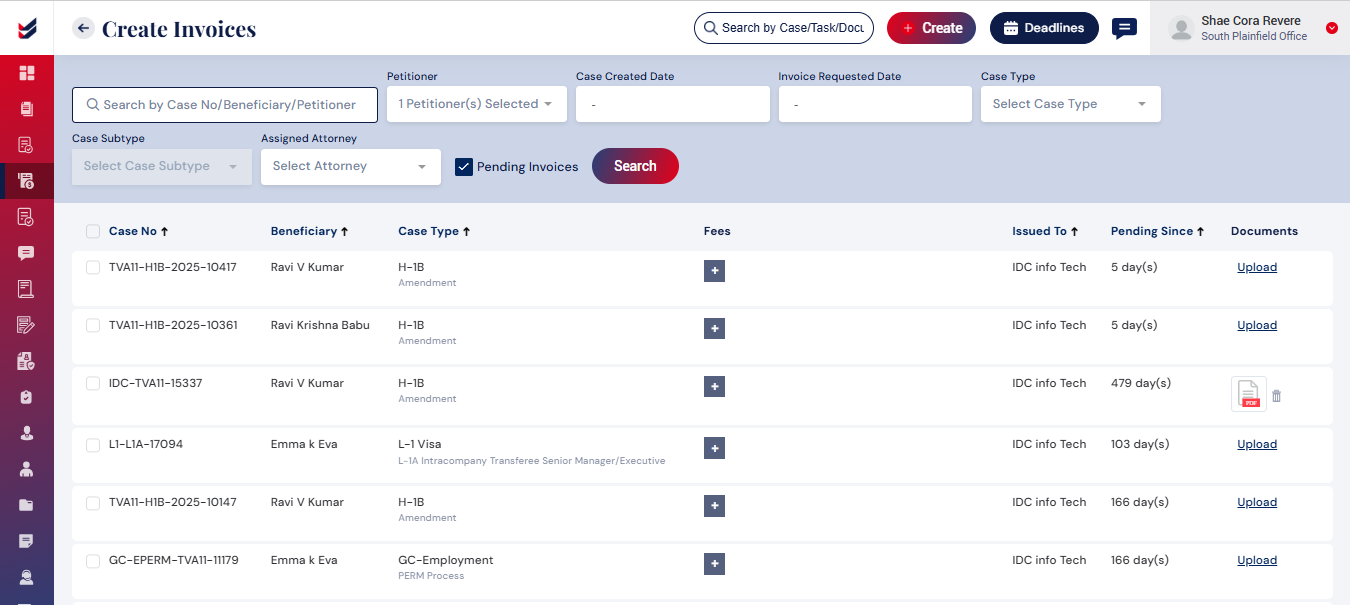
Once the applicable Fees are added, all relevant cases may be selected to see the ‘Issue Invoice’ button beside the ‘Search’ button. Selecting that will issue the invoices directly. The selection can be done individually or multiple at a time.
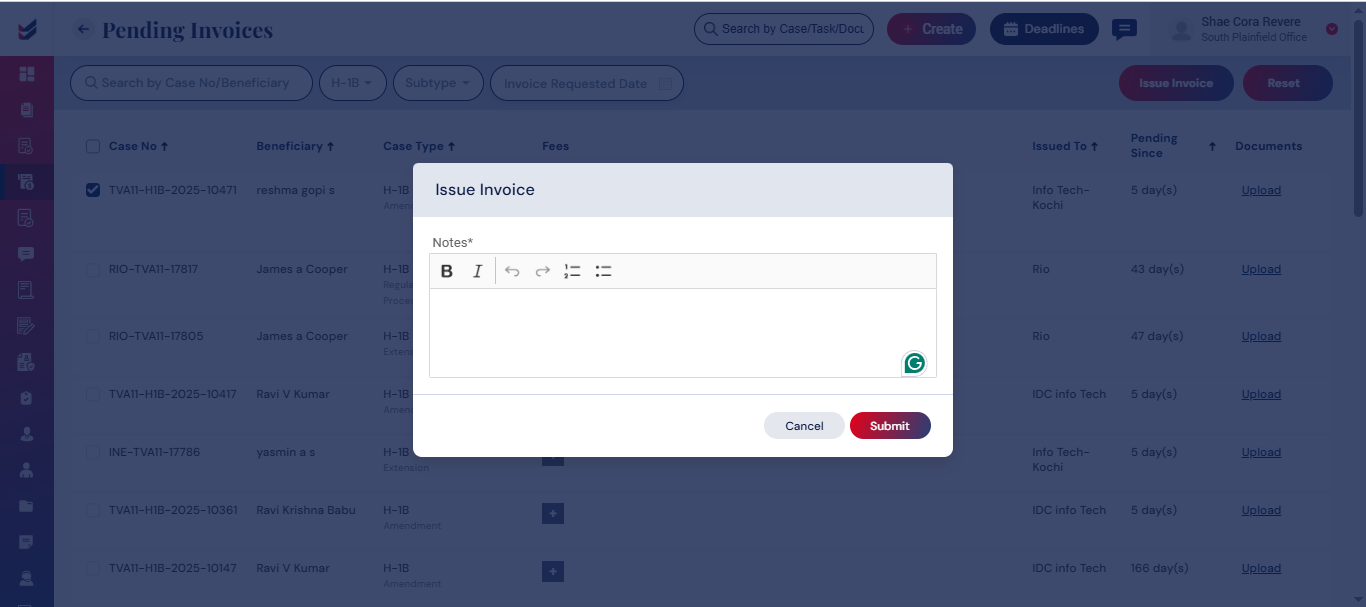
Pending Invoices
When the users initiate the invoice from the Case Details, all such requests will be found under ‘Pending invoices’ section for further processing. At times, the users may have already added all applicable Fees under Case Details prior to initiating the invoice. Alternatively, the Accountant, Branch Manager or Administrator shall add all applicable fees and issue the invoices individually or in bulk.

Edit Invoice
Invoices can be Edited within the case details under the Fee/Invoices tab. Once the invoice are issued, the Accountant, Branch Manager, and Administrator will possess the capability to Edit the invoice. By selecting the Details button, an option to Edit is available to adjust the fee components or add additional fees as applicable. Upon clicking the Update button, the invoice will be updated, and an email notification will be dispatched to the appropriate individual with the modifications made.
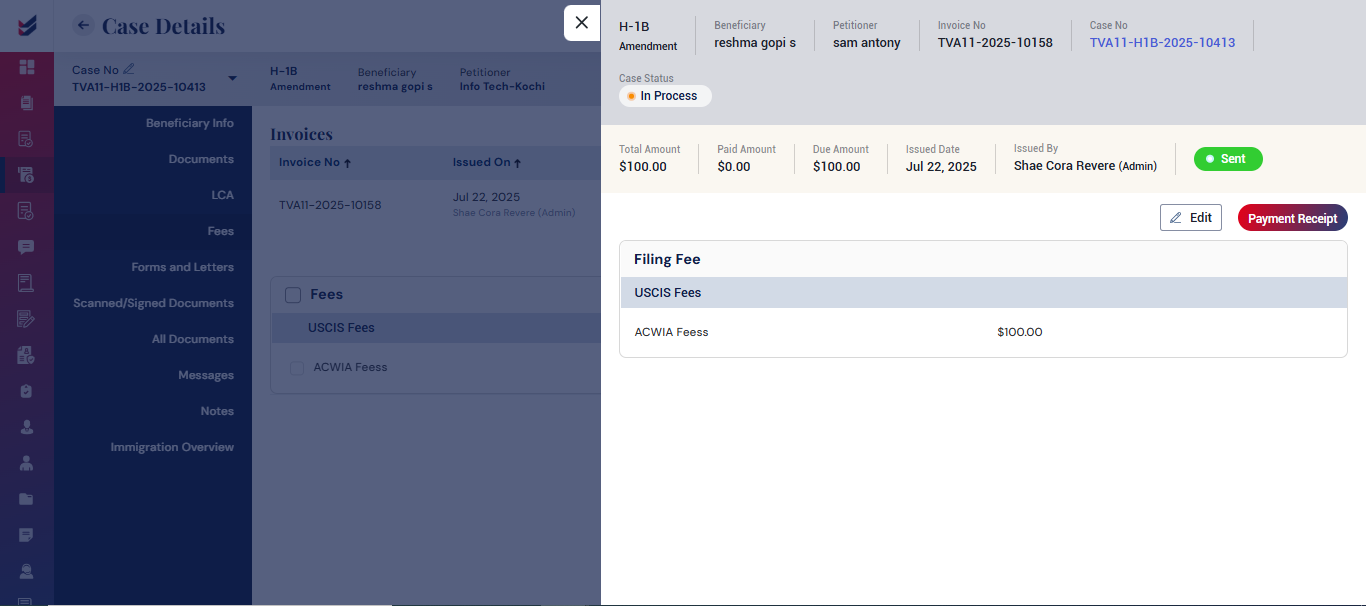
The identical action may be executed in the invoices section accessible from the navigation menu.
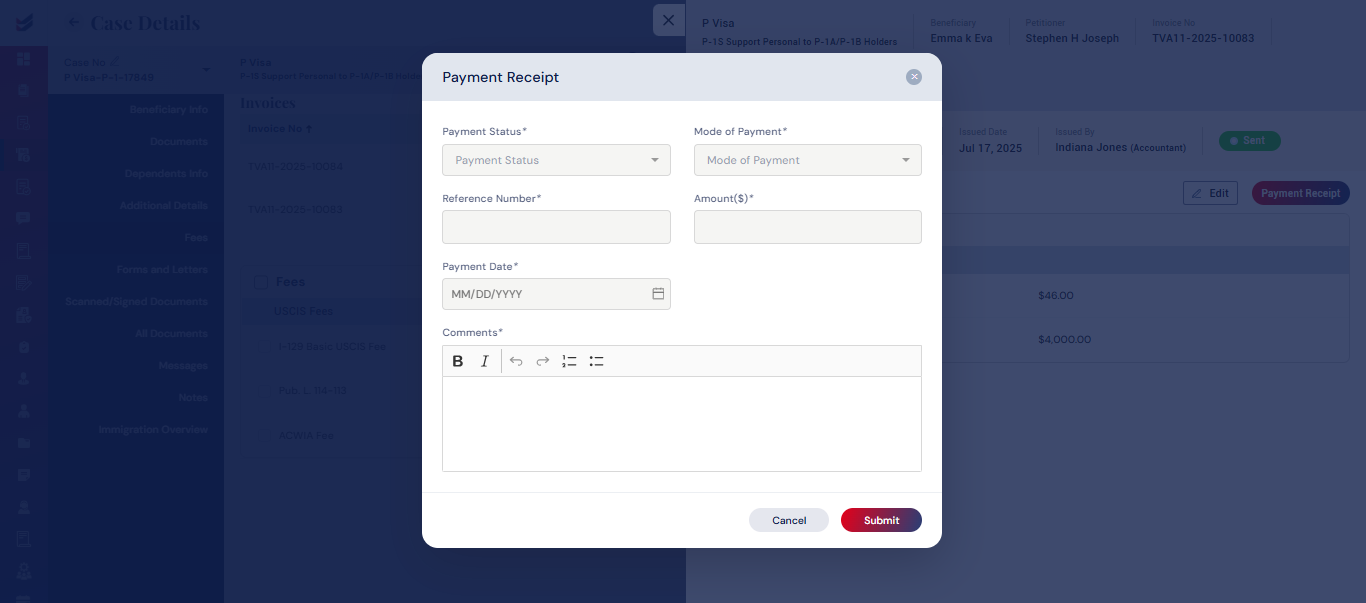
Payment Receipt
After the payment for the issued invoice has been completed, the invoice status can be modified by updating the Payment Receipt. The status may be changed to either Partially Paid or Fully Paid. This can be done within the case details by selecting the Details button and clicking on the Payment Receipt button. A pop-up will appear requesting the Payment Status, Mode of Payment, Reference Number, Amount, Payment Date, and Comments. Upon submission, the invoice status will be updated to either Partially Paid or Fully Paid.
The identical action may be executed in the invoices section accessible from the navigation menu.

